How to fix Marvel’s Spider-Man 2 HDR and brightness issues

You may find that Marvel’s Spider-Man 2 may look a little off when it comes to HDR and brightness. Some scenes may look too dark while others appear to be overly bright. The graphics may seem washed out as well.

You can check out this guide at Seeking Tech to see how you can fix the color display issues in this open-world superhero game.

1. For the first step, we recommend that you head to the Settings menu of your PS5. From there, select Screen and Video > Video Output. Next, make sure that HDR is set to On When Supported or Always On and then select Adjust HDR.

Finally, follow the instructions that appear on the next three screens to calibrate the white and black output levels.

2. If the visuals still do not look quite right, then you can open the in-game Settings menu in Spider-Man 2. From there, select Visual.

In the Visual Settings screen, you will be able to adjust the in-game Brightness and Contrast sliders. Both of which are set to 50 by default.
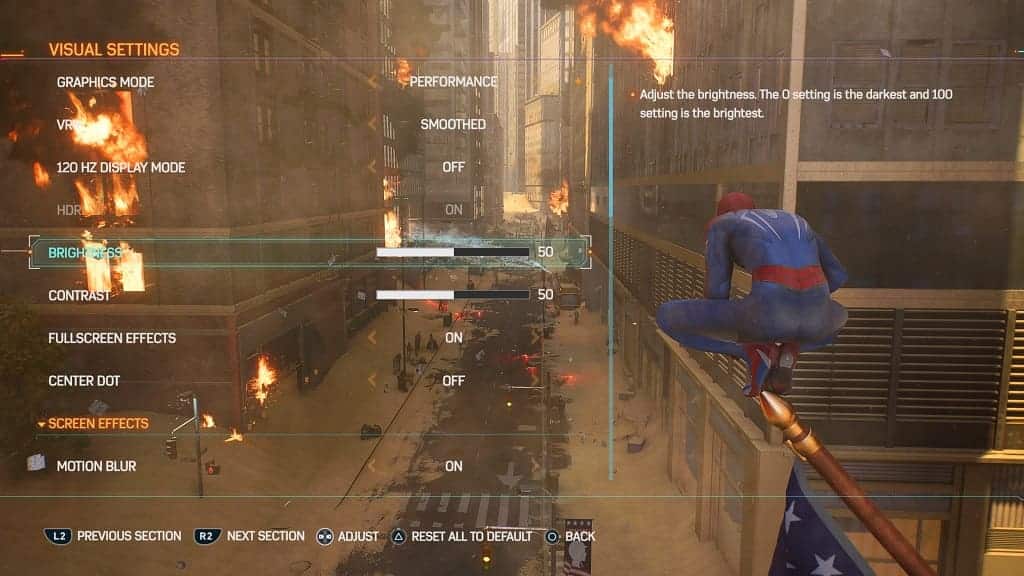
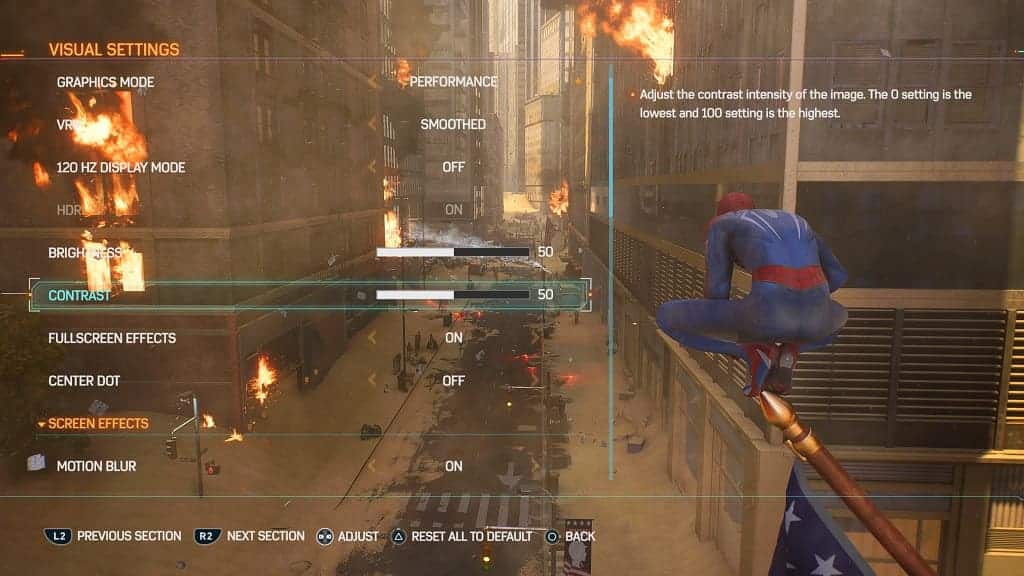
You may need to constantly adjust these settings when going from a brighter area to a darker one or vice versa.

3. You can also try playing the game in SDR instead of HDR. In order to do so, open the Settings menu of your PS5 and then go to Screen and Video > Video Output. Afterwards, make sure that HDR is set to Off.

4. If possible, you can also try connecting your PS5 to another TV or monitor. Some screens are better at handling HDR and/or SDR when compared to others.

How to disable adaptive triggers in Marvel’s Spider-Man 2

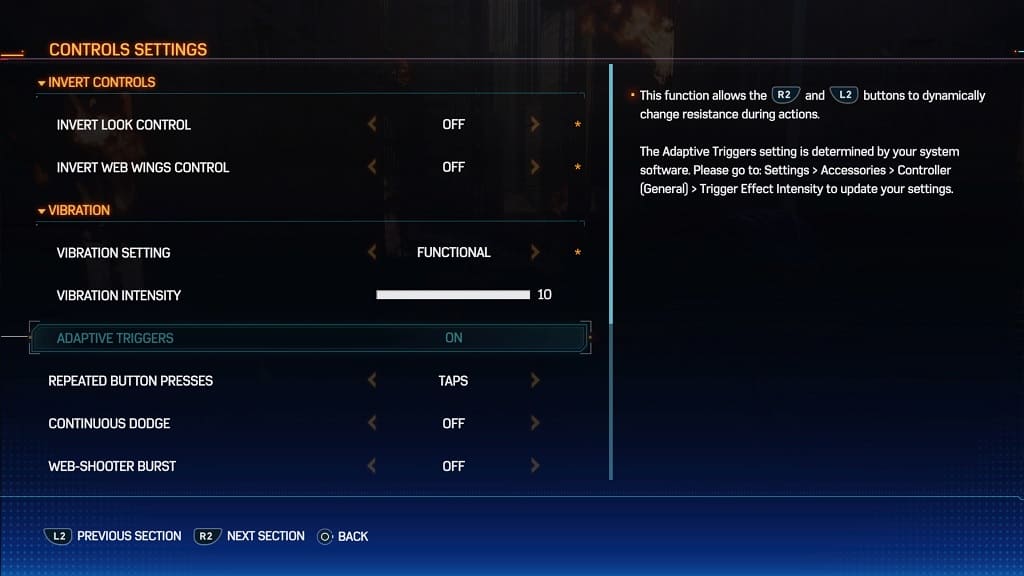
Marvel’s Spider-Man 2 uses adaptive resistance as you may feel extra resistance when pressing down on the L2 and R2 buttons of the DualSense. To see how you can disable this feature in the superhero game, you can take a look at this guide from Seeking Tech.

1. The adaptive trigger feature cannot be turned off from the in-game Settings menu. Instead, you need to do it on a system level.

So, for the first step, you need to press and hold the PS button to bring up the home screen.

2. From there, select the gear cog icon.

3. In the Settings menu of your PS5 console, scroll down and select Accessories.

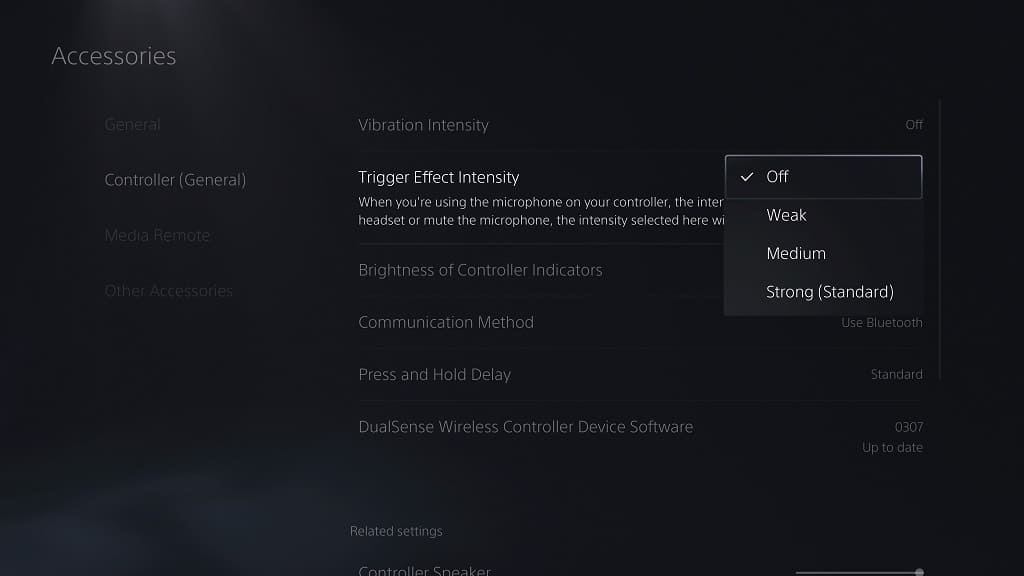
4. From the Accessories screen, select Controller (General) from the left column and then Trigger Effect Intensity on the right side.

5. In the drop-down menu, you should see the following choices:

  • Off
  • Weak
  • Medium
  • Strong (Standard)

To completely disable adaptive triggers in Spider-Man 2 and every other PS5 game, you need to select Off. If you want to keep the resistance but make the effect less noticeable, then you can select Weak or Medium instead.

6. After changing the Trigger Effect Intensity setting, you can back out of the system menus and then open Spider-Man 2 again.

How to automatically heal in Marvel’s Spider-Man 2

If you keep forgetting to heal constantly in Marvel’s Spider-Man 2, then you might want to consider turning on automatic healing. To see how you can enable this helpful feature, you can take a look at this guide from Seeking Tech.

1. If you haven’t done so already, head over to the Settings menu in the game.

2. From the Settings menu, you need to select Gameplay.

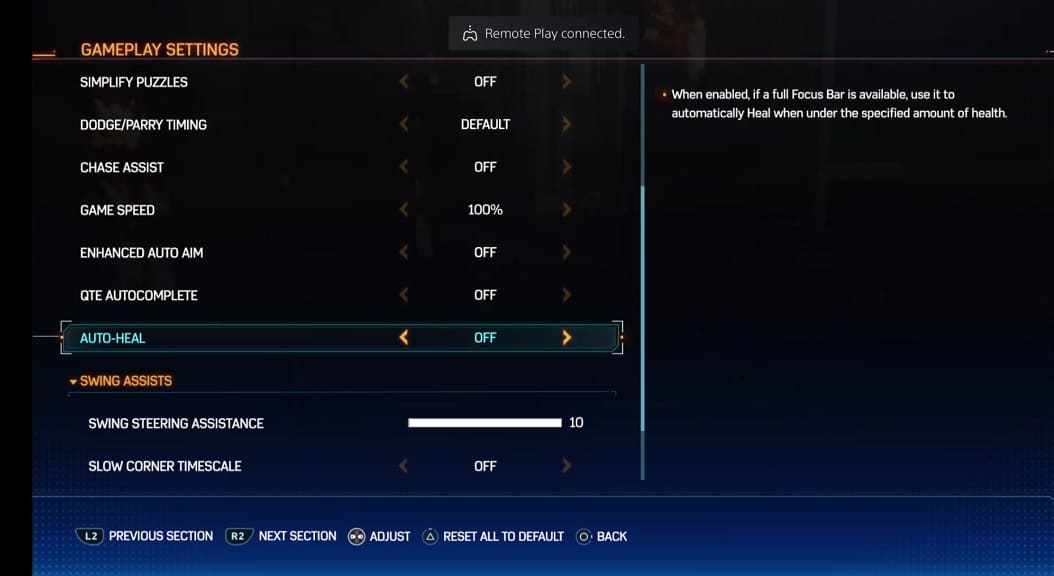
3. Once you get to the Gameplay Settings screen, scroll down and then move the cursor over to Auto-Heal. You should see the following description:

When enabled, if a full Focus Bar is available, use it to automatically Heal when under the specified amount of health.

4. By default, the Auto-Heal is set to Off. You will be able to change it to any of the following:

  • 10%
  • 30%
  • 50%

5. Once you are done, you can exit the Settings menu.

Depending on how you set up the Auto-Heal seeing, Spider-Man will heal himself if his health drops to 10%, 30% or 50% as long as there is a full Focus Bar.

How to adjust the DualSense vibration in Marvel’s Spider-Man 2

DualSense rumble is enabled by default in Marvel’s Spider-Man 2. You can check out this guide at Seeking Tech to see how you can adjust when the controller will vibrate, how strong it will vibrate and/or turn off haptic feedback altogether.

1. For the first step, you need to head over to the Settings menu.

2. From there, select Controls.

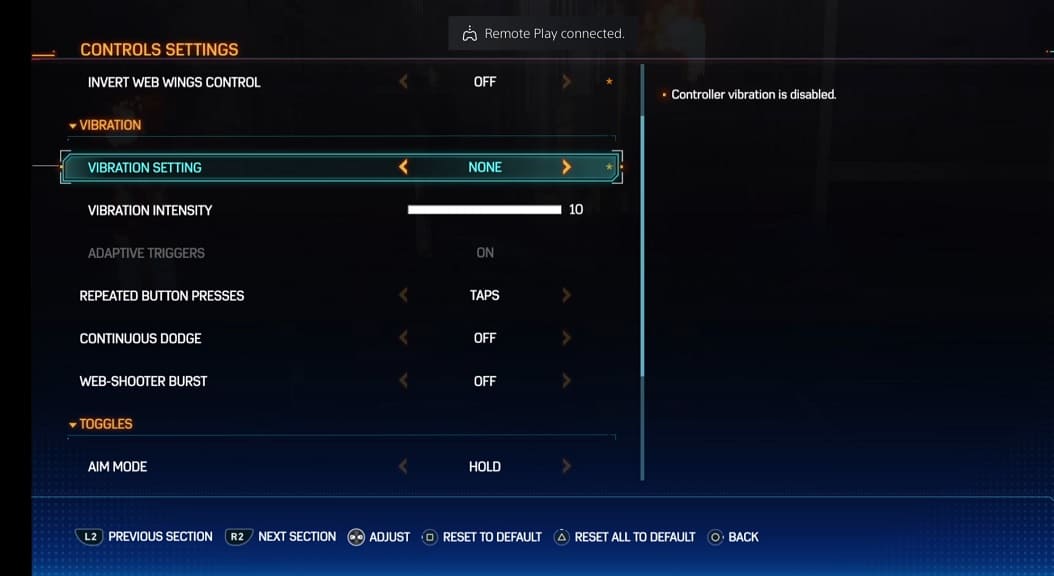
3. In the Controls Settings screen, move the cursor down to Vibration Setting.

By default, this is set to Experiential, which means that all vibrations are enabled. You can also set it to Functional, which makes the gamepad rumble only during gameplay and accessibility cues.

To turn off haptic feedback completely, set Vibration Setting to Off.

4. If you decide to set the aforementioned Vibration Setting to Experiential or Functional, then you can use the Vibration Intensity slider to adjust how strong you want the rumble to feel.

The intensity is set to 10, which is the strongest, by default, you will be able to decrease it all the way down to 1.

5. After changing the rumble settings, you can exit the Settings menu.

The new vibration changes should now be applied to the game.

How to disable quick time events in Marvel’s Spider-Man 2

Marvel’s Spider-Man 2 features quick time events where you have to press the corresponding button that appear on the screen in order to perform specific actions. To see how you can disable QTEs for this open-world superhero game, you can check out this tutorial from Seeking Tech.

1. To start off, head over to the Settings menu in Spider-Man 2.

2. In Settings, head to the Gameplay section.

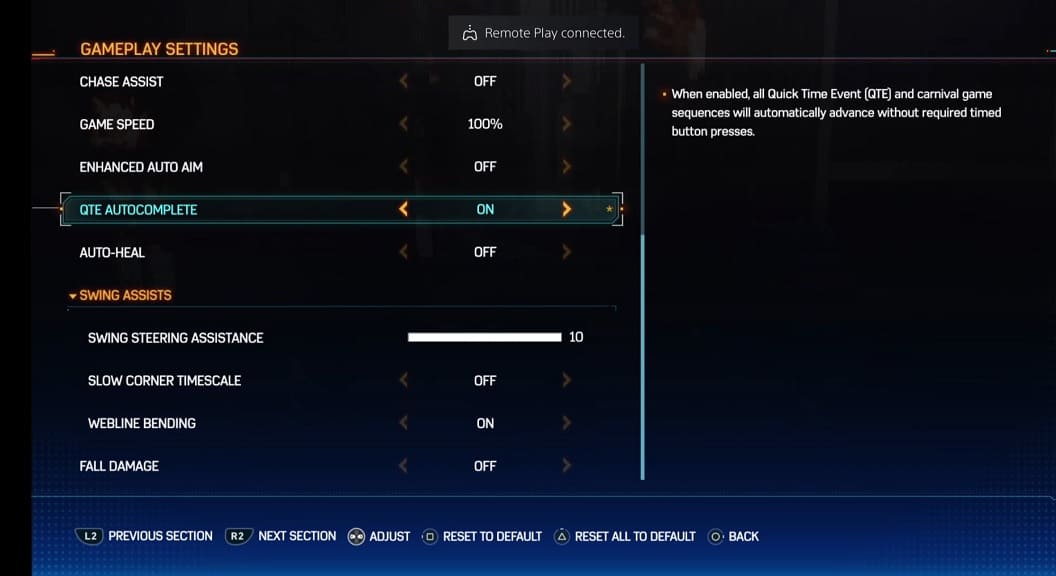
3. From the Gameplay Settings screen, scroll down and then move the cursor to QTE Autocomplete. It should be showing the following description:

When enabled, all Quick Time Event (QTE) and carnival game sequences will automatically advance without the required timed button presses.

4. By default, QTE Autocomplete is set to Off. Make sure you set it to On if you want to disable quick time events.

5. Exit the Settings menu and then return to the game.

You should no longer see anymore QTEs in Spider-Man 2.

How to change the graphics quality in Mobile Suit Gundam U.C. ENGAGE

Mobile Suit Gundam U.C. ENGAGE supports three graphics quality modes. To see how you can switch between these visual settings, you can take a look at this guide from Seeking Tech.

1. For the first step, you need to open the Menu. This can be done by pressing the hamburger icon located on the bottom right of the screen.

2. Next, you need to select Miscellaneous Settings from the pop-up Menu screen.

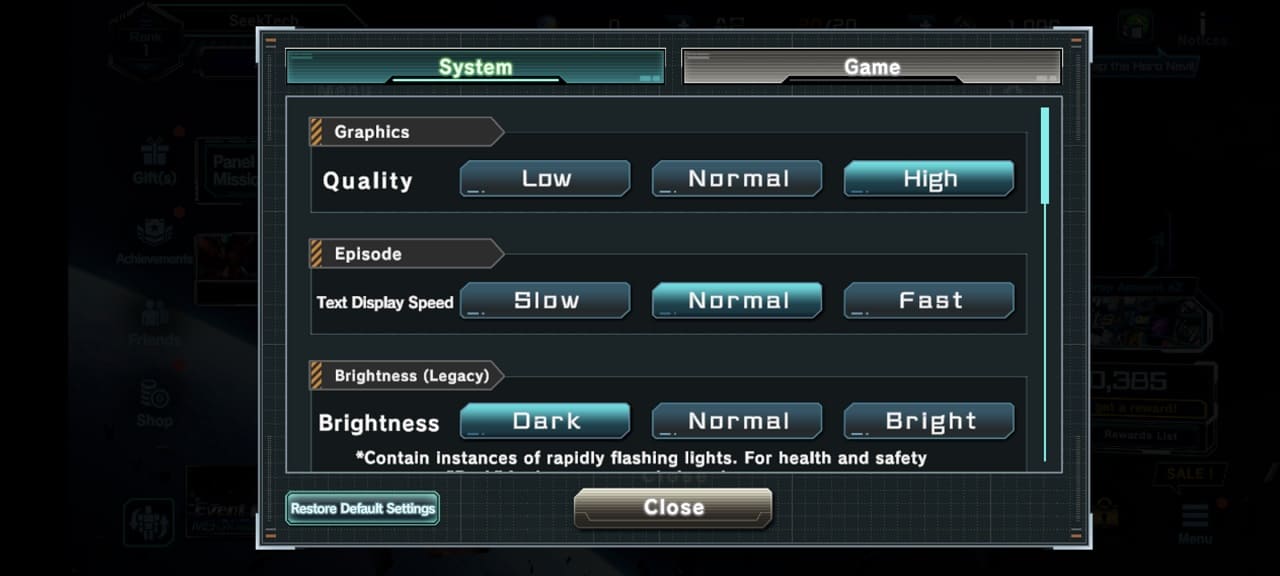
3. You should see the Graphics Quality setting located at the top. By default, this is set to Normal.

If the frame rate appears to be choppy when you are playing Mobile Suit Gundam U.C. ENGAGE, then you should set Graphics Quality to Low. You should lower this setting if the game is draining your phone battery faster than you would like.

On the other hand, you can set Graphics Quality to High if you want to experience the best visuals.

4. After you are done changing the visual modes, select the Close option.

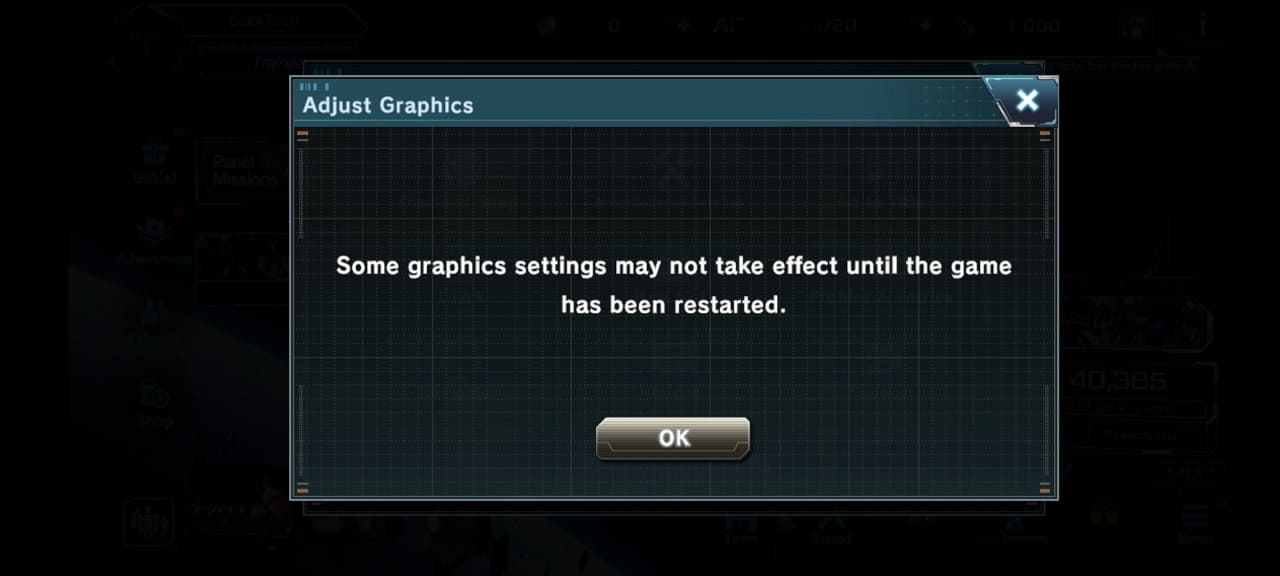
5. You should see the following message appear:

Some graphics settings may not take effect until the game has been restarted. Select OK to close the message.

6. Finally, close Mobile Suit Gundam U.C. ENGAGE and then open it again.

How to make dodging and parrying easier in Marvel’s Spider-Man 2

If you have a hard time dodging or parrying incoming enemy attacks in Marvel’s Spider-Man 2, then you can check out this guide to see how you can increase the timing window.

1. If you haven’t done so already, head over to the Settings menu from either the title screen or pause screen.

2. In Setting, select Gameplay to head into Gameplay Settings.

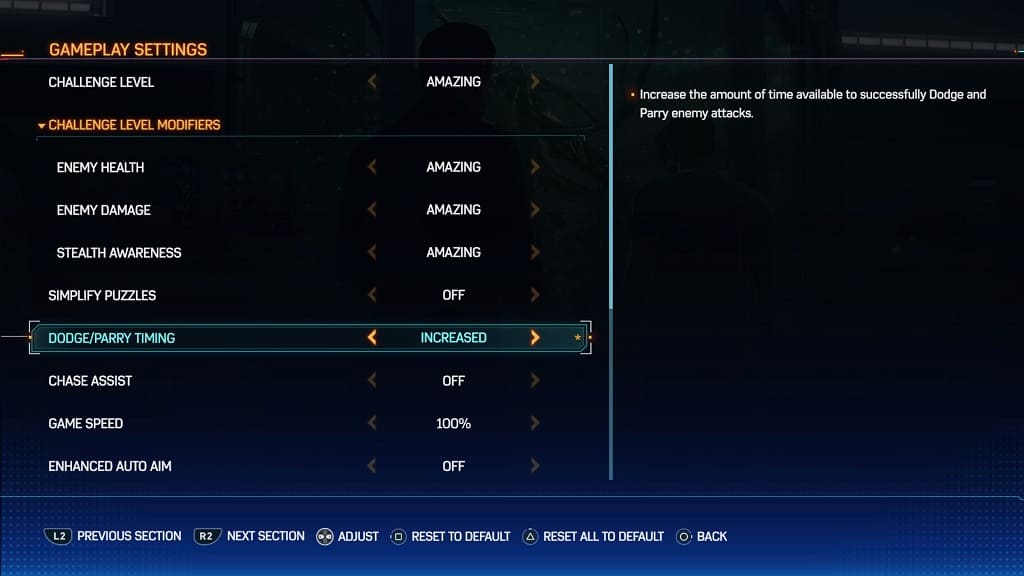
3. Once you get there, move the cursor down to Dodge/Parry Timing, which should be showing the following description:

Increase the amount of time available to successfully Dodge and Parry enemy attacks.

4. You can use the left analog stick, left directional pad button or right directional pad button to change the Dodge/Parry Timing from “Default” to “Increased.”

5. Afterwards, close the Settings menu and then load back into the game.

The next time you enter combat, you should have a much easier time dodging and parrying.

How to make puzzles easier in Marvel’s Spider-Man 2

If you have a hard time completing puzzles in Marvel’s Spider-Man 2, then you can check out this tutorial to see how you can make them easy to complete so that you can get back to the fast-paced action.

1. To start off, you need to open the Settings menu.

This can be done from the title screen before you load into the game or from the pause menu that you can bring up by pressing the Options button on the DualSense.

2. Inside of Settings, you first need to select Gameplay.

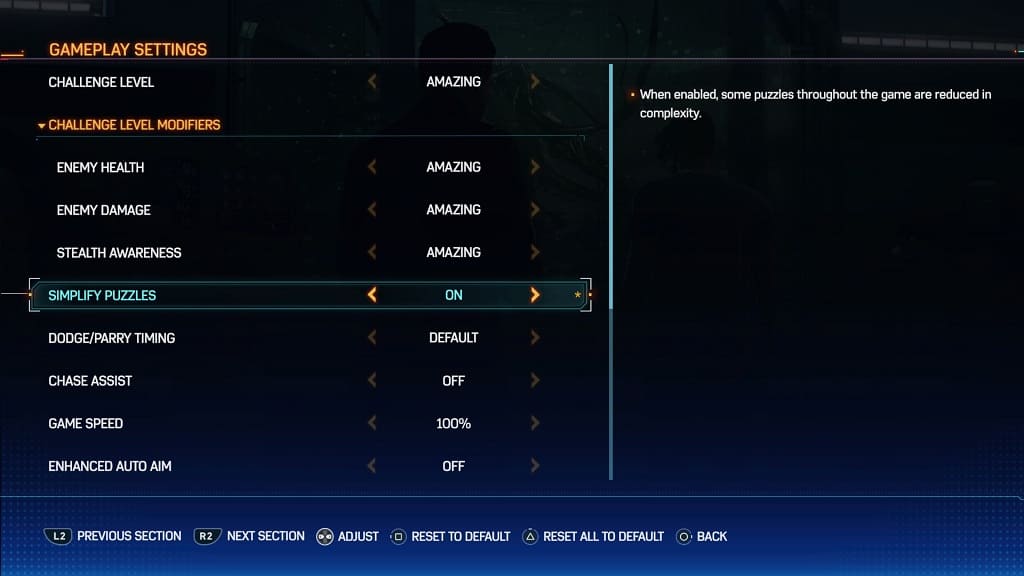
3. From the Gameplay Settings screen, move the cursor down to Simplify Puzzles. It should contain the following description:

When enabled, some puzzles throughout the game are reduced in complexity.

4. Use the left directional pad button, right direction pad button or left analog stick to change the Simplify Puzzles from “Off” to “On.”

5. Exit the Settings and return to playing Spider-Man 2.

The puzzles should now be a lot easier to solve.

How to change inverted camera controls in Marvel’s Spider-Man 2

Marvel’s Spider-Man 2 uses inverted camera controls by default. To see how you can change these to normal so that the camera will move in the same direction where you are pointing the right analog stick, you can take a look at this tutorial from Seeking Tech.

1. If you haven’t done so already, open the Settings menu in Spider-Man 2. This can be done from either the main menu or pause screen.

2. From the Settings menu, select Controls.

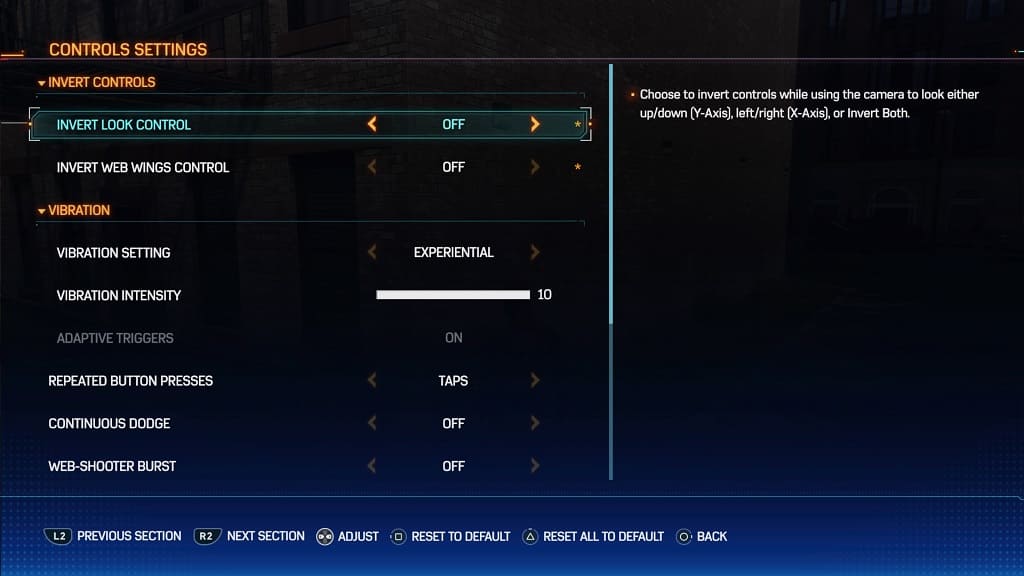
3. In the Controls Settings screen, move the cursor down to Invert Look Control option, which should have the following description:

Choose to invert controls while using the camera to look either up/down (Y-Axis,) left/right (X-Axis,) or invert both.

By default, Invert Look Control option is set to “Invert Both.” To make it non-inverted, you need to change it to “Off.”

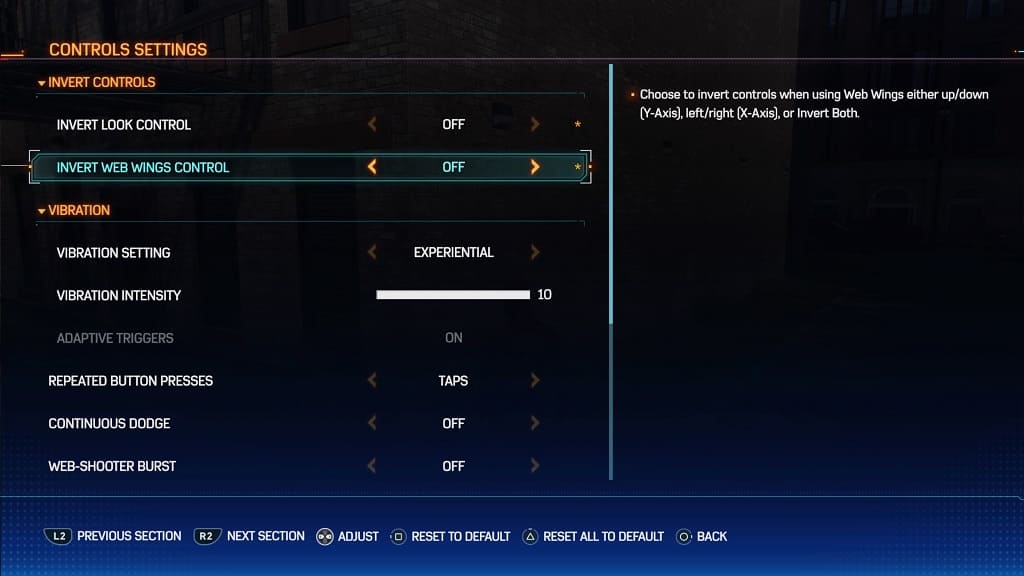
4. Next, you need to move the cursor down to Invert Web Wings Control. It should be showing the following description:

Choose to invert controls while using Web Wings either up/down (Y-Axis,) left/right (X-Axis,) or invert both.

The Invert Web Wings Control is set to “Y-Axis” by default. To make it normal, you need to change it to “Off.”

5. Once you are done non-inverting the camera controls, you can exit the Settings menu.

When you return to playing Spider-Man 2 again, the camera should no longer be inverted.

How to fix Mortal Kombat: Onslaught lost connection error

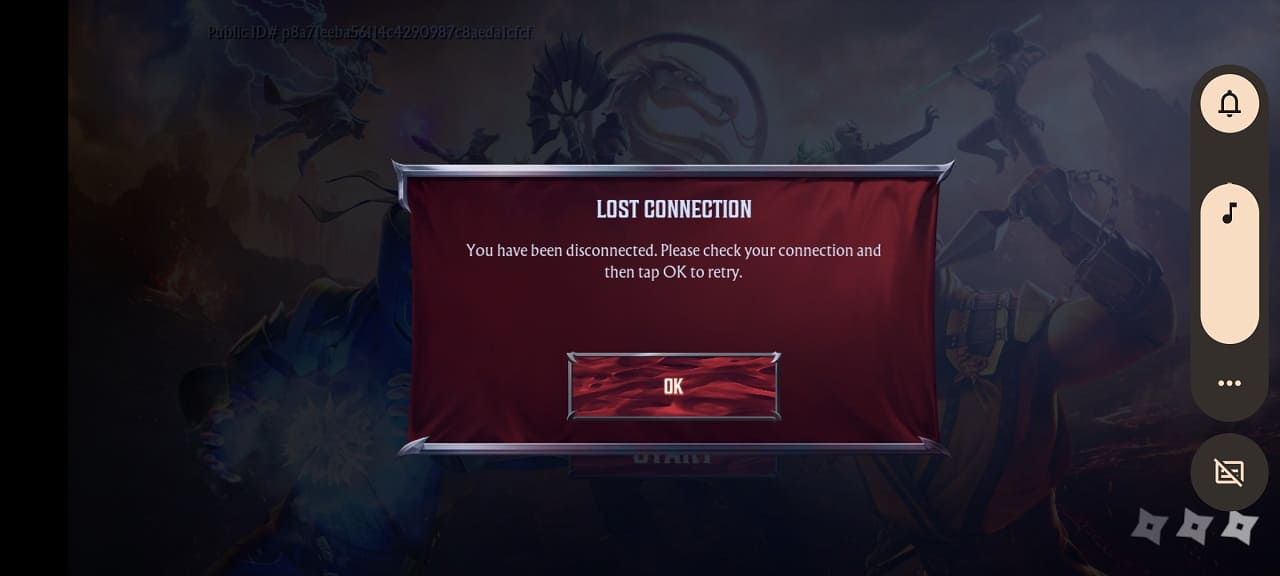
When trying to play Mortal Kombat: Onslaught, you may end up seeing the following error message:

Lost Connection. You have been disconnected. Please check your connection and then tap OK to retry.

To see how you can fix this internet issue for this mobile spin-off Mortal Kombat title, you can take a look at this troubleshooting article at Seeking Tech.

1. For the first step, we suggest taking a look at the official Mortal Kombat: Onslaught Twitter page to see if there are any server issues.

If there is downtime, then you won’t be able to connect to the game until they get fixed.

2. If the servers appear to be fine, then you should check the internet connection of your smartphone. Try to make sure that you have a strong enough signal.

Of course, you should also avoid using the same internet connection to download and/or stream the same time you are playing the game.

3. Furthermore, you can try closing any other or suspended applications as these may conflict with the online connection in Onslaught.

4. If possible, try switching to a different wireless network on your phone.

5. Make sure you have the latest patch installed for the game as well.

6. Deleting and then re-installing the game from the Google Play Store or Apple App Store may also help.