How to pre-order PS VR2 games from the PlayStation Store of PS5

You are able to pre-order select PlayStation VR2 games directly from the PlayStation Store on your PlayStation 5 or PlayStation 5 Digital Edition console. To find out how you can reserve these virtual reality titles, you can take a look at this tutorial from Seeking Tech.

1. Before doing anything else, make sure you open the PlayStation Store App from the home screen of your PS5.

If you are currently playing a game, using an app, or in another area of the system menus, then you can press and hold the PS button on your controller to return to the home screen.

You can also quick press the PS button and then select the house icon at the bottom menu to return to the same location.

2. In the home screen, select the PlayStation Store App from the Games section.

If you are in the Media section, then you have to press L1 to switch back to Games.

3. With the PlayStation Store App opened, make sure you are viewing the Latest tab.

You can use the L1 and R1 buttons to change tabs.

4. In the Latest tab, scroll down until you get to the Pre-orders row.

5. From there, move the cursor all the way to the right and then select the View All option.

6. You should now be in the Pre-orders screen, which shows you all of the PlayStation 4 and PlayStation 5 games that are eligible for reservation.

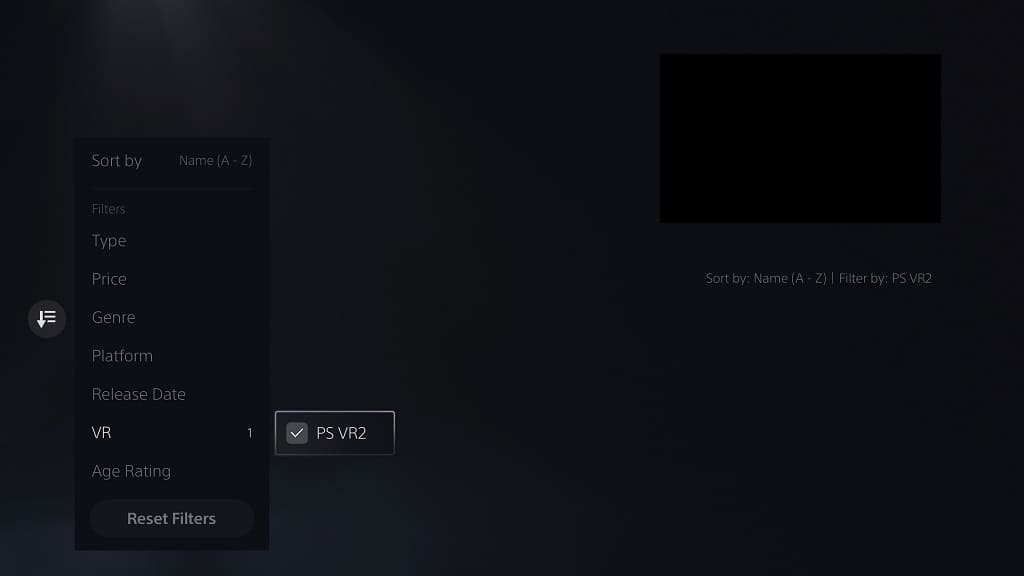
7. To filter this list to only show PS VR2 games, move all the way to the left and then select the Sort and Filter option.

8. In the pop-up menu, select VR.

9. Afterwards, make sure that the PS VR2 box is checked.
10. Press the Circle button to return to the Sort and Filter menu.

11. From there, we recommend selecting the Sort By option. This will let you order the list of PlayStation VR2 games that can be pre-ordered. You can sort based on the following:

  1. Best Selling
  2. Most Downloaded
  3. Name (A to Z)
  4. Name (Z to A)
  5. Release Date (Old to New)
  6. Release Date (New to Old)
  7. Recently Added to PS Plus
  8. Price (Low to High)
  9. Price (High to Low)

12. Once you are done with the sorting, press the Circle button to return to the Sort and Filter menu and then the same Circle button again to go back to the Pre-orders screen.

You should now be able to view the list of all PlayStation VR2 games that can currently be pre-ordered from the PlayStation Store.

How to disable trophy and other notifications when playing PlayStation VR2

When playing with the PlayStation VR2 on your PlayStation 5 or PlayStation 5 Digital Edition console, you may end up seeing notifications pop-up on the screen. These may include trophies that you unlocked in the PS VR2 game. Not only do these graphics break your virtual reality immersion, but they can also block off important sections of the screen.

To see how you can turn off these system messages from showing up, you can take a look at this step-by-step tutorial at Seeking Tech.

1. To start off, you need to head back to the home screen of your PS5.

In order to do so, you can press and hold the PS button on the DualSense, left PlayStation VR2 Sense controller or right PlayStation VR2 Sense controller.

You can also press the PS button on either of these controls and then select the house icon located on the bottom menu to head to the home screen.

2. From the home screen, you need to make your way to the top right corner of the screen, where you can then select the gear icon.

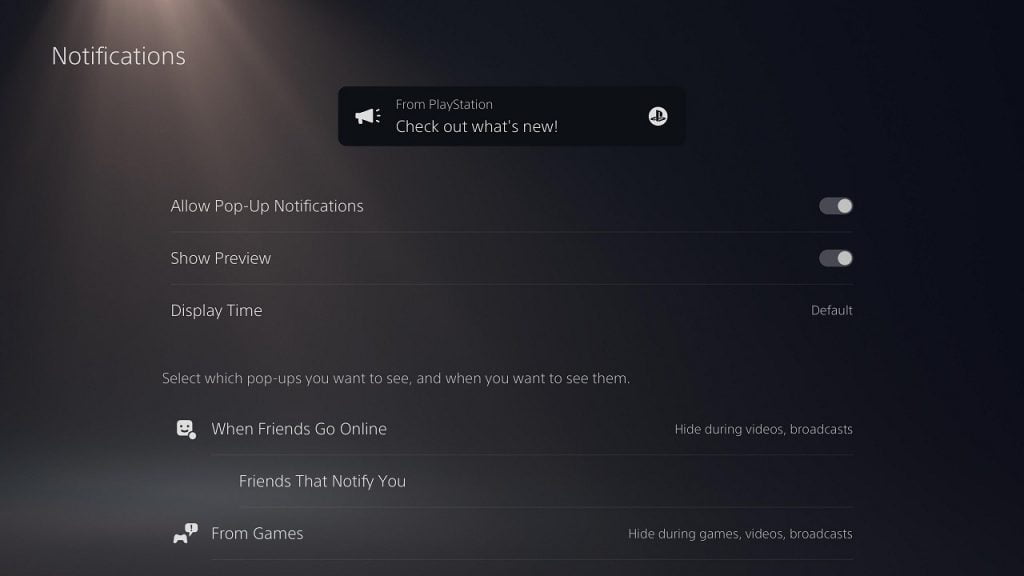
3. You should now be in Setting, which is where you need to scroll down and then select Notifications.

4. After getting to the Notifications menu, make sure that the Allow Pop-Up Notifications setting is disabled.

By turning it off, you should no longer see any trophy or another system messages pop-up when you are playing a game with your PlayStation VR2 headset.

It is important to note that disabling Allow Pop-Up Notifications setting will also prevent them from showing up when you are playing flat screen titles.

If you want to re-enable these pop-up messages, then you need to go back to the Settings > Notifications menu. Once you get there, you should then make sure that Allow Pop-Up Notifications is turned back on again.

How to find PS VR2 games on PlayStation Plus

Sony recently started adding PlayStation VR2 games to the PlayStation Plus subscription. To see how you can find and locate these virtual reality titles, you can take a look at this tutorial from Seeking Tech.

1. If you haven’t done so already, then your first step is to open the PlayStation Plus App from the home screen menu of your PlayStation 5 or PlayStation 5 Digital Edition console.

To go to the home menu, press and hold the PS button on your controller. You can also quick press the PS button and then select the house icon on the bottom left to head home.

From the home menu, select the PlayStation Plus App. If you can’t find it, then make sure you are viewing the Games section. If you are in the Media section, then you have to press L1 to change over to Games.

2. Inside of PlayStation Plus App, press the R1 buttons several times until you get to the Games tab.

3. The Games tab shows you a full list of games that are being offered for PlayStation Plus members.

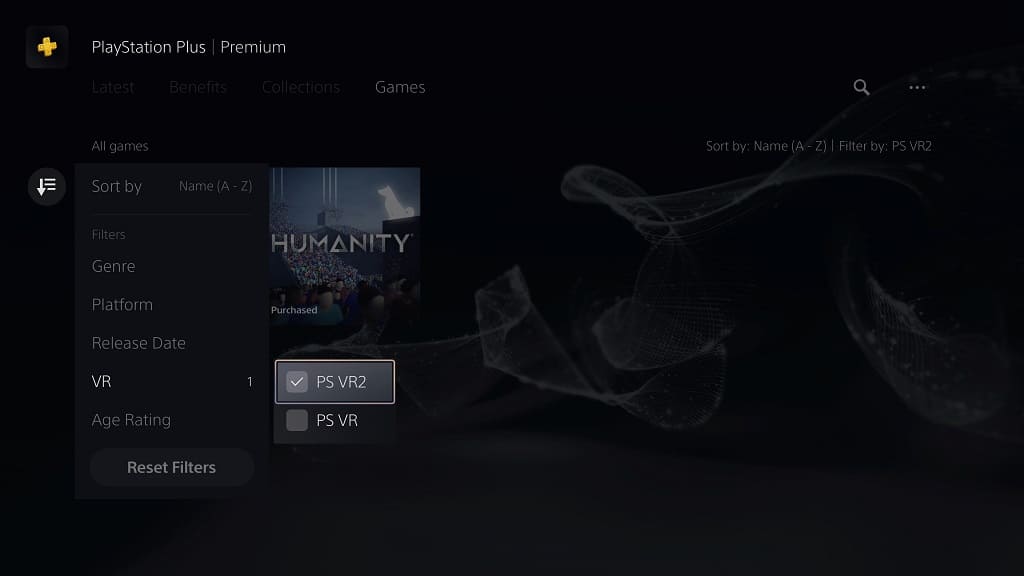
Here, you need to move to the left until you can find and select the Sort and Filter option.

4. In the pop-up window, you should select VR.

5. Afterwards, make sure that only PS VR2 is selected.

By doing so, the listing will be filtered to only show games that are compatible with the PlayStation VR 2 headset.

6. From the same Sort and Filter window, you can also select the “Sort by” option, which lets you sort the list of games based on the following orders:

  • Name (A to Z)
  • Name (Z to A)
  • Release Date (Old to New)
  • Release Date (New to Old)
  • Recently Added to PS Plus

7. Once you are done filtering and sorting the list, exit out of the Sort and Filter window by pressing the Circle button on the controller.

You should now be able to see a list of PS VR2 games that are currently being offered for PlayStation Plus members.

If you are interested in playing one of these virtual reality titles, then you can select it from the list. On the product page, you can then select the Download option.

What to do if PS VR2 Sense Controller is not working after an update

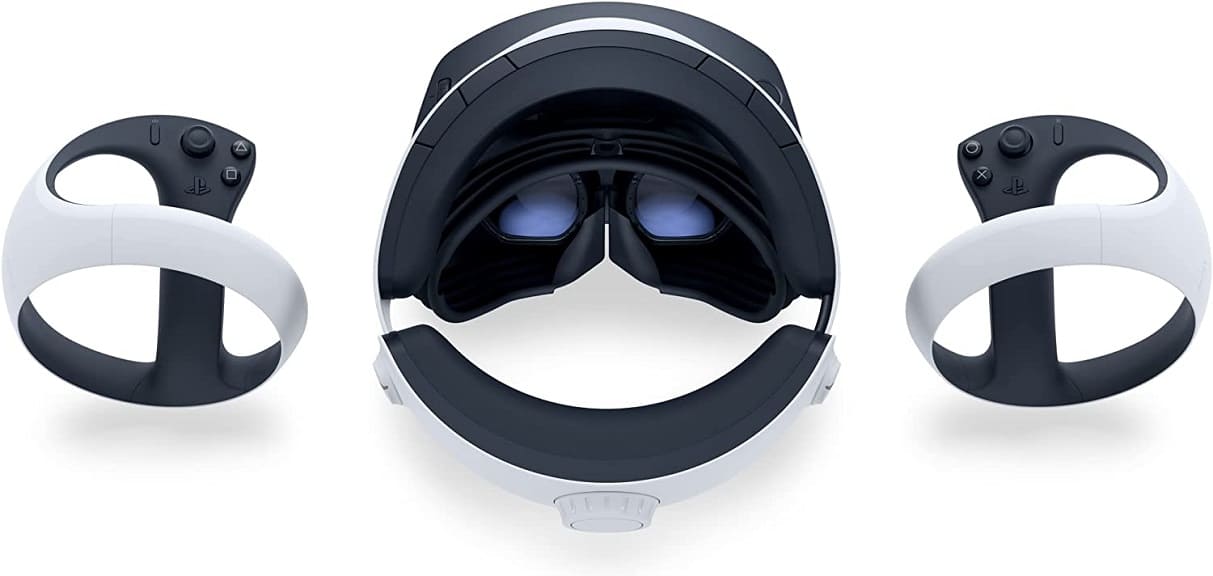
After updating the PlayStation VR2 Sense controllers, you may notice that either the left or right pad may not be working normally, or at all. To see how you can fix these motion control problems, you can follow the troubleshooting steps laid out in this article from Seeking Tech.

1. It is important to note that both the left and right Sense controllers need to be updated before you can use them again. Therefore, you need to go through the update process twice.

If you can’t get the other controller to update, then you can try restarting the console and then turning on the problematic gamepad. You may need to restart several times in order to get the update message to appear.

To see more tips about how you can update these virtual reality game pads, you can check out this link.

2. If you are sure that you have updated your controllers, then you try setting up your Play Area again.

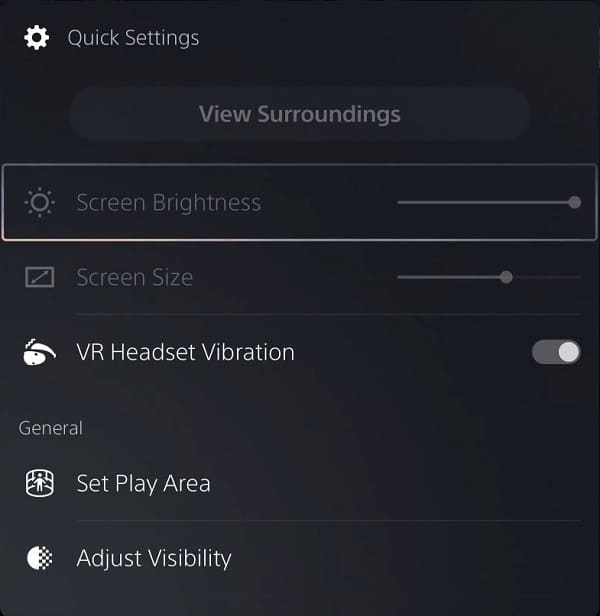
If order to do so, you can press the PS button, select the Quick Settings tile and then select Set Play Area. You can also go to your PS5’s settings menu, select Accessories, select PlayStation VR2 and then select Set Play Area.

3. There is a possibility that your issue may be related to a specific game. In this case, you can try restarting the game.

Alternatively, you can also try to see if there is a new patch available. In order to do so, move the cursor over to the PlayStation VR2 game in the home screen menu of your PlayStation 5 or PlayStation 5 Digital Edition console. Next, press the Options button and then select Check for Update.

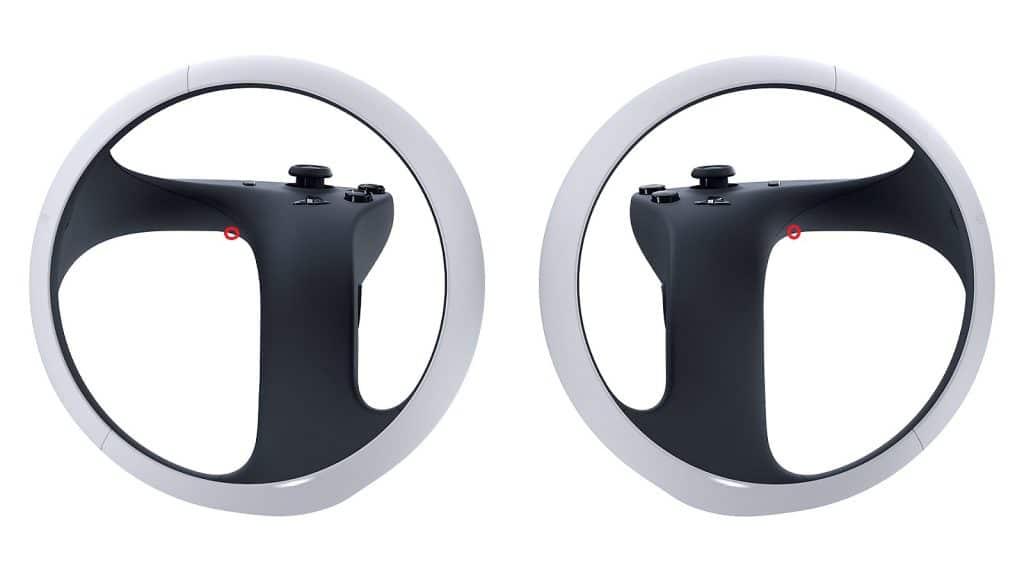
4. You may also want to consider resetting the problematic PS VR2 Sense controller.

To do so, you need to use a pin to press down on the reset button that can be found in a small opening. You should be able to locate it in the following location:

Once you reset the controller, you need to pair it again to your PlayStation 5 again.

5. You motion controller may not be function normally if the battery life gets too low. Therefore, make sure that they are fully charged up if they aren’t already.

6. If none of the aforementioned potential solutions have worked so far, you can take a look at this general PlayStation VR2 Sense Controller troubleshooting guide for the to see if you can get the left, right or both controls to work normally.

Here’s what Sony has to say about PS VR2 causing motion sickness

Playing the PlayStation VR2 may end up causing motion sickness. This is especially prevalent to new virtual reality players or for users who haven’t played in VR for a long time. So, what does Sony has to say about these issues?

According to the user manual, Sony states that using this virtual reality headset may cause “motion sickness, nausea, disorientation, blurred vision, or other discomfort or other abnormalities.” If you experience any of these symptoms, then the company urges you stop playing immediately.

If possible, they recommend that you rest up. You should not partake in any activities that require you to use your “unimpaired vision, balance or coordination” until you recover.

You can find their full statement regarding motion sickness and other issues below:

“Some people may experience motion sickness, nausea, disorientation, blurred vision, or other discomfort or other abnormalities. If experienced, stop using immediately, and remove the VR headset. If you experience symptoms during or after use, rest, and do not engage in any activities that require unimpaired vision, balance or coordination until after symptoms have completely disappeared.”

In another section of the same manual, Sony suggest taking a 15-minute break after every hour-long play session. With that said, these lengths and frequencies will be different from the individual.

If you are new to VR and/or more prone to motion sickness, for instance, then Sony recommends that you take more frequent breaks:

“It may take some time to become accustomed to images from PS VR2. During initial use, it is recommended that you use the product for short periods of time.”

If you are experienced in virtual reality gaming and/or don’t feel any discomfort at all while playing for an hour, then you most likely won’t need any long breaks.

You can find Sony’s comments regarding taking breaks below:

“Generally we recommend that you take 15 minute breaks for every hour of play. However, when viewing virtual reality content, the length and frequency of necessary breaks may vary from person to person—please take breaks that are long enough to allow any feelings of discomfort to subside.”

In addition to building up your VR legs for the PlayStation VR2, there are also tips and tricks that you can use in order to prevent yourself from getting motion sickness. You can take a look at this PSVR 2 nausea prevention guide to see how you can stop feeling nauseous when using this virtual reality headset.

Here’s what Sony has to say about PlayStation VR2 Mura issues

You may notice that there is a bit of noise and/or cloudiness when playing a PlayStation VR2 game on your PlayStation 5 or PlayStation 5 Digital Edition console. This is most likely due to Mura, which is the result of uneven brightness and/or color consistency across pixels.

If you look through the user manual of the PS VR2, you should be able to find a section where Sony talked about this issue. According to the company, Mura is considered to be a “normal occurrence” and isn’t considered to be a sign that the virtual reality headset is not functioning properly.

While the OLED display is made with “precise technology,” the manufacturing process does not result in consistent brightness and color uniformity.

You can find the full statement below:

“Black (dark) pixels and continuously lit pixels may appear in certain locations on the screen. The appearance of such spots is a normal occurrence associated with screens and is not a sign of a system malfunction. Screens are made using highly precise technology. However, a very small number of dark pixels or continuously lit pixels may exist and color irregularities or brightness irregularities may be visible on each screen.”

It is important to note that Mura also occurs on other OLED screens, such as the original PlayStation Vita model and the Nintendo Switch OLED model. So, this issue isn’t just limited to the PS VR2.

So, what can be done if you are noticing that your PlayStation VR2 headset has Mura? For one, you can try adjusting the brightness level, either through the in-game settings or through the PS5 system menus, to see if the cloudiness will become less noticeable in darker or brighter lighting. Mura usually becomes more apparent in extremely dark areas or in places where there is only one primary color being shown.

Of course, you can simply choose to power through and play the game despite the Mura effect. Once you get fully immersed in the experience, you most likely won’t care about the graininess.

While Sony considers Mura to be normal, you may be able to still exchange your virtual reality headset for a new one as well. Some PlayStation VR2 units may have less Mura than others. Of course, there is also a possibility that Mura will be just as prevalent, if not more, with the new unit.

To find out more about how you can deal with this issue, you can take a look at this PlayStation VR2 Mura troubleshooting article.

How to prevent PlayStation VR2 OLED burn in

The PlayStation VR2 uses an OLED display, which provides an incredible contrast thanks to true blacks and HDR support. With that said, it is more susceptible to burn in and other image retentions issues. To see how you can prevent the PS VR2 from suffering these problems, you can take a look at this article from Seeking Tech.

1. For the first precautionary step, you can try turning down the brightness. Most games have a brightness setting that you could use in the in-game menu.

Alternatively, you can also use the system menus of your PlayStation 5 or PlayStation 5 Digital Edition console. In order to do so, you can press the PS button and then select the Quick Settings card. You should then be able to adjust the Brightness slider from there.

You can also press and hold the PS button (or press the PS button and then select home) to head back to the home screen of your PS5. From that location, select Settings > Accessories > PlayStation VR2 and you should see the Brightness slider.

The PlayStation VR2 comes with a great light shield that should block out external lighting as long as you are properly wearing the headset. Therefore, you shouldn’t need to play VR games at the maximum brightness setting in most cases. Not to mention that turning down the brightness level should help remove some of the blurriness you may be experiencing.

2. Some games may also offer a dynamic heads-up-display that will only show up when needed. As a result, these static images won’t stay on the screen for long periods of time, preventing potential image retention.

Thus, we recommend checking the in-game menus to see if there is a dynamic HUD option.

With that said, a vast majority of PlayStation VR2 titles, and modern games in general, do a good job of preventing screen burn-in as the HUDs are usually more transparent.

The only content you most likely have to worry about is playing a retro game with persistent HUD and/or black bars. Watching a video with a static logo or black bars may also cause issues as well.

You may also make the screen size of the cinema mode as big as possible. You can change this screen display size by pressing the PS button and then selecting Quick Settings. You can also head over to the home screen of your PS5 and then selecting Settings > Accessories > PlayStation VR2 to find the same slider.

3. Another way to prevent PlayStation VR2 image retention is to take frequent breaks.

Sony recommend that you take a 15-minute break after every hour when using the PlayStation VR2 headset. If you start feeling motion sickness, then we suggest that you stop immediately and don’t play again until your body starts to feel normal.

When taking a break, remove the virtual reality headset from your head. By doing so, the screen of the PS VR2 should turn off automatically, preventing any potential burn-in problems.

What to do if you can’t update the PS VR2 Sense Controller firmware

If you are having problems trying to update the left or right PlayStation VR2 Sense Controller, then you can take a look at this troubleshooting article from Seeking Tech to see how you can download and install the firmware without any issues.

1. For the first step, make sure that you have the latest system software installed on your PlayStation 5 or PlayStation 5 Digital Edition console; otherwise, you won’t get a prompt asking you to update your PS VR2 Sense controller when you connect it to the system.

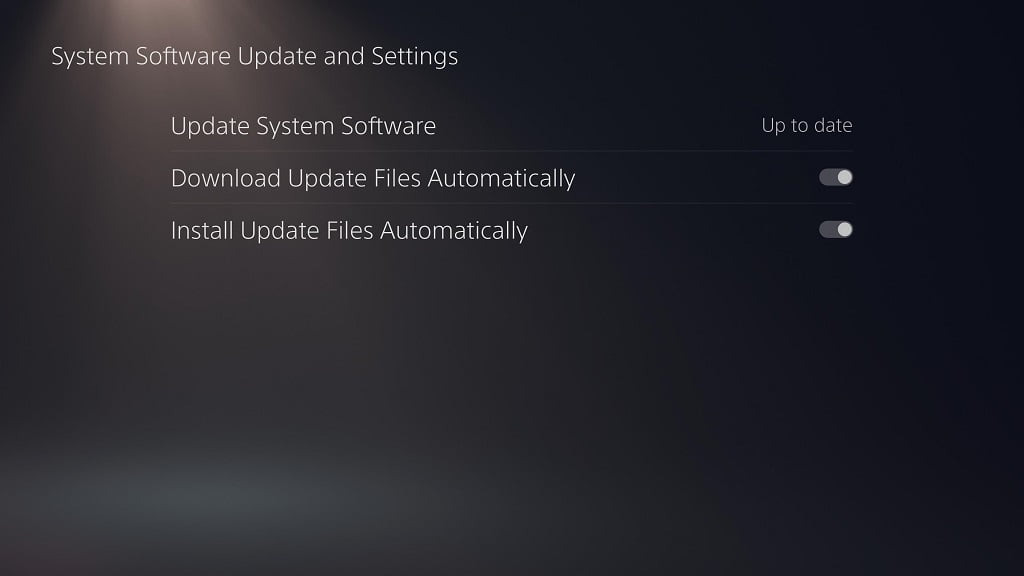
To manually update your PS5, go to the Settings menu from the home screen. From there, you need to select System > System Software > System Software Update and Settings > Update System Software > Update Using Internet.

Once the system has been updated, it should reboot on its own. Afterwards, you can turn on your PlayStation VR2 Sense Controller to check if you are able to see the “PS VR2 Sense Controller (L) Device Software” or “PS VR2 Sense Controller (R) Device Software” message.

2. You should also make sure that your motion controls have sufficient battery life to go through with the update. If not, then you may not be able to install the new firmware.

If you need to recharge, then you should only need to do so for a minimum of 15 minutes in order to get a good enough battery life to go through with the firmware update.

3. If you don’t see the update prompt for the virtual reality controller when it is connected to your console wirelessly, then you can try connecting the controls to the USB port of the PS5 by using a USB cable.

4. You can also try turning off both the left and right Sense controllers, as well as any other controllers you have connected to your PlayStation 5.

Afterwards, only turn on the left or right PlayStation VR2 Sense to see if you are able to get the firmware update message to show up on your television screen.

5. If you are able to update one of the Sense controllers but not the other one, then you can try restarting your PS5.

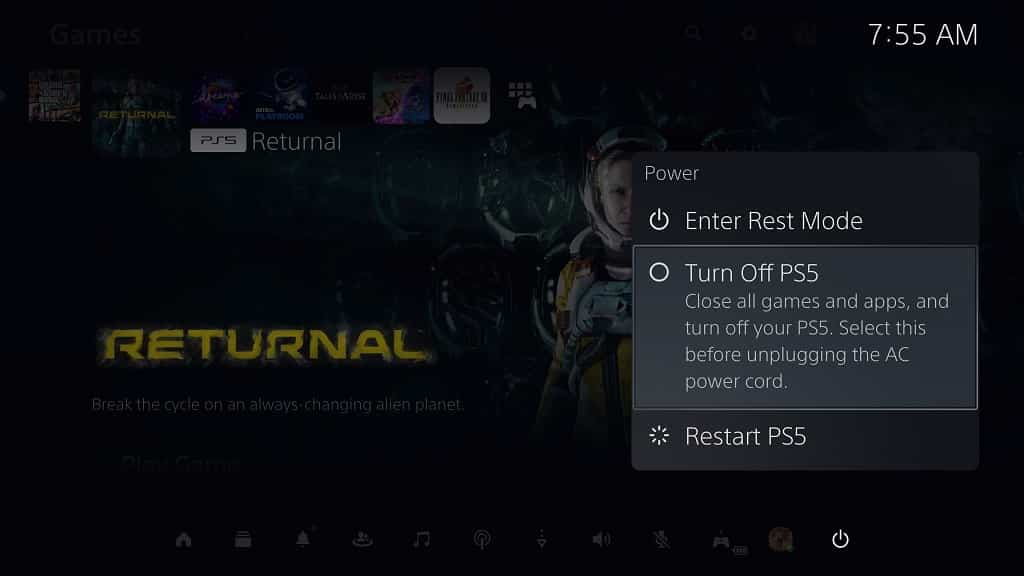
To do so, press the PS button to open the Control Center menu, where you can then select the Power option on the bottom right side. From the Power menu, you then need to select the Restart option.

You may need to restart multiple times to be able to update the motion controls.

5. Resetting the problematic PlayStation VR2 Sense controller may get it to update. In order to do so, you can follow the steps laid out in this guide.

Once you are done resetting the game pad, you need to pair it back to your PlayStation 5 console. Once the connection has been made again, you should be able to see the firmware update message.

How to update the PlayStation VR2 Sense Controller firmware

Just like the DualSense and Dualsense Edge, the PlayStation VR2 Sense can be updated. The new firmware may come with bug fixes, improved stability, new features and more. To see how you can update these virtual reality motion controllers, you can follow the steps laid out in this article from Seeking Tech.

1. You won’t get prompted to update the PlayStation VR2 Sense Controller until you update the firmware of your PlayStation 5 or PlayStation 5 Digital Edition console.

So, if you haven’t done so already, make sure you update your system software by doing the following:

  • Turn on your console and then make sure it is connected to the internet.
  • If you don’t see a prompt to update the system software, then you can head over to Settings from the home screen. From Settings, you then need to select System > System Software > System Software Update and Settings > Update System Software > Update Using Internet.
  • If there is a new update available for the PS5, wait for it to download and install. It should then restart on its own.

2. Once your PS5 has been updated, turn on either the left or right PlayStation VR2 Sense Controller. If there is a new firmware for this accessory available, then you should see the following messages:

For the left Sense Controller:

“PS VR2 Sense Controller (L) Device Software. To use your PS VR2 sense controller (L), you need to update its device software to the latest version. This update will be quick and you console won’t need to restart.”

For the right Sense controller:

“PS VR2 Sense Controller (R) Device Software. To use your PS VR2 sense controller (R), you need to update its device software to the latest version. This update will be quick and you console won’t need to restart.”

Here, you need to select the Update Now option to start the process.

3. Once you update the firmware for one of your PlayStation VR2 Sense Controllers, you need to do the same for the other controller.

To do so, you simply need to turn on the other controller and you should see the aforementioned update screen.

4. After updating the controllers to the latest firmware version, you should be able to use them when playing with the PlayStation VR2 headset.

How to fix PlayStation VR2 ‘remove your headset’ error

When playing a PlayStation VR2 game, you may run into an error message asking you to remove your virtual reality headset error and then follow the instructions that appear on the TV screen. If you look at the television, you may notice that it displays an unrelated message, potentially asking you to adjust the display area.

To see how you can potentially get this error message to go away, you can take a look at this troubleshooting article from Seeking Tech.

1. If you have been playing the PS VR2 with your television screen or monitor turned on, then you can try enabling the Tracking Support feature.

You can do so from the PlayStation VR2 menu, which you can get to by pressing the PS button, selecting the Quick Settings title and then selecting Other Settings. Alternatively, you can also press and hold the PS button to go to the home menu of your PS5, where you can then select Settings > Accessories > PlayStation VR2.

2. If you have been playing without a television set or monitor turned on, then you should make sure that your room is suitable for the inside-out tracking cameras of the virtual reality headset.

To see how you can improve the tracking of this headset, you can follow the steps laid out in this previous guide.

3. There is a possibility that the play area you set up is too small, which may end up causing this issue.

You can edit your play area by pressing the PS button, selecting the Quick Settings tile and then selecting Set Play Area. You can also go to the home screen of your PlayStation 5 or PlayStation 5 Digital Edition console and then head over to Settings > Settings > Accessories > PlayStation VR2 > Set Play Area.

To see how you can expand the play area from the sitting position, you can check out this troubleshooter.

4. Make sure you have sufficient lighting for your headset. Unlike the PS VR1, the PS VR2 works better in a brighter room. With that said, if you are looking directly at a light source, then you may end up getting an error message asking you to remove your headset.

5. If your PS5 isn’t connected to a TV or monitor, then you can try disabling the Tracking Support feature from the aforementioned PlayStation VR2 menu.

6. Furthermore, you can also try turning on your PS5 via Remote Play if the console isn’t connected to a television set or gaming monitor.

You can set up this feature by doing the following:

  • Go to the home screen of your PS5 and then head over to Settings > System > Remote Play.
  • Next, you need to go to Settings > System > Power Saving > Features Available in Rest Mode. From there, make sure you enable Stay Connected to the Internet and Enable Turning on PS5 from Network.
  • Put your PS5 in Rest Mode.
  • Use the PlayStation Remote Play App to then turn on your PS5. You can get this app on PC, Android or Apple devices.

7. Keep the software of your PlayStation 5 and PlayStation VR2 updated as the new firmware may help fix this issue.