How to fix Ghostwire Tokyo frame rate issues on Xbox Series X and S

When playing the Ghostwire Tokyo on your Xbox Series X or Xbox Series S, you may notice some frame rate drops and/or stuttering. To see how you can get this first-person action-adventure game to run smoother, you can take a look at this troubleshooting article from Seeking Tech.

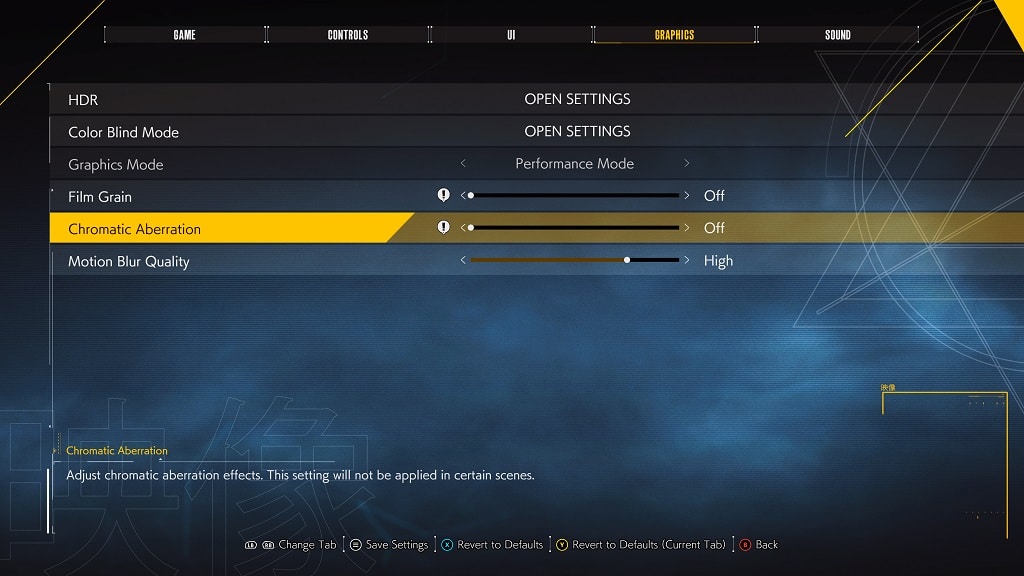
1. For the first step, you should make sure you are playing the game in Performance Mode, which increases the frame rate to a maximum of 60 per second.

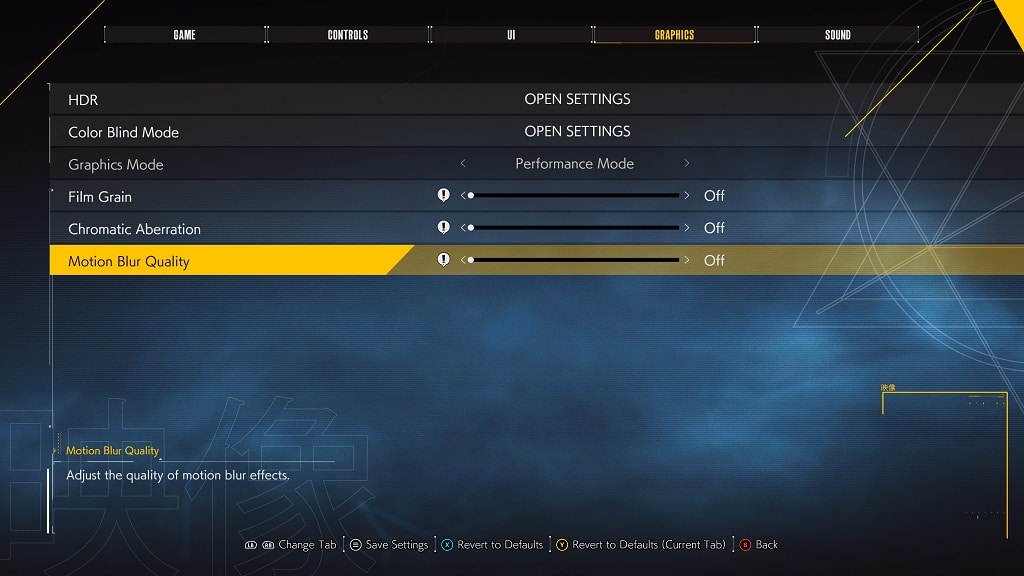
You can change modes by heading into the Graphics tab of the Options menu. You can find the Options menu from either the main menu or pause screen.
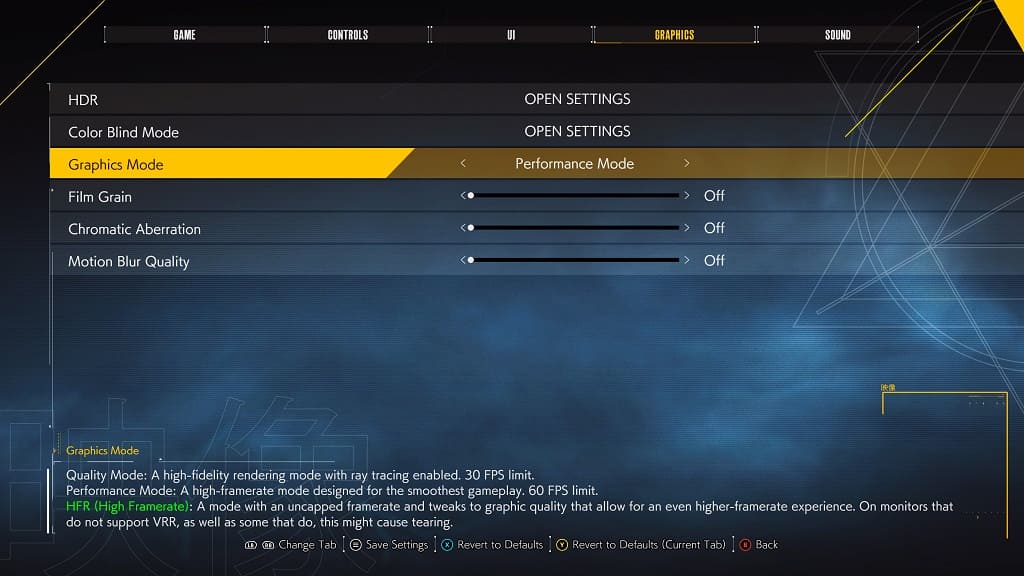
2. If your television or computer monitor supports Variable Refresh Rate, then you should make sure you enable it on the settings of your screen. VRR will make minor frame rate drops less noticeable in addition to preventing the screen from tearing.

After enabling Variable Refresh Rate from your TV or monitor, you should make sure you do the same on your game system. In order to do so, head over to the Settings menu of your Series X or Series S. From there, go to General > TV & display options > Video modes. Inside the General – Video modes menu, make sure that the Allow Variable Refresh Rate setting is enabled.
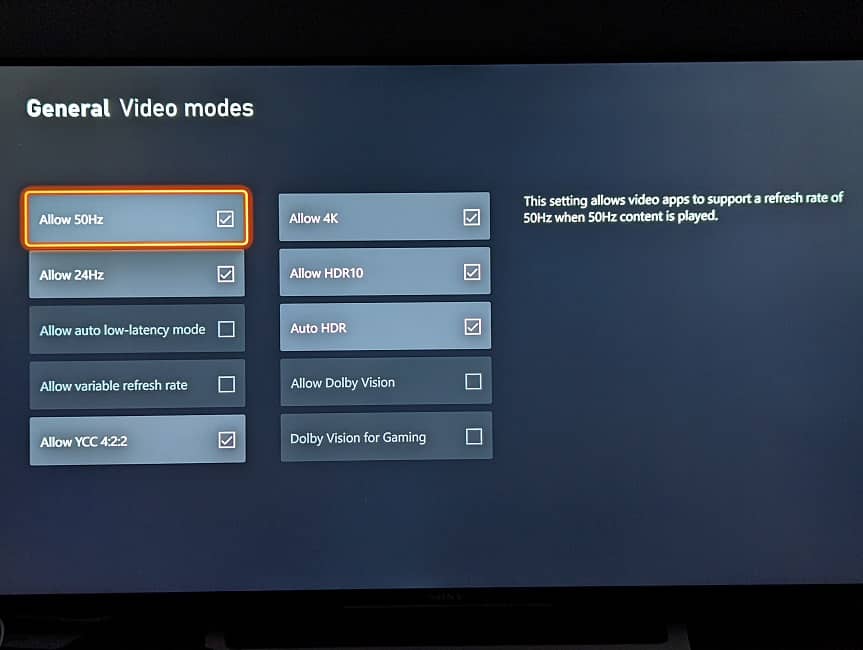
3. If you have a 120 Hz television set or monitor, then you can try set the graphics mode to any of the following in order to get even higher frame rates:

  • High Frame Rate Quality Mode
  • High Frame Rate Performance Mode
  • High Frame Rate Quality Mode (VSync)
  • High Frame Rate Performance Mode (VSync)

By playing the game at more than 60 frames per second, minor frame drops should be less noticeable, especially if you are also playing with Variable Refresh Rate enabled.
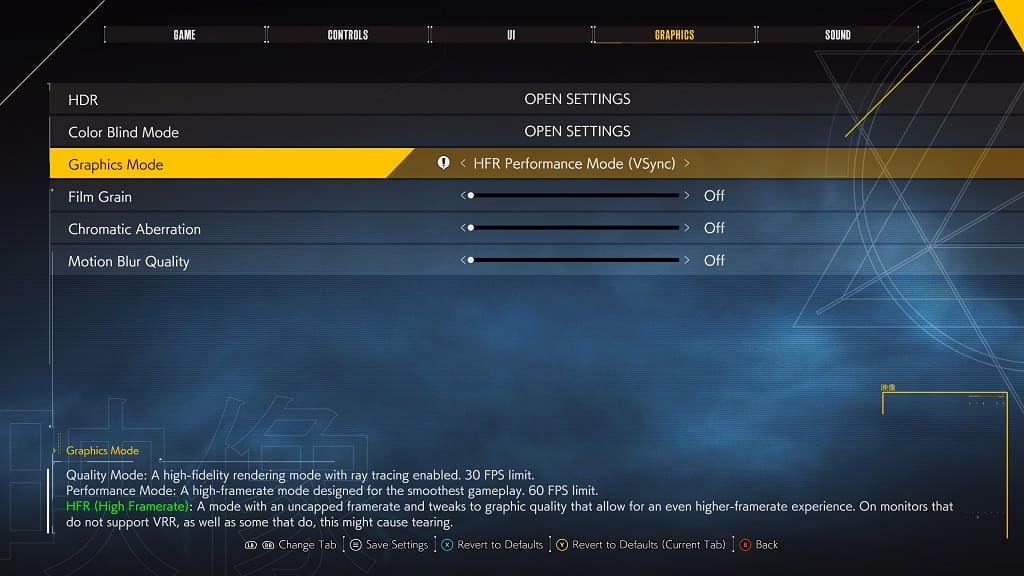
4. Quick Resume can cause performance issues in Ghostwire Tokyo as well as other Xbox Series X and Xbox Series S games.

  • So, if you are experiencing frame rate drops, we recommend that you try restarting the game. In order to do so, you need to take the following steps:
  • Press the Xbox button on the controller to open the Guide quick menu.
  • From there, move the cursor over to the Ghostwire Tokyo icon and then press the Menu button on the controller.
  • In the small pop-up window, select the Quit option.
  • Once the game has closed, open it again.
  • Resume your progress to see if you can get the game to run more smoothly after a fresh reboot.

How to fix Ghostwire Tokyo screen tearing issues on Xbox Series X and S

When playing the Xbox Series X and Xbox Series S versions of Ghostwire Tokyo, you may notice that there is a lot of screen tearing or ripping. To see how you can get rid of this graphical issue, you can take a look at this troubleshooting article from Seeking Tech.

1. For the first potential fix, you can try changing the graphics mode in Ghostwire Tokyo by taking the following steps:

  • Start by opening the Options menu. If you are currently playing this first-person action-adventure title, you can get there by pressing the Menu button to pause the game. From there, you should be able to head to Options.
  • In Options, use the LB and RB buttons until you get to the Graphics tab.
  • On the Graphics tab, move the cursor to Graphics Mode.
  • If your television or monitor display has a maximum refresh rate of 60 Hz, make sure you set Graphics Mode to Performance Mode.
  • If your display is capable of 120 Hz refresh rate, then you should change Graphics Mode to either HFR Quality Mode (VSYNC) or HFR Performance Mode (VSYNC). Out of these two, we recommend going with HFR Performance Mode (VSYNC) if you want to eliminate as much of the screen tearing as possible.

2. If your TV or monitor supports Variable Refresh Rate, then you should make sure you enable this feature from its menu.

Afterwards, head to the Settings menu of your Xbox Series X or Xbox Series S (you can get there by pressing the Xbox logo button on the controller and then selecting Settings from the Profile & System tab).

In Settings, select General > TV & display options > Video modes. Finally, make sure that Allow Variable Refresh Rate is selected in the General – Video Modes menu.

3. You should also make sure that you have the latest patch for Ghostwire Tokyo installed as a new update may help fix the screen tearing.

To manually check if there is a new update available for this first-person action-adventure game, press the Xbox logo button and then move the cursor to the Ghostwire Tokyo icon. Afterwards, press the Menu button on the controller and then select Manage Game and Add-Ons. In the Manage – Ghostwire Tokyo screen, select Updates.

If there is a new update available, make sure you download and install it onto your Series X or Series S.

How to prevent motion sickness when playing Ghostwire Tokyo

When playing Ghostwire Tokyo, you may start to feel nauseous. To see how you can prevent yourself from getting motion sick, you can take a look at the following tips in this Seeking Tech article.

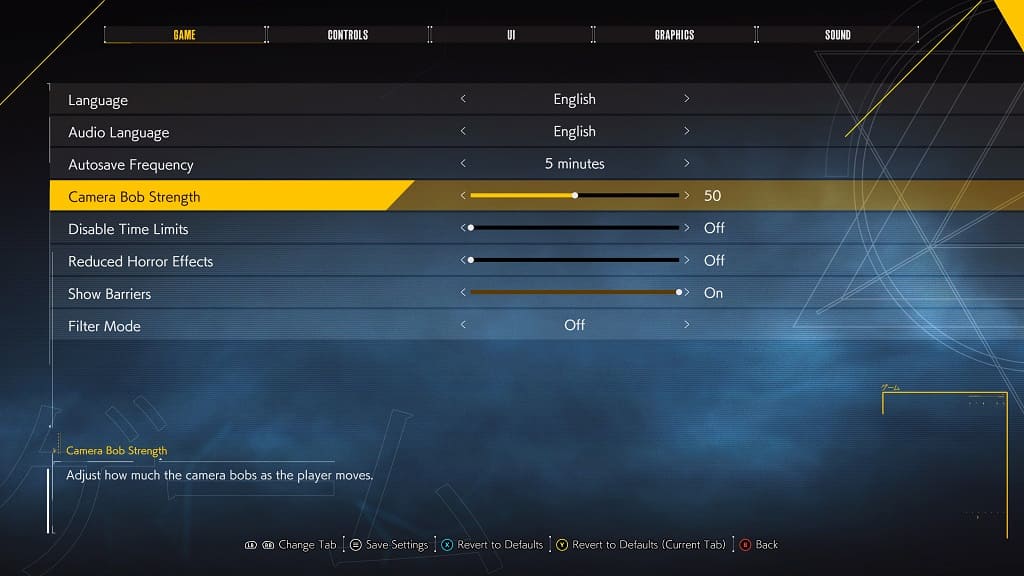
1. For the first potential solution, you can try turning down the camera movement when you move the character in the game. Having less camera shake may alleviate your nausea.

To do so, you need to take the following steps:

  • To begin, open the Options menu. You can do so from either the main menu or pause menu. To pause the game on PlayStation 5, you can press the Options button. On the Xbox Series X or Xbox Series S, you need to press the Menu button.
  • From the Options menu, you should already be in the Game tab. If you are in another tab, then you can use the L1 and R1 buttons on the PS5 or LB and RB buttons on Xbox to change tabs.
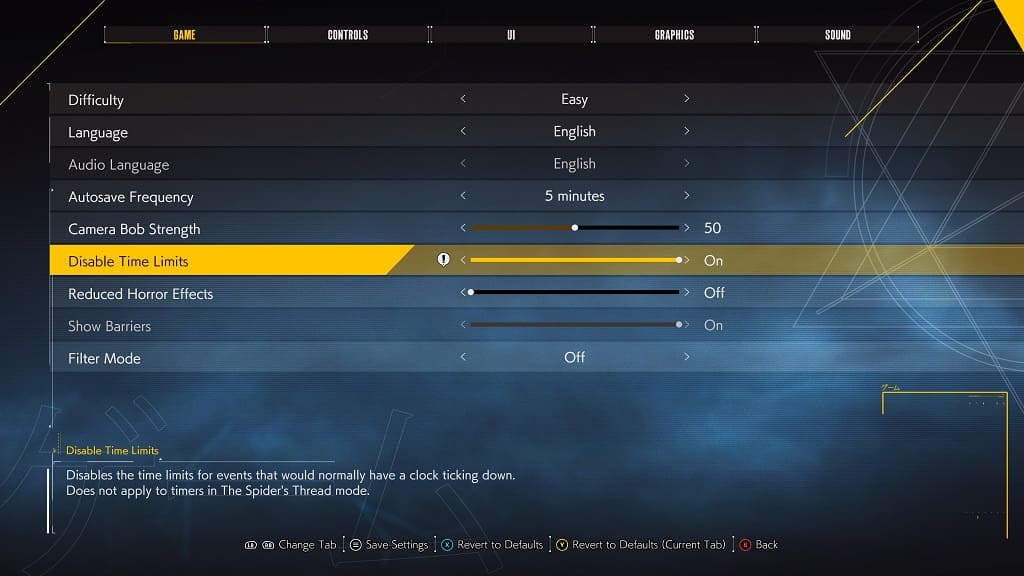
  • From the Game tab, move the cursor down to the Camera Bob Strength setting.
  • You can then use the directional pad or left analog stick to reduce the camera shake movement. By default, this setting has a value of 50. You will be able to reduce it all the way down to 0.

2. Playing Ghostwire Tokyo at a higher frame rate may also help prevent motion sickness.

To change graphics mode, head over to the Graphics tab in the Options menu. You should then be able to change Graphics Mode to Performance Mode.

If your screen supports 120 Hz refresh rate and/or Variable Refresh Rate, then we suggest changing the Graphics Mode to any of the following:

  • HFR Quality Mode
  • HFR Performance Mode
  • HFR Quality Mode (VSync)
  • HFR Performance Mode (VSync)

3. We also suggest turning off the film grain, chromatic aberration and motion blur effects as the extra blurriness added to the graphics may trigger your nausea.

You can follow these steps to see how you can disable these visual effects.

4. If the character isn’t moving or aiming as fast as you like, then it may lead to motion sickness.

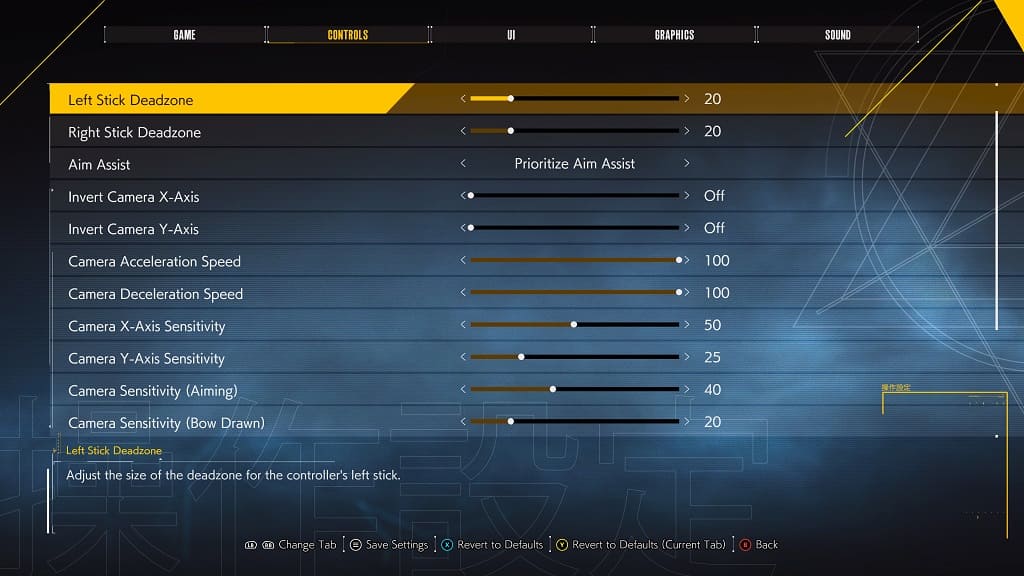
In this case, we recommend heading over to the Controls tab in the Options menu. From there, you will be able to adjust the following settings in order to get movement to feel as natural as possible:

  • Left Stick Deadzone
  • Right Stick Deadzone
  • Camera Acceleration Speed
  • Camera Deceleration Speed
  • Camera X-Axis Sensitivity
  • Camera Y-Axis Sensitivity
  • Camera Sensitivity (Aiming)
  • Camera Sensitivity (Bow Drawn)

How to fix Ghostwire Tokyo HDR issues on Xbox Series X and S

When playing Ghostwire Tokyo on your Xbox Series X or Xbox Series S, you may notice that the game is either too dark, too bright or seems to be washed out. To see how you can fix these HDR issues for the first-person action-adventure game, you can take a look at this troubleshooting article from Seeking Tech.

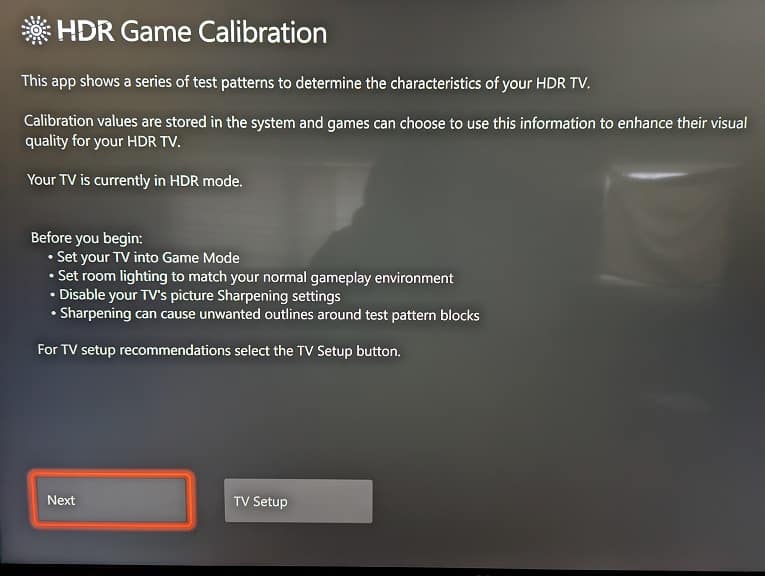
1. For the first potential fix, we recommend that you re-calibrate the HDR output of your console. In order to do so, you need to take the following steps:

  • Head over to the Settings menu of your Series X or Series S.
  • From there, select General > TV & display options > Calibrate HDR for games.
  • Follow the on-screen instructions in order to match the HDR brightness output of your console to the capabilities of your television set or gaming monitor.

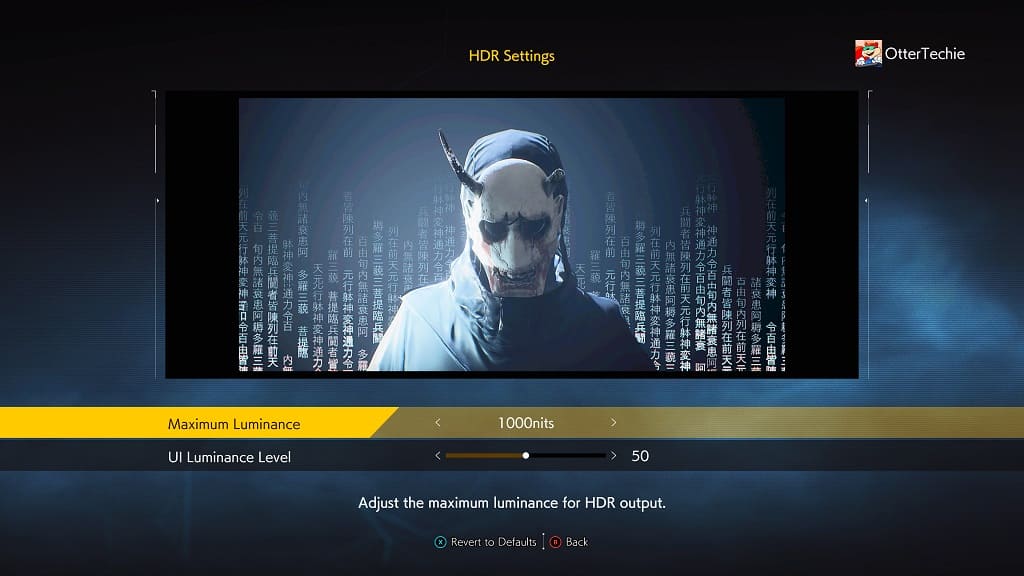
2. Of course, you can also try adjusting the HDR brightness out from within Ghostwire Tokyo. In order to do so, you need to do the following:

  • Start by heading over to the Options menu.
  • Inside of Options, use the LB and RB buttons to change tabs until you get to Graphics.
  • From the Graphics tabs, select HDR – Open Settings.
  • In the HDR Settings menu, you will be able to change the Maximum Luminance from 1000 nits to 2000 nits.
  • You will also be able to adjust the luminance level of the user interface from a value of 0 all the way to 100.

3. If you still can’t get the game to look just right with HDR, then you can try using a different television set or gaming monitor. Some screens are better at displaying HDR games when compared to others.

4. If you aren’t able to change screens, then you can try playing Ghostwire Tokyo without HDR to see if it looks better. To do so, you need to take the following steps:

  • First off, you need to close the game if you haven’t done so already. To do so, press the Xbox logo button on the controller to open the Guide menu. From there, move the cursor over to the Ghostwire Tokyo icon and then press the Menu button on the controller. Finally, select the Quit option in the pop-up menu.
  • Next, you need to head over to the Settings menu of your Xbox Series X or Xbox Series S.
  • From the front page of Settings, you need to select General > TV & display options > Video modes.
  • In the General – Video modes menu, make sure that the Allow HDR10, Auto HDR, Allow Dolby Vision and Dolby Vision for Gaming settings are deselected.
  • Afterwards, launch Ghostwire Tokyo again.
  • If the game still doesn’t look right, then you can head into the Graphics tab in the Options menu.
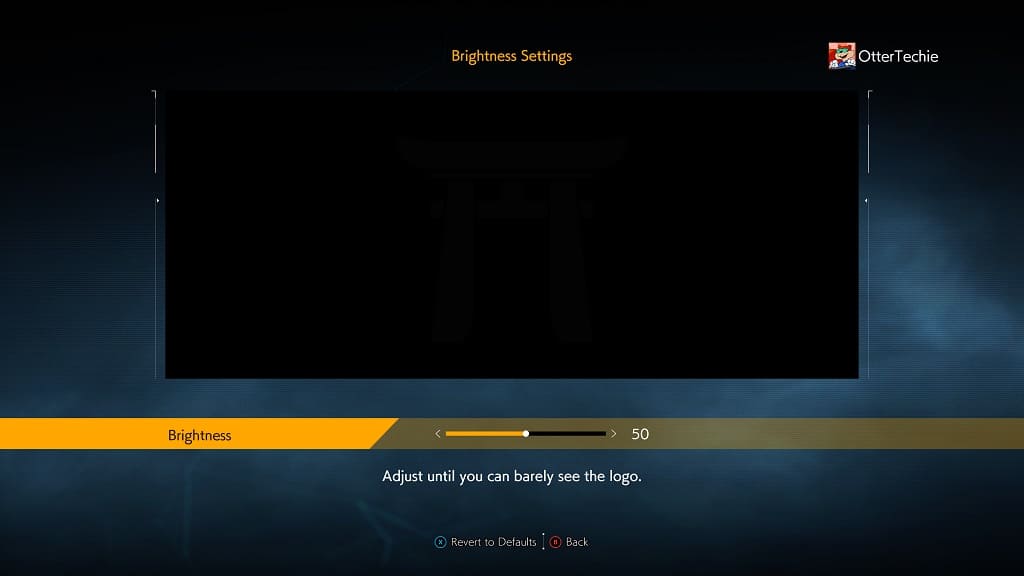
  • From there, select Brightness – Open Settings.

  • In the Brightness Settings menu, you can adjust the brightness output in SDR mode. You can change this value from a scale of 0 to 100.

How to fix Ghostwire Tokyo input lag issues on Xbox Series X and S

Ghostwire Tokyo was recently ported over to the Xbox Series X and Xbox Series S console. If you are experiencing a lot of input lag when playing through this first-person action-adventure title, then you can check out this tutorial from Seeking Tech to see how you can reduce the latency.

1. For the first step, you can try using your Xbox controller in wired mode as it should lead to less of a delay when compared to a wireless connection.

In order to do so, you simply need to use a USB cable plug the gamepad into one of the available USB ports of your Series X or Series S console.

2. If you haven’t done so already, make sure that you are playing in Performance Mode. The Quality Mode in Ghostwire Tokyo limits the frame rate to just 30, which will result in a lot of input lag.

In order to change graphics modes, you first need to head over to the Options menu from either the title screen or pause screen. Afterwards, use the LB and RB buttons to switch tabs until you get to Graphics. You should be able to find the Graphics Modes setting from there.

3. If your television set or monitor supports variable refresh rate, then you should have it enabled on both the screen and your console.

On your Xbox, you need to go to the console’s Settings menu and then select General > TV & display options > Video modes and then make sure that the “Allow variable refresh rate” feature is selected. For your TV/monitor, you need to look into the instruction manual to see how you can activate this feature.

VRR should help reduce the input delay for Ghostwire Tokyo and other games.

4. If your TV or monitor is capable of 120 Hz refresh rate, then we recommend playing the game in any of the High Frame Rate modes as it will uncap the frame rate to a maximum of 120 fps. With the higher frame rate, the latency should also be lowered.

In order to do so, go back to the aforementioned Graphics Mode setting. Here, you can pick between any of the following:

  • High Frame Rate Quality Mode
  • High Frame Rate Performance Mode
  • High Frame Rate Quality Mode (VSync)
  • High Frame Rate Performance Mode (VSync)

Out of these, we recommend selecting High Frame Rate Performance Mode to get the most frames per second.

5. If you only notice input lag when moving the left and/or right analog stick, then you are able to adjust the dead zone and sensitivity for both in Ghostwire Tokyo.

To do so, head over to the Options menu in the game. From there, use the LB and RB buttons to navigate to the Controls tab. Afterwards, you should be able to adjust the following parameters:

  • Left Stick Deadzone
  • Right Stick Deadzone
  • Camera Acceleration Speed
  • Camera Deceleration Speed
  • Camera X-Axis Sensitivity
  • Camera Y-Axis Sensitivity
  • Camera Sensitivity (Aiming)
  • Camera Sensitivity (Bow Drawn)

If you have a hard time aiming in general, then you should make sure that you have the Aim Assist setting in the Controls tab of the Options menu set to Prioritize Aim Assist.

How to disable time limits in Ghostwire Tokyo

With Ghostwire Tokyo arriving on the PlayStation Plus service on PlayStation 5 as well as the Xbox Game Pass service on the PC, Xbox Series S and Xbox Series X systems, many new players are jumping into this unique game.

This first-person action-adventure title contains some main and side missions that feature a time limit. If you don’t accomplish your tasks before the clock runs out, then you will need to start over.

If you would rather play these time constraint missions at your own leisure, then you can take a look at this tutorial from Seeking Tech to see how you can turn off time limits.

1. For the first step, you need to head over to the Options menu in Ghostwire Tokyo. You can do so from either the main menu or pause menu.

To bring up the pause menu while playing the game, you need to press the Options button on the DualSense controller if you are playing on the PlayStation 5 or PlayStation 5 Digital Edition console.

For the Xbox Series S or Xbox Series X consoles, you need to press the Menu button on the Xbox Series controller.

2. From the Options menu, you should already be in the Game tab.

If you are in another tab instead, then you need to press the L1 and R1 buttons on PS5 or LB and RB buttons on Xbox to change to the appropriate tab.

3. From the Game tab, you need to move the cursor down to Disable Time Limits, which should show the following description:

“Disables the time limits for events that would normally have a clock ticking down. Does not apply to the timers in The Spider’s Thread mode.”

By default, this feature is turned off. To turn it on, you can use the directional pad or left analog stick to change it from “Off” to “On.”

4. Afterwards, press the circle or B button to exit the Options menu.

5. You should see a warning notification pop-up. Here, you need to select Yes to save the change you made to the Disable Time Limits setting.

6. You should no longer see any time limits when playing the main and side missions in Ghostwire Tokyo.

The only mode where you will still get a time constraint is The Spider’s Thread mode, which is a rogue-like gauntlet that contains 30 levels. You can simply avoid this optional mode once you unlock it after completing the second chapter in the campaign.

How to turn off Ghostwire Tokyo film grain, chromatic aberration and motion blur

With the new Tokyo Spider’s Thread update to go along with the Xbox Series X and Xbox Series S release of Ghostwire Tokyo, many players are now jumping into the unique first-person action-adventure game.

When you are playing this game, you may not like the look of the film grain, chromatic aberration and/or motion blur effects have on the in-game graphics.

To see how you can disable these features, you can take a look at tutorial from Seeking Tech.

1. For the first step, make sure you launch Ghostwire Tokyo on your PC, PS5, Series X or Series S system if you haven’t done so already.

2. From the main menu, you need to select Options.

If you are currently playing the game, then you can also head into settings from the pause menu. To pause the game, press the Options button on the DualSense or the Menu button on the Xbox Series Controller.

3. Inside the Options menu, you need to use the L1 and R1 buttons on the DualSense or LB and RB buttons on the Xbox Series Controller to change tabs until you get to Graphics.

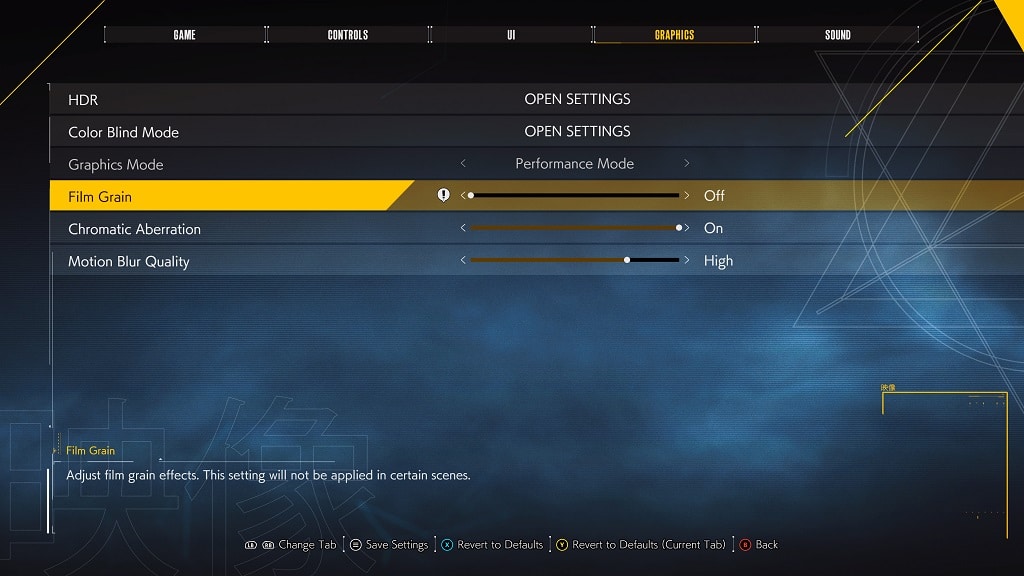
4. From the Graphics tab, move the cursor down to Film Grain, which should have the following description:

  • “Adjust film grain effects. This setting will not be applied in certain scenes.”

By default, this visual feature is set to On. You can use the directional pad or left analog stick to set it to Off.

5. In the same tab, you can then move the cursor down to Chromatic Aberration, which contains the following description:

  • “Adjust chromatic aberration effects. This setting will not be applied in certain scenes.”

Once again, you can use the D-pad or left analog stick to change this setting from “On” to “Off.”

6. Last but not least, you should also find Motion Blur Quality in the Graphics tab with the following description:

  • “Adjust the quality of motion blur effects.”

By default, this setting is set to High. You can also use the directional pad or left analog stick to change it to Off, Low, Medium or Cinematic.

7. Once you are done disabling the film grain, chromatic aberration and/or motion blur effects, you need to press the circle or B button to back out of the Options menu.

8. You should then see a Warning screen asking if you want to save your changes. Here, you need to select Yes to apply the edits you made from the Options menu.