What to do if Resident Evil 4 Remake is too dark

If you find that the Resident Evil 4 Remake is too dark to the point you aren’t able to comfortably see, then you can take a look at this guide at Seeking Tech to see how you can make this survivor horror game brighter.

1. Before we begin, it is important to note that the graphics in some of the scenes are made to be intentionally dark. Not being able to see in the dark adds an extra layer of suspense.

2. Resident Evil 4 Remake is best played in a dark room or at night with no room light. The ambient lighting may add glare to your television set or monitor, making it harder to see the environment and other objects in the game clearly.

So, if you have lights turned on, we recommend that you turn them off. If you are playing the game at daytime in a room with a lot of windows, then you can try using blinders to block out as much of the sunlight as possible.

3. If you still have a hard time seeing, then you can try using the in-game menus to change the brightness level.

In order to do so, you need to open the Options menu from either the title screen or pause screen. From there use the L1 and R1 buttons if you have a PlayStation controller or LB or RB buttons if you have an Xbox controller to switch to the Display tab. From there, you need to select the Brightness (HDR) option.

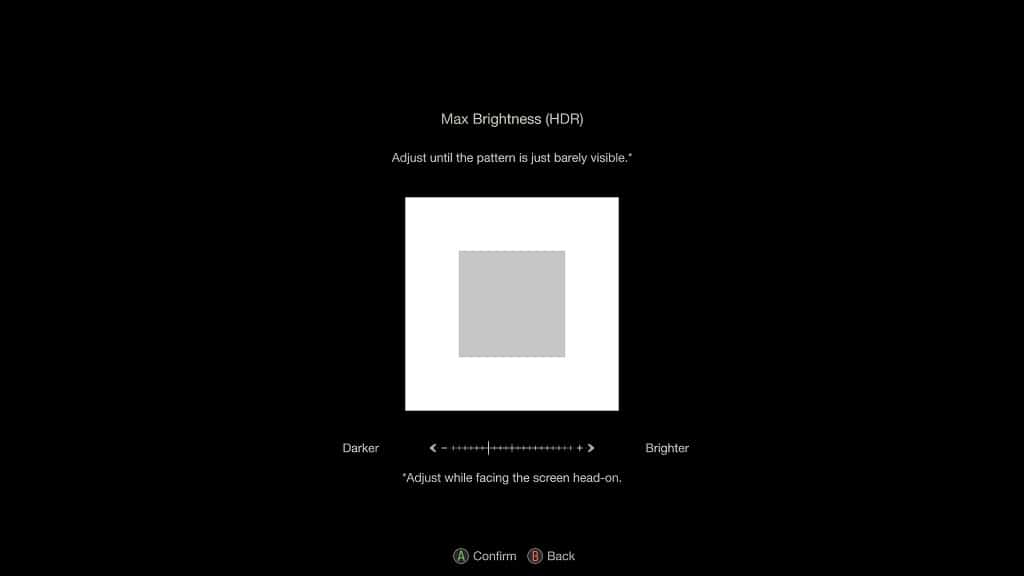
Follow the instructions on the first screen to adjust the maximum brightness level when playing the game in HDR.
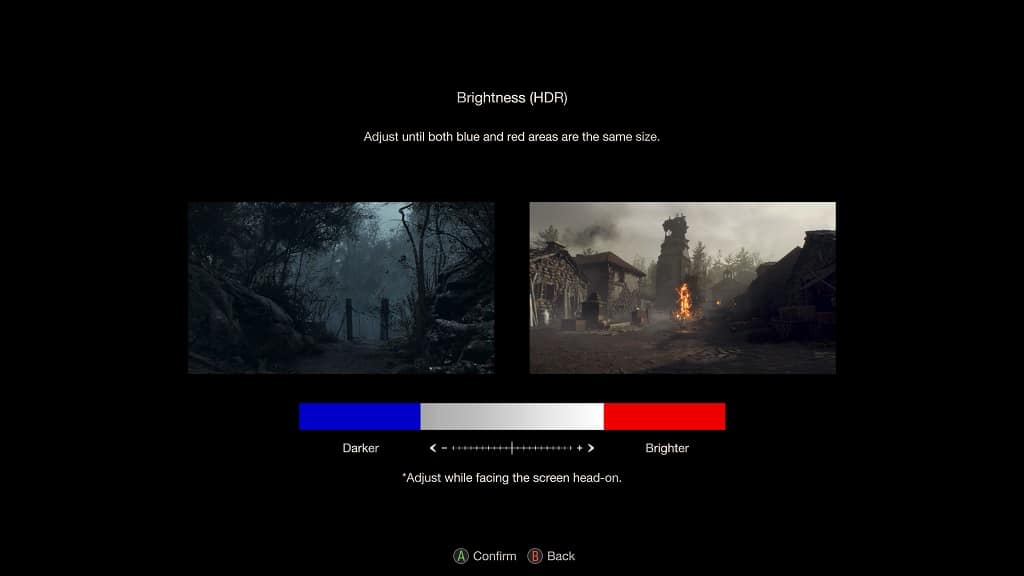
You also need to follow the instructions on the second screen to further adjust the brightness.
4. You can also adjust the HDR brightness on a system-level.

In order to do so on your PlayStation 5 or PlayStation 5 Digital Edition console, for instance, you need to go to the system’s Settings menu and then select Screen and Video > Video Output > Adjust HDR.

If you are playing RE4 Remake on the Xbox Series X or Xbox Series S, then you need to go to the console’s Settings menu and then selecting General > TV & Display Options > Calibrate HDR.

Once you get to these menus, follow the on-screen steps to calibrate the maximum and minimum brightness of the HDR output from your console to your television set or gaming monitor.

5. Some screens are better than others when it comes to displaying darker content. So, if possible, you can try playing Resident Evil 4 Remake on a different screen to see if the dark areas in the game show off more details.

6. On your television set or monitor, make sure you disable any auto-dimming features that you may have enabled as these will make the brightness output darker in order to save on energy consumption and/or prevent screen burn-in.

How to fix flickering issues when playing Resident Evil 4 Remake on PS5

The PlayStation 5 version of Resident Evil 4 Remake has an issue where the bottom of the screen may start to flicker. To see how you can potentially get rid of these flashing lights, you can take a look at this tutorial from Seeking Tech.

1. According to Capcom, this issue can be fixed by restarting the game. In order to do so, you should first make sure that you save your progress; otherwise, you will need to start back at an earlier point.

With your progress saved, bring up the home screen of your PlayStation 5, which can be done by pressing and holding the PS logo button on the DualSense. You can also get to the home screen by pressing the same PS logo button and then selecting the house icon that can be found on the bottom left side of the Control Center menu.

From the home menu, you then need to move the cursor over to the Resident Evil 4 Remake icon and then press the Options button on the controller. In the pop-up screen, select Close Game.

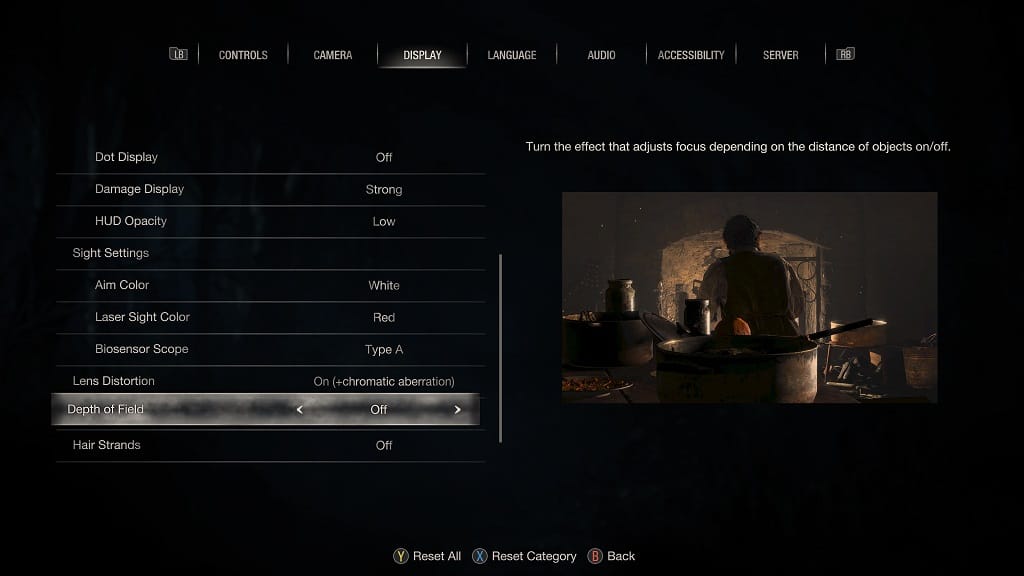
2. If the flicking lights persist after closing and then restarting Resident Evil 4, then you can try disabling the Depth of Field setting.

You can find this setting from the Options menu, which you can open from either the main menu or pause screen. From the Options menu, use the L1 and R1 buttons to switch over to the Display tab. From there, scroll to Depth of Field and then turn this setting off.

The change will be made once you back out of the Options menu and return to your game.

3. If disabling Depth of Field does not work, then you can try enabling Motion Blur.

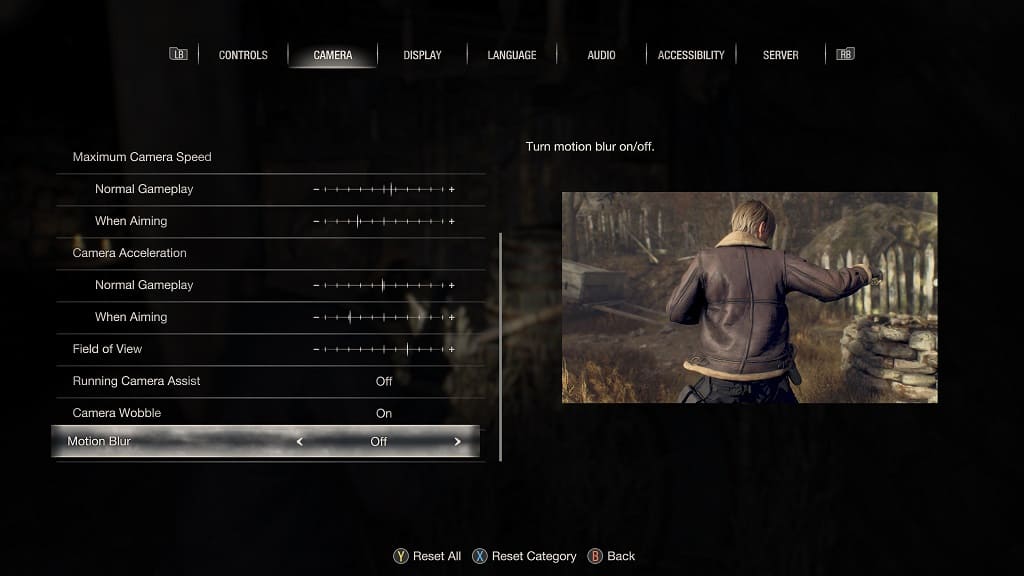
You can find this setting in the Camera tab of the Options menu. If it is set to “Off,” then you need to set it to “On.”

4. Capcom is planning to release a patch that will fix this problem.

To manually update the Resident Evil 4 Remake on your PlayStation 5 and PlayStation 5 Digital Edition, move the cursor to the game’s icon from the home screen of your console. Afterwards, press the Options button on the DualSense to open a pop-up menu, where you can then select the Check for Update option.

How to make the Resident Evil 4 Remake HUD easier to see

In order to switch weapons in real-time while playing the Resident Evil 4 Remake, you need to use the directional pad. By pressing the left directional button, up directional button, right directional button or down directional button, you will bring up the heads-up display for changing your weapon.

If you have a hard time seeing this HUD, especially during the more intense encounters, then you can check out this guide at Seeking Tech to see how you can make this overlay menu easier to see.

1. To start off, you need to open the Options menu, which can be done from the main menu.

If you are playing the game, then you can also open the same menu from the pause screen. To pause the gameplay, you can press the Options button on your PlayStation controller or Menu button on your Xbox controller.

2. Once you get to the Options menu, you need to move over to the Display section.

In order to switch sections with the PlayStation gamepad, you need to use the L1 and R1 buttons. For the Xbox gamepad, you need to use the LB and RB buttons.

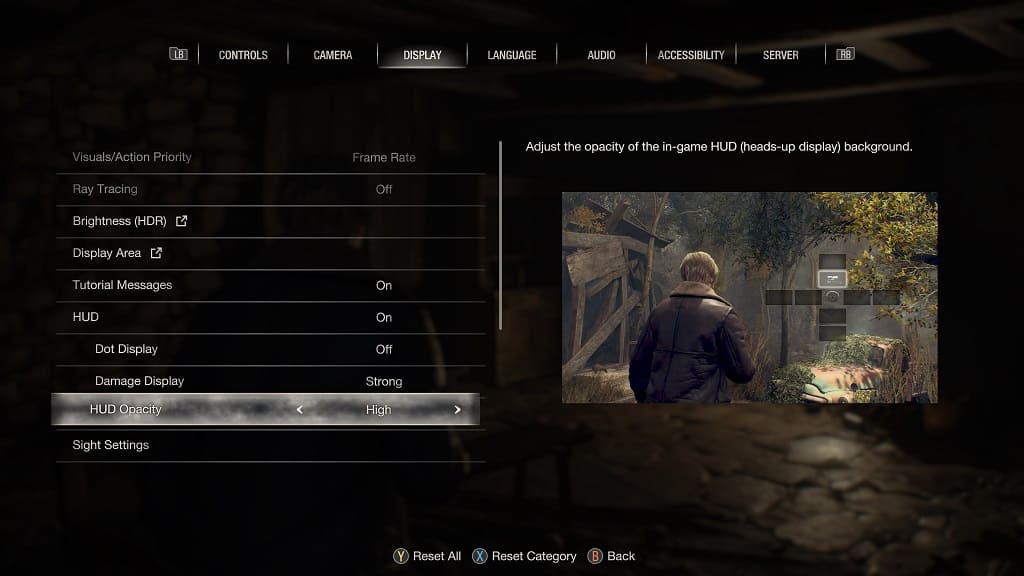
3. After you get to the Display section, you need to scroll down and then move the cursor to HUD Opacity. This setting should have the following description:

  • “Adjust the opacity of the in-game HUD (heads-up display) background.”

4. By default, HUD Opacity is set to Low. To change this to Medium or High, you can use the left or right directional buttons. You can also move the left analog stick to the left or right directions.

You should see a preview image of what the opacity of the weapon changing menu will look like with your current setting.

5. Once you are done changing the HUD Opacity setting, you need to press the circle button if you are using the PlayStation controller or B button if you are using the Xbox controller to back out of the menu and then return to your game.

6. When you open the real-time weapon switching menu, you should notice the change in the heads-up display.

How to change costumes, charms and more in Resident Evil 4 Remake

If you pre-order and/or purchase the deluxe edition of the Resident Evil 4 Remake, then you will get several extra in-game bonuses. You can check out this guide at Seeking Tech to see how you can access these costumes, charms, attaché cases filters, deluxe weapons as well as the soundtrack swap.

How to change costume and swap soundtracks in RE4 Remake

If you want to change the costumes for Leon and Ashley, as well as swap out the soundtrack and sound effects of the remake for the original version of Resident Evil 4, then you can do so from the Options menu from the title screen. You aren’t able to change these settings from the Options menu if you access it from the pause screen.

To go back to the title screen, we first suggest that you save your game so that you won’t lose any progress when quitting. Once you are done saving, you need to press the Options button if you are using the DualShock 4 or DualSense. If you are using an Xbox One or Xbox Series controller instead, then you need to press the Menu button. Afterwards, select Quit Game and then Yes when asked to confirm your choice.

From the title screen, select Options and then Extras. You should then be able to change the OST and/or costumes from there.

How to unlock the deluxe weapons in RE4

In order to unlock the deluxe weapons in the Resident Evil 4 Remake, including the Sentinel Nine handgun and Skull Shaker shotgun that you get from the deluxe edition, you need to first look for a typewriter in the game.

For the uninformed, you need to use this object in order to manually save your progress.

Once you get to the typewriter, select Storage. You should be able to find the deluxe weapon you previously unlocked from there.

How to use charms and attaché cases in RE4 Remake

In order to use the charms and attaché cases you unlocked in the remake version of Resident Evil 4, you also need to look for a typewriter.

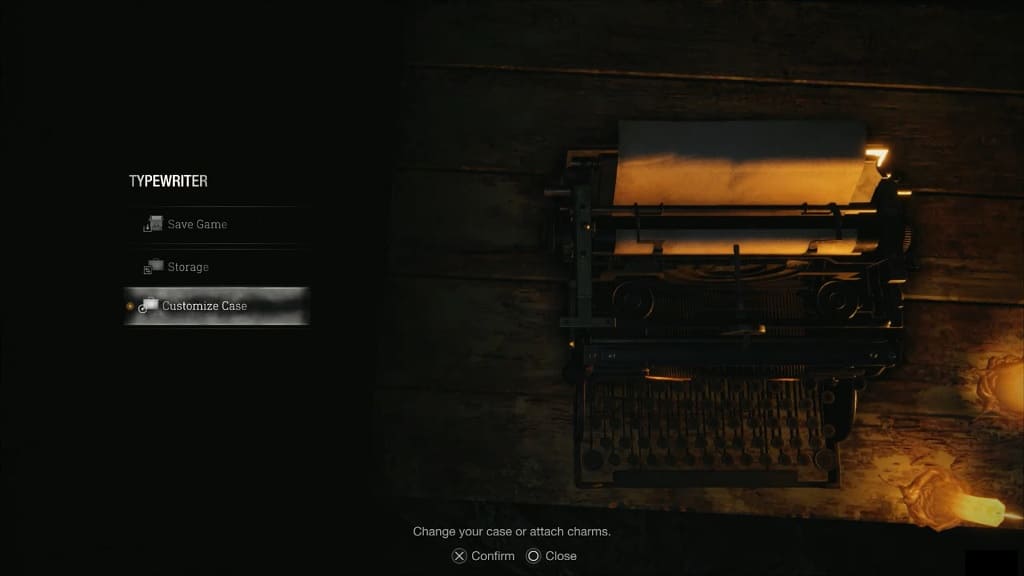
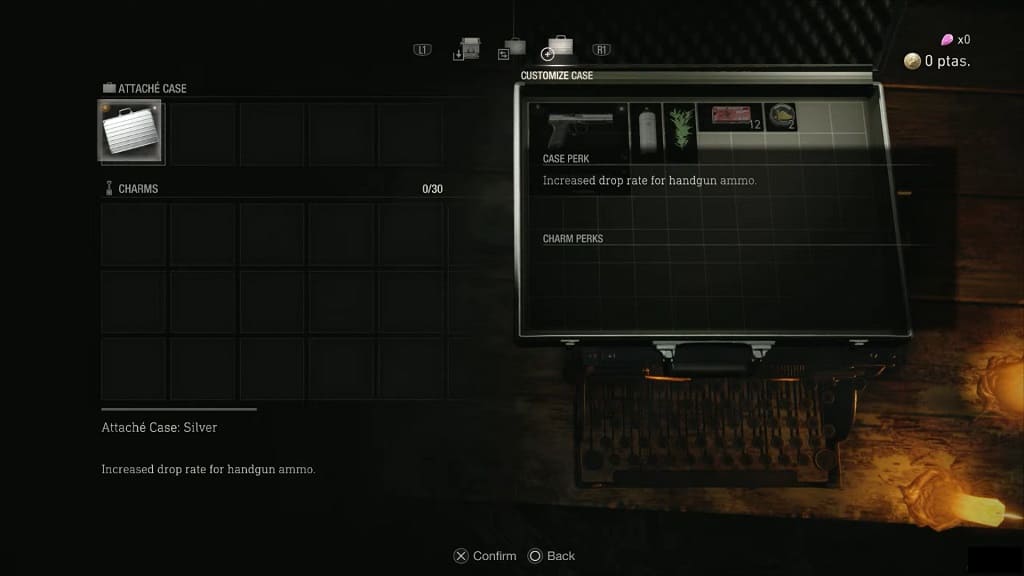
After opening the typewriter menu, you should then select the Customize Case option. In the next screen, you will be able to equip the charms and attaché cases that you unlocked.

How to turn off tutorials in Resident Evil 4 Remake

When playing the Resident Evil 4 Remake on your PC, PlayStation 4, PlayStation 4 Pro, PlayStation 5, PlayStation 5 Digital Edition, Xbox Series S or Xbox Series X system, you may notice that tutorials will occasionally pop up.

If you already know how to play this survivor horror game and would, therefore, like to disable these notifications, then you can take a look at this tutorial to see how you can properly do so.

1. For the first step, you need to open the Options menu while playing RE4 Remake. You should be able to access it from either the main menu or pause screen.

2. Once you get to the Options menu, you need to switch tabs until you get to the Display section.

If you are using a DualShock 4 or DualSense controller, then you need to use the L1 and R1 buttons in order to change tabs. If you are using the Xbox One or Xbox Series gamepad, then you need to press the LB and RB buttons.

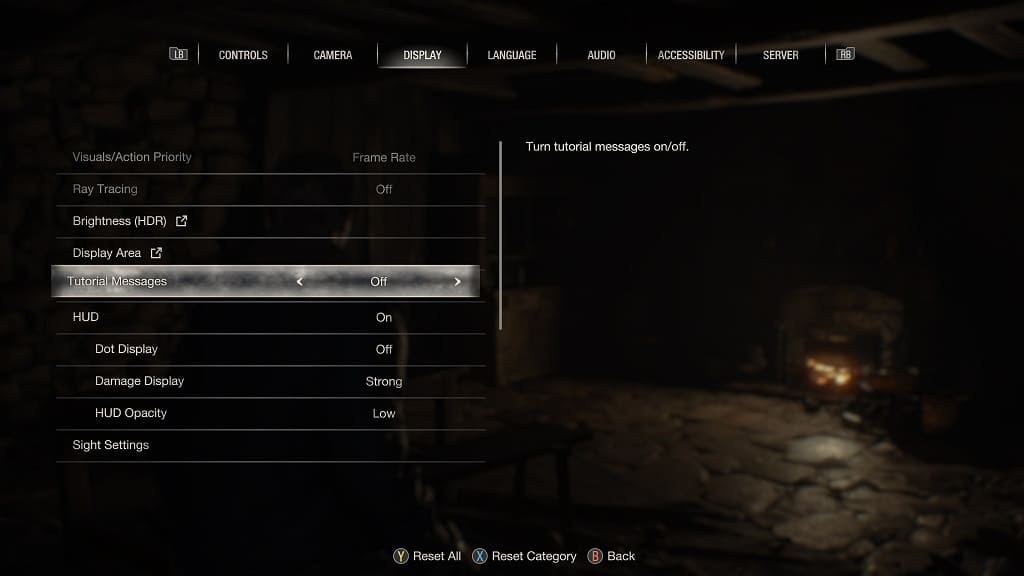
3. Once you get to the Display, scroll down and then move the cursor over to Tutorial Messages, which should contain the following message:

  • “Turn tutorial messages on/off.”

4. To turn this feature off, you can press the left directional pad button, right directional pad button, move the left analog stick leftward or move the left analog stick rightward.

5. With the Tutorial Messages setting set to “Off,” press the circle button if you are using a PlayStation controller or B button if you are using an Xbox controller in order to exit the Options menu.

The changes you made to the tutorials and other settings will automatically be saved and applied.

6. Once you return to your game, you should no longer see any tutorial notifications appear.

How to prevent motion sickness when playing Valheim on Xbox Series X and S

When playing Valheim on your Xbox Series X or Xbox Series S, you may start to feel a little nauseous. To see how you can prevent yourself from getting motion sickness when playing this open-world survival game, you can check out this article from Seeking Tech.

1. To start off, you need to head over to the Settings menu in Valheim, which you can do from either the title screen or pause screen.

2. After getting to Settings, use the LB and RB buttons on the controllers to navigate over to the Graphics tab.

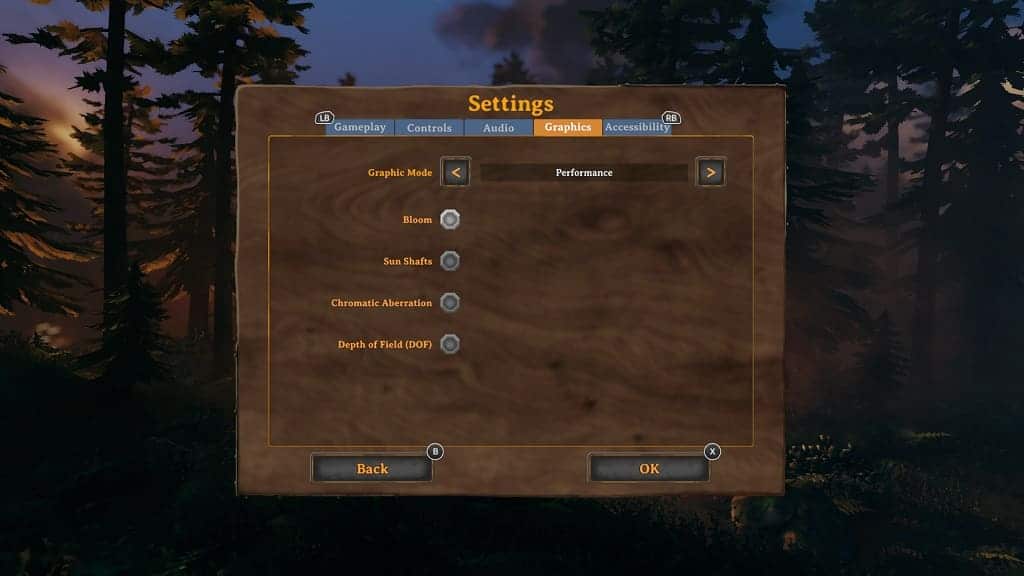
3. In the Graphics tabs, we recommend that you change Graphics Mode to Performance if you haven’t done so already.

By doing so, the game will target a 60 frames per second frame rate, which should make the action appear smoother.

4. From the same Graphics tab of the Settings menu, we recommend that you disable the Bloom and Sun Shafts settings.

These additional lighting features make it harder to see during the daytime in Valheim, which may end up triggering your motion sickness.

5. Furthermore, we suggest that you turn off the Chromatic and Depth of Field settings from the same Graphics menu. These will add blur to objects, which will make the game look blurrier than it already is.

6. Once you are done making changes in the Graphics tab, you should then navigate over to the Accessibility tab.

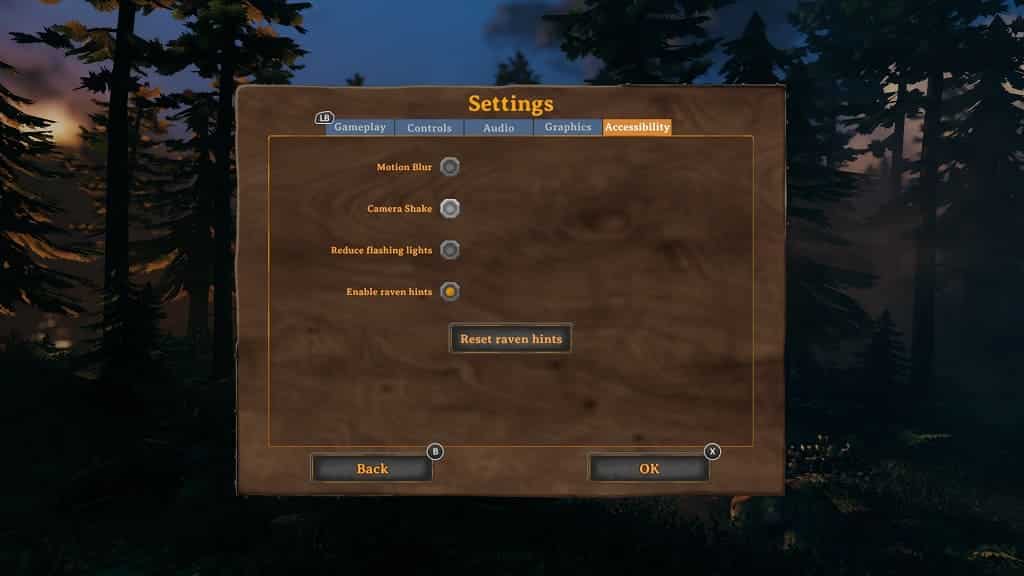
7. Once you get there, we suggest that you disable Motion Blur and Camera Shake.

As we mentioned above, the blur will make it harder to see in Valheim. To learn more about how you can make this game appear sharper, you can check out these steps.

The Camera Shake feature may also trigger your nausea due to the constant movement.

8. From the same Accessibility tab, you may also want to enable the Reduce Flashing Lights setting if you find that the flashing light effects are making you feel uncomfortable.

9. Once you are done making the aforementioned changes, press the X button on your Xbox controller to save your customized settings and then return to the game.

How to disable the damage indicator in Resident Evil 4 Remake

When you get hit, or your character is low on health, then the borders of the screen will flash red in the Resident Evil 4 Remake. This damage indicator can be very distracting, especially if you are in the middle of an intense encounter.

To see how you can disable this effect, you can take a look at this guide from Seeking Tech.

1. While playing Resident Evil 4 Remake, you need to open the Options menu, which you can do on either the main menu or pause screen.

2. From the Options menu, you need to navigate over to the Display tab.

You can change tabs by pressing the L1 and R1 buttons on the DualShock 4 or DualSense if you are using those game pads. If you are using an Xbox controller instead, then you need to use the LB and RB buttons.

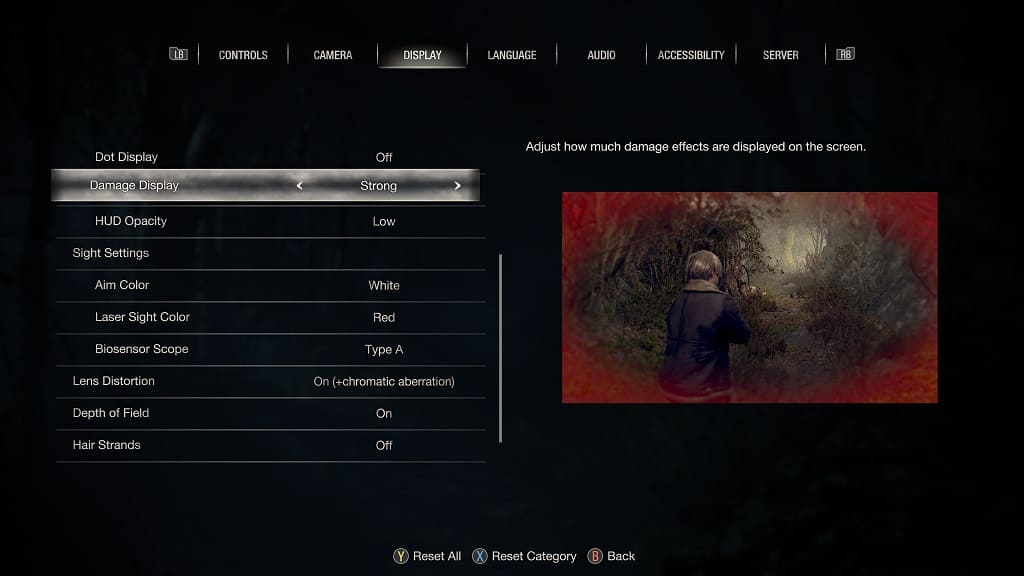
3. Once you are in the Display tab on the Options menu, scroll down and then move the cursor over to Damage Display. This setting should have the following description:

  • “Adjust how much damage effects are displayed on the screen.”

4. You can use the left directional pad button, right directional pad button, move the left analog stick to the left direction or move the left analog stick to the right direction in order to change the Damage Display setting to “Off” to fully disable the effect.

If you want to keep the damage indicator enabled but make it less distracting, then you can change the Damage Display setting to “Weak” instead.

5. Once you are done changing the damage indicator setting, you can save and apply it by simply backing out of the Options menu.

You can do so by pressing the circle button on the PlayStation controller or B button on the Xbox controller. The game will then save any changes you make automatically.

How to disable and enable Ray Tracing in Resident Evil 4 Remake on PS5 and Xbox Series X

The PlayStation 5 and Xbox Series X versions of the Resident Evil 4 Remake feature ray tracing as you will see more realistic reflections. With that said, the frame rate won’t be as stable due to the increased performance cost.

To see how you can enable or disable this feature, you can take a look at this tutorial from Seeking Tech.

1. It is important to note that Ray Tracing can’t be enabled or disabled from the Options menu if you open it from the pause screen. Instead, you need to exit your current game and then go back to the main menu.

So, if you are currently playing RE4 Remake at this moment, then you need to bring up the pause screen, which you can do by pressing the Options menu on the DualSense or the Menu button on the Xbox controller.

From the Options menu select Quit Game and then Yes when a notification pops up asking if you want to continue as you will lose any unsaved progress.

2. Once you get to the main menu, you need to select Options.

3. From the Options menu, you need to change tabs until you get to Display.

To change tabs on the DualSesne, you need to use the L1 and R1 buttons. To do the same on the Xbox controller, you need to use the LB and RB buttons.

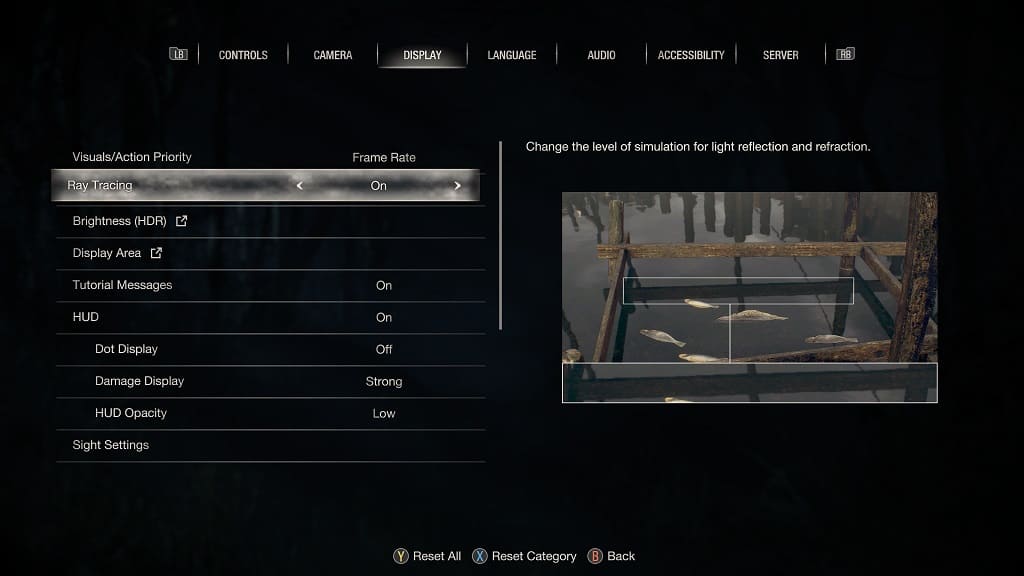
4. In the Display tab, move the cursor to Ray Tracing.

If you set the Visuals/Action Priority setting to “Resolution,” then Ray Tracing is set to “On” by default. If you set the Visuals/Action Priority setting to “Frame Rate,” then Ray Tracing is set to “Off” by default.

5. To change the Ray Tracing setting, you can use the left directional pad button, right directional pad button, tilt the left analog stick to the left side or tilt the left analog stick to the right side.

6. Once you are done enabling or disabling Ray Tracing, you need to press the circle button on the DualSense or B button on Xbox in order to back out of the Options menu.

Any changes you make before backing out will be saved and applied in RE4.

7. Once you get back to the main menu, load back into your save file and you should see the effects of turning on or off the Ray Tracing feature.

How to disable auto reload in Resident Evil 4 Remake

Auto reload is enabled by default in the Resident Evil 4 Remake. As a result, the character will automatically reload when you fire a shot with an empty clip as long as you still have more ammo in your inventory.

If you find that the auto reload is causing you to make mistakes and/or breaking your immersion, then you can disable it from the in-game menu. To find out how you can do so, you can follow the steps laid out in this Seeking Tech tutorial.

1. To start off, you need to head into the Options menu in the game.

In order to get there, you need to select “Options” from either the title screen or pause screen. To open the pause screen you can press the Options button if you are using a PlayStation controller or the Menu button if you are using an Xbox controller.

2. Inside the Options menu, you should already be in the Controls tab.

If you are in another tab at this moment, then you can press the L1/R1 or LB/RB buttons to change tabs.

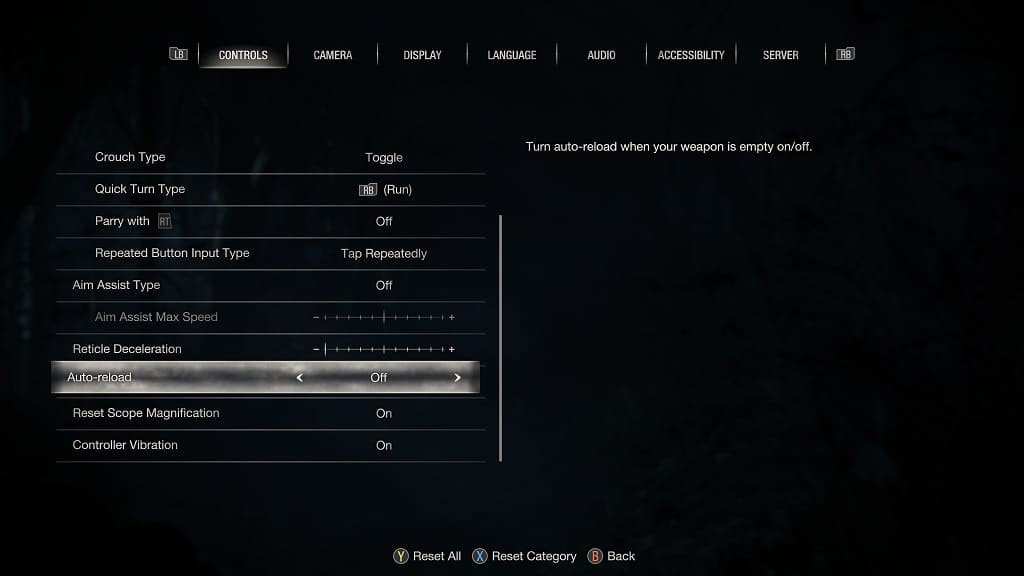
3. On the Controls tab, scroll down and then move the cursor to Auto-Reload, which should have the following description:

  • “Turn auto-reload when your weapon is empty on/off.”

4. By default, the Auto Reload setting is set to “On.”

With the cursor on the setting, you can use the directional pad or left analog stick to set it to “Off.”

5. Once you are done, press the circle button if you are using a PlayStation gamepad or the B button if you are using an Xbox gamepad.

The new setting should automatically be saved and applied.

The next time you try to shoot a weapon on an empty clip, the character won’t reload. Instead, you have to manually press the reload button, which is square if you are using a PlayStation controller or B if you are using an Xbox controller.

How to invert camera and aiming controls in Resident Evil 4 Remake

The Resident evil 4 Remake uses normal directional controls when it comes to using the right analog stick to look around as well as when you are aiming a weapon. As a result, if you move the right analog stick upwards, then the camera will also pan upwards.

If you would like to invert the camera and aiming controls in this game, then you can check out this guide at Seeking Tech to see how you can properly do so.

1. To start this process off, you need to head over to the Options menu from either the main menu or pause menu.

2. From the Options menu, you need to head over to the Camera tab.

You can change tabs by using the L1 and R1 buttons if you are playing the RE4 Remake on your PlayStation 4, PlayStation 4 Pro, PlayStation 5 or PlayStation 5 Digital Editon console.

If you are playing the game on your Xbox Series X or Xbox Series S, then you need to use the LB or RB buttons instead to change tabs.

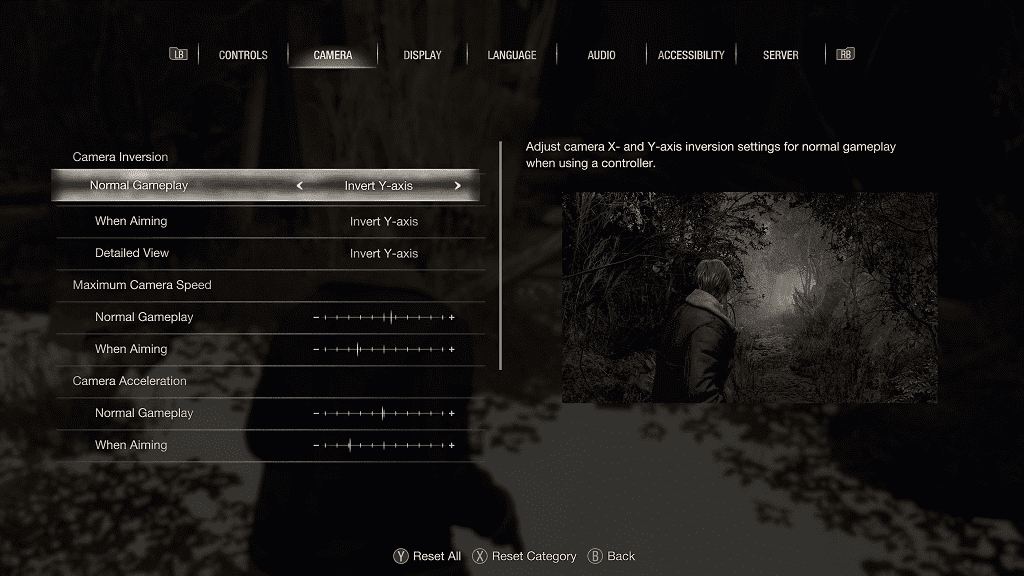
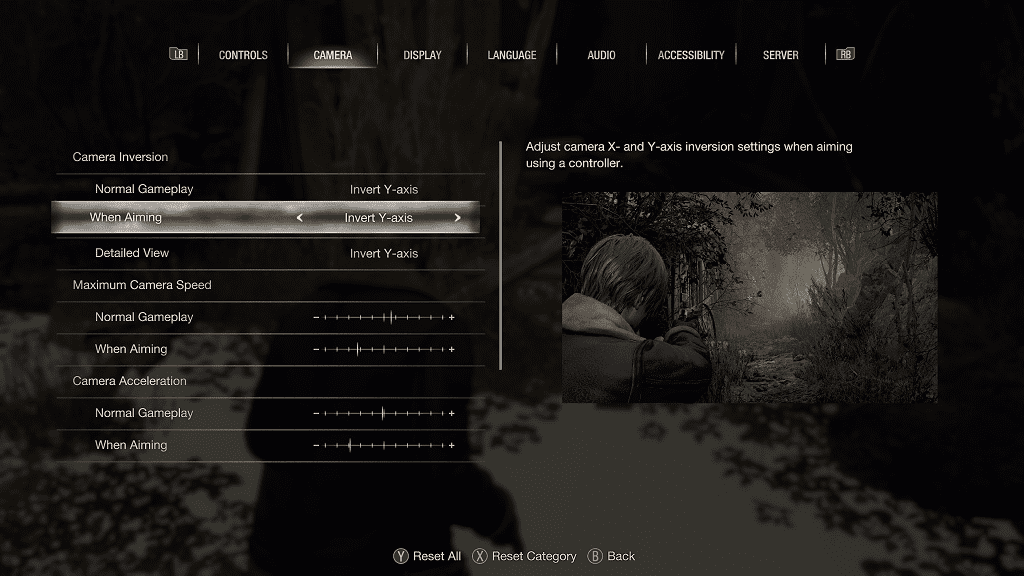
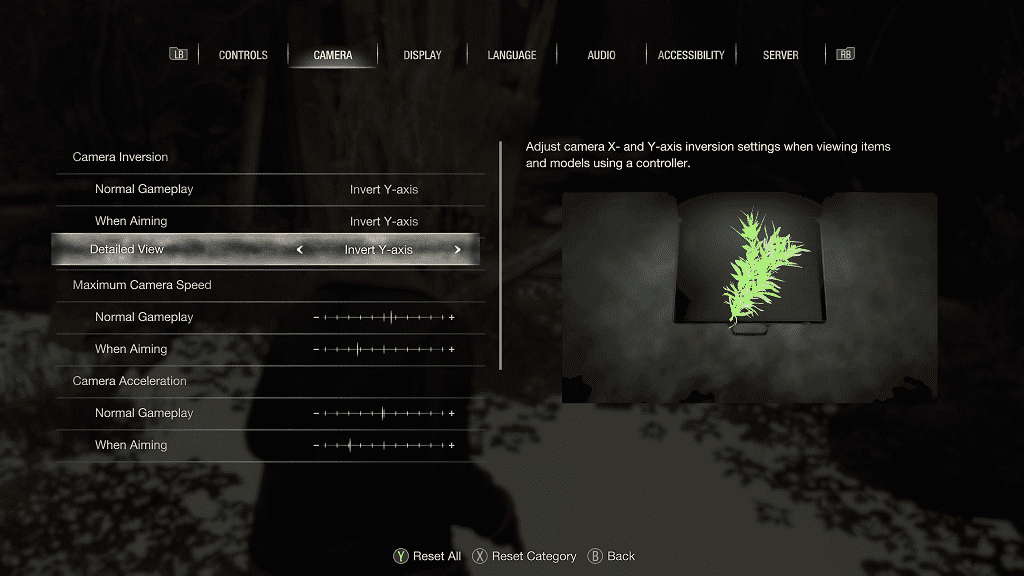
3. From the Camera tab, you should see the Camera Inversion section located at the top. You can find the different settings that you can change, as well as the descriptions, below:

Normal Gameplay: “Adjust camera X- and Y-axis inversion settings for normal gameplay when using a controller.”

When Aiming: “Adjust camera X- and Y-axis inversion settings when aiming using a controller.”

Detailed View: “Adjust camera X- and Y-axis inversion settings when viewing items and models using a controller.”

You can change these three settings to None, Invert Y-Axis, Invert X-Axis, Invert X- and Y-Axis.

None is the default option as it features no inversion whatsoever.

The Invert Y-Axis will let you invert the controls so that pushing the right analog stick upwards will move the camera downwards and vice versa.

The Inver X-Axis option will make it so that moving the right analog stick to the left side will move the camera to the right side and vice versa.

You can change these settings by using the left or right directional pad buttons as well as the left analog stick.

4. Once you are done making changes to the camera inversion for the Normal Gameplay, When Aiming and/or Detailed View settings, you need to back out of the Options menu to save and apply the edits.

5. When you go back to playing the Resident Evil 4 Remake, the camera and/or aiming controls should now be inverted.