How to mute your microphone in Forza Motorsport

By default, your microphone is enabled in Forza Motorsport. If you would like to prevent your voice from being heard by others while playing online in this racing sim, then you can check out this tutorial from Seeking Tech.

1. To begin, make sure you open the Settings menu. This can be done from the home screen menu or the pause menu.

2. From Settings, make your way to the Audio tab.

For the uninformed, you can change tabs by pressing the LB and RB buttons if you are playing Forza Motorsport with an Xbox controller.

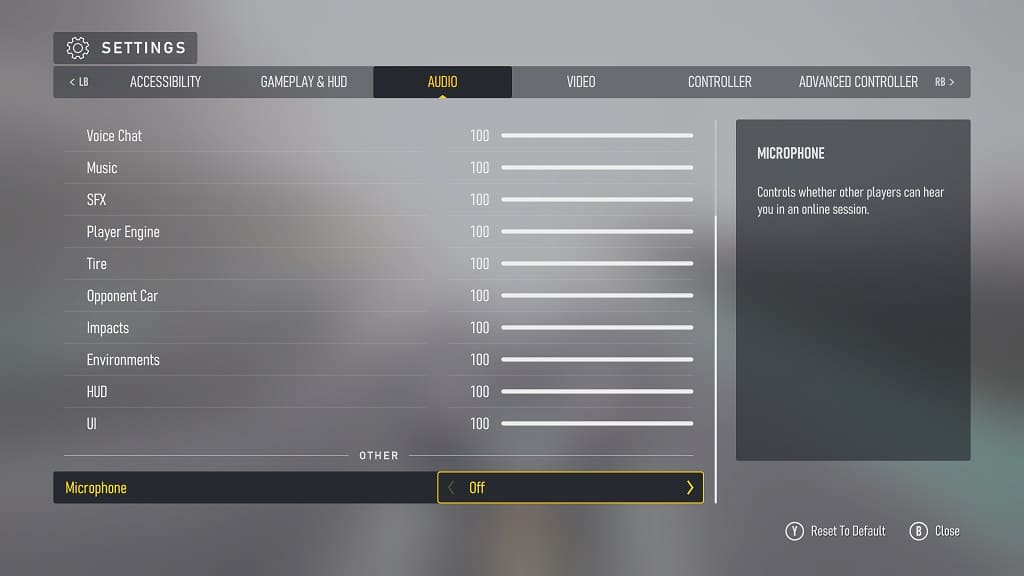
3. From the Sound tab, scroll all the way to the bottom to find Microphone. It should show the following description:

Controls whether other players can hear you in an online session.

4. Make sure that Microphone is set to Off.
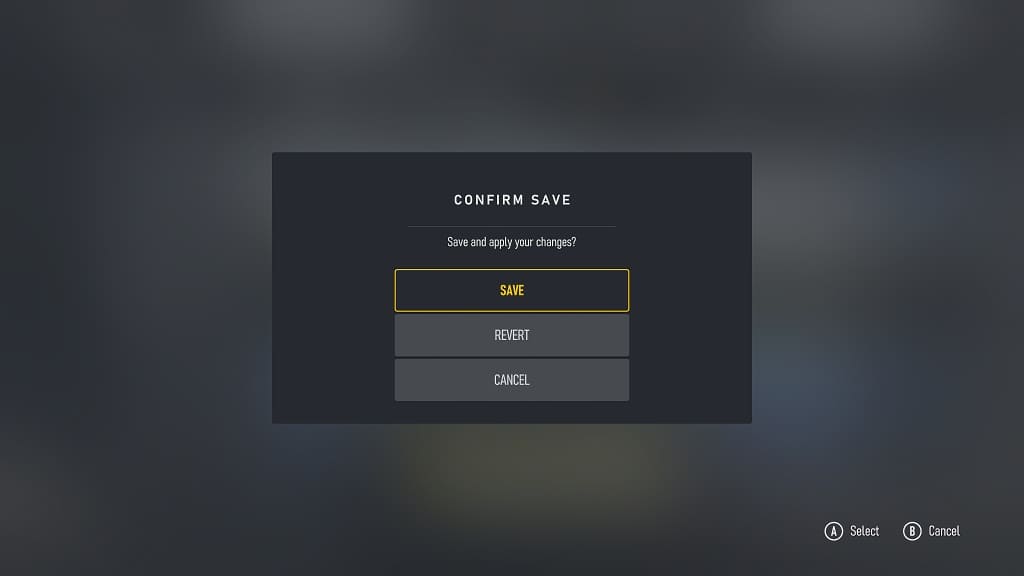
5. Exit the Settings menu and you will be asked to save and apply the change you just made. Select Save to continue.
Your mic should now be muted when you play online with others.

How to mute voice chat in Forza Motorsport

By default, you will hear other players talking while playing online in Forza Motorsport. To see how you can disable voice chat in this racing sim, you can take a look at this tutorial from Seeking Tech.

1. Head over to the Settings menu if you haven’t done so already.

2. In Settings, change tabs until you get to Audio.

If you are playing with an Xbox controller, then you need to use the LB and RB buttons to switch tabs.

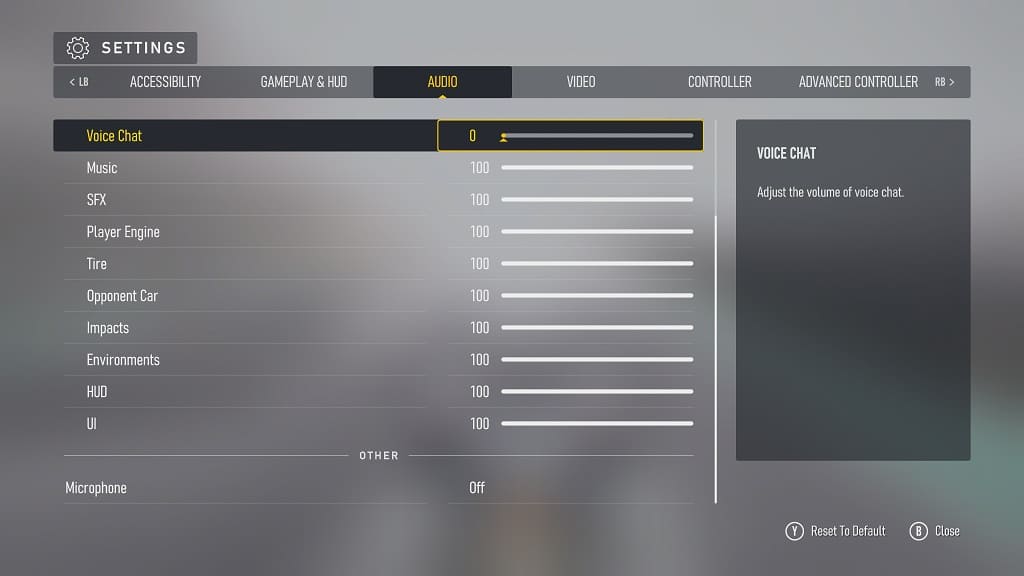
3. From the Audio tab, move the cursor down to Voice Chat. It should show the following description on the right side of the screen:

Adjust the volume of voice chat.

4. By default, the volume is set to 100, which is the maximum. You can lower it by increments of 1.

To complete mute the voice chat, make sure that this setting is set to 0.

5. After changing the volume, try to exit the Settings menu.

6. When asked to save and apply the new change, select Save.

You should no longer hear other players talking while playing online matches in Forza Motorsport.

How to fix Forza Motorsport controller steering issues

You may find that steering with a controller to be somewhat clunky in Forza Motorsport as it can be either overly sensitive or too unresponsive. To see how you can make steering feel more natural, you can take a look at this tutorial from Seeking Tech.

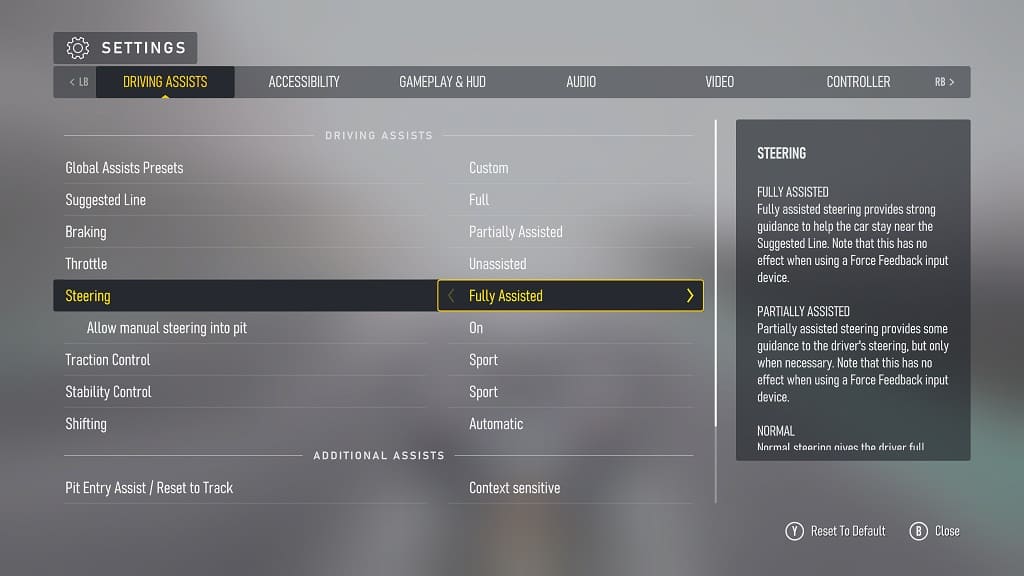
1. For the first potential solution, you can try changing the steering assist in Forza Motorsport. In order to do so, open the Settings menu and then make sure you are viewing the Driving Assists tab.

Next, move the cursor over to Steering. You will be able to change this assist to any of the following:

  • Fully Assisted
  • Partially Assisted
  • Normal
  • Simulation

On the right side of the screen, you will be able to read through the description for each of the assist option.

We recommend that you test out all four out to see which one you prefer when it comes to steering.

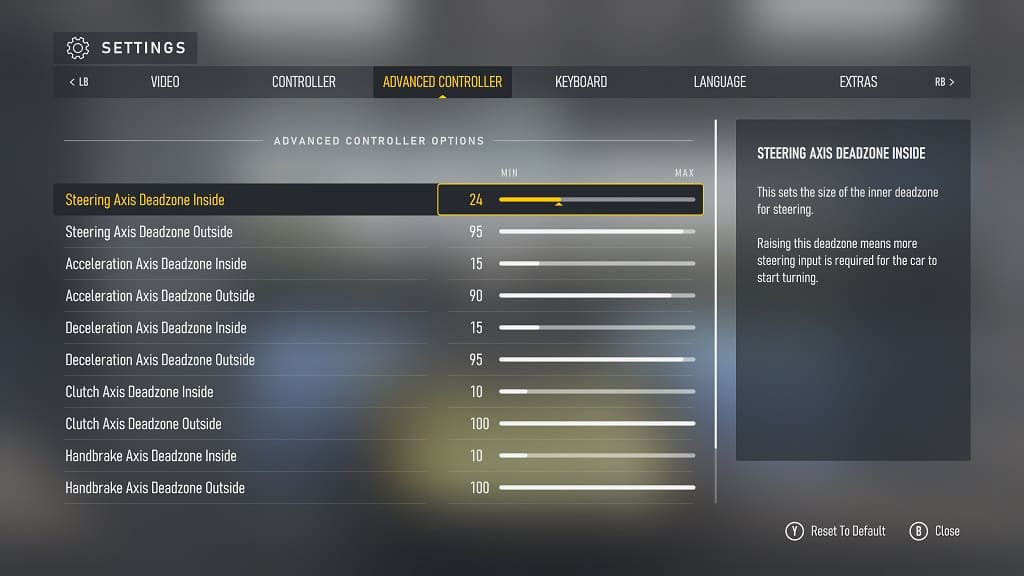
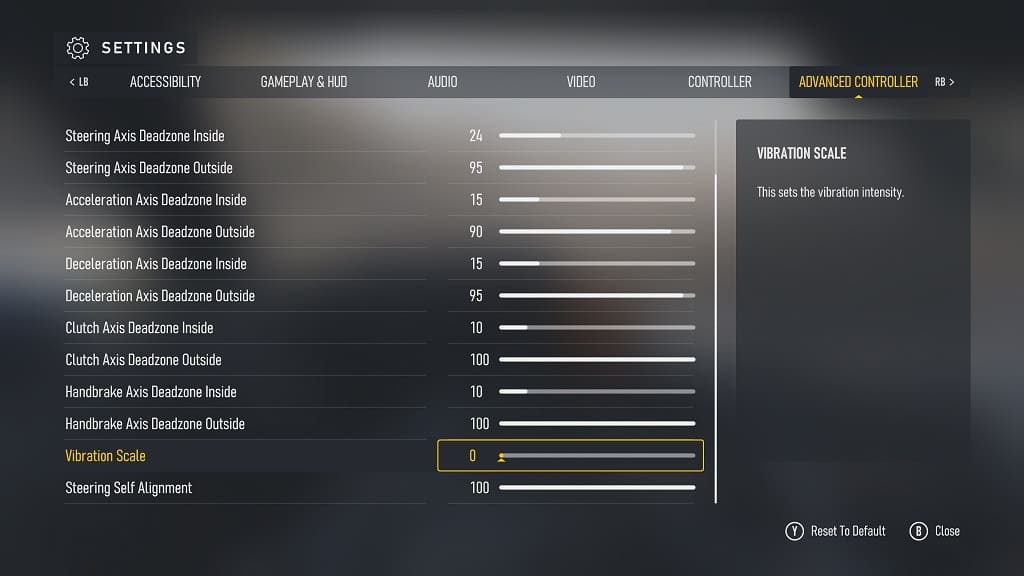
2. You are also able to adjust the deadzones when it comes to analog steering. You can find these options in the Advanced Controller tab from the Settings menu. You need to use the RB buttons to change tabs until you get there.

Once you do, you will be able to adjust the following:

  • Steering Axis Deadzone Inside
  • Steering Axis Deadzone Outside
  • Acceleration Axis Deadzone Inside
  • Acceleration Axis Deadzone Outside
  • Deceleration Axis Deadzone Inside
  • Deceleration Axis Deadzone Outside
  • Clutch Axis Deadzone Inside
  • Clutch Axis Deadzone Outside
  • Handbrake Axis Deadzone Inside
  • Handbrake Axis Deadzone Outside
  • Vibration Scale
  • Steering Self Alignment

We suggest that you play around with these options until steering a car with the analog stick feels more natural.

How to disable the Forza Motorsport screen narrator and audio description

You may hear someone reading the text that appears on the screen when browsing the menus in Forza Motorsport. You may also hear someone describing the action. If you want to disable these A.I. voices, you can check out this guide from Seeking Tech.

1. To start off, open the Settings menu in Forza Motorsport, which can be done from the home menu or pause screen.

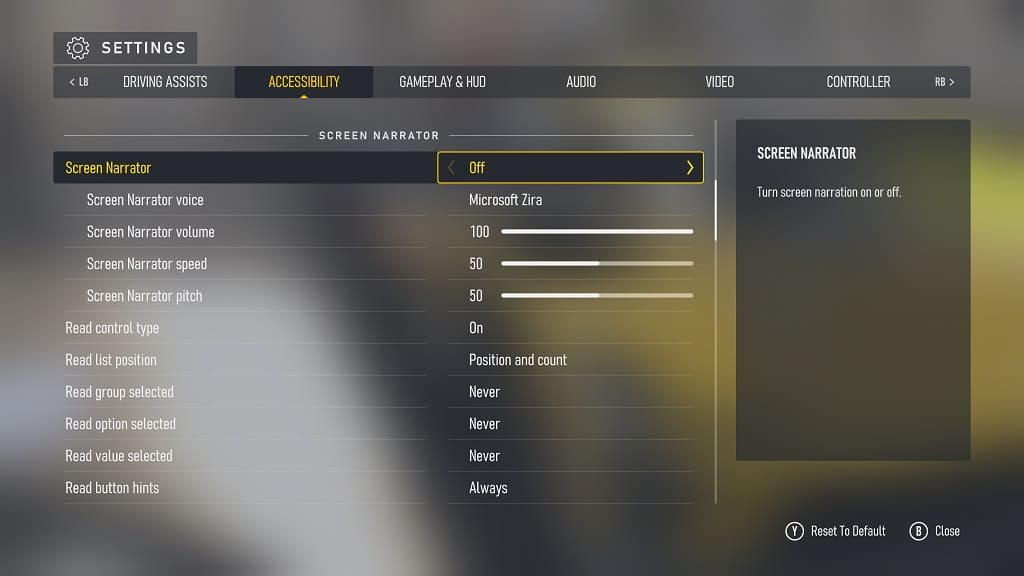
2. In Settings, you need to switch over to the Accessibility tab.

3. From the Accessibility tab, scroll down to the Screen Narrator option.

4. Make sure that Screen Narrator is set to Off. By doing so, you should no longer hear a voice reading through the menus.

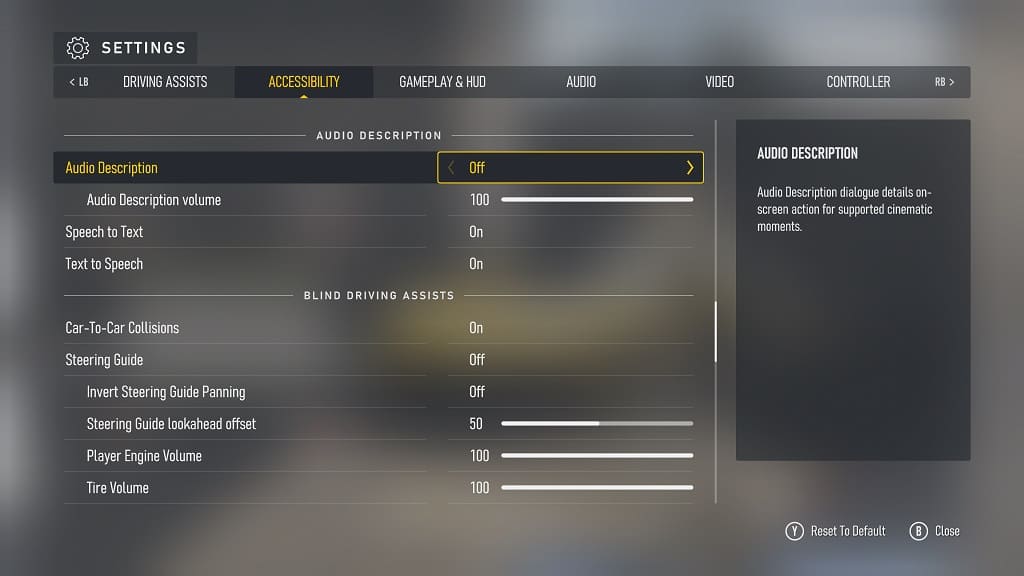
5. Afterwards, scroll down to the Audio Description option. It should show the following information:

Audi Description dialogue details on-screen action for supported cinematic moments.

6. Make sure that Audio Description is set to Off.

7. Exit the Settings menu.

8. When asked if you want to save and apply the new changes, select Save.

You should no longer hear AI voices when using the menus and/or during certain sections of gameplay in Forza Motorsport.

How to disable vibration in Forza Motorsport

If you are playing Forza Motorsport with a compatible controller or racing wheel, then vibrations are enabled by default. To see how you can reduce or completely disable rumble for this racing simulator, you can take a look at this tutorial from Seeking Tech.

1. To start off, you need to head over to the Settings menu in the game. This can be done from pause screen or home menu.

2. Once you get to the Settings menu, you need to switch over to the Advanced Controller tab. You can change tabs by using the LB and RB buttons if you are playing with an Xbox themed controller or racing wheel.

The Advanced Controller tab is located to the right of the Controller tab as it will appear off-screen when you first head into Settings.

3. Next, scroll down the tab until you see Vibration Scale, which should be the second to last option. It should show the following description:

This sets the vibration intensity.

4. By default, the Vibration Scale is set to 100. You will be able to reduce in increments of 1. To completely disable haptic feedback, make sure it is set to 0.

5. Exit out of the Settings menu and you will be asked to save and apply the new changes.

Here, you need to select the Save option.

How to enable or disable adaptive triggers in Call of Duty: Modern Warfare 3

Call of Duty: Modern Warfare III supports the adaptive triggers of the DualSense controller. To see how you can enable or disable this feature, you can take a look at this tutorial from Seeking Tech.

1. For the first step, you need to open the in-game menu, which you can do by pressing the Options button on the gamepad.

2. From there, use the L1 and R1 buttons to change tabs until you get to Settings.

3. On the Settings tab, select Controller.

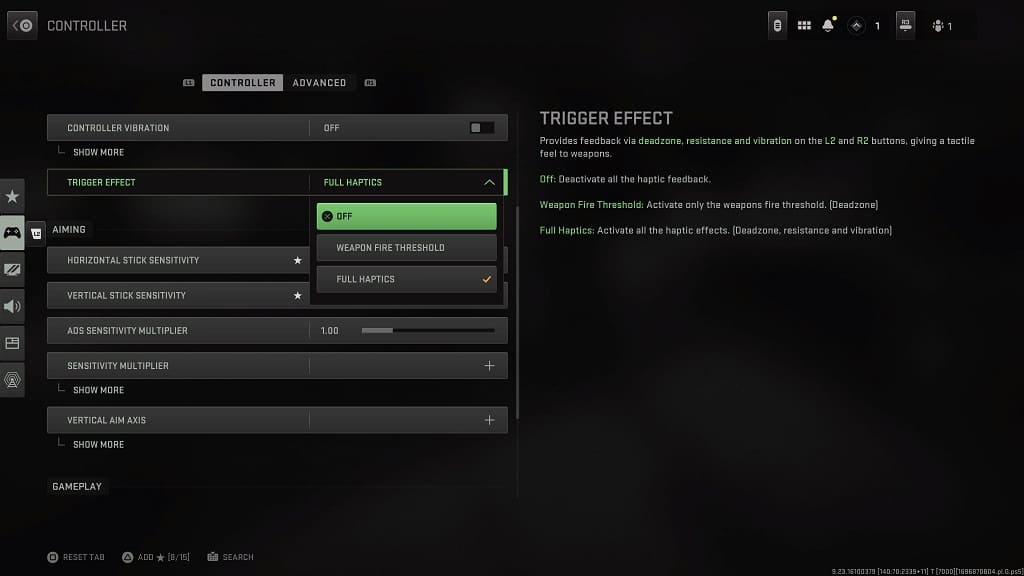
4. In the Controller section, navigate down until you get to Trigger Effect.

5. You should see the following description appear on the right side:

Provides feedback via deadzone, resistance and vibration on the L2 and R2 buttons, giving a tactile feel to the weapons.

Off: Deactivate all the haptic feedback.

Weapon Fire Threshold: Activate only the weapons fire threshold. [Deadzone]

Full Haptics: Activate all the haptic effects. [Deadzone, Resistance and Vibration]

Select the option that best fit your playstyle.

6. Exit the Settings menu.

When you play Call of Duty: Modern Warfare 3 again, you should notice the changes applied to the L2 and R2 buttons.

How to fix Monster Hunter Now empty map issues

You may notice that the map is not loading properly when playing Monster Hunter Now. You can check out this troubleshooting article at Seeking Tech to see how you can get it to properly populate.

1. For the first potential solution, you can try restarting the game to re-establish its connections.

2. If a restart did not help, then make sure you close any other apps you have opened on your smartphone as these may be conflicting with Monster Hunter Now.

3. If you are playing over a Wi-Fi connection, then switching over to mobile data may fix the empty map issue.

4. You should also make sure that you have “precise location” tracking enabled for the game as it should help improve the tracking accuracy.

On Android, for example, you need to do the following:

  • Go to the App Info screen for Monster Hunter Now.
  • Tap Permissions.
  • Tap Location.
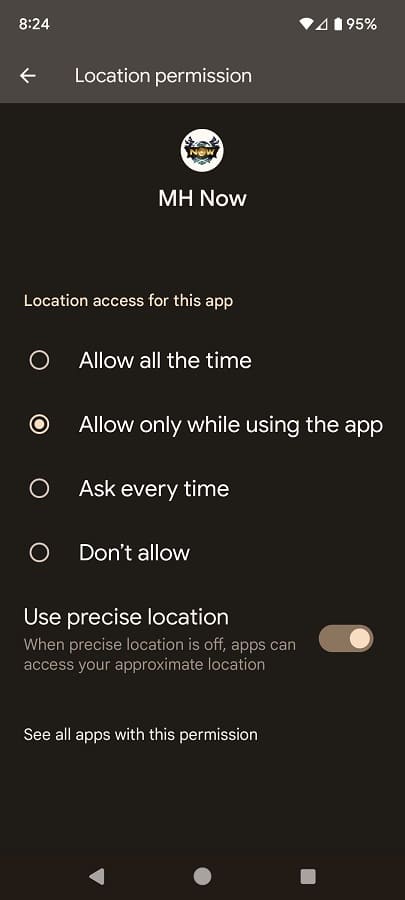
  • Make sure that “Allow all the time” or “Allow only while using this app” is selected from the “Location access for this app section.”
  • You should also make sure that the “Use precise location” setting is enabled.

5. You should check to see if there is a new update to download for Monster Hunter Now as a new patch may improve the map feature in the game.

6. If you still can’t get the map to work, then you can try uninstalling and then reinstalling the app.

How to fix Monster Hunter Now ‘location permissions not set’ error

When playing Monster Hunter Now, you may experience the following error message:

Location Permissions Not Set

In order to play this game, access to location permissions must be allowed on your device.

To see how you can potentially fix this issue for the Monster Hunter mobile spin-off, you can take a look at this troubleshooting article from Seeking Tech.

1. For the first potential fix, you should check that you have the correct Location setting set for the game.

On iOS, you need to set Location to either “Always” or “While Using the App” for Monster Hunter Now.

On Android, the Location Permission needs to be set to either “Allow all the time” or “Allow only while using the app.”

2. If your Location settings are correct, then you can try closing any other opened or background-running apps on your smartphone.

3. Phones use Bluetooth, GPS and/or Wi-Fi to determine your general location. So, if there is some sort of wireless interference, then you may not be able to play Monster Hunter Now.

In this case, you can try moving into a different area to see if you can get better wireless signals.

4. Restarting your phone may also help as doing so will reset the wireless connections that are used to determine your location.

5. You can also try deleting and then re-installing Monster Hunter Now.

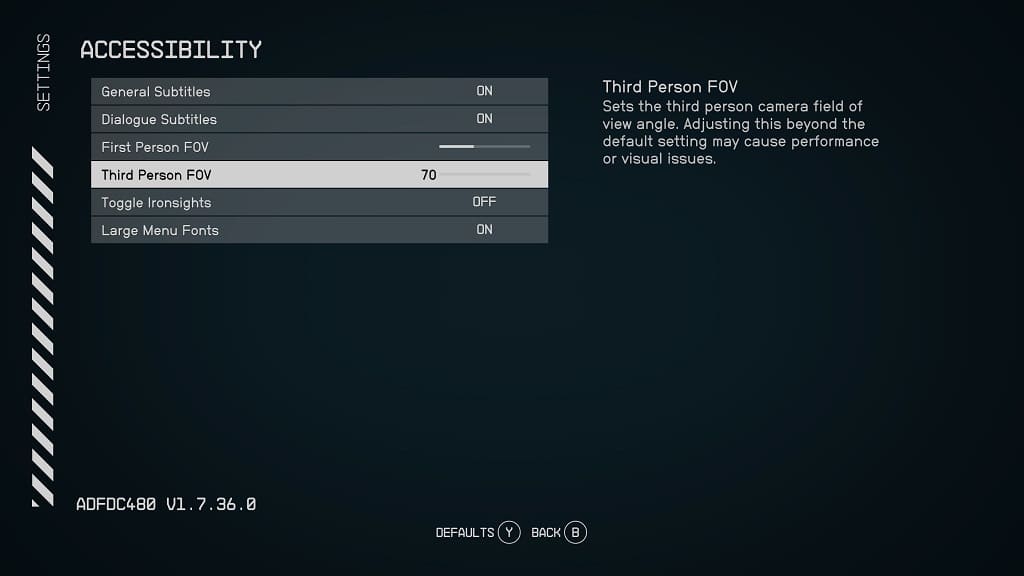
How to adjust the field of view in Starfield

A new patch added field of view sliders for both the first-person and third-person perspectives in Starfield. To see how you can change the FOV in this open-world space RPG, you can check out this guide from Seeking Tech.

1. If you haven’t done so already, make sure you downloaded the latest patch for the game. The field of view sliders were added in the update.

2. With the game updated, head over to the Settings menu in Starfield.

3. In Settings, you need to select Accessibility.

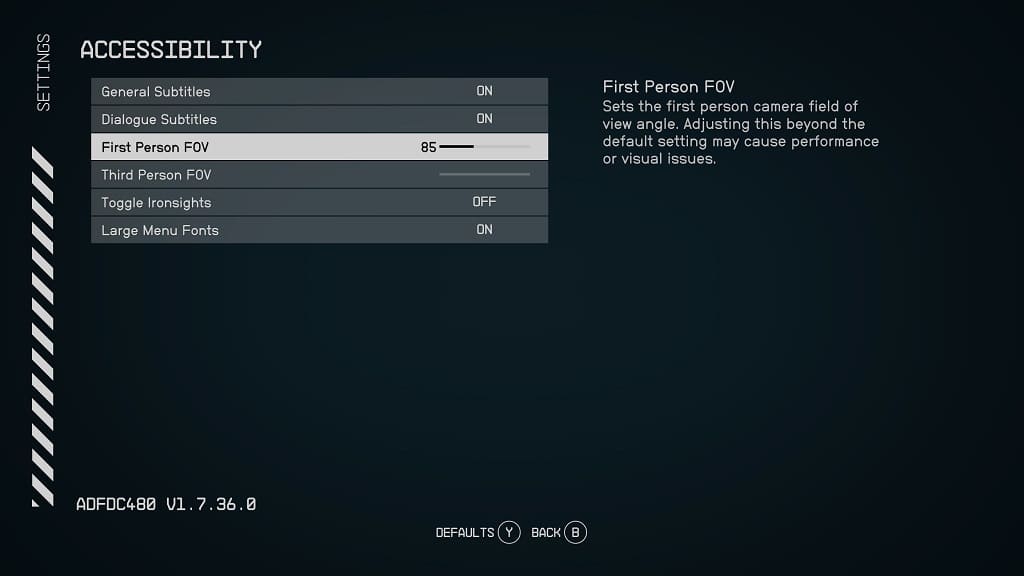
4. From the Accessibility menu, you should see First Person FOV, which should show the following description:

Sets the first person camera field of view angle. Adjusting this beyond the default setting may cause performance or visual issues.

By default, First Person FOV is set to 85. You will be able to adjust it anywhere from a range of 70 to 110.

5. From the same Accessibility menu, you will also see Third Person FOV, which shows the following description:

Sets the third person camera field of view angle. Adjusting this beyond the default setting may cause performance or visual issues.

By default, the Third Person FOV is set to 70. You will be able to increase it all the way to 110.

6. After changing either of the field of view sliders, exit the Settings menu.

The new angles will be applied when you resume playing Starfield.

How to delete your Monster Hunter Now account

If you decide that you no longer want to play Monster Hunter Now and would like to delete your account, then you can check out this guide from Seeking Tech to see how you can properly do so.

1. From the main menu, tap your profile picture on the lower left corner.

2. Next, you need to tap Settings.

3. From the Settings menu, scroll all the way down to the bottom. You should see the Delete Account option with the following description:

Once your Monster Hunter Now account is deleted, it will no longer be accessible by you or anyone else. This action cannot be undone.

Select Delete Account.

4. You should see a pop-up notification with a 10-second countdown.

Once the countdown has been completed, tap the Continue option to start the account deletion process.