How to add Google Home shortcut to the lock screen of your Pixel 6

Thanks to a new update, you are now able to add a Google Home shortcut to the lock screen of your Google Pixel 6, Google Pixel 6a or Google Pixel 6 Pro. This feature is helpful as you don’t have to go through the extra steps in order to access the smart devices you have linked to your smartphone.

To find out how this shortcut can be added, you can take a look at this tutorial from Seeking Tech.

1. To start off, make sure you update your smartphone to Android 13. Without this new operating system, you won’t be able to add the Google Home shortcut to the lock screen.

2. If you haven’t done so already, you should also make sure that you add your smart devices to the Google Home App. In order to do so, you can take the following steps:

Start by opening the Google Home App on your Pixel 6, Pixel 6a or Pixel 6 Pro. If you can’t find it, then you can swipe up from any empty space on the home screen to bring up the list of installed applications. You should be able to find and go to the Home App from there.

Inside of the Google Home App, you then need to tap the plus sign icon located at the top left side of the screen.

In the Add and Manage menu, you then need to tap Set Up Device.

You should now be in the Set Up a Device menu, where you should be able to add a new smart device to the Google Home App.

3. Once you have everything set up, you need to go ahead and open the Settings App on your phone.

4. From the Settings menu, you need to tap Display.

5. You then need to tap the Lock Screen option in the Display menu.

6. From the Lock Screen menu, you first need to make sure that the Show Device Controls setting is enabled. Otherwise, the Control from Locked Device setting will be greyed out.

7. Next, you need to also enable the aforementioned Control from Locked Device setting from the same Lock Screen menu.

8. You should now be able to open the Google Home App straight from the lock screen without having to unlock your phone beforehand.

How to access the privacy dashboard on Pixel 6

The Google Pixel 6, Google Pixel 6a and Google Pixel 6 Pro recently got updated to the Android 13 operating system, adding several new features. One of which is a privacy dashboard that makes it easier to see what potentially sensitive information are being tracked on your smartphone.

To see how you can open this dashboard, as well as use it to enable or disable permissions, you can take a look at this tutorial from Seeking Tech.

1. Before we start, make sure that your smartphone has been updated to Android 13 if you haven’t done so already. Otherwise, the privacy dashboard won’t be accessible in an older Android operation system.

2. Once you have your Pixel 6, Pixel 6a, or Pixel 6 Pro updated, you can then head over to the Settings App.

If you can find this app, then it should appear when you swipe up from an empty space to bring up a list of installed applications on your phone.

3. From inside the Settings App, you need to scroll down and then select Privacy.

4. In the Privacy menu, you then need tap the Privacy Dashboard option located at the top.

5. Inside of the Privacy Dashboard menu, you will see the type of information that was being tracked over the past 24 hours.

To view more permission types, tap the See Other Permissions options. The full list should include the following categories:

  • Location
  • Camera
  • Microphone
  • Body Sensors
  • Calendar
  • Call Logs
  • Contacts
  • Files
  • Music and Audio
  • Nearby Devices
  • Notifications
  • Phone
  • Photos and Videos
  • Physical Activity
  • SMS

6. Select any of the aforementioned permissions to view more time-specific details on the tracking.

7. In the next screen, you can also tap the Manage Permission option at the bottom of the screen, which will let you choose to allow, or disallow, apps from using this type of tracking.

8. Next, you should see a list of apps that have been categorized based on the following options:

  • Allowed all the time
  • Allowed only while in use
  • Ask every time
  • Not allowed

Here, you can tap any apps that support this permission. Afterwards, you should be able to select any of the aforementioned options.

9. Repeat the same process for any permissions that you want to allow or disallow from apps by using the Privacy Dashboard menu.

How to add Google Assistant gesture and button shortcuts to Pixel 6

New Assistant shortcuts have been added to the Google Pixel 6, Google Pixel 6a and Google Pixel 6 Pro. To find out how you can add these new ways of activating the voice control feature, you can take a look at this tutorial from Seeking Tech

How to add Google Assistant shortcut to gestures-based navigation

In order to add the Assistant shortcut when you are using the gestures-based navigation on your Pixel 6, Pixel 6a or Pixel 6 Pro, you need to take the following steps:

1. Before you begin, make sure you turn on your phone and unlock its screen. Afterwards, you should also make sure that you have updated the device to the latest firmware as the new shortcut was added in the Android 13 operating system.

2. Once you are ready, you need to launch the Settings App.

3. Inside of the application, select System from the bottom of the screen.

4. In the System sub-menu, you then need to go to Gestures.

5. You should then head to System Navigation in the Gestures sub-menu.

6. From the System Navigation menu, you should first make sure that the Gesture Navigation setting is selected.

7. Afterwards, tap the gear icon next to the Gesture Navigation setting in the same screen.

8. Once you get to the Gestures Navigation Sensitivity sub-menu, make sure that the Swipe to Invoke Assistant setting is enabled.

9. With this setting turned on, you will be able to activate Google Assistant by swipe upwards from the bottom left corner or bottom right corner of the screen.

How to add Google Assistant shortcut to buttons-based navigation

If you want to add the Google Assistant shortcut while using buttons-based navigation, then you need to do the following:

1. To start off, make sure you update your Google Pixel 6, Google Pixel 6a or Google Pixel 6 Pro to Android 13 if you haven’t done so already. Otherwise, the shortcut won’t be available.

2. After making sure that your smartphone is running the latest Android operating system, you need to open the Settings App.

3. Inside of the Settings application, you need to scroll down and then select the System option located near the bottom.

4. Once you get to the System sub-menu, you need to tap Gestures.

5. From the Gestures sub-menu, go to System Navigation.

6. In the System Navigation sub-menu, make sure that the 3-Button Navigation option is selected and then tap the gear icon next to it.

7. From the Button navigation sub-menu, make sure that the Hold Home for Assistant setting is enabled.

8. With this setting enabled, you can now be able to activate Google Assistant by pressing and holding the circle icon, which should now have a circular outline, located at the bottom of the screen.

How to add flashlight back tap shortcut to Pixel 6

With the Google Pixel 6, Google Pixel 6a and Google Pixel 6 Pro, you can add a back tap shortcut in order to use your smartphone as a flash light. To find out how to do so, you can take a look at this tutorial from Seeking Tech.

Downloading the Android 13 Firmware

The flashlight back tap shortcut was added in Android 13. So, if you haven’t updated your phone to that operating system, then make sure you do so.

The Pixel 6 series came out starting in 2021; therefore, you should be able to update to Android 13.

In order to manually update your smartphone, you can try doing the following:

1. Open and unlock you Pixel 6 series phone if you haven’t done so already.

2. Now that you can interact with your smartphone, you then need to go to the Settings App.

3. In the Settings App, you first need to select the System option located near the bottom of the list.

4. Inside the System screen, you should then select System Update.

5. From the System update screen, select Check for Update.

6. Wait for the firmware to complete.

How to add flashlight to the back tap shortcut to Pixel 6, Pixel 6a and Pixel 6 Pro

Once your Google Pixel 6, Google Pixel 6a or Google Pixel 6 Pro has been updated to Android 13, you will be able to add the flashlight back tap shortcut by doing the following:

1. Once again, you should head over to the Settings App.

2. On the front page of the Settings application you need to scroll down and then tap System.

3. After getting to the System screen, you then need to head over to Gestures.

4. Select the Quick Tap to Start Actions option in the Gestures menu.

5. Once you get to the Quick Tap to Start Actions menu, you first need to make sure that the Use Quick Tap settings is enabled.

6. Next, you need to select the Toggle Flashlight option from the same Quick Tap to Start Actions menu.

7. Exit out of the Quick Tap to Start Actions menu and then double tap the back of your Pixel 6, Pixel 6a or Pixel 6 Pro.

You should be able to turn on the flashlight feature of your phone.

8. If you are having a hard time trying to activate and deactivate the flashlight, then make sure that you are taping towards the middle port on the back of your phone.

If you are using a protective case, then it may be causing issues with your phone not being able to recognize the back taps. In this scenario, you can try applying more pressures to the back taps. Alternatively, you can try removing the case to see if the device will become more responsive to your inputs.

9. If you keep accidentally turning on your flashlight, then you can go back to the aforementioned Quick Tap to Start Actions menu. From there, you can turn on the require Stronger Taps setting.

What to do if FPS Boost is greyed out on Xbox Series X and Xbox Series S

FPS Boost is a feature that lets you play a backwards compatible video game at a higher frame rate than what the software was originally capable of running.

If this option is greyed out and can’t be selected, then you can take a look at this troubleshooting article from Seeking Tech to see what you can do to potentially fix this issue.

1. The first step we recommend taking is to make sure that the game you are trying to enable FPS Boost for actually supports the feature.

The compatibility may depend on whether you have an Xbox Series X or Xbox Series S. Furthermore, some games may have FPS Boost enabled by default. Therefore, there is no need to manually enable it.

You can find the full list of backwards compatible games with this link.

2. You should also make sure that your television set or monitor is capable of displaying games at 60 Hz. For games that support FPS Boost for up to 120 frames per second, then the screen needs to support 120 Hz.

To see what refresh rate are supported on your television set or computer monitor when it is connected to your Xbox console, you need to take the following steps:

  • Start by going into the Settings app on your Xbox Series X or Xbox Series S. If you can’t find it, then you can press the Xbox button on the controller to bring up the Guide menu. From there, scroll to the right until you get to the “Profile & system” tab. Finally, select Settings.
  • In the Settings menu, select “TV & display options.”
  • Inside the “General – TV & display options” screen, select “4K TV details.”
  • The “General – 4K TV details” screen will show you what your screen is capable of displaying when it comes to resolution, refresh rate and more.

3. If the game and television set are capable of supporting higher frame rates, then you can try power cycling your console and then re-test to see if FPS Boost can be enabled.

In order to do so, you need to do the following:

  • Press and hold the Xbox button.
  • Select the “Turn off console” option.
  • After the console has shut down, unplug it from the power outlet.
  • Wait for at least 30 seconds.
  • Plug the console back into the power outlet.
  • Turn the console back on.
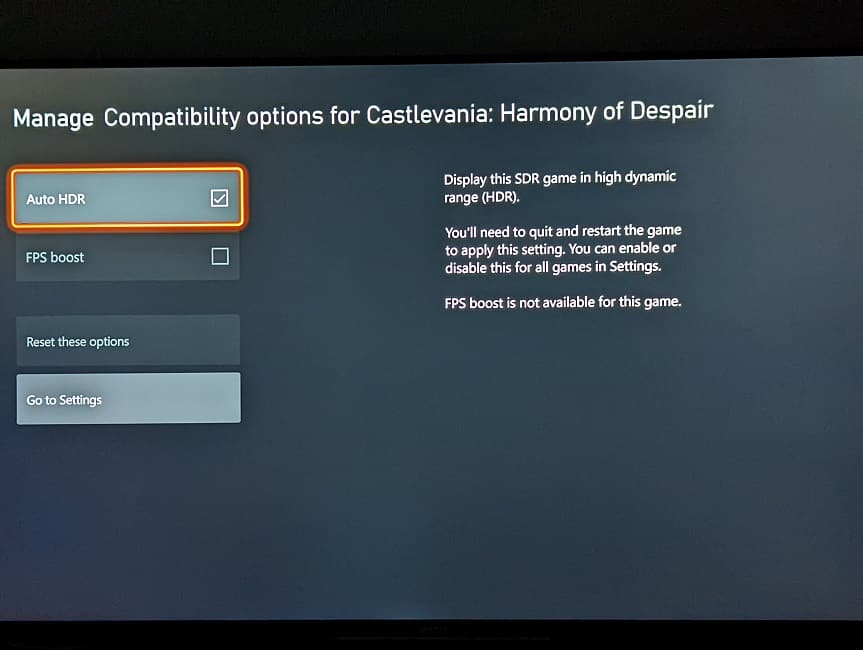
  • Go to the “Manage game and add-ons” menu of the game that you are trying to enable FPS Boost for.
  • Select “Compatibly options.”

You should see the FPS Boost setting. Hopefully, it won’t be greyed out after power cycling your Xbox Series X or Xbox Series S.

4. If you are still having issues when it comes to not being able to select FPS Boost for a specific game, then you can try updating the game to the latest available patch.

5. You can also try updating your Xbox Series console to the latest available firmware.

How to exit a game on the Steam Deck

If you aren’t familiar with using the Steam Deck, then you may have a hard time trying to close a video game and get back to the Steam operating system.

To see how you can properly exit a game, you can take a look at this guide from Seeking Tech.

Method #1

The most efficient way to exit a game and return to the Steam system menus on the Steam Deck is by using the Steam Menu. In order to do so, you need to take the following steps:

1. Make sure that you are currently playing the game.

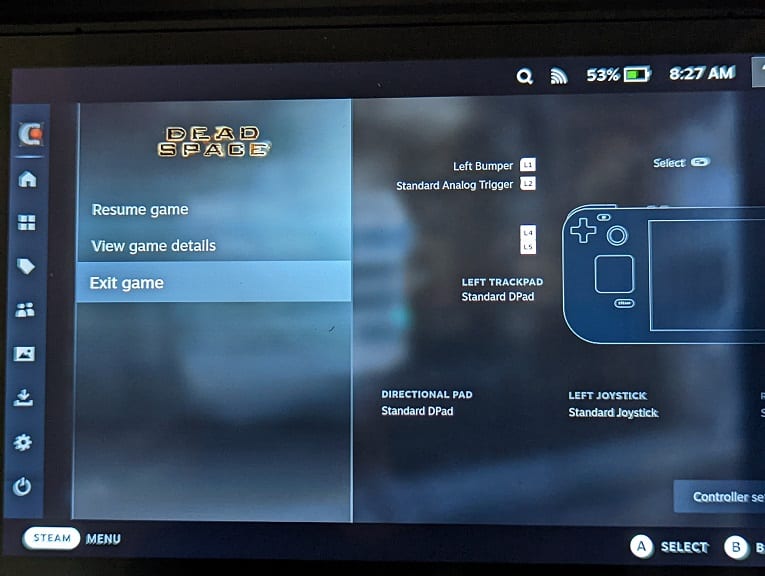
2. When playing a game, press the Steam button, which should open the Steam Menu.

3. From the Steam Menu, make sure that you navigate to the top most option, which should have the name of the videogame you are currently playing.

4. From the top most option of the Steam Menu, move to the right.

5. You should be able to select the Exit Game, Quit Game or another similar option in order to close the videogame and head back to the Steam OS.

Method #2

You can also use the Library menu in order to close a game on the Steam Deck by doing the following:

1. When playing a video game on the portable system, press the Steam button to open the Steam Menu.

2. Select Library on the left column of the Steam Menu.

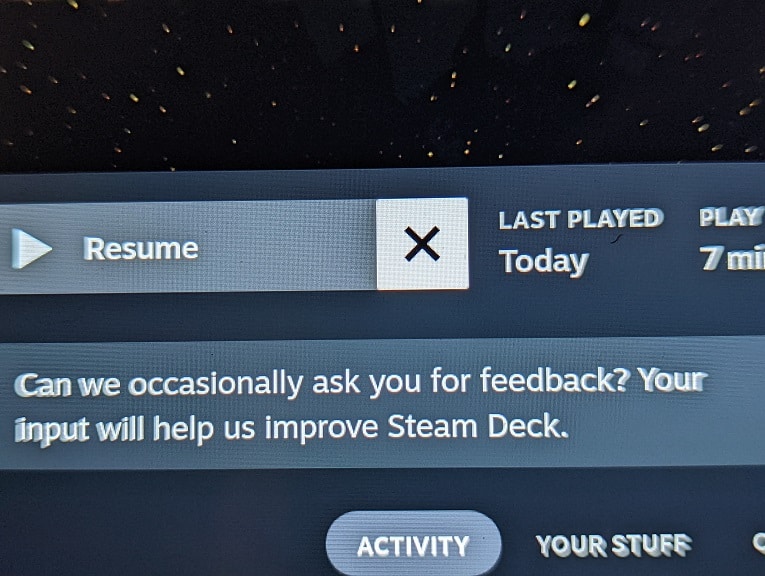
3. In the Library section, select the game you are currently playing.

4. On the game’s page, select the X icon, which should be located directly to the right of the Resume option.

5. A notification should then pop-up, asking if you want to exit the video game. Select confirm to close the currently running game.

Method #3

Most games also have an option in the pause menu and/or title menu where you can exit out of the game and head back to the Steam system menus.

Method #4

Another way that you can close a game is by restarting your Steam Deck.

In order to do so, open the Steam Menu and then select Power. You then need to select the Restart option.

Method #5

You can also turn off your portable system and then turn it back on again in order to close a game.

To do so, go back to the Power menu from the Steam Menu. You should then select the Shutdown option. Afterwards, press the power button on the Steam Deck in order to turn it back on again.

How to customize rumble on the Steam Deck

The Steam Deck comes with haptics on the left and right grips. To see how you can customize the force feedback of this portable gaming system, you can take a look at this article from Seeking Tech.

How to enable rumble on the Steam Deck

There are multiple ways you can enable rumble when using the Steam Deck.

The quickest way to do so is to use the Quick Access menu by taking the following steps:

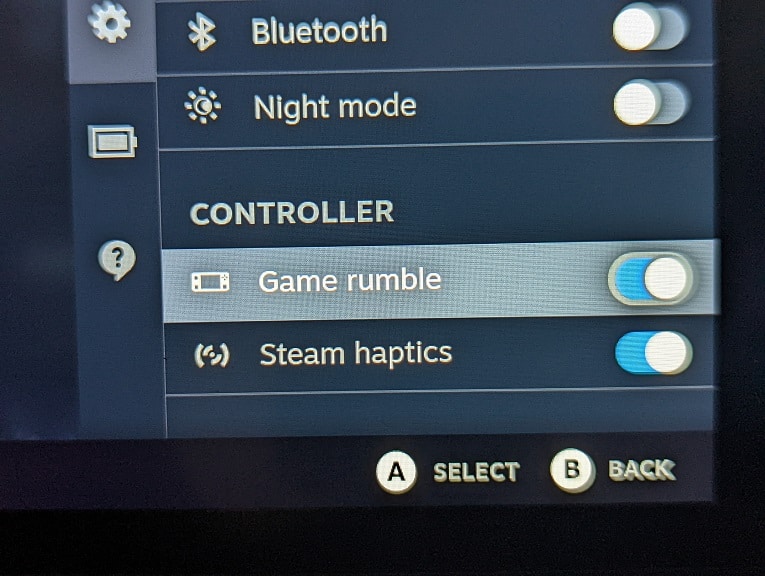
1. Press the button that has the three dots located on the bottom right side of the system.

2. In the Quick Access menu, scroll down to the gear cog icon.

3. From the Quick Settings section, scroll all the way down to get to Controller.

4. Make sure that the Game Rumble and Steam Haptics features are both turned on.

You can also use the Steam Menu to turn on vibrations by doing the following:

1. Open the Steam Menu by pressing the Steam button located on the bottom left side of the system.

2. After launching the Steam Menu, go to Settings.

3. From the Settings menu, select Controller on the left column.

4. On the right side of the same screen, select the Open option next to Calibration and Advanced Settings.

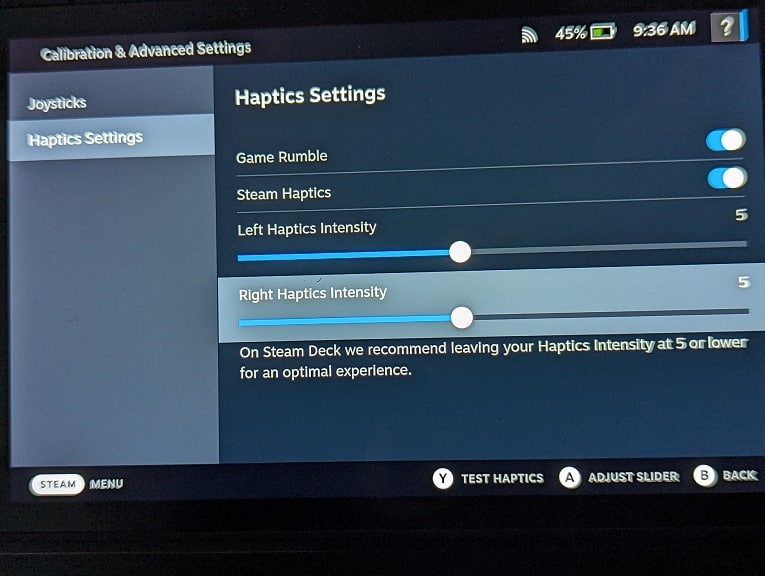
5. In the Calibration and Advanced Settings menu, select Haptics Settings on the left column.

6. On the right side of the same screen, make sure that both the Game Rumble and Steam Haptics settings are enabled.

Along with enabling rumble support on your Steam Deck, you should also make sure that rumble is also enabled for the game when you are playing it as well.

How adjust the vibration intensity on the Steam Deck

In order to adjust force feedback intensity of your portable system, you need to take the following steps:

1. Open up the Steam Menu and then head into Settings.

2. Inside of Settings, select Controller and then the Open option next to Calibration and Advanced Settings.

3. From the Calibration and Advanced Settings menu, select Haptics Settings on the left side.

4. On the right side, you will be able to adjust the Left Haptics Intensity and Right Haptics Intensity. Both can be adjusted anywhere between a value of 1 to 10.

With that said, Valve recommends that you keep the rumble intensity to 5 or below for the most optimal gaming experience.

How to disable force feedback on the Steam Deck

In order to disable force feedback when using the Steam Deck, you can press the three dots button to open the Quick Access menu. Afterwards, select the gear icon to go Quick Settings. From there, make sure that Game Rumble and Steam Haptics settings are disabled.

Alternatively, you can open the Steam menu and then head to Settings. In the Settings menu, go to Controller and then open the Calibration and Advanced Settings menu. From there, select Haptics Settings on the left side before disabling the Game Rumble and Steam Haptics settings.

How to delete PS3 cloud saves on PS5

You can delete save files from PlayStation 3 games that are stored on the cloud from your PlayStation 5 or PlayStation 5 Digital Edition system. To find out how to do so, you can follow this tutorial at Seeking Tech.

Why you need to PS3 saved files

When it comes to the PlayStation 3, you can only store up to 1 GB worth of saved data on the cloud. There is also a limit of 1,000 save files that can be stored.

Therefore, you need to delete some files in order to make more space in the cloud storage if you want to upload a new file.

How to delete PS3 cloud save files on your PlayStation 5

In order to delete could save files for PlayStation 3 games on your PS5 or PS5 Digital Edition console, you need to do the following:

1. Before we begin, make sure you are subscribed to the PlayStation Plus Premium plan as you will need it in order to remove PS3 save files from the cloud storage via your PlayStation 5.

2. Furthermore, make sure you are using the same PlayStation Network account on your PS5 as you were using for the cloud storage of your PS3 saved data.

3. Once you have everything set up, go to the home menu on your PlayStation 5. To get there, you can press and hold the PS button on your DualSense controller.

4. In the home menu, open a PS3 game stream.

If you don’t have a PS3 game in the home screen, then you can check out this guide to see where you can find and open a PS3 game stream.

5. Wait for the stream to connect as well as the PS3 game to boot up.

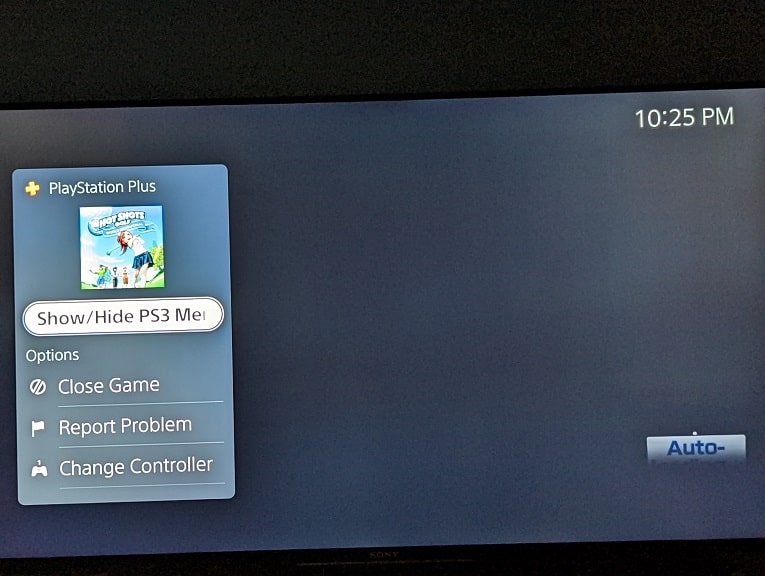
6. Once the game has fully launched, press the PS button to open the quick menu for your PlayStation 5 console.

7. Inside of the quick menu, select the Now Streaming card to make it bigger.

8. From the expanded Now Streaming card menu, you then need to select Show/Hide PS3 Menu.

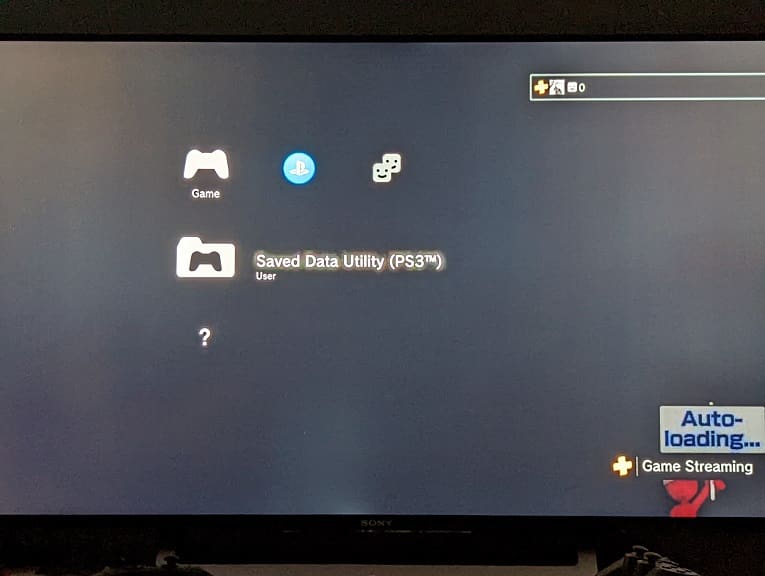
9. You should now be in the truncated version of the classic XMB menu of the remote PS3 console. Here, you need to select Saved Data Utility (PS3).

10. In order to continue, you need to quit your game. Select the Yes option when asked to do so.

11. After the game has closed, select Online Storage.

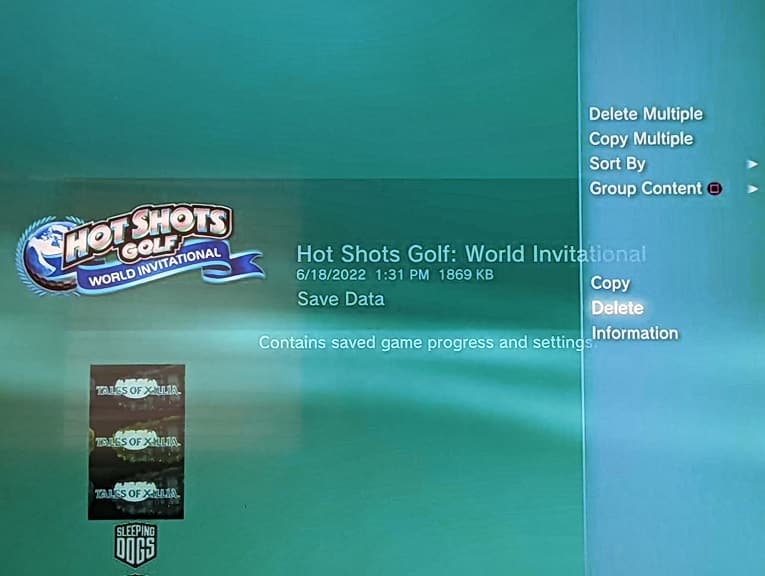
12. In the Online Storage menu, you will see a list of PS3 save files you have uploaded to cloud storage. Your most recent uploads are located at the top of the list.

13. Select any of the save files to make a side menu appear.

14. In the side menu, you can sort the list based on upload date or name. You can also group save files together if they are from the same game.

15. To delete the save file that you previously selected, you can select the Delete option from the side menu.

If you have more save files that you want to delete, then you need to select the Delete Multiple options instead. Afterwards, select the saved data that you want to delete and then select OK in order to remove them from the cloud storage.

How to view download speed and do a speed test on the Steam Deck

The Steam Deck uses a Wi-Fi connection for downloading games, updates as well as other digital content. To see how you can view the download speed, as well as perform a speed test, you can take a look at this tutorial from Seeking Tech.

How to view the download speed when downloading from the Steam Store

In order to view the download speed while you are downloading a game (or other content) from the Steam Store, you need to take the following steps:

1. First off, turn on your Steam Deck portable console if you haven’t done so already.

2. You should make sure that the system is connected to the internet as well.

3. Furthermore, you should make sure that you are currently downloading a file.

4. When you are downloading a file on the Steam Deck, you need to open the Steam Menu.

You can do so by pressing the Steam button. Alternatively, you can tap the Steam Menu icon located on the bottom right corner of the screen if it is visible.

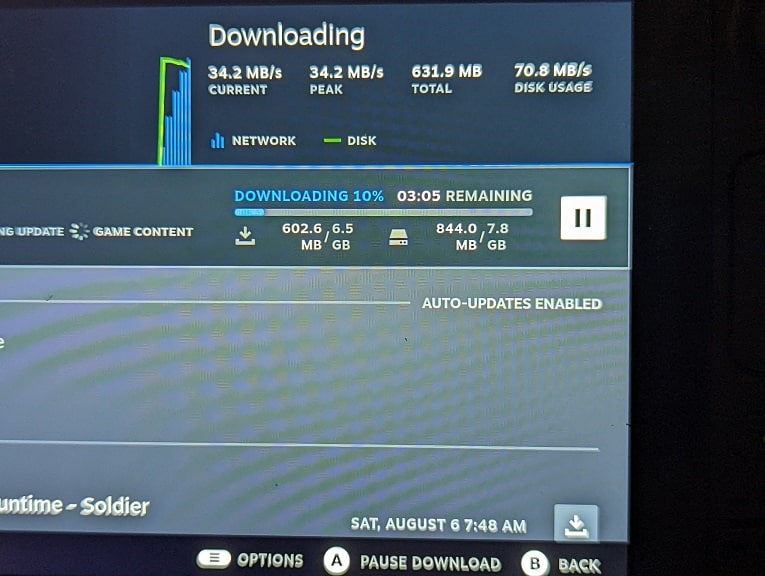
5. With the Steam Menu opened, select Downloads from the list of available options.

6. You should now be in the Downloads section. Here, you can see the download process of the content you are currently downloading. You will find the download speed at the top right side.

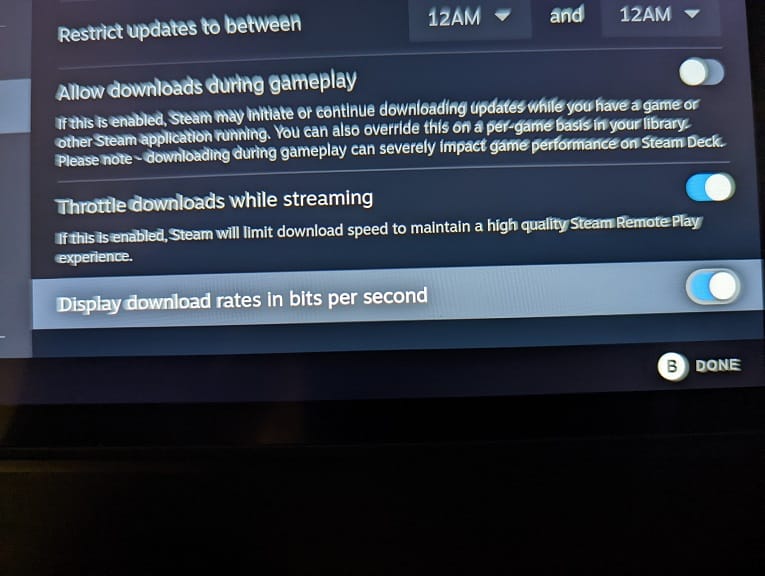
7. If you want to view the download speeds in bits per second, then you need to open the Steam Menu and then select Settings. Inside of Settings, you need to select Downloads on the left column and then make sure that the “Display download rates in bits per second” setting is enabled.

How to perform a speed test on Steam Deck

If you want to perform a speed test on the Steam Deck, you need to do the following:

1. For the most accurate results, make sure you aren’t downloading or streaming anything during the process. Otherwise, the download and upload speeds will appear to be slower.

2. Once you are ready, turn on your portable console and then make sure it is connected to the internet.

3. Next, you need to switch over to the Desktop Mode, which you can do by taking the following steps:

  • Open the Steam Menu.
  • Inside the Steam Menu, select the Power option.
  • From the Power Menu, select Switch to Desktop.

4. After the Steam Deck has been switched to Desktop Mode, you need to open a web browser.

If you are unfamiliar with using the Desktop Mode, then you need to use the right touch pad as a mouse. To bring up the virtual keyboard, you need to press the Steam and X buttons at the same time.

5. With the web browser opened, you need to go to a web site that can test your download and upload speed.

We used the tool from Google. To find it, search for the term “speed test” on the Google website. The first option you should see should be the speed test tool. Select the Run Speed Test option in order to test your download and upload speeds.

How to invert controls when playing PS1, PS2 and PSP games on PS5

With the launch of PlayStation Plus Premium, a curated list of PS1, PS2 and PSP videogames can be played on your PlayStation 5 or PlayStation 5 Digital Edition system. In addition to being included in the subscription service, some of these games can be bought individually as well.

If you want to invert your controls for these classic titles, then you can take a look at this tutorial from Seeking Tech.

1. The first step we recommend taking is to check the pause menu and/or main menu of the PS1, PS2 or PSP game you are currently playing on your PlayStation 5.

Some titles may offer a setting where you can invert the camera and/or flight controls.

2. If you don’t see an in-game setting to invert, then you need to go to the home screen of your PS5. In order to do so, you need to press and hold the PS button.

3. After getting to the home screen, you then need to head to Settings. To get there, select the gear icon located on the top right corner.

4. In Settings, scroll down and then selected Saved Data and Game/App Settings.

5. From the Saved Data and Game/App Settings menu, select Game Presets on the left side.

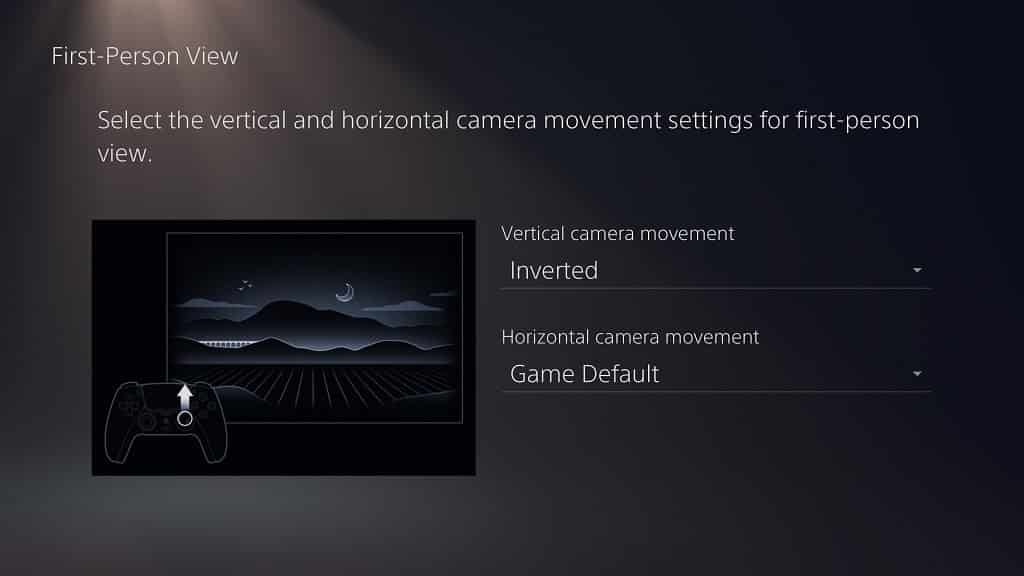
6. On the right side, you can select either First-Person View or Third-Person View depending on the type of game you are currently playing.

7. In the next screen, change the vertical and horizontal movement to your preference.

8. With the changes made, open your PS1, PS2 or PSP game and then test to see if the controls have changed.

9. If it hasn’t, then you can return to Settings and then select Accessibility.

10. From the Accessibility menu, you first need to select Controllers from the left column and then Custom Button Assignments on the right side of the same screen.

11. After getting to the Custom Button Assignments menu, make sure that the Enable Custom Assignments setting is turned on.

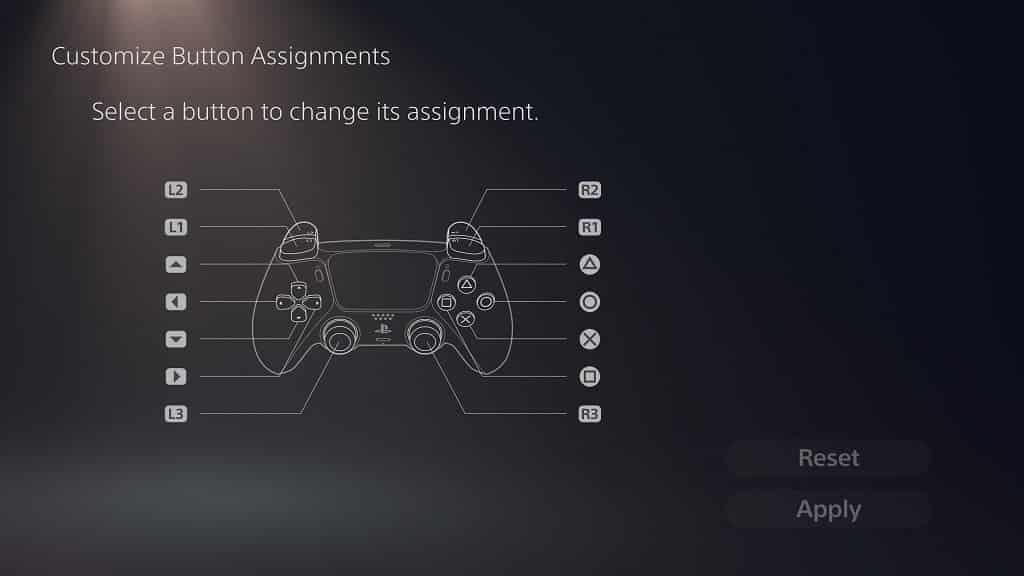
12. In the same screen, select Customize Button Assignment.

13. Inside the Customize Button Assignment, select the button that you want to invert.

14. In the pop-up menu, you can choose the new button assignment.

If your game is using L1 and R1 to control the camera or flight, for example, then you can try switching these two buttons.

Some games may also use L2 and R2 for camera or light controls. The up and down, as well as the left and right, buttons of the directional pad may be used for camera movement as well.

15. Once you made all the necessary changes to the button assignments, you need to select the Apply option to confirm your choices.

16. After making the changes, open your PS1, PS2 or PSP game and then test to see if your controls have been inverted from the original default setting.