How to disable cross play in Age of Empires II: Definitive Edition on Xbox Series X and S

The Xbox Series X and Xbox Series S versions of Age of Empires II: Definitive Edition support cross play as you can play online with other players on PC.

With that said, PC players may end up getting a competitive advantage due to using a keyboard and mouse control scheme. Not to mention that it is most likely easier to cheat in the PC version.

If you would like to disable cross play for the Xbox Series X and Xbox Series X version of this strategy game, then you can take a look at this tutorial from Seeking Tech.

1. To begin, make sure you turn on your console and then open Age of Empires II: Definitive Edition if you haven’t done so already.

2. When you are in the game, you need to press the Menu button. This button, which has three horizontal lines, should be located directly to the left of the X button.

3. You should now be in the Settings menu. Here, you need to head over to Options.

4. In the Options menu, you need to select Game on the left column.

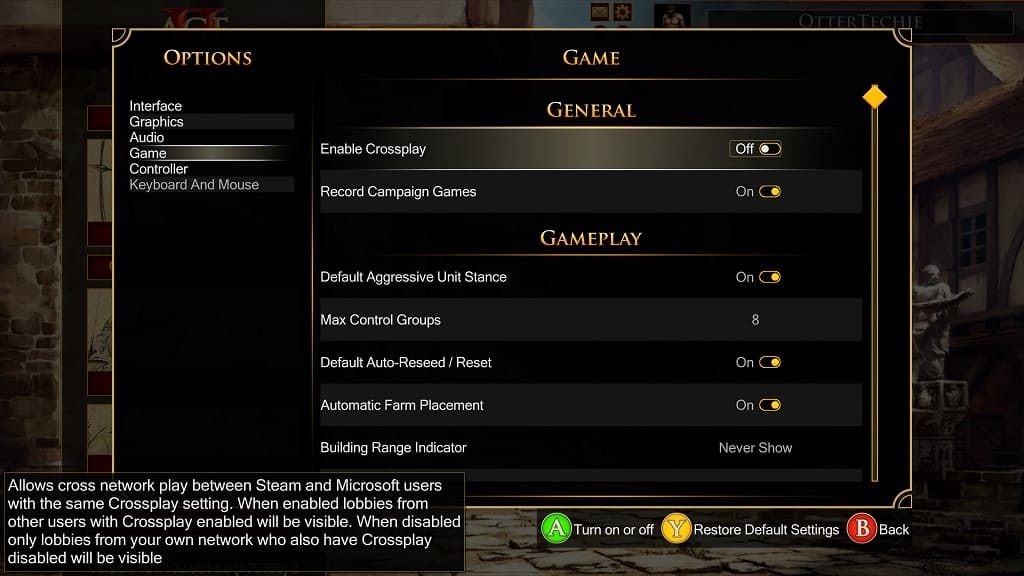
5. On the right side of the same screen, you should see the Enable Crossplay setting underneath the General section.

By default, this setting is enabled. Therefore, you need to select it in order to turn off cross play in Age of Empires II: Definitive Edition on Xbox Series X and Xbox Series S.
6. After turning off cross play, you can press the B button on the Xbox controller to back out of the Settings menu and then return to the game.

7. When you create or join an online session, you should no longer be matched with PC players. Xbox Series X and Xbox Series S players should still be able to play with each other with cross play disabled.

How to fix the ‘can’t be bought’ issue when trying to redeem a PS Plus monthly game

When trying to add a video game from the Monthly Games Catalog, you may run into a purchase error code stating that it can’t be bought as you already have it. To see how you can potentially fix this issue, you can take a look at this troubleshooting article from Seeking Tech.

Why you are getting the error code

The likely cause as to why you got this error code is that you may have previously downloaded the same game from the Game or Classics Catalogs.

The Monthly Games Catalog is different than the Game Catalog and Classics Catalog when it comes to licensing.

For the games you added to your library through the Monthly Games Catalog, you will be able to keep playing them as long as you remain a member of PlayStation Plus Essential, PlayStation Plus Extra, PlayStation Plus Deluxe or PlayStation Plus Premium.

For the Game Catalog, you must remain a member of PlayStation Plus Extra, PlayStation Plus Deluxe or PlayStation Plus Premium. For the Classics Catalog, you need to be a member of PlayStation Plus Deluxe or PlayStation Plus Premium. Furthermore, you will also lose access to the game if it gets removed from the Game and Classics Catalogs.

The licensing system for PlayStation Plus is currently buggy as you can’t redeem the same game from the Monthly Games Catalog that you previously redeemed from the Game and Classics Catalogs.

To learn more about the different collections for the PS Plus subscription service, you can check out this comparison post.

How to fix the “can’t be bought” problem

The only way you can fix this specific problem is to get a customer service representative to delete your license for the game. In order to contact the PlayStation Support team, you can visit this link.

Once the license has been removed, you will need to restore your game licenses on your game console.

For the PlayStation 4 or PlayStation 4 Pro, you need to head over to Settings > Account Management > Restore Licenses.

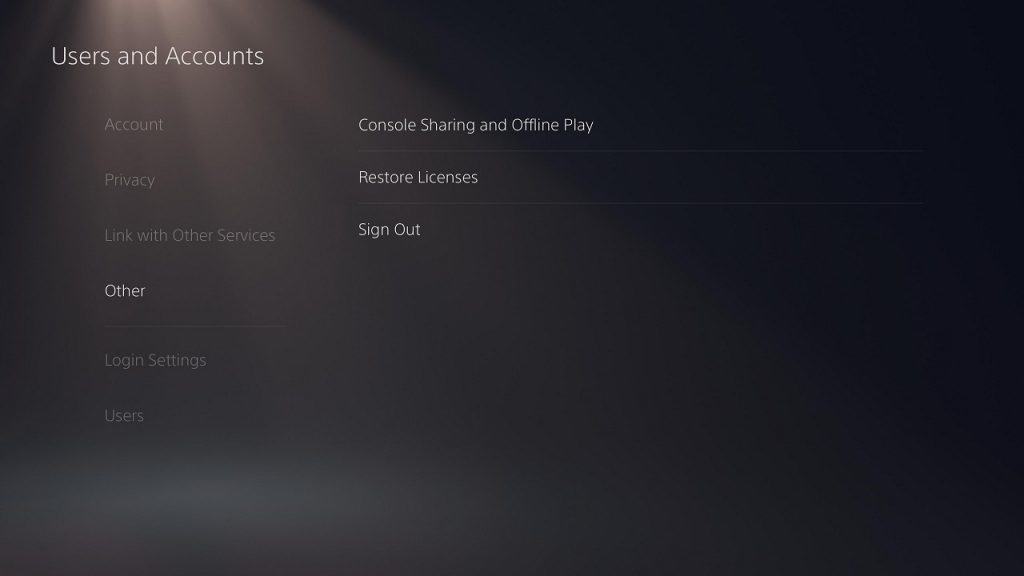
For the PlayStation 5 or PlayStation 5 Digital Edition console, you need to go to Settings > Users and Accounts > Other > Restore Licenses > Restore.

Once the restoration process has been completed, try to add the PlayStation Plus Monthly Game to your library again to see if the transaction will go through without any issues this time around.

If you are still having problems, then you will need to contact the PlayStation Support team to get additional help.

How to find and pre-install Xbox Game Pass coming soon games on Series X and S

Xbox Game Pass gets a constant stream of new games added. To see how you can find these “coming soon” titles for the subscription service from your Xbox Series X or Xbox Series S console, you can take a look at this step-by-step tutorial from Seeking Tech.

1. To start off, you need to power on your Series X or Series S console if you haven’t done so already.

2. You should then head over to the home screen menu.

If you are playing a game, using an app or in another place at the moment, then you need to press the Xbox logo button on your game pad and then select the Home option in the Guide menu.

3. Once you get to the home menu, you need to find and select the Xbox Game Pass icon.

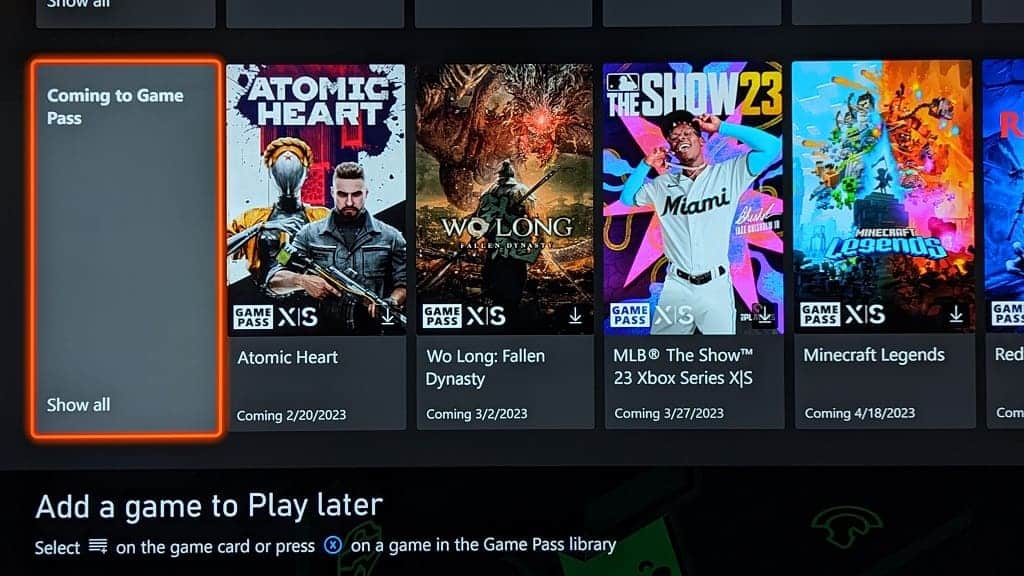
4. After getting inside the Game Pass App, scroll down until you get to the Coming to Game Pass row. Here, you will see a list of five notable upcoming videogames that will be added to the streaming service.

5. If you want to see more, then you need to select the “Coming to Game Pass – Show all” option located on the left side of this row.

You should then be able to find more games in the Coming to Games Pass menu.

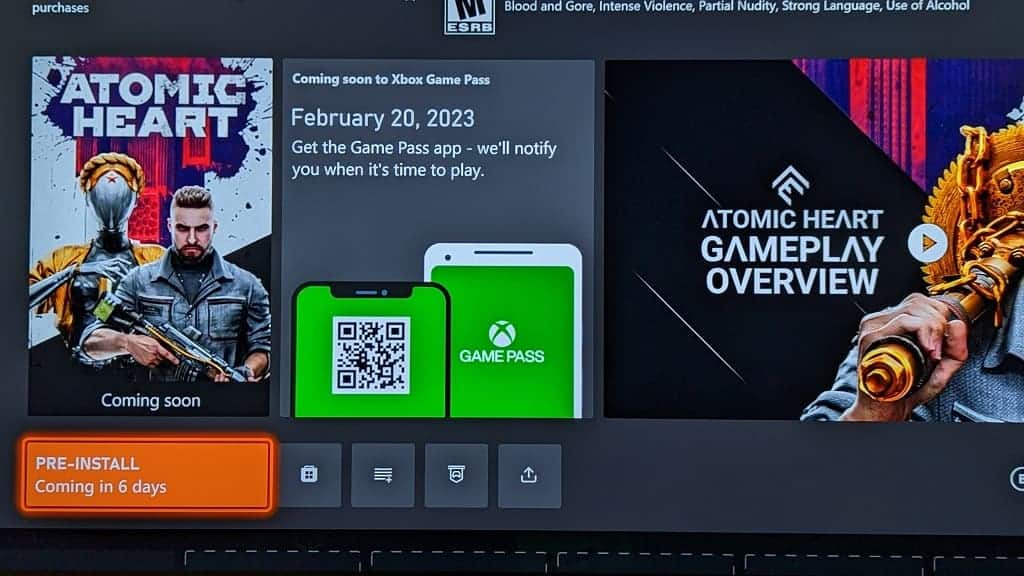
6. In order to pre-install a game from the Coming to Game Pass section, you need to first select it.

7. On the product page, you then need to select the Pre-Install option.

8. The download and installation process should then start.

9. By pre-installing the game in advance, you should be able to play it right away without having to first download when it official comes out digitally.

How to find complete list of Xbox Game Pass games on Xbox Series X and S

The Xbox Game Pass features hundreds of games that you have full access to as long as you remain a member to the subscription service.

To see how you can full the complete list of titles that are currently being offered on your Xbox Series X or Xbox Series S, you can take a look at this tutorial from Seeking Tech.

Method #1:

For the first method, you need to take the following steps:

1. Turn on the home console and then head over to the home menu.

If you are doing something else at the moment on your Series X or Series S, then you can press the Xbox logo button on your controller and the select Home.

2. In the home menu, find and select Xbox Game Pass.

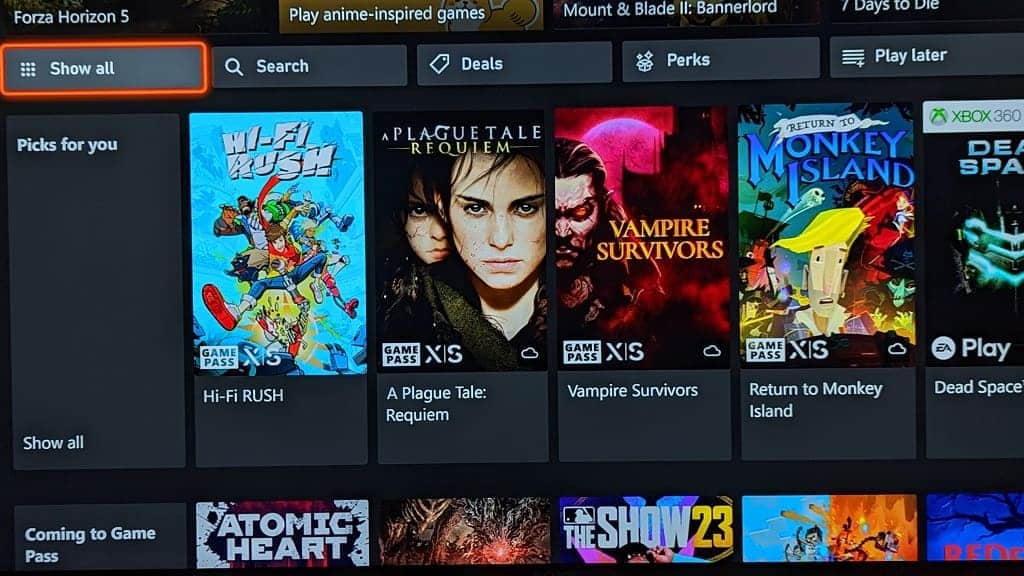
3. Inside of the Game Pass App, scroll a little bit down from the top until you get to the row that has the following listed from left to right:

  • Show all
  • Search
  • Deals
  • Perks
  • Play Later

4. On this row, select the “Show all” option.

5. You should now be able to view the full list of games currently available on Xbox Game Pass.

Method #2:

For the second method, you can do the following:

1. Turn on your console and the go to the Xbox Game Pass App from the home menu.

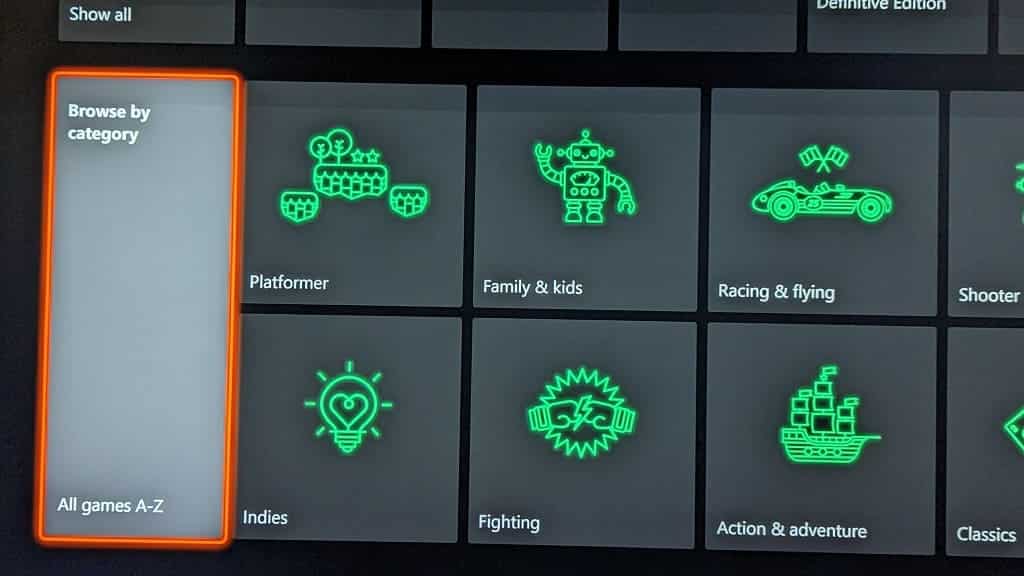
2. After getting to the Xbox Game Pass App, scroll all the way down to the very bottom.

3. Here, you need to select the “Browse by category: All games A – Z” option.

4. You should now be able to view the full list of Xbox Game Pass titles that are currently available for download and installation.

The Game Pass menu are sorted based on the name of the videogame. Any titles that start with a number are listed first at the top, followed by other titles in alphabetical order. Unfortunately, there are no other way to sort or filter this listing from this menu.

In order to download a game from Xbox Game Pass, you should first make sure you are signed into the account is subscribed to the appropriate subscription tier. Afterwards, select a game from the aforementioned Game Pass menu. Finally, you need to select the Install option on the product page.

Once the game has been installed, you can play it as long as you remain a member of Xbox Game Pass. The same game must also remain on the subscription service; if it leaves, then you will lose access.

How to download and update the Netflix App on Xbox Series X and S

The Netflix App does not come pre-installed on the Xbox Series X or Xbox Series S. To see how you can download and update this streaming application on your game console, you can take a look at this tutorial from Seeking Tech.

How to get Netflix on Xbox Series X and S

To download and install the Netflix streaming app on these Microsoft gaming console, you need to take the following steps:

1. To start off, make sure you power on your Series X or Series S if you haven’t done so already.

2. Next, you need to head over to the home screen. If you aren’t there, then you can simply press the Xbox button on your controller and then select Home.

3. From the home screen, scroll down and then select Store.

4. Inside of the Store App, move the cursor to the left in order to open the left column menu.

5. From there, select Apps.

6. In the Apps section of the store, select Netflix.

If you can’t find the streaming app, then you can scroll to the Top Entertainment Apps row, go all the way to the right and then select Show All. You should be able to find Netflix from the Top Entertainment Apps menu.

7. In the Download page of the Netflix App select the Get (Free) option.

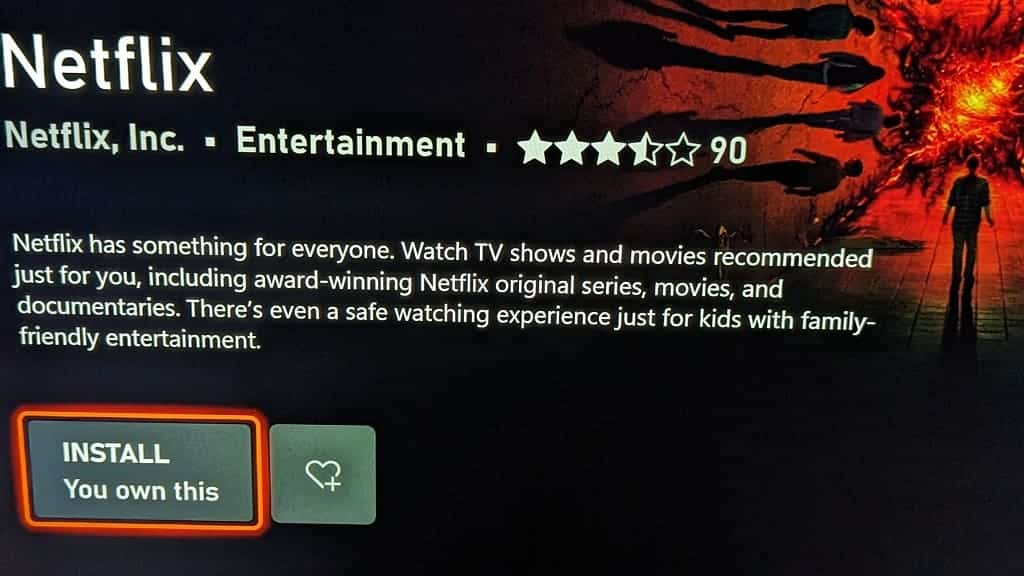
If you previously downloaded and then deleted Netflix, then you need to select the Install (You Own This) option.

8. The download for the application should start. Once the installation has completed, you should be able to use Netflix on your Xbox Series X or Xbox Series S.

How to manually update the Netflix App on Xbox Series X and S

To manually update the Netflix App on these game systems, you need to do the following:

1. To begin, turn on your console and then go to its home screen menu.

2. From the home screen, move the cursor to Netflix and then press the Menu button.

If you can’t find Netflix in the home screen, then you need to select the My Games & Apps option. In the next screen, select Apps on the left side. You should then be able to find Netflix.

3. In the small pop-up menu, you need to select Manage App.

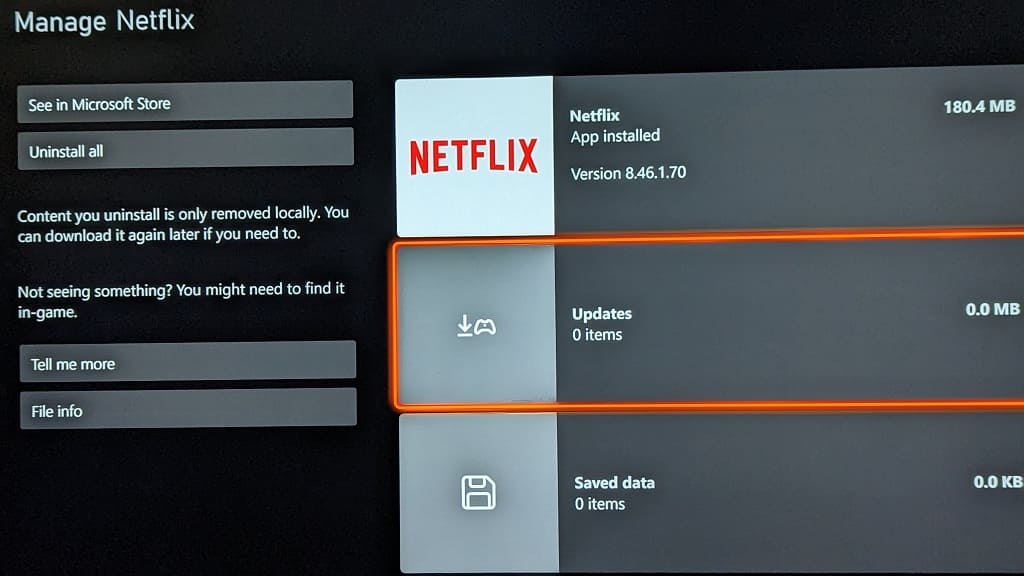
4. After getting to the Manage – Netflix menu, you need to select Updates.

5. The Netflix – Updates menu will show whether or not a new version of the application is available to download. If there is, then you should be able to download it directly from this screen.

How to disable haptic feedback vibrations in Octopath Traveler II

The PlayStation 5 version of Octopath Traveler II supports haptic feedback. If you don’t like how the DualSense rumbles and/or would like to save on the battery life of the controller, then you can check out this guide at Seeking Tech to see how you can disable this feature.

How to turn off vibrations in Octopath Traveler II on PS5

In order to disable the DualSense rumble in Octopath Traveler II on PlayStation 5 and PlayStation 5 Digital Edition, you need to do the following:

1. To start off, you need to head over to the Settings menu from within the role-playing game.

To get there, you can select the Settings option from the Title Menu.

If you are actively playing the game currently, then you need to press the Triangle button to open the Main Menu, where you then need to select Miscellaneous > Settings.

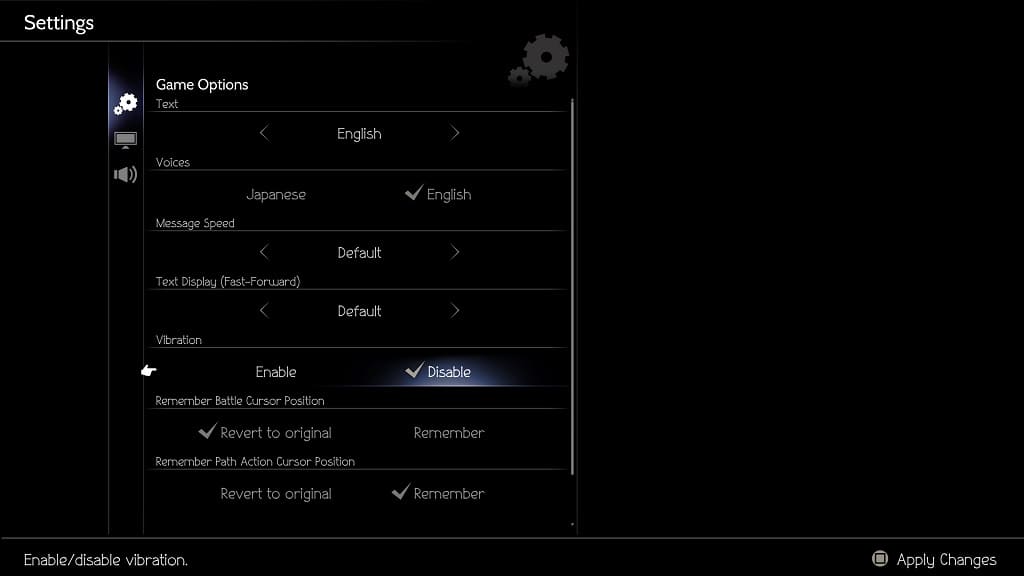
2. Inside of Settings, select Game options on the left column.

3. On the right side of the same screen, make sure that the Vibration setting is set to Disable.

4. Press the square button to save your changes.

How to lower the rumble intensity in Octopath Traveler II on PS5

If you would rather keep the haptic feedback turned on for the PS5 version of Octopath Traveler II but you lower its intensity level, then you need to do the following:

1. First off, you need to head back to the home screen of your console.

If you are playing the RPG currently, then you can go home by pressing and holding the PS button on the DualSense. Alternatively, you can also quick press the PS button and then select the house icon located on the bottom left of the screen.

2. Select the gear icon located on the top right side in the home screen to head into Settings.

3. From the Settings menu, scroll down and then select Accessories.

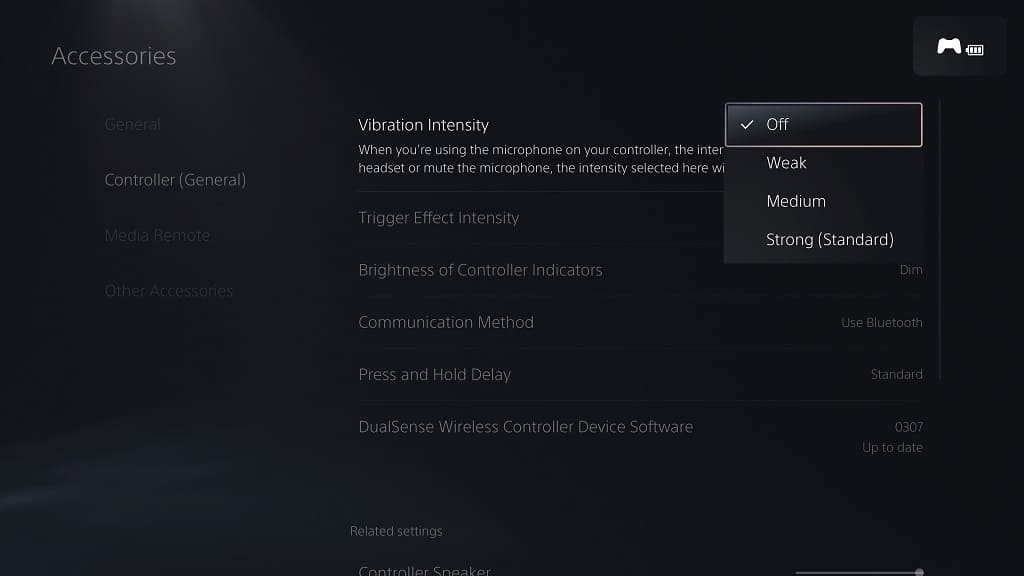
4. Next, you need to select Controller (General) on the left column and then Vibration Intensity on the right side of the same screen.

5. In the pop-up menu, you will be able to change the Vibration Intensity to any of the following:

  • Off
  • Weak
  • Medium
  • Strong (Standard)

By default, this setting is set to Strong (Standard). If you would like the rumble to be weaker in Octopath Traveler II, then you can try changing this to either Weak or Medium instead.

How to fix HDR issues when playing Octopath Traveler II on PS5

When playing Octopath Traveler II on your PlayStation 5 or PlayStation 5 Digital Edition system, you may notice that some scenes may look too dark while appears appear to be too bright. Some of the colors may look washed out as well.

To see how you can fix these HDR issues with this turn-based Japanese role-playing game, you can take a look at this troubleshooting article from Seeking Tech.

1. To begin, you can try adjusting the HDR brightness output on a system level.

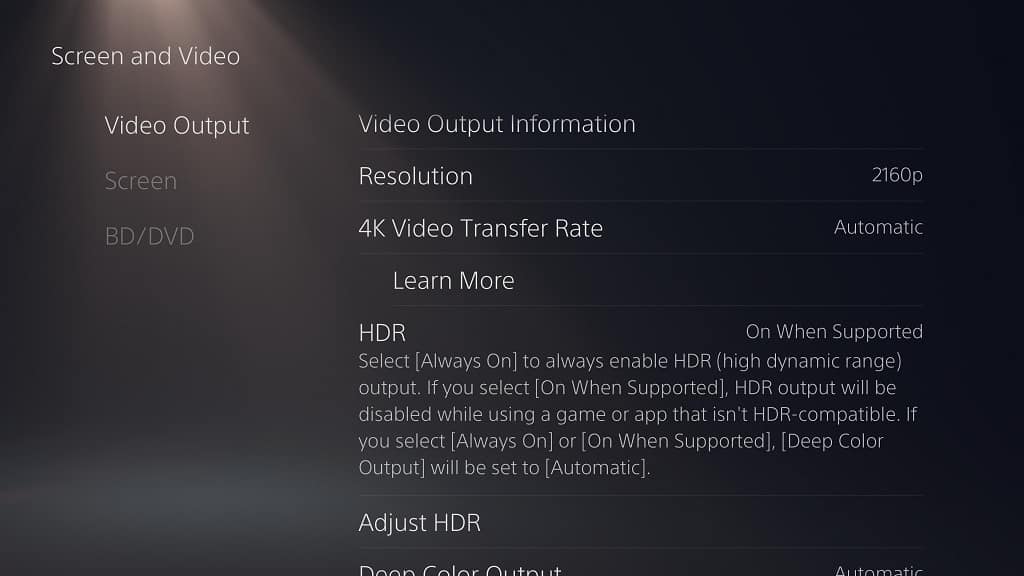
In order to do so, you need to head over to the Settings menu of your PS5 and then select Screen and Video > Video Output. From there, make sure that HDR is set to either Always On or On When Supported.

Next, you need to select Adjust HDR from the same menu. The next several screens will show you how you can calibrate the PS5’s HDR output for your television screen or gaming monitor.

2. You can also try adjusting the gamma setting by using the in-game menu of Octopath Traveler II.

To do so, you first need to head to the Settings menu in the JRPG, which you can do so in the Title Menu.

If you are currently playing the game, then you need to press the triangle button to first open the Main Menu. From there, you need to select Miscellaneous and then Settings.

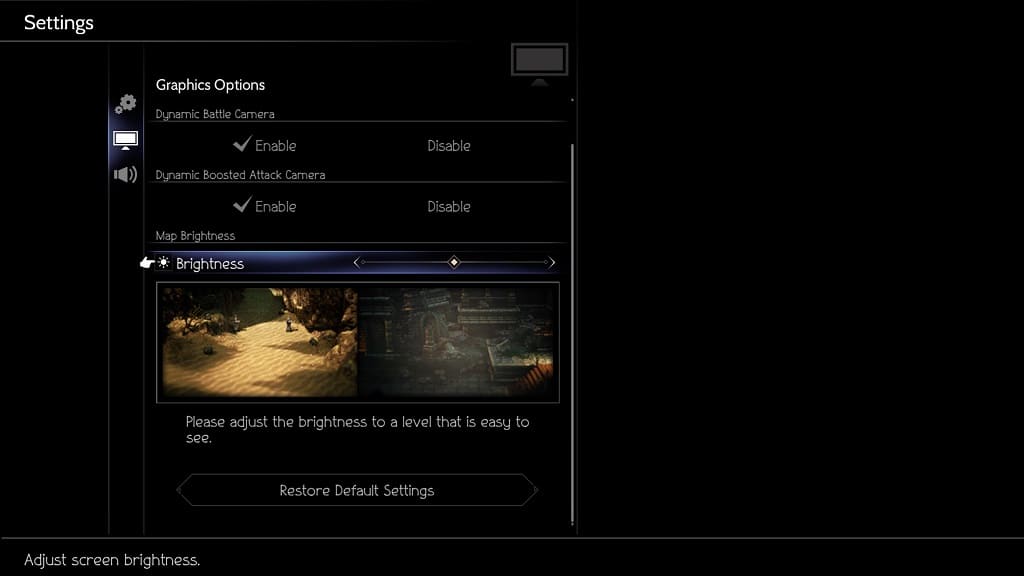
Inside of the Settings menu, select Graphics Options from the left column.

On the right side of the same screen, you should see the Map Brightness setting with the Brightness slider.

To make the graphics darker, you need to move the slider to the left. To make the picture brighter, you need to move the slider to the right. Once you are done making your adjustment, press the square button to save the new gamma setting.

You may need to go back to the Graphics Options occasionally when going from a bright area to a dark area, or vice versa, in Octopath Traveler II.

3. Some televisions and monitors are better at displaying HDR when compared to others. So, if possible, you can try playing the role-playing game on another screen.

4. Alternatively, you can also try turning off HDR on your PS5 to see if you prefer how the game looks in SDR.

You can do so by heading over to the Settings menu of your PS5 and then select Screen and Video > Video Output. From there, you can set the HDR setting to Off.

How to disable narrator in Age of Empires II: Definitive Edition on Xbox Series X and S

When playing Age of Empires II: Definitive Edition on your Xbox Series X or Xbox Series S, you may hear a voice reading the texts that appear on the screen.

If you find that this feature is annoying and would like to disable it, then you can take a look at this guide at Seeking Tech to see how you can properly do so.

1. For the first step, you need to open the game on your console if you haven’t done so already.

2. With the game opened, press the Menu button, which is the button with the three horizontal lines on your Xbox controller.

3. You should now be in the Settings menu. From there, you need to select Options.

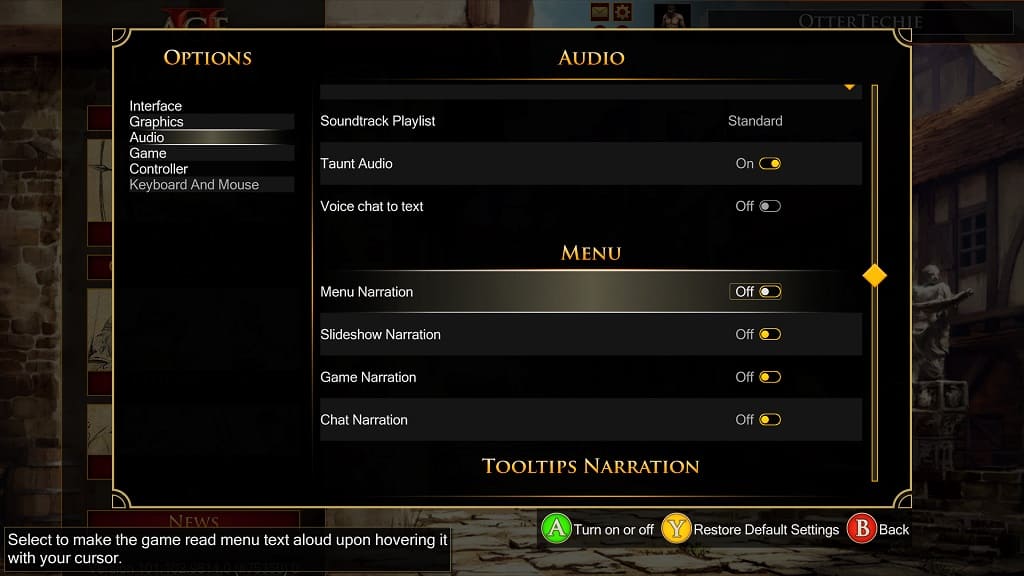
4. From the Options menu, select Audio on the left column.

5. On the right side of the same screen, scroll down to the Menu section.

6. In this section, you will be able to turn off Menu Narration, Slideshow Narration, Game Narration and Chat Narration.

You can find the description for each of these features below:

Menu Narration:

“Select to make the game read menu text aloud upon hovering it with your cursor.”

Slideshow Narration:

“Select to make the game read the slide show text. This is primarily for people who have difficulties with accents. If you have this on, please lower the voice volume so both aren’t speaking at the same time. “

Game Narration:

“Select to make the game read ingame text aloud upon hovering it with your cursor.”

Chat Narration:

“Select to make the game read chat text aloud upon hovering it with your cursor.”

It should be noted that, if you turn off Menu Narration, then it won’t be disabled right away. Instead, it will turn off once the narrator finishes its current line.

7. Once you made the necessary changes, press the B button on your controller several times until you see a message asking if you want to confirm changes that you made while in the Options menu. Select the Yes option to saved your edits.

You should no longer hear the narrator when playing Age of Empires II: Definitive Edition on your Xbox Series X or Xbox Series S.

If you are still hearing a voice when playing the game, then make sure you head back to the Audio menu and make sure that the Menu Narration, Slideshow Narration, Game Narration and/or Chat Narration features have been disabled.

How to tell if a PlayStation VR 2 game supports sitting, standing and room scale play styles

You can use the PlayStation VR 2 sitting down, standing up and moving around freely within a small space. Not all of the games support all three of these positions, however. To see the supported play styles for each individual PSVR2 title, you can take a look at this tutorial from Seeking Tech.

1. To start off, you need to turn on your PlayStation 5 or PlayStation 5 Digital Edition console. You do not need to connect your PlayStation VR 2 headset.

2. Next, sign into a PlayStation Network account and then head to the home screen menu.

3. In the home screen menu, select the blue shopping bag icon in order to open the PlayStation Store.

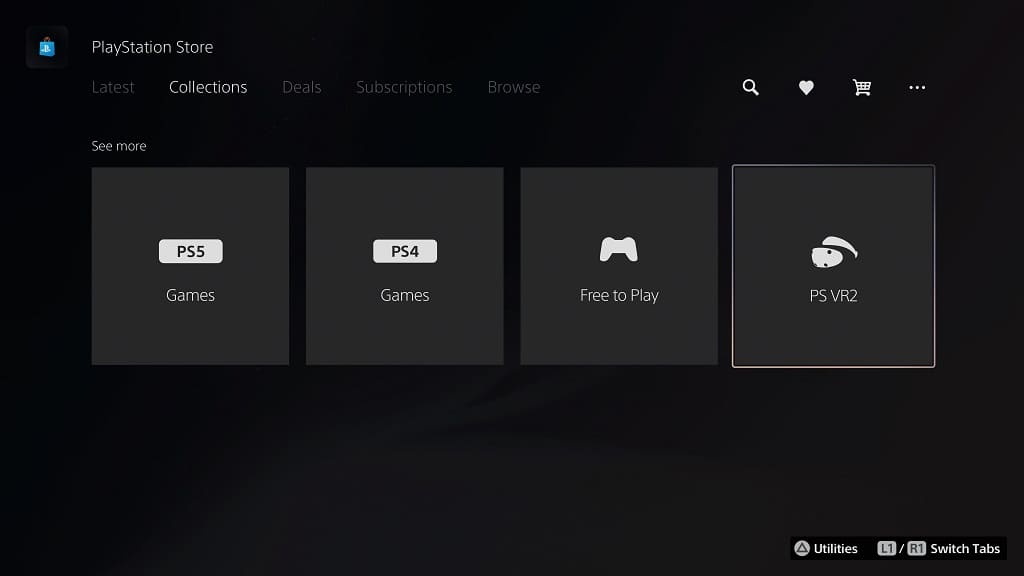
4. Once you opened the PlayStation Store, make sure that you are in the Latest, Collections or Deals tab. You can change tabs by using the L1 and R1 buttons.

5. Once you get to the Latest, Collections or Deals tab, scroll down and then select PSVR 2 from the See More section.

6. In the PlayStation VR 2 menu, you should see a list of games. Here, you need to select a game that you are interested in checking out.

To see how you can sort the listing from the PlayStation VR 2 menu, you can check out this previous tutorial.

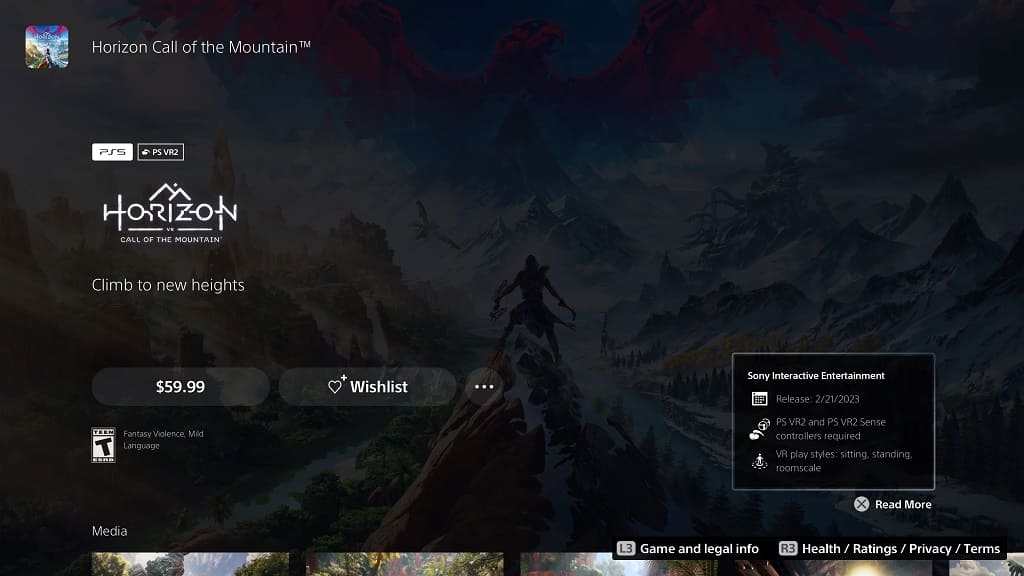
7. On the product page for the PSVR 2 game, you need to head over to the Compatibility Notices menu, which you can do by either selecting the box located on the right side at the top of the screen or the middle box from the Game and Legal Info section located at the bottom.

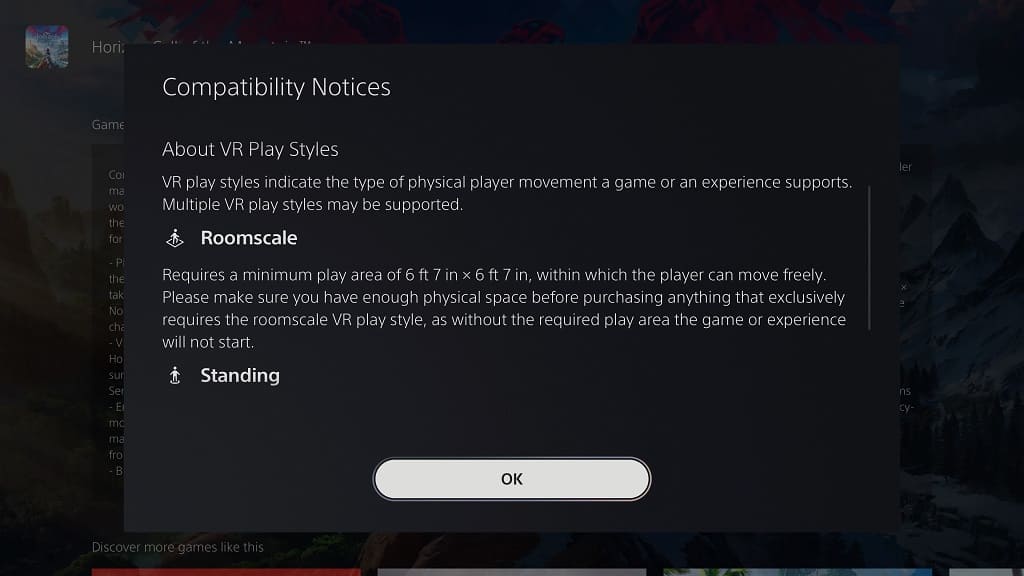
8. In the Compatibility Notices menu for the game, you will find a list of supported features. At the bottom of this screen, you should see a section about VR Play Styles, which refers to the positions you can take when playing this particular title.

The Roomscale VR Play Style will let you move around the room. Sony recommends that you have a minimum play area of 6 ft 7 in × 6 ft 7 in (or 2 m × 2 m).

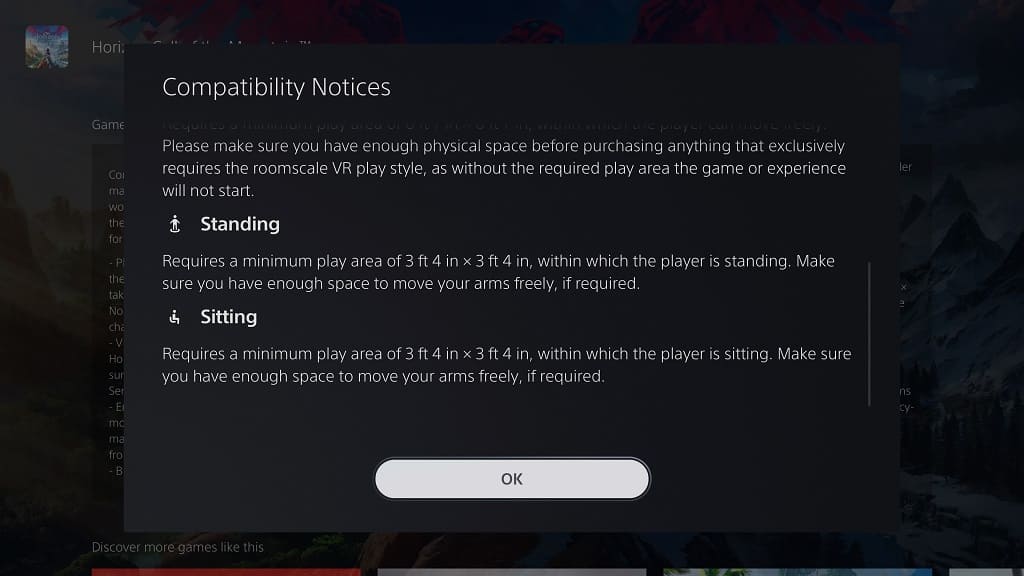
With the Sitting VR Play Style, you can play this game while sitting down. Even with no movement, Sony suggest that you leave a minimum play area of 3 ft 4 in × 3 ft 4 in (or 1 m x 1 m) so that you can move your arms around without hitting anything.

For the Standing VR Play Style, you can play the game while standing up. For this position, Sony also recommends that you leave a play area of at least 3 ft 4 in × 3 ft 4 in (or 1 m x 1 m).

Some games may work better in one position when compared to others; therefore, you should play around with the different play styles to see which one is best suited for your virtual reality experience.

How to make Theathrhythm Final Bar Line easier

If you are having a hard time playing Theathrhythm Final Bar Line on your Nintendo Switch Lite, Nintendo Switch, PlayStation 4, PlayStation 4 Pro, PlayStation 5 or PlayStation 5 Digital Edition system, then you can take a look at this guide from Seeking Tech to see how you can make this music rhythm game easier.

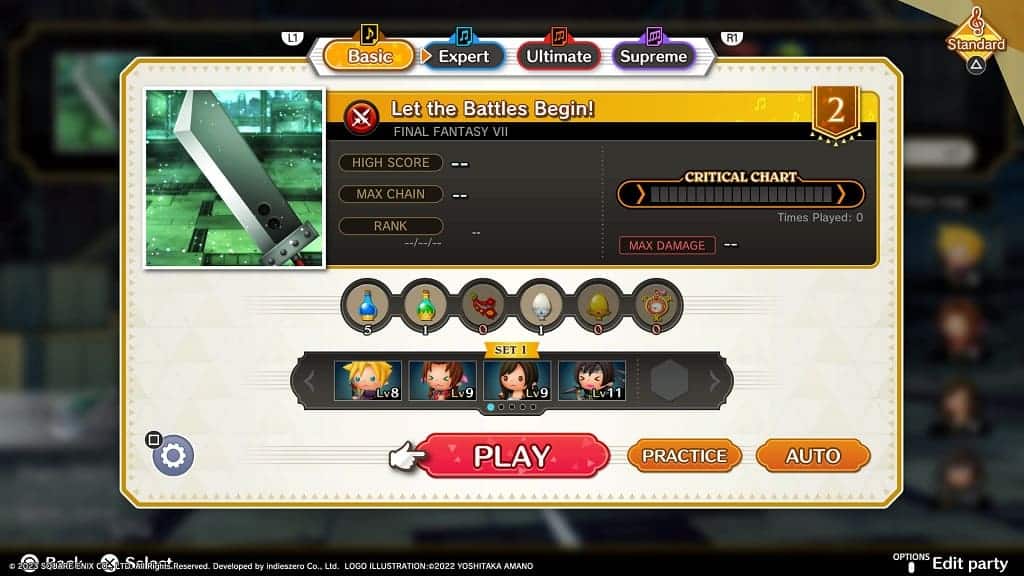
1. To start off, you need to head over to the stage that you are having issue with. You need to go to the menu where it shows the big red Play icon.

2. From there, you should be able to see the difficulty mode locate at the top. You can use the L and R button on the Nintendo Switch or the L1 and RB buttons on PlayStation to switch between the following:

  • “Basic” is the easiest difficulty setting and should be the default option.
  • If you want a slightly harder challenge, then you can select “Expert.”
  • For those seeking an even tougher experience, then you should change the difficulty to “Ultimate.”
  • The “Supreme” difficulty is the hardest mode in the game.

3. In addition to changing the difficulty mode, there are also a few settings that you can customize in order to make Theathrhythm Final Bar Line easier by taking the following steps:

  • In the same screen with the Play icon, press the Square or Y button to open the Settings menu. Alternatively, you can select the gear icon from the Main Menu of the game.
  • After getting to the Settings menu, you need to select MS Settings.
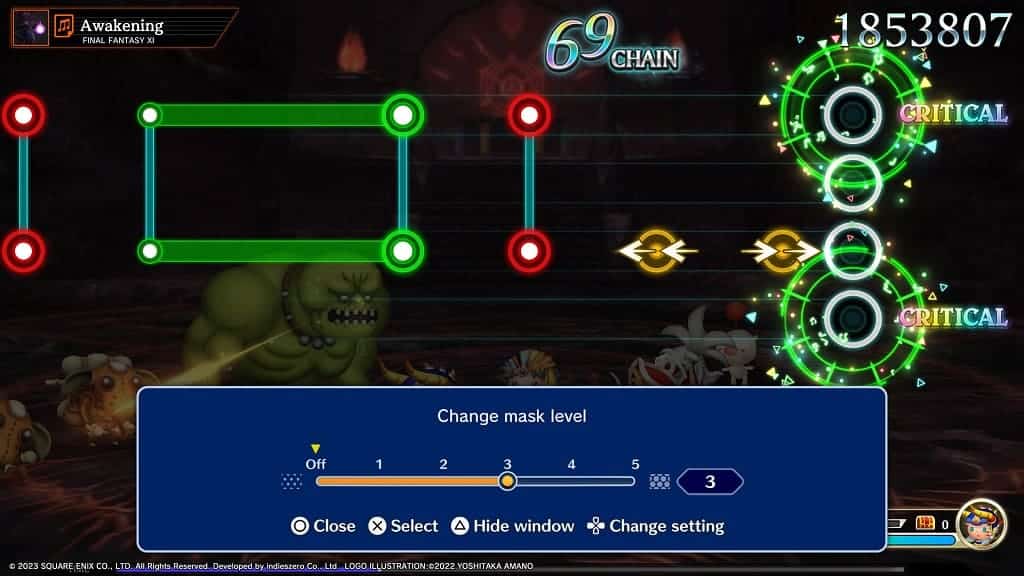
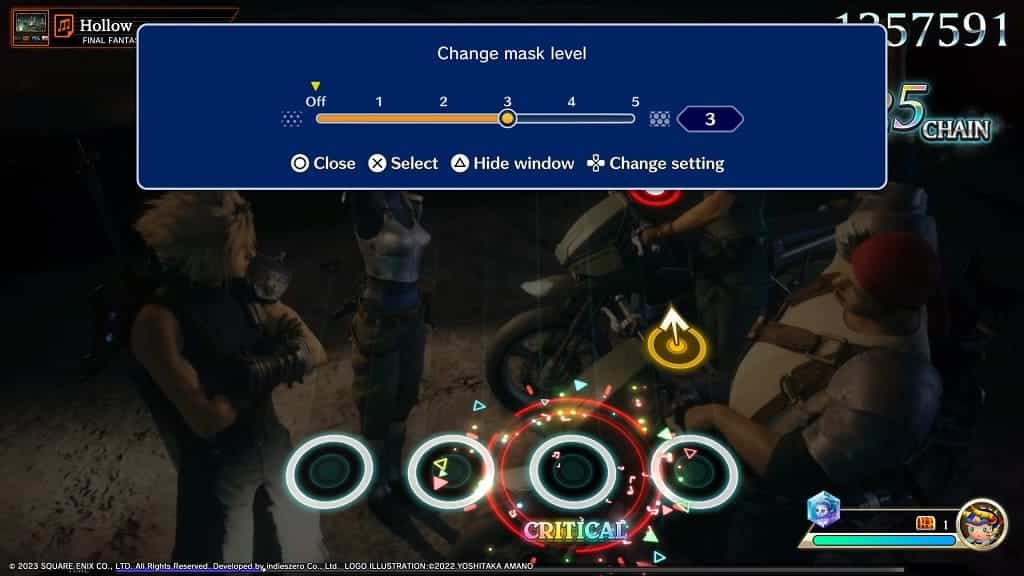
  • From the Settings > MS Settings menu, we recommend that selecting the Background Mask Level settings for Battle/Field and Cinematic. With these, you can darken the background so that they will be less distracting to you when you are trying to time your button presses with the notes that appear on the screen.

  • In the same Settings > MS Settings menu, you may also want to consider turning off Special Damage, Ability Animation, Ability Special Effect, Camera Movement and/or Critical Hit Display as these may distract you from hitting the notes at the right time.
  • Furthermore, you can also use the BGM Timing slider to adjust the input latency if you think that you are consistently hitting the notes too early or too late.
  • With the Settings > MS Settings menu, you will also be able to adjust the Trigger Speed, Music Volume, Trigger Sound Effects, Music Stage Sound Effects, Lane Cover, Moogle Voice Volume, Timing Display, Battle Trigger Sound Effect, Field Trigger Sound Effect, Cinematic Trigger Sound Effect and Trigger Colors. We suggest playing around with all of these settings to see which of these makes the game easier for you.