How to turn off Ghostwire Tokyo film grain, chromatic aberration and motion blur

With the new Tokyo Spider’s Thread update to go along with the Xbox Series X and Xbox Series S release of Ghostwire Tokyo, many players are now jumping into the unique first-person action-adventure game.

When you are playing this game, you may not like the look of the film grain, chromatic aberration and/or motion blur effects have on the in-game graphics.

To see how you can disable these features, you can take a look at tutorial from Seeking Tech.

1. For the first step, make sure you launch Ghostwire Tokyo on your PC, PS5, Series X or Series S system if you haven’t done so already.

2. From the main menu, you need to select Options.

If you are currently playing the game, then you can also head into settings from the pause menu. To pause the game, press the Options button on the DualSense or the Menu button on the Xbox Series Controller.

3. Inside the Options menu, you need to use the L1 and R1 buttons on the DualSense or LB and RB buttons on the Xbox Series Controller to change tabs until you get to Graphics.

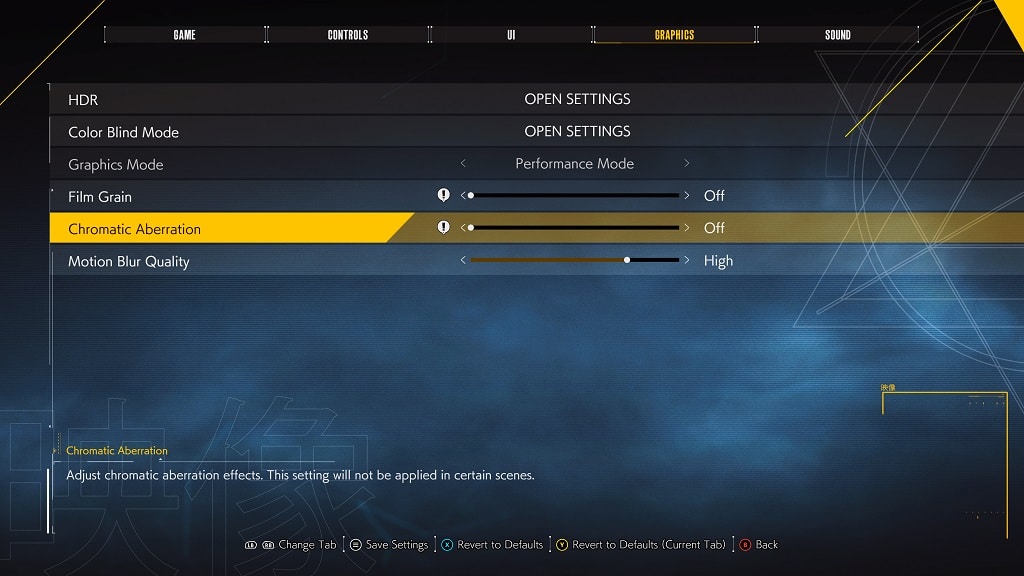
4. From the Graphics tab, move the cursor down to Film Grain, which should have the following description:

  • “Adjust film grain effects. This setting will not be applied in certain scenes.”

By default, this visual feature is set to On. You can use the directional pad or left analog stick to set it to Off.
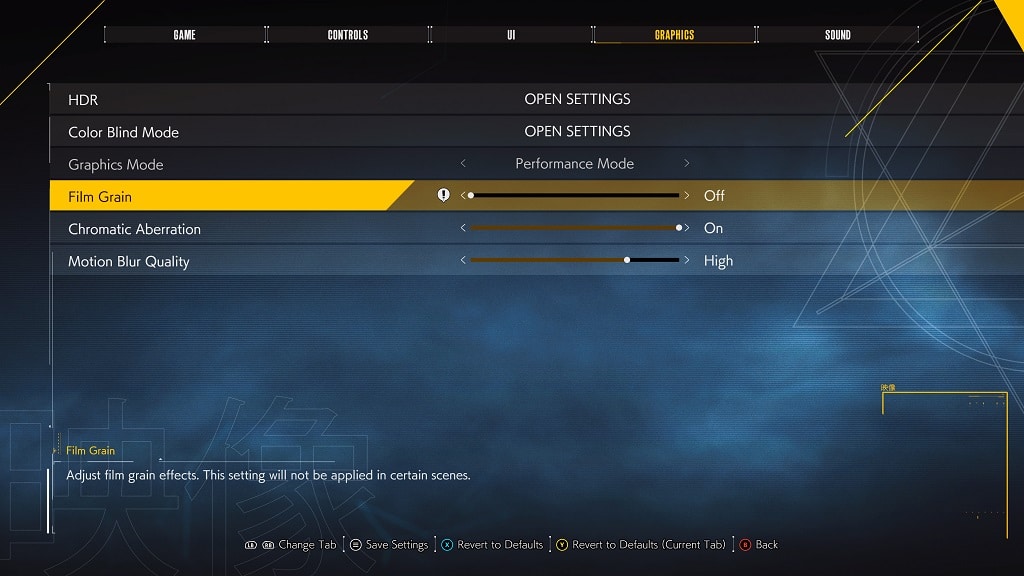
5. In the same tab, you can then move the cursor down to Chromatic Aberration, which contains the following description:

  • “Adjust chromatic aberration effects. This setting will not be applied in certain scenes.”

Once again, you can use the D-pad or left analog stick to change this setting from “On” to “Off.”
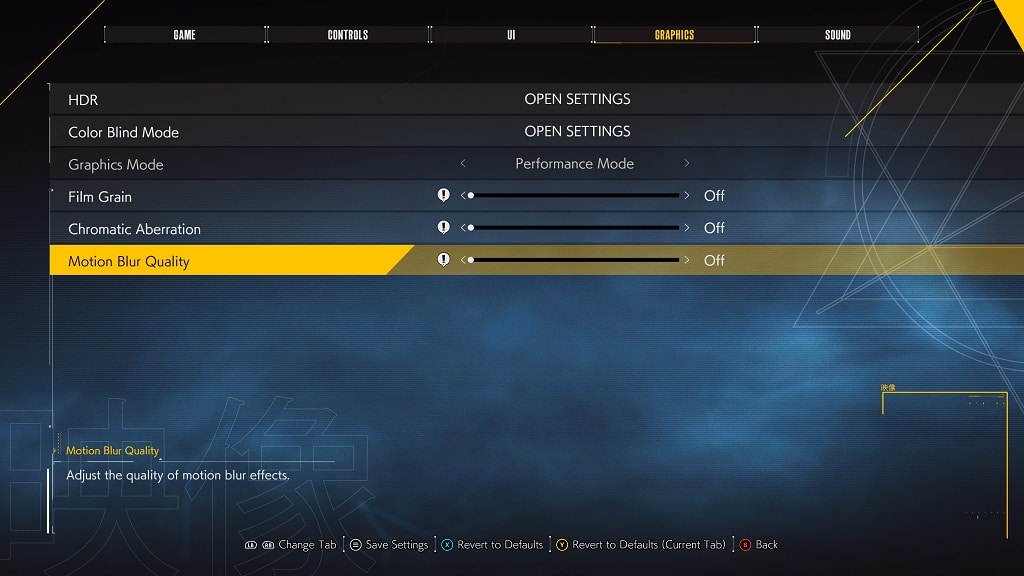
6. Last but not least, you should also find Motion Blur Quality in the Graphics tab with the following description:

  • “Adjust the quality of motion blur effects.”

By default, this setting is set to High. You can also use the directional pad or left analog stick to change it to Off, Low, Medium or Cinematic.
7. Once you are done disabling the film grain, chromatic aberration and/or motion blur effects, you need to press the circle or B button to back out of the Options menu.

8. You should then see a Warning screen asking if you want to save your changes. Here, you need to select Yes to apply the edits you made from the Options menu.

How to play Atomic Heart at 120 fps on PS5, Xbox Series X and S

Thanks to the new patch, you are now able to play Atomic Heart at up to 120 frames per second on the PlayStation 5, Xbox Series X and Xbox Series S consoles. To find out how you can do so, you can follow this guide at Seeking Tech.

Requirements

The 120 Hz mode was added through a recent patch for Atomic Heart. So, if you haven’t done so already, you should make sure you have the latest version of the game downloaded and installed on your console. Otherwise, you won’t be able to unlock this graphics mode.

You should also make sure that your television set supports 120 Hz as it is required if you want to play this and other supported games at 120 frames per second.

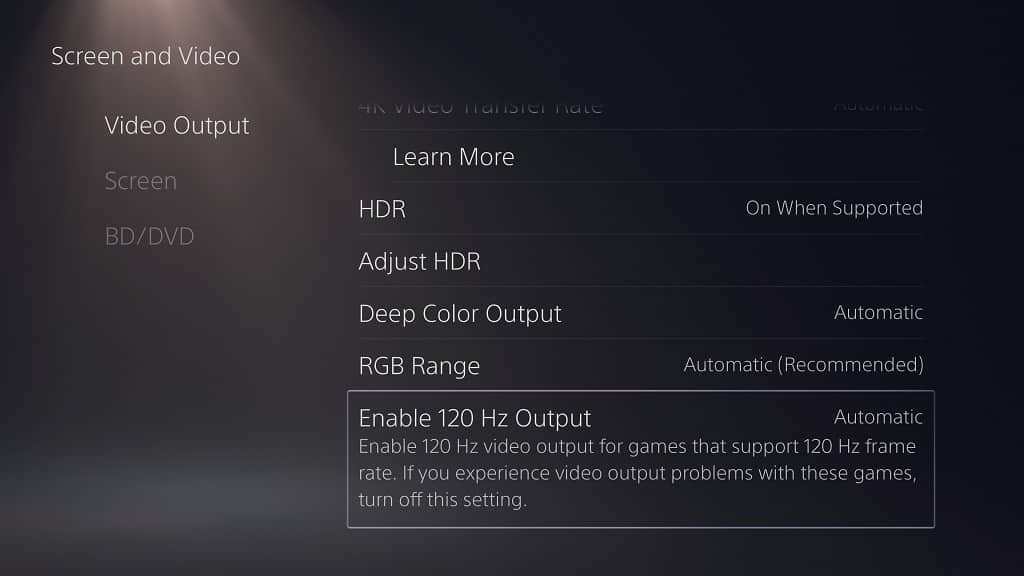
On the PlayStation 5 and PlayStation 5 Digital Edition, you also need to go to Settings > Screen and Video > Video Output > 120 Hz Output and then select Automatic. Afterwards, go to Settings > Screen and Video > Video Output > VRR and then select Automatic.

If you are playing on Xbox Series X or Xbox Series S, you should head over to Settings > General > TV & display options > Video modes and then make sure that the “Allow variable refresh rate” box is checked.

By enabling VRR, you should not notice any frame rate drops when playing this game at 120 Hz.

How to enable 120 Hz mode in Atomic Heart

Once you have met the aforementioned requirements, you can then enable the 120 Hz mode in Atomic Heart by taking the following steps:

1. Open the game if you haven’t done so already.

2. Inside of the first-person shooting title, head over to the Options menu from either the main menu or pause menu.

You can access the pause menu by pressing the Options button on the DualSense or Menu button on the Xbox controller.

3. From the Options menu, press the R1 button on PlayStation or RB button on Xbox to switch from the Audio tab to the Gameplay tab.

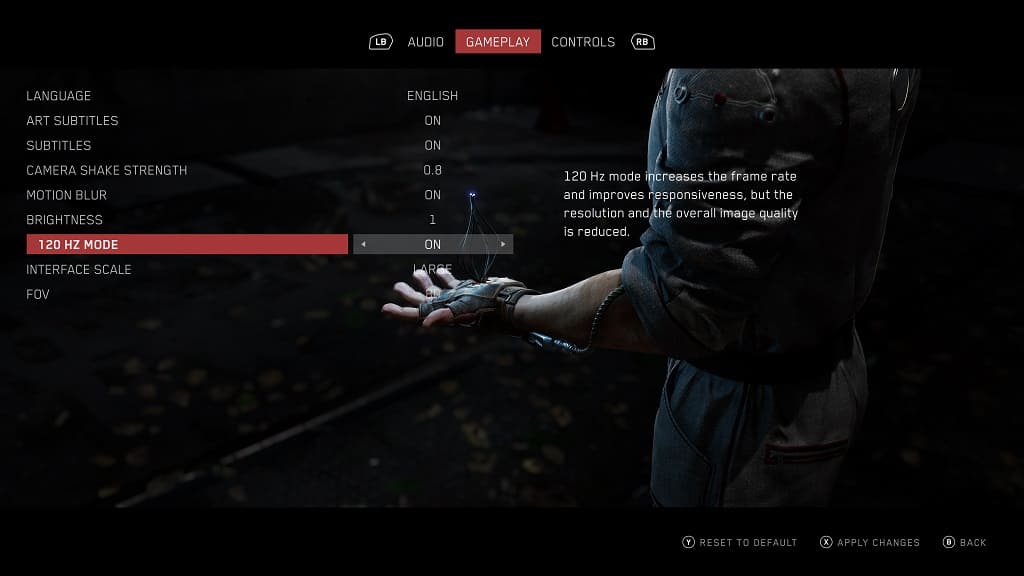
4. Once you get to the Gameplay tab, move the cursor down to the 120 Hz Mode, which should have the following description:

  • “120 Hz mode increases the frame rate and improves the responsiveness, but the resolution and overall image quality is reduced.”

5. Use the directional pad or left analog stick to set 120 Hz Mode from Off to On.

6. Press the square button on the PS5 controller or the X button on the Xbox controller to apply the change.

7. Load back into your save in Atomic Heart and you should now be able to play the game at up to 120 fps.

How to change subtitle and HUD size in Atomic Heart

A recent patch update for Atomic Heart has enabled the ability to change the subtitle and heads-up display sizes. To find out how you can properly use this new setting, you can take a look at this tutorial from Seeking Tech.

1. For the first step, make sure you have the latest patch update installed for Atomic Heart on your PC, PlayStation 4, PlayStation 4 Pro, PlayStation 5, Xbox One, Xbox One S, Xbox One X, Xbox Series S or Xbox Series X.

Depending on the platform, the ability to change the text size has been added in either the 1.4.0.0 or 1.5.0.0 patch.

You can find the full patch notes from the development team at Mundfish with this official Focus forum post.

To update the game on the PS5, go to your console’s home screen and then move the cursor to Atomic Heart. Next, press the Options button on your DualSense and then select the Check for Update option that appears in the pop-up menu.

For the Xbox Series S or Xbox Series X, you also need to move the cursor over to the game’s icon in the home screen. Afterwards, press the Menu button and then select Manage Game and Add-ons. Finally, select Updates in the Manage – Atomic Heart menu.

2. Once you are sure that you have the latest patch downloaded, open the game and then head over to the Options menu. You can do so from either the main menu or pause screen.

3. Inside of Options, you need to switch over to the Gameplay tab, which can be done by pressing the L1 and R1 buttons if you are playing with a DualShock 4 or DualSense controller.

If you are using an Xbox One or Xbox Series gamepad, then you need to press LB or RB to switch tabs instead.

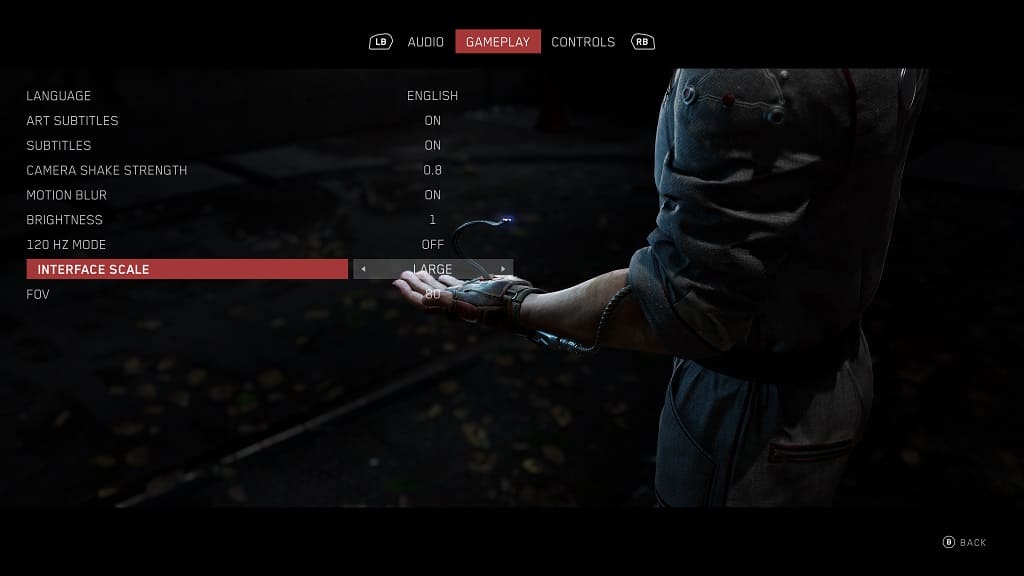
4. Once you get to the Gameplay tab, move the cursor down to Interface Scale.

By default, this setting is set to Small.

5. You can either use the directional pad or the left analog stick, if you are using a controller, to change Interface Scale from Small to Medium or Large.

When you are changing the subtitle and HUD size, you should see the changes apply in real time from the Gameplay tab of the Options menu.

6. Once you are done changing the Interface Scale setting, you need to back out of the Options menu and then load back into your game.

Hopefully, the change will make the text much easier to read while you are playing Atomic Heart.

How to turn off injuries in MLB The Show 23

By default, baseball players will get injured in MLB The Show 23 just like they do in real life. If you want to turn off injuries in this videogame, then you can check out this tutorial at Seeking Tech to see how you can properly do so.

1. To start off, you need to navigate over towards the Settings menu. You can find it on the upper right corner of the main menu.

You can also go to Settings from the pause menu. To open the pause menu, you need to press the Options button in the middle of a baseball game if you are playing on PS4 or PS5. On the Xbox One, Xbox Series S and Xbox Series X, you need to press the Menu button. On the Nintendo Switch, you should be pressing the + button.

2. From the Settings menu, you need to select Gameplay.

3. Inside the Gameplay menu, make sure you are in the General tab.

You are able to change to different tabs by pressing the L1 and R1 buttons on PlayStation, LB and RB buttons on Xbox or L and R buttons on Switch.

4. In the General tab, you need to change tabs until you arrive at the Rules section.

You need to press the L2 and R2 buttons to change sections on PlayStation 4 and PlayStation 5. For the Xbox consoles, you need to use the Lt and RT buttons. If you are playing on the Switch, then you need to press the ZL and ZR buttons.

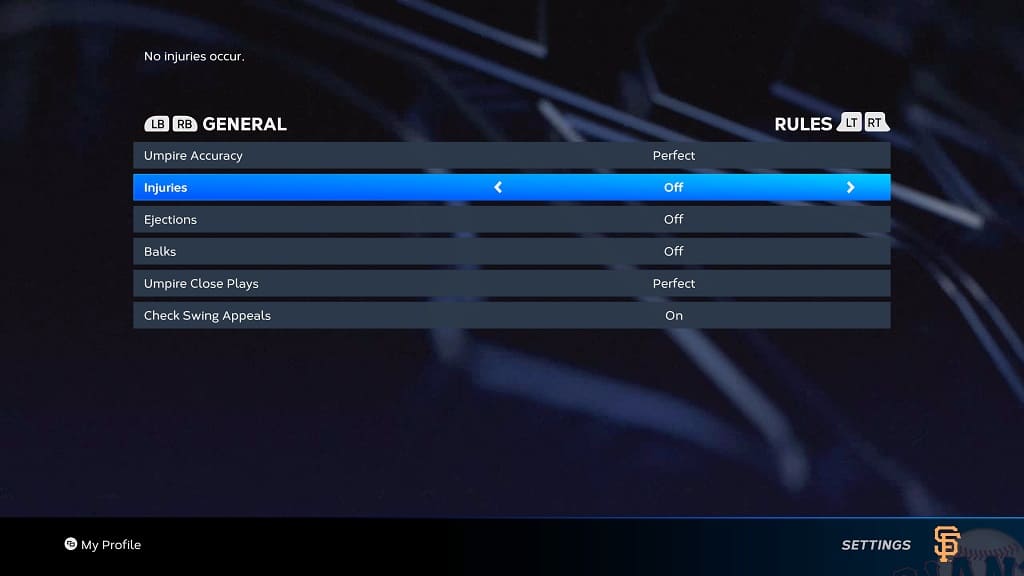
5. From the Rules section in the General tab of the Settings menu, move the cursor to Injuries.

6. You should see the following options:

  • On: “Players are susceptible to injury. NOTE: This setting is automatically turned OFF in Online Play, if CPU Roster control is On, or if Hitting or Pitching Difficulty is set to BEGINNER.”
  • Manual: “Injuries can be applied withing the Injured List screen. NOTE: This setting is automatically turned OFF in Online Play, if CPU Roster control is On, or if Hitting or Pitching Difficulty is set to BEGINNER.”
  • Off: “No injuries occur.”

7. You need to use the directional pad or left analog stick to change the Injuries setting to Off.

8. Afterwards, you need to exit out of the settings menu. During this process, you should see a Notice saying that some of the settings have been modified. Here, you need to select Apply Changes to confirm that you want to disable injuries in MLB The Show 23.

How to dive and jump in MLB The Show 23

When playing defense in MLB The Show 23, you can dive and jump if a ball gets within your vicinity. If you can’t seem to extend your reach to catch the baseball, then you can take a look at this guide from Seeking Tech to see how you can properly do so.

By default, the dive and jump actions are set to the two right shoulder buttons on the controller.

Therefore, you need to press R1 or R2 to extend your reach if you are playing the game on PlayStation 4, PlayStation 4 Pro or PlayStation 5.

For the Xbox One, Xbox One S, Xbox One X, Xbox Series S or Xbox Series X, you need to press the RB or RT buttons.

On the Nintendo Switch, you should be pressing the R or ZR buttons.

By pressing either of the two right shoulder buttons, the controlling baseball player will either dive or jump. The action is determined by the AI of the selected player.

If you want to separate the dive and jump actions into different buttons, then you need to do the following:

1. To begin, open the Settings menu, which can be done from either the main menu or from the pause screen.

2. Next, you need to select Gameplay from the Settings menu.

3. In the Gameplay section, use the L1 and R1 buttons on PlayStation, LB and RB buttons on Xbox or L and R buttons on Switch to change tabs until you get to the Control tab.

4. From the Control tab, use L2 and R2 buttons on PlayStation, LT and RT buttons on Xbox or ZL and ZR buttons on Switch to switch over to the Defense section.

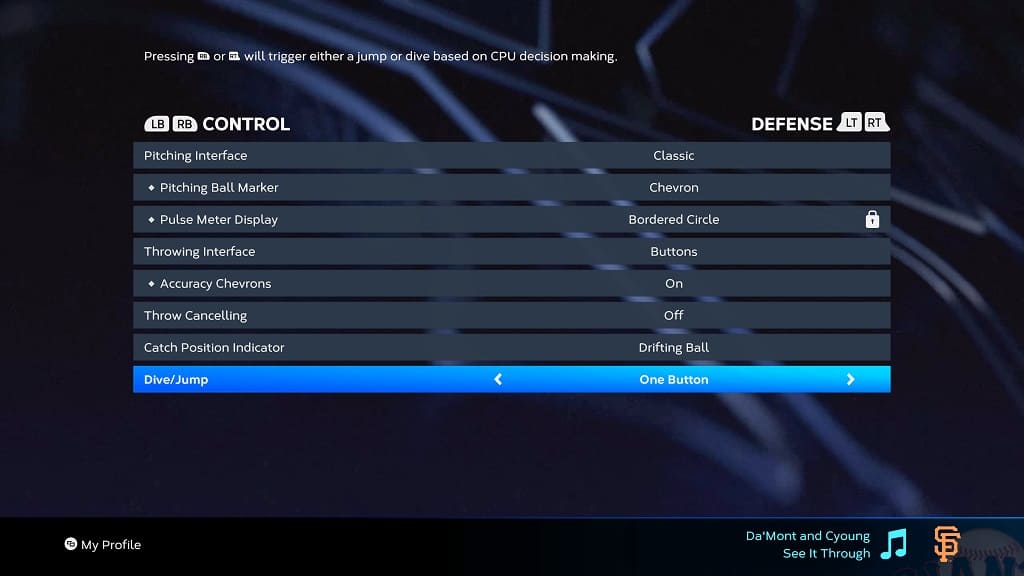
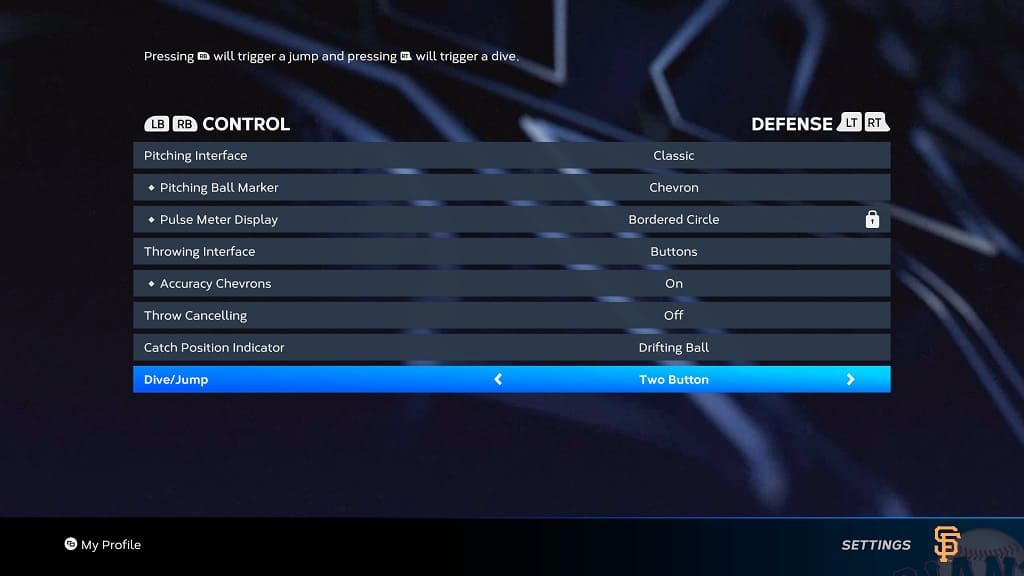
5. In the Defense section, you should find the Dive/Jump setting, which is set to “One Button” by default.

6. Move the cursor down to the Dive/Jump setting and then use the directional pad or left analog stick to change it from “One Button” to “Two Button.”

7. Once you are done, keep backing out of the Settings menu until you see a notice saying the following:

  • “The settings configurations have been modified.”

Here, you need to select Apply Changes to save the two-button setting when it comes to diving and jumping.

To jump with the two-button setting, you now need to press R1 on PlayStation, RB on Xbox or R on Switch.

To dive with the new two-button setting, you need to press R2 on PlayStation, RT on Xbox or ZR on Switch.

How to edit the MLB The Show 23 soundtrack

When using the menus of MLB The Show 23, you will hear randomly selected songs being played in the background. By using the Jukebox feature, you are able to add or subtract songs from this playlist. You can also directly play back any songs from the soundtrack.

To find out how you can do these actions in the baseball game, you can follow the steps laid out in this article from Seeking Tech.

1. For the first step, you need to head over to main menu of MLB The Show 23. The Jukebox menu can’t be accessed from the pause screen if you are in the middle of playing a baseball game.

2. From the home screen, you need to select the gear icon in order to open the Settings menu.

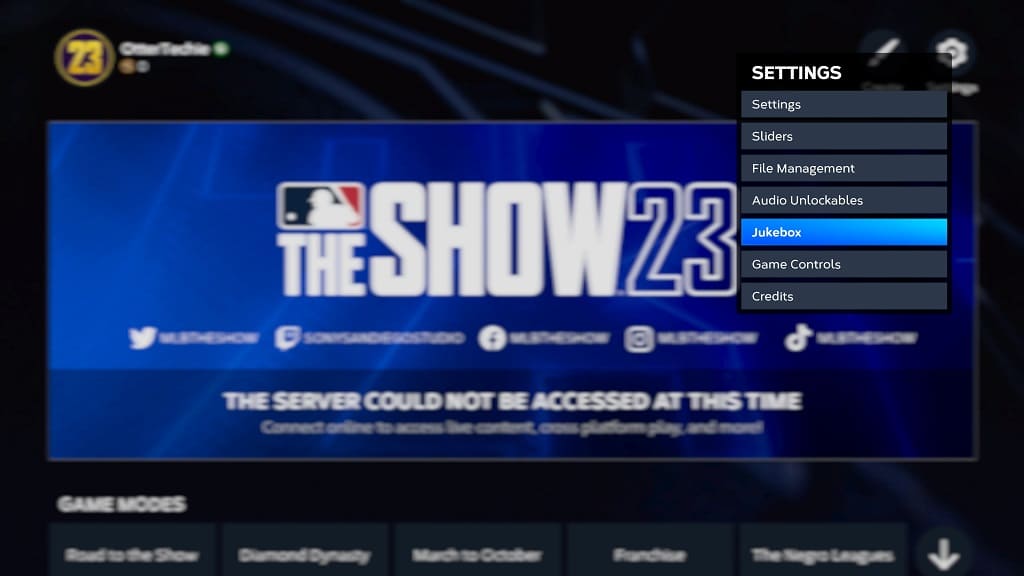
3. In the small Settings menu that appears on the top right side of the screen, you should then be able to select Jukebox.

4. Inside of the Jukebox menu, you will find the full lists of songs in 2023 version of MLB The Show.

5. In order to play any song from this list, move the cursor to the desired track and then press the square button on PlayStation, X button on Xbox or Y button on the Nintendo Switch controller.

6. To add or remove any songs from the playlist, you need to move the cursor to the desired track. Afterwards, press the X button on PlayStation, A button on Xbox and B button on Switch to add or remove.

If a song gets removed, then it will be greyed out with a red cross symbol. As a result, it won’t be played when you are using the menus.

You can find the full soundtrack listing for MLB The Show 23 below:

  • 6am by Channel Tres
  • Bad Boy by Oxlade feat. Mayonkun
  • Birds of a Feather by Phish
  • Blue World by Mac Miller
  • Champions by NLE Choppa
  • Don’t Miss by The Blue Stones
  • Fly The Coop by Big K.R.I.T and Girl Talk
  • Forever Ting by Tasha the Amazon
  • Get Inspired by Genesis Owusu
  • Glowed Up by KAYTRANADA feat. Anderson Paak
  • GOAT by Ari Lennox
  • Hollandaise by Ab-Soul
  • Human Condition by Pretty Sick
  • I Ain’t No Joke by Eric B. & Rakim
  • Jungle by Abhi The Nomad
  • Kimbo Slice by Rexx Life Raj
  • Lux Aeterna by Metallica
  • Narco by Blasterjaxx and Timmy Trumpet
  • NERD by Omni !
  • Night Drive by Ari Lennox
  • No Singles by Wiz Khalifa, Big K.R.I.T. and Girl Talk
  • Pause Play by Preme
  • Persuasive by Doechii feat. SZA
  • Phante by Sweet You
  • Pink Slip by White Reaper
  • Raindrops by GoldLink feat. Flo Milli
  • Scenario by A Tribe Called Quest
  • Section by The Roots
  • See It Through by Da’Mont and Cyoung
  • Shapes by Poppy
  • Smino by 90 Proof with J. Cole
  • So Cool by Big K.R.I.T
  • Sticky by Ravyn Lenae
  • Stop That by Saba
  • Take Losses by Meekz
  • The Boys Are Back in Town by Thin Lizzy
  • The Fire by The Roots feat. John Legend
  • The Light by Juice WRLD
  • Tonight by Phoenix feat. Ezra Koenig
  • Try Again by Oddisee
  • Wasteland by TALK
  • Watch Me Now by The Crystal Method feat. Koda and VAAAL
  • Weight by Redveil

How to fix ‘server could not be accessed at this time’ error for MLB The Show 23

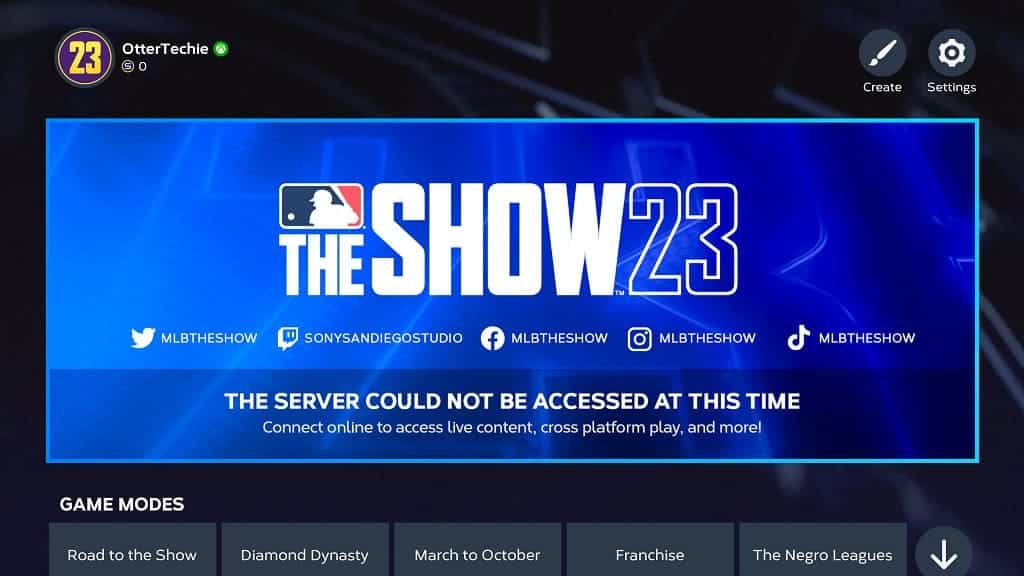
When playing MLB The Show 23 on your PS4, PS5, Xbox One, Xbox Series X/S or Nintendo Switch console, you may encounter the following error message:

  • “The server could not be accessed at this time. Connect online to access live content, cross platform play, and more!”

To see how you can fix the connection issues with this baseball game, you can take a look at this troubleshooting article from Seeking Tech.

1. For the first step, we recommend taking a look at the social media channels for the game, including the official Twitter account. There is a possibility that the game may be currently suffering from some downtime.

If part, or all, of the servers aren’t working normally, then you need to wait until the issues get fixed on the other end before trying to play MLB The Show 23 again.

2. If the servers appear to be fine, then there could be something wrong with your internet connection. If you think this is the case, then you can try using other devices online to see if these are experiencing issues as well.

If your internet appears to be down, then you can try power cycling your modem and routers by turning them off, waiting for a few minutes and then turning them back on again. If this procedure does not work, then we recommend contacting your internet service provider for additional help.

3. If both the MLB The Show 23 and your home network appear to be fine, then you can try checking the internet connection on your game console.

If possible, we suggest playing this baseball game online using a wired connection as it should be faster and more stable when compared to Wi-Fi.

Furthermore, you should also avoid downloading and streaming at the same time when you are playing online. By doing so, you should free up extra bandwidth that should help prevent disconnections.

4. If you haven’t done so already, you should make sure that you have the latest patch downloaded and installed for MLB The Show 23.

5. You should also make sure that you have the latest system software update installed for your PS4, PS5, Xbox One, Xbox Series X/S or Nintendo Switch.

These updates may help when it comes to fixing the “server could not be accessed at this time.”

How to fix MLB The Show 23 network error issues

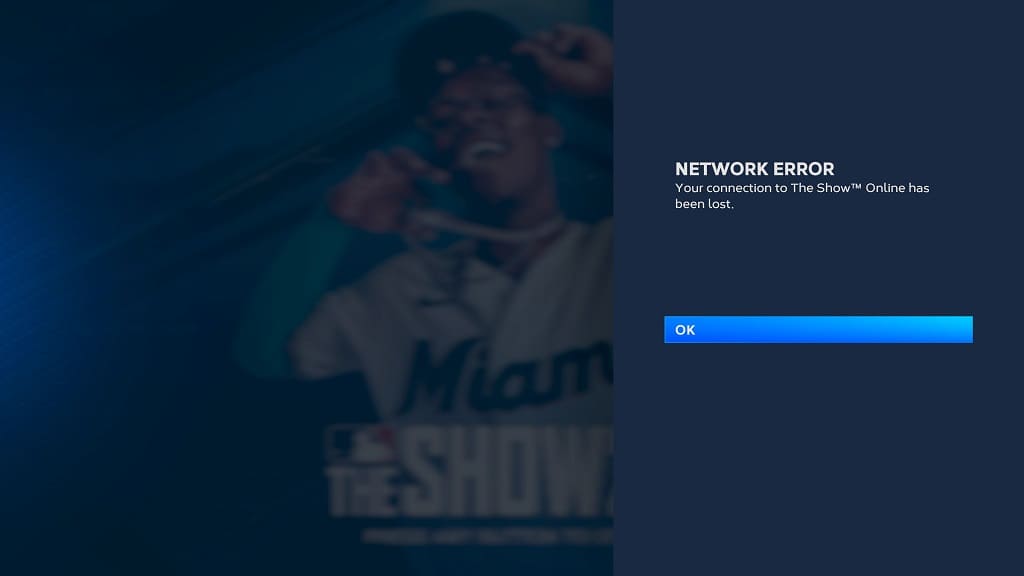
When playing MLB The Show 23, you may end up getting the following error message:

  • “NETWORK ERROR. Your connection to The Show Online has been lost.”

To see how you can prevent these disconnection issues, you can take a look at this troubleshooting article from Seeking Tech.

1. For the first step, we recommend checking to see if the MLB The Show 23 servers are working normally. If there is an issue, then it should usually be communicated through the official MLB The Show 23 Twitter account.

In these cases, you simply have to wait until the servers are functioning properly again if you want to prevent these network errors.

2. If the servers are working just fine but you are still getting disconnected, then you can try looking at how the internet is set up on your console.

If possible, we recommend using a wired internet connection for MLB The Show 23 as it is faster and more stable when compared to Wi-Fi, especially on the PlayStation 4, PlayStation 4 Pro, PlayStation 5, PlayStation 5 Digital Edition, Xbox One, Xbox One S, Xbox One X, Xbox Series S and Xbox Series X consoles.

If you are limited only to Wi-Fi, then you can try moving your gaming system closer to the Wi-Fi access point. You should also make sure that there aren’t any physical objects and/or other wireless devices that may be weakening the signal.

3. If you are downloading or streaming at the same time you are playing the 2023 version of MLB The Show, then these actions may be causing the disconnections.

Therefore, you can try pausing or stopping the downloads/streams in order to free up more bandwidth.

4. You can also try power cycling your internet connection by doing the following:

  • Start by turning off your game console.
  • Next, you need to turn off and/or unplug the modem and routers on your home network.
  • Wait for several minutes.
  • Once you waited long enough, you need to turn on the modem and routers on your network again.
  • Once your home network has gone back online, turn on your console and then open MLB The Show 23 to see if you are able to play the game without any internet connection problems.

5. Suspending the game to go back to the home screen may also cause network errors as well. Therefore, we recommend that you simply pause the game if you need to step away.

If you are playing the baseball game on the Series S or Series X, then we suggest that you avoid using Quick Resume. Instead, you should quit the game from the Xbox guide menu every time before you turn off the console.

6. Of course, the development team at Sony San Diego Studio may eventually release a patch that fixes the network errors. Thus, you should make sure that you have the latest version of this baseball game downloaded on your PlayStation, Xbox or Switch system.

How to change camera angles in MLB The Show 23

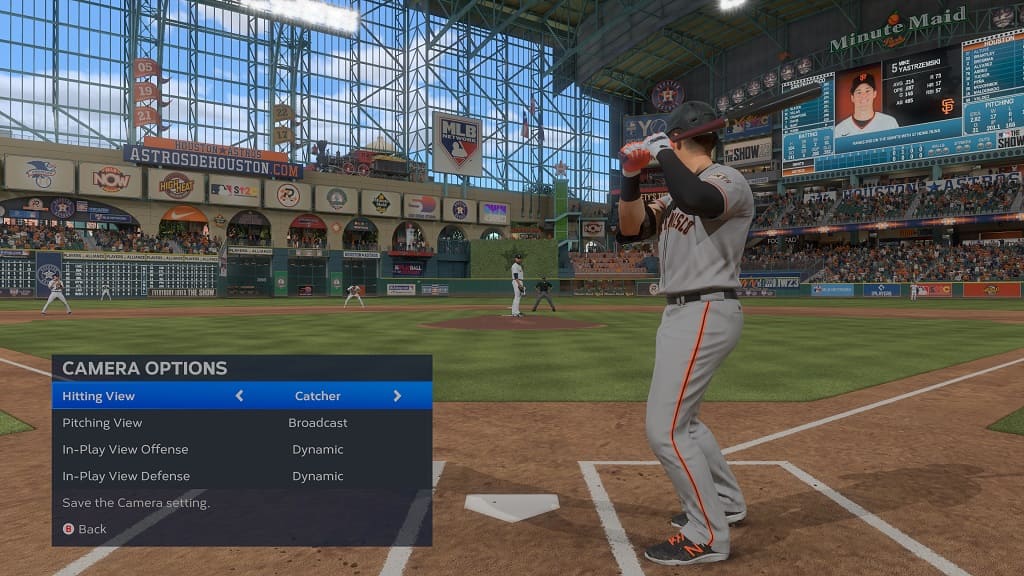
By default, MLB The Show 23 features the catcher’s perspective when you are hitting. While pitching, the game uses the broadcast’s perspective. When it comes to balls put in play, it uses dynamic camera angles.

If you don’t like how the camera angles are set up, then you can take a look at this tutorial from Seeking Tech to see how you can customize them.

1. For the first step, you need to open the Settings menu, which can be done from either the main menu or during the middle of the game by opening the pause menu.

With that said, changing the camera angles can only be done from the pause menu.

To open the pause menu, you need to press the Options button on the DualShock 4 or DualSense during gameplay. On the Xbox, you should press the Menu button. For the Nintendo Switch version, you need to press the + button.

2. From the small Settings menu, you then need to select Cameras.

3. In the Cameras menu, you should see where you previously pause the game.

On the bottom left side, you will be able to adjust the following:

  • Hitting View
  • Pitching View
  • In-Play View Offense
  • In-Play View Defense

By default, the Hitting View is set to Catcher. You can also change it to Catcher Far, Catcher Near, Fish Eye, Fish Eye 2,Offset, Offset 2, Offset Zoom, Retro, Strike Zone, Strike Zone 2, Strike Zone 3, Strike Zone High, Strike Zone Offset, Wide, Zoom, Broadcast, Outfield, Pitcher, Pitcher Center, Pitcher Offset, Pitcher Wide, Pitcher Zoom as well as four custom profiles.

By default, the Pitching View uses Broadcast. It can also be changed to Outfield, Pitcher, Pitcher Center, Pitcher Center, Pitcher Offset, Pitcher Wide, Pitcher Zoom, Catcher, Catcher Far, Catcher Near, Fish Eye, Fish Eye 2,Offset, Offset 2, Offset Zoom, Retro, Strike Zone, Strike Zone 2, Strike Zone 3, Strike Zone High, Strike Zone Offset, Wide, Zoom in addition to four custom profiles.

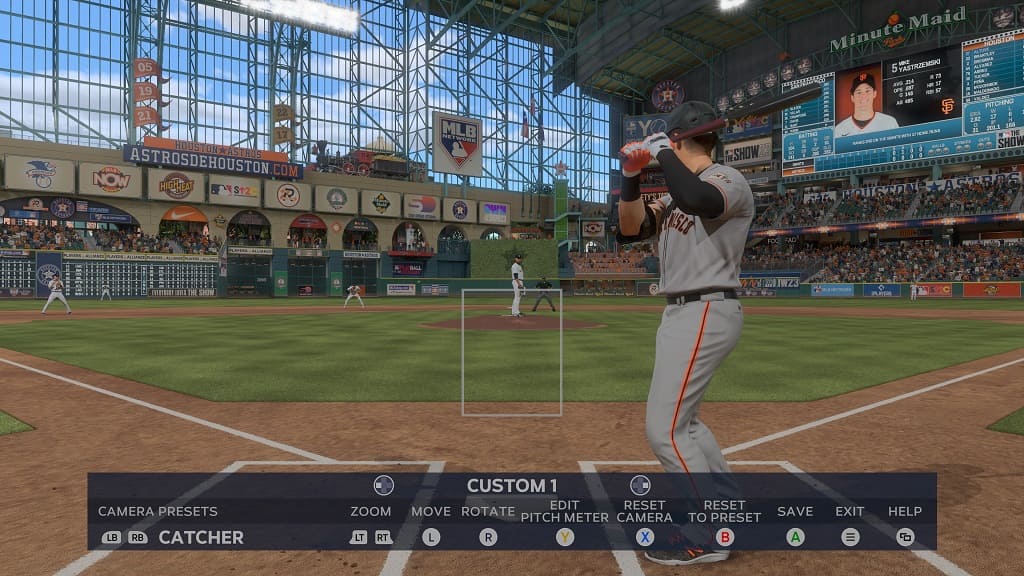
For custom camera angles, you can zoom, rotate and move the in-game camera in order to find the most suitable viewpoint.

The In-Play View Offense and In-Play View Defense camera angles are dynamic by default. These can also be changed to High, Medium, Retro or Broadcast.

4. Once you are done changing the camera angles, you need to back out of the Camera menu.

5. You should then see a Confirm message appear on the screen. From there, you need to select Apply Changes in order to save the new camera angles.

How to disable errors in MLB The Show 23

If you find that you are making a lot of fielding errors in MLB The Show 23, then you are able to disable this aspect of the video game. You can check out this step-by-step guide at Seeking Tech to see how you can make the fielding percentage perfect.

1. To start off, you need to open the Settings menu in MLB The Show 23.

You will be able to get there from the main menu. If you are in a game, then you can bring up the pause screen and then select Settings from there.

2. In the Settings menu, you then need to select Sliders.

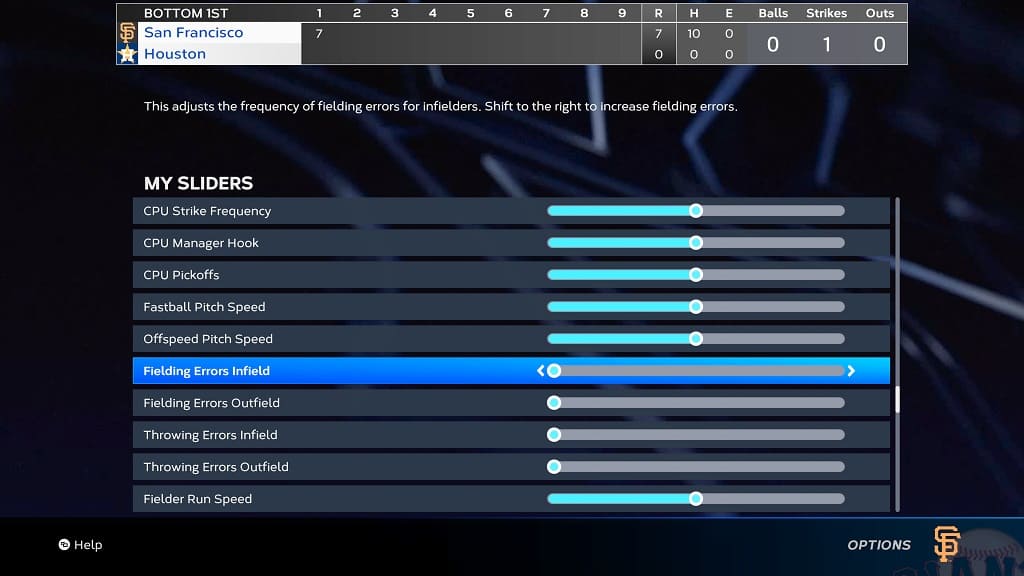
3. After getting to the Sliders menu, scroll down until you see the following settings and descriptions:

Fielding Errors Infield:

  • “This adjusts the frequency of fielding errors for infielders. Shift to the right to increase fielding errors.”

Fielding Errors Outfield:

  • “This adjusts the frequency of fielding errors for outfielders. Shift to the right to increase fielding errors.”

Fielding Errors Infield:

  • “This adjusts the frequency of throwing errors for the infield. Shift to the right to increase throwing errors.”

Fielding Errors Outfield:

  • “This adjusts the frequency of throwing errors for the outfield. Shift to the right to increase throwing errors.”

4. In order to reduce the fielding and throwing errors from both the infield and outfield, you need to move the sliders for the four aforementioned settings all the way to the left.

5. Once you are done with reducing the error frequency, you need to go back to the previous screen.

6. The following message should pop-up:

  • “The settings configurations have been modified. Apply modifications to the sliders now? Warning: Earned XP will be reduced if the gameplay sliders are changed from the default settings.”

Here, you need to select the Apply Changes option.

The next time you play a game in MLB The Show 23, the infielders and outfielders on your team should no longer commit any errors.