How to disable vibration in Granblue Fantasy: Relink

Granblue Fantasy: Relink features rumble by default. If you want to turn off vibrations in this action role-playing game, then you can check out this Seeking Tech guide to see how you can properly do so.

1. To start off, you need to head to the main menu. If you are playing with a PlayStation controller, then this can be done by pressing the Options button during gameplay.

2. Select Game Options from the Main Menu.

3. On the left side of the Game Options menu, select Gameplay.

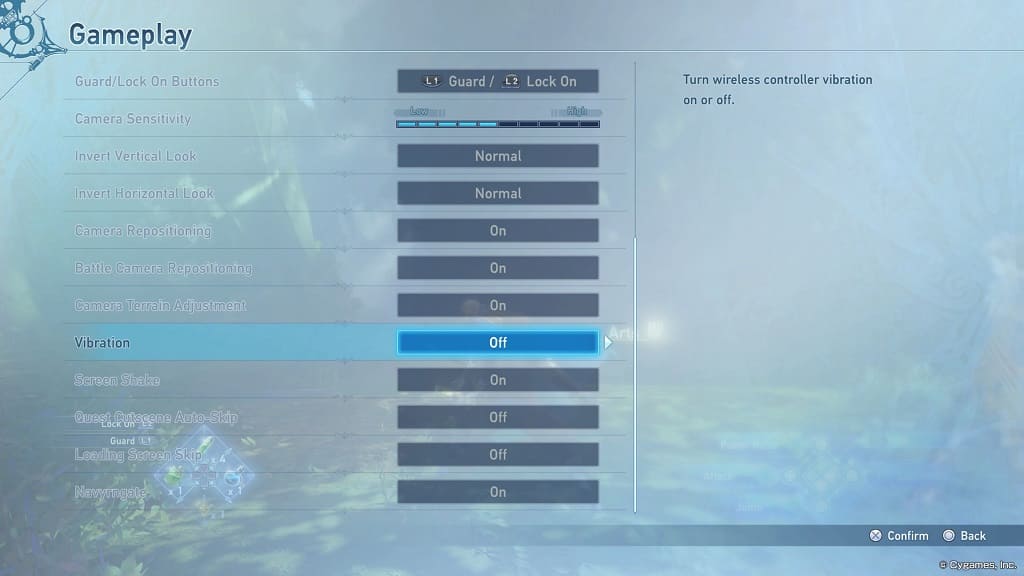
4. On the right side of the same screen, move the cursor down to Vibration.

5. Make sure that the Vibration setting is set to Off.
6. Exit the main menu and return to playing Granblue Fantasy: Relink. Your controller should no longer vibrate.

How to change voice language in Granblue Fantasy: Relink

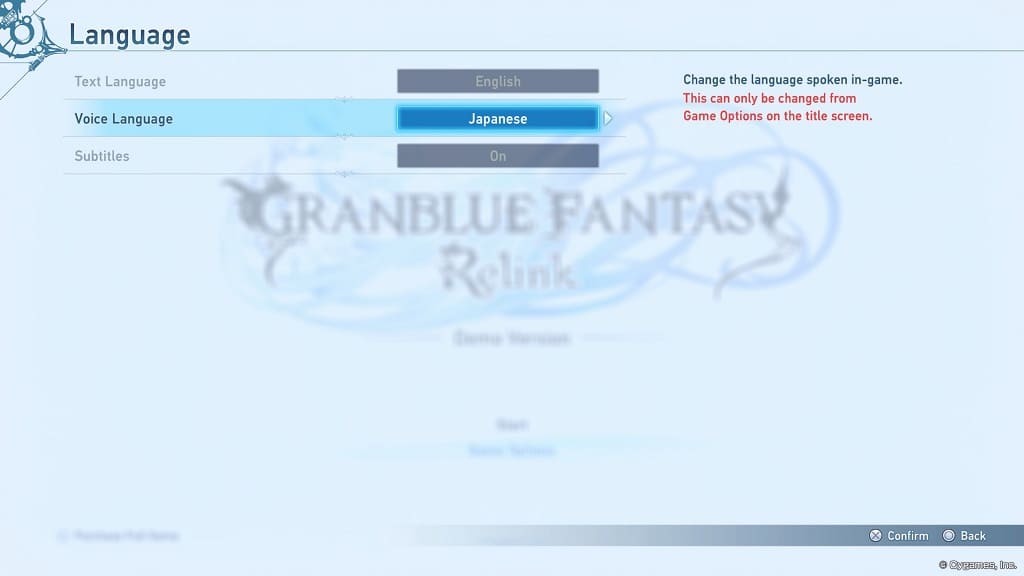
Granblue Fantasy: Relink supports both English and Japanese voice overs. To see how you can switch between the two in the game, you can take a look at this tutorial from Seeking Tech.

1 The voice language can only be changed from the Title Menu. So, if you are currently loaded into your save file, you need to exit back out.

To exit, open the Main Menu and then select System. Afterwards, select Quit Mode.

2. From the Title Menu, select Game Options.

3. Next, you need to select Language on the left column.

4. On the right side of the same screen, you should see the Voice Language option. Use this setting to change the voice acting from English to Japanese or vice versa.

How to automatically skip quest cutscenes in Granblue Fantasy: Relink

A cinematic will play out by default anytime you start and end a quest in Granblue Fantasy: Relink. If you get tired of seeing these same cutscenes over and over again, then you can check out this guide at Seeking Tech to see how you can disable them.

1. To start off, open the main menu. This can be done by pressing the Options button if you are playing with a DualSense or DualShock 4.

2. From the Main Menu, select System and then Game Options.

3. On the left side of the screen, select Gameplay.

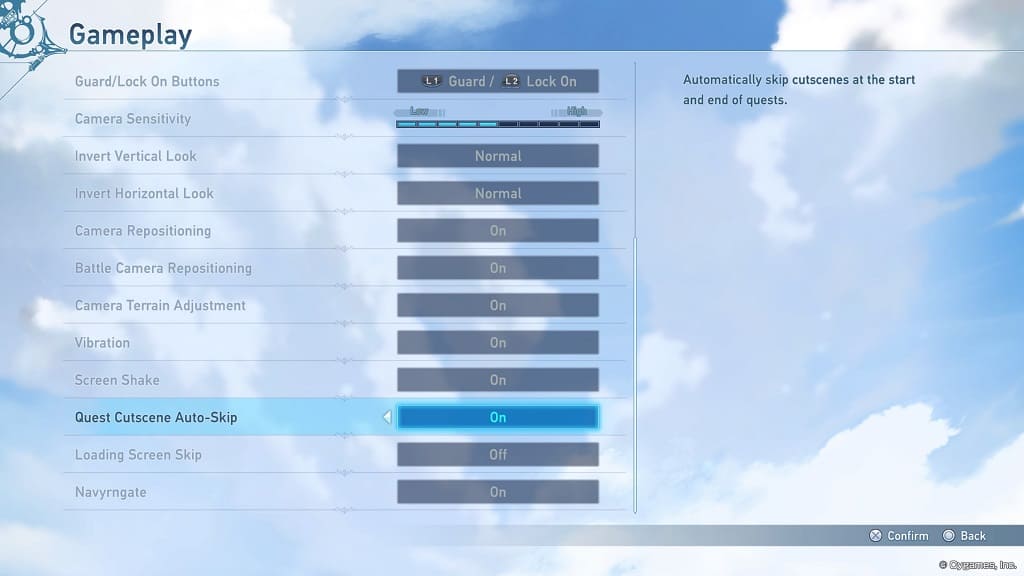
4. On the right side move the cursor down to Quest Cutscene Auto-Skip. It should show the following description:

Automatically skip cutscenes at the start and end of quests.

Make sure that the Quest Cutscene Auto-Skip is set to On.

Cinematics should no longer be played when entering and leaving quests.

How to skip loading screen confirmations in Granblue Fantasy: Relink

By default, Granblue Fantasy: Relink requires you to manually control when to close a loading screen. If you want this process automated, then you can check out this guide at Seeking Tech to see how you can properly do so.

Method #1:

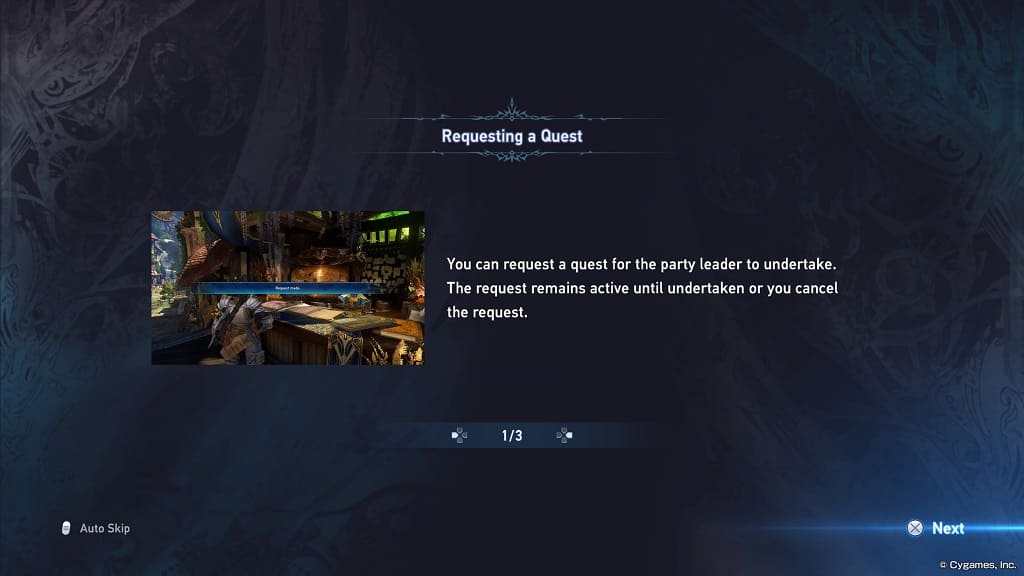
For the first method, wait until you get a loading screen. On the bottom left corner, you should see the button layout to Auto Skip.

If you are playing with a DualShock 4 or DualSense controller, for example, then you need to press the Options button.

By doing so, all future loading screen should automatically be skipped.

Method #2:

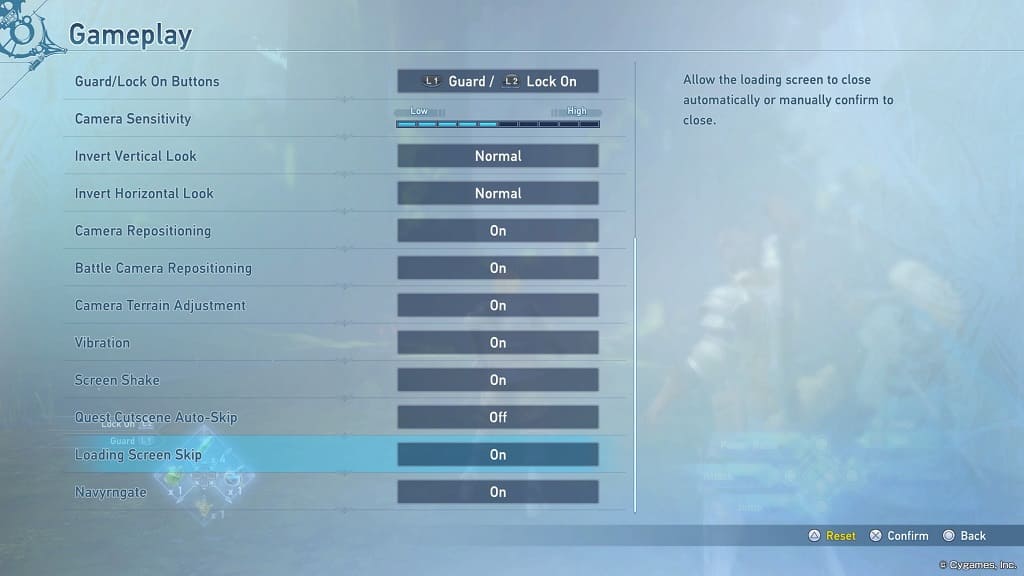
For the second method, head to open the Main Menu, select System and then Game Options. From there, go to Gameplay and then move the cursor down to Loading Screen Skip. It should show the following description:

Allow the loading screen to close automatically or manually confirm to close.

Make sure that the Loading Screen Skip setting is set to On.

How to turn off motion blur in Granblue Fantasy: Relink

Granblue Fantasy: Relink has motion blur enabled by default. If you don’t like the blurring in this game, then you can check out this guide at Seeking Tech to see how you can disable it.

1. Open the main menu in the game. If you are playing with a PlayStation controller, then this can be done by pressing the Options button.

2. From there, you need to select System.

3. Afterwards, select Game Options.

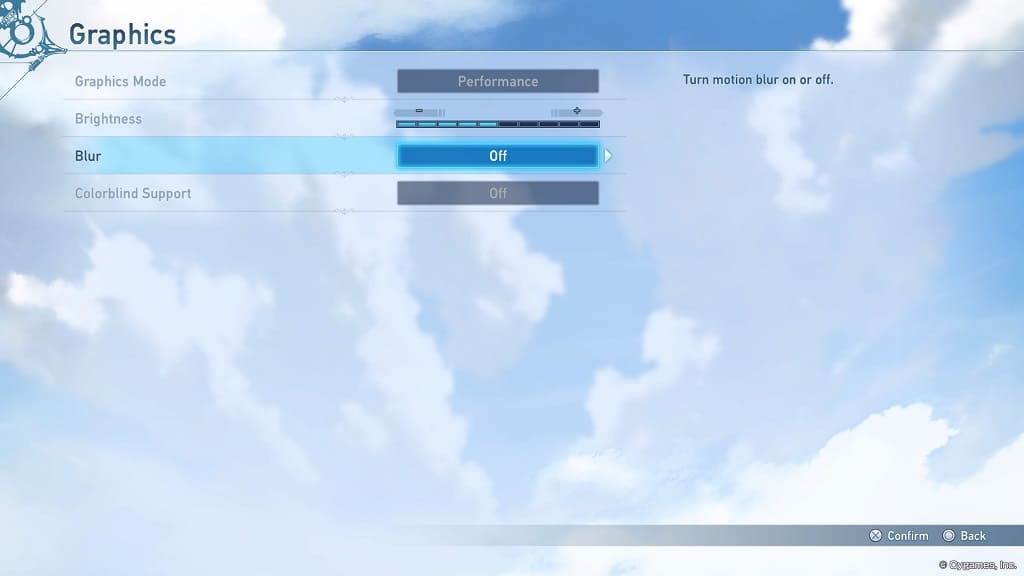
4. You then need to select Graphics from the Game Options menu.

5. On the same screen, make sure that Blur is set to Off.

Exit the main menu and your new settings should be applied in Granblue Fantasy: Relink.

How to make dodging and parrying easier in Prince of Persia: The Lost Crown

If you are having a hard time trying to dodge and parry in Prince of Persia: The Lost Crown, then you can check out this guide to see how you can increase the timing windows for these actions.

1. If you haven’t done so already, make your way to the Options menu.

You can do so by pausing the game, heading over to the System tab and then selecting Options.

2. From there, switch over to the Difficulty tab.

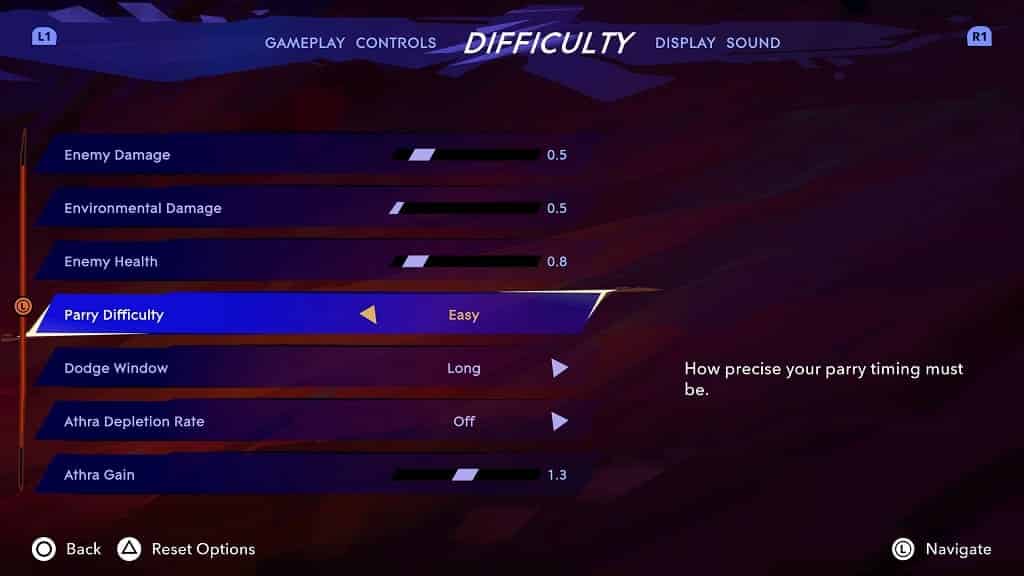
3. Scroll down and then move the cursor to Parry Difficulty. You should see the following description:

How precise your parry timing must be.

Make sure that this setting is set to Easy.

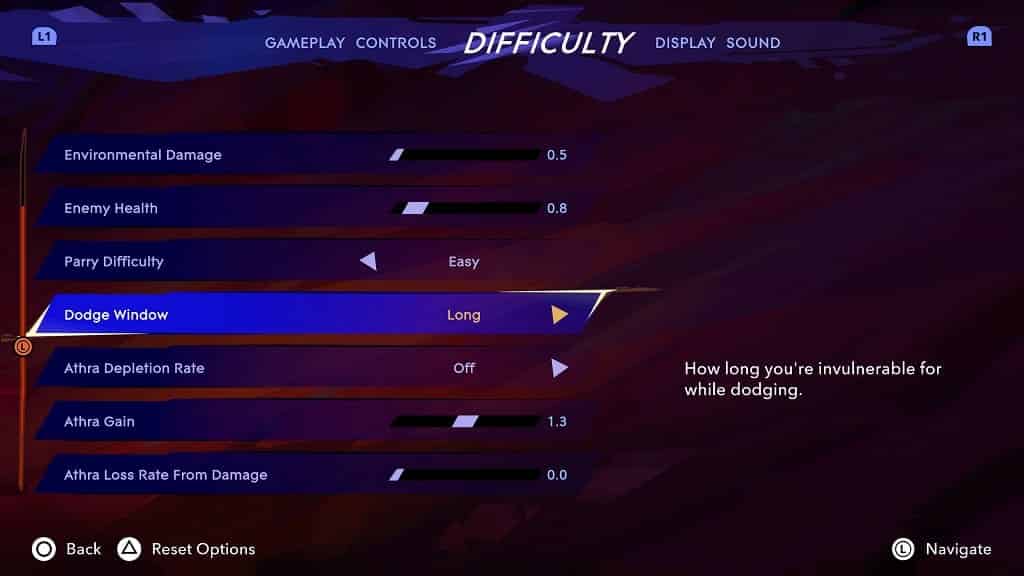
4. Next, move the cursor down to Dodge Window, which has the following description:

How long you’re invulnerable for while dodging.

Make sure that this setting is set to Long.

Exit the Options menu and return to your game. The new dodging and parrying settings should be applied.

How to make aiming and targeting easier in Prince of Persia: The Lost Crown

If you have issues trying to target and/or aim at enemies in Prince of Persia: The Lost Crown, then you can check out this guide at Seeking Tech to see how you can make these actions easier.

1. To start off, open the pause menu, head over to the System tab and then select Options.

2. In the Options screen, make sure you are viewing the Gameplay tab.

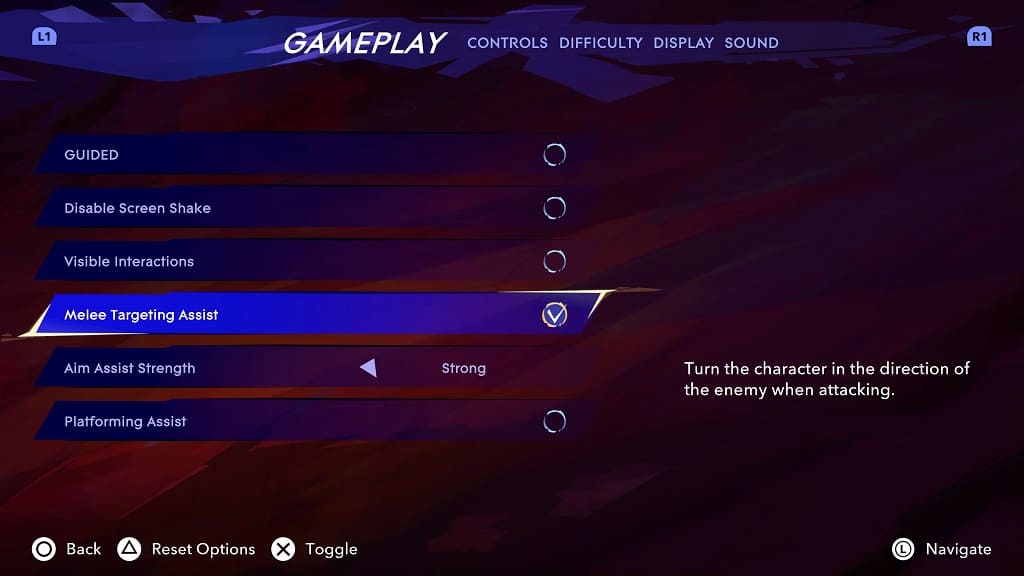
3. Move the menu cursor down to Melee Targeting Assist. It should have the following description:

Turn the character in the direction of the enemy when attacking.

Enable this setting so that you don’t have to worry about which direction your character is facing when executing a melee attack.

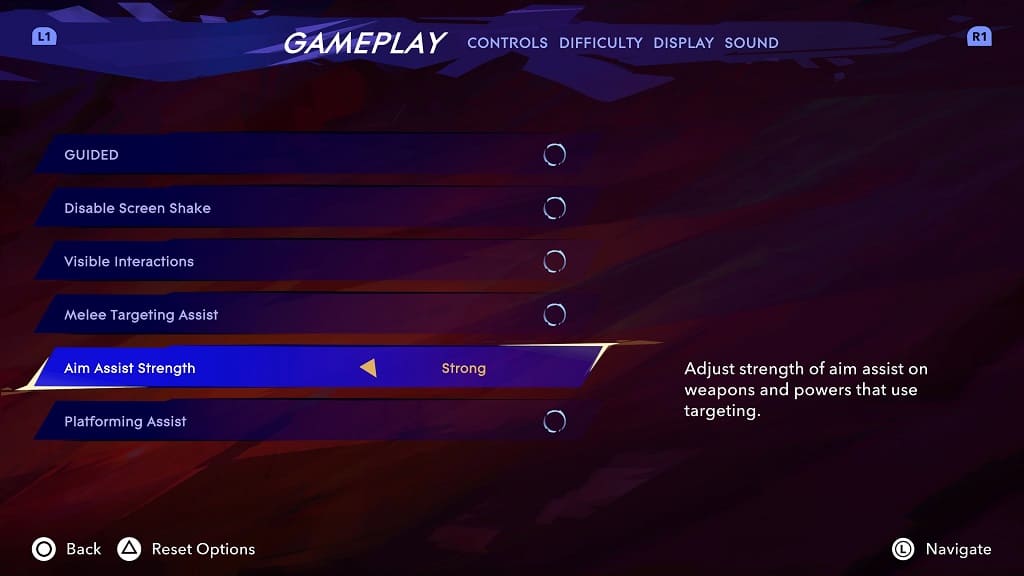
4. Move the cursor further down to Aim Assist Strength. You should see the following description:

Adjust strength of aim assist on weapons and powers that use targeting.

Make sure this setting is set to Strong if you have problems aiming.

Afterwards, exit the pause menu and then return to playing The Lost Crown. The assists should be applied to the game.

How to disable vibrations in Prince of Persia: The Lost Crown

If you are playing Prince of Persia: The Lost Crown with a compatible controller, then it will vibrate on certain actions. If you want to decrease the rumble intensity, or disable it altogether, then you can check out this tutorial from Seeking Tech.

1. To start off, open the pause menu, head over to the System tab and then select Options.

2. Inside of Options, you need to switch over to the Controls tab.

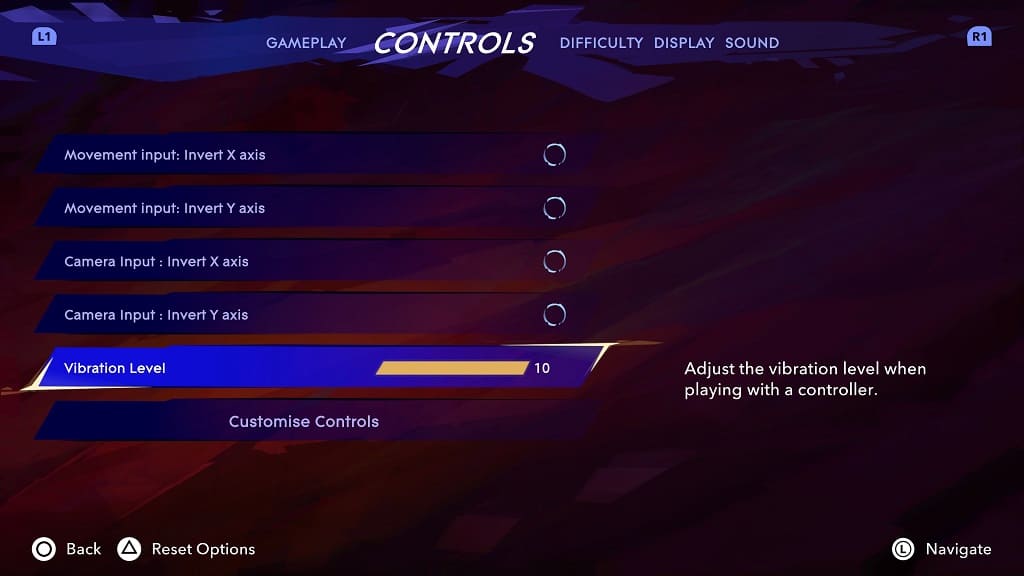
3. You should be able to find Vibration Level, which has the following description:

Adjust the vibration level when playing with a controller.

4. By default, this setting is set to 10.

To decrease it, move the slider to the left in increments of 1.

To fully disable haptic feedback in Prince of Persia: The Lost Crown, make sure that the Vibration Level is set to 0.

How to disable camera shake in Prince of Persia: The Lost Crown

The camera may shake during some situations in Prince of Persia: The Lost Crown. If you find this visual effect to be too distracting, then you can take a look at this troubleshooting article from Seeking Tech to see how you can disable it for this Metroidvania.

1. For the first step, open the pause menu and then head over to the System tab, where you can then select Options.

2. In Options, make sure you are viewing the Gameplay tab.

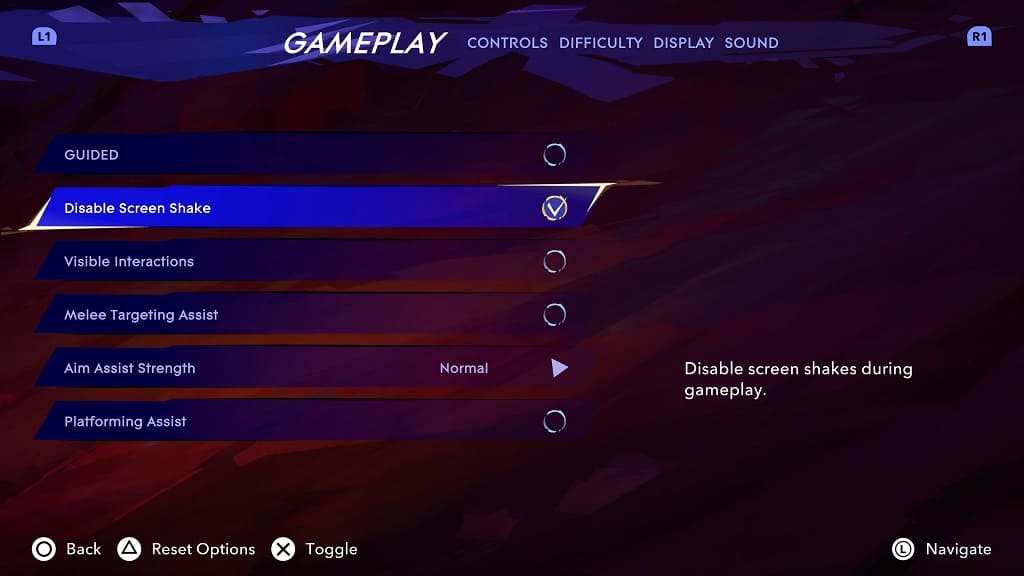
3. From there, move the menu cursor down to Disable Screen Shake. It should be showing the following description:

Disable screen shakes during gameplay.

4. Make sure that the Disable Screen Shake is selected.

5. Exit the pause menu.

You should no longer see the camera shaking in Prince of Persia: The Lost Crown.

How to skip platforming sections in Prince of Persia: The Lost Crown

If you find that some of the platforming levels in Prince of Persia: The Lost Crown to be too difficult, then you can check out this guide at Seeking Tech to see how you can skip them.

1. For the first step, make your way over to the Options menu.

You can do so by opening the pause menu and then going to the System tab. From there, select Options.

2. In Options, make sure you are viewing the Gameplay tab.

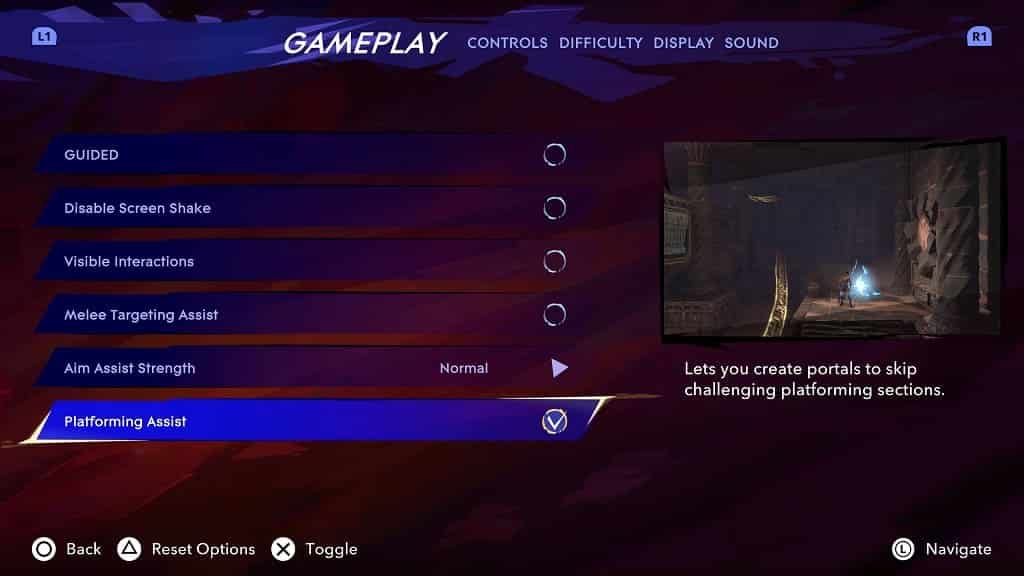
3. Next, scroll down to the Platforming Assist setting, which should be showing the following description:

Let’s you create a portable to skip challenging platforming sections.

4. Make sure that the setting is selected and then exit the Options menu.

A portable should now appear in platforming areas that will allow you to skip them in order to move onto the next section.