How to fix PlayStation VR2 cinematic mode blurriness

When using the cinematic mode of the PlayStation VR2 to play flat screen game or watch flat screen movies, you may notice that the image quality is not as sharp as you would like. To see how you get a sharper picture, you can take a look at this troubleshooting article from Seeking Tech.

1. Before we begin, it is important to note that, although the PlayStation VR2 has been advertised to output at 4K, it is not the same 4K resolution you see on a television screen. Instead, the sharpness of the image quality that you see through the lenses of the PS VR2 headset is closer to 1080p.

2. The image quality will also be at the clearest in the middle of the flat screen in cinematic mode. As a result, the picture will get blurrier as you look closer to the edges.

If you want the edge of the screen to look clearly, then you have to manually tilt your head towards that direction.

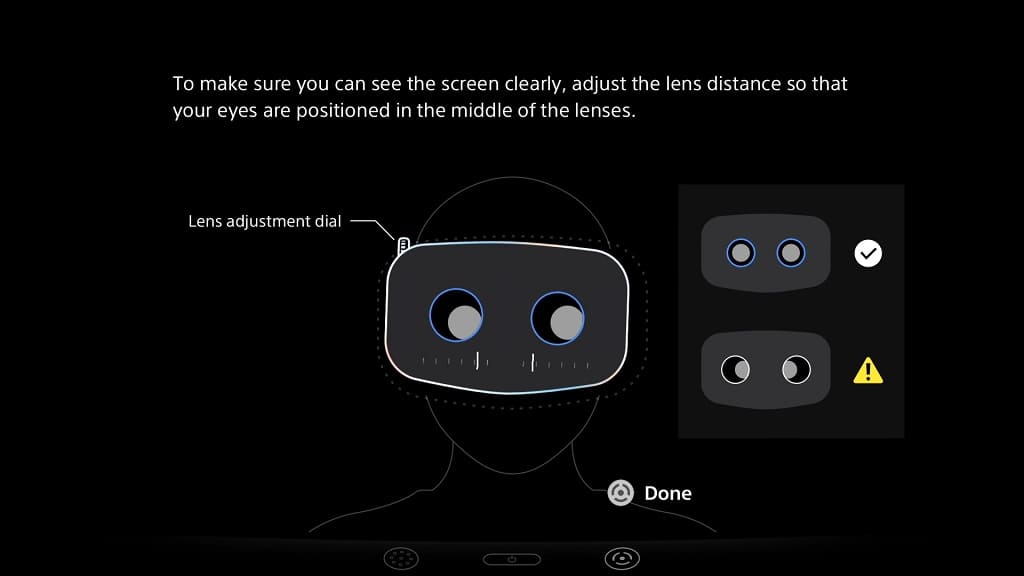
3. If the cinematic mode appears to be extremely blurry, then you try re-adjusting the lenses of your virtual reality headset.

Keep in mind that the PlayStation VR2 has a small sweet spot that can easily be misaligned with the slightest of head movements, which would lead to a blurrier than expected picture output.

To adjust the visibility when using this VR headset, press the PS button while wearing the PS VR2 to open the Control Center quick menu. From there, select the PlayStation VR2 Quick Settings option. Afterwards, select the Adjust Visibility from the small menu. Finally, follow the on-screen instructions to improve the clarity of the image.
4. In some games or apps, you may be able to change the resolution of the graphics or videos. Doing so may lead to better sharpness.

For games, see if you are able to change the Graphics Mode to Resolution, Fidelity or something similar. When it comes to videos, check to see if there is an option to change to a higher resolution.
5. You should also make sure that the lens of the PlayStation VR2 are clean as oil from your hair and/or face may have smudge them.

To clean, we recommend that you use a dry, lint-free microfiber cloth to wipe. Avoid using water or any cleaning solution as these could strip away the coating that was applied to the lenses.

6. If you haven’t done so already, make sure you have the latest firmware updated for your PS5 or PS5 Digital Edition console as a new update may improve the overall image quality of the PlayStation VR2 headset.
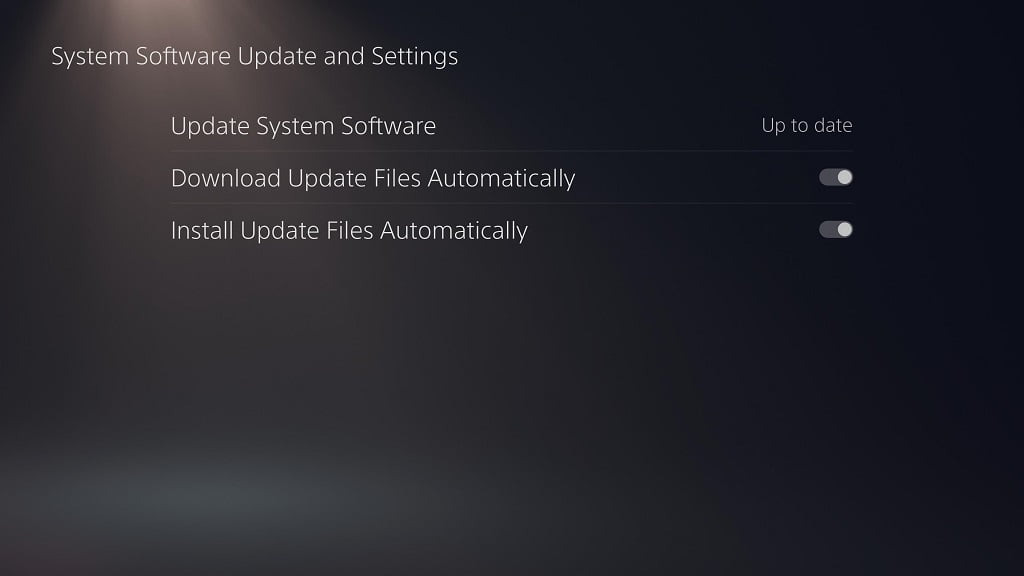
To update your console’s firmware, you can open the Settings menu of your PlayStation 5 and then select System > System Software > System Software Update and Settings > Update System Software > Update Using Internet.

How to fix PlayStation VR2 cinematic mode flickering issues

You may encounter some screen flicker when using the cinematic mode while using the PlayStation VR2. To see how you can potentially fix these problems with this virtual reality headset, you can check out this troubleshooting post from Seeking Tech.

1. To start off, you should make sure that the VR headset is directly connected to the USB Type-C port that is located on the front side of the console. If you are using an extension cord, then it may be causing issues with the data transfer, which could result in the flickering errors.

2. You should also make sure that the USB cable is securely connected to the USB Type-C port of the PS5 as well as your headset. If the connection appears to be loose on the PS VR2, then you can try pushing it into the port.

3. If you haven’t done so already, you can try restarting the game or app where you are experiencing the flickering issues.

4. Furthermore, you can also try restarting your PlayStation 5 or PlayStation 5 Digital Edition console.

5. Make sure that the game, app or console have been updated as well.

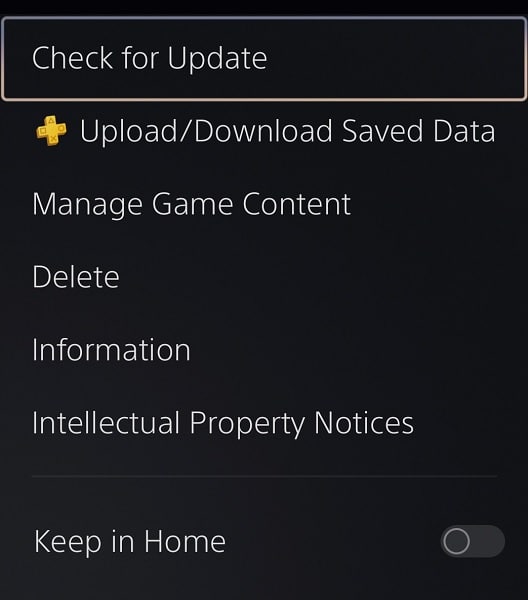
To update a game or app, move the menu cursor over to its icon from the home screen of your PlayStation 5. Afterwards, press the Options button on the controller and then select Check for Update from the small window menu.

To update the firmware of your console, open its Settings menu and then select the following: System > System Software > System Software Update and Settings > Update System Software > Update Using Internet.
After updating, check to see if you are play games and watch videos via the PSVR2 cinematic mode without any flickering.

6. You should also check to see if the USB cable is damaged. If it is, then you have to send your entire PlayStation VR2 in to Sony for repair as the connection cable is propriety.

How to fix PlayStation VR2 cinematic mode drifting issues

You may notice that the screen may drift when playing a flat screen game or watching a flat screen video by using the PlayStation VR2 headset in cinematic mode. To see how you can fix this drifting issue, you can take a look at this troubleshooting article from Seeking Tech.

1. For the first potential solution, try to press and hold the Options button on the controller. By doing so, the screen will re-center itself based on your current head position.

2. If the screen is still drifting, then you should check the lighting condition of your room. For the PlayStation VR2 to track your head position accurately, the room should be bright.

With that said, you should make sure you aren’t looking directly into a light source as the headset could end up losing its tracking.

2. If you are looking at a simple blank wall with no discernible features, then the headset may lose track of your head position. In this case, you can try putting some tape or other objects on the wall to see if you are still experiencing the drifting problems in the cinematic mode.

3. You can also try turning on Tracking Support for the VR headset and then look directly at your television set. In order to do so, go to the Settings menu of your PlayStation 5 and then navigate over to Accessories > PlayStation VR2. From there, make sure that you have Tracking Support enabled.

By doing so, a border will be added to your TV, which should give your PS VR2 a reference when it comes to tracking.

4. If you didn’t tighten the back strap of your virtual reality headset tight enough, then it may cause the picture to drift as. In order to tighten, turn the dial on the back clockwise.

5. Make sure you have the latest firmware installed for your PS5 or PS5 Digital Edition console as the new update may improve the tracking of the PlayStation VR2 headset and, therefore, eliminate the drifting problems.

You can manually update the gaming system by going over to the Settings menu and then selecting System > System Software > System Software Update and Settings > Update System Software > Update Using Internet.
6. If the virtual reality headset is also drifting when you are playing a PS VR2 game, and you tried all of the aforementioned potential fixes, then there may be a hardware problem.

In this scenario, there is not much else you can do but to contact Sony about potentially getting your headset repaired or replaced.

How to change songs in Les Mills BodyCombat

Les Mills BodyCombat features a nice soundtrack when it comes to getting you into the mood for fitness. To see how you can change songs while playing this virtual reality game, you can take a look at this tutorial from Seeking Tech.

Before we start, it is important to note that the songs are tied to the workout session in Body Combat. Therefore, you won’t be able to change a song for a specific stage as the targets sync up with the beat.

If you are interested in playing a session that contains a specific song, then you need to do the following:

1. If you haven’t done so already, return to the main menu of Les Mills BodyCombat. If you are currently in the middle of a session, then you can either finish it or exit out of it to return to the main menu.

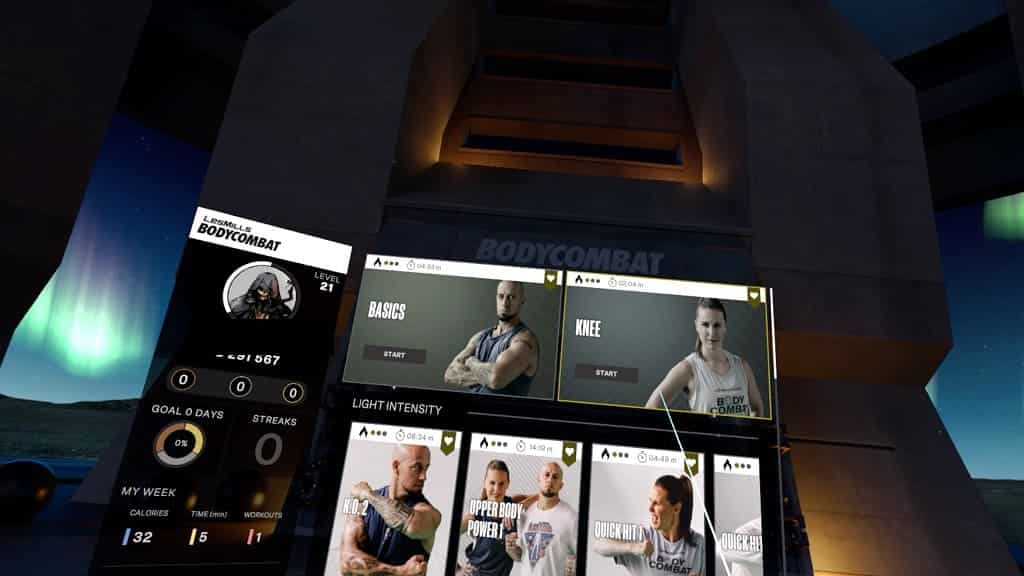
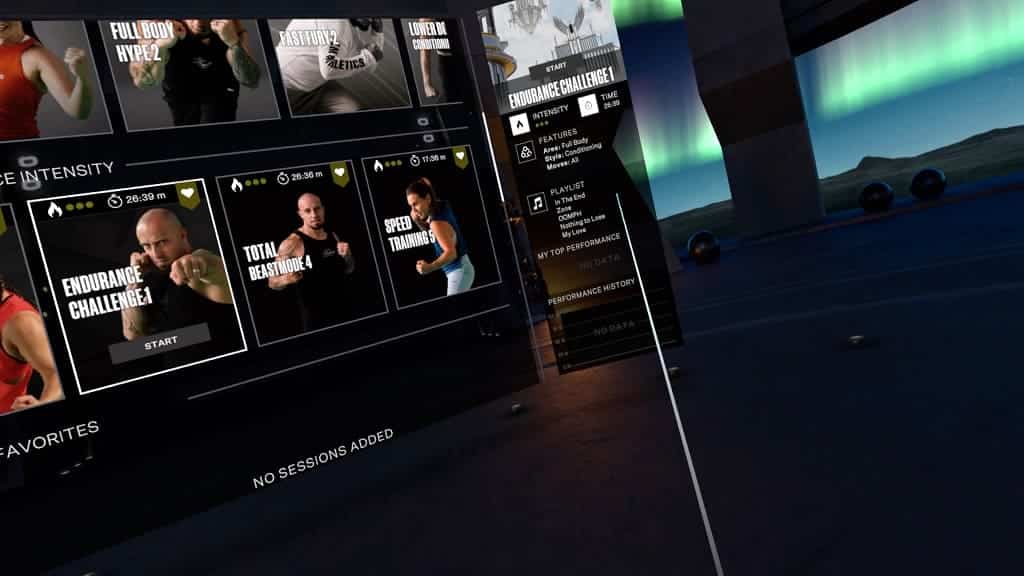
2. Next, you need to select a session. Make sure you don’t select the Start option in the session panel as you will end up starting the workout instead.

3. If you did the above step correctly, then you should see the right panel pop up in the main menu. This panel provides details on the workout session, including a list of songs that will be played.

Some of the sessions are long and, as a result, will feature multiple music tracks.

4. After finding a workout session with a list of songs that you want to listen to while working out, you can select the Start option to begin the stage.

How to properly do knee strikes in Les Mills BodyCombat

The knee strike in Les Mills BodyCombat can be somewhat tricky and awkward as the game may not register your actions even if you think that you are doing them correctly. You can check out this guide at Seeking Tech to see how you can properly do this exercise in this virtual reality game.

Before we begin, it should be noted that this guide is based on the PlayStation VR2 version of the workout game. With that said, the same tips should also be applicable to the other versions of Les Mills Body Combat as well.

If you haven’t done so already, there is a refresher tutorial that you can select on the top right side of the main menu. In this tutorial, you should see a clip of one of the trainers performing a knee strike as well as a short practice session that follows afterwards.

If you are still having a hard time successfully pulling off a knee strike in Les Mills BodyCombat, then you can follow these tips:

1. When you hold the target, you will see a line. Do not move the target to follow the line. Instead, we recommend that you hold the target in the same place.

2. Once you get towards the end of the line, quickly rotate your inwards and then move your arms downwards towards the end target to smash it. If you are too slow, then your action may not be registered by the game.

3. The game does not read your knee movement at all. Therefore, you can technically perform this motion with either very little knee movement or without moving your knee at all.

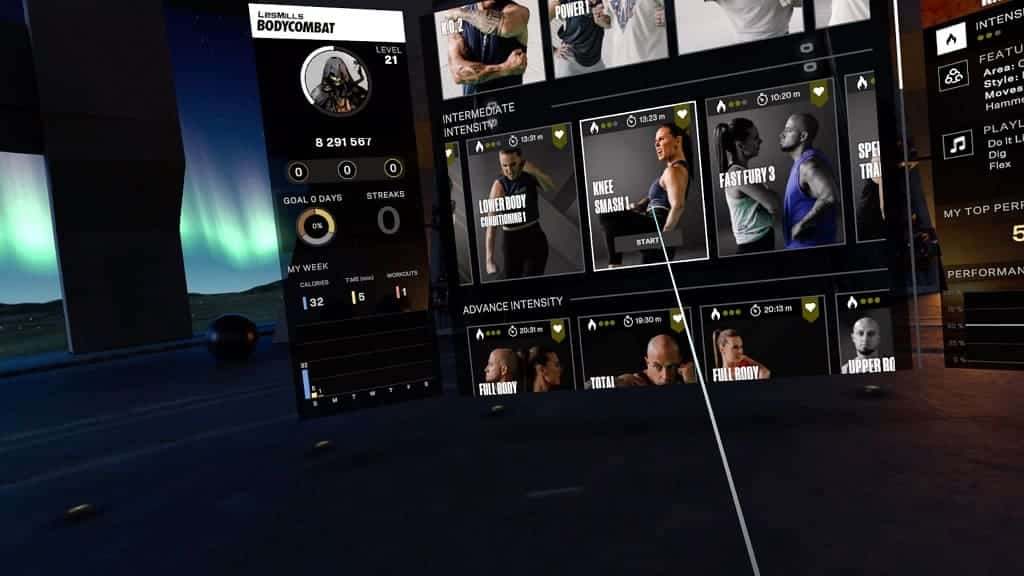
4. It may take several tries until you get to a good rhythm where you can constantly hitting the knee strike targets. You can use the Knee Smash 1 session in the Intermediate Intensity section to practice your strikes until you improve your timing.

Even if you get good, the game may not register your strikes correctly as it is more finicky when compared to the standard punches you do.

Of course, you can simply ignore the missed targets if you care more about getting a good workout instead of achieving a high score.

How to turn off trainer voices in Les Mills BodyCombat

By default, you will hear the voices of real-life trainers encouraging you during your workouts in Les Mills BodyCombat. While these audio clips can be extremely helpful, they can end up sounding repetitive as the same lines are repeated over and over again.

To see how you can disable the coach voices in the virtual reality game, you can take a look at this tutorial from Seeking Tech.

While this guide is based on the PlayStation VR2 version of Les Mills Body Combat running on the PlayStation 5, the steps should also be applicable to the other versions as well.

1. If you haven’t done so already, make sure you are in the main menu. If you are currently in the middle of a session, then you can either finish the session or quit out of it to return to the main menu.

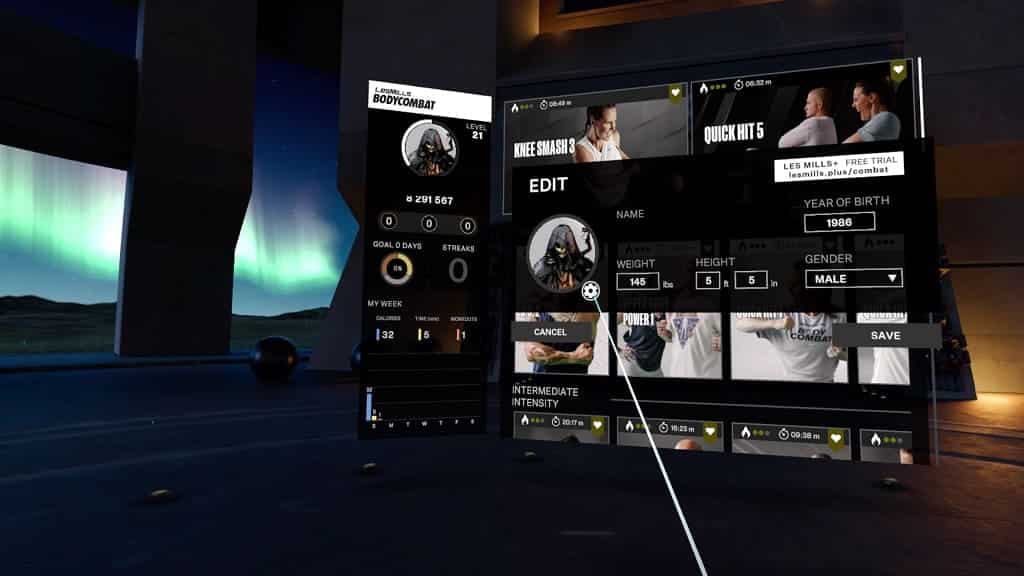
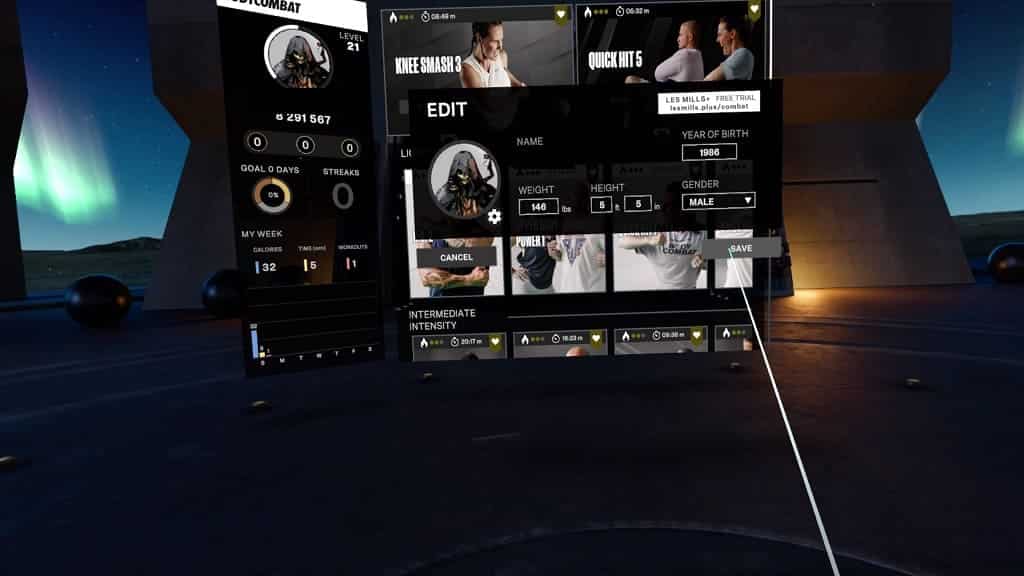
2. From the main menu, select your PSN profile picture, which should appear at the top of the left column.

3. In the Select User pop-up menu that appears on the right side of the screen, select the gear cog icon located on the bottom right side of your PSN profile picture.

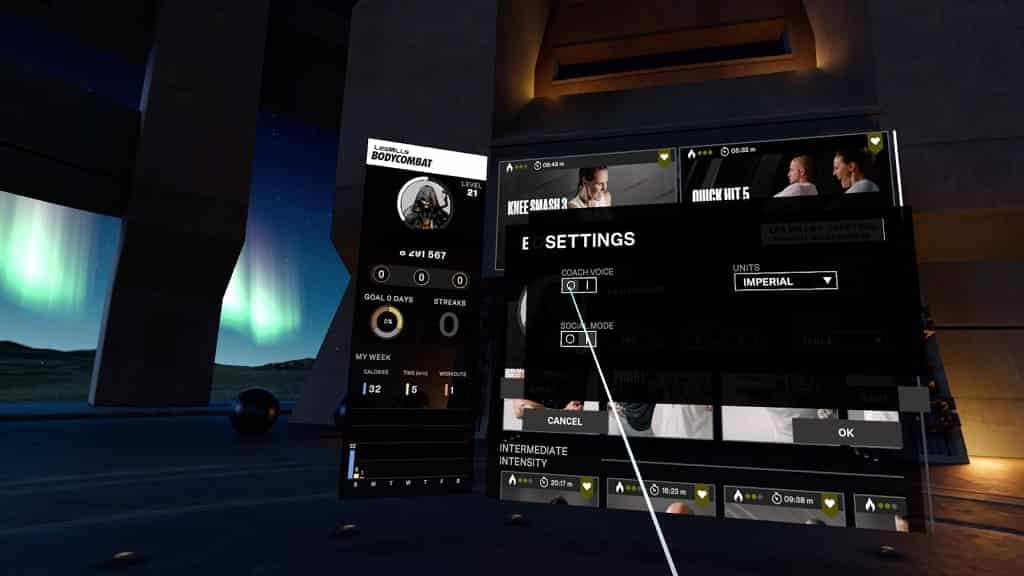
4. You should now be in the Settings menu. Here, you should see the Coach Voice setting, which is set to “1” by default. This indicates that the trainer voices are turned on during workout sessions.

5. To disable commentary, select the “0” option underneath the Coach Voice setting.

6. Next, you need to select the OK option on the bottom right side of the Settings menu to confirm the change.

7. You should be brought back to the Edit menu, where you then need to select the Save option. Otherwise, the change you made previously will be reverted.

8. When you start a new workout session in Les Mills BodyCombat, you should no longer hear any dialogue.

How to bypass the roomscale launch error in PS VR2 version of Les Mills BodyCombat

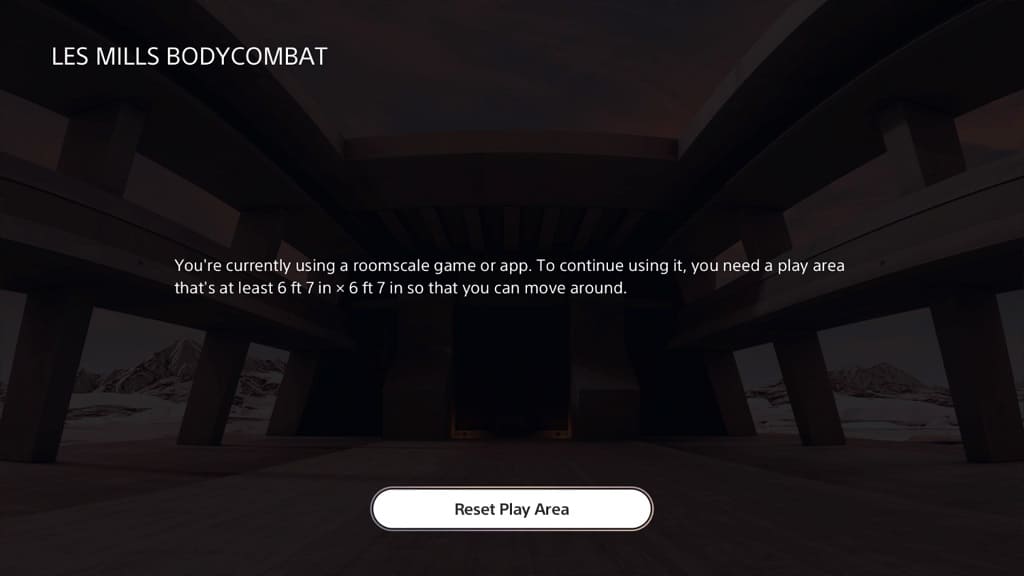
Despite the fact that you will mostly stand around in one small area, the PlayStation VR2 version of Les Mills BodyCombat is a roomscale only game. If you don’t have enough room in the Play Area you previously set, then you will see the following message pop-up:

  • “You’re currently using a roomscale game or app. To continue using it, you need a play area that’s at least 6 ft x 7 in x 6 ft x 7 in so that you can move around.”

As a result, you won’t be able to launch Les Mills BodyCombat. To see how you can bypass this warning screen and boot up the game normally, you can take a look at this troubleshooting article from Seeking Tech.

1. To bypass this screen, we recommend that you edit your Play Area. If you are still in the aforementioned “You’re currently using a roomscale game or app” screen, then you can select the Reset Play Area option.

Otherwise, you can press the PS button while wearing the virtual reality headset to bring up the Control Center menu. Afterwards, select the PlayStation VR2 Quick Settings card. Next, scroll down and then select the Set Play Area option. When asked how you would like to play, select Stand Still and Moving Around. Finally, select Reset Play Area.

2. Next, select the Edit Play Area option.

3. In the Edit Play Area menu, you can use the Left or Right PlayStation VR2 Sense Controller to point and the L2 or R2 button to add or remove your Play Area.

As we stated above, you will spend most of your time standing in a small area when playing Les Mills BodyCombat. Therefore, you can use this menu to manually expand your Play Area to beyond any walls or objects. You only have to make sure that you have plenty of free air space near your body to accommodate for the front and side punches.

Once you managed to meet the minimum 6 ft x 7 in x 6 ft x 7 in requirement, you should be able to start up and play Les Mills BodyCombat.

What to do if you get no sound or audio when using the PS VR2 cinematic mode

The cinematic mode of the PlayStation VR2 can be utilized to play flat screen video games and watch flat screen videos. If you aren’t getting any sound or audio while using this mode in the virtual reality headset, then you can take a look at this troubleshooting article from Seeking Tech to see what you can do to fix your issue.

1. For the first step, we recommend checking the audio output source while you are wearing the PS VR2.

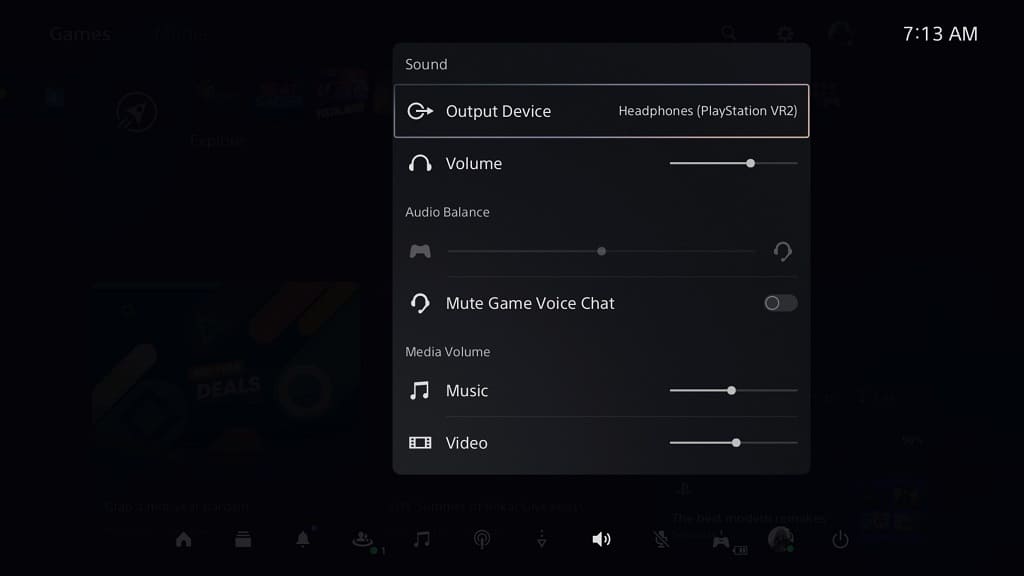
In order to do so, press the PS logo button on the DualSense, Left PlayStation VR2 Sense Controller or Eight PlayStation VR2 Sense Controller to bring up the quick menu. From there, select the Sound icon located at the bottom.

Once you get to the Sound menu, select Output Device and then select your preferred listening device.

2. You should also make sure that the listening device you are using is turned on and hasn’t been muted.

3. Furthermore, you can try connecting your listening device to another electronic to see if it can function without any issues.

4. If you haven’t done so already, try to unplug the listening device and then plug it back in.

5. You should also check the sound settings of the videogame you are playing or app you are using.

Make sure you didn’t mute the volume when you are playing a game.

For videos, you should make sure that the volume slider isn’t moved all the way to the left.

6. If you are still getting no audio or sound while using the cinematic mode with the PlayStation VR2, then you can try using a different listening device.

For best compatibility, you can use the headphones that are connected with the virtual reality headset.

7. If you are using the headphones that are connected to your PS VR2 headset for sound output, then return to the aforementioned Sound menu.

Once you get there, make sure that the Volume slider isn’t all the way to the left as this will mute your sound output.

How to change resolution in PlayStation VR2 cinematic mode

With the PlayStation VR2, you can play flat screen games and watch flat screen video content. If you want to change the resolution of these games and videos, then you can take a look at this tutorial from Seeking Tech.

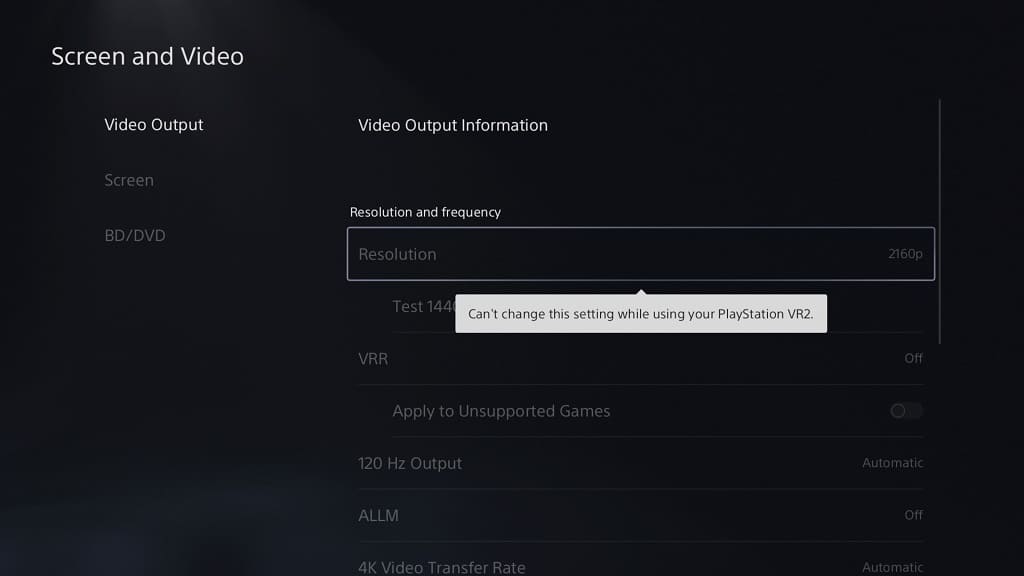
Before we start, it is important to note that you won’t be able to change the resolution from the system menu of your PlayStation 5 or PlayStation 5 Digital Edition console. If you try to do so, you will see that the Resolution setting from the Settings > Screen and Video > Video Output menu is greyed out with the following message:

Can’t change this setting while using your PlayStation VR2.

Therefore, the only way to change resolution is from within the game or app.

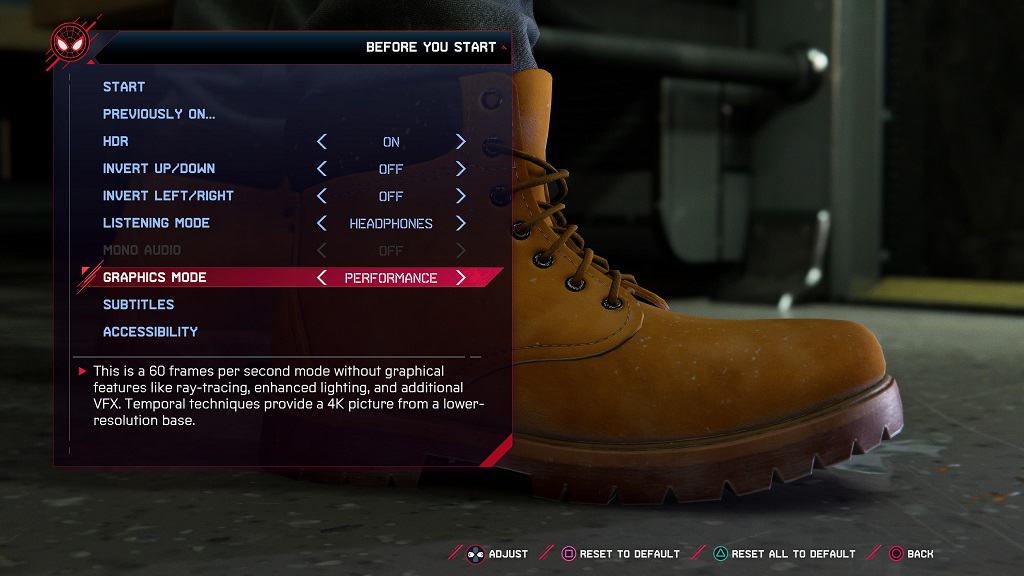
If you are playing Marvel’s Spider-Man: Miles Morales, for example, then you need to go to the Visual Settings menu and then change the Graphics Mode in order to change the resolution of the game.

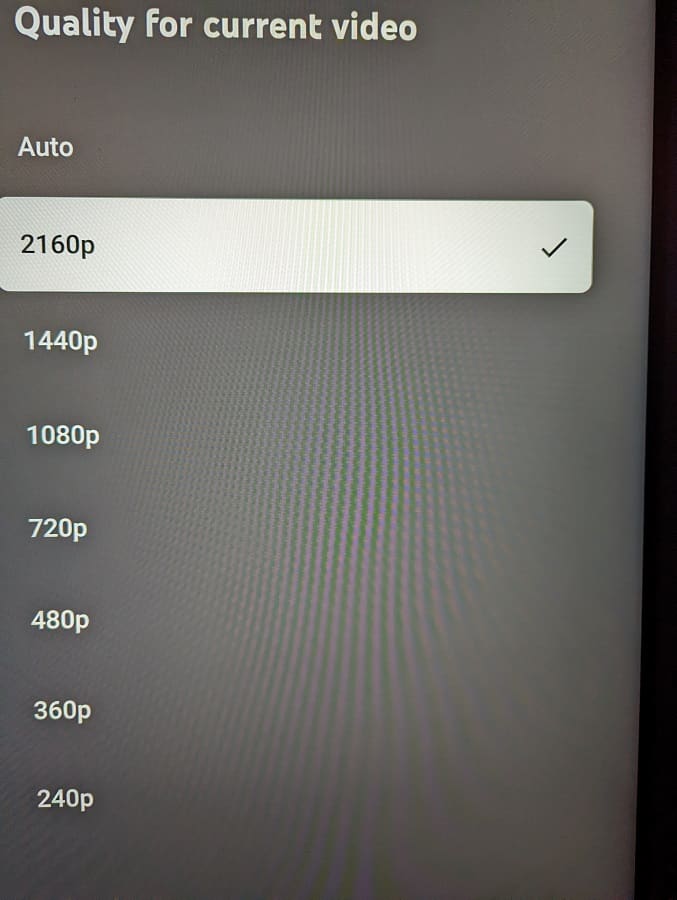
If you are watching a YouTube video, for instance, then you have to press the X button while the video is playing to open the in-video menu. From there, select Settings and then Quality. You should be able to change the resolution from there.

By increasing the resolution from within the game or app, you should get a sharper image even if the display resolution of the PlayStation VR2 headset remains the same. The higher resolution will get down sampled to the lower resolution, which should end up looking clearer than content with the lower resolution output.

How to get a good workout with PS VR2 version of Pistol Whip

If you really want to work up a good sweat while playing Pistol Whip with the PlayStation VR2, then you can check out this guide to see which style you should be using.

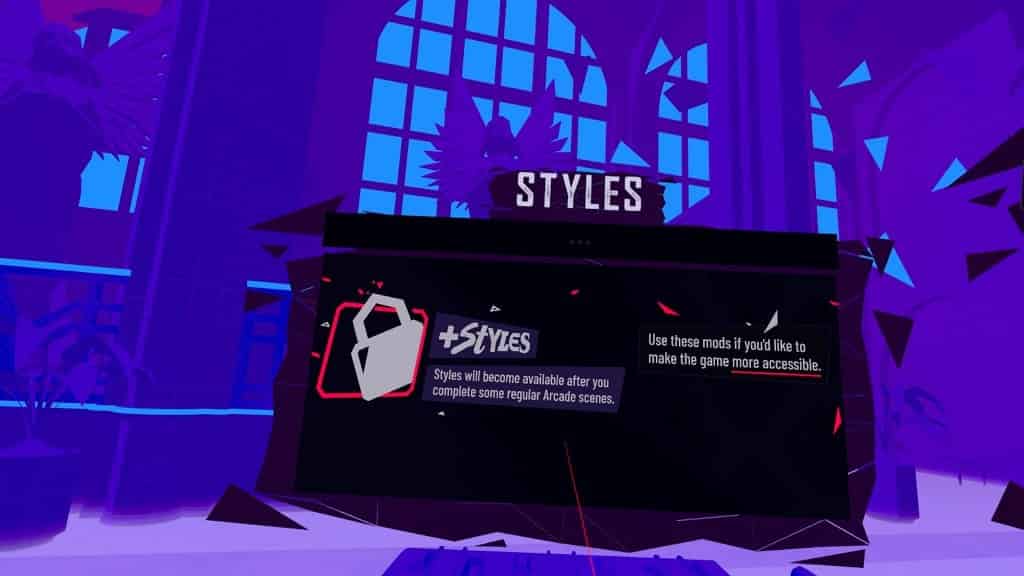
1. To start off, make sure you unlock the Styles menu. To find out how you can do so, you can check out this tutorial.

2. Once you have styles unlocked, go to the Arcade or Party Mode.

3. In the level selection menu, move your head to the left to find the Styles menu.

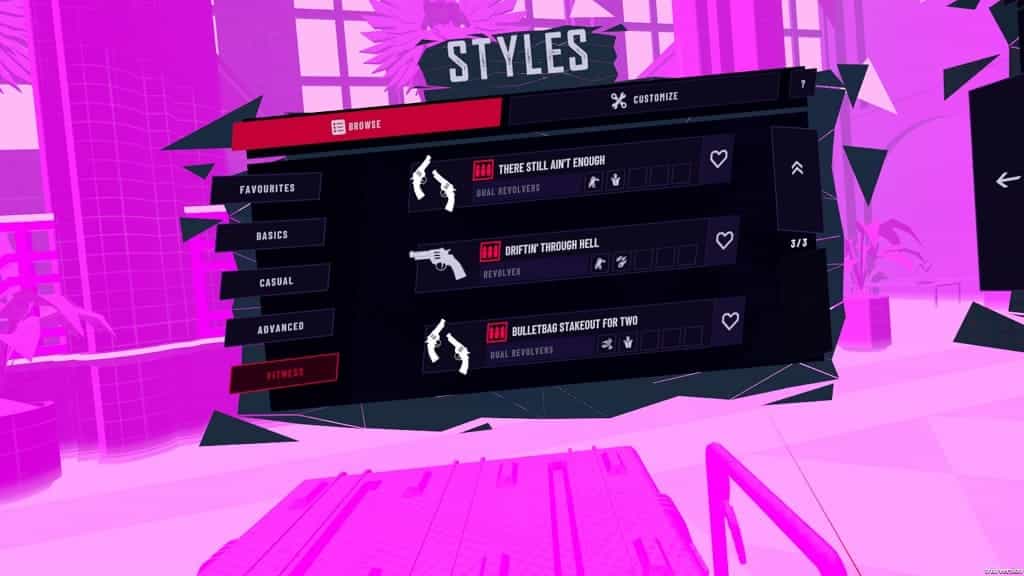
4. From there, we recommend that you select the Browse tab on the top left side.

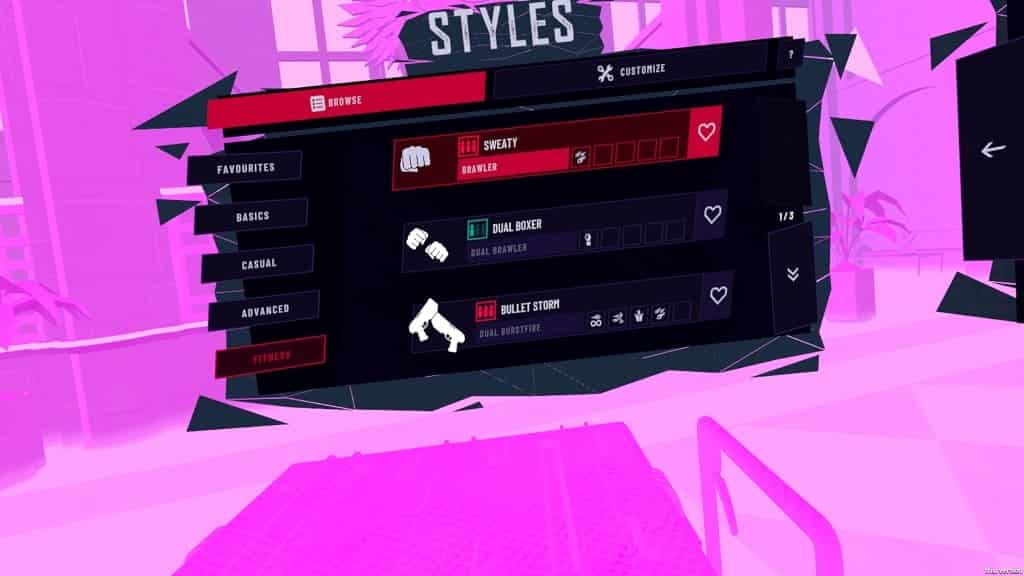
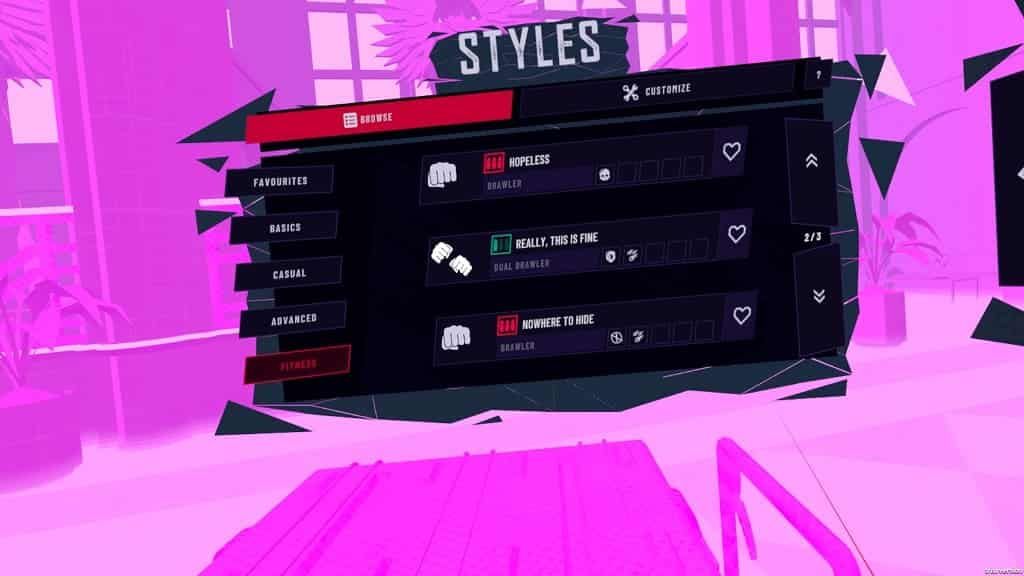
5. You should then select Fitness to find the following list of workout style presets:

Sweaty Style Preset

  • Weapon Preset: One Handed Brawler
  • Modifiers: Bullet Hell

The Sweaty preset increases the number of bullets while limiting your attacks to one-handed punches.

Dual Boxer Style Preset

  • Weapon Preset: Dual Brawler
  • Modifiers: Big Head

This Dual Boxer preset limits you to melee attacks on both hands. With that said, the head size of your targets will be increased.

Bulletstorm Style Preset

  • Weapon Preset: Dual Burstfires
  • Modifiers: Bottomless, Vengeance, Heavies and Bullet Hell

The Bulletstorm Style Preset gives you two Burstfire weapons with no lead to reload. You should expect to see a lot of bullets due to increase enemy fire rate, ricochets and heavily armored targets.

Hopeless Style Preset

  • Weapon Preset: One Handed Brawler
  • Modifiers: Reckless

The Hopeless Style Preset gives you no armor and only a one-handed melee attack.

Really, This is Fine Style Preset

  • Weapon Preset: Dual Brawler
  • Modifiers: Bulletproof and Bullet Hell

The “Really, This is Fine” makes you invincible while also making the enemies fire more bullets. You can only use punching attacks with both hands with this mode.

Nowhere to Hide Style Preset

  • Weapon Preset: One Handed Brawler
  • Modifiers: Unobstructed and Bullet Hell

The Nowhere to Hide removes all the obstacles from the game while also increasing enemy fire rate. You can only attack by punching with one hand.

There Still Ain’t Enough Style Preset

  • Weapon Preset: Dual Revolvers
  • Modifiers: Scavenger and Heavies

The There Still Ain’t Enough preset gives you two revolvers to counter the heavily armored targets. In order to reload, you need to successfully pistol whip a target.

Driftin’ Through Hell Style Preset

  • Weapon Preset: One Handed Revolver
  • Modifiers: Scavenger and Bullet Hell

The Driftin’ Through Hell limits your to using one revolver. This will also increase the enemy fire rate as well as limit reloading to successful pistol whips.

Bulletbag Stakeout for Two Style Preset

  • Weapon Preset: Dual Revolvers
  • Modifiers: Vengeance and Heavies

The Bulletbag Stakeout for Two preset gives to two revolvers. However, the targets receive extra armor while bullets will ricochet.

6. Select a preset you want to try from the Fitness menu.

7. Once you are done, we recommend that you select Customize.

8. From the Customize menu, you should see a list of modifiers that you can add or subtract from the preset.

We highly recommend that you select the Bulletproof. Otherwise, the stage can come to an abrupt and premature end if you took too much damage from bullets and/or obstacles.

If you find that the bullets are coming at you too fast, then you can try enabling the Low Velocity mod from this menu as well.

9. Once you are done setting everything up, look back to the right and then start a level. The preset and/or modifiers you previously set should now be activated in the stage.