How to fix PlayStation VR2 Sense Controller finger detection issues

You may notice that the Left or Right PlayStation VR2 Sense Controller may not properly detect your finger placements and/or movements. To see how you can potentially fix this problem with the virtual reality device, you can take a look at this troubleshooting article from Seeking Tech.

1. To start off, we recommend that you check the controls for the game you are currently playing.

Some games will detect fingers differently when compared to others. Not to mention that a few titles may not support finger detection at all.

2. If you are sure that the PlayStation VR2 game you are currently playing does support finger detection, then the next step you can take is to try cleaning the Sense Controller.

You can start off by using a soft, lint-free cloth to wipe any dirt or substances away from the analog stick, buttons and other surfaces.

If you are having a difficult time removing some of the dirt and/or substances, then you can add some 99.9% isopropyl alcohol.

3. If you are wearing gloves while using the PS VR2 controller, then you can try removing them to see if it fixes the finger detection issues.

4. Of course, you can also try washing your hands if they are dirty.

5. If you haven’t done so already, you should make sure that you have the latest firmware versions of the Sense installed.

In order to do so, you first need to update your PlayStation 5 console by going to System > System Software > System Software Update and Settings > Update System Software > Update Using Internet.
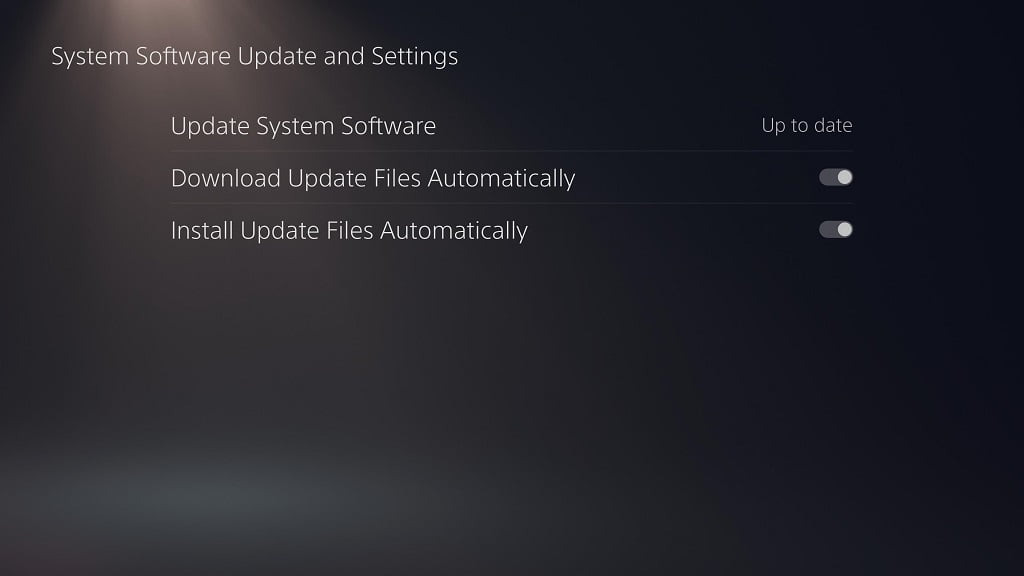
Afterwards, connect your PlayStation VR2 Sense Controllers. If there is a new firmware available, then you should see a notification appear on screen asking you to update.

6. You can also try resetting the problematic controller.

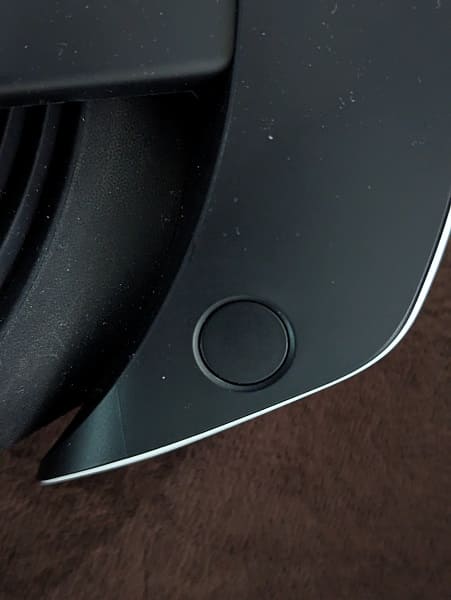
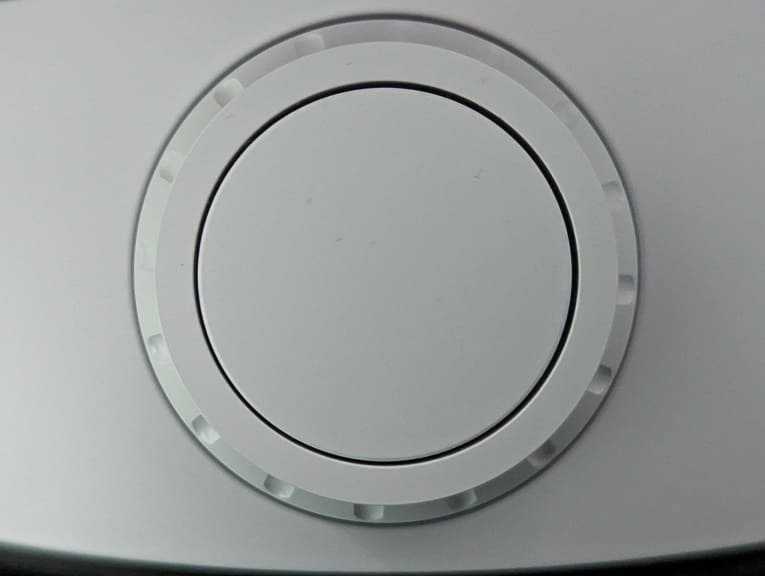
To do so, make sure that your PS5 and the controllers are both turned off. Afterwards, use a small pin to push to button underneath the pinhole of the Left or Right PlayStation VR2 Sense.
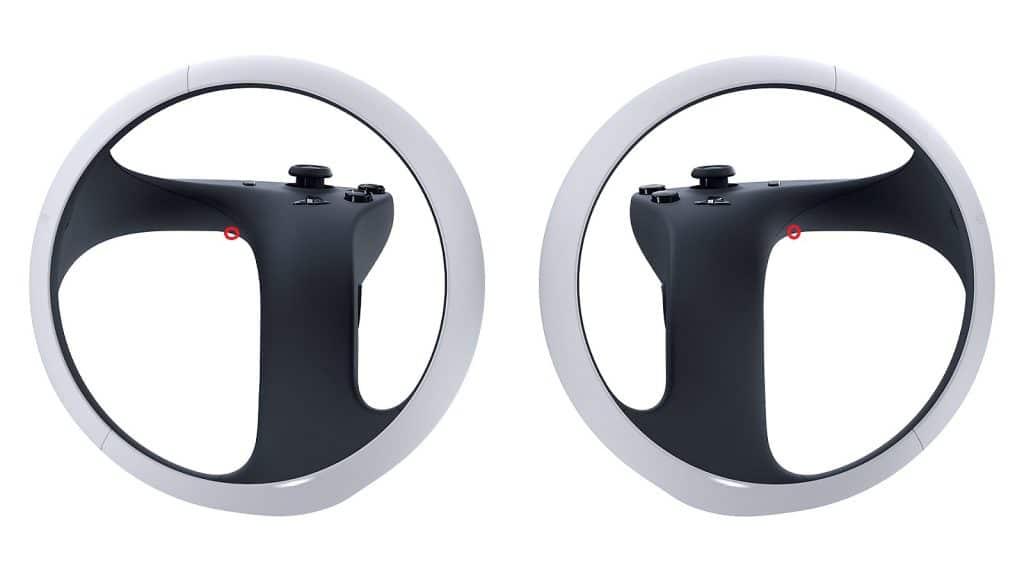
You should eventually push down on a button. Keep that button pressed for at least 5 seconds to reset.

Once the Sense Controller has been reset, connect it again to your PlayStation 5. Afterwards, you should test it out to see if your fingers can be detected properly.

6. If your finger placements and movements aren’t still being recognized, then your controller may be defective. In this case, you will need to send it in to be replaced or repaired.

How to loosen sticky PlayStation VR2 Sense Controller analog and buttons

You may notice that the analog stick and/or buttons of the Left or Right PlayStation VR2 Sense Controller may feel stuck or sticky. To see how you can loosen these inputs, you can take a look at this troubleshooting article from Seeking Tech.

1. For the first step, you can use a lint-free cleaning cloth to remove any dust, dirt and other substances that may have been causing the analog or buttons to become sticky.

If you are having a hard time removing some of the dirt or substances, then you can try using 99.9% isopropyl alcohol. These solutions are safe for electronics as they dry much faster than water.

If you are looking for a product, then we suggest getting the MG Chemicals 824 99.9% Isopropyl Alcohol Electronics Cleaner for the PS VR2 Sense controllers, which you can find on Amazon with this link. (#CommissionsEarned).

2. If the analog or buttons are still stuck, then you can try soaking a Q-Tip with isopropyl alcohol and then cleaning the outer edge of the stuck button or analog stick.

Try to see if you can get a little bit of the solution to drop down the opening so that the liquid will loosen any debris.

3. You can also use a compressed air canister to blow into the outer edge of the sticky or stuck analog or button of the PlayStation VR2 Sense Controller.

4. If none of the aforementioned steps have worked so far, then you can try applying some pressure.

In order to do so, press down hard on the analog or button with your thumb. Next, rotate the analog or button clockwise and clockwise a couple of times to see if you are able to loosen it.

5. If the analog or button remains stuck, then you might want to consider taking the controller apart to see if you are able to clean the insides. This is a more advanced method that we don’t recommend doing if you aren’t familiar with taking electronics apart, cleaning it and then reassembling the parts.

If you are still interested in doing so, then you can check out the following official tear down video of the PlayStation VR2 Sense Controller below:

6. If you don’t want to take the controller apart, then you should send it in to be repaired or replaced. You most likely need to send in your entire PlayStation VR2 unit if you are asking Sony to do the repair.

PECOOVR PlayStation VR2 Smooth Glasses Spacer Protector review

If you want to use the PlayStation VR2 while wearing glasses, then there is a possibility that you may end up scratching the lenses of the virtual reality headset. To prevent this from happening, you can get a spacer that prevents your glasses from hitting the VR lenses.

During your research, you may have found the PECOOVR PlayStation VR2 Smooth Glasses Spacer Protector on Amazon. So, is this product worth getting? You can find out in this article from Seeking Tech.

What’s Included

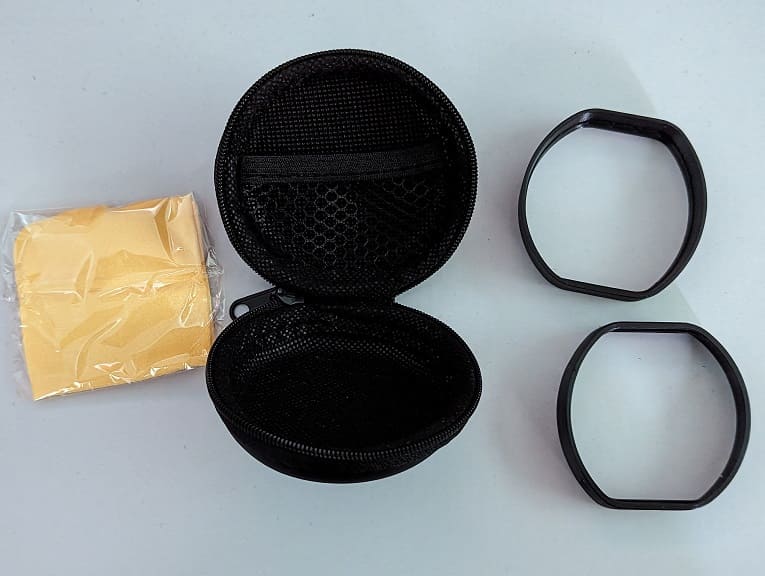
The PECOOVR PlayStation VR2 Smooth Glasses Spacer Protector features a left and right spacer insert for the lenses of the headset. It also features a microfiber cleaning cloth that you can use to wipe your glasses and the lenses clean.

All of these are stored inside a hard carrying case in case you need to take out the spacers and put them away somewhere safe.

Installation

Unfortunately, there aren’t any text instructions included with the PECOOVR PlayStation VR2 Smooth Glasses Spacer Protector. You will only find a video of the steps from a video posted on the Amazon product page or YouTube.

If you need help with the installation, then you can check out our tutorial.

Function

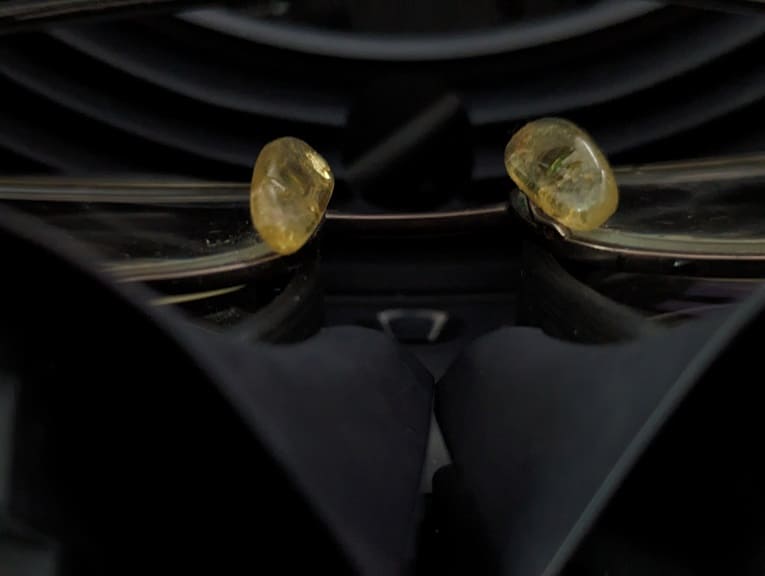
The PECOOVR Spacer does what it advertises as it adds a few extra centimeters to the outer edges of the left and right lenses in the PlayStation VR2 headset. By doing so, your glasses should not be able to make contact, and potentially scratch, the lenses.

While Sony has confirmed that you can wear glasses with the PS VR2, there have been many reports from consumers that they end up scratching the lens. Even if you are extremely careful when putting on and taking off the headset, scratches can happen if you move your head too much while playing a VR game.

Therefore, a spacer such as the PECOOVR can help save you time and money in terms of making you avoid sending your PlayStation VR2 unit in for repair.

We have been playing with the spacers equipped for dozens of hours so far and have found that the lenses of the VR headset have remained scratch free. These hours included playing titles that require a lot of movement such as Beat Saber, Pistol Whip and Les Mills BodyCombat.

Overall

As long as you installed it correctly, the PECOOVR PlayStation VR2 Smooth Glasses Spacer Protector does what it advertises as the product creates space between the lenses of the headset and your glasses. As a result, your glasses won’t cause any scratches to the lens.

While a little bit on the expensive side, it does come with a cleaning cloth and hard carrying case. You can find the current price of the product on Amazon with this link. (#CommissionsEarned).

If you have a 3D printer, or know someone that does, then you can use the print instructions provided by Lowfategg on Thingiverse in order to print out a compatible spacer.

How to install the PECOOVR PlayStation VR2 Smooth Glasses Spacer Protector

The PECOOVR PlayStation VR2 Smooth Glasses Spacer Protector does not come with any printed instructions. To see how you can properly install this accessory to the virtual reality headset, you can take a look at this tutorial from Seeking Tech.

1. If you haven’t done so already, make sure you take the two spacer protectors out of the carrying case.

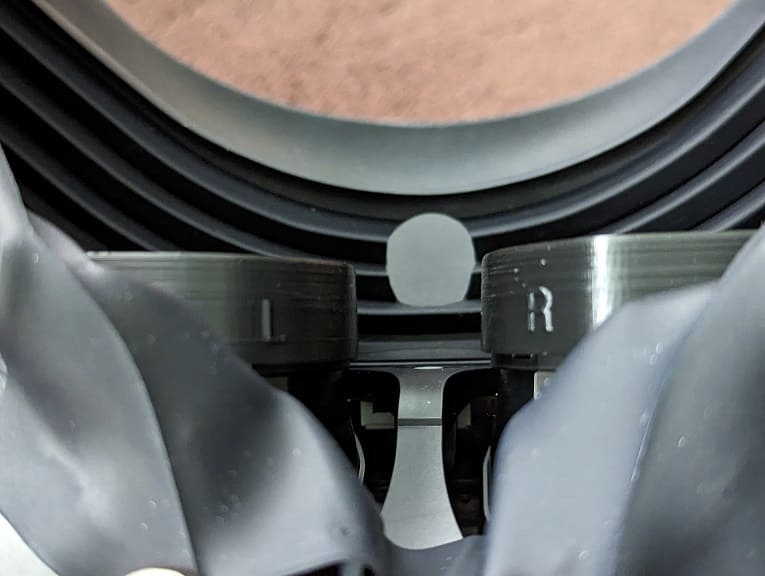
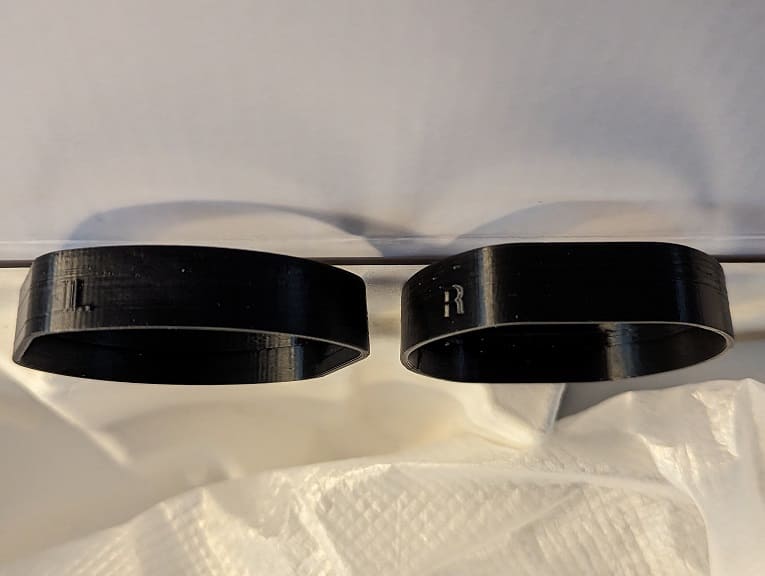
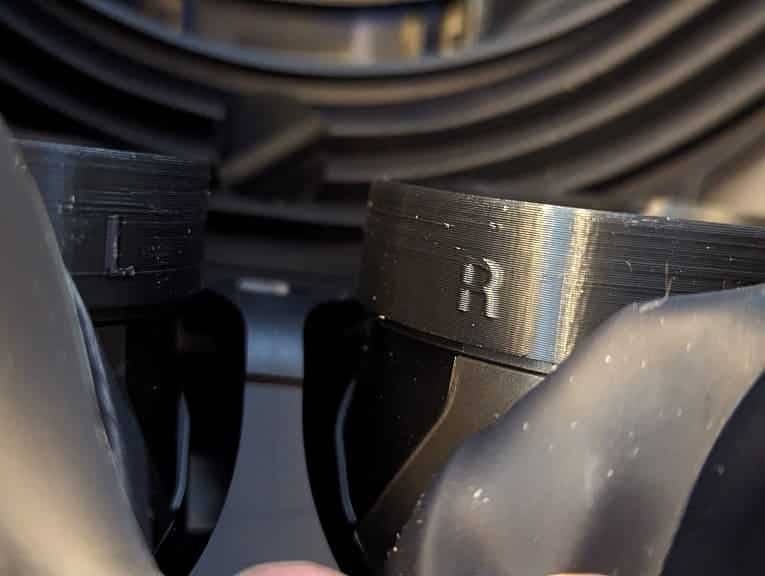
2. Look on the outer rings of the spacer protectors and you should see the L and R letters. You may need to inspect these accessories under bright lights to find these labels.

L indicates that the spacer is intended for the left lens of the PS VR2 while R indicates that it must be put on the right lens.

3. Next, lay the PlayStation VR2 face down on a soft surface. We recommend using a soft surface so that you don’t accidentally scratch or damage the scope and/or tracking cameras when installing the PECOOVR Smooth Glasses Spacer Protectors.

4. You may also want to find a way to keep the PlayStation VR2 upright. You can use your off hand to hold the headset and your other hand for installing the protectors.

In our case, we put the PS VR2 face down on a sofa. The soft surface of the couch prevented any scratches and damage while its back support keeps the headset stable while freeing us to use both hands during the installation.

5. Take one of the spacers and then make sure that the L or R isn’t upside down.

6. The L or R should be pointed towards the nose cut out of the light guard. So, you should make sure that you have the correct positioning.

7. Once you are sure you have the correct position, carefully align the spacer into the outer edge of the lens.

Avoid applying as much force as possible during this step as you don’t want to scratch the lens when maneuvering the spacer around.

8. Once you are done fitting the spacer, carefully push it down the lens in order to secure it. Make sure you push down on all sides of the spacer to ensure that it is equally leveled.

9. After installing one of the spacers, follow the same steps to install the other one.

If you need a video demonstration, then you can check out the following video from the PECOOVR YouTube channel:

10. You should be done installing the PECOOVR Smooth Glasses Spacer Protectors.

If the spacer or your skin made contact with the lenses on the PlayStation VR2, then you can use the cleaning cloth that came with the PECOOVR carrying case to carefully wipe the lens of any dirt, oil and other debris.

How to properly store the PlayStation VR2

If you aren’t using the PlayStation VR2, then leaving it out in the open can damage the expensive accessory. To see how you can properly store your virtual reality headset, you can take a look at this guide from Seeking Tech.

What can happen if you don’t properly store your PS VR2

If you don’t properly store your PlayStation VR2, then you could risk damaging its lenses due to the overexposure to direct sunlight.

Dust particles and other contaminants can also get to the lens, causing visual artifacts if you don’t wipe them off before using your headset. Dust can also end up blocking the ventilation shaft, which is designed to keep the lens from fogging up.

So, if you are aren’t using the virtual reality headset, it is best that you store it properly in order to avoid any potential damage.

Using the retail box

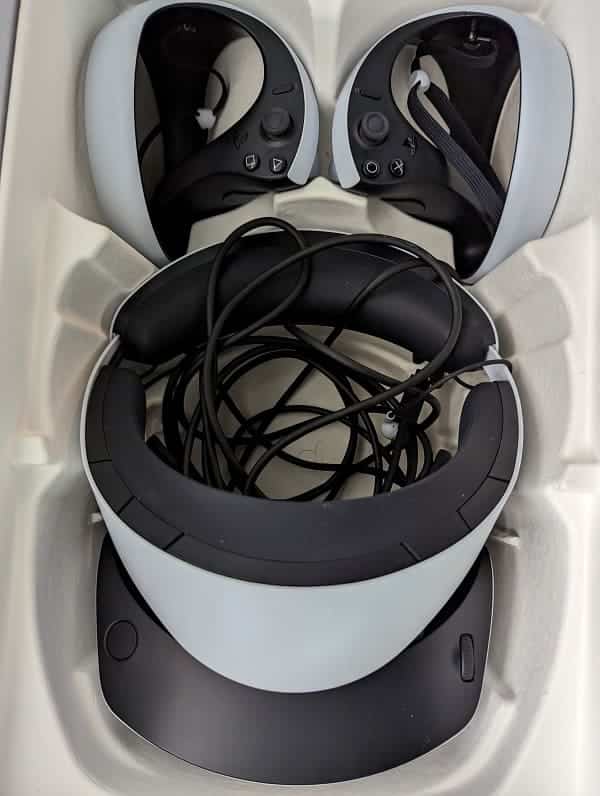
The good news is that packaging box that comes with the PlayStation VR2 can be re-used as a storage box. If you still have it around, then we recommend that you take the following steps:

1. To start off, unplug the PS VR2 from the USB C port of your PlayStation 5.

2. If you have the earphones attached to the earpiece holders, then we suggest that you remove them. Otherwise, the headset may not be able to fit properly in the grooves of the box.

3. If you haven’t done so already, long press the scope adjustment button and then slide the scope all the way in. This is needed to fit the headset into the groove of the retail box.

4. Once you have everything set up, put the headset into its groove in the retail box. Make sure that the earphones aren’t blocking the sides when doing so.

5. Afterwards, carefully put the USB cable in the open space in between the the scope and the headband.

6. If you want to, you can also put the Left PlayStation VR2 Sense Controller and Right PlayStation VR2 Sense Controller into their respective groves.

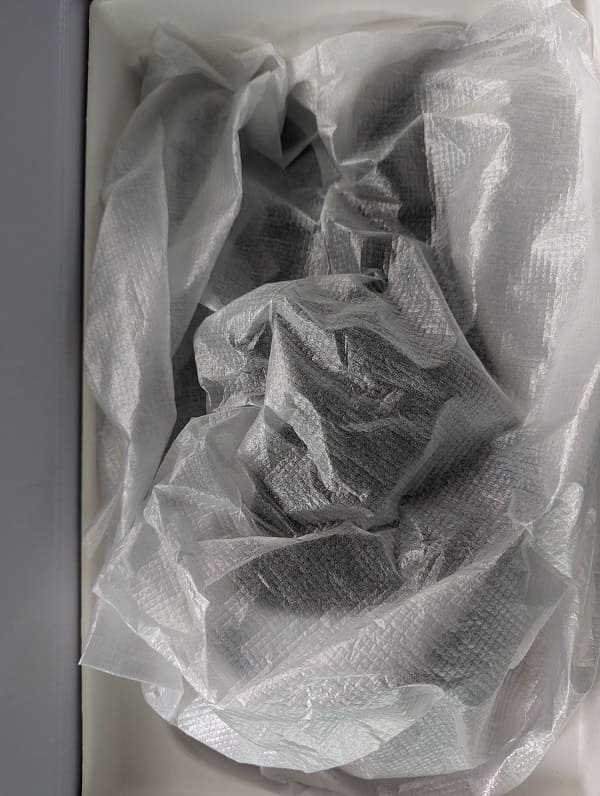
7. The retail box may not close all the way. If it doesn’t, then you can use one of the white plastic sheets that came in the packaging box as a dust cover.

PlayStation VR2 carrying case

If you already threw away the packaging box that came with your PlayStation VR2 and/or would like to easily move the virtual reality headset around, then you might want to consider getting a carrying case.

If you are interested in doing so, then we recommend checking out the Sarlar PlayStation VR2 Hard Carrying Case, which you can find on Amazon with this link. (#CommissionsEarned).

How to prevent the PS VR2 from slipping or sliding down your face

The PlayStation VR2 may slip or slide down your face, especially if you have to move around a lot in certain games. This can be somewhat annoying as the virtual reality headset has a small sweet spot in terms of sharpness. So, if that spot gets slightly off-centered, then the graphics will become blurrier.

To see how you can prevent the PS VR2 from slipping or sliding, you can check out this guide from Seeking Tech.

1. For the first step, you should make sure that the head band is securely enough. To tighten it, rotate the headband adjustment dial located at the back clockwise.

Be careful not to tighten it too much. If it feels like the virtual reality headset is squeezing your head, then press the headband release button to loosen it and then tighten it again until you reach an equilibrium in terms of comfort and stability.

2. Furthermore, you can try pulling the scope inner towards your face as well.

To do so, press and hold the scope adjustment button located on the top right side and then push the scope inwards.

3. You can also try wearing a sweat band as it will absorb any sweat from your forehead. As a result, the PlayStation VR2 won’t lose its grip due to a slippery skin.

To find out more about how you can prevent sweat from getting inside the PS VR2, you can take a look at our previous post.

4. If you don’t have a headband available, then you can try wearing a baseball cap backwards. The bill of the back should provide additional support on the backside of the VR headset.

5. You can also try using headphones instead of ear buds or earphones. The bigger ear cups should prevent the PS VR2 from slipping or sliding as it should make the sides of the VR headset more stable.

What to do if you don’t get an image on screen when using PS VR2

If you don’t see an image when using the PlayStation VR2, then you can take a look at this troubleshooting guide from Seeking Tech to see how you can resolve this issue.

1. For the first step, you should make sure that you press the power button located at the bottom of the scope. The power indicator located at the front of the scope should turn solid white.

2. If you aren’t seeing anything while wearing the headset while the headset is powered on, then you should try re-connecting the accessory by doing the following:

  • Completely turn off your PlayStation 5 or PlayStation 5 Digital Edition.
  • Unplug the PlayStation VR2 from the USB C port of your console.
  • Re-plug the virtual reality headset back into the USB C port on the PS5.
  • Turn your PS5 back on.
  • Turn on the PS VR2.

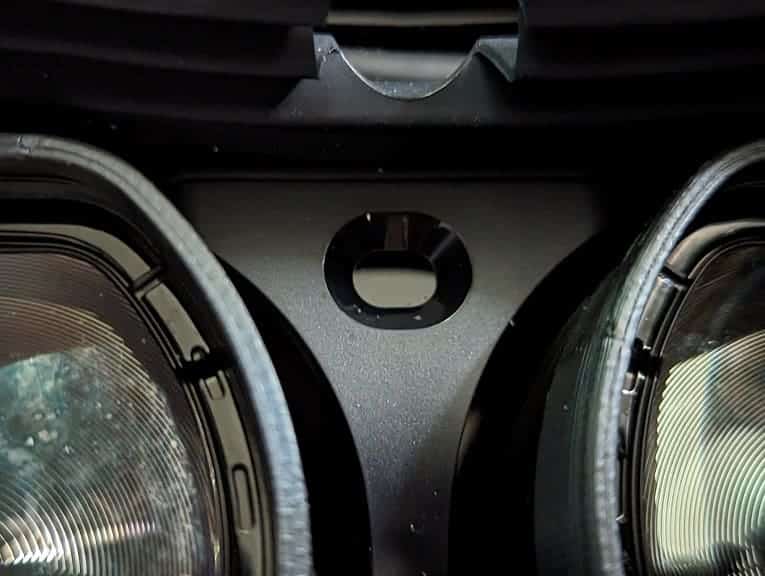
3. There is an attachment sensor located inside of the headset. You should make sure that the sensor is clean; otherwise, it may not be able to detect whether or not you are currently wearing the PlayStation VR2.

To clean the sensor, use a dry, lint-free cloth.

4. Hair and head accessories may also make the attachment sensor to be inaccurate. Therefore, you should make sure that only your bare face is inside the light shield.

Keep in mind that the PlayStation VR2 supports glasses. So, you should be fine if you need to wear glasses with this product.

5. Make sure that the USB cable is securely connected on both ends.

On the PlayStation VR2, the proprietary USB port is located in between the scope and light shield. You will need to pull the scope outwards to find it.

6. If possible, try to plug another accessory in to the USB C port of your PlayStation 5.

If the other accessory isn’t working as well, then you may need to send your console in for repair due to a faulty USB C port.

7. You can also try using your PlayStation VR2 headset on another PS5 if possible.

If the virtual reality headset isn’t showing an image when used on another console, then you may need to send the accessory in for repair.

What to do if PlayStation VR2 keeps turning off

When playing with the PlayStation VR2, the headset may keep turning off. To see how you can potentially fix this power problem, you can take a look at this troubleshooting article from Seeking Tech.

1. The first step you can take is to inspect the USB connection between the PS VR2 and PS5. You should make sure that this connecting is securely plugged in on both ends.

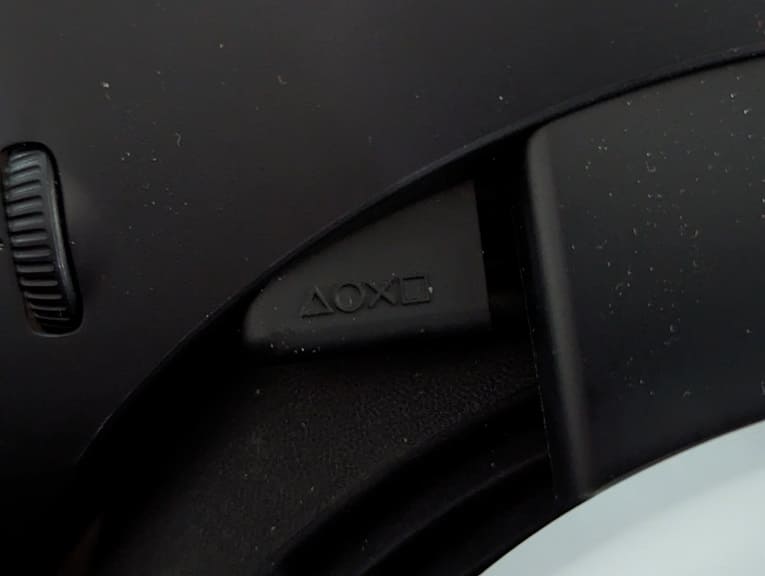
To find the USB connection on the virtual reality headset, you need to move the scope outwards. You should then see the PlayStation symbols on the plug located in between the scope and light shield.

2. Using an extension cable may cause the headset to shut off at random times.

Therefore, we recommend that you avoid using any extensions and, instead, simply connect your PlayStation VR2 headset directly to the PlayStation 5 or PlayStation 5 Digital Edition console.

3. There is also a possibility that the virtual reality headset may be overheating.

To see how you can prevent the temperatures from rising too high while you are using the PS VR2, you can check out our previous guide.

4. If you haven’t done so already, you should check to see if you have the latest system software update installed on your PS5.

To manually check, you can go to the Settings of the gaming system and then select System > System Software > System Software Update and Settings > Update System Software > Update Using Internet.

A new update may fix the power issue of your PS VR2.

5. If possible, you can try plugging in a different USB C device into your PS5 to see if the other device can function without any issues.

If you are also having problems with other USB C accessories, then the USB C port of your console may be faulty. In this case, you will need to get it repaired.

6. You can also try testing the PlayStation VR2 on a different PS5 if possible.

If the headset is also shutting off randomly on another console, then there may be a hardware issue with the VR headset. In this scenario, you will need to get the PlayStation VR2 repaired.

What to do if the PlayStation VR2 isn’t turning on

If the PlayStation VR2 isn’t turning on when you press the power button, then you can check out this troubleshooting article from Seeking Tech to see how you can potentially fix this issue.

1. For the first step, you can try restarting your PS5 by taking the following steps:

  • Unplug the PS VR2 from your PlayStation 5 or PlayStation 5 Digital Edition console.
  • Restart your PS5 by pressing the PS button, selecting the Power option located at the bottom menu and then selecting Restart PS5.
  • Connect the PS VR2 to the USB Type-C port of the PS5 again.
  • Press the power button on the PS VR2.

2. If your virtual reality headset still won’t turn on, then you should make sure that you aren’t using any extension cable to connect it to your PS5. Instead, the PS VR2 should be directly connected to the console.

3. You should also check to see if the USB cable is securely connected to the PlayStation VR2 headset.

In order to do so, pull the scope of the headset all the way out. You should then be able to find the USB connection between the scope and light shield.

If the connection appears to be loose, then try to push it inwards.

4. If the PS VR2 still won’t turn on, then you can try using it on another PlayStation 5 console if possible. If the accessory is able to power on just fine on a different system, then there may be something wrong with the USB Type-C port of the first PS5.

In this case, you need to repair the USB port of the console.

5. If the PlayStation VR2 does not work on multiple PS5 systems, then there could be something wrong with the hardware of the virtual reality headset.

For this scenario, you will most likely need to send the PS VR2 in to be repaired or replaced.

How to stop sweat from getting into your PlayStation VR2 headset

Your sweat can easily get into the PlayStation VR2 headset when you are playing Beat Saber, Pavlov, Pistol Whip and other games that require a lot of movement. As a result, the lens may fog up and become dirty after sometime.

To see how you can prevent sweat from getting into the PS VR2, you can take a look at this guide from Seeking Tech.

1. If you haven’t done so already, try to get a fan to blow on your face while you are playing. This should cool down your head, which should prevent most of the sweat from dripping down your forehead.

A fan is also extremely helpful if you are getting motion sickness when playing a virtual reality game.

2. If you are playing during a really warm day, then you can try opening the window or turning on the air conditioner as well.

3. You can also wear a headband before putting on your PlayStation VR2. The headband will help absorb the sweat coming out of your forehead and, therefore, preventing it from dripping down into the headset.

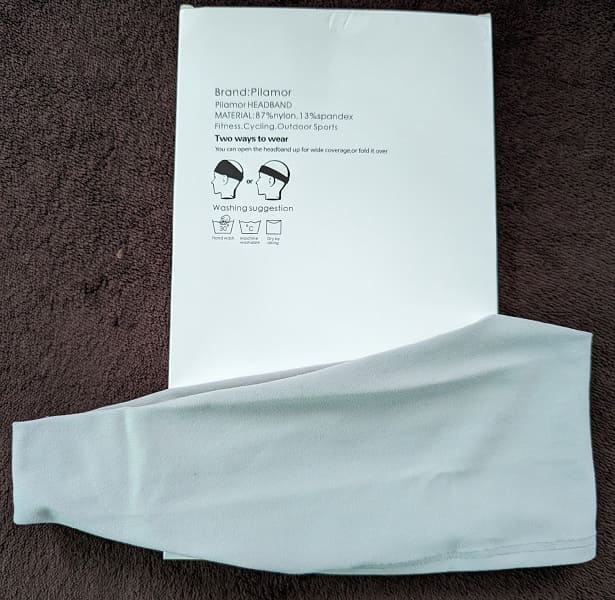
In our case, we use the Pilamor Sports Headbands, which have worked extremely well for us so far as do a great job at keeping sweat out of the PS VR2 despite being quite thin.

If you are interested, you can purchase this product on Amazon with the following link:

3. Of course, we also recommend taking a short break every time you start to sweat.

During your rest, you should remove the virtual reality headset from your head and then wipe off any sweat that may have accumulated on the headrest or other areas inside the PS VR2.

You should also take the opportunity to wipe off any sweat from your face and/or cool down before jumping back into another session.

Once you get used to it, you can easily jump back into the PlayStation VR2 game and adjust your visibility to hit the sweet spot relatively quickly.