What to do if the Diablo 4 action bar is not working

When playing Diablo IV, you may notice that the action bar or skill bar may randomly stop working. While you may see your controller inputs being registered in the heads-up display user interface, your character may not respond to it.

To see how you can fix this specific control issue, you can take a look at this troubleshooting article from Seeking Tech.

1. The most common way to make the action bar work normally again is to try having a conversation with a non-playable character in the game that will give you multiple dialogue options.

Once you have finished your talk, the glitch should be fixed as you should be able to use your skills again.

2. If talking to the NPCs in the game does not work, then you can try logging out and then logging back into the game.

3. You can also try closing the software and then re-opening it.

If you are playing Diablo 4 on the Xbox Series S or Xbox Series X, then you should make sure that you remove it from the Quick Resume queue. Otherwise, the game will end up getting suspending instead of being closed.

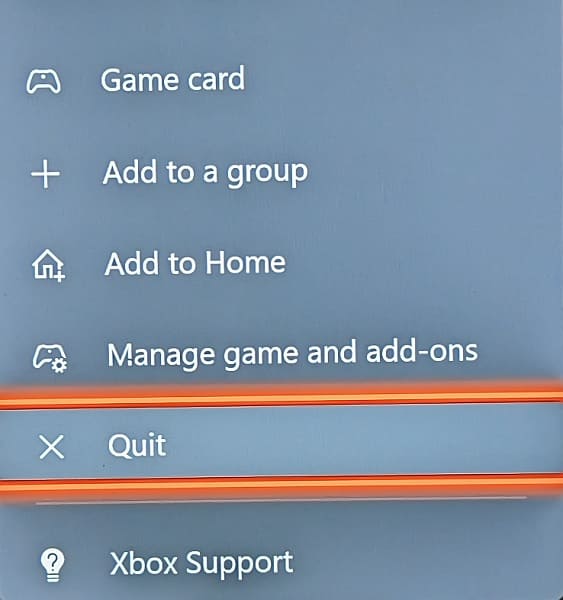
In order to do so, open the Xbox Guide menu by pressing the Xbox button on your controller. Once you get there, move the cursor over to the Diablo IV icon and then press the Menu button. Finally, select the Quit option.

4. Restarting your PC or console may help as well since the control issues may be related to the operating system.

5. Make sure you have the latest patch downloaded and installed for Diablo IV. The action bar problems seem to be a pretty common bug that may likely get fixed in a future title update.

6. If you still can’t use your skills, then you can try using a different controller to see if your character will respond to your commands.

How to turn off Street Fighter 6 modern controls

In order to be more accessible to causal players, Street Fighter 6 added Modern Controls as the default button layout. This combines kicks and punches as well as turn Dive Impact, Dive Parry and Special Moves into one button press actions instead of having to press a combination on buttons.

With that said, Modern Controls will limit the number of attacks that you can perform when compared to Classic control type. Not to mention that you will also do around 20% less damage on Special Moves.

If you find that this default layout is too limiting and/or causing you to lose matches, then you can check out this guide at Seeking Tech to see how you can disable it.

1. The controls in Street Fighter IV can only be changed outside of a match. So, if you are in a middle of the fight, you can either finish it or open the Pause Menu and then go back to the Mode Select screen.

2. Next, you need to open the Multi Menu from the Mode Select screen.

You can do so by pressing the Options button if you are using a DualSense/DualShock 4 or Menu button if you are using an Xbox One/Xbox Series controller.

3. In the Multi Menu, select Options.

4. After getting to Options, press the R1 or RB button on the controller to switch over to the Controls tab.

5. Inside the Controls tab, you can either select Player 1 Side Control Settings (Battle) or Player 2 Side Control Settings (Battle).

Select Player 1 Side Control Settings (Battle) if you prefer to start your matches on the left side of the screen or Player 2 Side Control Settings (Battle) if you prefer to start off on the right.

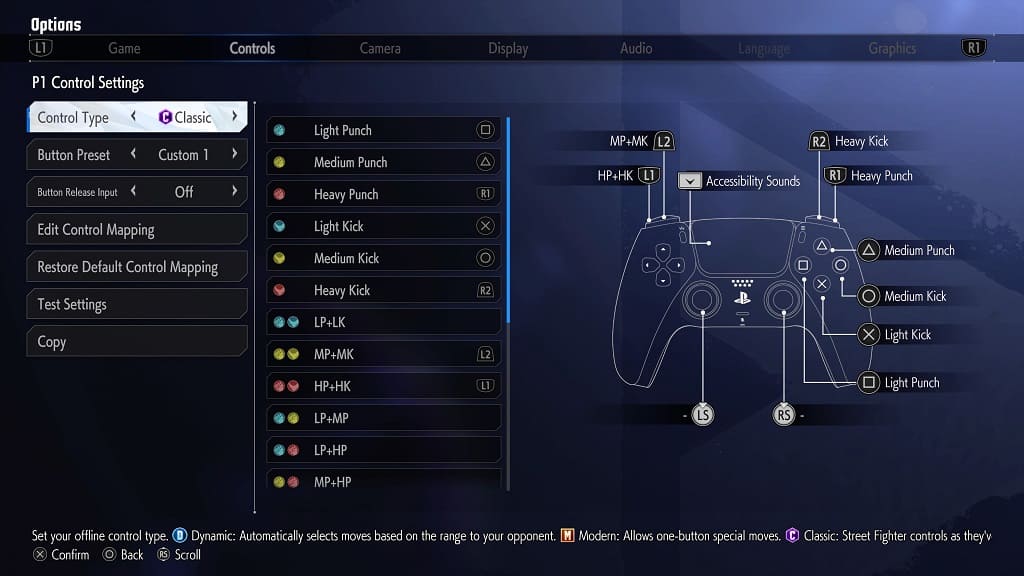
6. From the P1 Control Settings or P2 Control Settings menu, you should see the Control Type setting near the top.

With that setting highlighted with the cursor, you can use the directional pad or left analog stick to change to a different control type.

In addition to Modern and Classic, you can also switch over to Dynamic. For the uninformed, Dynamic offers even more simplistic controls when compared to Modern.

With that said, if you want the most roster moves and or damage potential, then we recommend changing the control type to Classic.

7. Once you are done changing the control type, press the Circle button on PlayStation or B button on Xbox to back out.

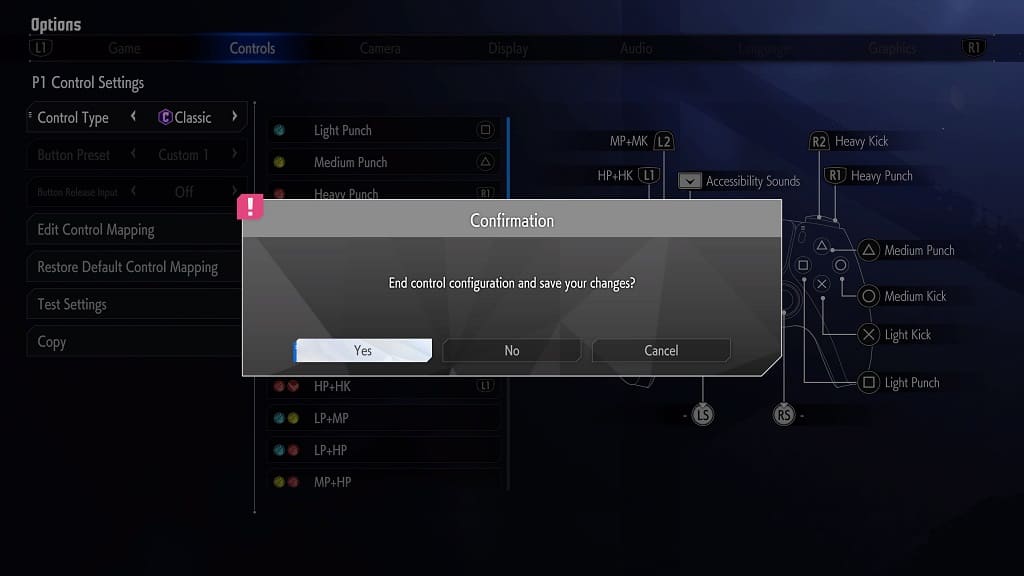
8. You should then see a Confirmation notification pop-up saying the following:

  • “End control configuration and save your changes?”

Here, you need to select the Yes option to save and apply the new controls.

If your changes weren’t applied, then you should make sure you did not mix up the Player 1 Side Control Settings (Battle) and Player 2 Side Control Settings (Battle) selection.

How to turn off commentary in Street Fighter 6

A new feature introduced in Street Fighter 6 is audio commentary as you will hear play by play and color analyst talking about your match. This is done to mimic the eSports feel of this competitive fighting game. If you would like to turn off this setting instead, then you can take a look at this tutorial to find out how you can properly do so.

1. You can only disable the commentary from the Mode Select menu. Therefore, you should return to the title screen if you haven’t done so already.

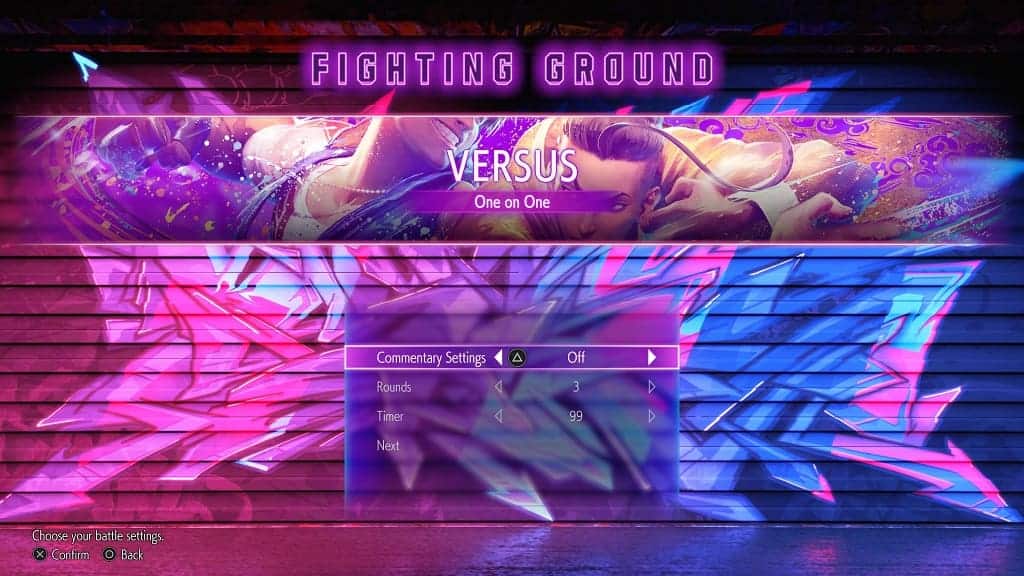
2. In the title screen, select a mode that you want to play. In our case, we choose a “One on One” battle in the Versus tab.

3. You should then see a list of Battle Settings. At the top, you should find Commentary Settings.

4. Move the cursor over to Commentary Settings and then use the left direction pad, right directional pad, move the left analog stick to the left or move the left analog stick to the right in order to change it from On to Off.

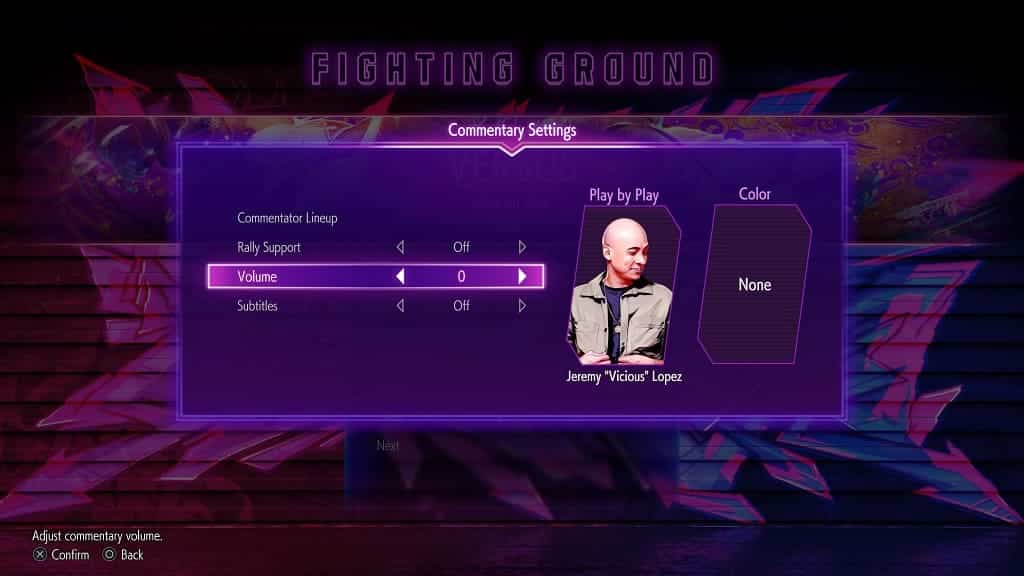
Alternatively, you can press the Triangle button on a PlayStation controller or Y button on an Xbox controller with the cursor on Commentary Settings to open the small window menu. From there, you should to change the lineup of the play by play and color commentators. Furthermore, you can also customize the rally support volume and subtitle display.

Setting the Volume level to 0 from the Commentary Settings menu should also disable the audio comments during battles.

5. Afterwards, move the cursor down and select Next. You can then go on to start a match.

You should no longer hear any commentary when fighting a match in Street Fighter VI. The changes you made in the aforementioned Battle Settings should be applied across modes as well.

What to do if you are stuck in the Diablo 4 ‘queued for game’ screen

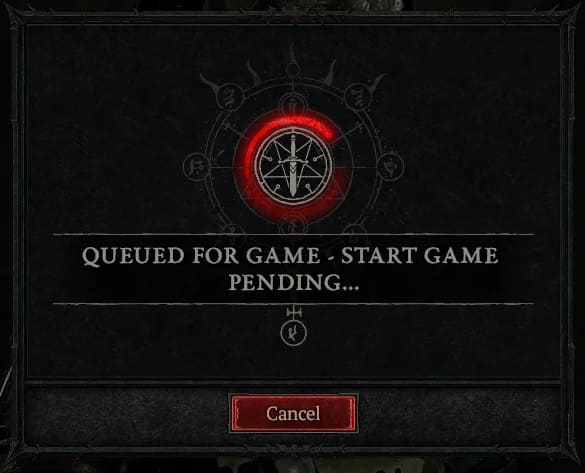
When trying to log into your Battle.net account for Diablo 4, you may notice that it will stay stuck at the “Queued for game – Start game pending …” screen. To see how you can get potentially get past this menu and then load into your save file, you can take a look at this troubleshooting article from Seeking Tech.

1. For the first step, you can try selecting the Cancel option and then try to log in again.

2. If you the game still freezes up at the “Queued for game – Start game pending …” screen, then you can try restarting your game.

If you are playing Diablo 4 on your Xbox Series X or Xbox Series S, then you should make sure you remove it from the Quick Resume queue. Otherwise, you won’t be able to restart. In order to do so, press the Xbox logo button on the controller and then move the cursor over to the Diablo 4 icon. From there, press the Menu button on the controller and then select Quit.

3. You can also power cycle your home network devices.

In order to do so, turn off your game console. Afterwards, turn off or unplug your modem, router and other networking devices. After waiting for a few minutes, turn your modem, router and other networking devices back on again.

Once your home internet has gone back online, turn on your game console, open Diablo 4 and then try to sign into your account.

4. If you haven’t done so already, make sure you have the latest patch installed for the game as the new update may fix the “Queued for game” infinite loading error.

5. There is also a possibility that there are currently some issues with the online servers of the game. Keep in mind that the latest title from the Diablo series requires an online connection even if you are playing it by yourself.

To see if there is a problem with the servers, we recommend that you follow the official Blizzard Entertainment North America Customer Support Twitter page.

If the servers are down and/or undergoing maintenance, then you have to wait until the development team fixes them before trying to sign into your account in Diablo 4.

How to find missing Diablo 4 Deluxe or Ultimate Edition content

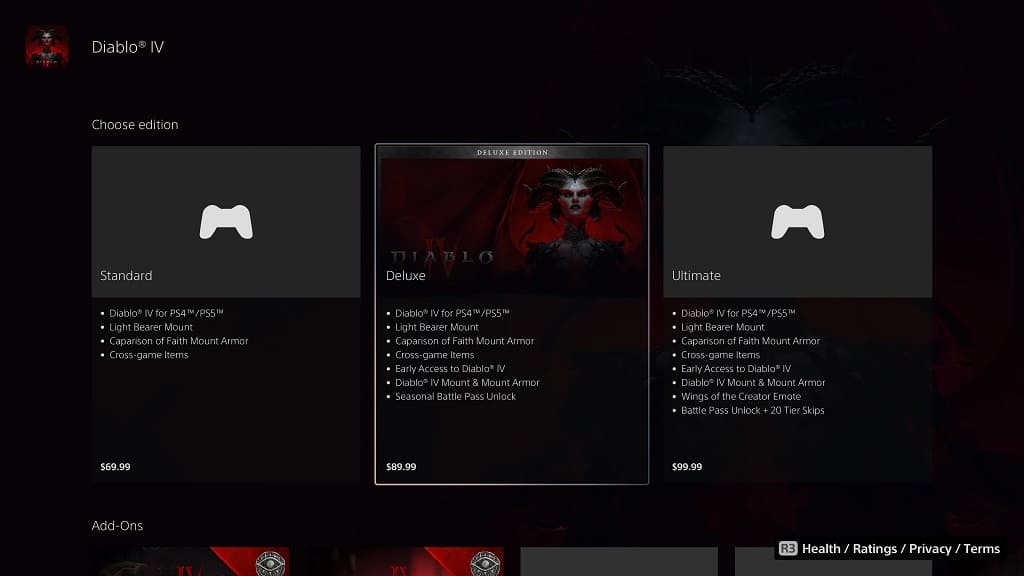
If you downloaded the Deluxe or Ultimate Edition of Diablo 4, you may have a hard time finding the extra content included with the more expensive version of this action role-playing game. To see how you can locate these DLC bonuses, you can take a look at this guide from Seeking Tech.

1. Before we begin, it is very important to note that the Deluxe and Ultimate Edition contents do not require a separate download. Instead, these are unlocked once you are signed into your Battle.net account in the game.

Therefore, you will end up download the standard version of Diablo IV as there isn’t a separate download for the more expensive releases.

2. It is also very important to note that you can’t share this bonus content with a different Battle.net account. Instead, these extras are tied to the account that was used to make the purchase.

3. Depending on where you are in the main campaign, you may not be able to access the in-game bonuses. For the uninformed, you will get the following extras based on the version you purchased:

Diablo IV Standard Edition:

  • Light Bearer Mount

Diablo IV Deluxe Edition:

  • Light Bearer Mount
  • Temptation Mount
  • Hellborn Carapace Mount Armor
  • Seasonal Battle Pass Unlock

Diablo IV Ultimate Edition:

  • Light Bearer Mount
  • Temptation Mount
  • Hellborn Carapace Mount Armor
  • Accelerated Seasonal Battle Pass Unlock
  • Wings of the Creator Emote

The Wings of the Creator Emote won’t be unlocked until you complete the prologue in Diablo 4. Afterwards, you should be able to find it in the action wheel, which you can access by pressing the up directional pad button if you are playing with a controller or by pressing the E eye if you are playing with a keyboard and mouse.

The Light Bearer Mount, Temptation Mount and Hellborn Carapace Mount Armor can only be unlocked after you gain the ability to ride a horse in the campaign. In order to do so, you have to get to the Act 4 in the story. Once you earn your first horse, go to a stable to find the Light Bearer Mount, Temptation Mount and/or Hellborn Carapace Mount Armor bonuses.

For the Season Pass Unlocks, you have to wait until Diablo 4 gets its first season of content before you can use these bonuses.

4. If your Deluxe or Ultimate Edition content is still missing after trying all of the aforementioned steps, then we suggest that you contact the Activision Blizzard Support team to take a look at your account and to get direct support.

How to fix Diablo 4 ‘none of your characters are eligible’ co-op error

When playing Diablo 4 with another player through the local couch co-op feature, you may end up seeing an error saying that none of your characters are eligible. This warning may show up even if you are able to play with another player locally previously without any problems.

To see how you can potentially fix this issue with the cooperative mode in this action role-playing game, you can take a look at this troubleshooting article from Seeking Tech.

1. For the first step, you should make sure that both the first and second player have finished the prologue. If the second player only joined the game after the first player has completed the prologue, then you will need to do the following:

  • The first player needs to create a new character.
  • The second player should then join in with their existing character right away.
  • The first and second player should go on to start and then finish to prologue.
  • Restart Diablo 4.
  • This time, the first player should select their original character.
  • The second player should then join in and select their existing character.
  • Hopefully, you should no longer see any ineligibility errors once both players have cleared the prologue.

2. If you bought the Diablo IV Deluxe Edition or Diablo IV Ultimate Edition, then there are currently some issues with the licensing authorization system during the Early Access period that may be causing the co-op issues.

This is probably due to Activision Blizzard not allowing you to game share a copy of your game to another player during Early Access.

In this case, we recommend that you wait until June 6, 2023, which should be when the licensing restrictions should end and game sharing should start working as intended. Hopefully, the “none of your characters are eligible” issue in local co-op should be resolved on its own by that date as well.

3. You can also wait until the next hot fix or patch is deployed for Diablo 4. The update can either be done on the sever side or through a title update to the game’s files. Therefore, you should make sure that you have the latest version of this game installed on your gaming system.

Diablo IV can be played on PC, PlayStation 4, PlayStation 4 Pro, PlayStation 5, PlayStation 5 Digital Edition, Xbox One, Xbox One S, Xbox One X, Xbox Series S and Xbox Series X.

4. If you are still getting the “none of your characters are eligible” warning, then we suggest that you contact the Blizzard support team to get direct support.

What microtransactions can you get for Diablo IV?

At launch Diablo IV features multiple microtransactions if you want to make your journey a lot easier as well as progress through the battle pass a lot faster. You can check out this Seeking Tech guide to see what these DLC packs for this action role-playing game contain.

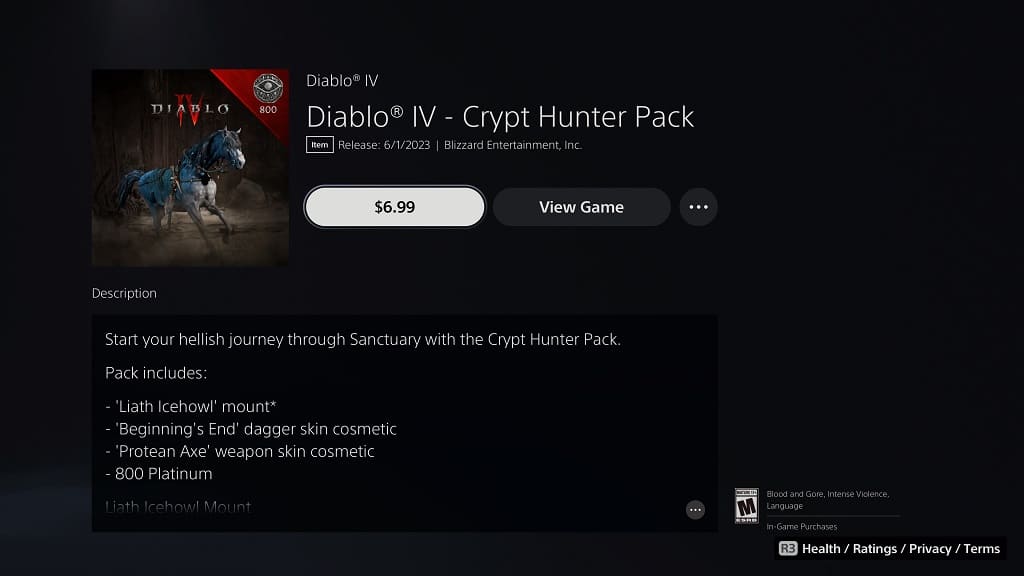
What is the Diablo 4 Crypt Hunter Pack?

The Crypt Hunter Pack comes with the following in-game items:

  • Liath Icehowl mount
  • Beginning’s End dagger skin cosmetic
  • Protean Axe weapon skin cosmetic
  • 800 Platinum

The Liath Icehowl is a mottled horse that carries trinkets from heroes of the past. Keep in mind that you won’t be able to use this mount until you unlock the ability to ride animals in the campaign.

The Beginning’s End dagger skin is crafted from timber from a baby crib bedpost.

The Protean Axe weapon skin is designed to kill as well as dispose the remains of enemies.

Platinum is the virtual currency in Diablo IV. You will get 800 of these from this downloadable content pack. You can find out more about this later in this article.

In the U.S. region, the Crypt Hunter Pack has a price tag of $6.99. This DLC can’t be shared with other users as you can only use the content on the original account used to make the purchase.

Since your save progression is saved on the server, you should be able to carry this DLC over to another platform thanks to cross-save and cross-progression.

What are the Diablo 4 Platinum DLC Packs?

Diablo IV also comes with multiple Platinum Packs. You can use these in-game virtual currency to do the following:

  • Buy cosmetic items from the shop
  • Unlock the Premium Battle Pass
  • Skip Batter Pass tiers

The following Platinum downloadable content are available:

Diablo IV – 200 Platinum

This DLC comes with 200 Platinum. It is the cheapest option available as it costs $1.99 in USD.

Diablo IV – 500 Platinum

The next cheapest microtransaction in Diablo 4 is the 500 Platinum, which costs $4.99.

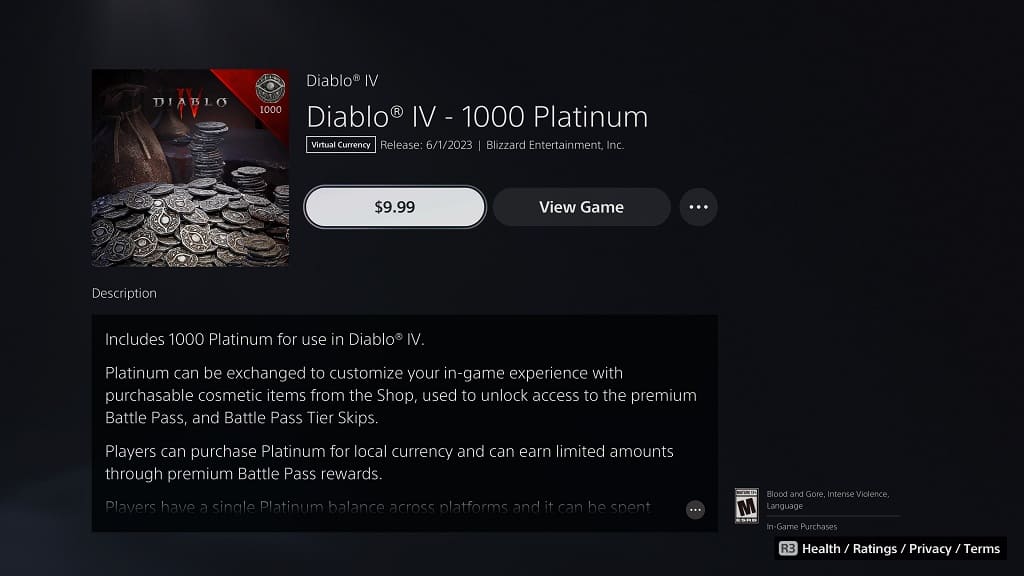
Diablo IV – 1000 Platinum

The next tier up is the 1000 Platinum pack, which is priced at $9.99.

Diablo IV – 2800 Platinum: 2500 + 300 Platinum Bonus

If you don’t mind spending more, then you will start saving some cash starting with the 2800 Platinum downloadable content pack. For $24.99, you will get 2500 Platinum to go along with 300 Platinum as a bonus (which is worth around $2.99).

Diablo IV – 5700 Platinum: 5000 + 700 Platinum Bonus

With the 5700 Platinum DLC, you will have to pay $49.99. With that said, you do save a little bit on cash (approximately $6.99) thanks to the additional 700 Platinum as an added bonus.

Diablo IV – 11500 Platinum: 10000 + 1500 Platinum Bonus

The most expensive Diablo 4 microtransaction pack is the 11500 Platinum. While costing $99.99, you will also get 1500 Platinum (worth around $14.99) as an additional bonus.

So, if you don’t mind spending that huge amount, you will actually end up saving some money as opposed to getting to 11500 Platinum by making smaller purchases.

The Platinum Packs are tied to your Blizzard.net account. Therefore, you should be able to carry your Platinum currency across to other platforms thanks to the game’s support for cross-save and cross-progression.

With that said, you won’t be able to share the microtransaction purchases with other players.

What microtransactions can you get for Street Fighter 6?

Street Fighter 6 comes with several microtransaction packs that you can purchase. You can check out this guide from Seeking Tech to see what these DLC packs do.

About Fighter Coins

This game uses Fighter Coins as virtual currency. You can use these to buy in-game items, fighting passes, DLC characters and DLC stages.

What Street Fighter 6 microtransactions are available?

You can take a look at the available microtransaction DLC packs for this fighting game below:

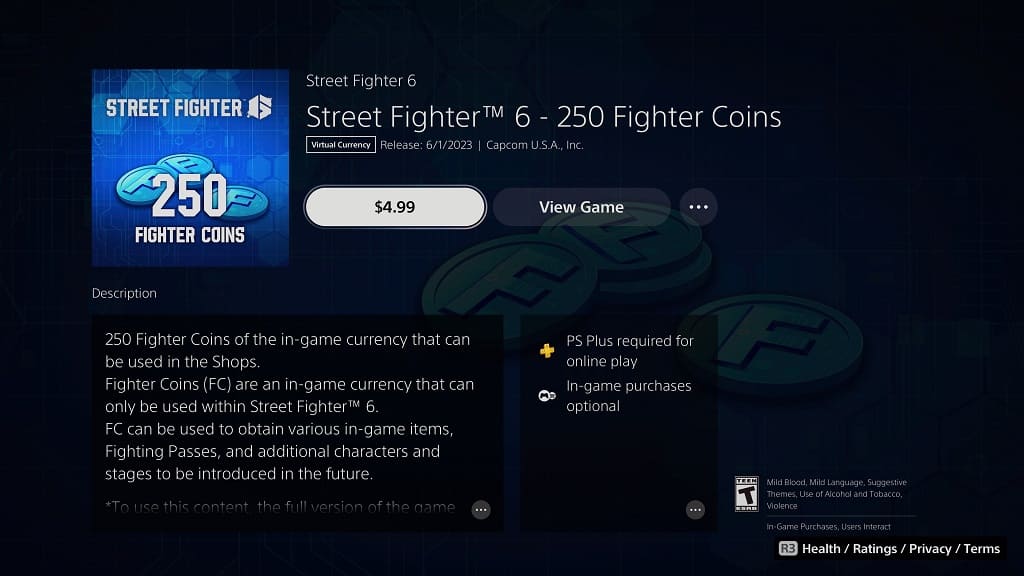
  • Street Fighter 6 – 250 Fighter Coins
  • Street Fighter 6 – 610 Fighter Coins
  • Street Fighter 6 – 1250 Fighter Coins
  • Street Fighter 6 – 2750 Fighter Coins

The 250 Fighter Coins pack is priced at $4.99 in USD, which means that you will be paying around $0.01996 per every virtual coin.

The 610 Fighter Coins pack costs $11.99, which is a slightly better value at $0.01966 per coin.

For the 1250 Fighter Coins pack, you will be paying $23.99, or $0.01919 per coin.

The most expensive microtransaction in this game is the 2750 Fighter Coins which is priced at a rather substantial $49.99. With that said, it also offers the most savings at $0.01818 per coin.

In order to use the Fighter Coins you bought, make sure you have the latest patch downloaded for Street Fighter 6; otherwise, you may not get the added coins to your account if you are playing an older version of this fighting game.

You should be able to view any purchases you made with this virtual currency from the Purchase Details section of the in-game menu.

It is also very important to note that these microtransaction packs can’t be game share. Instead, the virtual currency can only be used on the primary account that was used to make the purchase. If you want to use another account in Street Fighter 6, then your Fighter Coins won’t carry over from your old account.

Street Fighter 6 is now available for the PC, PlayStation 4, PlayStation 5, Xbox Series X and Xbox Series S platforms.

What’s the difference between the SF6 Year 1 Character Pass and Year 1 Ultimate Pass?

If you want to get the first four DLC characters for Street Fighter 6, you may want to consider purchasing the Year 1 Character Pass or Year 1 Ultimate Pass. So, what are the main differences between these two downloadable contents? You can find out in this comparison article from Seeking Tech.

Street Fighter 6: Year 1 Character Pass vs. Year 1 Ultimate Pass Comparison Chart

You can find our comparison table for these two DLC packs below:

Street Fighter 6 Year 1 Character PassStreet Fighter 6 Year 1 Ultimate Character Pass
Standalone Pricing$29.99$49.99
Included withStreet Fighter 6 Deluxe EditionStreet Fighter 6 Ultimate Edition
DLC CharactersRashid

A.K.I.

Ed

Akuma
Rashid

A.K.I.

Ed

Akuma
DLC Character Outfit #1Included with 10 different color variantsIncluded with 10 different color variants
DLC Character Outfit #2Not includedIncluded with 10 different color variants
DLC Character Outfit #3Not includedIncluded with 10 different color variants
DLC StagesNot included2
Drive Tickets4,200 Drive Tickets7,700 Drive Tickets

Bundles

The Year 1 Character Pass comes with the Street Fighter 6 Deluxe Edition bundle which has a MSRP of $84.99 in USD.

The Year 1 Ultimate Pass is included with the Street Fighter 6 Ultimate Edition, which has a standard pricing of $104.99.

Standalone Pricing

Of course, you can also purchase both DLC packs as standalone.

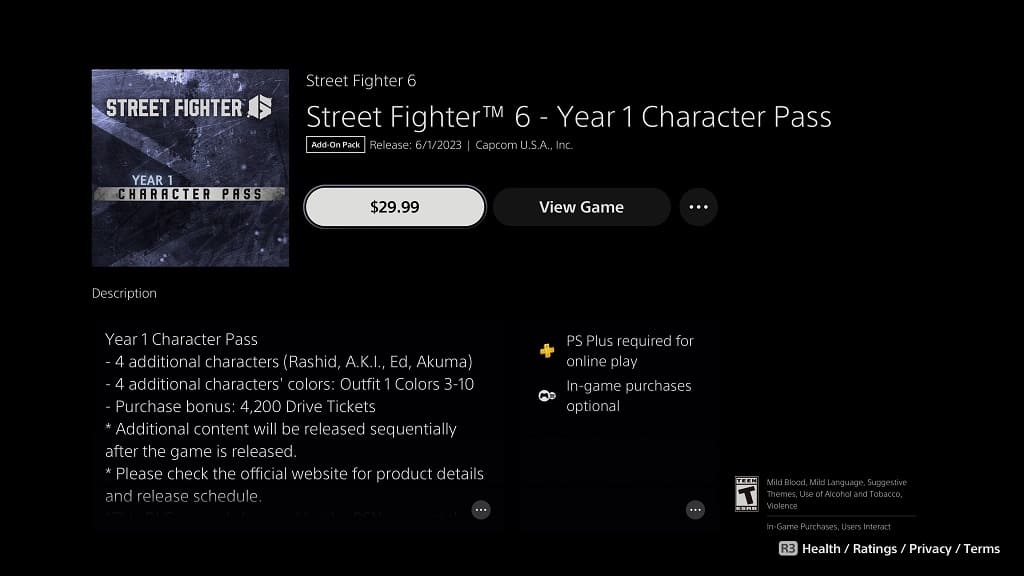
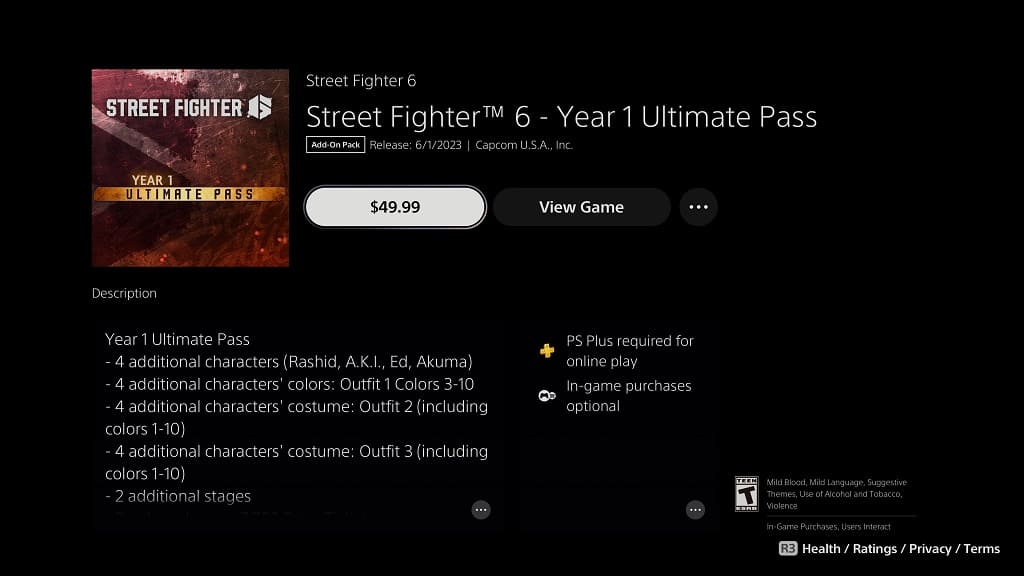
The Year 1 Character Pass is priced at $29.99 while the Year 1 Ultimate Pass is a lot more expensive at $49.99.

If you purchase Street Fighter 6 Deluxe Edition or Street Fighter 6 Ultimate Edition instead of buying the standard version of the game and then the DLC pack, then you will save around $5 in both scenarios.
DLC Characters

Both of these passes will come with the first four DLC characters in SF6. The following fighters have already been confirmed by Capcom to appear within a year of the initial launch for this game:

  • Rashid
  • A.K.I.
  • Ed
  • Akuma

DLC Character Costumes

Furthermore, both packs also include Colors #1 through #10 for the Outfit #1 costumes of Rashid, A.K.I., Ed and Akuma.

Exclusive to the Year 1 Ultimate Pass is the second and third outfits for the four DLC characters. You will also get Colors #1 through #10 from these outfits.

DLC Stages

The Year 1 Ultimate Pass also comes with two additional stages. As of this posting, Capcom has not revealed where these new locations are.
Drive Tickets

With the standard Year 1 Character Pass, you will get 4,200 Drive Tickets. For the Year 1 Ultimate Pass, 7,700 Drive Tickets will be added to your account.

For the uninformed, Drive Tickets are free virtual currency that you can earn by completing daily challenges as well as doing any other activities in SF6. You can use these to buy specific items from the in-game shop.

Recap

The Year 1 Character Pass comes with four characters: Rashid, A.K.I., Ed and Akuma. Each of these fighters includes one costume with 10 different color variants. This bundle also includes 4,200 Drive Tickets that you can use to buy in-game items.

The Year 1 Ultimate Pass comes with everything from the Year 1 Character Pass while also adding two more costumes (each of which have 10 color variants). Furthermore, you will also get two new DLC stages to go along with 7,700 Drive Tickets.

If all you care about are the new playable characters, then the Year 1 Character Pass is the cheaper option of the two DLC packs. If you want more outfits, stages and/or Drive Tickets, then you might want to consider picking up the Year 1 Ultimate Pass instead.
How to prevent accidental pausing in Street Fighter 6

When playing Street Fighter 6, you may keep accidentally pausing the screen. This can be a major problem for you, as well as your opponent if you are playing against another player in versus mode, as it will cause a break in concentration. To see how you can make it a lot harder to pause in SF6, you can take a look at this tutorial from Seeking Tech.

1. To start off, you need to go to the Options menu in this fighting game.

To do so from the Mode Select Screen, press the Options button on the DualSense or DualShock 4 if you are using the PS4/PS5 controller. If you are using the Xbox Series or Xbox One controller, then you need to press the Menu button. Next, select Options from the Multi Menu.

You can also go to Options from the Pause Menu. You can pause the action by pressing either the aforementioned Option button on PlayStation or Menu button on Xbox.

2. From the Options menu, you should be viewing the Game tab by default. If you aren’t then you can use the L1/R1 buttons to LB or RB buttons to change tabs.

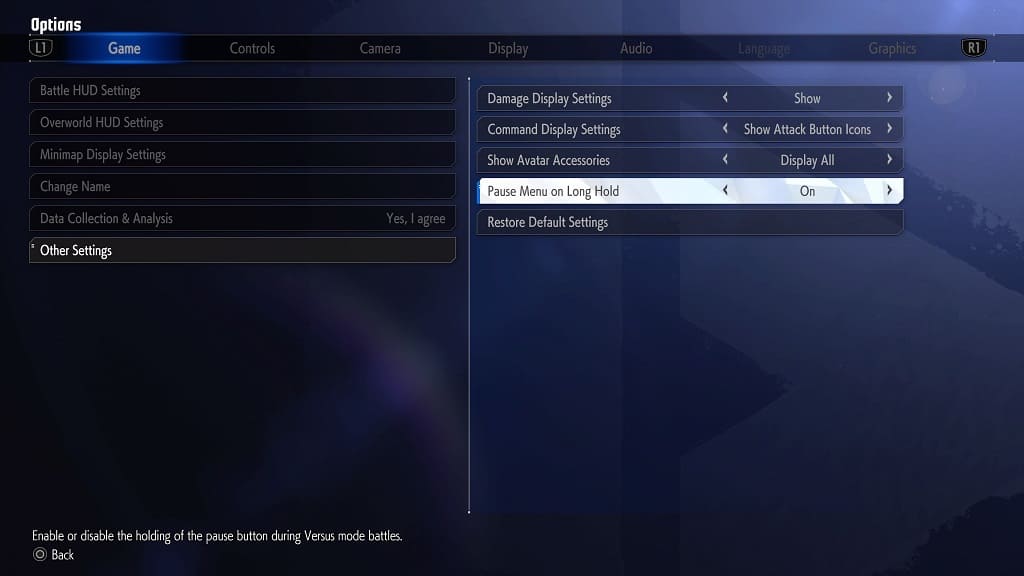
3. From the Game tab, select Other Settings on the left side.

4. On the right side of the same screen, you should see Pause Menu on Long Hold. This should have the following description:

  • “Enable or disable the holding of the pause button during Versus Mode battles.”

5. Use the left analog stick or directional pad to change the Pause Menu on Long Hold setting from Off to On.

6. Press the Circle or B button a few times to exit the Options menu. The new setting should now be saved and applied.

The next time you play a versus match in Street Fighter 6, the only way you can pause the action is by pressing and holding the Options button on PlayStation or Menu button for Xbox for around two seconds. As a result, it is very unlikely that you will end up accidentally pausing during the middle of the fight.