How to add PlayStation VR 2 support to Gran Turismo 7

Gran Turismo 7 is one of the major standout games available for the PlayStation VR 2. To see how you can play this racing game in virtual reality, you can take a look at this tutorial from Seeking Tech.

1. For the uninformed, only the PlayStation 5 version of Gran Turismo 7 supports PS VR2. So, for the first step, we recommend that you check to see if you have the correct version of the game installed on your PS5 or PS5 Digital Edition console.

To check, open the home screen and then move the cursor over to the Gran Turismo 7 icon. You should see the white “PS5” logo to the right of the icon.

If you only have the PS4 version installed, then you will need to upgrade to the PS5 version of GT7 if you want to play the game in virtual reality.

If you only own the PlayStation 4 version, then you will need to pay an upgrade fee to get the PlayStation 5 version. In the United States region, this fee is $10. If you bought the PS5 version previously, then you don’t need to pay for anything as you can simply download it from the PlayStation Store.

2. Once you are sure that you have the PS5 version of the game, press the Options button (which is the button with the three horizontal lines) on the DualSense with the cursor on the game’s icon from the home screen.

If Gran Turismo 7 isn’t on your home screen, then you need to select Game Library. Open the game from there in order to bring the icon to the home menu. You can then return to the home screen by pressing and holding the PS button on the DualSense.

3. If done correctly, you should open a small pop-up window. Here, you should select the Check for Update option to see if there is a new patch to download.

4. Wait for the game to download and install the update.

5. Keep in mind that PlayStation VR2 support was added to the 1.29 patch of Gran Turismo 7.

To see what version of the game you have installed on your PS5, move the cursor over to the game’s icon in the home screen menu of the console. Afterwards, press the Options button to open a small window menu, where you can then select Information.

You should then be able to find the version of the racing game that is currently installed on your system. If it is 1.29 or later, then you should be able to play Gran Turismo 7 in virtual reality by using the PlayStation VR 2 headset.

6. Once you downloaded the patch, put up the PS VR2 headset and then open the game. You should then be able to play in virtual reality when you start a race. Furthermore, you will be able to view cars up close by going over to the VR Showroom mode in the Garage.

How to fix Wild Hearts frame rate issues on PS5, Xbox Series X and S

When playing Wild Hearts on consoles, you may notice some slowdown and choppiness during gameplay. To see how you can potentially fix these performance issues on your PlayStation 5, PlayStation 5 Digital Edition, Xbox Series X or Xbox Series S console, you can take a look at this troubleshooting article from Seeking Tech.

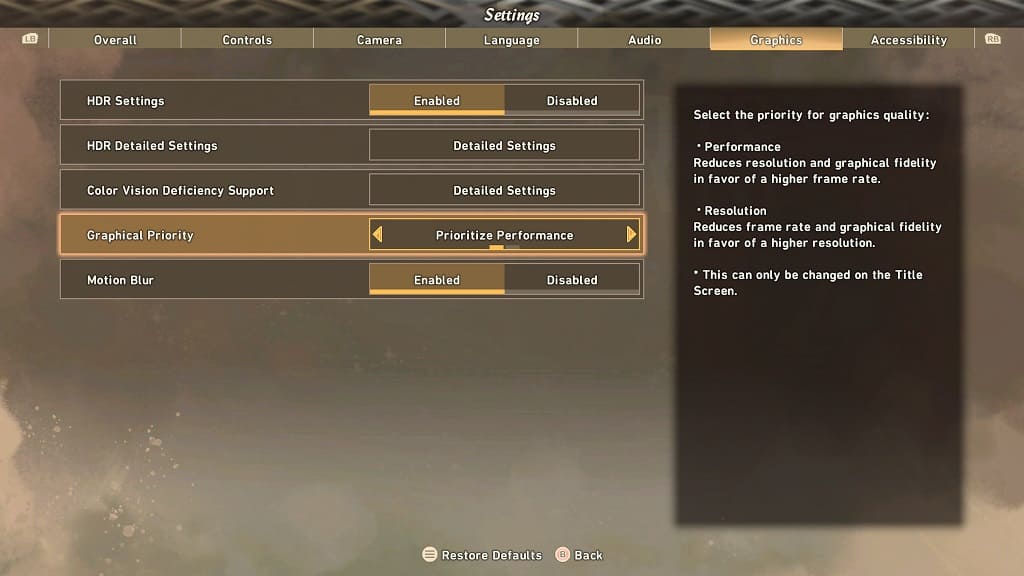
1. For the first step, you should make sure that you are playing the game in the Prioritize Performance graphics mode. By doing so, the frame rate cap for Wild Hearts will rise to 60 fps as opposed to the choppier 30 fps cap in the Prioritize Resolution graphics mode.

In order to change graphics modes, you need to take the following steps:

  • First off, you need to head to the Title Screen in Wild Hearts. If you are actively playing the game, then you need to press the Options button on the DualSense or Menu button on the Xbox controller to bring up the in-game menu. From there, select the Return to Title Screen option.
  • From the Title Screen, select Settings.
  • In Settings, use the L1 and R1 buttons on the DualSense or LB and RB buttons of the Xbox controller to switch over to the Graphics tab.
  • Inside the Graphics tab of Settings, you should make sure that Graphics Priority is set to Prioritize Performance.
  • Press the Triangle button on the DualSense or Y button on the Xbox controller to confirm the graphics mode change.

2. You should also make sure that you have Variable Refresh Rate enabled if your television set or gaming monitor supports that feature.

To start off, see if there is an option to enable VRR on your TV or monitor. In some cases, this feature may be automatically turned on when you use game mode.

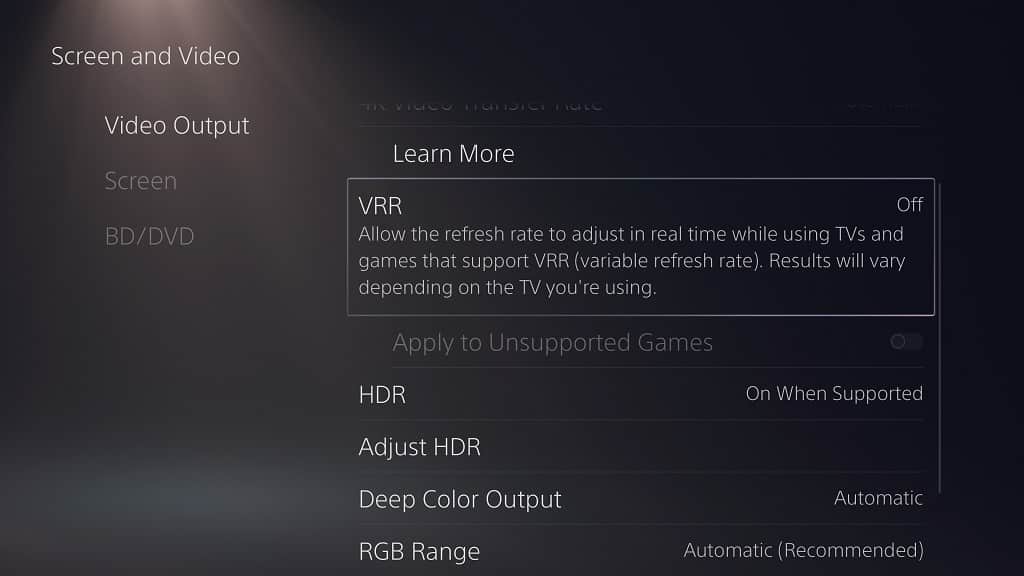
On the PlayStation 5 or PlayStation 5 Digital Edition console, you need to open the console’s Settings menu and then select Screen and Video > Video Output > VRR. Afterwards, you should set VRR to Automatic.

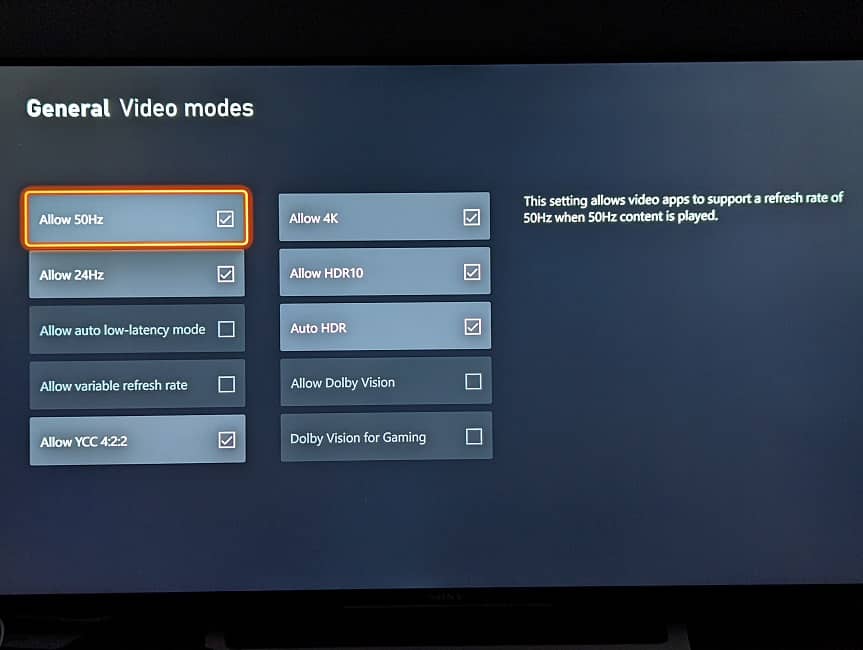
For the Xbox Series X and Xbox Series S, you also need to head over to your system’s Settings menu. Once you get there, select General > TV & display options > Video modes. In the “General – Video modes” screen, make sure that the “Allow variable refresh rate” setting is enabled.

3. Restarting the game may help, especially if you have it suspended or using the Quick Resume feature, as these may have been causing the frame rate issues.

4. If you have been putting your PS5 in Rest Mode or your Series X/S in Sleep Mode, then we recommend restarting your console to see if you can get better performance when playing Wild Hearts.

5. Make sure you have the latest patch downloaded for the game as a new update may make the monster hunting game run smoother.

6. You should make sure you have the latest firmware downloaded and installed on your console as well since the new system software may provide general performance optimizations.

How to disable voice chat in Wild Hearts

By default, voice chat is turned on in Wild Hearts. If you don’t feel like chatting with other players and/or hearing their voices in this monster hunting game, then you can take a look at this guide from Seeking Tech to see how you can disable this feature.

1. For the first step, make sure that your gaming system is turned on and you have the Wild Hearts video game opened if you haven’t done so already.

2. Next, you need to head to the Settings menu. You can find it in the Title Screen.

If you are inside the game at this moment, then you can press the Options button on the PlayStation gamepad or the Menu button on the Xbox gamepad in order to bring up the in-game quick menu. From there, you should be able to select Settings.

3. Inside of Settings, you need to switch over to the Audio tab.

In order to switch tabs, you need to use the L1 and R1 buttons on the PlayStation controller or the LB and RB buttons on the Xbox controller.

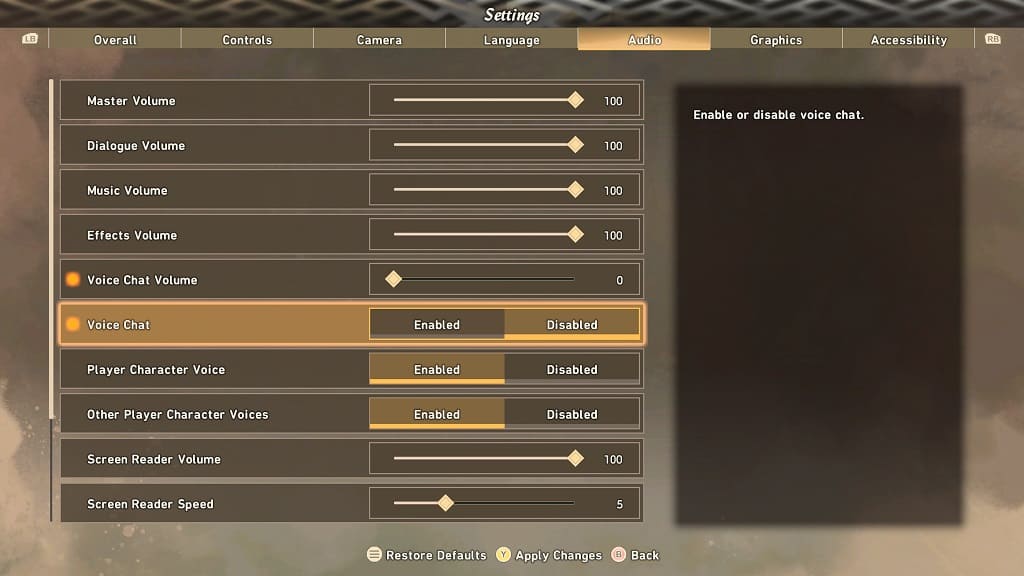
4. Once you get to the Audio tab of Settings, you should scroll down to Voice Chat.

5. Next, you should make sure that the Voice Chat setting is set to Disabled.

6. To save the change you made, you need to press the Triangle button on the PlayStation game pad or Y button on the Xbox game pad.

You should no longer be able to communicate with other players through the microphone. You should also no longer hear their voices while playing in an online lobby.

How to fix Wild Hearts brightness issues on PS5, Xbox Series X and S

When playing Wild Hearts on consoles, you may notice that some scenes may look too bright while others may look too dark. To see how you can get the brightness to display correctly in this monster hunting game, you can take a look at this troubleshooting article from Seeking Tech.

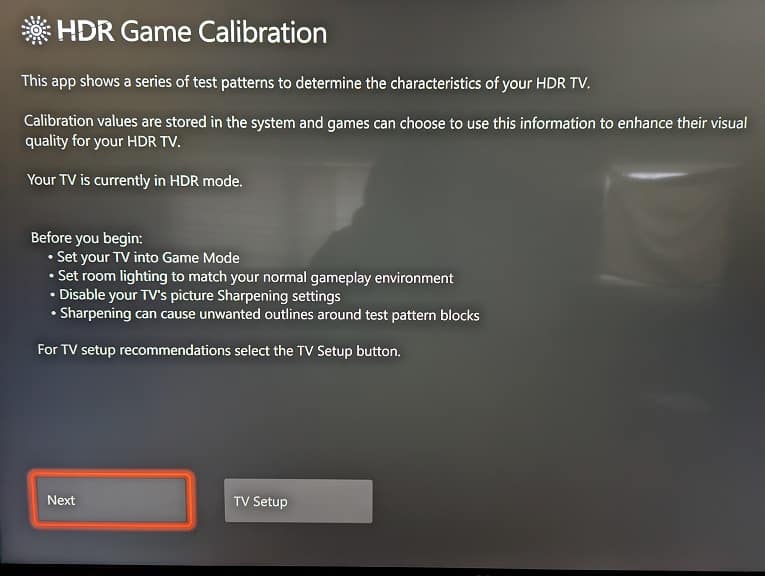
1. For the first step, we recommend that you re-calibrate the HDR brightness output of your console.

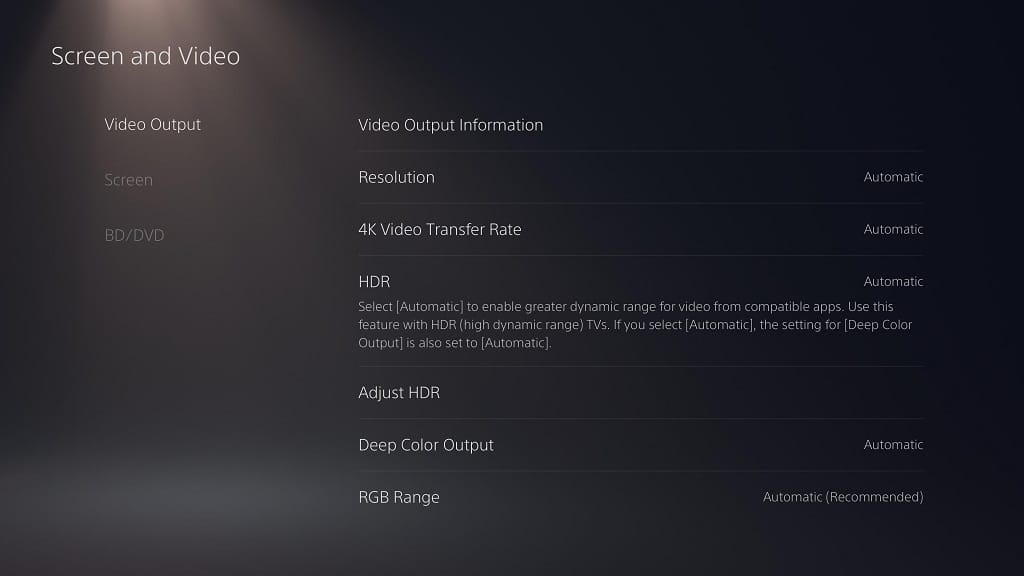
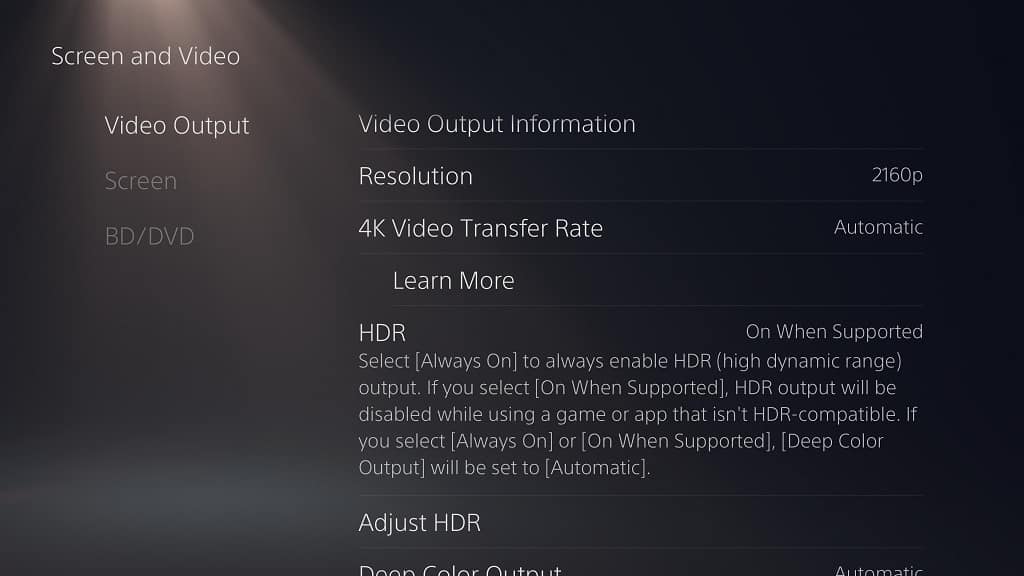
For the PS5 and PS5 Digital Edition consoles, you need to head over to the system’s Settings menu. Afterwards, select Screen and Video > Video Output > Adjust HDR. You should then follow the steps that appear on the screen.

On the Xbox Series X and Xbox Series S, you will also need to head over to its Settings menu. From there, select General > TV & display options > Calibrate HDR for games. Follow the directions on the screen to re-calibrate the HDR output.

2. You can also adjust the HDR brightness settings from within Wild Hearts. In order to do so, you need to take the following steps:

  • To start off, you need to open the Settings menu in Wild Hearts.
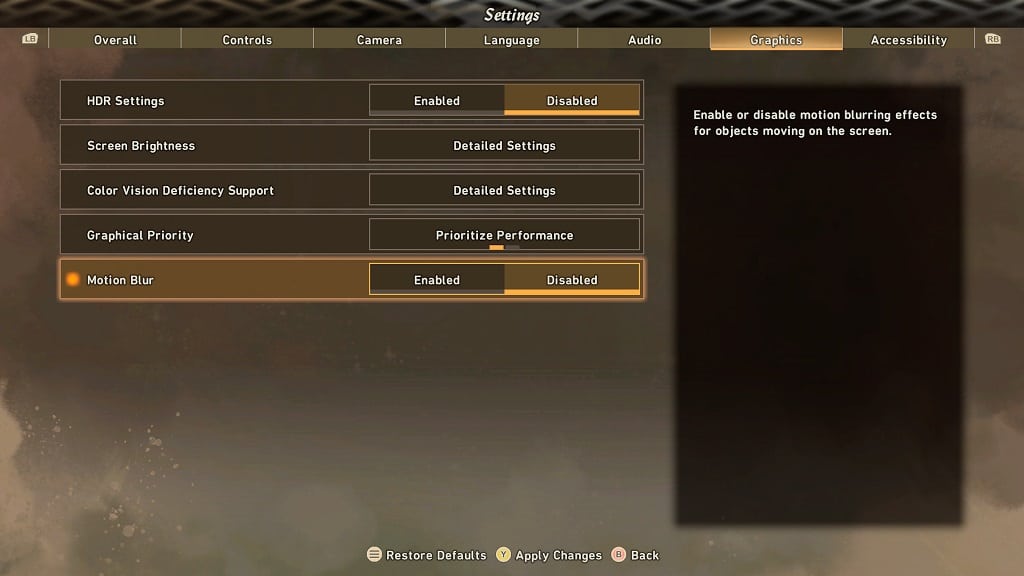
  • Inside of Settings, switch over to the Graphics tab. You can change tabs with the L1 and R1 buttons on PS5 or LB and RB buttons on the Xbox Series X and Xbox Series S.
  • In the Graphics tab of Settings, make sure that HDR Settings is enabled.
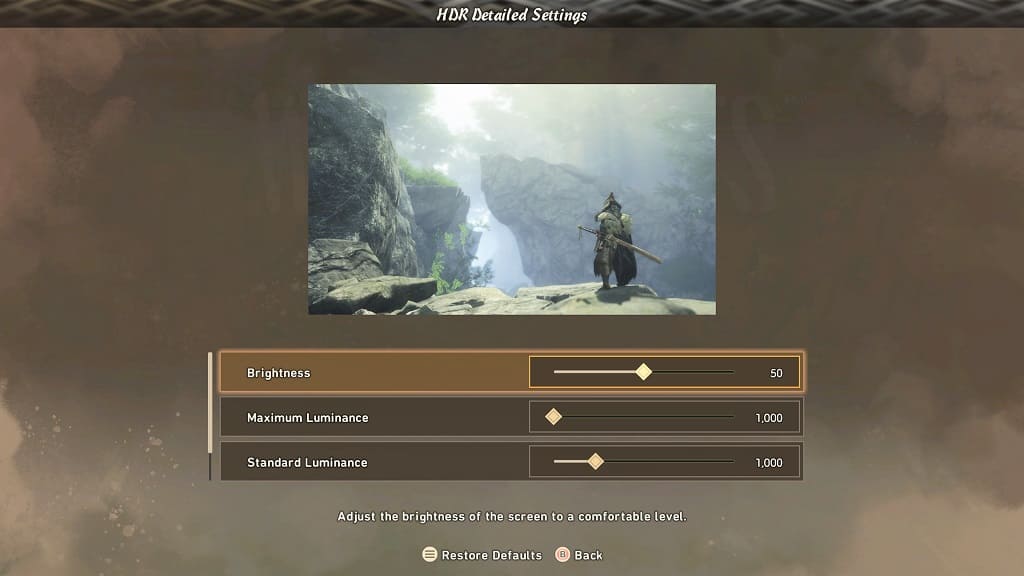
  • Afterwards, select HDR Detailed Settings.
  • From the HDR Detailed Settings menu, you will be able to adjust the Brightness, Maximum Luminance, Standard Luminance, Saturation and Contrast. The preview image will change when you move the slider.

  • Once you are done, press the Triangle button on PlayStation 5 or the Y button on Series X and S to apply the changes.
  • You may have to go back to the HDR Detailed Settings menu occasionally to re-adjust the sliders if you find some scenes to be overly bright or overly dark.

3. Your television screen or monitor may not be suitable when it comes to displaying games in HDR. In this case, you can try connecting your PlayStation 5, PlayStation 5 Digital Edition, Xbox Series X or Xbox Series S to a more capable HDR screen.

Alternatively, you can also try disabling HDR in the game to see if you prefer the graphics in SDR. To do so, go back to the Graphics tabs of the Settings menu in Wild Hearts. From there, make sure that the HDR Setting is set to Disabled.

How to disable motion blur in Wild Hearts

When playing Wild Hearts on your PC, PlayStation 5, PlayStation 5 Digital Edition, Xbox Series X or Xbox Series S, you may find that the motion blur effects to be too distracting. To see how you can turn this visual feature off, you can follow the steps laid out in this tutorial at Seeking Tech.

1. For the first step, make sure you open Wild Hearts if you aren’t currently playing the game.

2. In the Title Screen, you need to select Settings.

If you are inside the game at this moment, then you can bring up the in-game menu by pressing the Options button on the PlayStation controller or Menu button on the Xbox controller. You should then be able to select Settings from the in-game menu.

3. Once you are in the Settings menu, you need to head over to the Graphics tab.

You can use the LB and RB buttons on the Xbox controller, or the L1 and R1 buttons on the PlayStation controller, to change tabs.

4. From the Graphics tab, scroll all the way down until you get to Motion Blur.

5. Set the Motion Blur setting to Disabled and then press the Triangle button on the PlayStation controller or Y button on the Xbox button to save the new setting.

6. You should no longer see a blurring effect applied to objects in motion while playing Wild Hearts.

Motion blur may look better if you are playing this game at a high frame rate. So, you may want using this effect in Prioritize Performance graphics mode on the PlayStation 5, PlayStation 5 Digital Edition, Xbox Series X or Xbox Series S. In order to do so, you can take the following steps:

First, you need to head back to the Title Screen as the graphics mode can’t be changed while you are playing the game. To do so, you need to do the following:

  • Press the Options button on the PlayStation controller or Menu button on the Xbox controller to bring up the quick menu, where you can then select the Return to Title Screen option.
  • Head into Settings from the Title Screen.
  • In Settings, switch over to the Graphics tab.
  • From the Graphics tab, set Graphical Priority to Prioritize Performance and then make sure that Motion Blur is enabled.

If you still don’t like the motion blur effects at high frame rates, then you can disable blurring altogether.

How to disable cross play in Wild Hearts

Wild Hearts supports cross play by default as players from the PC, PlayStation 5, Xbox Series X and Xbox Series S platforms are able to play with each other. If you would rather limit the player base to others that are playing on the same gaming system as you, then you can take a look at this tutorial to see how you can disable this online matchmaking feature.

1. To start off, you need to open Wild Hearts if you haven’t done so yet.

2. Inside of the game, you need to head over to the Settings menu, which you can do by selecting Settings from the Title screen.

If you are actively playing the game, then you can bring up a quick menu by pressing the Options button on the DualSense or Menu button on the Xbox Controller. From there, you should be able to select Settings.

3. Inside of Settings, make sure you are in the Overall tab.

To switch tabs on the PlayStation 5, you can use the L1 and R1 buttons.

On the Xbox Serie X and Xbox Series S, you can use the LB and RB buttons to change tabs.

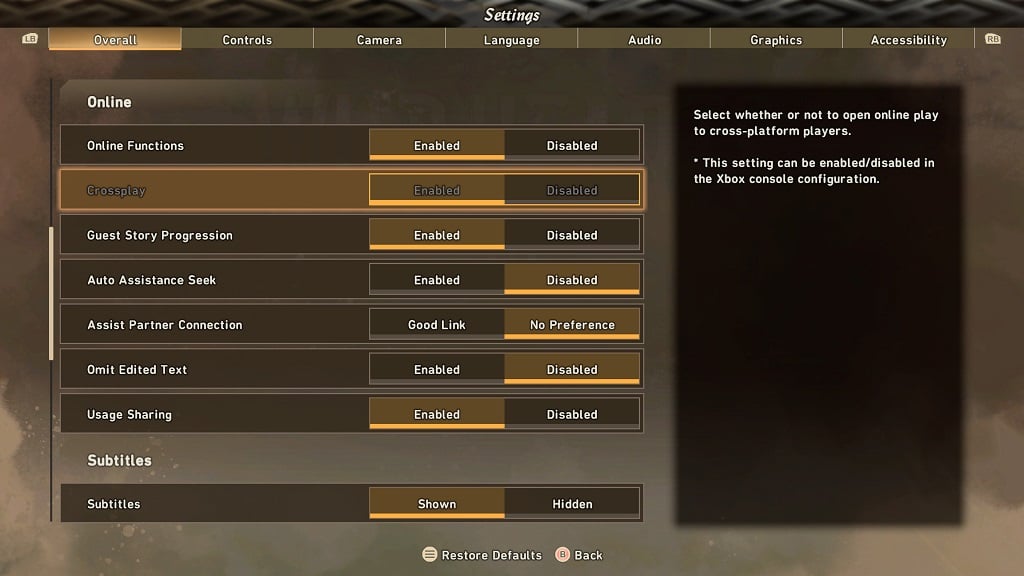
4. From the Overall tab, scroll down to the Online section.

5. Move the cursor over to the Crossplay setting and then select Disabled.

6. Press the Triangle button on the DualSense or the Y button on the Xbox controller to apply the change.

7. If you have the Xbox Series X or Xbox Series S version of Wild Hearts, then you won’t be able to disable cross play from the in-game menu. Instead, you need to do the following:

  • Open the Settings menu for your Series X or Series S.
  • From the front page of Settings, you need to select General > Online safety & family > Privacy & online safety > Xbox privacy > View details & customize > Communication & multiplayer.
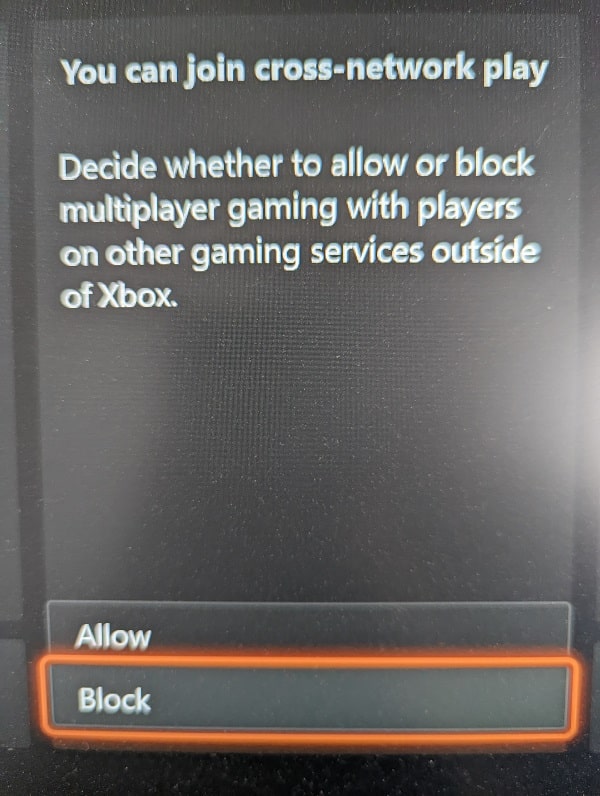
  • In the “Account – Communication & multiplayer” menu for your Xbox Live account, set the “You can join cross-network” setting to Block.

If you are playing the PC version of Wild Hearts, then you can only play with other PC players when you disable cross play.

On the PS5, you can only match up with other PS5 players with cross play turned off.

Xbox Series X and Xbox Series S players can only play the game online with each other with cross-network play disabled.

How to turn off narrator in Wild Hearts

In Wild Hearts, you may hear a robotic voice reading text off of the screen while playing on your PC, PlayStation 5, PlayStation 5 Digital Edition . If you would rather disable this feature, then you can take a look at this tutorial from Seeking Tech to see how you can properly do so.

1. To start off, you need to turn on your gaming system and then open the Wild Hearts video game.

2. Inside of the game, you then need to head over to the Accessibility menu.

In the title screen, you can simply select Accessibility.

If you are currently playing the game, then you need to bring up the in-game menu by pressing the Menu button if you are using an Xbox controller or Options button if you are using a PlayStation controller. In the pop-up menu, you then need to select Accessibility.

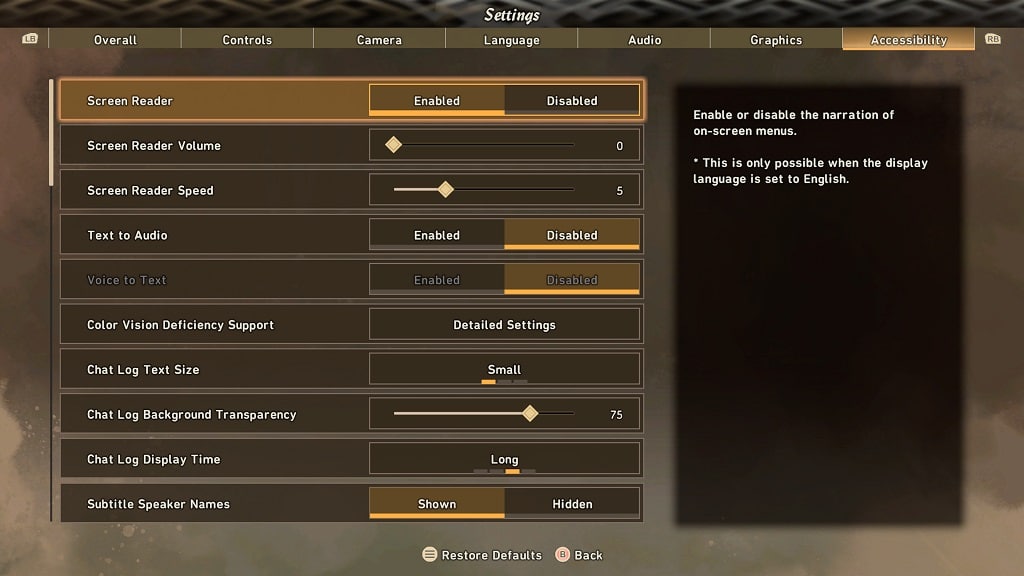
3. In the Accessibility menu, you should see the option to Enabled or Disabled Screen Reader at the top.

If you would like to keep the narrator enabled but adjust its volume and speech speed, then you can use the Screen Reader Volume and Screen Reader Speed sliders underneath the Screen Reader setting.

The default Screen Reader Volume is 100. You will be able to change it, in increments of 1, from a range of 0 to 100. Setting the volume to 0 will completely mute the narration voice, which should have the same effect as disabling the Screen Reader setting.

The Default Screen Reader Speed is set to 5. You can modify this, in increments of 1, from a range of 1 to 5.

4. Once you are done making any of the changes, you can press the Y button on the Xbox controller or Triangle button on the PlayStation controller in order to apply them into the game.

5. You should no longer hear a narration voice in Wild Hearts.

How to prevent PlayStation VR 2 motion sickness and nausea

When playing with the PlayStation VR 2 headset on your PlayStation 5 or PlayStation 5 Digital Edition, you may start to feel a little uncomfortable, which could eventually lead to motion sickness and/or nausea.

To see how you can overcome these issues when using this virtual reality headset, then you can take a look at this guide from Seeking Tech to see what you can do.

1. If you have never used a VR headset before PS VR 2, or haven’t played in virtual reality for a long time, then we suggest that you gradually build up your tolerance. This process is known as getting your “VR legs.”

In order to do so, you should play a PlayStation VR 2 game up until you start to feel a little uncomfortable. At that point, we suggest that you stop playing the game immediately and then remove the headset until your body recovers.

Once your body feels normal again, you can try playing the same virtual reality game until it starts to feel uncomfortable. Repeat this process as much as possible and you should eventually notice that you will be able to gradually play a longer session without experiencing motion sickness.

Keep in mind that getting your VR legs can take days or weeks. During this process, we recommend that you should play VR when you have nothing else to do for the rest of the day in case you get really sick and need to lay down for hours at a time.

2. Some games are more intense than others when it comes to motion. So, if you are playing a game with a lot of camera movements, then we suggest that you stop doing so temporarily if you are new to virtual reality gaming or haven’t been playing in VR for a long time.

Instead, you can try playing a game where you don’t have to turn your head and/or move around often. Once you can comfortably play these less intensive titles, then you can try playing the more intense ones.

3. Some games come with accessibility settings that you can use in order to avoid motion sickness.

One of which is snap turning (also known as blink turning or click turning), which temporarily turns the screen black when you turn in a virtual reality game. Some games may also add blinders (or vignettes), which decreases the field of view. Furthermore, you may also add a dot to the middle of the screen to help your eyes stay focused.

We suggest playing around with these accessibility settings in the in-game menu so that you can avoid getting sick.

4. You should feel less nausea for PlayStation VR 2 when compared to the original PlayStation VR as the newer release features better tracking as well as a sharper image quality.

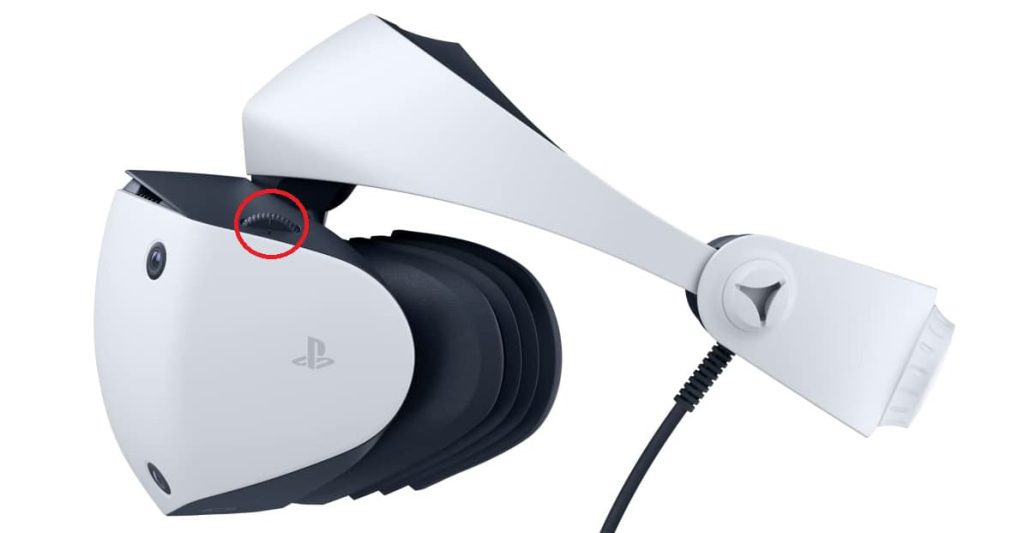
If you are getting a blurry image, however, then you can use the Lens Distance Adjustment Dial located on the top of the PS VR2 headset in order to get more picture clarity.

You can also try re-adjusting the eye tracking to see if you can get a sharper image in the areas where you are directly looking.

5. We found that chewing on ginger or chewing gum will help get your brain situated in the real world, which should lead to less motion sickness and nausea while playing in the PlayStation VR 2 headset.

We have great success when using the Sea-Band Anti-Nausea Ginger Gum, which you can find on Amazon with this link. (#CommissionsEarned).

6. Having a fan blow on you while you are playing in virtual reality should also get your brain anchored to the real world as well.

7. Make sure you take frequent breaks if you are playing long sessions with the PS VR 2.

What makes this headset great is that it is easy to remove and put back on. Therefore, you can easily jump back into the game after a short break.

8. Of course, you should stay well-hydrated, especially if you are playing a PlayStation VR2 game that features a lot of movement. Every time you take a short break, we also recommend that you take a couple sips of water if you are feeling a little thirsty before you continue playing in virtual reality on your PlayStation 5 or PlayStation 5 Digital Edition console.

How to fix Like a Dragon: Ishin brightness issues on PS5, Xbox Series X and S

When playing Like a Dragon: Ishin on your PlayStation 5, PlayStation 5 Digital Edition, Xbox Series X or Xbox Series S, you may notice that some scenes are too dark while others are glaringly bright.

To see how you can fix these brightness issues, you can take a look at this troubleshooting article from Seeking Tech.

1. To start off, you should make sure that you have HDR properly calibrated on your console.

On the PS5 and PS5 Digital Edition, you need to head over to the console’s Settings menu and then select Screen and Video > Video Output. Next, you need to make sure the HDR setting is set to On When Supported and then select HDR. Finally, follow the on-screen instructions over the next several screens.

On the Xbox Series X and Xbox Series S, open the console’s Settings menu and then select General > TV & display options > Calibrate HDR for games. You then need to follow the on-screen directions to calibrate the HDR brightness level.

2. You can also change the brightness level from within Like a Dragon: Ishin by taking the following steps:

  • To start off, you need to go to the in-game Settings menu. To do so, bring up the Pause Menu by pressing the Options button on PS5 or Menu button on Xbox. From there, you need to select Save/Settings and then Settings.
  • Inside of Settings, you need to select Brightness.
  • In the Brightness screen, you can move the slider to the left to make it darker or the right to make it brighter. To return the slider to its default position, you can press the Square button on PS5 or X button on Xbox.
  • You may need to return to the Brightness screen occasionally when you move from a darker area to a lighter area or vice versa while playing Ishin.

3. Some television sets and monitors are better than others when it comes to brightness accuracy. So, if possible, you can try playing this video game on another screen.

4. You may also be able to get better consistency, when it comes to brightness level, in SDR instead of HDR.

To disable HDR on PlayStation 5 and PlayStation 5 Digital Edition, head over to the console’s Settings menu and then select Screen and Video > Video Output. From there, make sure that HDR is set to Off.

On the Xbox Series X and Xbox Series S, you need to open the system’s Settings menu and then head over to General > TV & display options > Video modes. From there, make sure that Allow HDR10, Auto HDR and Dolby Vision for Gaming are all disabled.

How to fix Age of Empires II: Definitive Edition ‘cannot connect to Multiplayer Services’ error

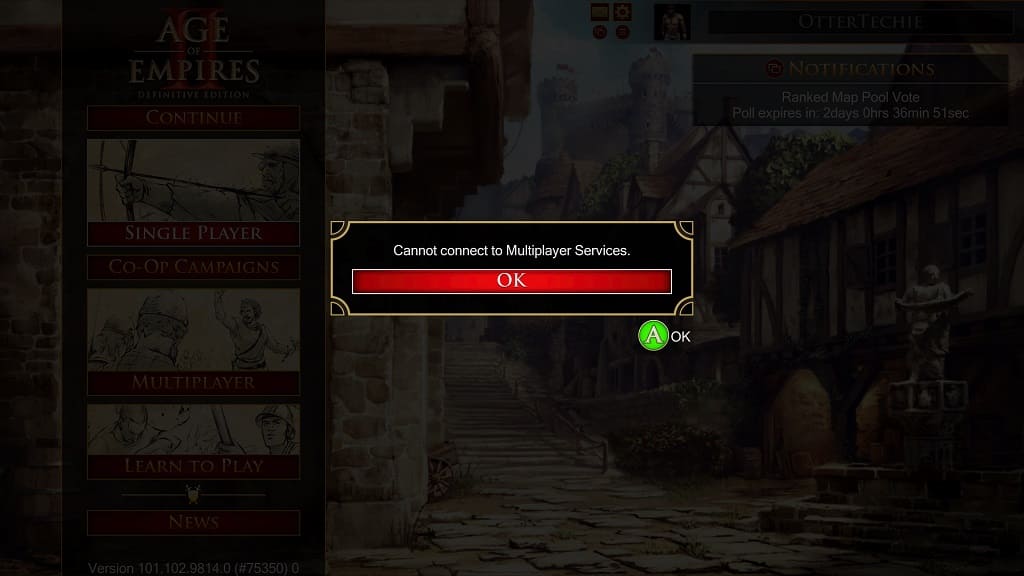
When playing Age of Empires II: Definitive Edition on the Xbox Series X or Xbox Series S, you may encounter the following error message:

  • “Cannot connect to Multiplayer Services.”

To see how you can potentially fix this problem, you can take a look at this troubleshooting article from Seeking Tech.

1. Since we were able to constantly replicate this problem by putting Age of Empires II: Definitive Edition in the Quick Resume queue, it appears that this game isn’t fully compatible with this Xbox Series X and Xbox Series S feature.

Quick Resume, which suspends the game so that you can quickly go back to where to left off when you want to play it again, has been known to cause issues, especially if you use it with games that features online multiplayer.

So, for the first potentially fix, you can try restarting the game by taking the following steps:

  • Press the Xbox button to open the Guide menu.
  • From the Guide menu, move the cursor over to the Age of Empires II: Definitive Edition icon.
  • With the game’s icon highlighted, press the Menu button (which is the button with the three horizontal lines) on your Xbox controller.
  • Select Quit in the pop-up menu.
  • Once you close the game, select it from the home menu of your Xbox Series X or Xbox Series S to open it again.

2. If you are still getting the error after restarting the game, then you can try restarting your console.

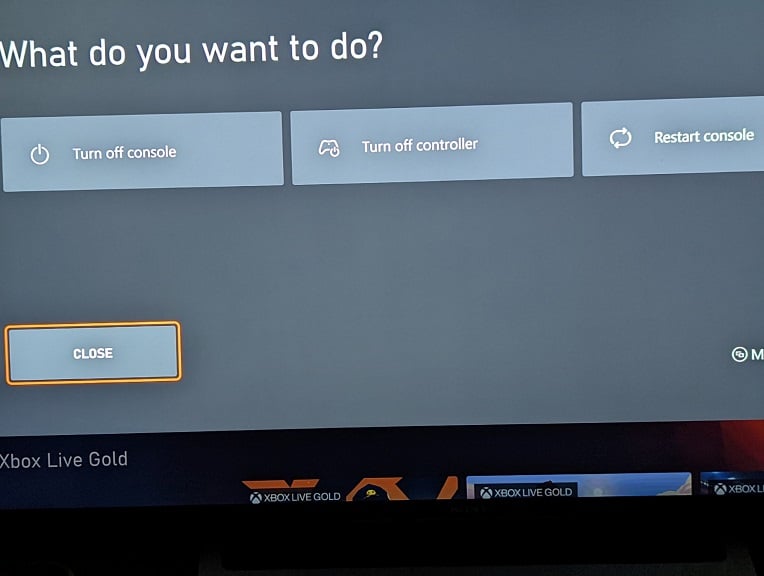
To do so, you need to first close the game. Afterwards, press and hold the Xbox button on the controller to bring up the “What do you want to do?” menu, where you can then select the Restart Console option.

3. You can also test the internet connection of your Series X or Series S to see if it is suitable for online play.

In order to do so, head over to the Settings menu of the console and then select General > Network Settings > Test Multiplayer Connection.

If there is something wrong with your internet connection, then you should see a link appear on the screen that you can visit to fix your specific issue.

4. If you haven’t done so already, make sure that you updated Age of Empires II: Definitive Edition to the latest version as a new patch may have fixed the “Cannot connect to Multiplayer Services” error.

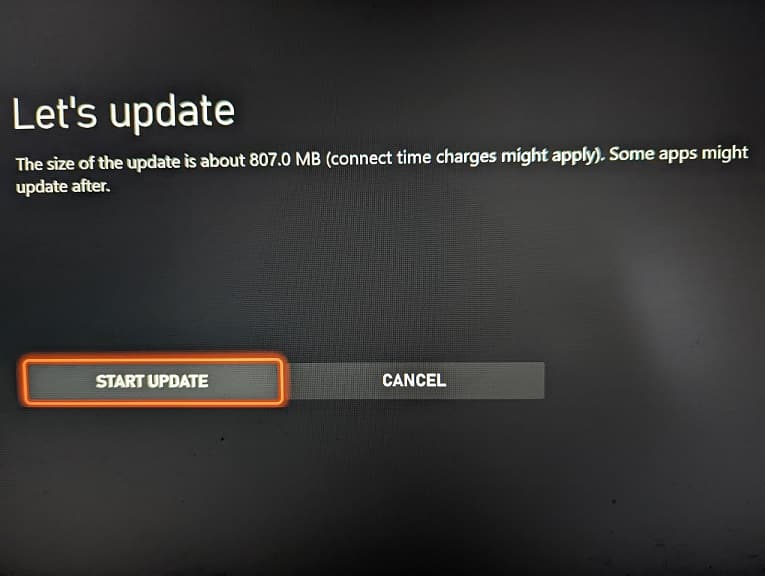
5. A new firmware update for the Xbox Series X or Xbox Series S may also help in this situation. To check if there is a new system software available, you need to go back to the Settings menu and then select System > Updates.

6. There is also a possibility that the servers for the game could be down at the moment. In this case, you should wait until the servers are working normally again before trying to play the game online.