How to hide and unhide games on the Steam Deck

With the Steam Deck, you are able to hide games that you don’t want to show up in your main game library. To find out how to do so with this portable gaming system, you can take a look at this tutorial from Seeking Tech.

How to hide games on the Steam Deck

In order to hide games on your Steam Deck, you need to take the following steps:

1. If you haven’t done so already, make sure to turn on your portable system.

2. With your Steam Deck turned on, go to the Library section.

In order to do so, press the Steam button to bring up the Steam menu, where you can then select Library.

3. In the Library section, you will see a list of games that are tied to your Steam account.

You can press the L1 and R1 buttons to switch between different categories. There are also multiple sorting and filter options you can used in order to find the game that you are trying to hide.

4. Hover over the game that you are trying to hide in the Library menu.

5. With the game highlighted, press the button that has the three horizontal lines on your Steam Deck.

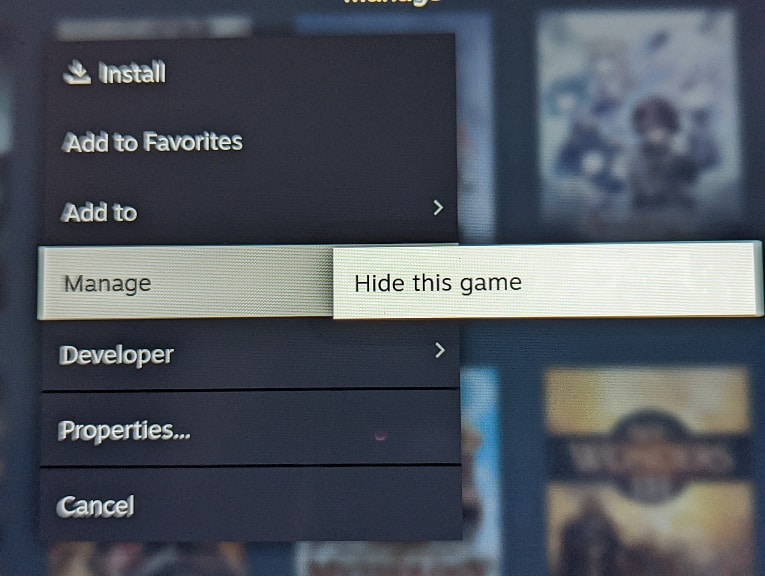
6. In the pop-up menu, you should then select Manage.

7. Finally, select the “Hide this game” option.
How to view hidden games on the Steam Deck

If you want to view games you previously hidden on the Steam Deck, then you need to do the following:

1. Press the Steam button on your portable system to open the Steam menu.

2. Once inside the Steam menu, select the Settings option from the list.

3. After opening the Settings menu, scroll down the left column and then select Home.

4. In the Home section you should see “X games are hidden.” Select the Manage option next to it.

5. You should now be able to see a list of games that you have hidden from your main game library.

You can use the L1 and R1 buttons on the Steam Deck to change categories. You can also use sorting and filtering options on these hidden games.

How to unhide games on the Steam Deck

If you changed you mind and want to unhide games on the Steam Deck, then you need to take the following steps:

1. Open the Steam menu and then go to Settings.

2. Inside of Settings, go to Home.

3. In the Home menu, select the Manage option next to the “X games are hidden” section.

4. Hover over the game that you want to unhide in the hidden games menu.

5. With the aforementioned game highlighted, press the button that has the three horizontal lines icon.

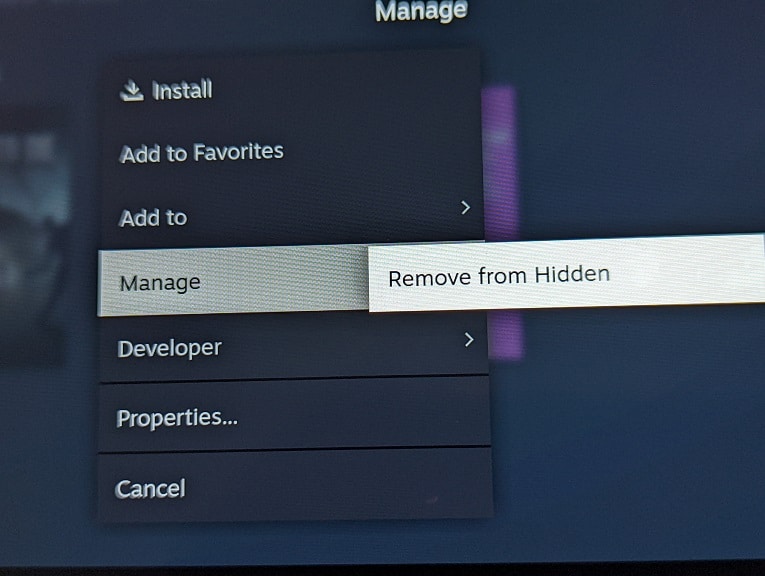
6. In the pop-up menu, you first need to select Hidden.

7. You then need to select the Remove from Hidden option.
8. The game should now appear in the main game library.

How to download beta and preview firmware updates on the Steam Deck

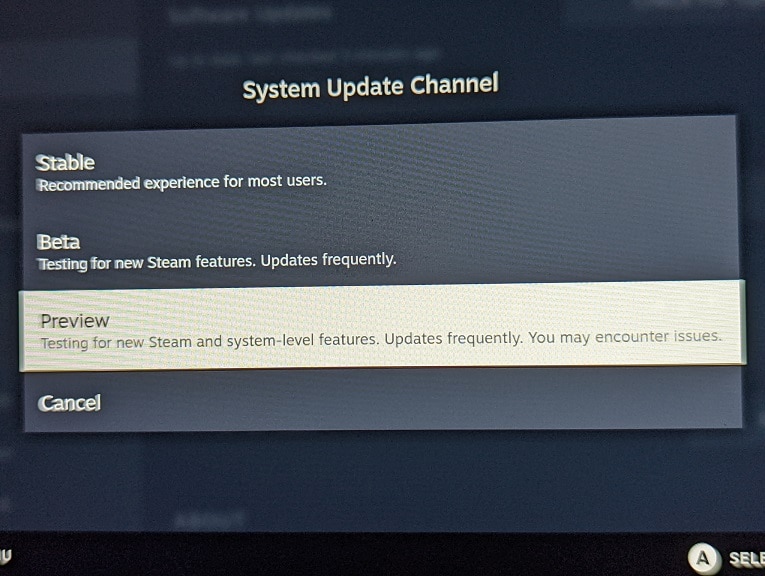
With Steam Deck, a new firmware release may add new features in addition to improving performance and stability. There are three types of updates you can download: Stable, Beta and Preview.

To see how you can download and install the beta and preview firmware files, you can take a look at this tutorial from Seeking Tech.

How to download the beta firmware on the Steam Deck

In order to download the latest beta firmware for your Steam Deck, you need to take the following steps:

1. Make sure you power on your portable console if you haven’t done so already.

2. Next, you need to press the Steam button so that you can open the Steam menu.

3. You should then select Settings from the Steam menu.

4. Now that you are in Settings, you need to select System.

5. In the System menu, scroll down and then select the drop-down menu next to OS Update Channel.

6. You then need to select Beta.

7. If there is a new firmware available after you switch the OS Update Channel to Beta, then you need to tap the apply option next to Software Updates. Afterwards, select the Restart option for the new beta firmware to be applied.

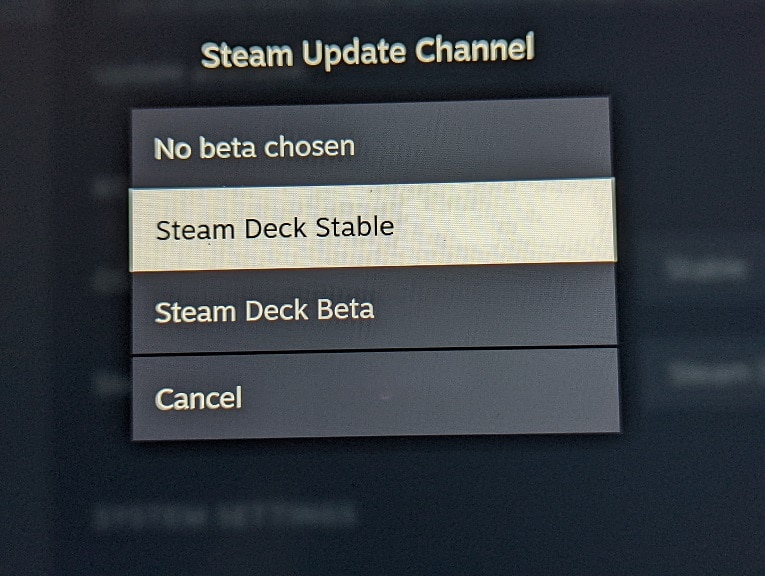
8. We also suggest that you go back to the System menu. This time, you should select the drop-down menu next to the Steam Update Channel.

9. From the drop-down menu, select Steam Deck Beta.

10. In the pop-up notification, select Restart Now.

11. The portable console will now restart. During this process, it will install the beta version of the Steam Update Channel.

How to download the preview firmware on the Steam Deck

In order to download the preview firmware for your Steam Deck, you need to do the following:

1. To start off, make sure you install the beta version of the Steam Update Channel. If you haven’t done so, then you need to do the following:

  • Open the Steam menu and the select Settings.
  • From the Settings menu, select System and then the drop-down menu next to Steam Update Channel.
  • In the drop-down menu, select Beta.
  • Select Restart Now in the pop-up message.

The console will then restart and install the beta version of the update channel.

2. After setting the Steam Update Channel to beta, go back to the System menu.

3. In the System menu, you need to select the drop-down menu next to the Steam Update Channel again.

4. In the drop-down menu, you then need to select Preview.

5. You will then be asked to restart your device for the changes to apply. Select Restart Now.

6. Once the Steam Deck has rebooted, go back to the System menu and then select Check for Updates.

7. If there is a new firmware available, select Apply to start the downloading and installation process.

8. Once the update has been completed, select Restart from the System menu to reset the console in order to apply the changes.

How to move files and change install location on the Steam Deck

In addition to the internal storage, the Steam Deck also comes with a microSD card expansion slot that will let you add more space. You can take a look at this tutorial to see how you can move files between the internal storage and the microSD card as well as learn how you can change the default installation location.

How to move files on the Steam Deck

In order to move files between different storage options on your Steam Deck, you need to take the following steps:

1. Turn on your portable system if it is currently turned off.

2. You should also make sure that you have the microSD card inserted into the Steam Deck and formatted for use with the gaming console.

If you have having problems trying to insert or format a microSD card, then you can follow the steps laid out in this guide.

3. Once you are ready, go ahead and open the Steam menu by pressing the Steam button.

4. With the Steam menu opened, you need to select Settings.

5. Inside of Settings, scroll down the left column and then select Storage.

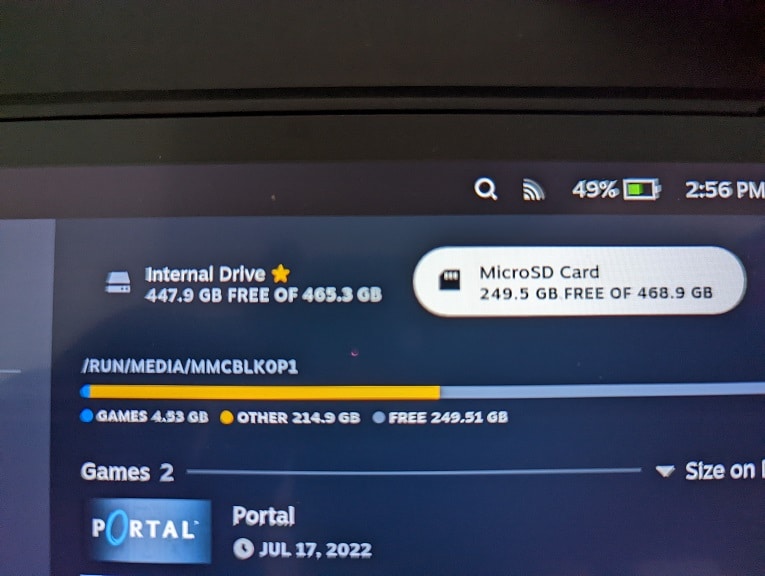
6. In the Storage section, you should see both Internal Drive and microSD card options located at the top. Here, you need to select the option that has the file(s) you want to move over to the other storage.

If you want to move something from the Internal Drive to the microSD card, then you need to select the Internal Drive option.

If you want to move something from the microSD card to the Internal Drive, then you need to select the microSD card.

7. Next, you need to hover over to the file that you want to move over.

8. With the aforementioned file highlighted, press the Y button.

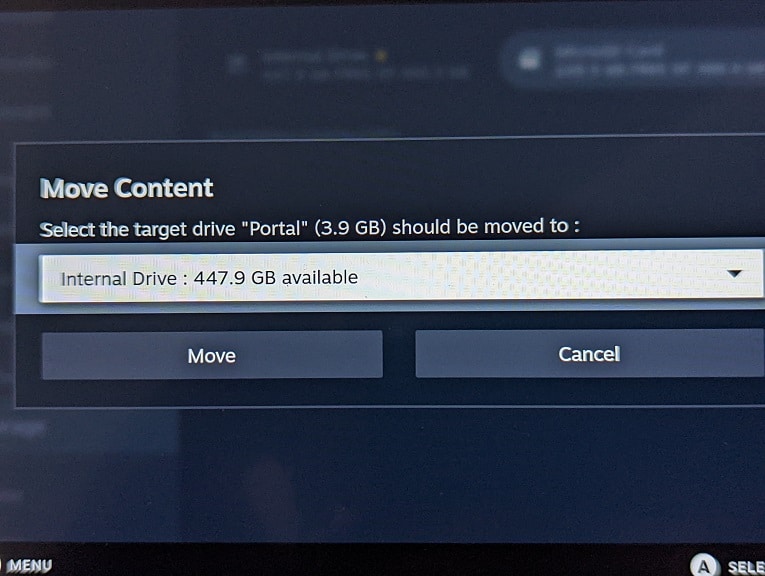
9. In the Move Content screen, select the new location and then select Move.

10. Once the transfer has completed, press the Close option in order to exit out of the Move Content screen.

How to change the default installation location on the Steam Deck

If you want to change the default installation location on your Steam Deck, then you need to do the following:

1. Open the Steam menu and then head into Settings.

2. Once you arrived in Settings, scroll down and then select Storage.

3. In the Storage section, you should see Internal Drive and microSD Card located at the top of the screen.

The option that has a star icon next to its name is the current default installation location.

4. Highlight the storage option that you want to switch to as the default installation location.

5. With the storage option highlighted, press the X button.

6. Once you are done, future game downloads and installations will now be stored in the storage option that you named as the default location.

How to insert, format and force format a microSD card for Steam Deck

Depending on the model, your Steam Deck could come with 64 GB, 256 GB or 512 GB of internal storage. All models of the portable system also come with a microSD card slot where you can add more storage.

You can check out this tutorial at Seeking Tech to see how you can insert, format and force format a microSD card for your Steam Deck.

What memory cards are compatible with the Steam Deck?

According to Valve, the Steam Deck supports SD, SDXC and SDHC cards that use the UHS-I bus interface with a class 3 rating or better.

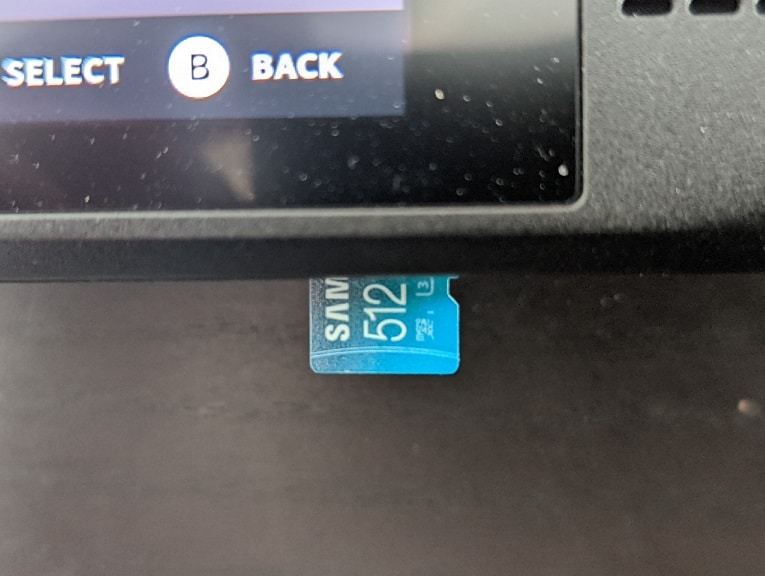
For this guide, we will be using the SAMSUNG EVO Select microSD card. If you are interested, you can purchase the same card on Amazon with this link. (#CommissionsEarned).

How to insert a microSD card to the Steam Deck

In order to insert a microSD card into the Steam Deck, you can try taking the following steps:

1. First off, locate the microSD card expansion slot, which should be on the below the left corner of the screen.

2. When inserting the microSD card, make sure that its label is facing upwards.

3. You should also make sure that the metal connectors are going into the slot first. If you try to insert the card using the other way, then it won’t fit into the slot.

4. Push the card inwards until it clicks in to the slot. You may have to use your finger nail to push it fully in.

How manually format a microSD card for Steam Deck

If the microSD card isn’t automatically formatted for your Steam Deck, then you can manually do so by doing the following:

1. Press the Steam button to open the Steam menu.

2. With the Steam menu opened, select Settings.

3. After arriving in the Settings menu, select System on the left side.

4. On the System section on the right side of the same screen, select Format.

5. You should get a notification saying that formatting will erase all the data currently stored on the microSD card. Furthermore, the deleted data won’t be recovered.

6. Once you are ready, select Confirm to start the formatting process.

How to force format a microSD card for Steam Deck

If you can’t get your microSD card to be formatted for the Steam Deck through the normal methods, then you can try to do a force format. In order to do so, you need to take the following steps:

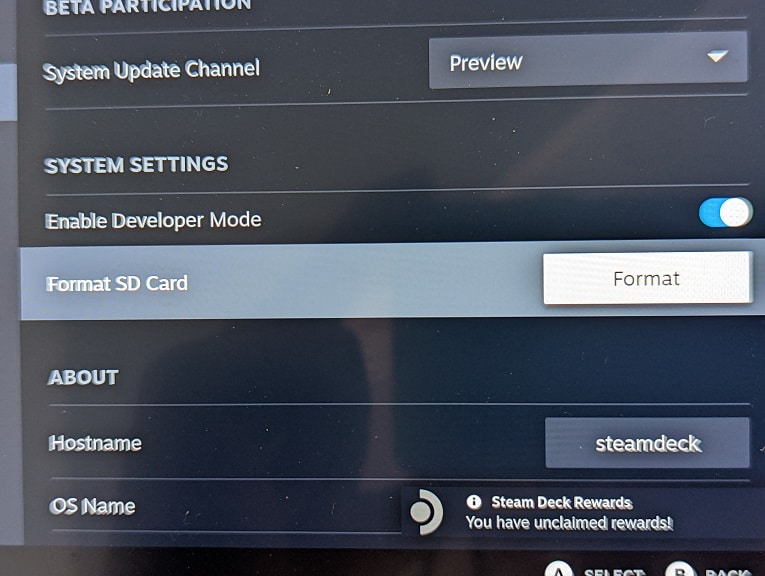
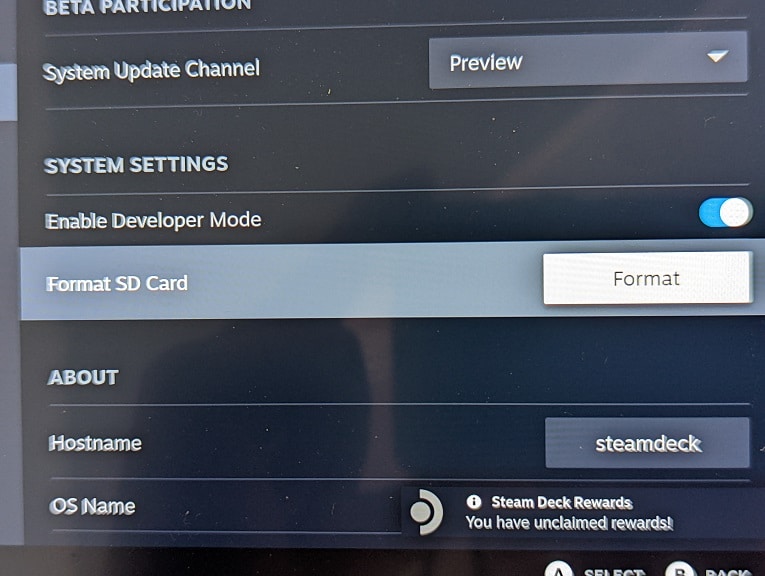
1. First off, make sure you enable the Developer menu. If you haven’t, then you need to go to Settings > System and then make sure that the Enable Developer Mode setting is turned on.

2. In the Settings menu, you need to select Developer, which is located at the very bottom of the left column.

3. In the Developer section, you then need to select Format.

4. In the pop-up notification, select Confirm in order to start the formatting process.

How to disable the Steam Deck microphone

The Steam Deck comes with two small microphones located right on top of the screen that you can use to chat with others when playing online. If you would rather disable the voice input of your portable system, then you can check out this guide to see how you can do so.

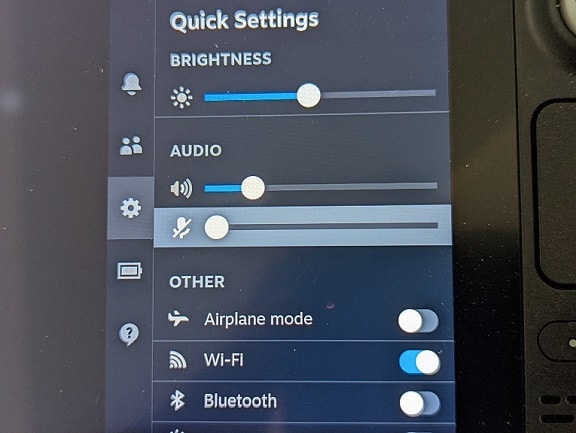
1. The easiest way to mute the microphones is by using the Quick Access menu. In order to do so, you need to take the following steps:

  • If your Steam Deck is turned off or set in Sleep Mode, then you need to power it on.
  • With the portable system turned on, press the Quick Access button, which has the three dots icon.
  • In the Quick Access menu, scroll down to the gear icon.
  • After getting to the Quick Settings section, you should see the Audio section.
  • From the Audio section, move the slider with the microphone icon all the way to the left. If done correctly, you should now see the icon crossed out.

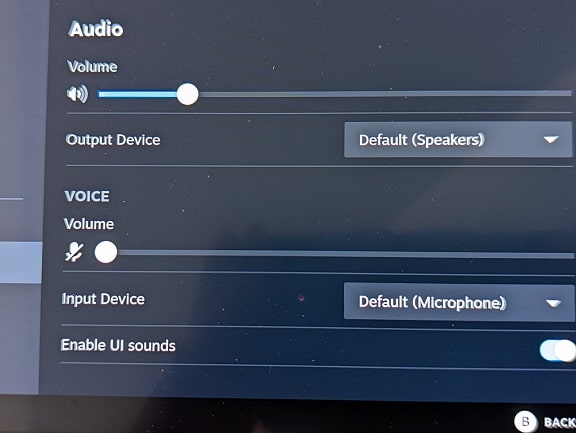
2. Another way to disable the microphone audio is by using the Steam menu by doing the following:

  • With the Steam Deck turned on, press the Steam button.
  • Once you arrive at the Steam menu, select Settings from the list.
  • From the Settings menu, you first need to select Audio from the list located on the left column.
  • In the Audio menu, head to the Voice section.
  • From the Voice section, move the microphone volume all the way to the left. If done correctly, the microphone icon should now be crossed out.

3. If you have a headset connected to your Steam Deck and want to disable its microphone, then you can try disabling the microphone on the headset.

For most recent gaming headsets, there should be a button where you can disable the microphone. Some products may feature a removeable microphone. Other headsets can turn off their mic audio if you flip the mic away from your mouth.

4. The game you are playing on your Steam Deck may also have an in-game option where you can adjust the microphone audio.

Therefore, you may want to look in the settings of the in-game menu to see if you can mute the mic.

5. You can also open your Steam Deck up and then detach the microphone from the motherboard. With that said, this can be quite complicated and you may end up damaging your portable system if you aren’t experienced with taking electronics apart.

How to change the refresh rate of the Steam Deck

With the Steam Deck, you are able to change the refresh rate on a system-wide level. To find out how to do so, you can take a look at this tutorial from Seeking Tech.

1. To start off, make sure you keep the firmware of your Steam Deck updated as the new version may introduce more options when it comes to being able to change the refresh rate. Not to mention that the new firmware may also improve stability.

To update your portable system manually, you can try doing the following:

  • Power on the Steam Deck if it is not already turned on.
  • Next, you need to make sure that the system is connected to the internet.
  • You then need to press the Steam button, which is located below the left touch pad, in order to open the Steam menu.
  • After arriving at the Steam menu, select Settings from the list of available options.
  • Inside of Settings, you need to select System from the list on the left column.
  • You then need to select Check for Updates on the right side of the same screen.
  • Follow the on-screen instructions to start the update process if there is a new firmware available to download and install.

2. With the firmware up to date, press the Quick Access button, which has the three dots icon located below the right touch pad.

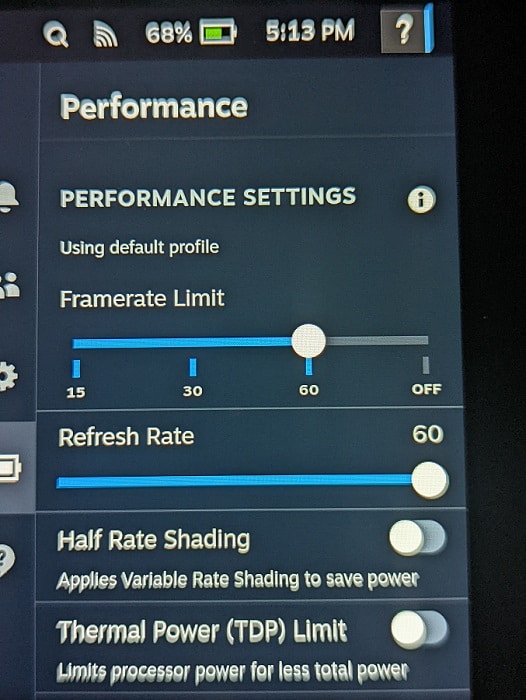
3. With the Quick Access opened, scroll down to the battery icon to access the Performance menu.

4. After getting to the Performance menu, make sure that the menu has been expanded. If not, then you need to select the Advanced View option.

5. In the expanded Performance menu, you should see the Refresh Rate slider.

With this slider you can change the refresh rate to the following options:

  • 40 Hz
  • 41 Hz
  • 42 Hz
  • 43 Hz
  • 44 Hz
  • 45 Hz
  • 46 Hz
  • 47 Hz
  • 48 Hz
  • 49 Hz
  • 50 Hz
  • 51 Hz
  • 52 Hz
  • 53 Hz
  • 54 Hz
  • 55 Hz
  • 56 Hz
  • 57 Hz
  • 58 Hz
  • 59 Hz
  • 60 Hz

5. In the performance menu, you should also see the Framerate Limit slider, which will let you set the maximum frame rate for your portable system.

If you are using the 60 Hz refresh rate, then you can set the Framerate Limit to the following maximum values:

  • 15 frames per second
  • 30 frames per second
  • 60 frames per second
  • Off

With the Off option, games will be able to run above 60 frames per second on the Steam Deck. Since the refresh rate of the screen is 60 Hz, however, then having an unlocked framerate won’t have an effect on the game’s performance. Instead, you will just end up wasting more battery life.

If you using the 40 Hz refresh rate, then you can choose between the following options for the Framerate Limit slider:

  • 10 frames per second
  • 20 frames per second
  • 40 frames per second
  • Off

For better frame rate performance, you might want to enable AMD FidelityFX Super Resolution on your Steam Deck. If you can’t seem to turn this graphical setting on, then you can take a look at this troubleshooting article.

What to do if you can’t enable adaptive brightness on the Steam Deck

With the adaptive brightness feature, the screen of the Steam Deck will automatically change its brightness level based on the lighting condition of the surrounding environment. If you can’t seem to be able to turn on this feature, then you can check out this troubleshooting article from Seeking Tech.

What is Steam Deck adaptive brightness?

If you enable the adaptive brightness feature of your Steam Deck, then the screen will automatically adjust its brightness output depending on how bright or how dark the ambient lighting is when you are using the portable system.

This can be helpful if you are moving from a bright area to a dark area or from a dark area to a bright area as you won’t need to make any manual adjustments to the screen brightness.

How to turn on adaptive brightness for the Steam Deck

In order to activate the adaptive brightness for the Steam Deck, you need to do the following:

1. If you haven’t done so already, power on your portable system.

2. With the Steam Deck turned on, press the Steam button in order to open the Steam menu.

3. Once the Steam menu has opened, select Settings.

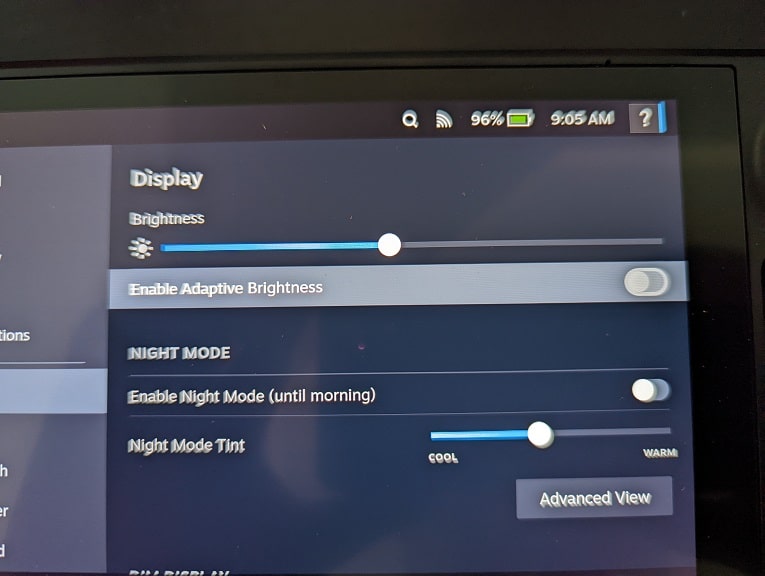
4. After arriving at Settings, you first need to select Display on the left side of the screen.

5. On the right side of the same screen, make sure that the Enable Adaptive Brightness setting is turned on.

What to do if you can’t turn on adaptive brightness on the Steam Deck

If you can’t turn on adaptive brightness on the Steam Deck, then it may be due to Valve intentionally disabling this feature. As of this writing, the automatic brightness adjustments were disabled due to it causing performance and stability issues.

So, if you want to enable this feature, then you need to wait for a new firmware update to see if this issue has been fixed.

In order to manually update the software version of your Steam Deck, you can try doing the following:

1. Turn on your portable system.

2. Make sure that your Steam Deck is connected online.

3. Go to the Steam menu by pressing the Steam button.

4. Select Settings from the Steam menu.

5. In Settings, select System on the left side.

6. On the right side of the same screen, you then need to select the Check for Updates option.

7. If there is a new update available, then you should follow the on-screen instructions to download the new software version.

What to do if FSR is not working on the Steam Deck

The AMD FidelityFX Super Resolution, also known as FSR, can be used to improve the image quality or frame rate of a videogame that is running on the Steam Deck.

If you aren’t able to get this graphical feature to work, then you can check out this troubleshooting article from Seeking Tech to see what actions you can take to potentially fix this problem.

1. Before doing anything else, make sure you update the firmware of your Steam Deck. A new software version of your portable system may help fix whatever issues you were having.

2. You should also make sure that you have properly enabled FSR. To enable AMD FidelityFX Super Resolution, you need to do the following:

  • Press the Quick Access button.
  • In the Quick Access menu, scroll down to the battery icon in the left column.
  • On the right side, you should see the Performance menu.
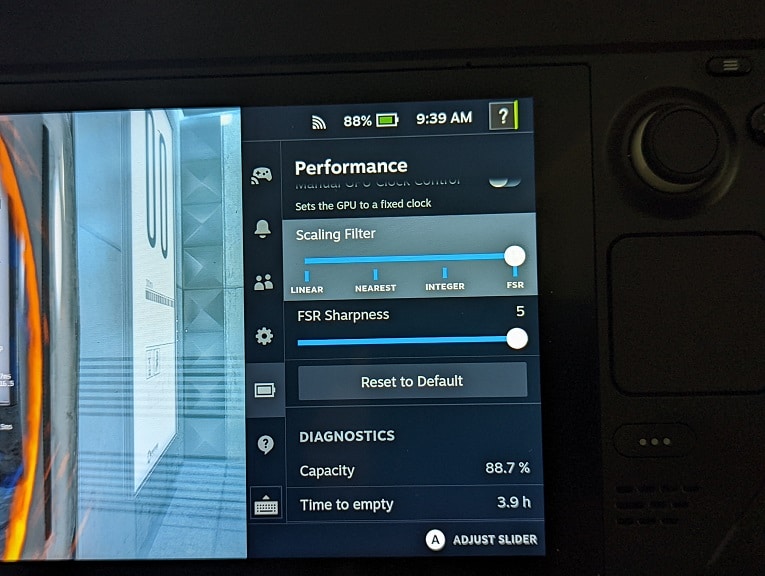
  • In the Performance menu, scroll down to the Scaling Filter setting.
  • Select the Scaling Filter setting and then move the slider all the way to FSR.
  • After enabling FSR, you may also want to adjust the FSR Sharpness slider right underneath the setting. This slider is helpful if the image appears to be too blurry or too sharp.

3. If you can’t get the Scaling Filter setting to appear in the Performance menu, then you can try doing the following:

  • Open a game.
  • Open the in-game menu and then try lowering the resolution to below 1280 x 800.
  • Afterwards, open the Quick Access menu and then go to Performance.
  • The Scaling Filter setting should now appear in the Performance menu. If it doesn’t, then you can try changing the other graphical settings in the game.

4. To check whether or not AMD FidelityFX Super Resolution is currently turned on, you need to take the following steps:

  • Open the Quick Access menu by pressing the Quick Access button.
  • Inside the Quick Access, scroll down to the battery icon.
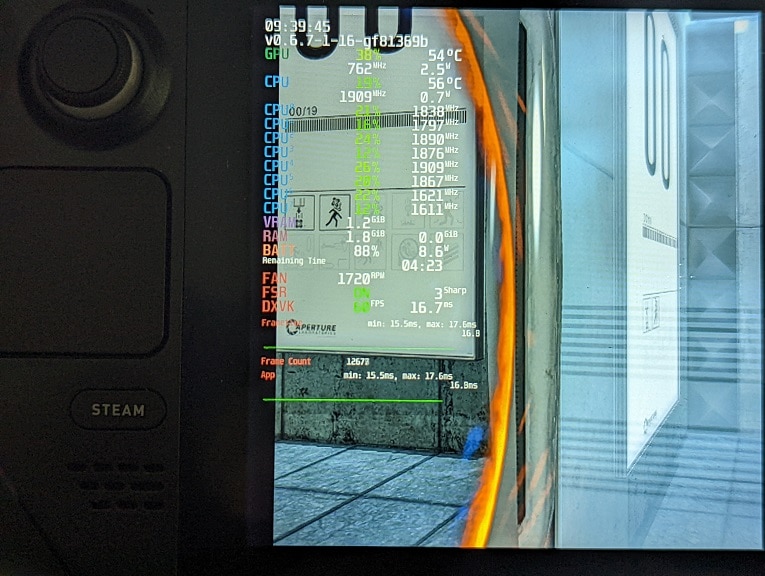
  • From the Performance menu, select the Performance Overlay Level slider.
  • Move the slider all the way to Level 4.
  • On the left side of the screen, you should now be able to see whether or not FSR has been enabled.

5. If you turned on FSR in the Performance menu but the Performance Overlay Menu shows that the feature is turned off, then you can try the following:

  • Using the in-game menu, look for the option where you can disable the game from being shown in a full screen. Instead, change this setting so that the game is able to run in a window.
  • As we stated above, you should also try lowering the resolution to below 1280 x 800.
  • You can also try changing other graphical settings to see if FSR is enabled in the Performance Overlay Menu.

6. Keep in mind that, even if a game is playable on the Steam Deck, it may not be fully compatible. Therefore, a feature like AMD FidelityFX Super Resolution may not work at all if you are playing the game on the portable system.

How to turn off the screen while downloading on Steam Deck

Downloading games and other files on the Steam Deck will take up a lot more battery life than what you may have expected. To save on battery usage, as well as potentially prevent any screen burn-in problems, you can take a look at this tutorial to see how you can turn off the screen of the portable system when downloading.

How to turn off the screen while downloading on Steam Deck by using Desktop Mode

To turn off the screen while downloading a file on the Steam Deck, you need to use the Desktop Mode. In order to do so, you need to take the following steps:

1. Press the Steam button on the portable console to open the Steam menu.

2. From the Steam menu, select Power.

3. In the Power Menu, select Switch to Desktop.

4. Once the Steam Deck has switched to the Desktop Mode, select the Steam Deck Icon with the mouse pointer located on the bottom left corner.

5. Next, you need to select Settings on the left column and then System Settings on the right side.

6. In the System Settings menu, scroll down the left column and then select Power Management.

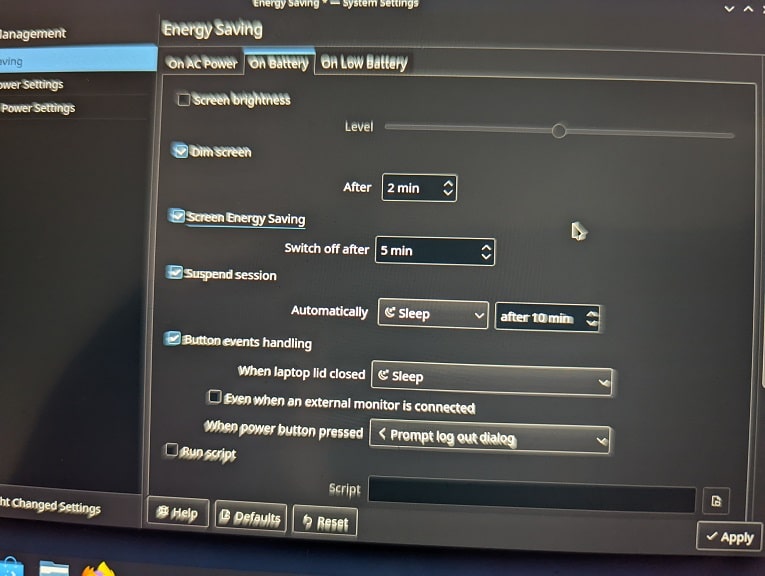
7. On the right side of the screen, you should see the Energy Saving menu along with three tabs: On AC Power, On Battery and On Low Battery.

8. In these tabs, you should see the Screen Energy Saving setting. Make sure that the box next to it is checked.

9. Underneath the Screen Energy Saving, you will see the option to see the amount of time that will past, based on the lack of user inputs, until the screen will automatically shut off on its own.

You can set this value to as low as 1 minute.

10. We recommend enabling the Screen Energy Saving setting in all of the On AC Power, On Battery and On Low Battery tabs so that the Steam Deck screen will automatically turn off while downloading under various battery conditions.

11. Once you made the changes, you need to switch Steam Deck to desktop mode whenever you are downloading a big file. Afterwards, you can simply let the portable system turn off its screen on its own.

Unfortunately, there is currently no way to turn off the Steam Deck screen while downloading if you are using the Steam Deck operating system.

In order to save on battery life and/or prevent screen burn-in while using the regular Steam Deck OS when downloading, we recommend that you turn down the brightness level all the way to the minimum.

With that said, Valve could always update the firmware of the Steam Deck to allow you to download files while it is set to sleep mode. So, it is a good idea to keep the portable system updated to see if any features are being added.

How to disable Wi-Fi power management on Steam Deck

If you are experiencing internet issues when using the Steam Deck, then you may want to consider disabling the Wi-Fi power management feature. To find out how you can turn off this function, then you can follow this step-by-step tutorial from Seeking Tech.

How to turn on the developer mode on the Steam Deck

In order to be able to disable the Wi-Fi power management feature of your Steam Deck, you first need to turn on the developer mode. To do so, you should take the following steps:

1. If you haven’t done so already, turn on your Steam Deck.

2. Next, you need to open the Steam menu, which you can do by pressing the Steam button.

3. From the Steam menu, you need to select Settings.

4. Inside the Settings menu, you need to first select System from the left column.

5. On the right side of the same screen, you then need to make sure that the Enable Developer Mode setting is turned on. You can find this setting right underneath the System Settings section.

How to turn off Wi-Fi power management on Steam Deck

After enabling the developer mode, you need to do the following in order to disable Wi-Fi power management for your Steam Deck:

1. Go back to the Settings menu of your portable system.

2. From the Settings menu, scroll all the way down and then select Developer.

If you don’t see this option, then you didn’t turn on the Developer Mode previously. Refer to the first part of this guide to see how you can enable this menu option.

3. In the Developer menu, scroll down to the Miscellaneous section.

4. Inside of the Miscellaneous section, make sure that the Enable Wifi Power Management setting is turned off.

5. After disabling the Enable Wifi Power Management, you will get a pop-up notification saying that you need to restart the Steam Deck in order for the change to take effect.

Here, you need to select the Restart Now option.

6. Once the portable system has restarted, the Wi-Fi power management feature should be disabled.

To enable it again, you need to go to Settings and then Developer. Afterwards, make sure you turn on the Enable Wifi Power Management setting.