How to fix Teardown input lag issues

You may find that the controls aren’t as responsive as you would like in Teardown. To see how you can find the input lag in this indie title, you can check out this troubleshooting guide from Seeking Tech.

1. To start off, you should make sure that you have Game Mode enabled on your television set or monitor as this will help remove most of the latency.

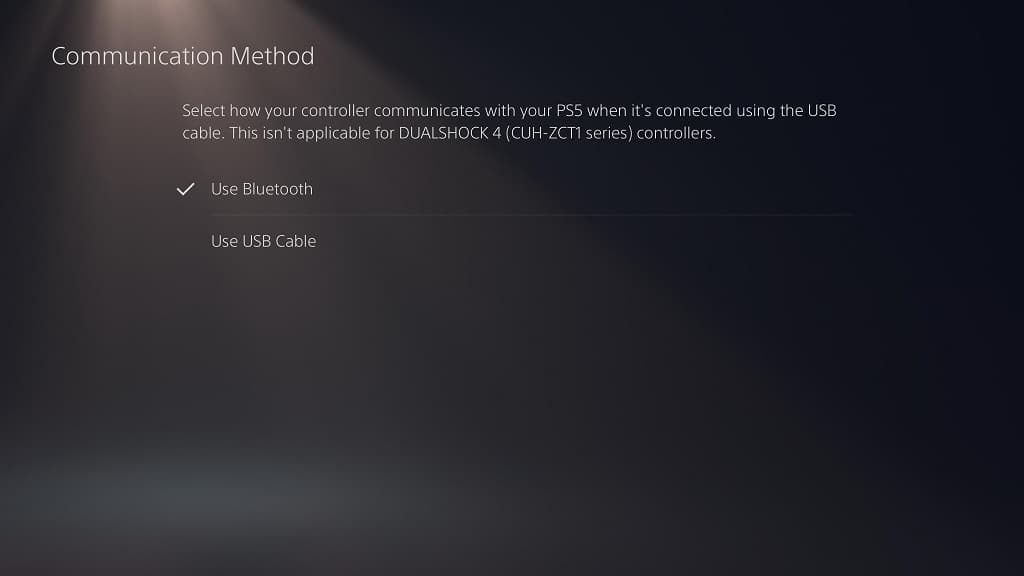
2. You should also connect the controller to your console or PC via USB as a wired communication is faster and more stable than a wireless one.

On the PS5, go to Settings > Accessories > Controller (General) > Communication Method and then make sure that Use USB Cable is selected.
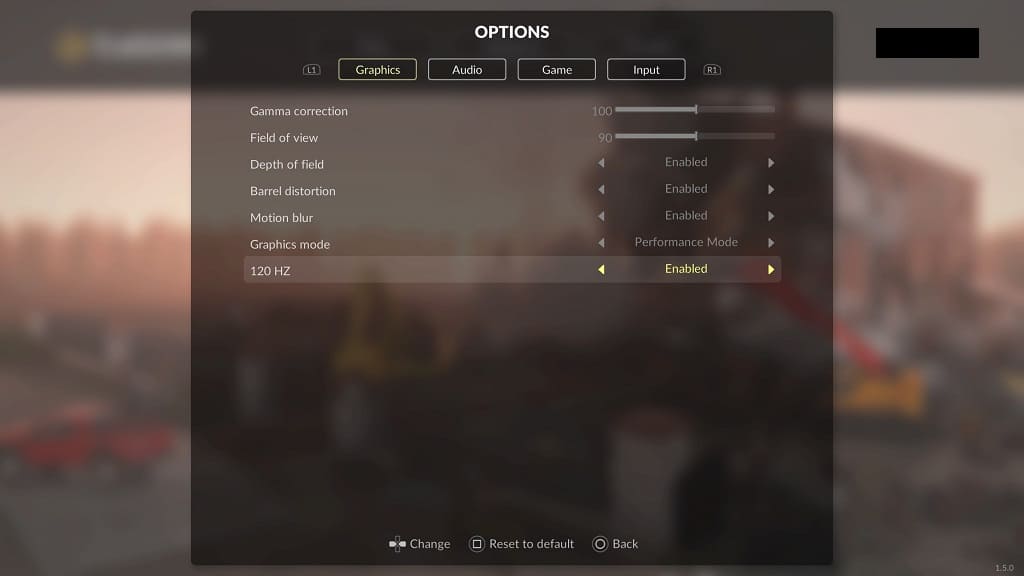
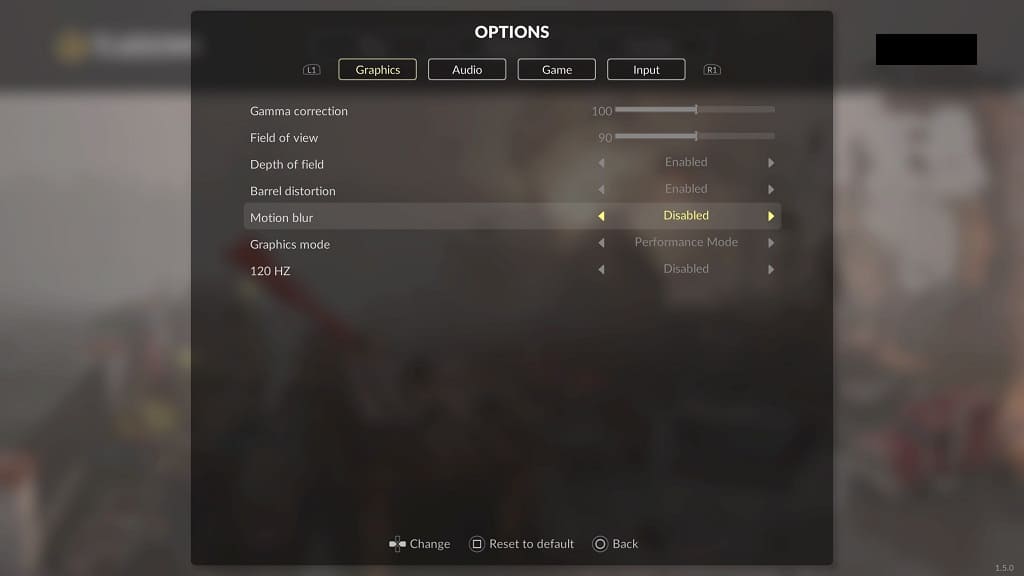
3. In Teardown, make sure you are playing in Performance Mode. If your screen supports the 120 Hz refresh rate, we suggest that you turn it on as well. At higher frame rates, the controller inputs should be more responsive.

To see how you can enable these, you can check out this tutorial.

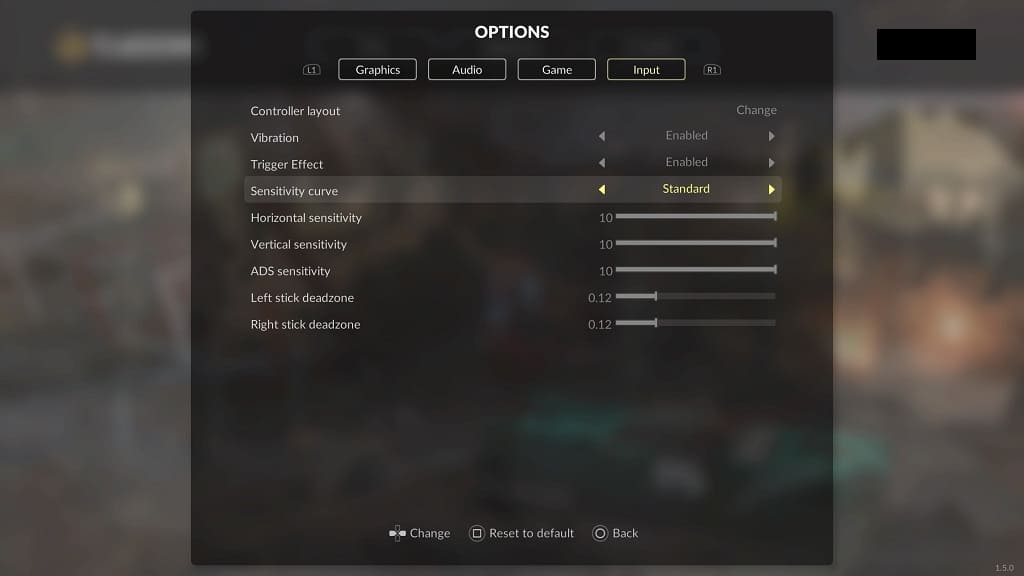
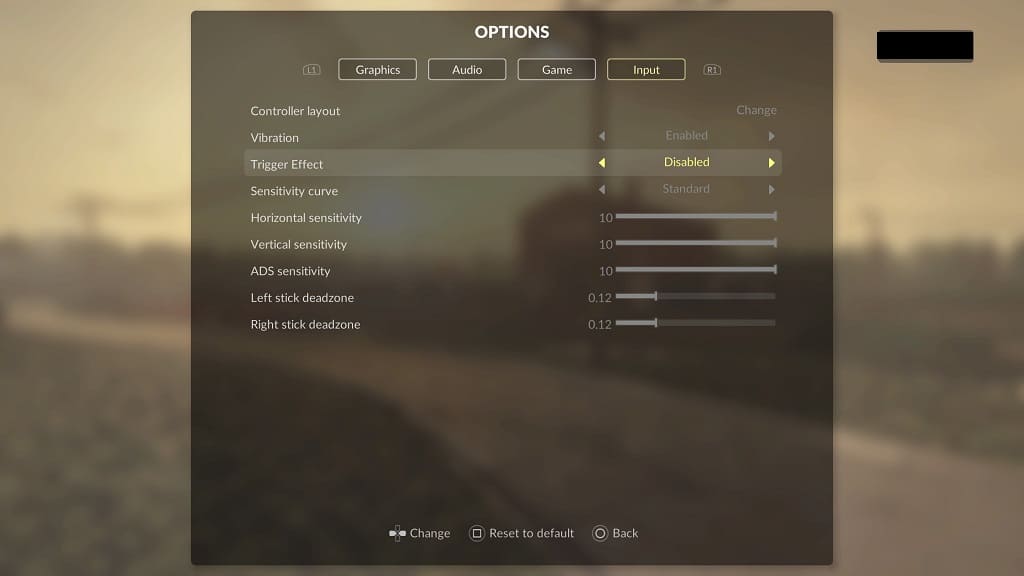
4. From the Options menu of Teardown, you can also head over to the Input tab. Once you get there, you should see the following options:

  • Sensitivity Curve
  • Horizontal Sensitivity
  • Vertical Sensitivity
  • ADS Sensitivity
  • Left Stick Deadzone
  • Right Stick Deadzone

We recommend that you play around with these settings until your analog movements feel naturally responsive.

How to play Teardown at 120 fps on PS5 and Xbox Series X

The PlayStation 5 and Xbox Series X versions of Teardown can be played at up to 120 frames per second. To see how you can properly do so in this desctrcution-themed game, you can take a look at this tutorial from Seeking Tech.

1. For the first step, you should check the settings of your television set or monitor to see how you are able to enable 120 Hz. In some cases, this is enabled by defualt.

2. Next, you need to check your console settings.

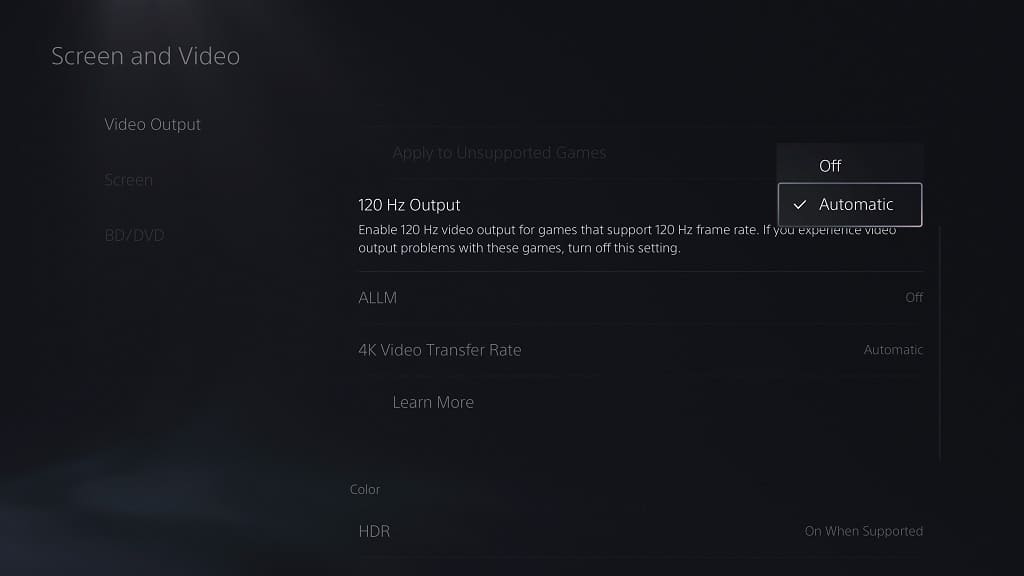
On the PS5, go to Settings > Screen and Video > Video Output and then make sure that 120 Hz Output is set to Automatic.

On the Series X, navigate over to General > TV & display options > Refresh rate and then make sure you select 120 Hz.

3. In Teardown, open the Options menu and then go to the Graphics tab. From there, set the Graphics Node to Performance Mode; otherwise, you won’t be able to see the 120 Hz option.

4. Next, make sure you set 120 Hz to Enabled from the same Options > Graphics menu.

When you play Teardown again, the game should now target 120 frames per second.

How to change the field of view in Teardown

If you find the default field of view in Teardown to be too wide or too narrow, then you can check out this guide from Seeking Tech to see how you are able to change it.

1. Begin by opening the Options menu in this game.

2. You should be viewing the Graphics tab by default. If not, then make sure you switch over to it.

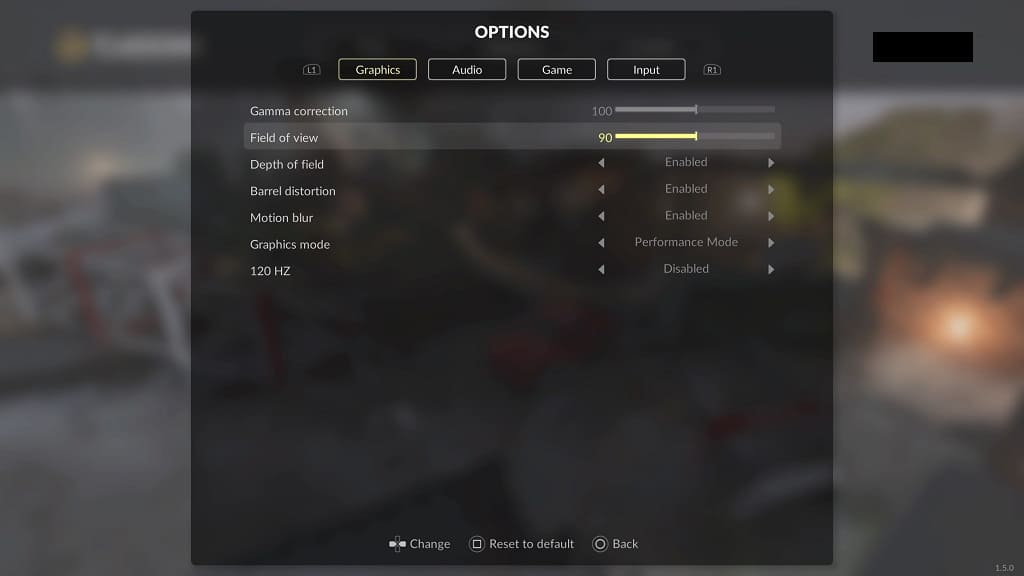
3. Move the cursor down to Field of View, which is set to 90 be default.

4. Use the left directional pad button to decrease the value in order to narrow your view. Alternatively, you can use the right directional pad to widen your view.

The Field of View setting can be changed in increments of 10 with a range of 60 to 120.

5. After you are done adjusting the FoV, exit the Options menu.

You should see your new viewing angle when you start playing Teardown again. If you don’t like the new angle, you can return to the Options > Graphics menu again to re-adjust it.

How to turn off depth of field Teardown

You may notice that the graphics looked less focused at a further distance in Teardown. If you don’t like this depth of field effect, then you can check out this Seeking Tech guide to see how you are able to turn it off.

1. Open up the Options menu in the videogame if you haven’t done so already.

2. In the Options screen, you need to be in the Graphics tab.

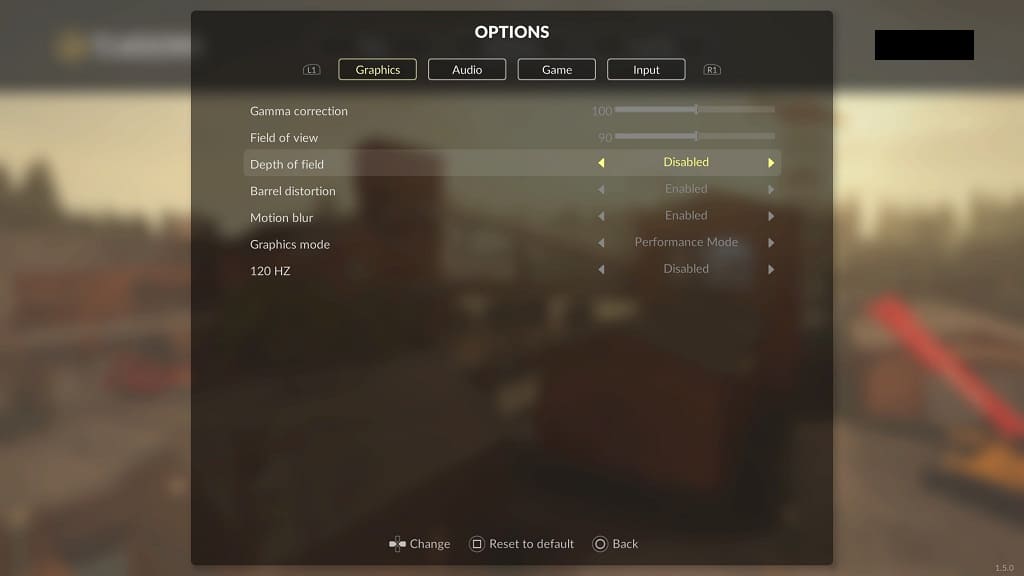
3. From there, move the cursor down to the Depth of Field setting, which is set to Enabled by default.

4. Use either the left or right directional pad button to switch it over to Disabled.

5. You can then back out of the Options menu.

When you start playing Teardown again, the depth of field should no longer be applied.

How to disable motion blur in Teardown

Motion blurring is enabled by default in Teardown. If you don’t like this visual effect, then you can check out this Seeking Tech guide to see how you can disable it in this destruction game.

1. Start off by opening the Options menu from either the main menu or pause screen.

2. Make sure you are viewing the Graphics tab in the Options menu. If you aren’t, then you can use the L1 and R1 buttons of a PlayStation controller or LB and RB buttons of an Xbox controller to switch tabs in Teardown.

3. Move the cursor down to Motion Blur in the Graphics tab.

4. By default, Motion Blur is set to Enabled. Use the left or right directional pad to switch it over to Disabled.

5. Exit the Options menu and return to playing the game. You should no longer see any motion-based blurring.

How to change difficulty the Teardown campaign mode

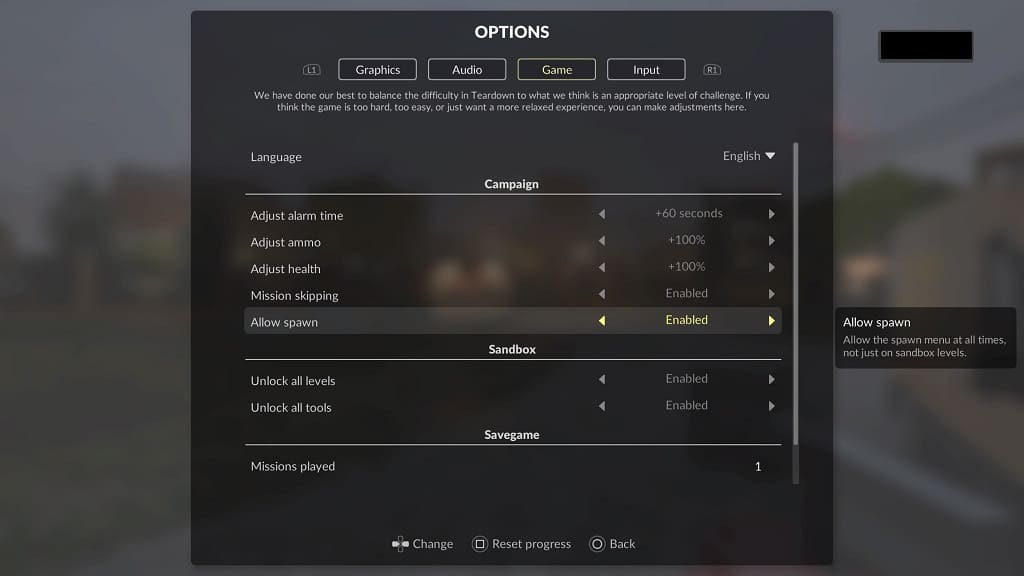
While Teardown does not have an easy mode, it does come with several optional “cheats” that you can enable to make the campaign easier or harder. You can check out this Seeking Tech guide to see how you can turn on these options.

1. To start off, you should head over to the Options menu from either the main menu or pause menu in Teardown.

2. In Options, switch over to viewing the Game tab.

Use the L1 and R1 buttons to change tabs on a controller with PlayStation buttons or LB and RB on a controller with Xbox buttons.

3. You should see the Campaign section located at the top of the Game tab.

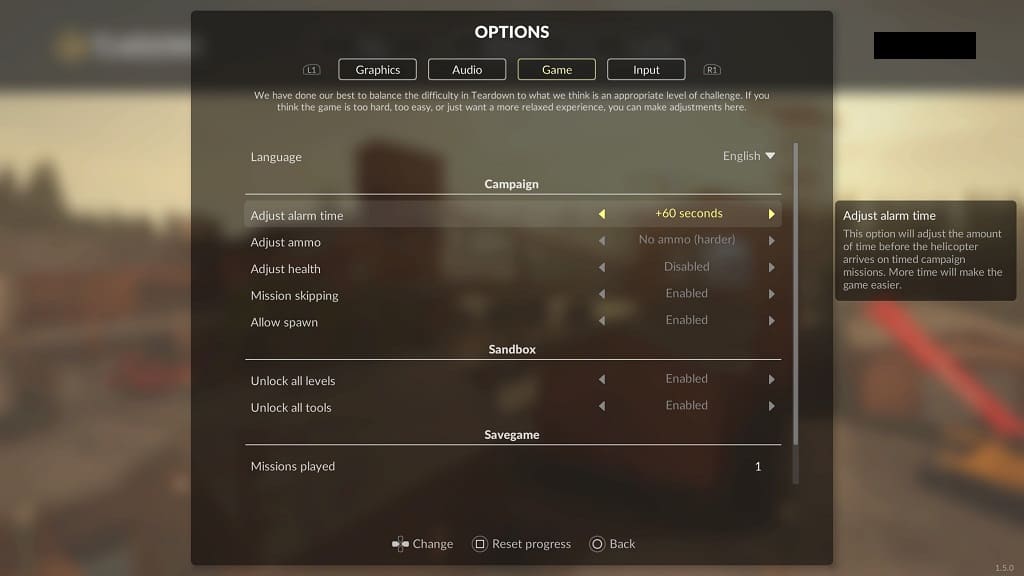
4. The first of these settings in Adjust Alarm Time, which adjusts the length of time before the helicopter shows up. You can adjust it to any of the following options:

  • Disabled
  • +15 seconds
  • +30 seconds
  • +60 seconds
  • -20 seconds (harder)

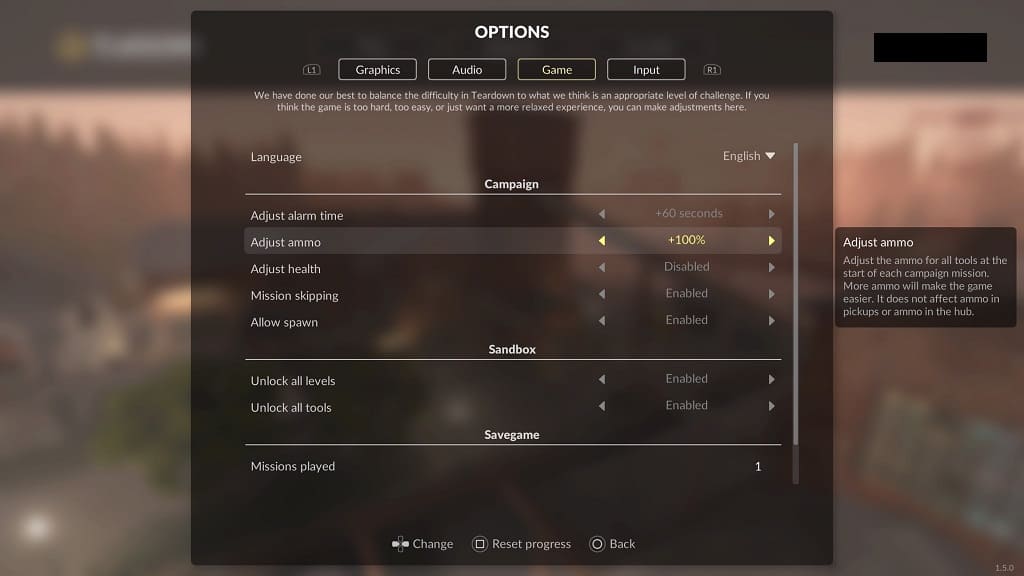
5. Next up is the Adjust Ammo setting, which adjusts the amount the ammo available at the start of the level. You should see the following options:

  • Disabled
  • +50%
  • +100%
  • No ammo (harder)

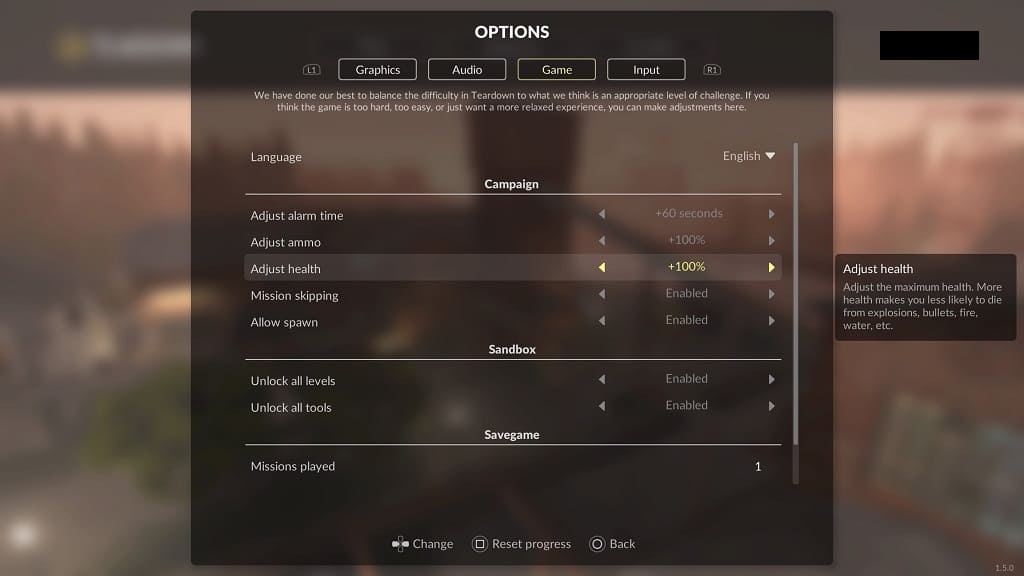
6. One last adjustable setting is the Adjust Health setting, which adjusts the maximum health of your character. You have the following options:

  • Disabled
  • +50%
  • +100%
  • -50%

7. Once you are done with the adjusting difficulty options, you can exit the Options menu and go back to playing the game.

How to enable the spawn menu in Teardown

Normally, the spawn menu can only be enabled in the sandbox mode of Teardown. By enabling a setting in the Options menu, however, you will be able to use this feature in other modes.

To see how you can do so in this demolition game, you can check out this tutorial at Seeking Tech.

1. If you haven’t done so already, you need to open the Options menu in Teardown.

2. From there, you need to switch over to the Game tab. Switch tabs can be down with the L1 and R1 or LB and RB buttons if you are playing with a controller.

3. In the Game tab, you should see the Allow Spawn setting, which has the following description:

Allow the spawn menu at all times, not just on sandbox levels.

4. Use the directional pad buttons to change the Allow Spawn setting from Disabled to Enabled.

5. You can then exit the Options menu.

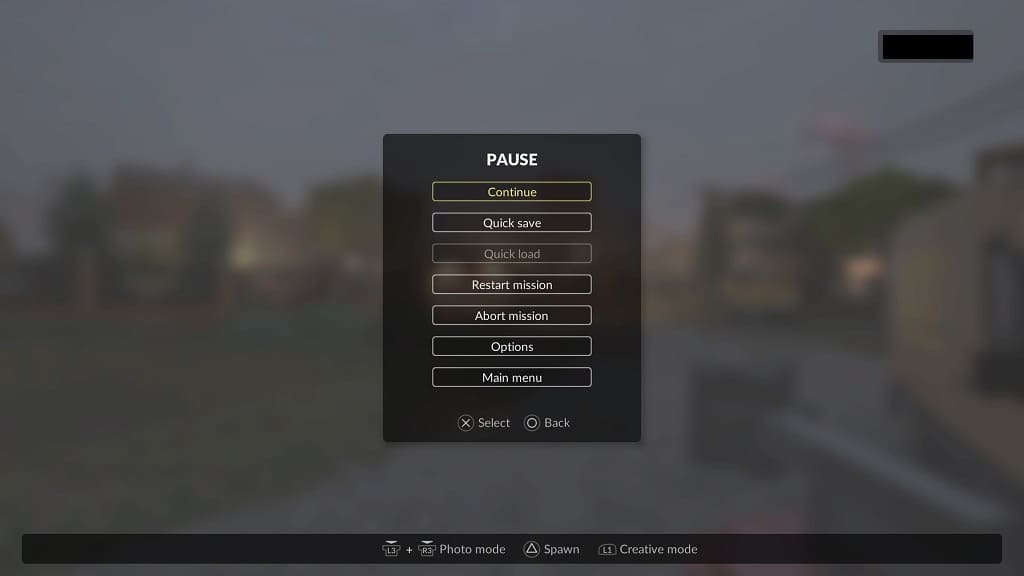
6. To open the spawn menu while playing through a level, bring up the pause menu. You can then open the menu by pressing the Triangle or Y button.

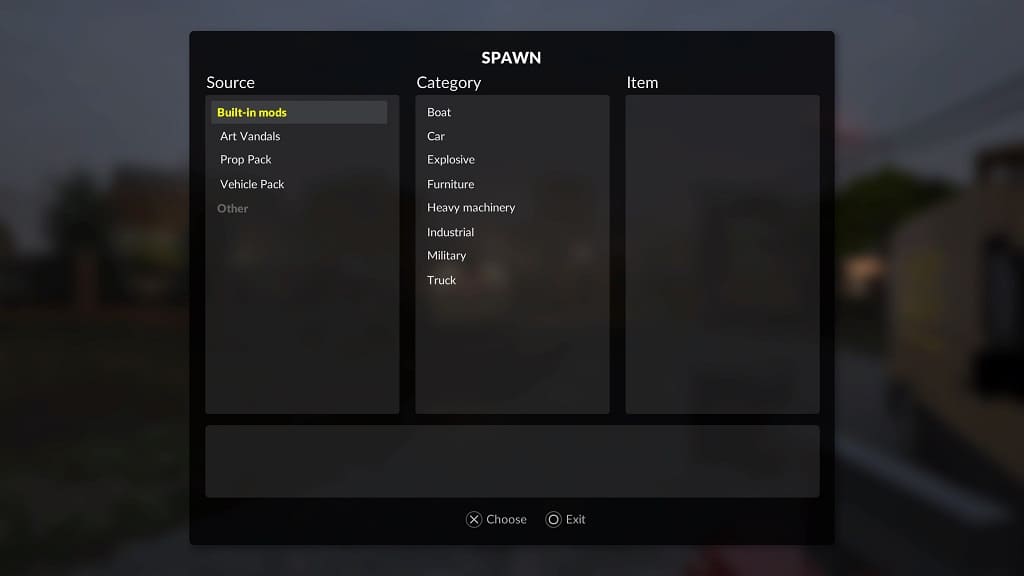
In the spawn screen, you need to select the Source first and then the Category before choosing which item you want to spawn into the level.

How to skip campaign levels in Teardown

If you find that a particular campaign level in Teardown to be very difficult and/or unfun, then you can skip it. To find out how you can properly move on to the next stage without having to complete the current one, you can take a look at this tutorial from Seeking Tech.

1. Start off by opening the Options menu, which can be done from the main menu screen or pause screen.

2. Inside of Options, make your way over to the Game tab.

You can switch tabs in Teardown by using the L1 and R1 buttons on the DualSense/DualShock 4 or LB and RB buttons on an Xbox controller.

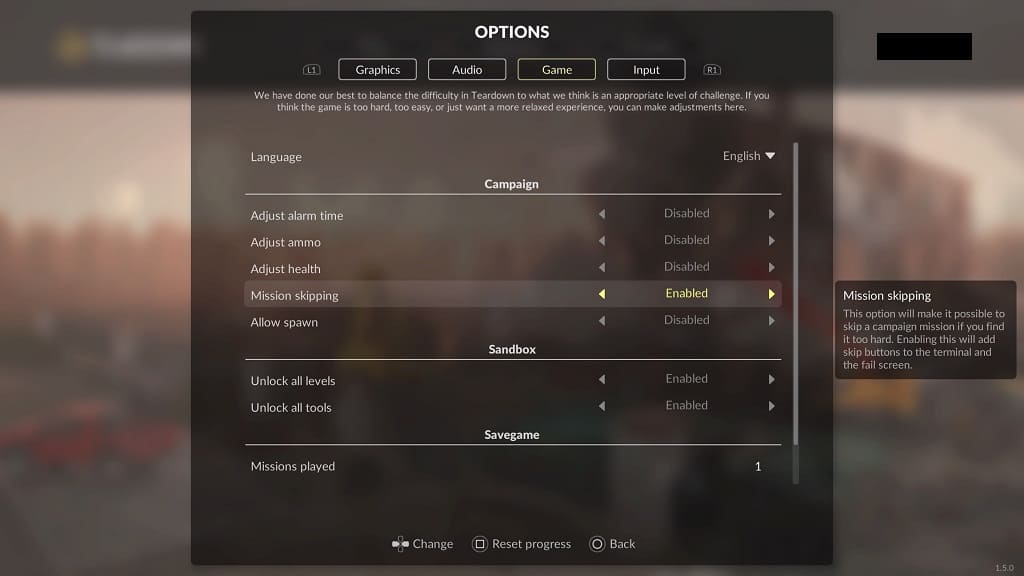
3. In the Options tab, you should see the Campaign section. Move the cursor down to Mission Skipping. You should see the following description:

This option will make it possible to skip a campaign mission if you find it too hard. Enabling this will add skip buttons to the terminal and the fail screen.

4. The Mission Skipping setting is set to Disabled by default. Use the directional pad buttons to change it to Enabled.

5. Exit the Options menu.

6. You should now see a skip button from the terminal and when you get a game over screen.

How to instantly unlock levels and tools in the Teardown sandbox mode

In order to unlock levels and tools for the sandbox mode in Teardown, you normally have to play through the campaign. If you don’t feel like going through the story mode, then you can check out this Seeking Tech tutorial to see how you can instantly unlock levels and tools.

1. To start off, you need to head over to the Options menu. This can be done from the main menu or pause screen.

2. In Options, make sure you are viewing the Game tab.

You can switch tabs by using the L1 and R1 buttons on a PlayStation controller or LB and RB buttons on an Xbox controller.

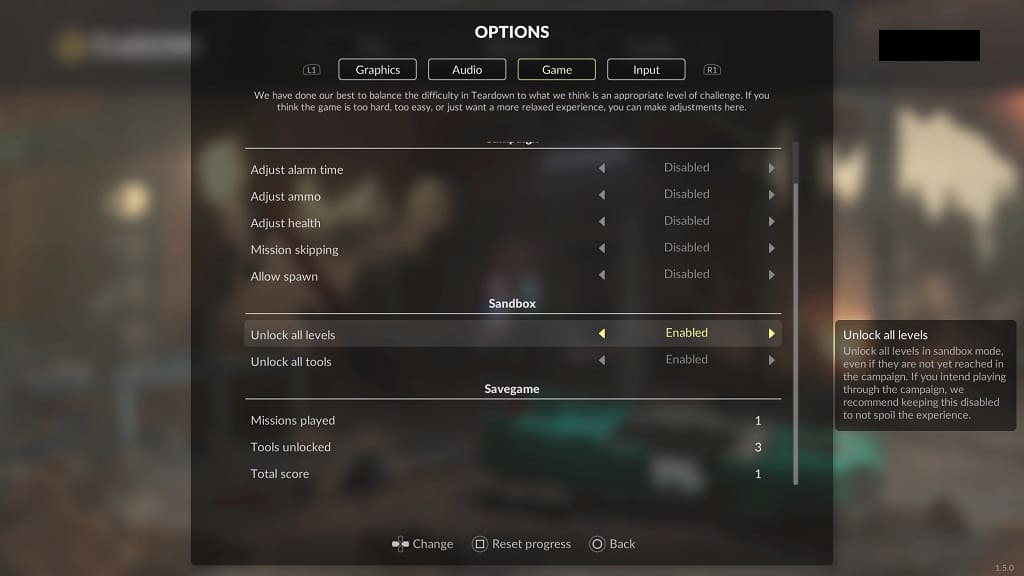
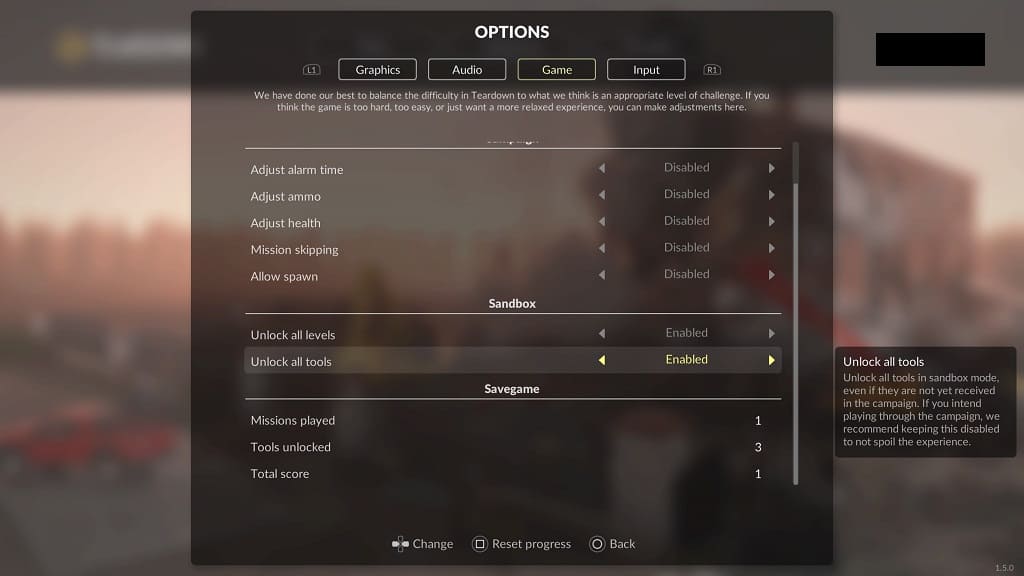
3. In the Game tab, move the cursor down to the Sandbox section. You should see two settings:

Unlock All Levels:

Unlock all levels in sandbox mode, even if they are not yet reached in the campaign. If you intend playing through the campaign, we recommend keeping this disabled to not spoil the experience.

Unlock All Tools:

Unlock all tools in sandbox mode, even if they are not yet received in the campaign. If you intend playing through the campaign, we recommend keeping this disabled to not spoil the experience.

4. Set the Unlock All Levels and Unlock All Tools to enabled and then exit the Options menu.

When you play the Sandbox mode in Teardown, all of the levels and tools should now be available.

How to disable adaptive triggers in Teardown

Teardown takes advantage of the DualSense’s adaptive triggers feature. If you would rather disable it so that the L2 and R2 won’t provide any resistance, then you can check out this tutorial from Seeking Tech.

1. For the first step, press the Options button on the DualSense to bring up the Pause menu.

2. From there, head into Options.

3. In Options, use the L1 and R1 buttons to change tabs until you are viewing Input.

4. Move the cursor down to Trigger Effect, which is set to Enabled by default.

5. Use the left or right directional pad button to set the setting to Disabled instead.

6. Exit the Options and Pause menus.

You should no longer feel any shoulder button resistance when playing Teardown.