What’s the difference between the Outcast: A New Beginning difficulty modes?

Outcast: A New Beginning features four difficulty modes. So, what are the main differences between Story, Easy, Normal and Hard? You can find out in this article from Seeking Tech.

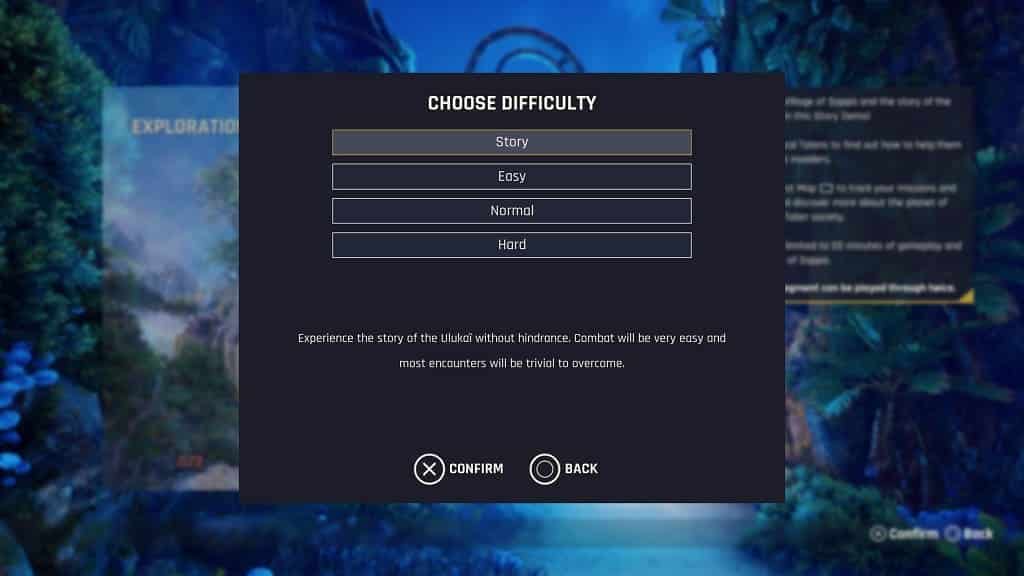
Story Mode

The story mode is the easiest difficulty in the game. By using this setting, combat will be a breeze and most of the encounters can be completed very quickly. It is designed for those who only want to play Outcast: A New Beginning for the story.
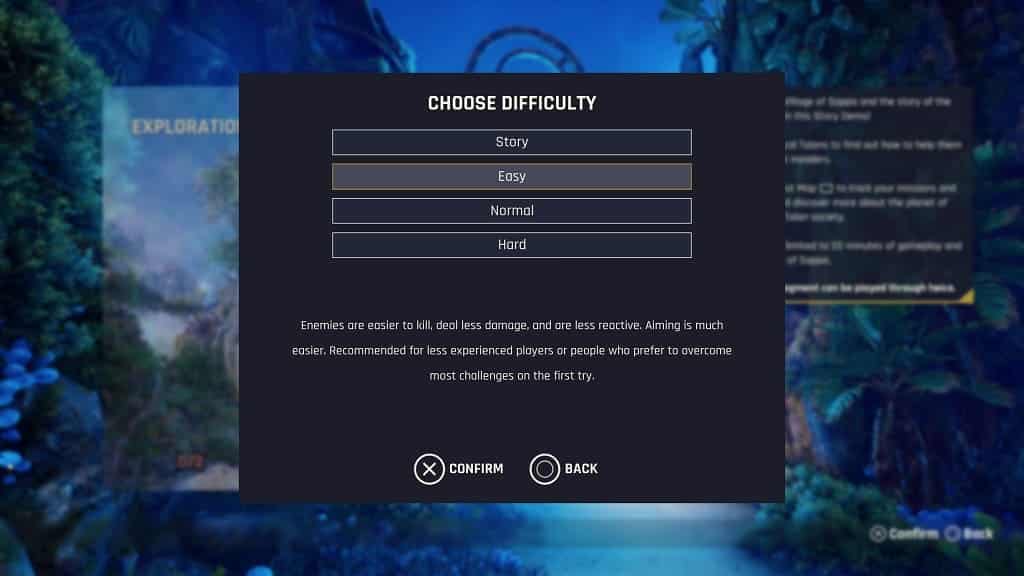
Easy Mode

Easy Mode should be a little bit harder than Story Mode but should pose little challenge. Your attacks are stronger while you should take less damage. Aiming your weapon should be easier as well. This is designed for players who want to beat a vast majority of the encounters on their first try.
Normal Mode

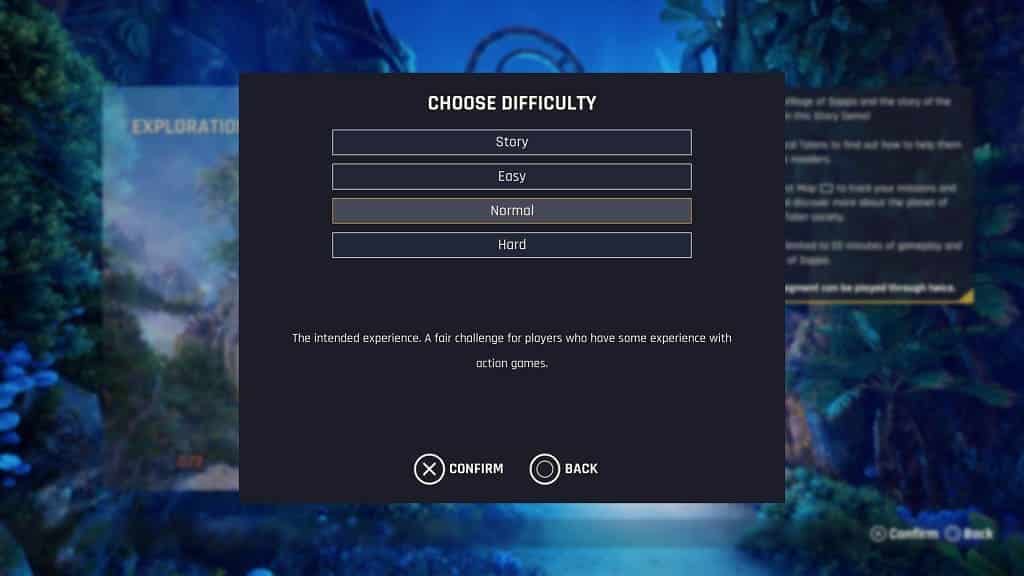
Normal Mode is how the developer intends for players to play this game. You should expect some challenge and may even die several times.
Hard Mode

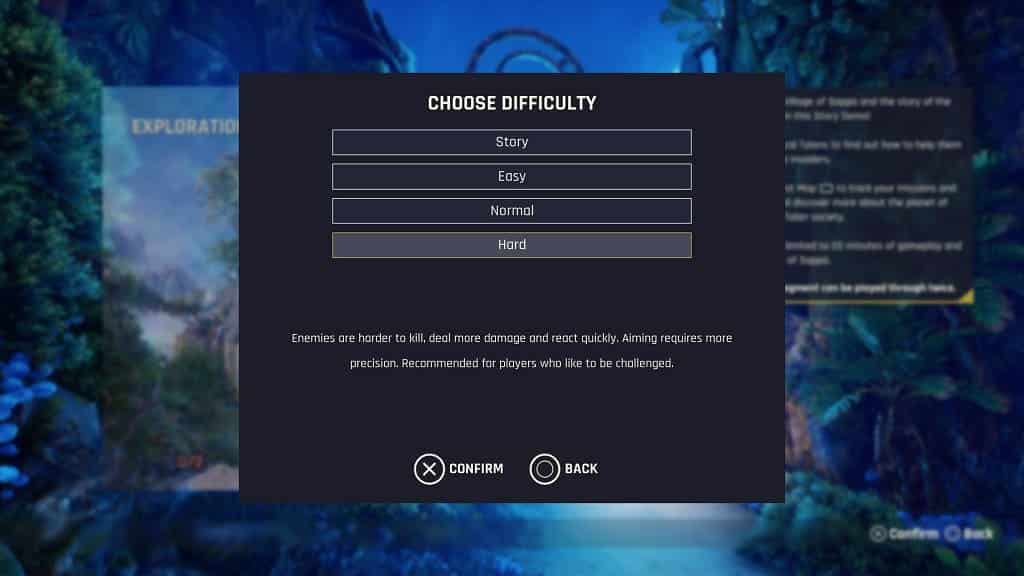
This is the most difficult mode. The enemies take more damage to be defeated while they deal more in return. They also are a lot more alert. Last but not least, you are required to be more accurate with your aim.
How to fix controller aiming issues in Outcast: A New Beginning

If you seem to have a hard time aiming with a controller in Outcast: A New Beginning, then you can check out this guide at Seeking Tech to see how you can potentially fix your issue.

1. To start off, make sure that your controller is connected to your console or PC. This is because a wired connection is better than a wireless one when it comes to input lag.

On the PlayStation 5, you need to go to Settings > Accessories > Controller (General) > Communication Method and then make sure that “Use USB cable” is selected.

2.You should also check to see if you have Game Mode enabled on your TV or monitor as this picture settings should also lower the latency for Outcast: A New Beginning and other games.

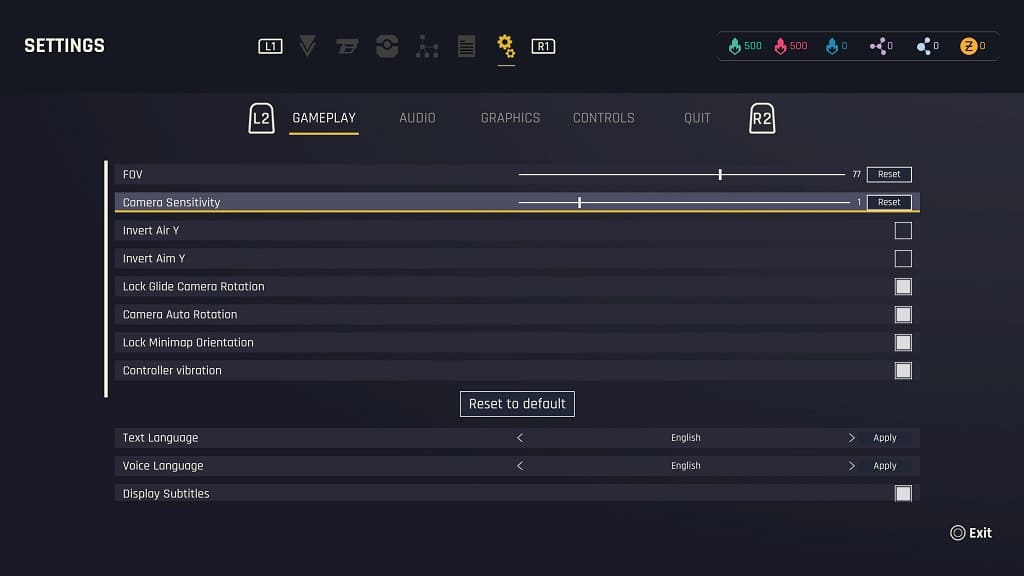
3. Furthermore, you can open the in-game menu and then head over to Settings > Gameplay. There, move the cursor down to Camera Sensitivity.

With this setting, you can change the sensitivity of the right analog stick. Move the slider to the left to make the right analog less sensitive or to the right to make it more sensitive.

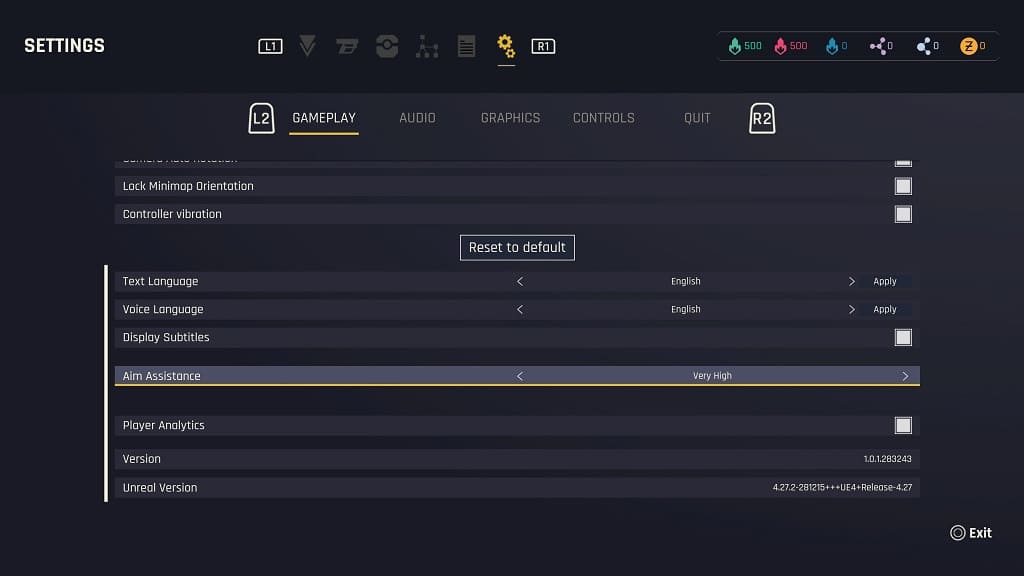
4. On the same screen, you can scroll down to Aim Assistance. You can use this setting to adjust the auto aim in the game.

How to change the field of view in Outcast: A New Beginning

If you find the camera to be too close in Outcast: A New Beginning, then you can move it back. To see how you can change the field of view in this third-person action game, you can take a look at this tutorial from Seeking Tech.

1. To start off, you need to open the in-game menu.

2. From there, navigate over to the Settings screen.

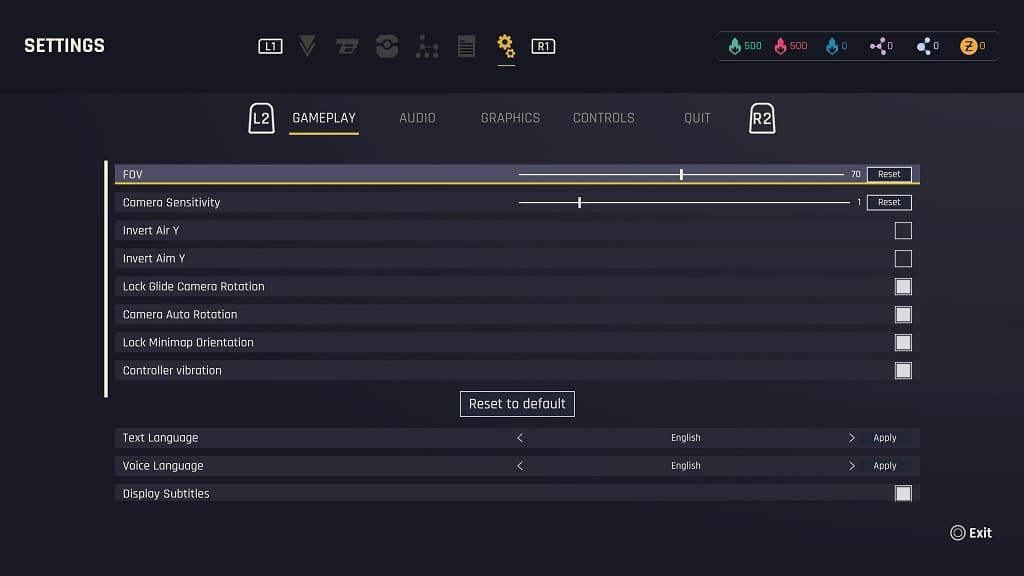
3. In the Settings section, make sure you are in the Gameplay tab.

4. You should be able to find the FOV slider there.

The default value is 70. You will be able to adjust it from a range of 40 to 100.

5. Exit the menus and return to gameplay to test out the new FOV. You can return to the same Settings > Gameplay screen to make any additional adjustments.

How to disable motion blur in Outcast: A New Beginning

Outcast: A New Beginning uses a strong motion blur effect. If you find it too distracting, then you can check out this guide at Seeking Tech to see how you can turn it off.

1. To begin, open the in-game menu.

2. From there, make your way to Settings and then Graphics.

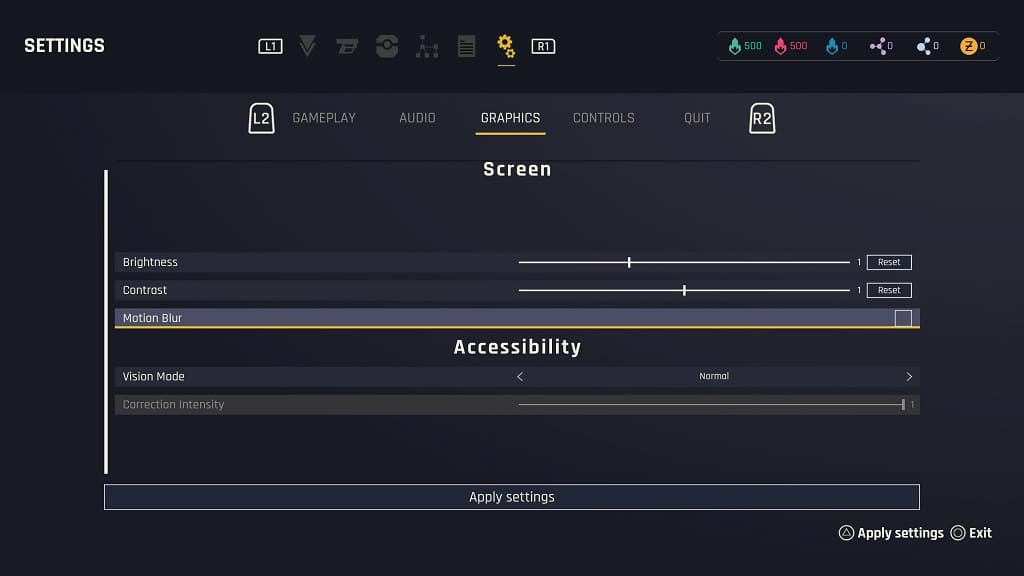
3. In the Graphics section, scroll down to the Motion Blur setting.

4. Make sure it is deselected. The box should be transparent instead of white.

5. Select Apply Settings at the bottom of the screen and then Yes when asked if you want to keep your settings.

6. You can then exit the menus and return to playing Outcast: A New Beginning. The motion blurring should now be gone.

How to disable vibrations in Final Fantasy VII: Rebirth

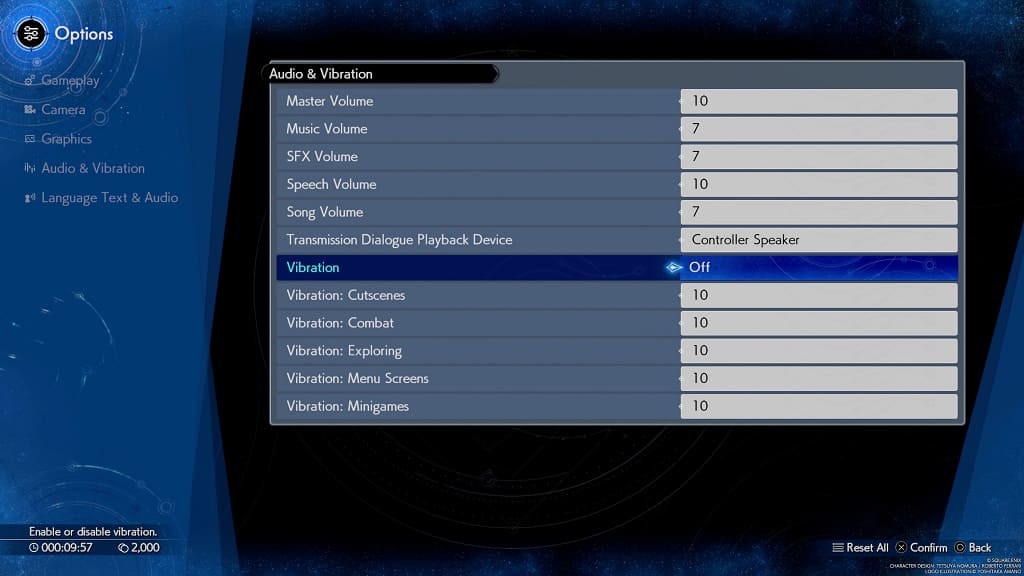
Final Fantasy VII: Rebirth uses the haptic feedback of the DualSense. If you find that the vibration is too strong, then you can check out this tutorial at Seeking Tech to see how you can disable it.

1. To start off, open the in-game menu and then navigate over to System > Options.

2. From this menu, select Audio & Vibration from the left column.

3. On the right side of the screen, select Vibration and then select Off to fully disable haptic feedback.

4. Alternatively, you can keep the Vibration setting turned on and adjust its contextual usage instead. Below it, you should see the following options:

  • Vibration: Cutscenes
  • Vibration: Combat
  • Vibration: Exploring
  • Vibration: Menu Screens
  • Vibration: Minigames

You will be able to change the rumble intensity for each of these anywhere from 0 to 10.

How to turn off camera shake in Final Fantasy VII: Rebirth

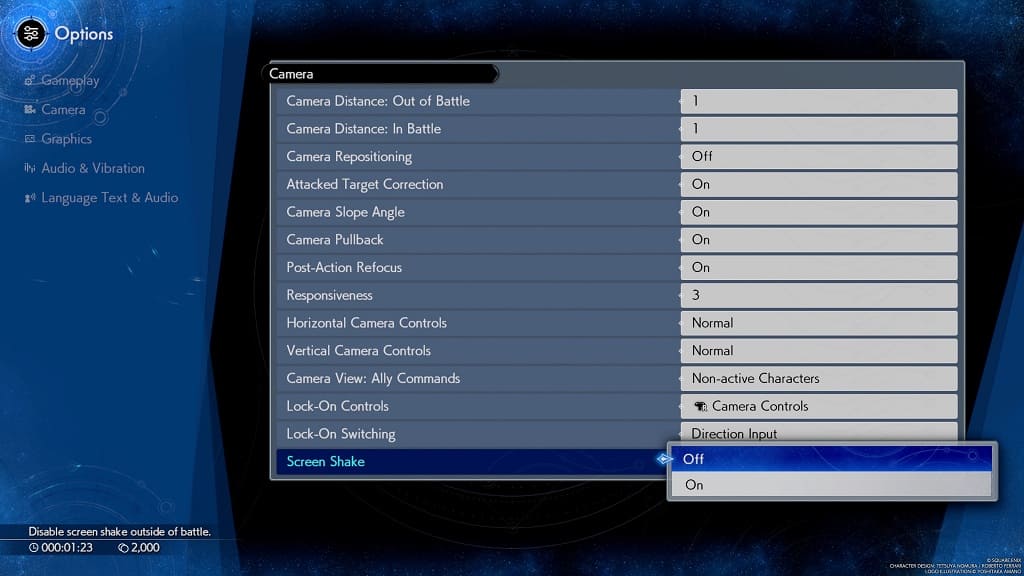
The camera will shake around in some instances while you are playing Final Fantasy VII: Rebirth. To see how you can disable this movement, you can take a look at this tutorial from Seeking Tech.

1. To start off, you need to open the in-game menu.

2. From there, navigate over to System and then Options.

3. In the Options screen, select Camera on the left column and then scroll all the way down to Screen Shake.

4. Make sure that the Screen Shake setting is set to Off and then exit the menus.

5. The screen should no longer shake in Rebirth.

How to disable motion controls in Final Fantasy VII: Rebirth

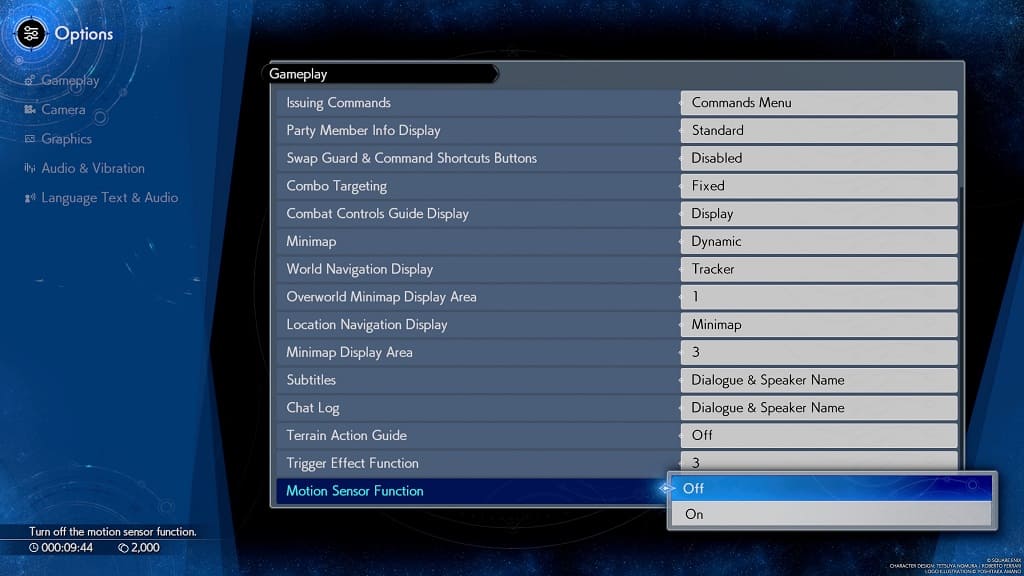
Certain situations require motion controls in Final Fantasy VII: Rebirth. If you want to turn off the motion sensor, then you can check out this guide at Seeking Tech.

1. To start off, open the in-game menu if you aren’t there already.

2. Inside, select System and then Options.

3. Once you are in the Options menu, select Gameplay on the left side of the screen.

4. On the right side of the same menu, scroll down to the last option, which is Motion Sensor function.

5. Make sure that the Motion Sensor function is set to Off and then exit the menus.

You should no longer have to use any motion controls in Final Fantasy VII: Rebirth.

How to make the Final Fantasy VII: Rebirth minimap show more area

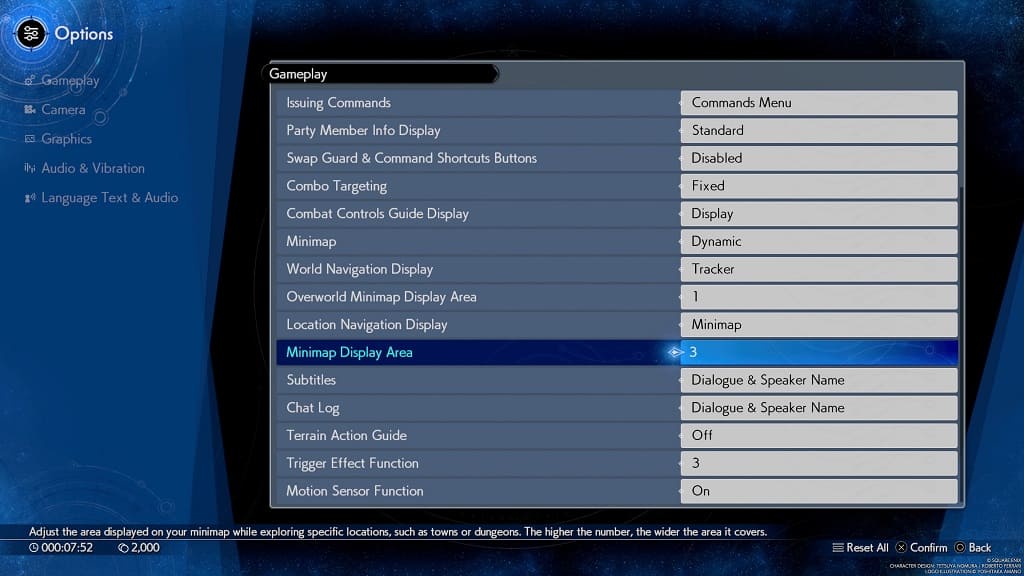
If you find that the mini-map of Final Fantasy VII: Rebirth to be too zoomed in, then you are able to make it show more of the surrounding area. To find out how you can properly do so, you can take a look at this article from Seeking Tech.

1. Start off by opening the in-game menu.

2. From there, select System and then Options.

3. Inside the Options menu, select Gameplay on the left side and then scroll down on the right side until you get to Minimap Display Area. You should see the following description:

  • Adjust the area displayed on your minimap while exploring specific locations, such as towns or dungeons. The higher the number, the wider the area it covers.

4. Set the Minimap Display Area setting to 3 and then exit the menus.

The mini-map should now show off more of the surrounding areas.

How to disable adaptive triggers in Final Fantasy VII: Rebirth

Final Fantasy VII: Rebirth supports adaptive triggers as you will feel the resistance when pressing down on the L2 and R2 buttons. If you would rather disable this DualSesne controller feature, then you can find out how to properly do so in this guide at Seeking Tech.

1. To start off, open the in-game menu.

2. From there, select System > Options > Gameplay.

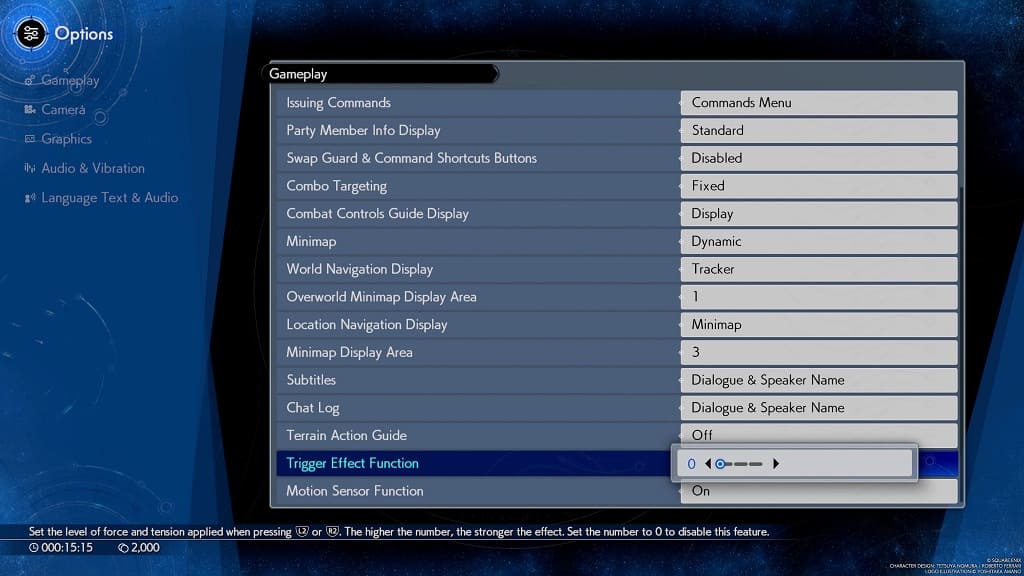
3. Next, you need to scroll down on the right side of the screen, until you can select Trigger Effect Function. It should have the following description:

Set the level of force and tension applied when pressing L2 or R2. The higher the number, the stronger the effect. Set the number to 0 to disable this feature.

4. Set the Trigger Effect Function to 0 and then exit the menus.

You should no longer feel any resistance in Rebirth.

How to keep in Final Fantasy VII: Rebirth minimap in a fixed position

The on-screen minimap in Final Fantasy VII: Rebirth will rotate when you move the right analog stick. If you find yourself constantly getting lost in the game, then having the map stay in a fixed position might help.

To see how you can change the minimap movement, you can check out this tutorial at Seeking Tech.

1. Open the pause menu and then select System.

2. From there, you need to select Options.

3. Next, select Gameplay.

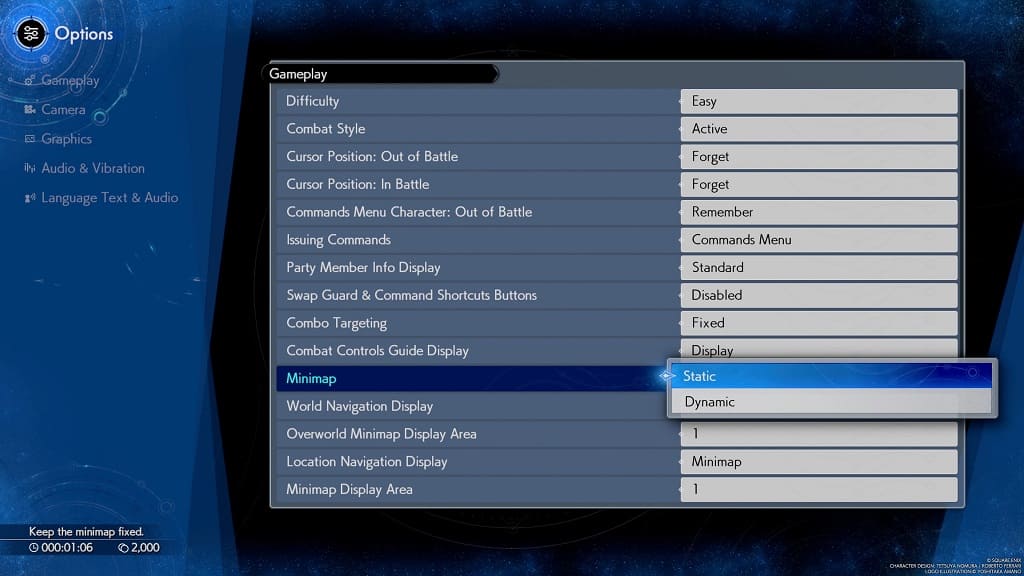
4. You then need to scroll down to the Minimap setting.

5. Make sure it is set to Static and then exit the menus.

The mini map should no longer rotate in the game.