How to disable The Legend of Zelda: Tears of the Kingdom mini map rotation

By default, the in-game miniature map will rotate as you explore in The Legend of Zelda: Tears of the Kingdom. If you find that this is causing you to constantly lose your sense of direction in this open-world action-adventure game, then you can take a look at this guide from Seeking Tech to see how you can make the in-game map display at a fixed position.

1. Start off by opening the Pause Menu. You can do so by pressing the + button found on the Right Joy-Con or Nintendo Switch Pro Controller.

2. In the Pauze Menu, you need to navigate towards to System tab. You are able to switch tabs by using the R button on the Right Joy-Con or Switch Pro Controller.

3. You then have to select Options from the System tab.

4. After getting to the Options menu, scroll down and then move the cursor down to “Lock minimap to north” setting, which should have the following description:

  • “Lock the minimap to the north regardless of which direction Link is facing.”
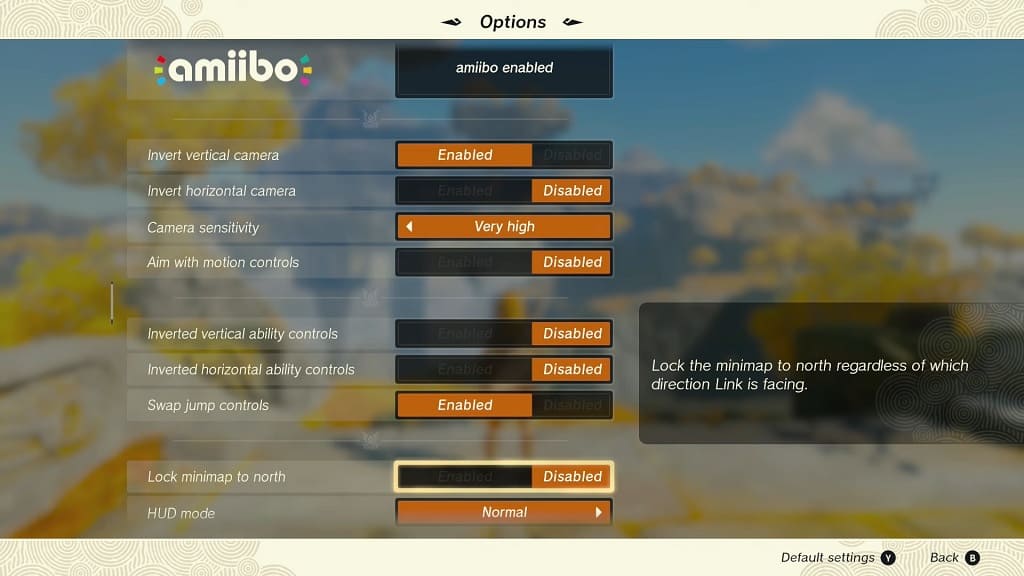
5. By default, the “Lock minimap to north” setting is set to Disabled. So, if you want the map to stay fixed, then you need to set this setting to Enabled.

6. Once you are done, exit the Pause Menu and then go back to playing Tears of the Kingdom.

The miniature map should now stay in a fixed position when you explore the open-world.

How to change camera sensitivity in The Legend of Zelda: Tears of the Kingdom

You may find that moving the camera around can be a little slow or sluggish in The Legend of Zelda: Tears of the Kingdom. To see how you can change the camera sensitivity in this open-world Nintendo Switch game, you can take a look at this tutorial from Seeking Tech.

1. For the first step, you need to open the Pause Menu, which can be done by pressing the + Button on the right Joy-Con or Nintendo Switch Pro Controller.

2. Next, you need to switch over to the System tab by using the R button on the gamepad.

3. In the System tab, you then need to select Options.

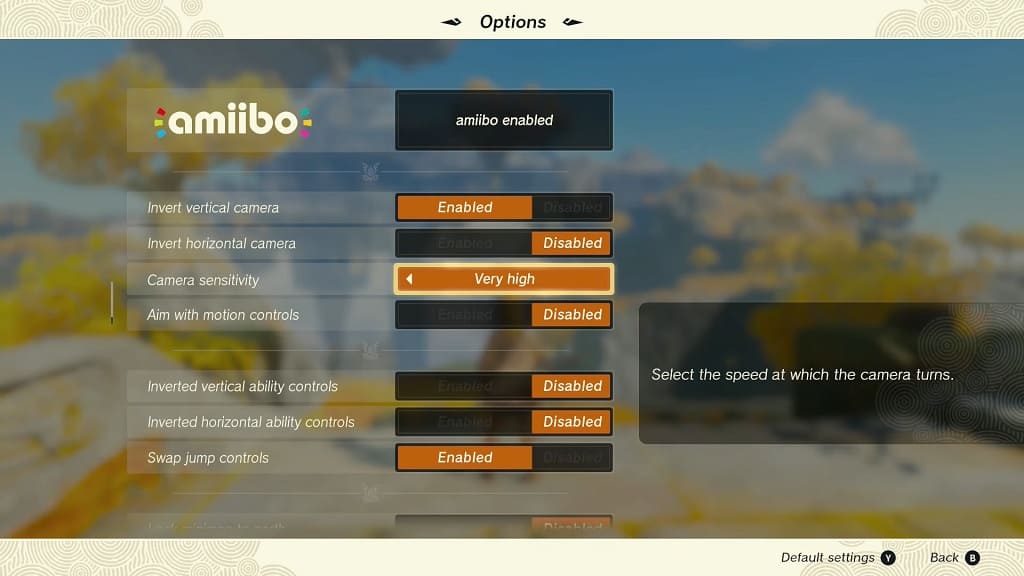
4. Once you get to the Options screen, move the cursor down to the “Camera sensitivity” setting, which has the following description:

  • “Select the speed at which the camera turns.”

5. By default, this setting is set to Normal. You can also change it to Very Low, Low, High or Very High.

If you find that the camera is too slow or sluggish, then you can try changing the “Camera sensitivity” setting to either High or Very High.

If you think that the camera is moving too fast and/or is super sensitive to your right analog movement, then you change this setting to either Very Low or Low.

6. Afterwards, you can exit the Options menu and then return to playing Tears of the Kingdom.

If the camera movement still does not feel quite right, then you can return to the “Camera sensitivity” setting in the Options menu to change to a different level.

How to remap The Legend of Zelda: Tears of the Kingdom controls

If you are having issues controlling Link in The Legend of Zelda: Tears of the Kingdom, then you are able to change the controls in the open-world title. To find out how to do so, you can take a look at this button remapping guide from Seeking Tech.

The Legend of Zelda: Tears of the Kingdom default button layout

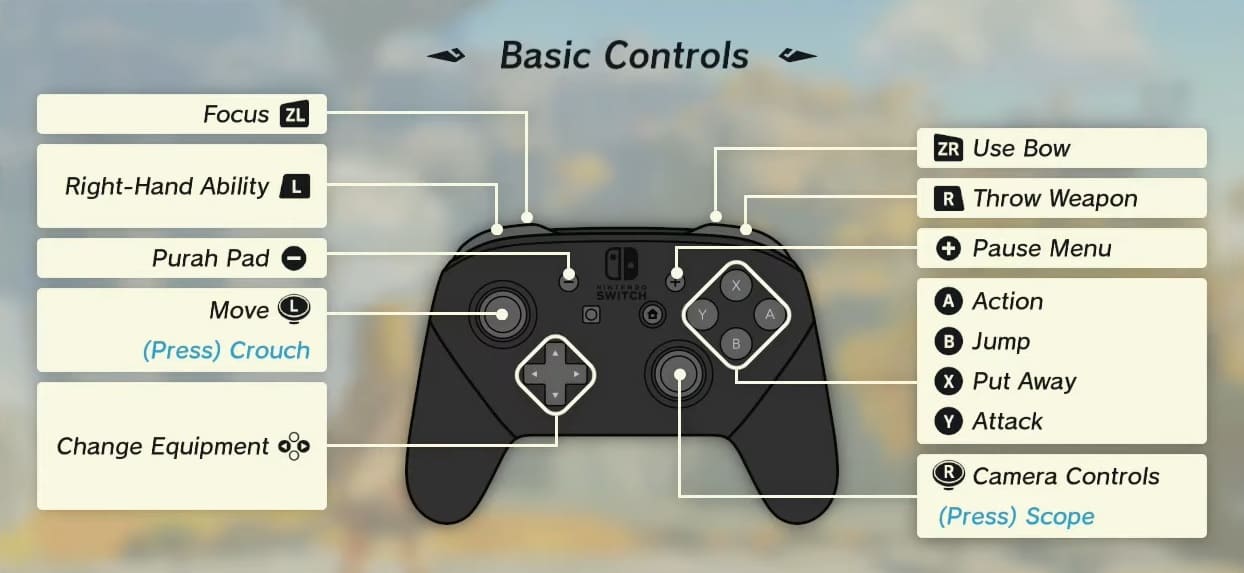
This Nintendo Switch game features the following default controls:

  • Left Analog: Move
  • Press Down on Left Analog: Crouch
  • Right Analog: Move Camera
  • Press Down on Right Analog: Use Scope
  • Left Directional Button: Change Equipment
  • Right Directional Button: Change Equipment
  • A Button: Action
  • B Button: Put Away
  • X Button: Jump
  • Y Button: Attack
  • L Button: Use Right-Hand Ability
  • ZL Button: Focus
  • R Button: Throw Weapon
  • ZR Button: Use Bow
  • Minus Button: Use Purah Pad
  • Plus Button: Open Pause Menu

How to swap the B and X buttons

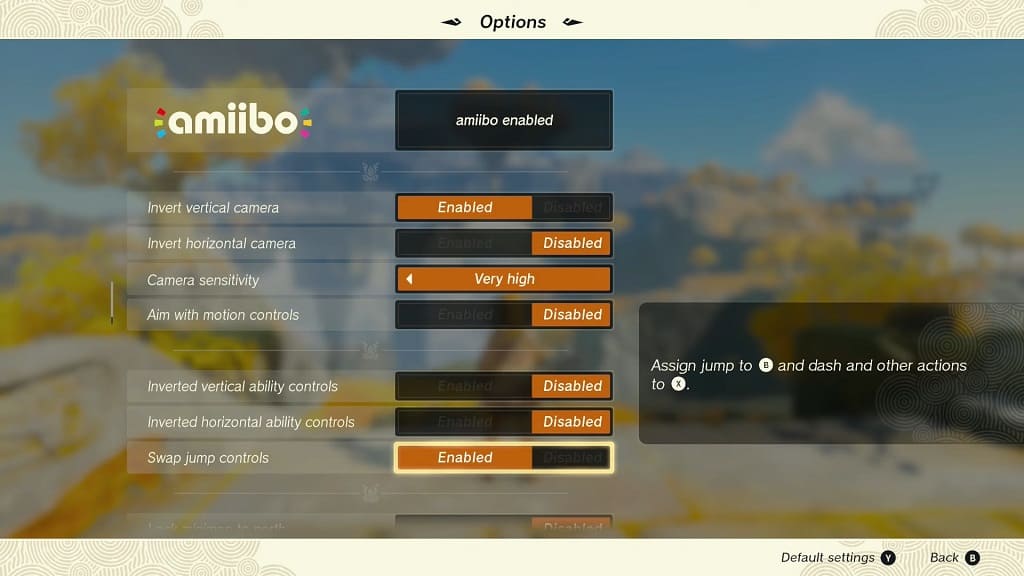
You can swap the B and X buttons in Tears of the Kingdom. By doing so, you will be able to use the B button to jump and the X button to perform an action.

If you are interested in changing the functionality of these two buttons, then you need to take the following steps:

1. Open the Pause Menu by pressing the Plus Button

2. Press the R button a few times until you get to the System tab.

3. Select Options in the System tab.

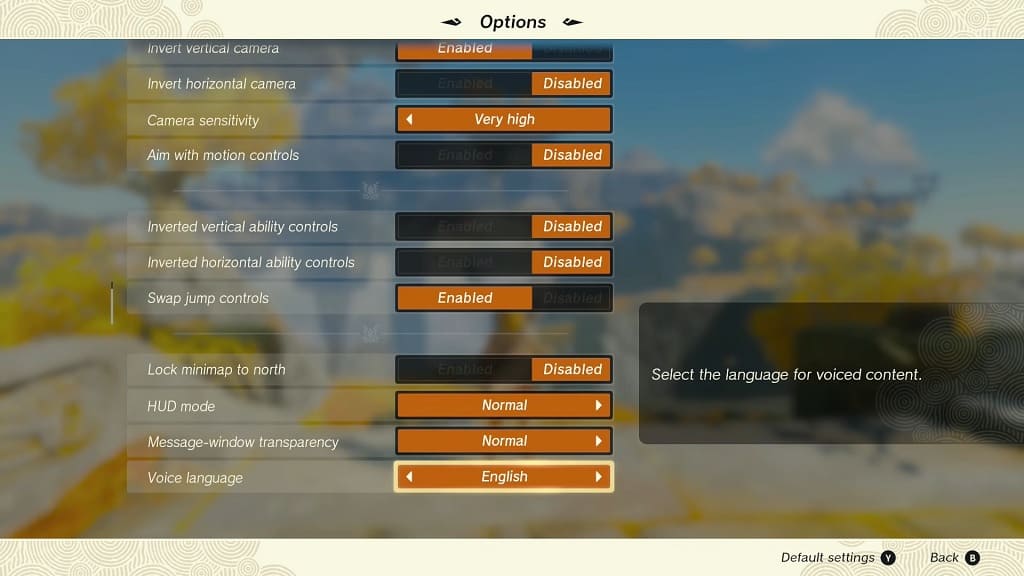
4. Scroll down the Options menu until you move the cursor to the Swap Jump Control setting.

5. Make sure that you set Swap Jump Control to Enabled.

How to remap other buttons for Tears of the Kingdom

If you want to remap the other buttons for this game, you need to do so by using the system menus of your Nintendo Switch, Nintendo Switch Lite or Nintendo Switch OLED by taking the following steps:

1. If you haven’t done so already, press the Home button to go back to the home menu of your portable system.

2. From there, select the System Settings option.

3. You then need to select Controllers and Sensors from the System Settings menu.

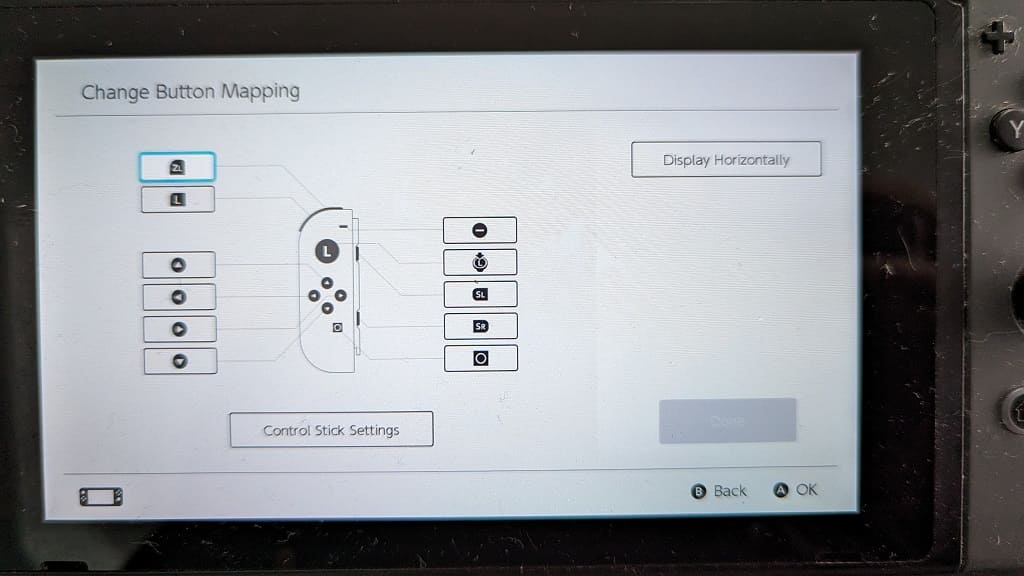
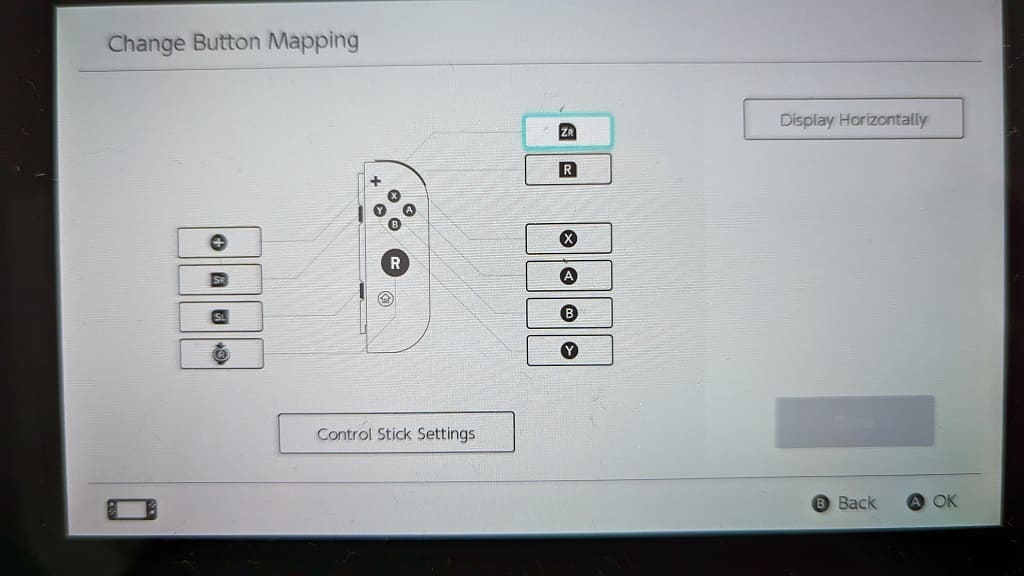
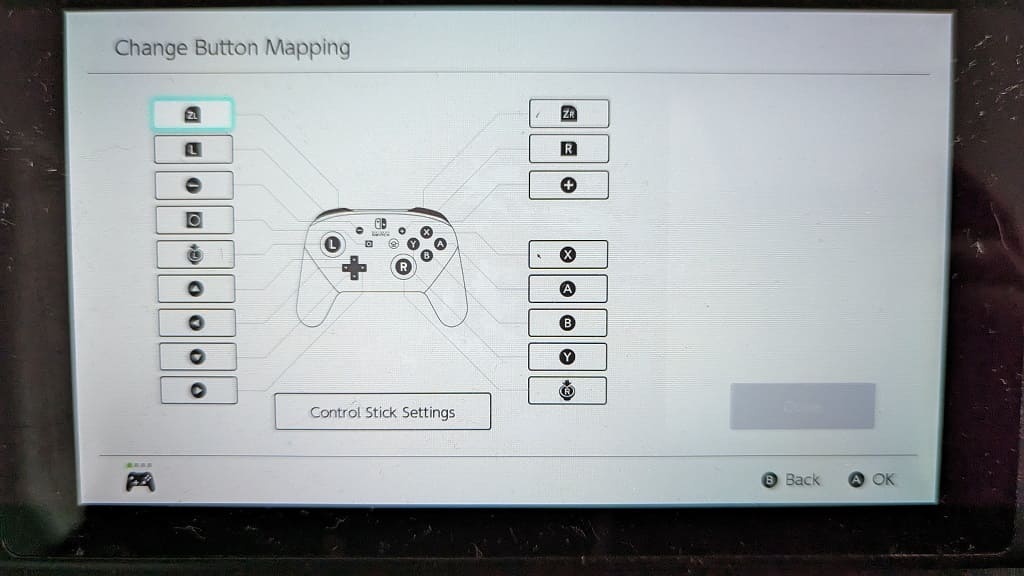
4. On the right side of the same screen, select Change Button Mapping.

5. Once you get to the Button Mapping screen, select the control you want remap on the left column.

6. You then need to select Change on the right side.


7. Finally, select the buttons that you want to remap and then select Done to save the changes.

You should now be able to play The Legend of Zelda: Tears of the Kingdom with remapped buttons.

How to switch over to Japanese voice acting in Zelda: Tears of the Kingdom

If you prefer hearing the voice acting to be done in Japanese for The Legend of Zelda: Tears of the Kingdom, then you are able to switch the dialogue language by using the in-game menus. To find out how you can properly do so in this open-world action-adventure title, you can take a look at this tutorial from Seeking Tech.

1. To start off, you need to open the Options menu.

To get there while you are currently playing the game, you need to first press the Plus (+) button on your Joy-Con or Nintendo Switch Pro Controller. Afterwards, you need to change tabs until you get to the gear cog icon by pressing the R button a few times.

You should now be in the System tab, where you can then select Options.

2. Once you get to the Options screen, scroll all the way down the list until you get to the Voice Language setting.

3. You can then change this setting to Japanese or any of the other following options:

  • English
  • French (France)
  • French (Canada)
  • German
  • Spanish (Spain)
  • Spanish (Latin America)
  • Italian
  • Russian

4. Once you are done, you can exit out of the Options menu and then resume playing your game.

The next time you hear a spoken dialogue in The Legend of Zelda: Tears of the Kingdom, you should be hearing the voice acting done in Japanese.

How to turn off damage numbers in Diablo IV

When you deal damage to your enemies in Diablo 4, you will see a number pop up indicating how much you are hurting them. If you find that this feature is too distracting, then you can take a look at this tutorial to see how you can disable it.

1. If you want to turn off damage numbers, then the first step you need to take is to head over to the Options menu in Diablo IV.

If you have loaded into your save file, then you need to press down on the touch pad on PS4/PS5 or the View button on Xbox in order to open the Map Screen. On the Map Screen, use the L1/R1 button on PlayStation or LB/RB button on Xbox One/Series to move to the Game tab. Afterwards, select Options.

If you are still in the main menu, then you need to press the Options button on PlayStation or Menu button on Xbox to open Game Menu. From there, head over to Options.

2. From the Options menu, you need to first move over to the Gameplay tab. You can change tabs by using the L1/R1 or LB/RB buttons.

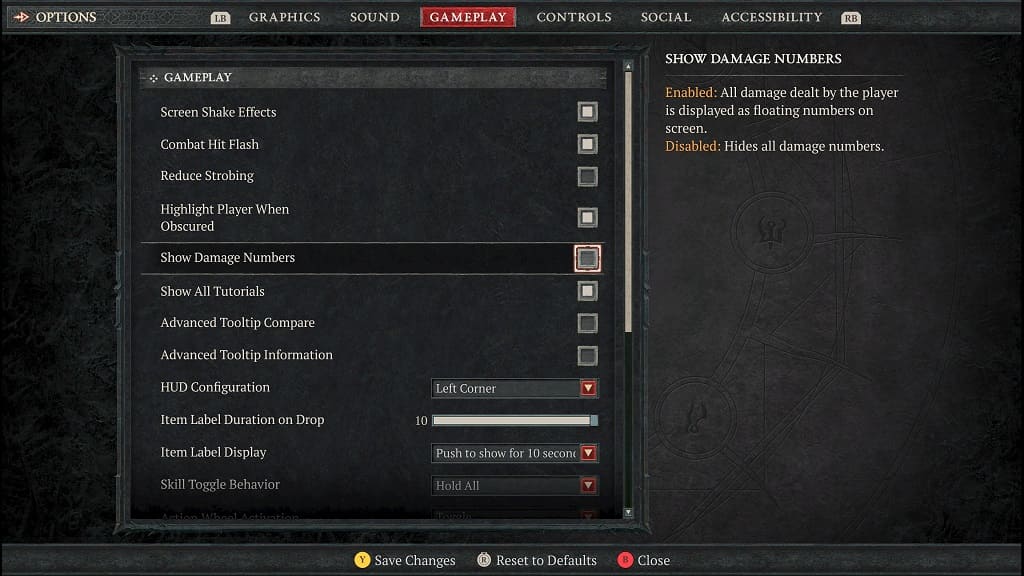
3. Once you get to the Gameplay tab, move the cursor to the Show Damage Number settings, which should have the following description:

Enabled: All damage dealt by the player is displayed as floating numbers on screen.

Disabled: Hides all damage numbers.

4. By default, this setting is enabled. To turn it off, make sure that it is not selected in the Gameplay tab of the Options menu.

5. Once you deselected Show Damage Number, press the Triangle or Y button to save and apply the change.

When you start fighting in Diablo 4 again, you should no longer see any numbers appear on the screen after you dealt damage to your targeted enemies.

How to fix Diablo IV ‘disconnected from the server’ issues

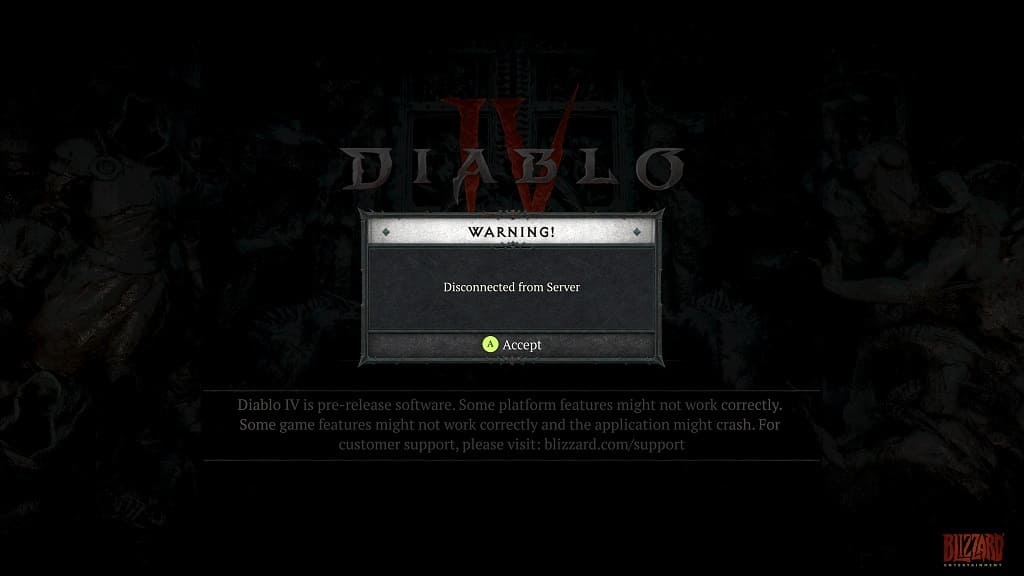
When playing Diablo IV, you may end up getting the following Warning message:

  • “Disconnected from Server.”

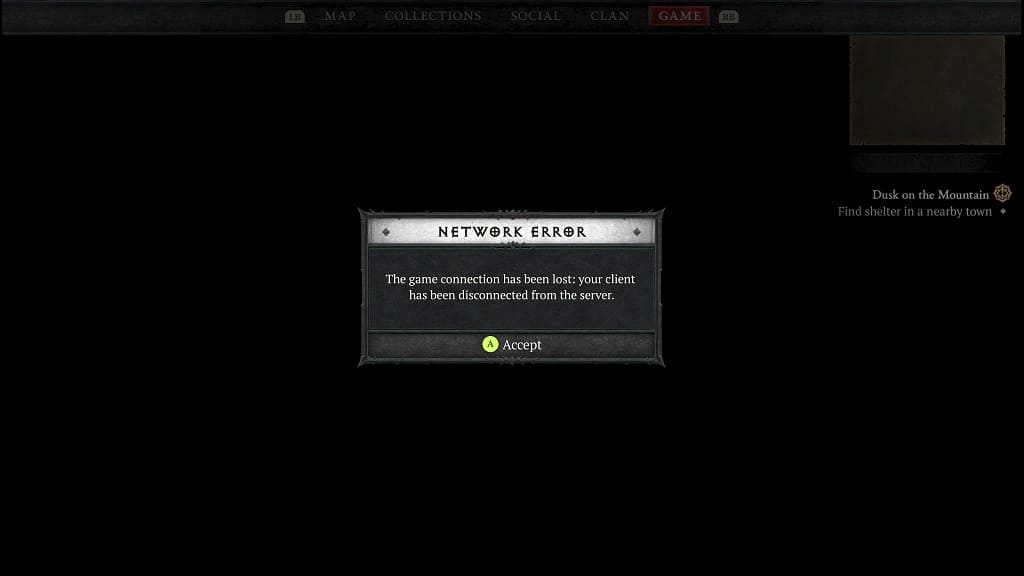
You may also get the following Network Error:

  • “The game connection has been lost; your client has been disconnected from the server.”

To see how you can fix these disconnection issues, you can take a look at this troubleshooting article from Seeking Tech.

1. To start off, you can try loading your save file again if you get kicked out to the main menu. This usually works for us when we get logged out of the server.

2. If Diablo 4 still keeps getting disconnected, then we recommend taking a look at the official Diablo Twitter account to see if there are any announcements regarding server issues and/or maintenance.

If the servers aren’t operational, then you can’t do anything else but wait until they are back online before you can continue playing the game.

Unfortunately, Diablo 4 require an internet connection at all times. So, even if you are playing by yourself, the game still needs to be connected to the internet.

3. If the servers appear to be fine, then you should make sure that you have the latest patch for the game installed as a new update may fix the connection problems.

On the PS5, go to the home menu and then move the cursor over to the Diablo IV icon. Afterwards, press the Options button on the DualSense and then select Check for Update to manually download and install the patch.

On the Xbox Series X or Xbox Series S, you can press the Xbox logo button to open the Guide menu. You can then move the cursor over to Diablo 4’s icon and then press the Menu button. Afterwards, select “Manage game and add-ons” and then “Updates.”

If the action RPG needs to be updated, then make sure you download and install it. You should then open the game and resume your progress to see if you are still getting disconnected.

4. If you are downloading and or streaming at the same time on the same home network then the high bandwidth usage could cause the game to disconnect.

In this case, you can try stopping or pausing your other network activities to see if you are able to fix your disconnection issues when playing.

5. You may also want to consider power-cycling your modem and router. In order to do so, you can try taking the following steps:

  • Turn off your PC or game console.
  • You should also power down your modem or router. If these devices don’t have a power button, then you need to unplug the power cords from the power outlets.
  • Wait for a minimum of two minutes.
  • Power on your modem and router again.
  • Once your home network has re-connected to the internet, turn your PC or console back on.
  • Open Diablo 4 and then try load your save file. Hopefully, you should be able to play the game without experiencing any disconnects.

How to fix Diablo IV brightness issues on PS5, Xbox Series X and S

When playing Diablo IV on your PlayStation 5, PlayStation 5 Digital Edition, Xbox Series X or Xbox Series S, you may notice that the game may look too bright, too dark or washed out.

To see how you can fix these brightness issues with this action role-playing game, you can take a look at this troubleshooting article from Seeking Tech.

1. If you are using HDR with Diablo 4, then the first step you need to take is to make sure that you have the brightness output of your console calibrated with your television set or gaming monitor.

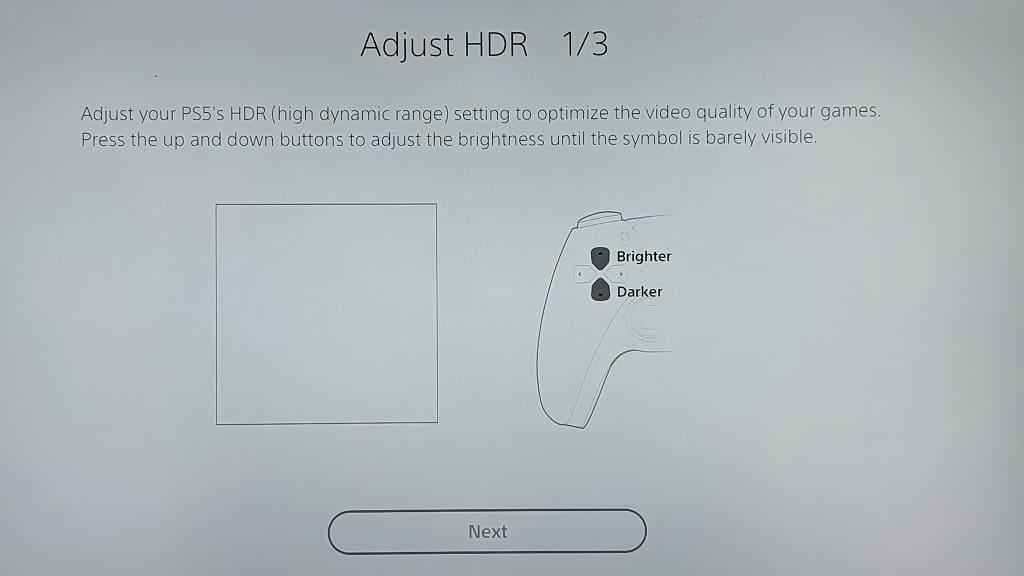
On the PS5, you need to open the Settings menu from the home screen. Afterwards, select Screen and Video > Video Output > Adjust HDR.

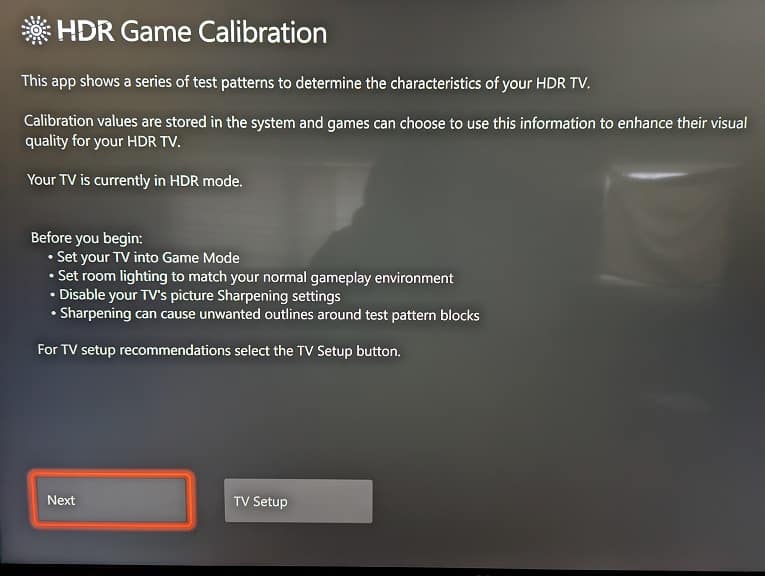
For the Series X and Series S, you first need to open the Settings App. Once you do, select General > TV & display options > Calibrate HDR for games.

After getting to the Adjust HDR or Calibrate HDR for games menu, follow the instructions over the next several screens.

2. After you have calibrated the HDR output of your console, you need to calibrate the brightness level from within Diablo IV. You can do so by taking the following steps:

  • Open the Options menu in the game.
  • Once you get to the Options menu, make sure you are viewing the Graphics tab. You can use the L1/R1 buttons on the DualSense or LB/RB buttons on the Xbox controller to change tabs.
  • Select the Calibrate Brightness option in the Graphics tab.
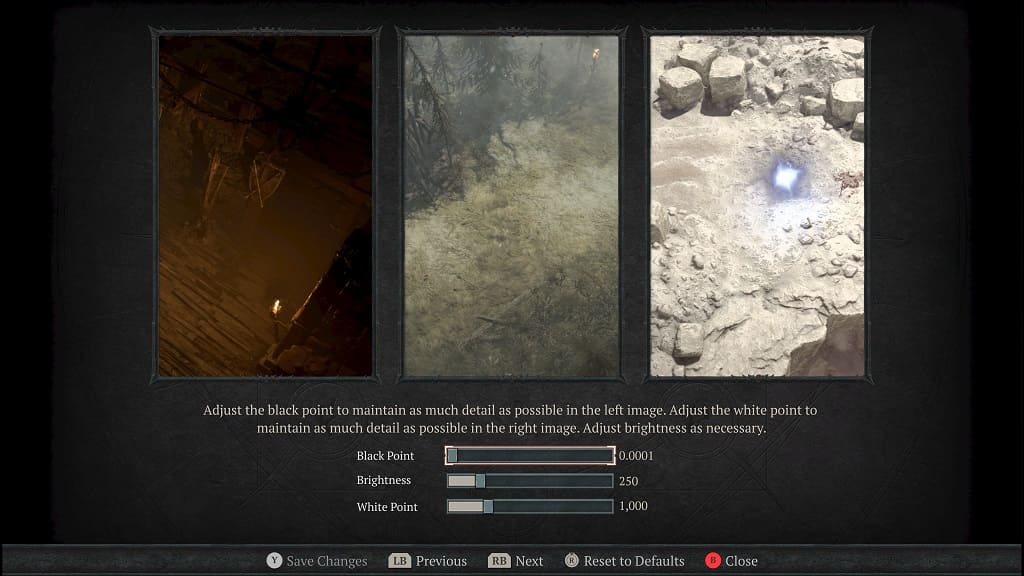
  • In the next screen, you will be able to adjust the Black Point, Brightness and White Point. You are instructed to adjust the Black Point first as you can use the left image as a guide. You should then adjust the White Point by using the right image. Finally, adjust the Brightness slider by using the middle image.
  • You may need to re-adjust these settings occasionally when you are moving from a dark environment to a bright one or vice versa. You may also need to change the Black Point, Brightness and/or White Point if the ambient lighting of your room changes.

3. If the game still looks too bright, too dark and/or washed out, then you can try disabling HDR from your system menu.

On the PS5, you need to go to Settings > Screen and Video > Video Output > HDR and then disable HDR.

On the Series X and Series S, you need to head over to Settings > General > TV & display options > Video modes. Afterwards, make sure that the Allow HDR10, Auto HDR and Allow Dolby Vision for Gaming settings are disabled.

4. If you have another HDR-capable screen, then you can try playing Diablo 4 from there. Some TV sets and monitors are better than others when it comes to displaying HDR content for games.

How to fix Diablo IV quick resume and suspension issues

When resuming your progress in Diablo IV, you may end up seeing the following message:

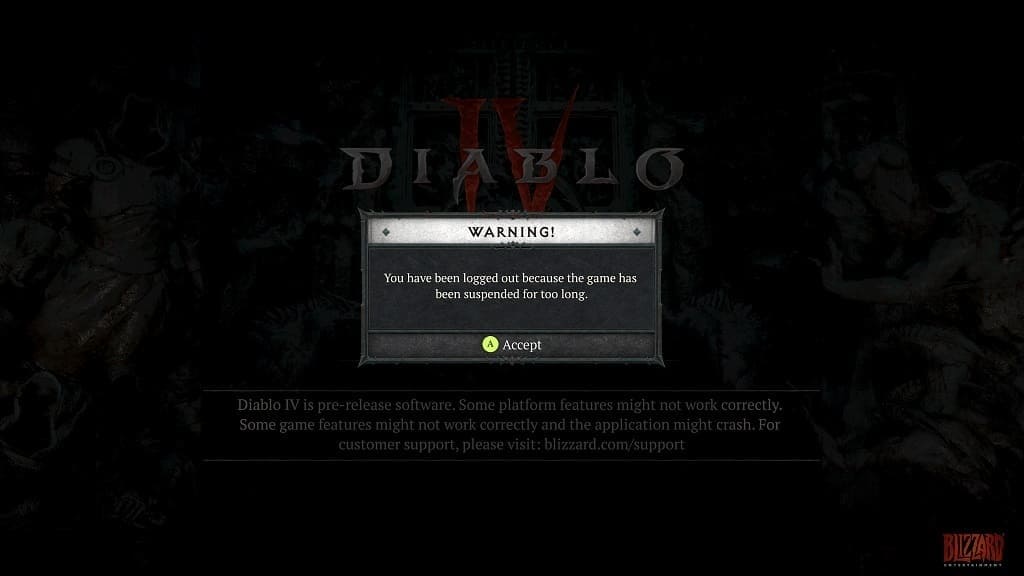
  • “You have been logged out because the game has been suspended for too long.”

To see how you can potentially fix this game suspension issue, you can take a look at this troubleshooting article from Seeking Tech.

Why you are getting logged out

For the uniformed, Diablo 4 is an online only game as it requires you to connect to the internet before you can load into your character save file.

Online games do not work well with being suspended or being put in quick resume as you will eventually lose your connection to the servers if you don’t return to your game in a quick enough fashion. As a result, there is no way to fix this problem aside from waiting for the development team to remove the online connection requirement.


How to avoid getting logged out in Diablo 4

While you may not be able fix this issue of the game logging you out if you suspend it, you should be able to avoid the problem.

In order to do so, you need to abstain from going back to the home screen while the game still remains open. If you do need to go to the home menu, then return to Diablo 4 as soon as possible to avoid getting logged out of the servers.

You should also avoid putting your system in Rest Mode or Sleep Mode while the game is still open. Otherwise, you should end up seeing the “You have been logged out” warning message when you turn your system back on and then try to play Diablo 4.

The Xbox Series S and Xbox Series X will put the game in the quick resume queue when you go back to the home screen of the dashboard, open another app, play another game, turn off your console or put your console to sleep. When you try to resume your progress in Diablo IV, you will end up getting logged out every time.

Therefore, the only way to avoid this issue is to simply leave the game open on all platforms. This should be able to prevent the servers from logging you out. Of course, if you aren’t able play the game for a long time, then you are better off just logging out of the servers and then turning off your gaming system to save on your electricity bill.

How to move the UI in Diablo IV

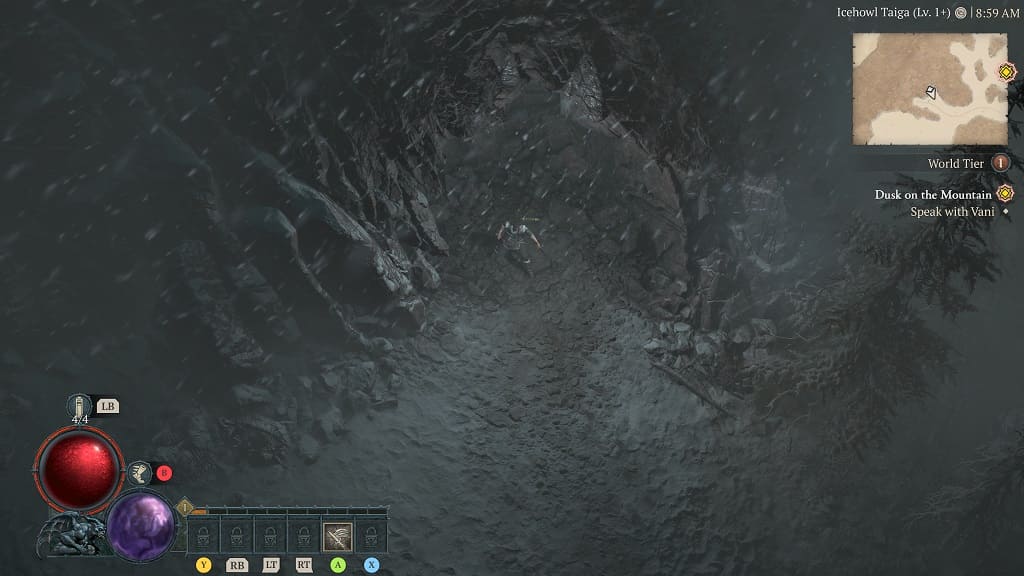
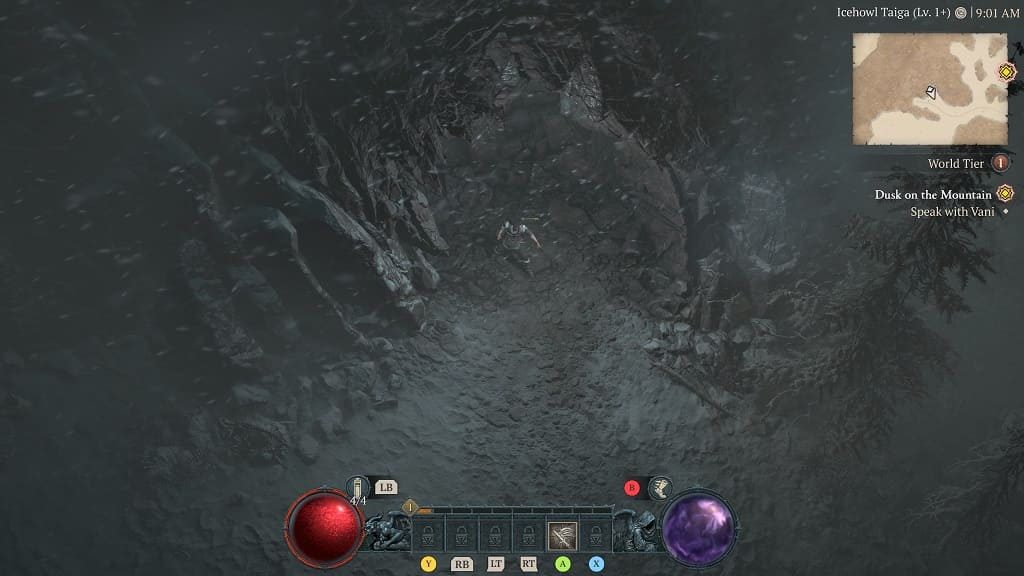
By default, the user interface is placed on the bottom left corner in Diablo IV. This heads-up display will show your life bar, skill bar as well as a set of skills that can be currently used.

If you would like to move this UI to a different location of the screen, then you can take a look at this tutorial from Seeking Tech to see how you can properly do so.

1. To start off, you should head over to the Options menu in Diablo 4.

From the main menu, you can get there by pressing the Options button of the DualShock 4/DualSense or Menu button on the Xbox One/Xbox Series controller and then selecting Options.

If you are currently playing this action role-playing game, then you have to first bring up the Map Screen by pressing the touch pad of the DualShock 4/DualSense or View button on Xbox. You should then be able to find Options in the Game tab.

For the uninformed, you can change tabs by using the L1 and R1 buttons if you are playing the game on a PlayStation 4, PlayStation 4 Pro, PlayStation 5 or PlayStation 5 Digital Edition. You need to use the LB and RB buttons if you are playing on Xbox One, Xbox One S, Xbox One X, Xbox Series S or Xbox Series X.

2. From the Options menu, navigate your way towards the Gameplay tab.

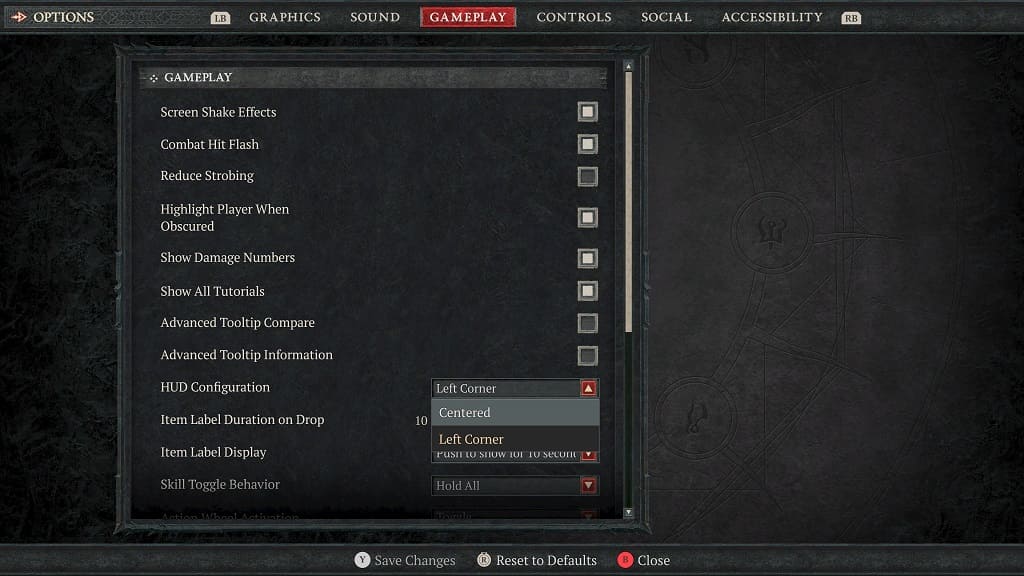
3. Once you get there, move the cursor down until you get to the HUD Configuration setting, which should be showing the following description:

  • “Choose a configuration for your Life, Resource, and Skill bar.”

4. By default, this setting is set to the Left Corner. In order to change it, you need to select the drop-down menu to the right.

5. Afterwards, you can select Centered from the drop-down menu.

6. Press the Triangle button on your DualShock 4/DualSense or Y button on your Xbox controller to save and apply the change you just made to the heads-up display.

7. Exit out of the Options menu and then return to your game.

You should now be able to see the new location for the UI. You can find a comparison shot between the two different HUD locations below:

Left Corner:

Centered:

If you don’t like how the new UI position looks, then you can change it back from the aforementioned HUD Configuration setting in the Gameplay tab of Options menu.

How to turn off Diablo IV subtitles

By default, Diablo 4 will display subtitles whenever you hear someone talking in the game. To see how you can disable these captions from appearing, you can take a look at this tutorial from Seeking Tech.

How to turn off cinematic subtitles

In order to disable subtitles that are displayed during cut scenes in this action role-playing game, you need to take the following steps:

1. First off, you should head over to the Options menu in Diablo IV.

Before selecting your character from the main menu, you can get to Options by pressing the Options button on a PlayStation controller or Menu button on an Xbox controller. You should then be able to head to the Options menu from there.

If you are already loaded into a character save, then you have to press down on the touch pad button on PlayStation or press the View button on Xbox to open the Map Screen. From there, change to the Game tab by using L1/R1 or LB/RB and then select Options.

2. Next, you need to use the same L1/R1 or LB/RB buttons to either move to the Subtitles tab or Accessibility tab.

3. After doing so, scroll down until you get to the Subtitles section.

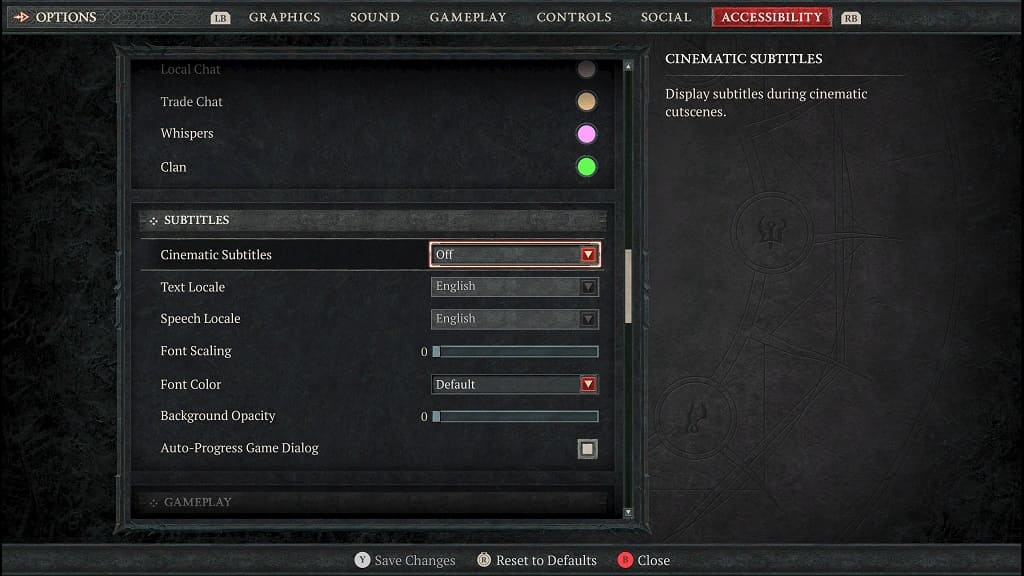
4. From there, you should find the Cinematic Subtitles section, which should have the following description:

  • “Display subtitles during cinematic cutscenes.”

5. By default, this setting is set to On. To turn it off, select the drop-down menu located to the right and then select Off.

6. After disabling subtitles for the cut scenes, you need to save and apply the change by pressing the Triangle button on PlayStation or Y button on Xbox.

You should no longer see any text appear at the bottom of the screen the next time you see a cinematic while playing Diablo 4.

Can you disable in-game subtitles in Diablo 4?

Unfortunately, there is currently no way you can turn off the subtitles that appear in-game when someone is talking. You may need to wait until the development studio adds the option to turn this feature off in a future patch update. Therefore, you can try checking the Options menu anytime the game gets patched.

For now, you can quickly remove the subtitles by either advancing through the dialogue by pressing the X button on PlayStation or A button on Xbox to advance. You can also skip the conversation completely by pressing the Circle button on PlayStation or B button on Xbox.