DualSense Edge settings for Resident Evil 4 Remake

When compared to the normal DualSense, the Edge version adds two back buttons, trigger stops and many other features. To see what the best settings are for this controller when it comes to playing the Resident Evil 4 Remake on your PlayStation 5 or PlayStation 5 Digital Edition console, you can take a look at this guide.

Analog Caps

When it comes to the analog caps for the DualSense, you can use whichever you are comfortable with. In our case, we used the same standard caps you found installed on the normal DualSense.

Back Buttons Attachments

We also recommend using whichever back button attachment you are comfortable with.

If you have smaller hands, then the levers may feel more accessible. If you have bigger hands, then the half dome attachments may be more comfortable.

Trigger Stops

If you want to fire your weapon as quickly as possible in the Resident Evil 4 Remake, then we suggest that you move the sliders located at the top back side of the gamepad all the way down.
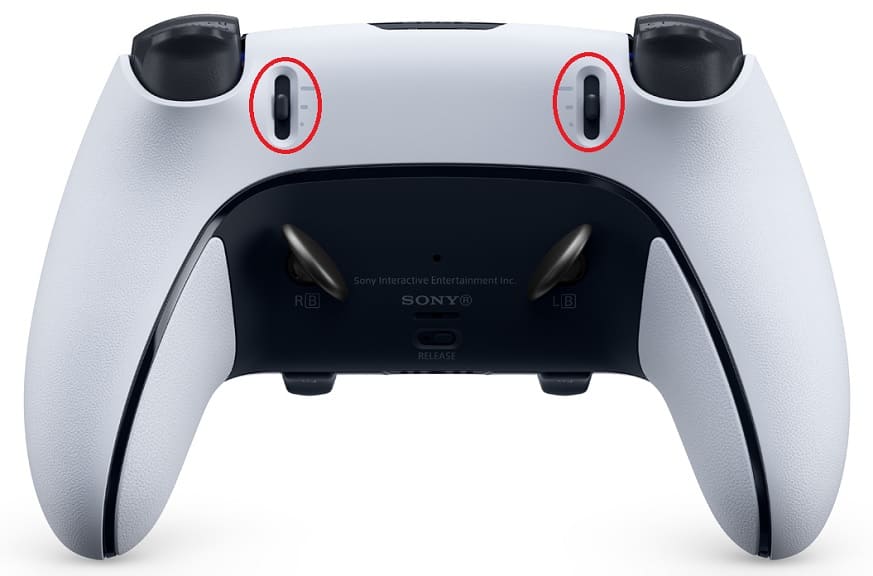
By doing so, you should be able to aim your weapon faster by holding the L2 button. You can also shoot your weapon or attack with your knife quickly by pressing down on the R2 button.

Keep in mind that, by setting the trigger stop sliders all the way down, you will also disable the adaptive trigger features in RE4. Therefore, you will no longer feel any resistance when pressing down on the two triggers.

If you would want to feel more immersive, then we recommend that you set the trigger stops all the way up and then make sure that the Trigger Effects setting is set to Strong (Standard) on the PS5 system menus. Afterwards, make sure that the Adaptive Triggers setting is enabled in the in-game menu of Resident Evil 4.

If you would rather have the quick-fire benefits, then you can keep the trigger stop sliders all the way down.

Customize Button Assignments
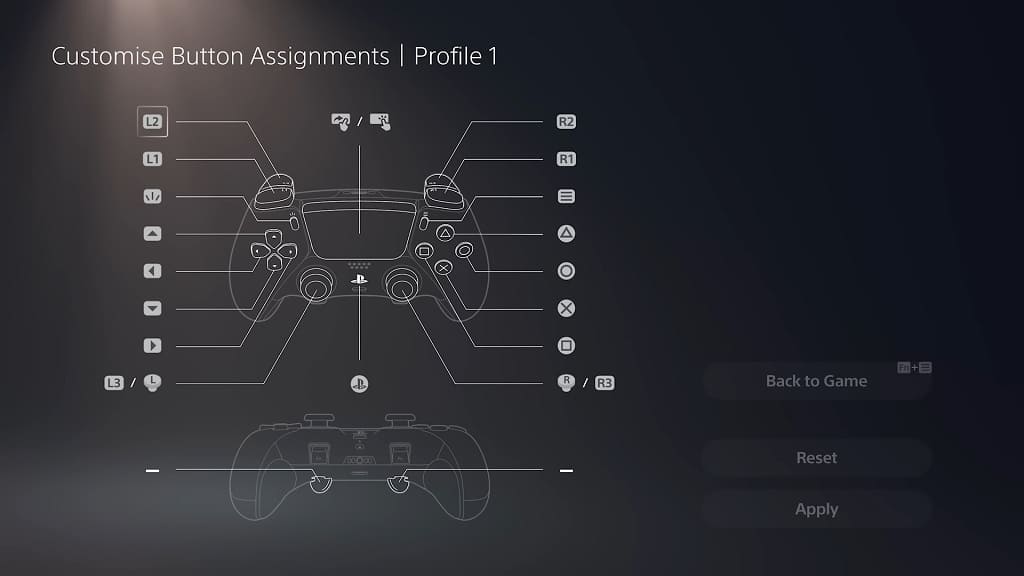
When it comes to the custom button assignments, we recommend setting the left back button to the run button. If you are using the default A-1 Control Type for Resident Evil 4 Remake, then you can set the left back button to function as R1 and then disable the L3 button.

To perform the quick turn action with this new setup, you need hold the left back button and then move the left analog downwards.

You can set the right back button to any button you want. For us, we replaced the R3 functionality, which is to command your partner in the A-1 Control Type, with the right back button. Afterwards, we disable the R3 button.

By disabling the L3 and R3 button, you should prevent yourself from doing any unintended actions if you accidentally press down on your control sticks.
Stick Sensitivity/Deadzone and Trigger Deadzone

There is a notable issue in the Resident Evil 4 Remake when it comes to aiming as there seem to be major deadzones for the analog sticks.

In this case, you can try adjusting the camera controls by going to the Camera tab in the Options in the game.

If the analog sticks still don’t feel quite right even if you turn up the sensitivity settings in the game’s menus, then you can use the Stick Sensitivity/Deadzone section the DualSense Edge Profile menu in order to adjust your controller’s deadzone.

You can also fine tune the trigger deadzone of the controller as well from the same Profile menu.

How to change to classic controls and more in Resident Evil 4 Remake

If you prefer using the button layout of the original Resident Evil 4 game that was first released for the Nintendo GameCube in 2005, then you can play the new remake with the same setup. To find out how you can change the control layout in the new game, you can check out this tutorial from Seeking Tech.

1. First off, you need to head over to the Options menu in Resident Evil 4 Remake. You can do so by selecting Options from either the main menu or pause menu.

2. In the Options menu, you should be in the Controls tab by default.

If you are in another tab, then you can use the L1 and R1 buttons if you are playing on the PlayStation 4 or PlayStation 5 to switch over to the Controls tab. On the Xbox Series X and Xbox Series S, you can use the LB and RB buttons to change over to the correct tab.

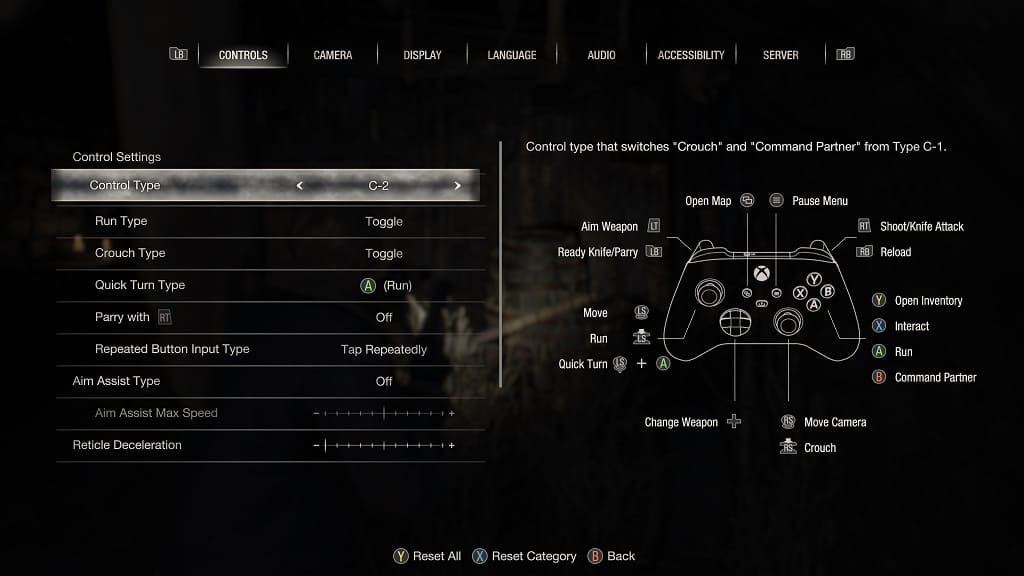
3. In the Controls tab, move the cursor over to Control Type.

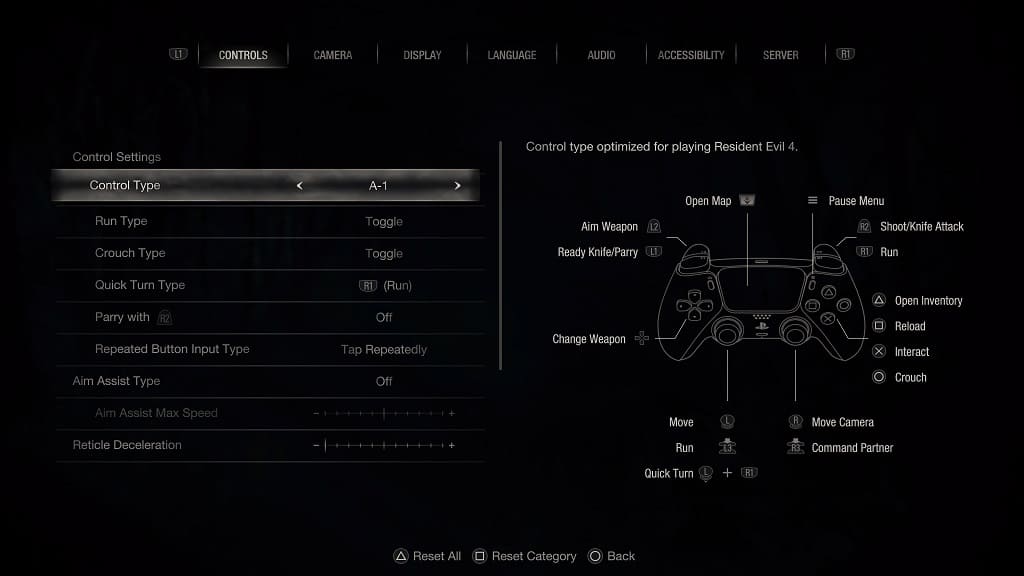
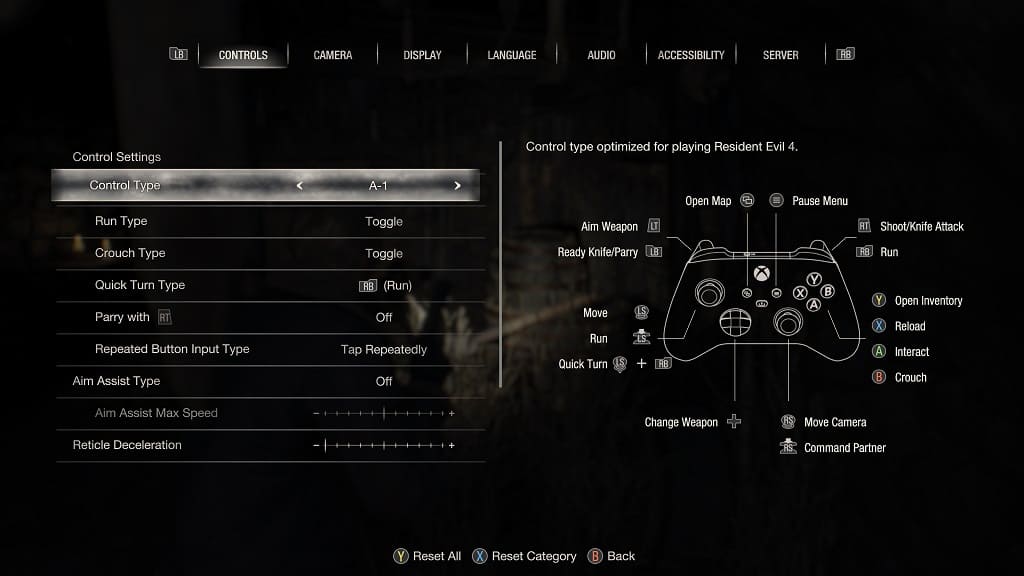
By default, the Control Type should be set to A-1, which has the following description:

  • “Control type optimized for playing Resident Evil 4.”

This button layout is based on modern third-person shooters.

4. In order to change to a different control type, you can press the left directional button, right direction button, move the left analog stick to the left or move the left analog stick to the right.

You will be able to change to the following layouts:

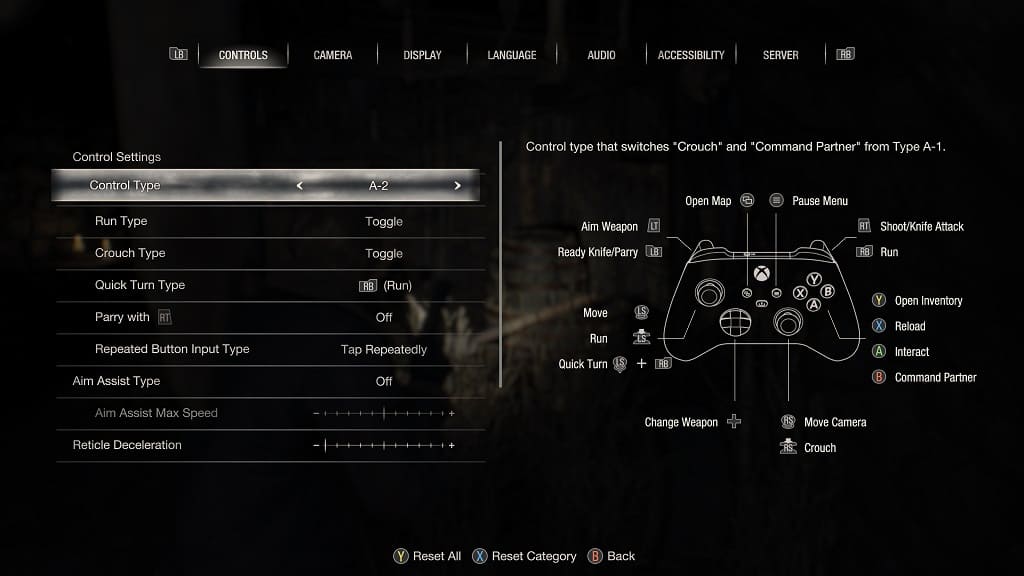
A-2: “Control type that switches Crouch and Command Partner from Type A-1.”

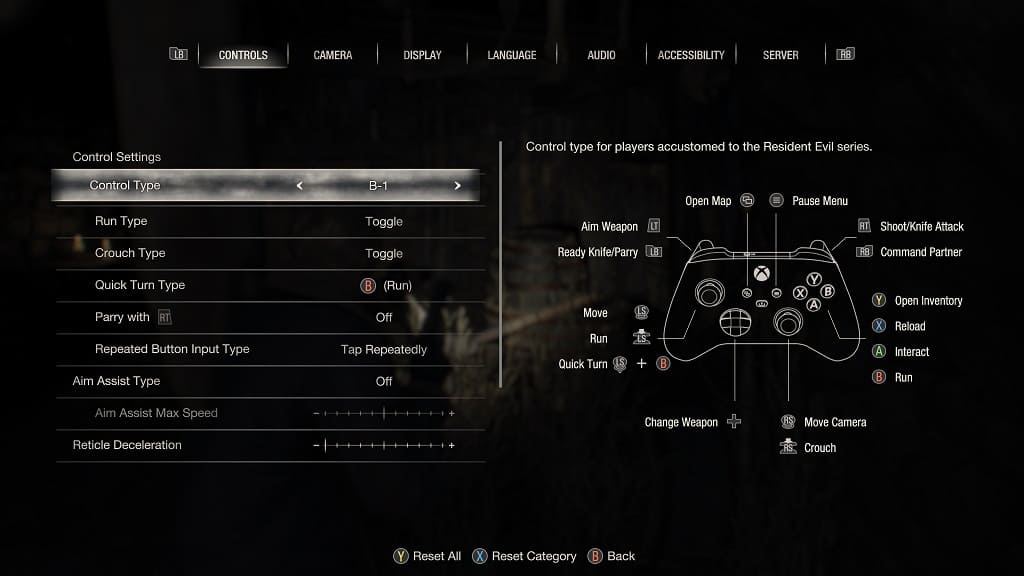
B-1: “Control type for players accustomed to the Resident Evil series.”

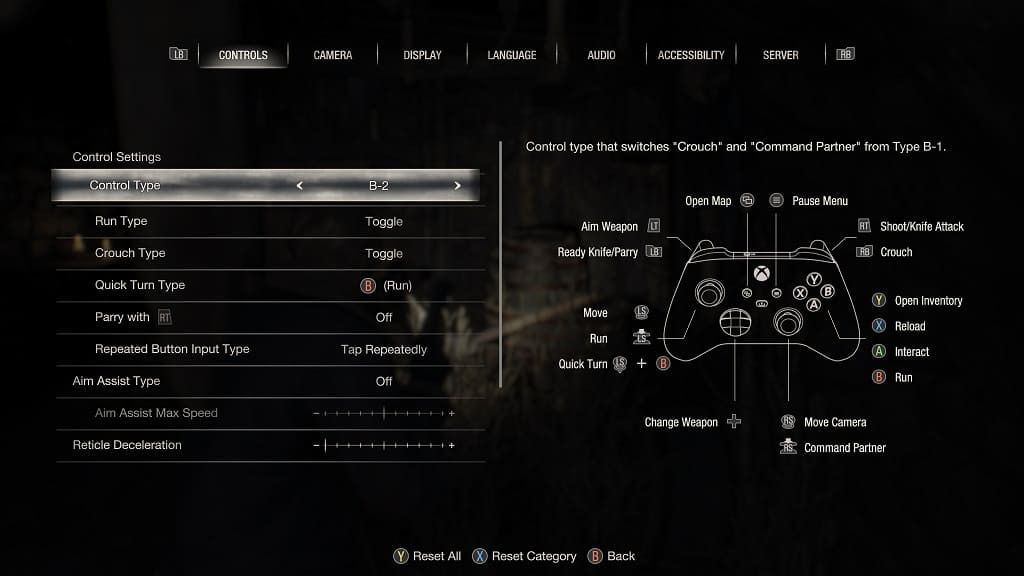
B-2: “Control type that switches Crouch and Command Partner from Type B-1.”

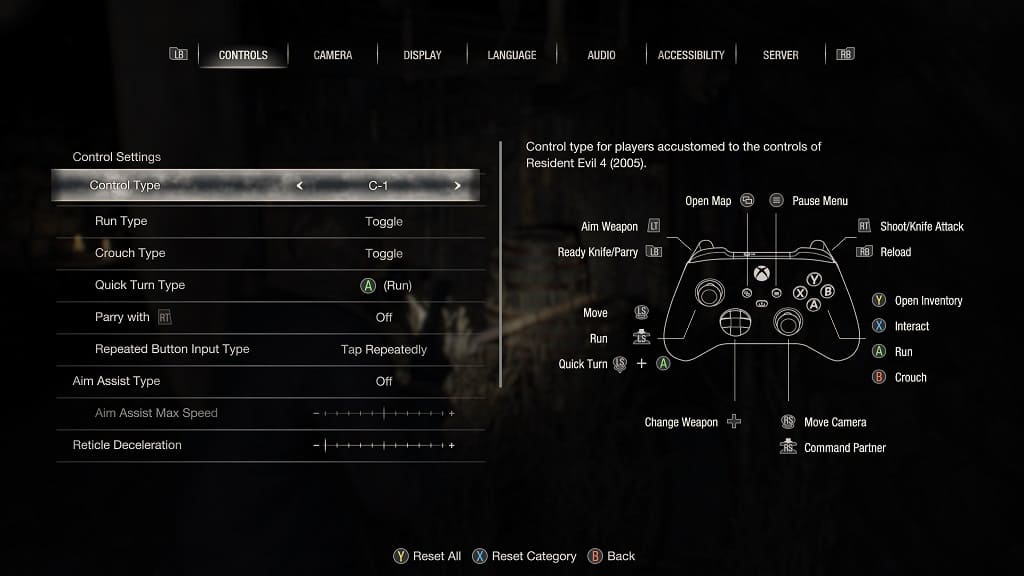
C-1: “Control type for players accustomed to the controls of Resident Evil 4 (2005).”

C-2: “Control type that switches Crouch and Command Partner from Type C-1.”

If you want to play the Resident Evil 4 Remake with the same controls as the original, then we recommend selecting C-1 or C-2. If you want to mimic the button layout for other Resident Evil titles, then you can select B-1 or B-2 instead.

5. In addition to changing the Control Type, you can also adjust the following button functions from the Controls tab of the Options menu:

Run Type:

  • Hold
  • Toggle

Crouch Type:

  • Hold
  • Toggle

Quick Turn Type:

  • L3 or press down on the left analog stick on Xbox
  • R1 or PlayStation or RB on Xbox
  • Circle on PlayStation or B on Xbox

Parry with R2 or Rt:

  • On
  • Off

Repeated Button Input Type:

  • Hold
  • Tap Repeatedly

Aim Assist Type:

  • Off
  • Snap
  • Snap and Follow

Aim Assist Max Speed

Reticle Deceleration

Auto-Reload:

  • On
  • Off

Reset Scope Magnification:

  • On
  • Off

Controller Vibration:

  • On
  • Off

6. Once you are done making the controller changes, you need to back out of the Options menu, which you can do by pressing the circle button on PlayStation or B button on Xbox.

7. The game should automatically save the new control settings.

How to turn off motion blur in Resident Evil 4 Remake

When you decide to move the camera or character around in the Resident Evil 4 Remake, you may notice that there is a lot of motion blur. If this effect makes it hard to see for your eyes, then we recommend disabling the feature.

To find out how you can properly do so on the PC, PlayStation 4, PlayStation 5, PlayStation 5 Digital Edition, Xbox Series X and Xbox Series S systems, you can follow the steps laid out in this tutorial from Seeking Tech.

1. To start off, you need to select Options from either the main menu or pause screen while playing the RE4 remake.

2. Once you get to the Options screen, you should notice that there are several tabs located at the top. Here, you need to go to the Camera tab.

In order to change tabs on the PlayStation 4 and PlayStation 5 consoles, you need to use the L1 and R1 shoulder buttons on the DualShock 4 or DualSense controllers.

To change tabs on the Xbox Series X and Xbox Series S systems, you need to press LB and RB shoulder buttons on the Xbox controller.

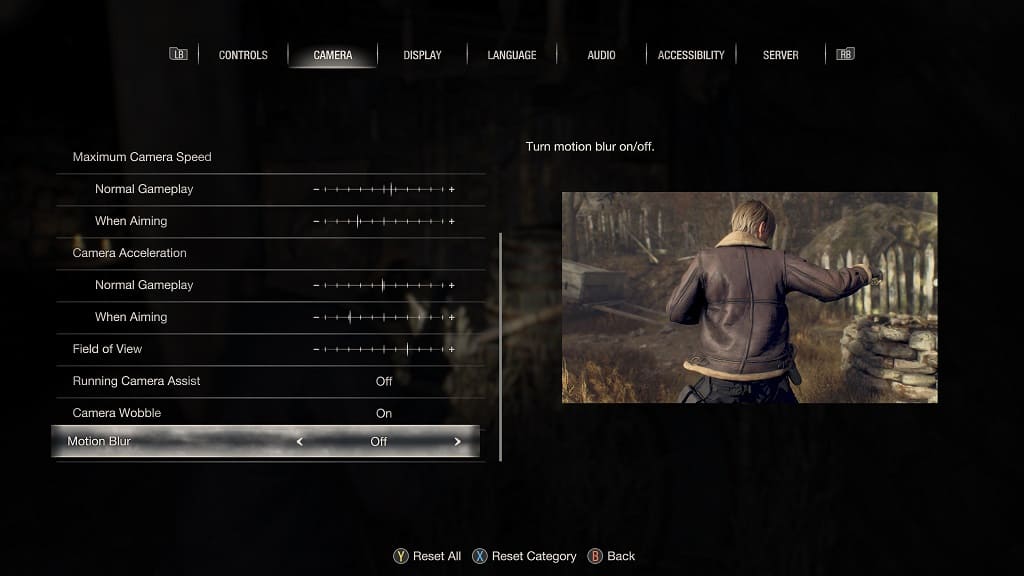
3. Once you arrive at the Camera tab, scroll all the way down to the bottom. The last setting should be Motion Blur with the following description:

  • “Turn motion blur on/off.”

4. You can use the following methods to set Motion Blur to Off:

  • Press the left directional pad button.
  • Press the right directional pad button.
  • Move the left analog stick to the left direction.
  • Move the left analog stick to the right direction.

5. Once you set Motion Blur to Off, you need to back out of the Options menu.

On PlayStation, you can press the circle button. For Xbox, you need to press the B button.

6. The game should automatically save any changes you made in the Options menu, including turning the motion blur effects off. When you resume playing Resident Evil 4, you should no longer see any blur when moving your character and/or camera.

If you want to re-enable motion blur, then you need to return to the Camera tab in the Options menu. From there, make sure that the Motion Blur setting is set to On.

What’s the difference between MLB The Show 23 Standard and Deluxe Editions?

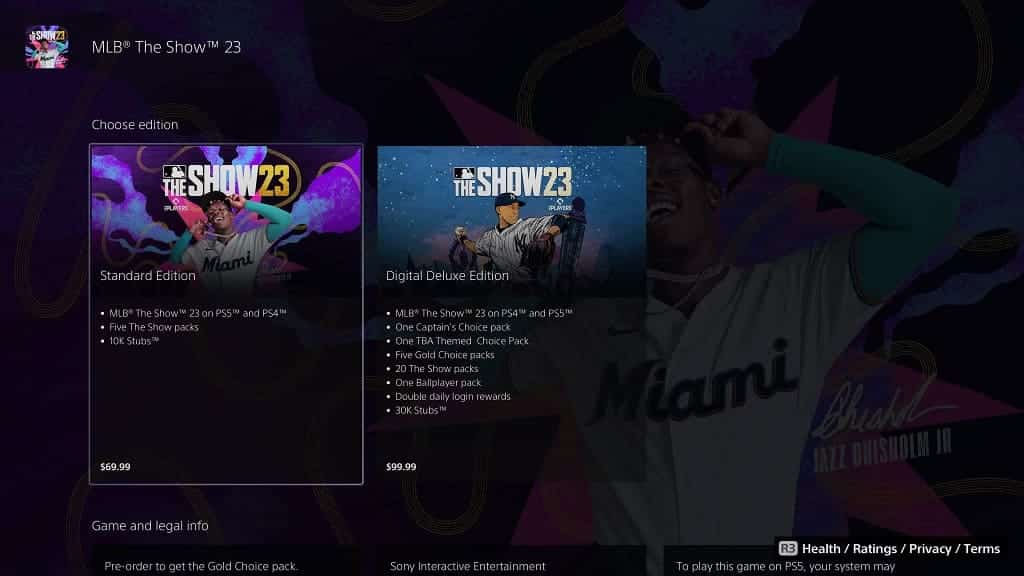
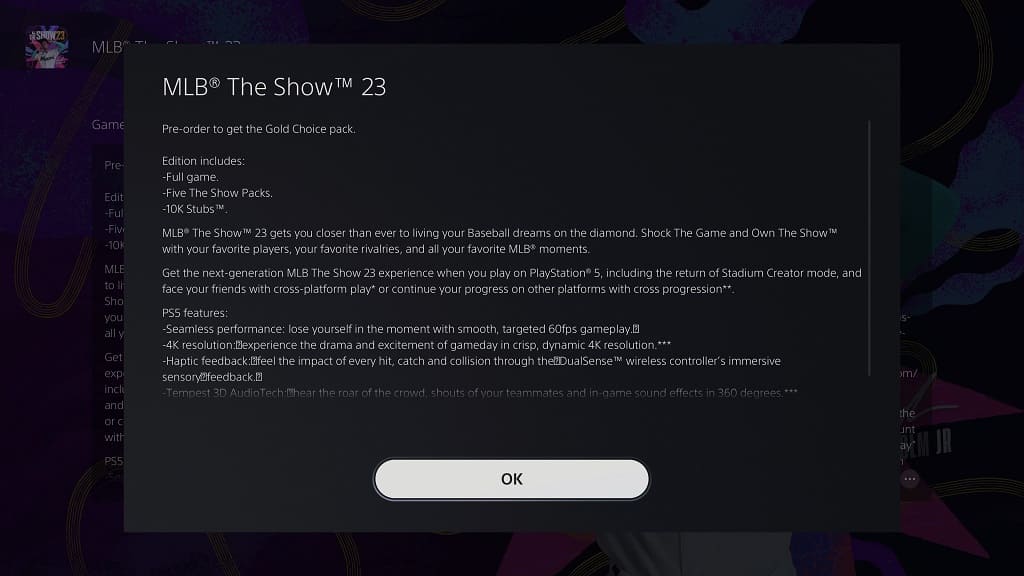
If you decide to get MLB The Show 23 digitally, then you can pick between the Standard and Digital Deluxe Editions. So, what are the differences between these two versions of this baseball game? You can find out in this comparison from Seeking Tech.

MLB The Show 23 Standard Edition vs. Deluxe Edition Comparison Chart

You can take a look at our comparison table for the Standard and Digital Deluxe Editions of MLB The Show 23 below:

MLB The Show 23 Last-Gen Standard EditionMLB The Show 23 Current-Gen Standard EditionMLB The Show 23 Digital Deluxe Edition
U.S. MSRP$59.99$69.99$99.99
Cross-Buy Benefits?NoYesYes
Stubs5,00010,00030,000
The Show Packs0510
Gold Choice Packs005
Captain’s Choice Pack001
Choice Pack001
Uniform Choice Pack001
Ballplayer Pack001
Double Daily Login Rewards?NoNoYes

Cross Buy Benefits

MLB The Show 23 is available for the Nintendo Switch, PlayStation 4, PlayStation 5, Xbox One, Xbox Series S and Xbox Series X consoles.

The baseball game is cheaper on the last-generation consoles (Switch, PS4, PS4 Pro, Xbox One, Xbox One S and Xbox One X). With that said, the next-generation console edition comes with cross buy benefits.

So, if you purchase MLB The Show 23 for PlayStation 5, then you will also get the PlayStation 4 version of the same title. If you bought this baseball game for Xbox Series S or Xbox Series X, then you will also the Xbox One version.

If you bought the game on the PS4 or Xbox One and would like to eventually upgrade to the PS5 or Series S/X version, then you have to pay a small fee in order to do so from the PlayStation Store or Microsoft Store.

The Digital Deluxe Edition also supports cross buy on the PlayStation and Xbox family of consoles.

Stubs

For the uninformed, stubs are virtual currency that you can use in The Show 23 to purchase in-game content.

By getting the standard version of this game on the Nintendo Switch, PS4 or Xbox One, you will get 5,000 stubs.

The standard version of the same title on the PlayStation 5, Xbox Series S and Xbox Series S comes with 10,000 stubs.

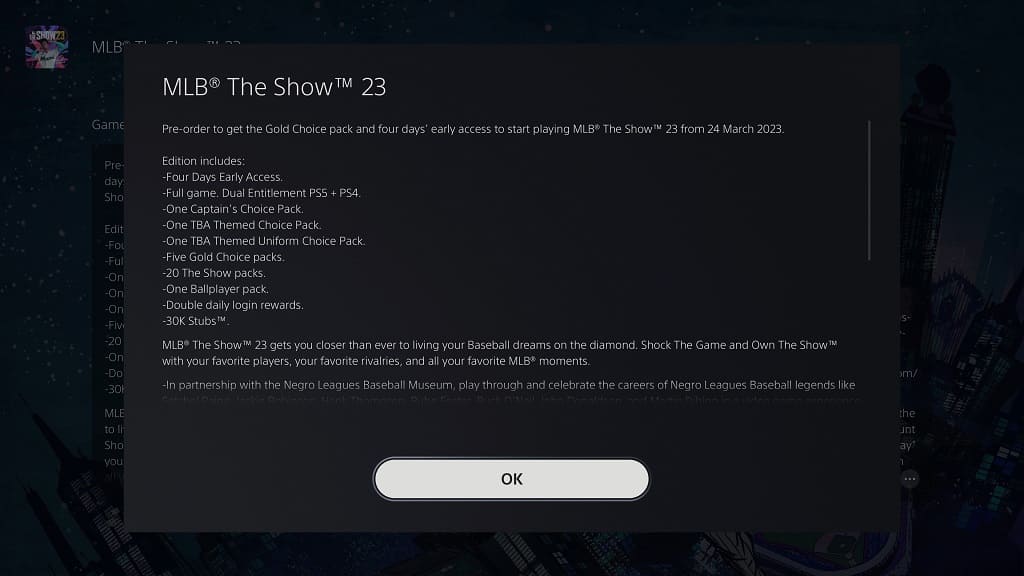
The Digital Deluxe Edition offers the most stubs as you will get 30,000.

The Show Packs

If you purchase the standard version of MLB The Show 23 on PS5 or Xbox, then you will get 5 The Show Packs.

If you opt for the deluxe edition, then you will get 10 The Show Packs instead.

Gold Choice Packs

Furthermore, MLB The Show 23 Deluxe Edition is the only one to include 5 Gold Choice Packs as well.

Other Packs

With the deluxe edition, you will also get the following packs included:

  • One Captain’s Choice Pack
  • One Choice Pack
  • One Uniform Choice Pack
  • One Ballplayer Pack
  • Double Daily Login Rewards

Last but not least, you will also get double the daily login rewards if you purchase the deluxe edition instead of the standard amount.

Recap

The MLB The Show 23 Deluxe Edition comes with cross-buy benefits in addition to having more stubs and packs. If you want to get the most out of this baseball game, then this is the most content-packed options.

The standard edition for the baseball game on PS5, Xbox Series S and Xbox Series S also comes with cross-buy benefits to go along with 10,000 stubs and 5 The Show Packs.

The standard edition for last-gen consoles (Switch, PS4 and Xbox One) do not come with any cross benefits. The only additional bonuses you get for the older-gen release are the 5,000 stubs of in-game currency.

How to fix Valheim blurry graphics on Xbox Series X and S

You may notice that the graphics for Valheim are a little bit blurry when you are playing this sandbox survival videogame on your Xbox Series X or Xbox Series S console. To see how you can get a shaper looking title, you can check out this guide from Seeking Tech.

1. To start off, you should head over to the Settings menu from either the Main Menu or Pause Menu.

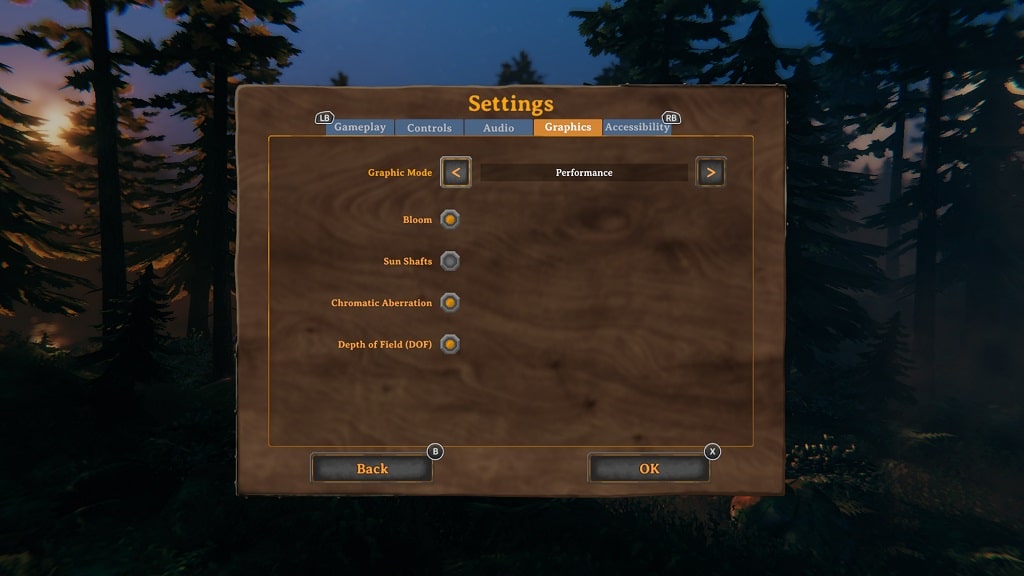
2. Once you get to the Settings menu, use the LB and RB buttons on the Xbox controller to switch tabs until you get to Graphics.

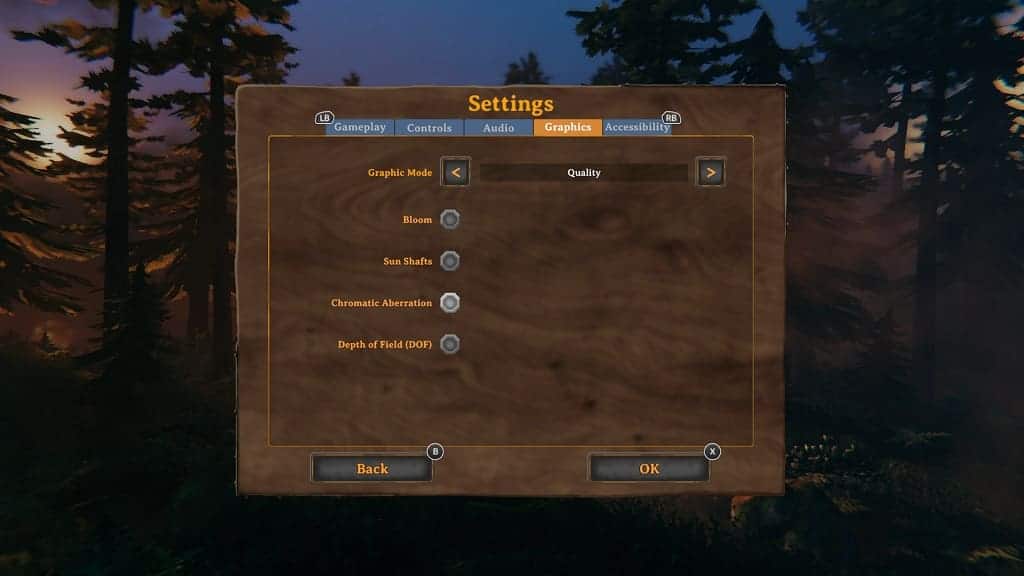
3. From the Graphics tab, we recommend disabling Bloom, Chromatic Aberration and Depth of Field (DOF).

Bloom adds an extra layer of brightness to some of the objects, which makes the game appear blurrier. Moreover, Chromatic Aberration also blurs the edges while adding red and/or blue borders. Last but not least, Depth of Field will blur surround objects that aren’t focused.

4. From the same Graphics tab, you can also change the Graphics Mode to Quality, which should provide a sharper image due to the higher resolution. With that said, the frame rate of Valheim will top out at just 30 frames per second in this mode.

While the Performance Mode will run the game at a lower resolution, it will target a much smoother 60 fps.

In this case, we recommend playing around between the Graphics Mode to see if you prefer the higher resolution (Quality) or smoother frame rate (Performance).

5. Next, we recommend that you use the LB and RB buttons on the Xbox controller in order to navigate over to the Accessibility tab in Settings.

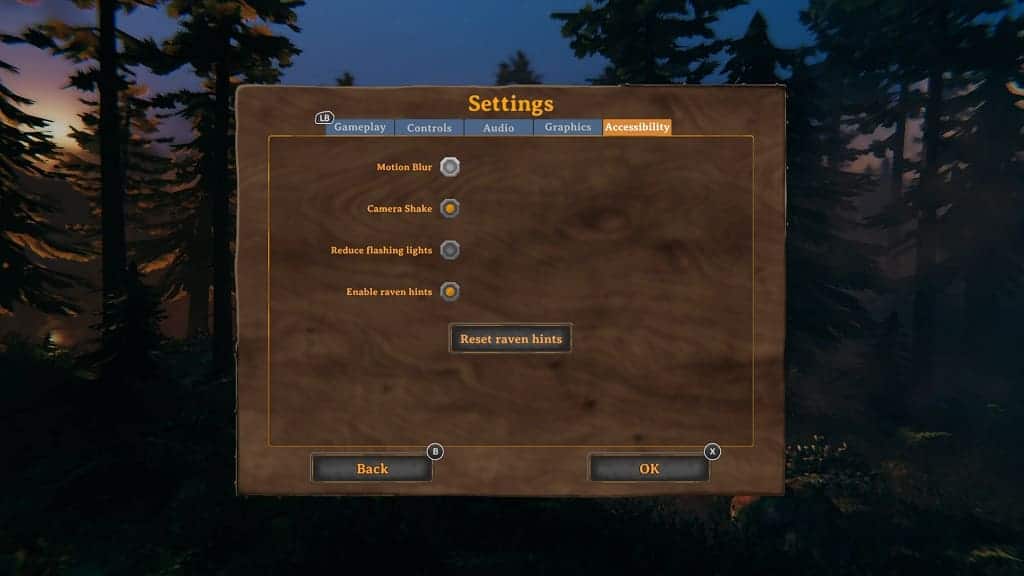
6. Once you get to the Accessibility tab, we suggest disabling Motion Blur.

As its name suggests, this setting adds blur to objects in motion. This includes moving the in-game camera around even if your character and surrounding objects remain still.

7. To save the changes you made, press the X button on the controller.

8. It is also important to note that the development team at Iron Gate Studio purposely made this game with lower resolution and pixelated graphics in mind. Therefore, even if you did all of the previous steps, the picture quality may not end up being as sharp as you would like.

How to disable camera shake in Resident Evil 4 Remake

When playing the Resident Evil 4 Remake, you may notice that the camera likes to wobble around when you are moving the character. While this may add a sense of immersion, it does make it harder to see in some instances. Furthermore, you may feel a little nauseous with this feature turned on.

To see how you can disable the camera shake effect in this new version of Resident Evil 4, you can take a look at this article from Seeking Tech.

1. For the first step, open the game on your PC, PlayStation 4, PlayStation 5, PlayStation 5 Digital Edition, Xbox Series S or Xbox Series X system if you haven’t done so already.

2. Next, you need to go to either the Main Menu or Pause Screen.

3. You can then select Options from either of the aforementioned menus.

4. Inside of the Options menu, you need to navigate your way over to the Camera tab.

On the PlayStation platforms, you can move tabs by using the L1 and R1 shoulder buttons. For the Xbox systems, you can use the LB and RB buttons.,

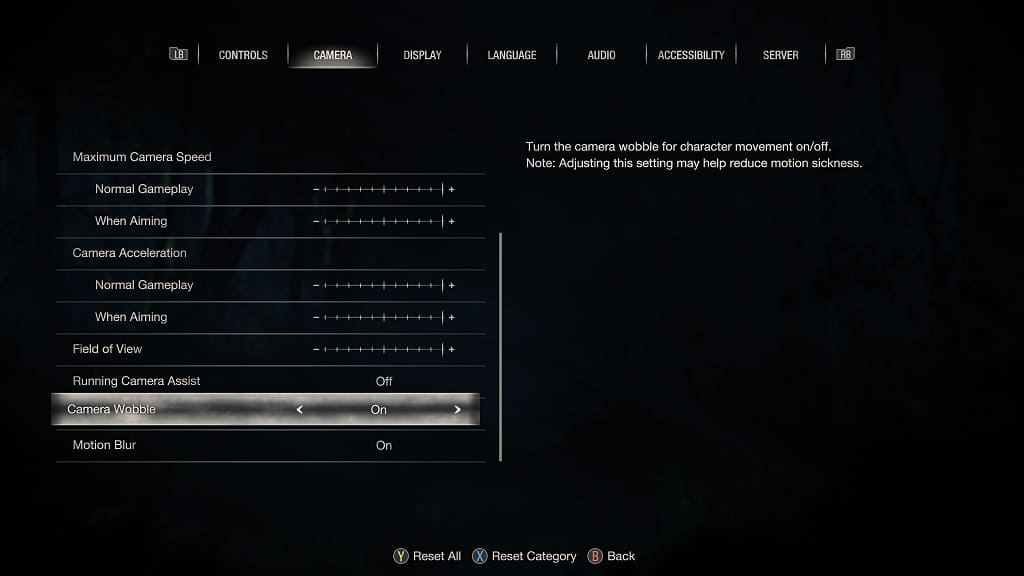
5. Once you get to the Camera tab, you need to scroll down and then move the cursor over to the Camera Wobble setting, which should have the following description:

“Turn the camera wobble for character movement on/off. Note: Adjusting this setting may help reduce motion sickness.”

6. By default the Camera Wobble setting is set to On.

To disable this feature, use the left directional button, right directional button, move the left analog stick to the left or move the left analog stick to the right in order to change this setting to Off.

7. Once you are done making this change, press the circle button on PlayStation or B button on the Xbox controller to back out and save your edit.

8. The next game you decide to play the Resident Evil 4 Remake, you should no longer see any camera shaking when you are moving your character.

9. If you would like to re-enable this feature, then you need to go back to the Camera tab from the Options menu. From there, you need to make sure that the Camera Wobble setting is set to On.

How to fix Valheim frame rate issues on Xbox Series X and S

When playing Valheim on your Xbox Series X or Xbox Series S, you may notice that the game will become choppy. To see how you can potentially fix these frame rate problems with this survival sandbox title, you can take a look at this troubleshooting article from Seeking Tech.

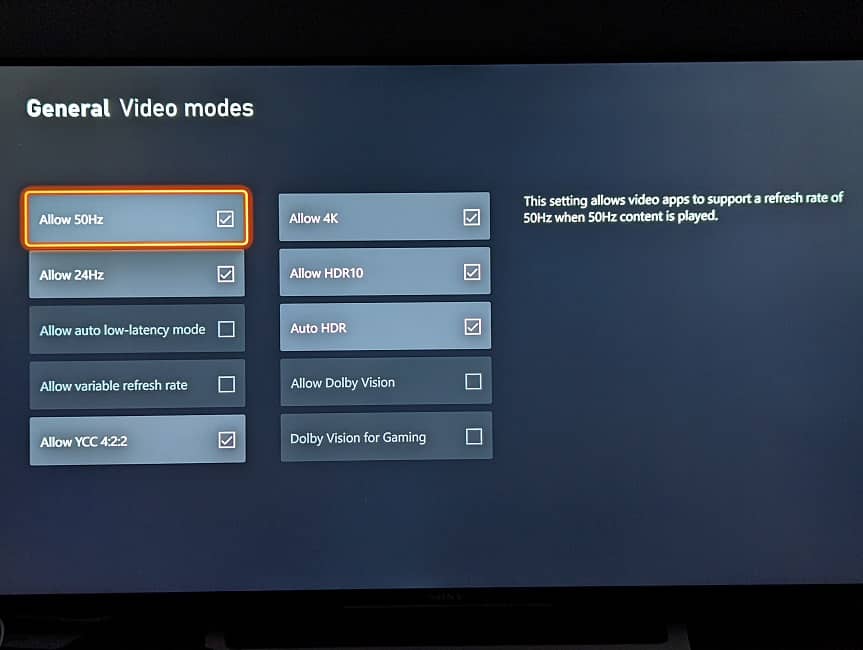
1. For the first step, we recommend enabling Variable Refresh Rate support on your television or monitor if this feature is supported.

Afterwards, open the home menu of your Series X or Series S console and then head over to General > TV & display options > Video modes. Finally, make sure that the “Allow variable refresh rate” box is checked.

VRR should make minor frame rate drops less noticeable when playing Valheim.

2. Moreover, make sure that you are playing this game in Performance mode. You can do so by taking the following steps:

  • To start off, you need to head over to the Settings menu in the game, which you can do by selecting Settings from the Main Menu or Pause Menu.
  • From the Settings menu, move over to the Graphics tab. You can change tabs by using the LB and RB buttons of the Xbox controller in Valheim.
  • After getting to the Graphics tab, move the cursor down to the Graphics Mode section.
  • Use the arrows in the Graphics Mode section in order to switch over to Performance.
  • Press the X button on the controller to save the change you previously made and then return to your game session.
  • By switching over to Performance mode, Valheim will now target 60 fps instead of 30 fps.

3. The Sleep Mode and Quick Resume features of the Xbox Series X and S consoles may also cause frame drops for this survival game.

In order to prevent this from happening, we recommend that you restart both the game and console by taking the following steps:

  • While playing Valheim, press the Xbox button to bring up the Guide menu.
  • In the Guide menu, move the cursor over the Valheim icon and then press the Menu button on the controller.
  • Next, you need to select Quit from the pop-up menu.
  • Once you close the game, press and hold the Xbox button to open the Power menu, where you can then select the Restart Console option.
  • After your Xbox Series X or Xbox Series S has rebooted, open Valheim again to see if you can get a smoother experience.

4. It is important to note that Valheim is currently in the “Game Preview” state as the full game has not been fully developed. Therefore, you aren’t playing the game at a polished state, which is resulting to a less than stable frame rate.

So, if you haven’t done so already, make sure you have the latest patch installed for this title as a new update may make the frame rate run better.

You can manually download a new patch by moving the cursors over to the game’s icon in the home screen of your Series X or Series S and then pressing the Menu button. Afterwards, you need to select Manage game and add-ons > Updates.

How to start or request share screen on PS5

The new firmware update for the PlayStation 5 and PlayStation 5 Digital Edition console makes it easier to share your screen with a friend and watch a shared screen from your friend. To see how you can set up the Share Screen feature, you can take a look at this tutorial from Seeking Tech.

1. To start off, we recommend updating the system software of your PS5 if you haven’t done so already as it streamlines the share screen access.

To manually update the console, you need to go to the Settings menu from the home screen. Afterwards, you need to select System > System Software > System Software Update and Settings > Update System Software > Update Using the Internet.

If there is a new firmware available, then the console will download and install it. The system will then restart on its own in order to complete the installation process.

2. Once you have the latest firmware installed, make sure that you added your friend’s PlayStation Network username to your Friends list if you haven’t done so already.

3. You should also make sure that your friend is currently online. You and/or your friend may also need to change some privacy settings on the PS5 in order to get the Share Screen feature to work.

4. Next, you need to press the PS logo button on your DualSense controller in order to bring up the Control Center menu.

5. From the Control Center menu, select Game Base located at the bottom. This setting should be in between the NotiCom and Music options.

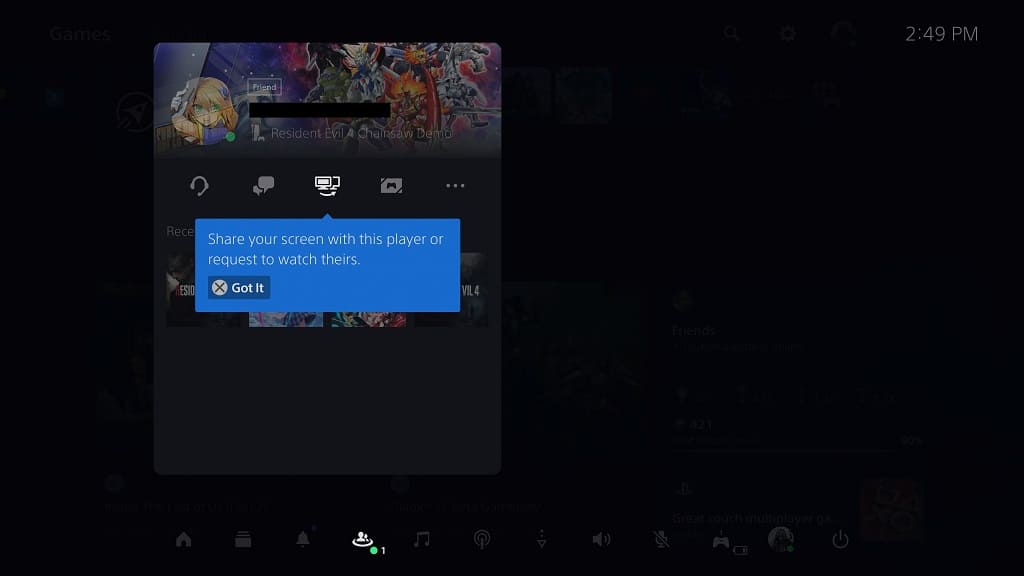
6. In the Game Base menu, select a friend.

7. On your friend’s profile screen, you should find the Share Screen option located in the middle.

8. In the pop-up menu, you can select the Share Your Screen option, which has the following description:

  • “Share your gameplay in a party. Share Screen isn’t supported on PS4.”

This option will let your friend watch what you are currently playing on your PlayStation 5.

9. In the same pop-up menu, you can also select Request Share Screen, which has the following description:

  • “Request to watch the player’s gameplay.”

This option will let you watch what your friend is currently playing on their PS5 console.

How to fix Resident Evil 4 Remake input lag

You may notice that there is input lag when you are playing the new remake of Resident Evil 4 on the PC, PlayStation 4, PlayStation 4 Pro, PlayStation 5, PlayStation 5 Digital Edition, Xbox Series S or Xbox Series X.

To see how you can potentially reduce the latency in this game, you can take a look at this troubleshooting article from Seeking Tech.

1. For the first step, you should make sure that your gaming system is directly connected to your screen. If you are using a splitter or pass-through device, then these may add extra latency to the control input.

2.If you are playing on TV, then make sure you have Game Mode, or a similar picture mode, enabled as it will reduce latency when playing games.

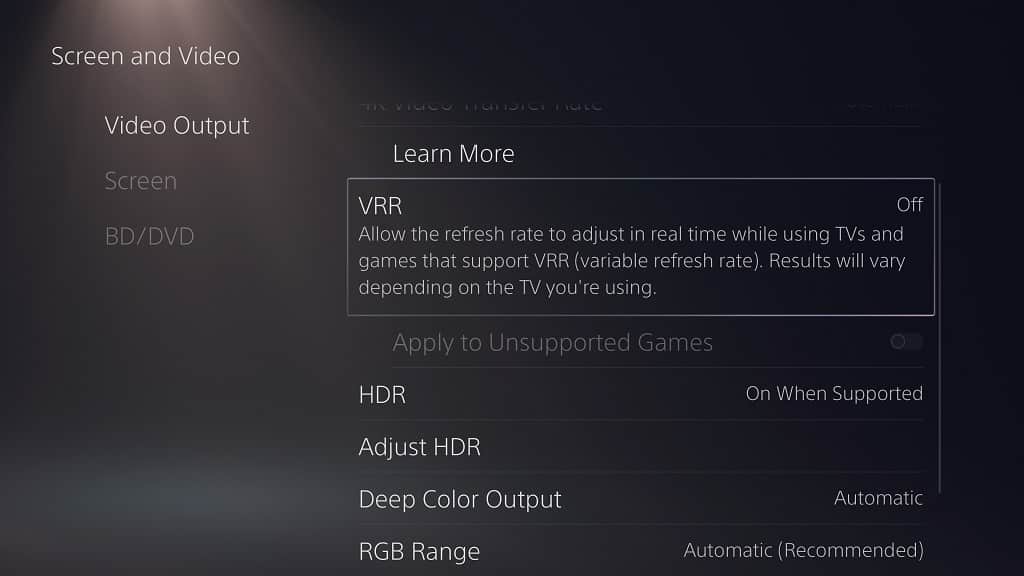
3. If your television or monitor supports Variable Refresh Rate, then you should have it enabled on the screen’s settings as this feature should help reduce input delay in Resident Evil 4 Remake and other games. You can then enable VRR on your system.

For the PlayStation 5 and PlayStation 5 Digital Edition consoles, you need to go to Settings > Screen and Video > Video Output > VRR and then select Automatic.

On the Xbox Series X and Xbox Series S, you need to enable the “Allow variable refresh rate” setting from the Settings > General > TV & display options > Video modes menu.

4. Moreover, you should make sure that you have the right Display settings in the game so that it can run as smooth as possible without any frame drops.

To see how you can deal with the frame rate issues in the RE4 Remake, you can take a look at this previous guide.

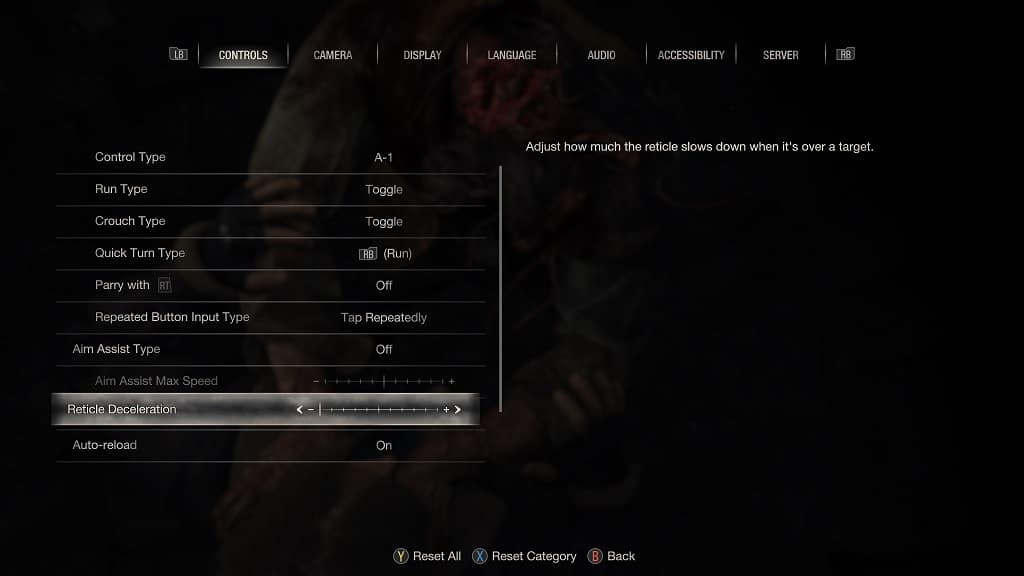
5. There are also several settings that you can change by using the in-game settings menu. The first of which is Reticle Deceleration, which you can get to by taking the following steps:

  • To start off, you need to head over to the Options menu of Resident Evil 4 Remake. You can get there by either selecting Options from the Main Menu or Pause Menu.
  • From the Options menu, switch over to the Controls section. You can switch sections by using the L1 and R1 buttons on PlayStation or LB or RB buttons on Xbox.
  • From the Controls section, you should find Reticle Deceleration. We recommend that you set this setting to the minimum to prevent the aiming reticle from slowing down when it is over a target.

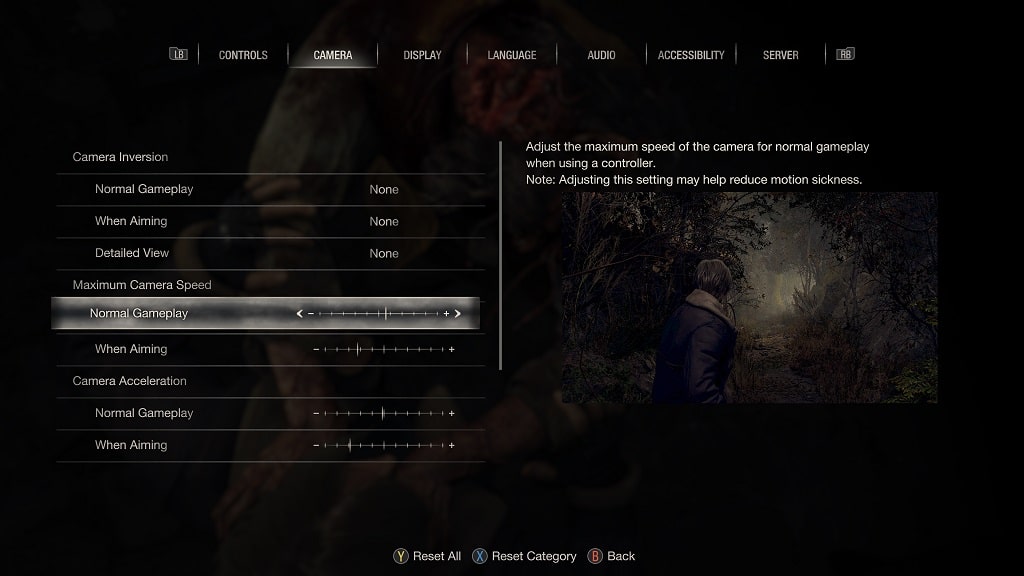
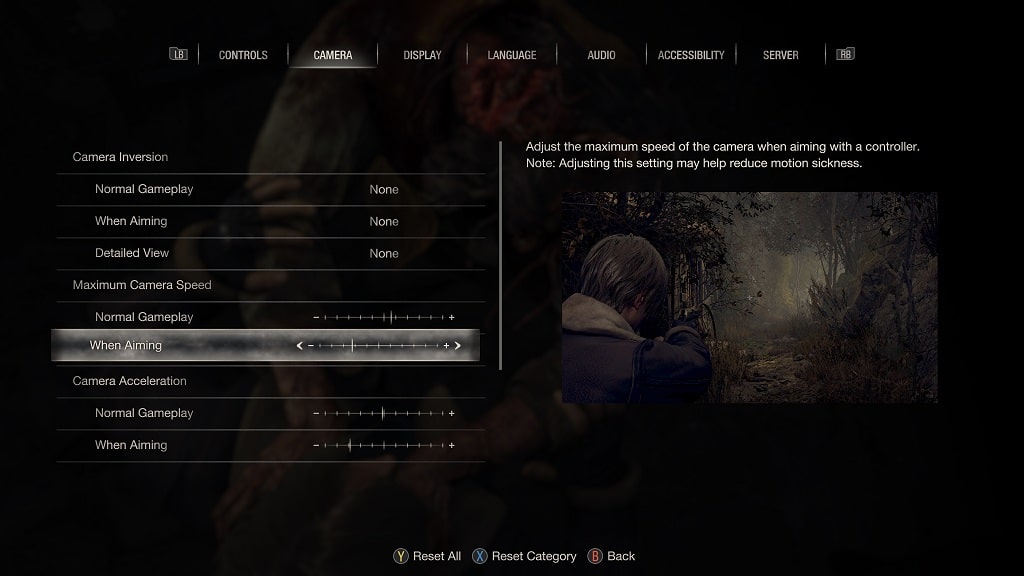
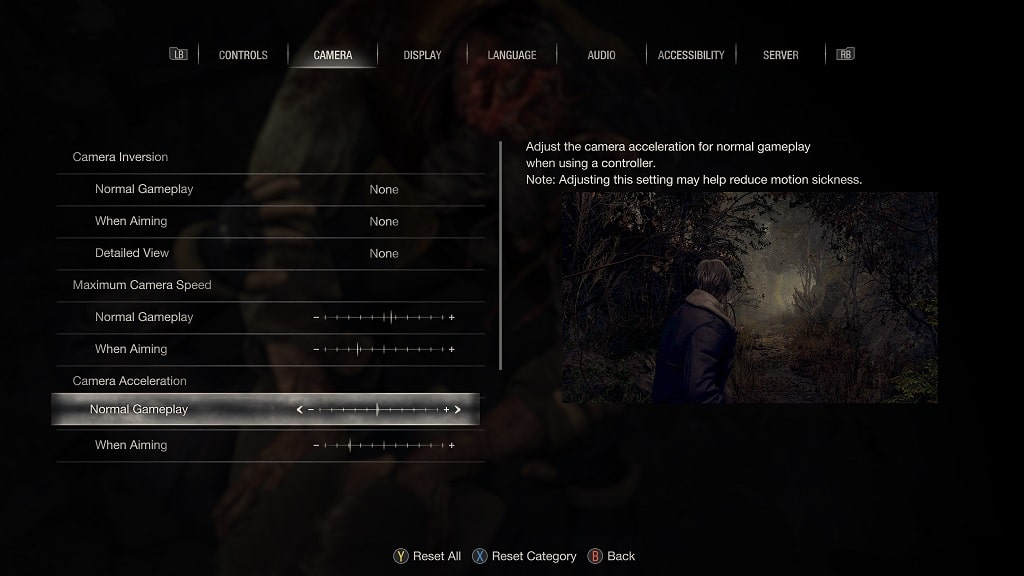
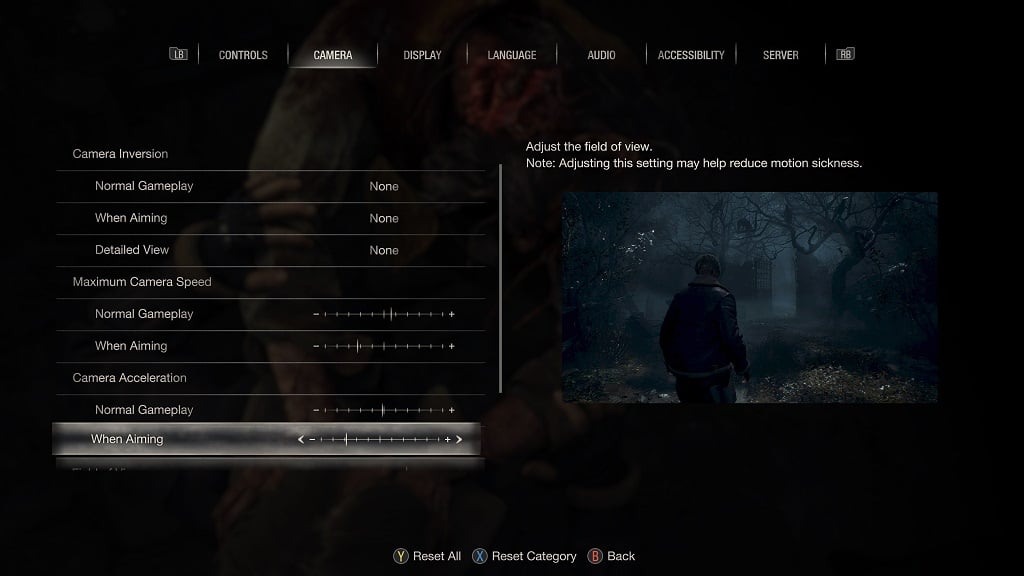
6. From the same Options menu, you can then switch over to the Camera section. From there, you will be able to adjust the following camera movements when playing the Resident Evil 4 remake:

  • Maximum Camera Speed During Normal Gameplay

  • Maximum Camera Speed When Aiming

  • Camera Acceleration During Normal Gameplay

  • Camera Acceleration When Aiming

We suggest that you experiment with these four settings until moving the camera around and aiming your weapon feels just right. It may take a few tries to be able to move the camera and aim without any noticeable input lag.

What’s the difference between Atelier Ryza 3 Standard, Deluxe and Ultimate Editions?

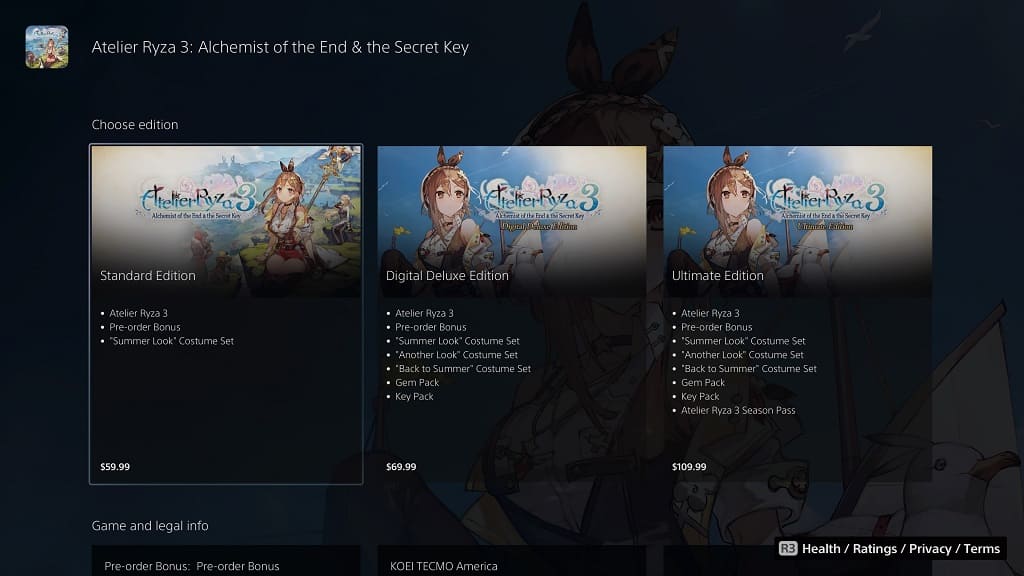
You have multiple options to choose from if you decide to purchase Atelier Ryza 3: Alchemist of the End & the Secret Key digitally on the PC, PlayStation 4, PlayStation 5 or Nintendo Switch. You can check out this comparison guide at Seeking Tech to see what the major differences are between the Standard, Deluxe and Ultimate Editions.

Atelier Ryza 3 Standard vs. Deluxe vs. Ultimate Comparison Chart

You can find our comparison table for the standard, deluxe and ultimate editions of Atelier Ryza 3 below:

Atelier Ryza 3 Standard EditionAtelier Ryza 3 Deluxe EditionAtelier Ryza 3 Ultiamte Edition
Base GameIncludedIncludedIncluded
Straw Hat" Accessory for RyzaIncluded with Pre-OrderIncluded with Pre-OrderIncluded with Pre-Order
Summer Flower Crown" Accessory for RyzaIncluded with Pre-OrderIncluded with Pre-OrderIncluded with Pre-Order
Great Alchemist's Staff" Weapon for RyzaIncluded with Pre-OrderIncluded with Pre-OrderIncluded with Pre-Order
Summer Look" Costume SetIncluded with Purchase by 4/6/23Included with Purchase by 4/6/23Included with Purchase by 4/6/23
Another Look" Costume SetNot IncludedIncludedIncluded
Back to Summer" Costume SetNot IncludedIncludedIncluded
Gem PackNot IncludedIncludedIncluded
Key PackNot IncludedIncludedIncluded
GUST Collaboration" Costume SetNot IncludedNot IncludedIncluded
Endless Summer Splash!" Costume SetNot IncludedNot IncludedIncluded
“Far East Travelers" Costume SetNot IncludedNot IncludedIncluded
Alchemy Mysteries" Recipe Expansion PackNot IncludedNot IncludedIncluded
Art of Adventure" Recipe Expansion PackNot IncludedNot IncludedIncluded
Rosca Island" Additional AreaNot IncludedNot IncludedIncluded
Gust Extra BGM PackNot IncludedNot IncludedIncluded

Base Game

All three editions come with the base game, which is the direct sequel to Atelier Ryza: Ever Darkness & the Secret Hideout and Atelier Ryza 2: Lost Legends & the Secret Fairy.

Pre-Order Bonuses

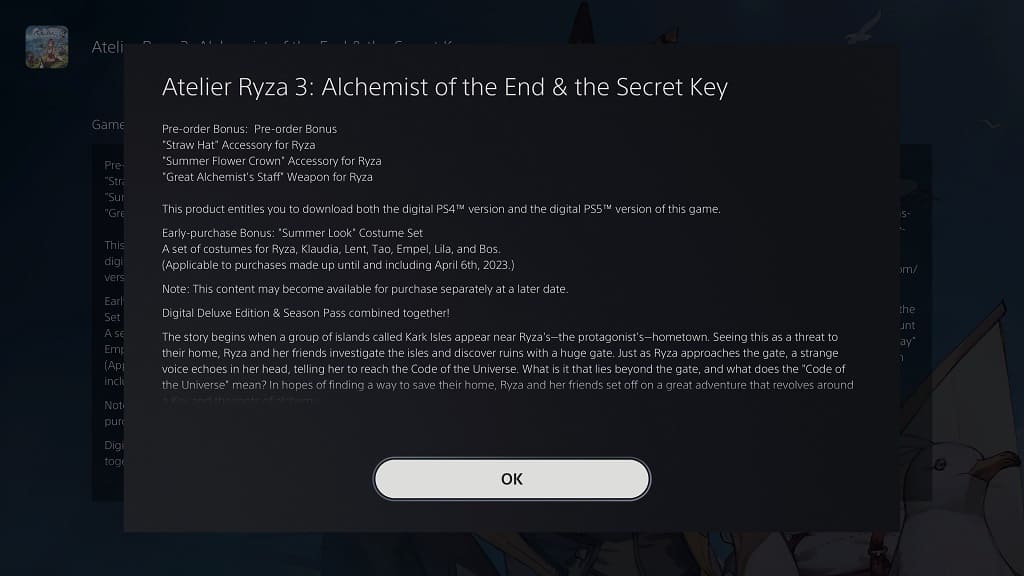
By pre-ordering Atelier Ryza 3: Alchemist of the End & the Secret Key, you will get the “Straw Hat” Accessory for Ryza, “Summer Flower Crown” Accessory for Ryza as well as the “Great Alchemist’s Staff” Weapon for Ryza.

Early-Purchase Bonus

If you pre-order or purchase any edition of this role-playing game by April 6th, 2023, then you will also receive the “Summer Look” Costume Set. This bundle includes new attires for the following characters in your party:

  • Ryza
  • Klaudia
  • Lent
  • Tao
  • Empel
  • Lila
  • Bos

Deluxe Edition Bonuses

Exclusive to the Deluxe and Ultimate Editions of this title are the following:

  • The “Another Look” Costume Set comes with 22 alternate outfits, two for each of the playable characters in the JRPG.
  • The “Back to Summer” Costume Set adds two returning outfits: the “Summer Adventure!” costume and “Sea Breeze Blouse” costume, for Ryza.
  • The Gem Pack gives you 100,000 Gems that you can use for Duplication or Item Rebuilding.
  • The Key Pack comes with 20 Pristine Keys that you can use for Key Creation and other activities.

Season Pass Contents

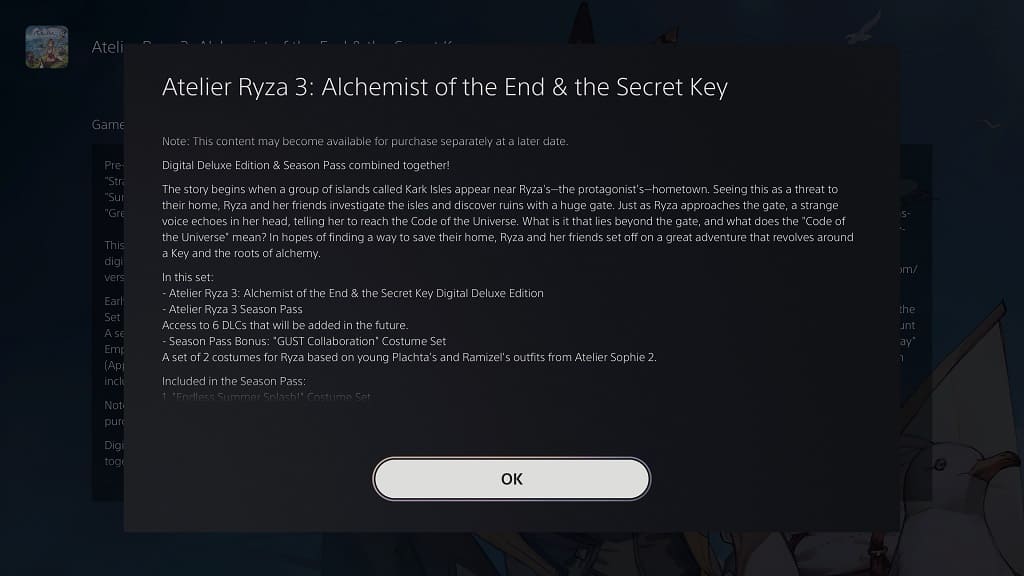
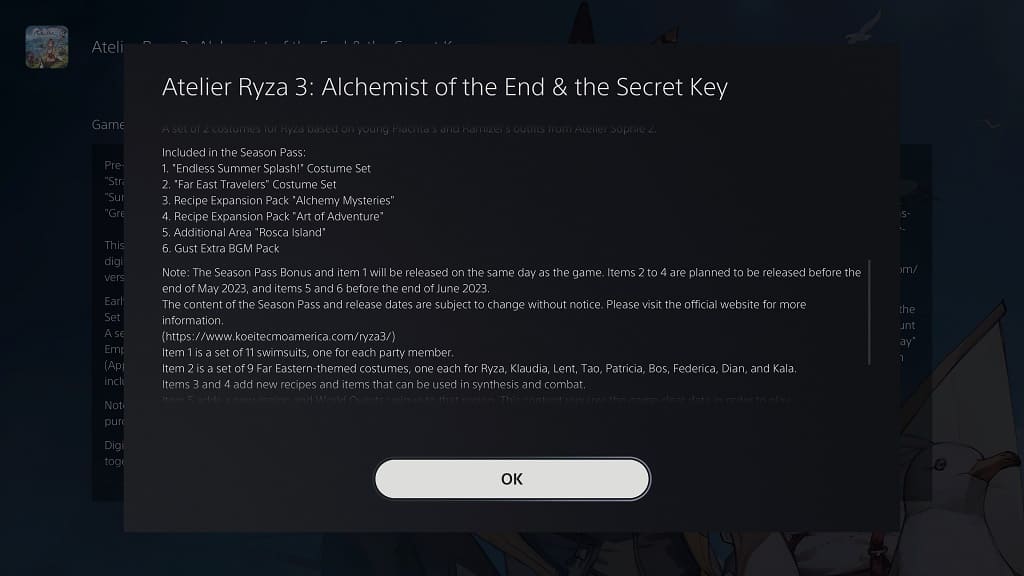
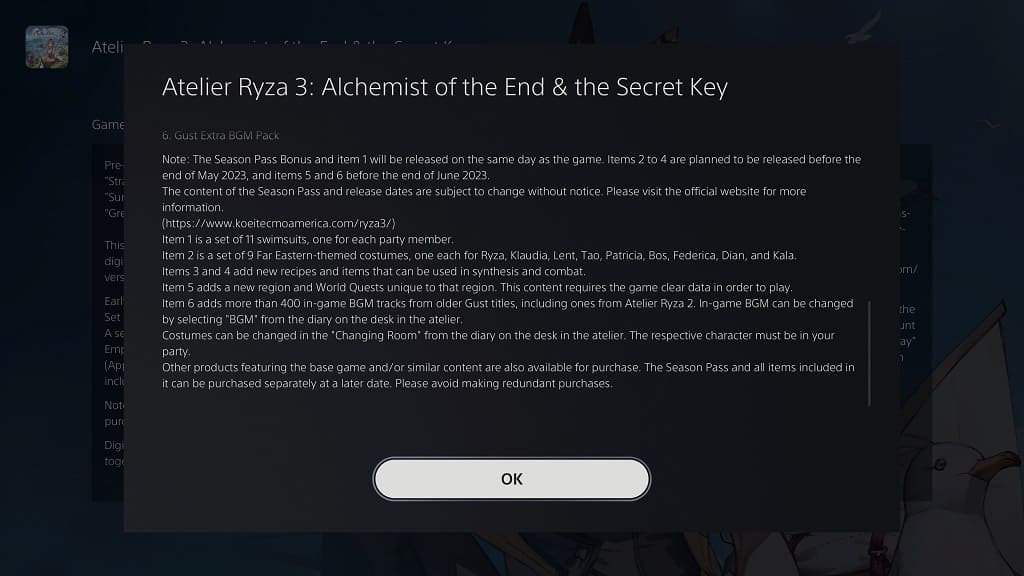
The Atelier Ryza 3: Alchemist of the End & the Secret Key Ultimate Edition comes with the Season Pass. The upcoming content for this game includes even more costumes to on along with new recipes, music tracks in addition to the new “Rosca Island” DLC area that you can fully explore.

You can find the full list of Atelier Ryza 3 season pass content below:

  • “GUST Collaboration” Costume Set
  • “Endless Summer Splash!” Costume Set
  • “Far East Travelers” Costume Set
  • “Alchemy Mysteries” Recipe Expansion Pack
  • “Art of Adventure” Recipe Expansion Pack
  • “Rosca Island” Additional Area
  • Gust Extra BGM Pack

Recap

The Atelier Ryza 3: Alchemist of the End & the Secret Key Ultimate Edition provides the most content as it comes with everything from the Deluxe Edition of the game while also including the Season Pass. So, if you are planning to get the most out of this game, then this is the best version you can get.

When compared to the Standard Edition, the Deluxe Edition offers new costumes to go along with the Gem and Key Packs that should make this game a lot cheaper.

The standard edition of Ryza 3 is the most affordable option if you don’t mind missing out on the extra content.