How to disable pop-up notifications in My Hero Ultra Rumble

You may see multiple pop-up notifications in My Hero Ultra Rumble after a battle. If you find that these messages to be annoying, then you can check out this guide at Seeking Tech to see how you can disable them.

1. For the first step, open the Menu screen.

2. Next, you need to select Settings.

3. From Settings, you should be viewing the Gameplay tab.

If you are on a different tab, then you can use the L1/R1 buttons on the PlayStation controller, LB/RB buttons on the Xbox controller or L/R buttons on the Switch controller to switch tabs in My Hero Ultra Rumble.

4. After getting to the Gameplay tab, you should find the Recommended Notifications setting. You should see the following description:

Set preferences for receiving recommended notifications on the main screen. Turn Off to stop receiving recommended notifications on the main screen after battle.

5. Make sure that the Recommended Notifications setting is set to Off and then save the change you made.
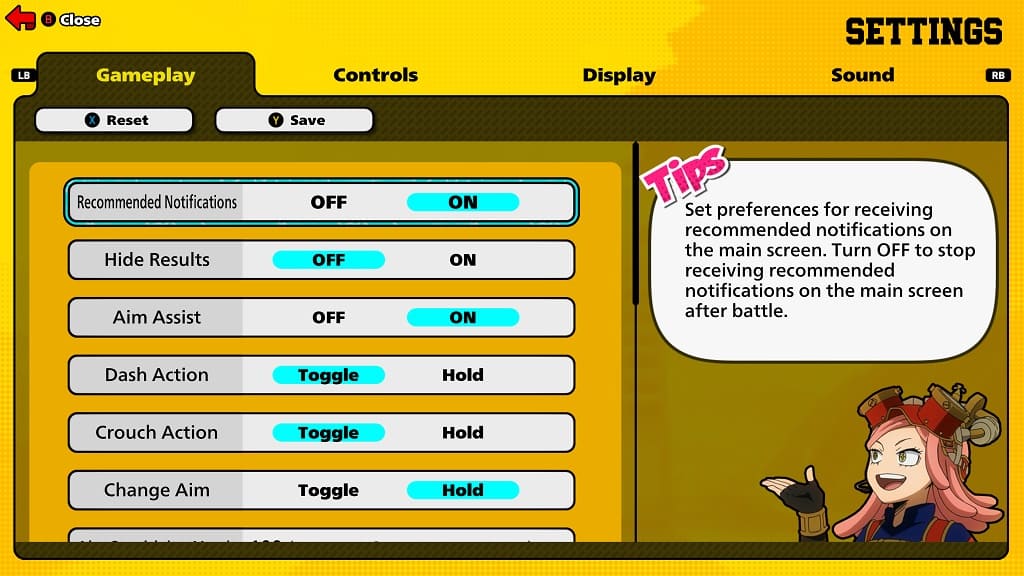
You can save the new setting by pressing Triangle on PlayStation, Y on Xbox or X on Switch.

You should no longer see any pop-ups in the main screen after completing a battle.

How to fix My Hero Ultra Rumble ‘download data is damaged’ issues

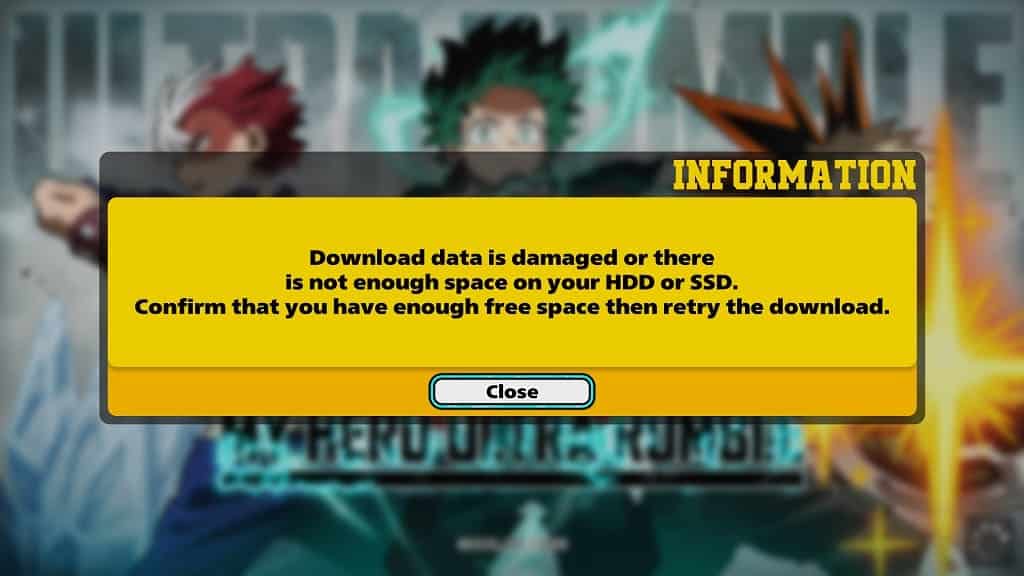
When launching My Hero Ultra Rumble, it will try to retrieve data from the server. During this process, you may encounter the following error message:

Download data is damaged or there is not enough space on your HDD or SSD. Confirm that you have enough space and then retry the download.

To see how you can potentially fix this data issue, you can check out this troubleshooting article from Seeking Tech.

1. For the first potential solution, you should make sure you have enough free space on the storage drive where the game is installed.

For optimal performance, we suggest leaving around 15% of free space on the hard disk drive or solid state drive.

2. You should also check your internet connection. Avoid using a mobile hotspot as a connection as it could result in the “download data is damaged” error.

Instead, you should use a direct internet connection. If possible, try to use a wired ethernet connection to play My Hero Ultra Rumble if you want a constant and stable online connection to the game. A direct Wi-Fi connection should work too as long as you can get a strong signal.

3. Check to see if there is a new patch available to download as the new update may fix the retrieving data issues.

4. You can also try deleting and then re-installing the game.

How to fix My Hero Ultra Rumble unexpected server error

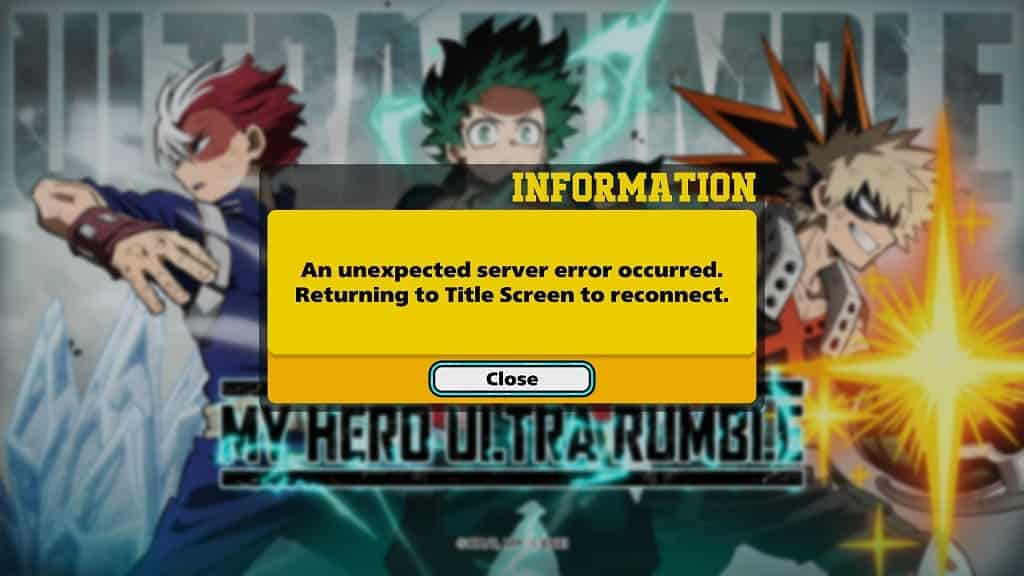
When playing My Hero Ultra Rumble, you may end up getting disconnected from the online servers and seeing the following message appear:

An unexpected server error occurred. Returning to Title Screen to reconnect.

You can check out this troubleshooting guide from Seeking Tech to see how you can fix this connection issue for the anime battle royal game.

1. For the first step, we recommend taking a look at the official My Hero Ultra Rumble Twitter page to see if there are any announcements regarding server downtime and/or maintenance.

If the servers are down for My Hero Ultra Rumble, then you can’t do much else but to wait until they go back online again in order to play the game.

2. If the servers appear to be fine but you are still getting an unexpected server error, then there could be something wrong with your internet connection.

In this case, you should make sure that you aren’t using the same network to download or stream at the same time as you are playing the game. Otherwise, the other activities may be taking up the bandwidth needed to have a stable connection to the game servers.

3. You can also try power cycling your network by taking the following steps:

  • Close My Hero Ultra Rumble and then turn off your gaming system.
  • Turn off or unplug your router, modem and other networking equipment.
  • Wait for at least two minutes before turning your outer, modem and other networking equipment.
  • Turn on your gaming system and then open My Hero Ultra Rumble.

4. If possible, try to use an Ethernet connection to play the game as it is faster and more stable than Wi-Fi.

If you are limited to only using Wi-Fi, then you can try re-positioning your gaming system or Wi-Fi hotspot to see if you can get a stronger wireless connection signal.

How to turn off audio commentary in My Hero Ultra Rumble

When fighting other players in My Hero Ultra Rumble, you will hear the commentator by default. If you would rather disable this feature in this online battle royal game, then you can check out this tutorial from Seeking Tech to see how you can properly do so.

1. For the first step, you need to open the Settings menu. This can be done from the main menu by selecting the hamburger icon on the bottom right of the screen.

If you are currently in a match, then you need to hold the Options button on PlayStation, Menu button on Xbox or + button on Nintendo Switch.

Either way, make sure you select Settings on the next screen.

2. After getting to Settings, switch tabs until you get to Sound.

Tabs can be changed by using the L1 and R1 buttons on PlayStation, LB and RB buttons on Xbox or L and R buttons on Switch.

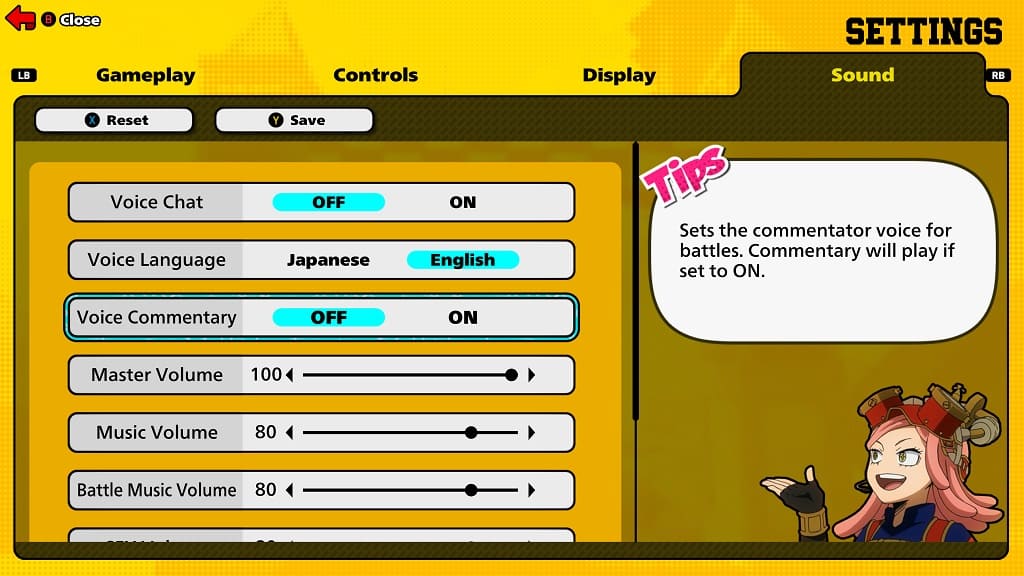
3. From the Sound tab, you will find the Voice Commentary setting. It should show the following description:

Sets the commentator voice for battles. Commentary will play if set to On.

4. Make sure that Voice Commentary is set to Off and then save the change.

You can save by pressing Triangle on PlayStation, Y on Xbox or X on Switch.

You should no longer hear any audio commentary while playing My Hero Ultra Rumble.

How to change voice language in My Hero Ultra Rumble

If you prefer listening to a different language when it comes to the voice acting in My Hero Ultra Rumble, then you check out this guide at Seeking Tech to see how you can change this setting.

1. For the first step, you need to head to the main menu if you haven’t done so already. Otherwise, you won’t be able to change the voice acting language from the in-game menu.

2. From the main menu, select the hamburger icon that is located on the bottom right of the screen.

If you are playing with a console controller, then you have to press the Options button on PlayStation, Menu button on Xbox or + button on Switch.

3. You then need to select Settings.

4. From the Settings menu, head over to the Sound tab.

You can change tabs in My Hero Ultra Rumble by using L1/R1 on PlayStation LB/RB on Xbox or L/R on Switch.

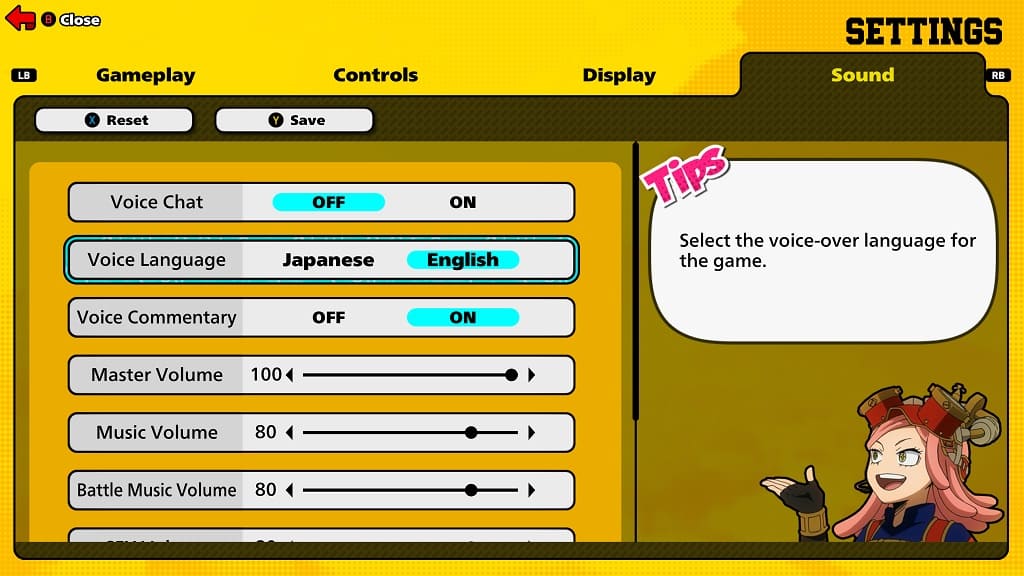
5. In the Sound tab, you should find the Voice Language setting, which should have the following description:

Select the voice-over language for the game.

6. If you are playing the game in the U.S. region, then the default voice language is English. The other option that you can switch over to is Japanese.

7. After changing the voice-over, you need to select Save to confirm and apply the new language.

To save on a console controller, press Triangle on PlayStation, Y on Xbox or X on Switch.

How to fix Party Animals network errors

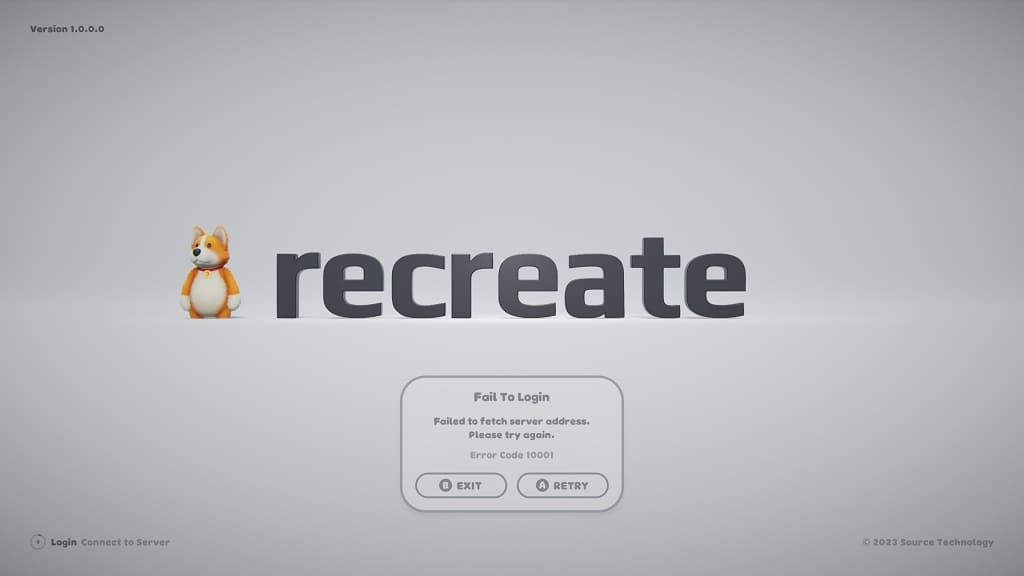
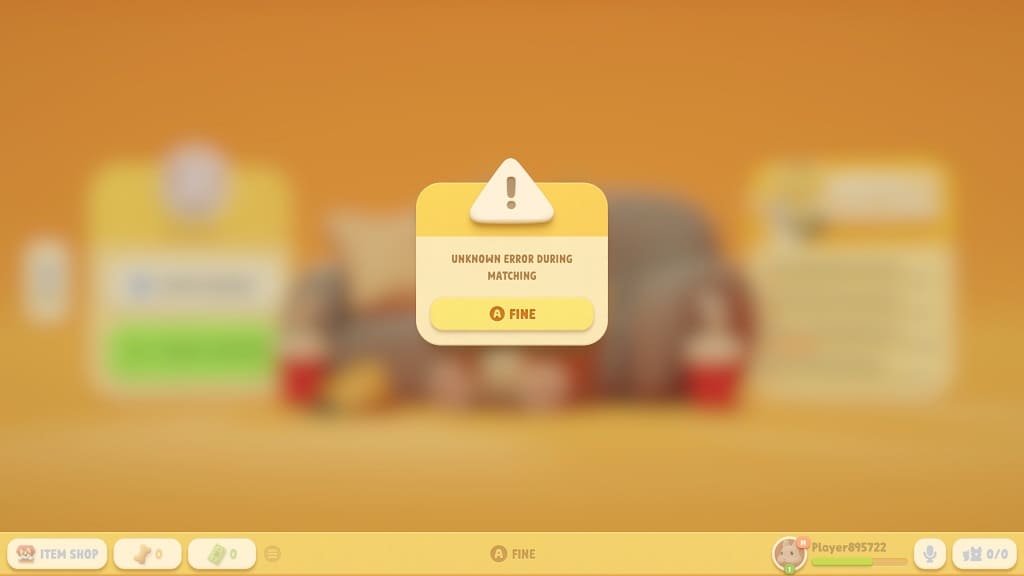
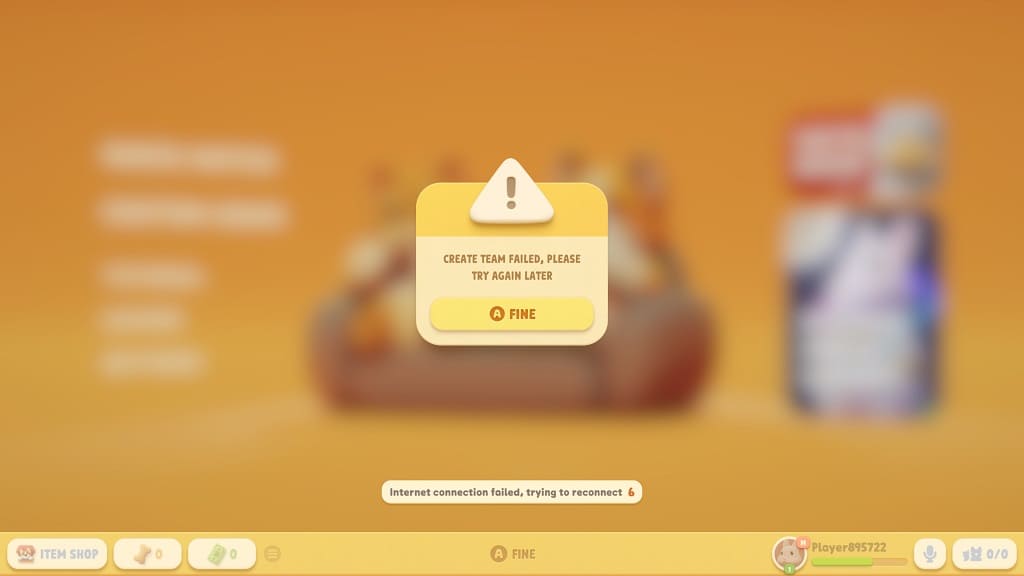
You may run into the following network errors while playing Party Animals:

  • Internet connection failed, trying to reconnect.
  • Create team failed, please try again later.
  • Unknown error during matching.
  • Failed to login. Failed to fetch server address. Please try again. Error Code 10001.

To see how you can potentially fix these connection issues for the multiplayer brawler, you can take a look at this troubleshooting article from Seeking Tech.

1. For the first step, we recommend checking the official Party Animals Twitter page to see if there are any announcements regarding server issues.

If there appears to be a server problem, then you need to wait for it to be fixed until you can play the game, which requires an online connection even for local multiplayer, in order to play it.

2. If the online servers seem to be fined, then you should make sure that you aren’t using your internet to stream and/or download at the same time as you are playing Party Animals.

If possible, we also recommend using a wired Ethernet connection over Wi-Fi. If you can only use wireless, then you should make sure that you have a strong signal that won’t drop at random times.

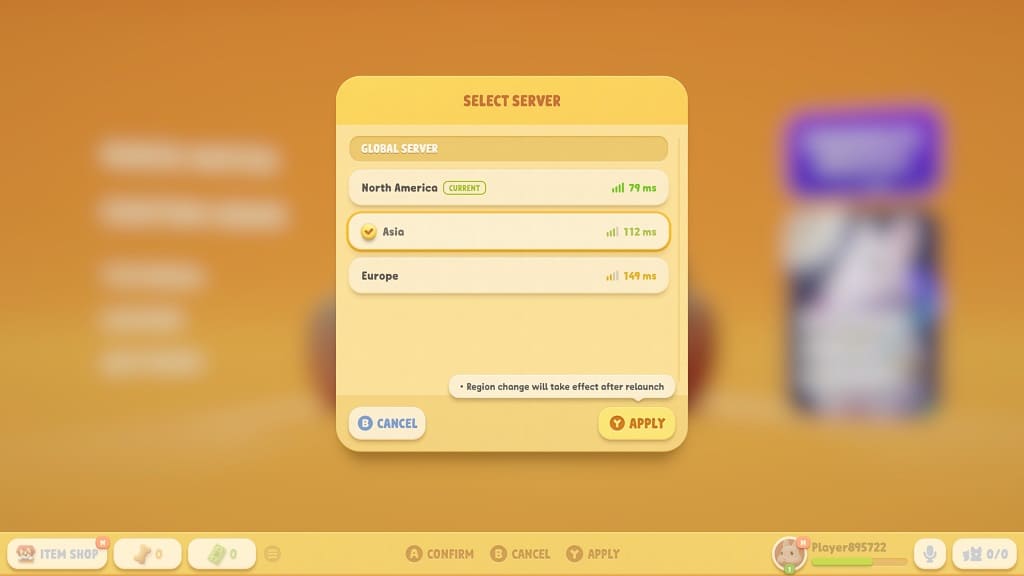
3. If your internet connection appears to be fine, then you can try switching servers. This can be done by going to the game’s Settings menu and then selecting Server & Region from the General tab.

Make sure you switch to the region with the lowest ping.

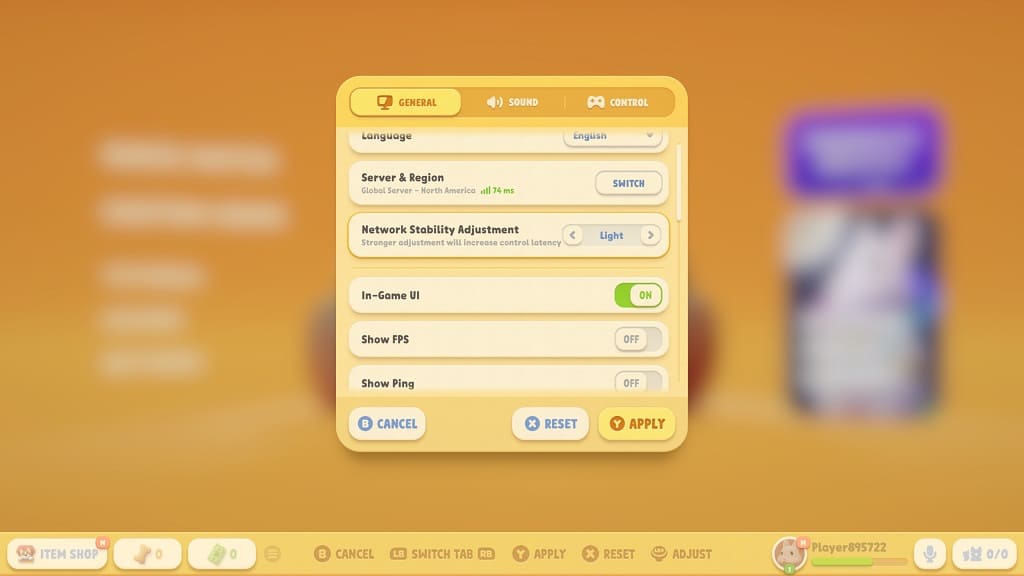
4. From the same General tab in settings, you can also try setting the Network Stability Adjustment to High.

How to disable the microphone and voice chat in Party Animals

The microphone and voice chat are enabled by default when playing Party Animals. To see how you can disable both of these communication features, you can take a look at this tutorial from Seeking Tech.

Method #1

For the first method, you can take the following steps:

1. Head over to the Settings menu from either the main menu or in-game menu.

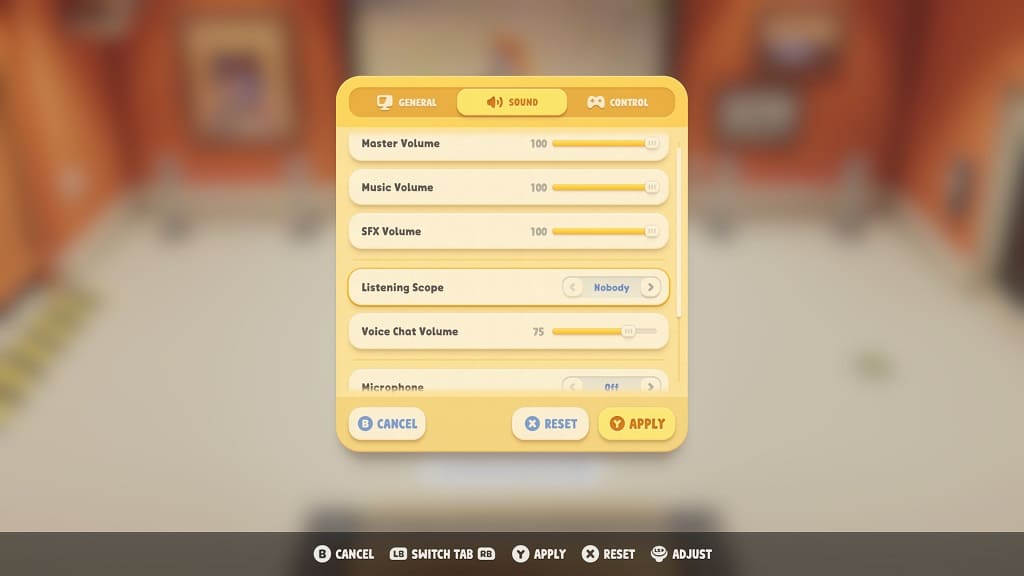
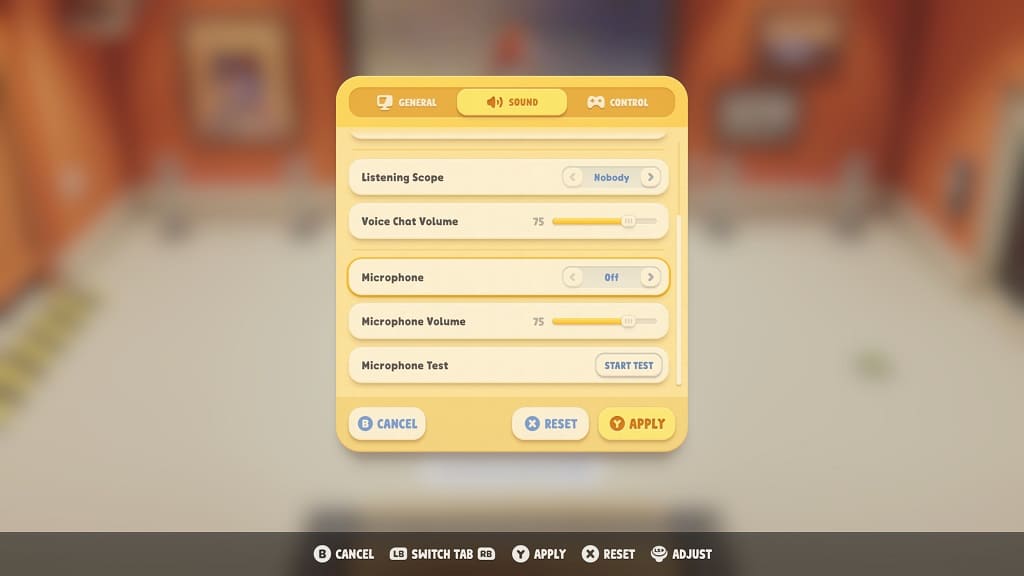
2. From there, you can head over to the Sound tab and then move the cursor down to Listening Scope.

3. Set the Listening Scope to Nobody so that you won’t hear other players chatting on their microphone.

4. Next, move the cursor down to Microphone.

5. Make sure that the Microphone setting is set to Off so that other players won’t be able to hear you talking.

9. Apply your changes.

Method #2

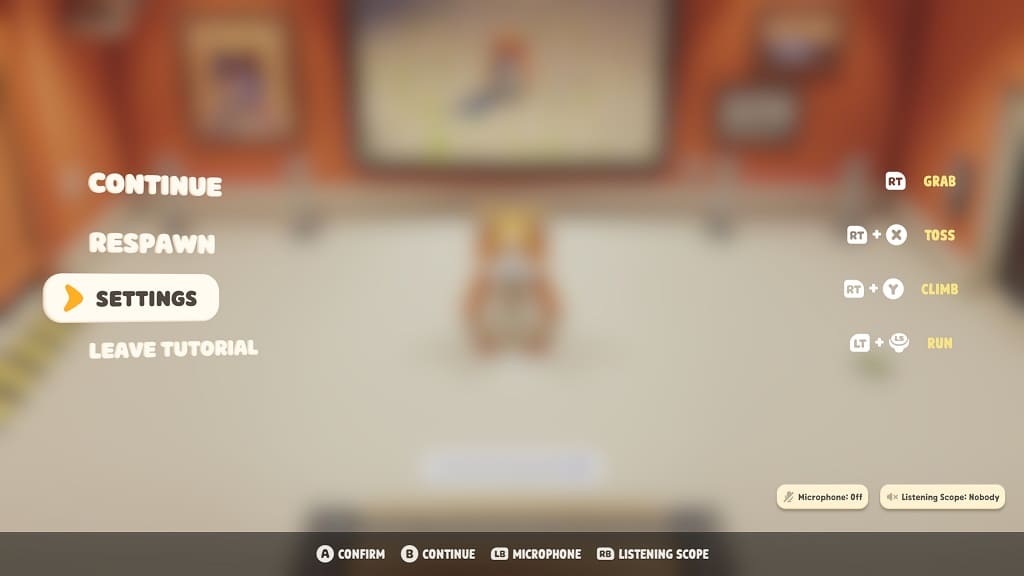
You can also mute the mic and voice chat from the in-game menu by doing the following:

1. During gameplay, open the menu. If you are using an Xbox controller, then you need to press the View button.

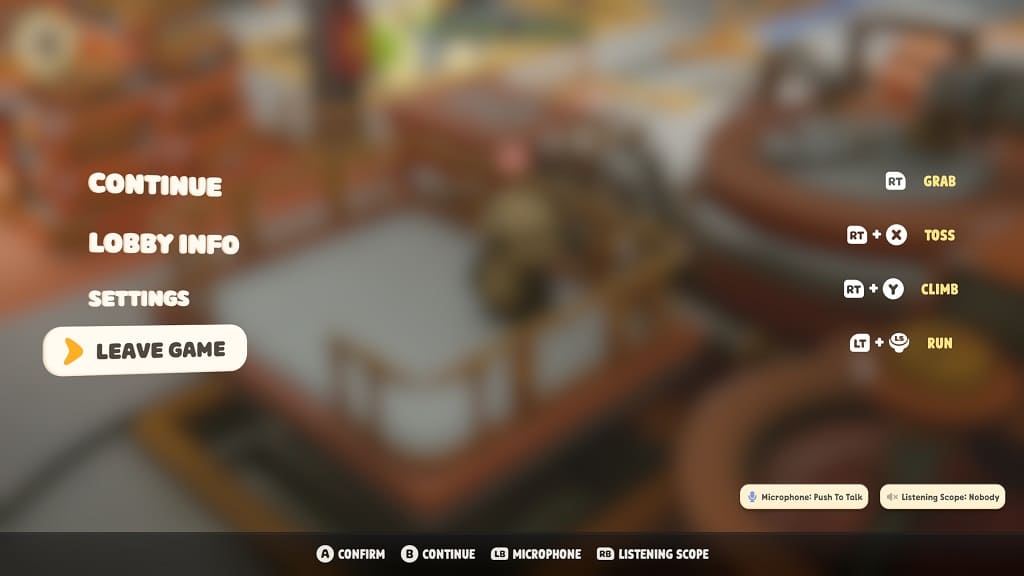
2. From the menu, you should see a button layout for menu navigating in the bottom as well as the Microphone and Listening Scope settings on the button left.

If you are using an Xbox gamepad, then you can change the Microphone setting with the LB button and the Listening Scope setting with the RB button.

Make sure that Microphone is set to Off and Listening Scope is set to Nobody.

How to fix Party Animals input lag issues

You may notice that there is a bit of delay when it comes to controller inputs while playing Party Animals. To see how you can potentially fix the latency for this multiplayer title, you can take a look at this troubleshooting article from Seeking Tech.

Before we start, it is important to note that this game relies heavily on ragdoll physics. As a result, your character feels heavier to control. This is a design choice made by the development team, which makes the game a lot less responsive.

With that said, you can still take some steps to lower the input lag as much as possible.

1. For the first potential fix, you should make sure that you have Game Mode enabled in the picture settings of your TV or monitor. This will lower the input latency when it comes to playing games such as Party Animals.

2. We also recommend plugging your controller into your computer, Xbox Series X or Xbox Series S. This is because a wired connection should be more responsive than a wireless connection when it comes to controller inputs.

3. You should also check the network settings in the game. In order to do so, head over to the General tab from the Settings menu.

From there, select Sever & Region. Afterwards, make sure your global server is set to a region with the lowest ping.

4. Head back to the General tab of the Settings menu and then move the cursor down to Network Stability Adjustment.

Make sure that this option is set to Light. The Medium or Strong setting could result in more input lag.

How to leave a game in Party Animals

You may be slightly confused in regards to leaving an offline game, online match or tutorial in Party Animals. To see how you can properly exit back to the main menu, you can take a look at this guide from Seeking Tech.

1. In the middle of gameplay, you first need to bring up the menu screen. This can be done by pressing the Esc key on the keyboard if you are playing on a PC.

If you are playing the game on an Xbox One, Xbox Series X or Xbox Series S, then you need to press the View button on the controller. This is the button with the two overlapping squares.

2. In the Menu screen, you can then select Leave Game if you are playing multiplayer or Leave Tutorial to quit the tutorial level.

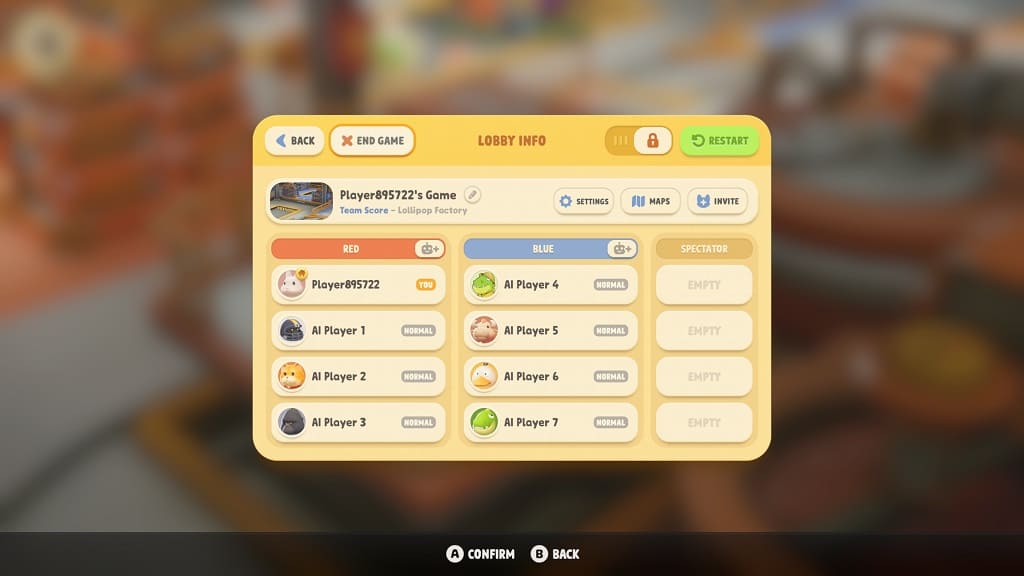
If you are hosting a multiplayer match, then you can also leave by selecting Lobby Info from the menu screen. Afterwards, you can select the End Game option to exit back to the main menu.

How to view user ratings for games on PS5

Thanks to a new stealth update, you can now view the user ratings for games directly on your PlayStation 5 or PlayStation 5 Digital Edition console. You can check out this guide from Seeking Tech to see how you can locate this helpful section.

In order to view the user ratings, you need to visit the product page of the game on the PlayStation Store App.

If you already added a game to your library, then you can view the user numerical reviews for it from the home screen by doing the following:

1. On the home screen, move the menu cursor to the game.

2. Press the down directional pad button or tilt the left analog stick downwards to view more information for the game.

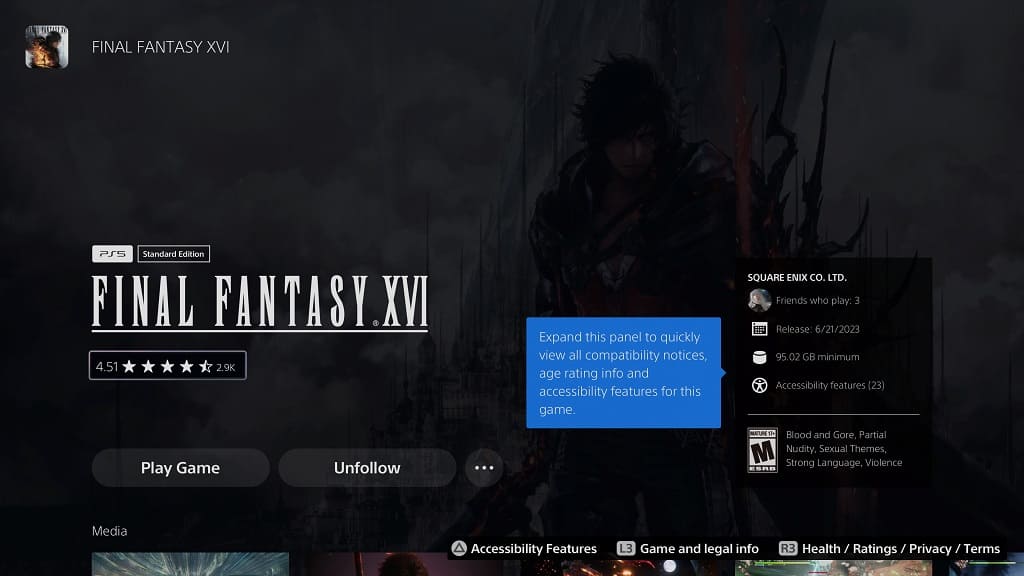
3. Select the three dots icon and then select View Product.

Note: If the game is not on the home screen, then you can select Game Library and then the game. You should then be able to select the three dots icon and the View Product option.

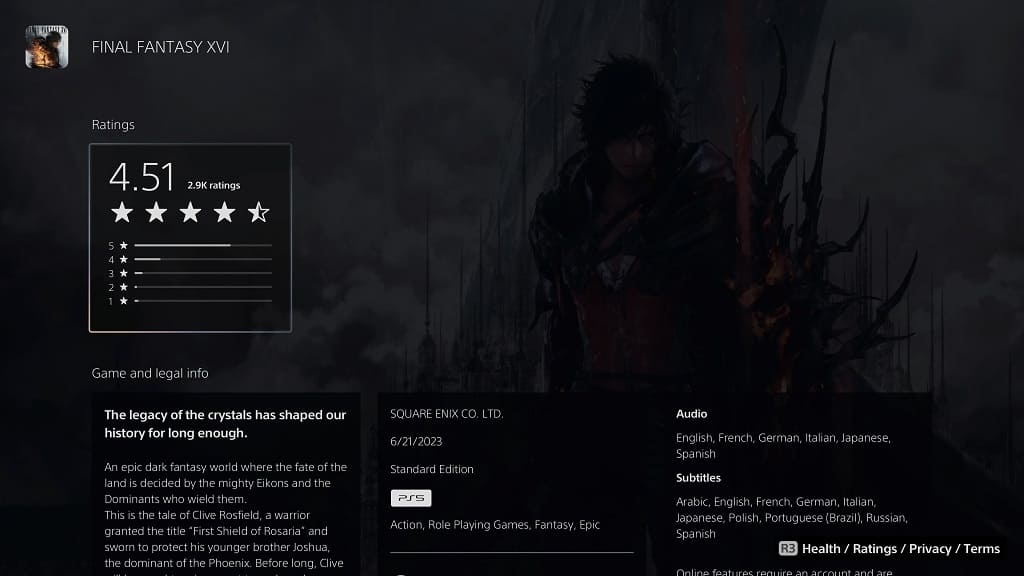
From the product page on the PlayStation Store, you should find the user ratings right underneath the game’s title. It uses a 1-to-5-star scale.

You can select the ratings to view a more detailed breakdown.