What to do if you can’t play Party Animals due to Xbox Game Pass Ultimate requirement

When trying to play Party Animals on your Xbox One, Xbox Series X or Xbox Series S, you may be asked to subscribe to Xbox Game Pass Ultimate first. If you encounter this issue, then you can check out this Seeking Tech guide to see how you can potentially fix it.

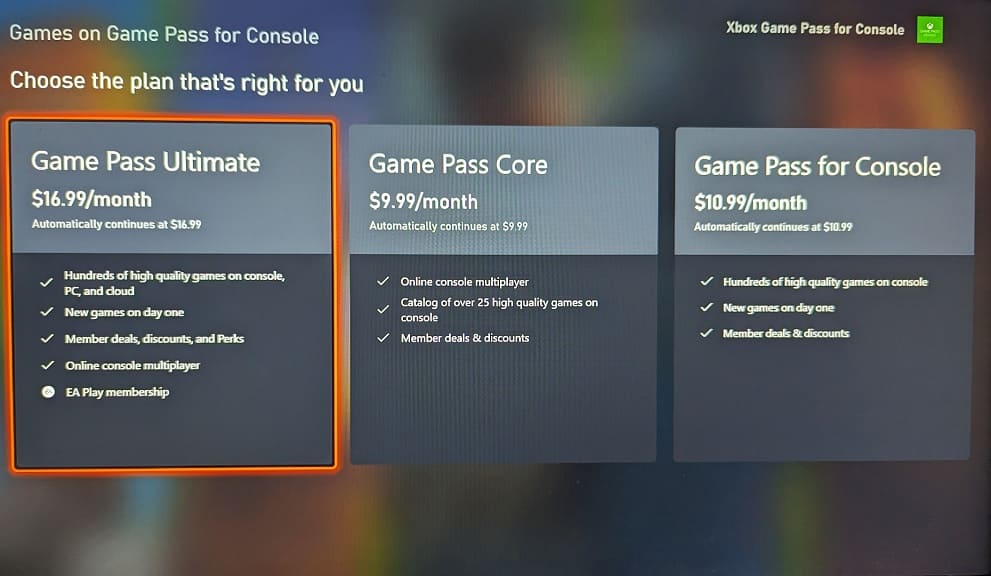
To start off, it is important to note that Party Animals requires a constant online connection even if you are playing local split-screen matches. In order to connect online for this game, you will need to subscribe to either Xbox Game Pass Core or Xbox Game Pass Ultimate. Without a subscription, you can only play through the tutorial.
Unfortunately, the development team at Recreate Games has issued a statement saying that they do not play to add an offline mode to the game. You can find their comments below (via Steam):

We regret the misunderstanding and wish to clarify that the game does not have, nor do we plan to introduce, an offline mode. Party Animals currently requires an online connection to play.

Keep in mind that the Xbox Game Pass Console tier does not include online multiplayer. So, if you downloaded Party Animals from the Console tier of this service, then you need to upgrade your subscription to Xbox Game Pass Ultimate to play the multiplayer modes.

How to change server region in Party Animals

You are able to switch to a different server region when playing online multiplayer in Party Animals. To find out how you can make this change, you can take a look at this guide from Seeking Tech.

1. For the first step, you need to go to the main menu of the game if you haven’t done so already.

2. From there, select Settings.

3. In Settings, make sure you are viewing the General tab. If you are on another tab, then you can use the LB or RB buttons to switch tabs on an Xbox controller.

3. From the General tab in Settings, select Server & Region.

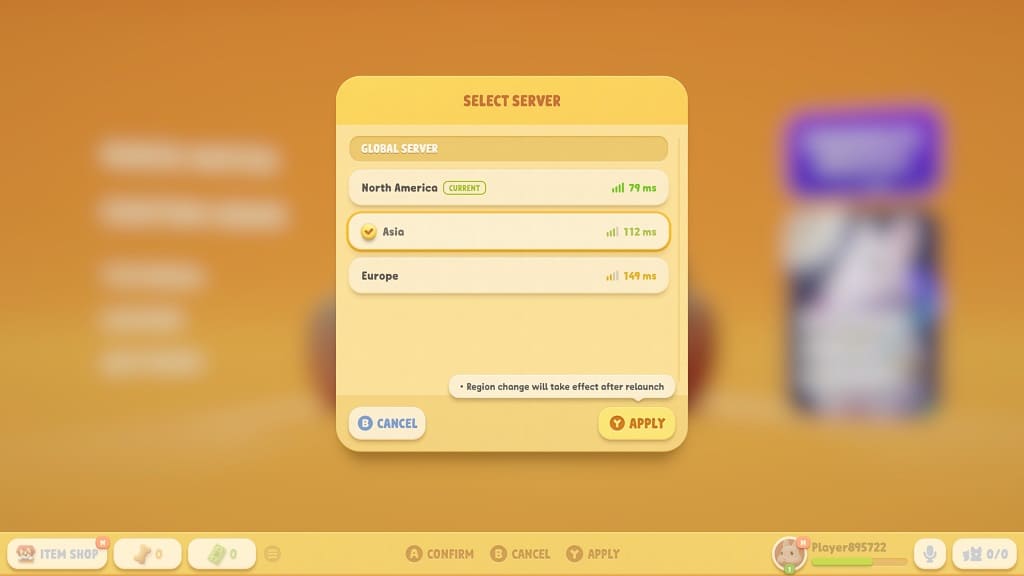
4. In the Select Server screen, you will see a list of available Global Servers.

The server you are currently connected to is marked as “Current.” You should also see the ping of each server located to the right.

5. Select a new region from the Select Server screen and then apply the change (which can be done by pressing the Y button on an Xbox controller).

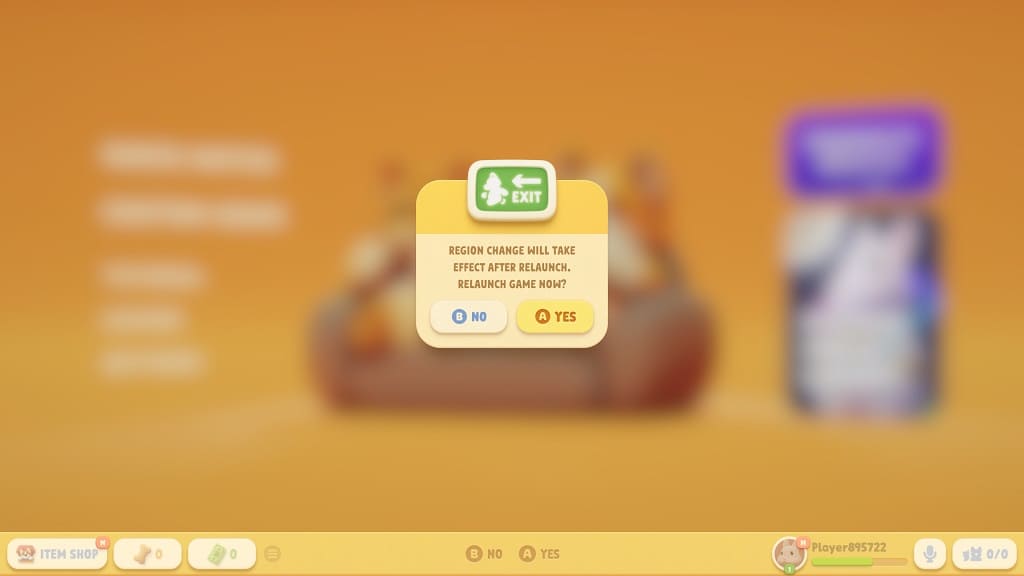
6. The game will then ask for a relaunch in order to connect to the new region server. Select Yes to continue.

7. Once the game has restarted, you should now be connected to the new server.

How to play with bots in Party Animals

If you want to play Party Animals against computer-controlled opponents, then you can check out this tutorial from Seeking Tech to see how you can properly do so.

1. Before we start, it is important to note that this game requires an online connection even if you are playing with bots. On Xbox, you need to subscribe to either Xbox Game Pass Core or Xbox Game Pass Ultimate.

2. Go to the main menu of Party Animals.

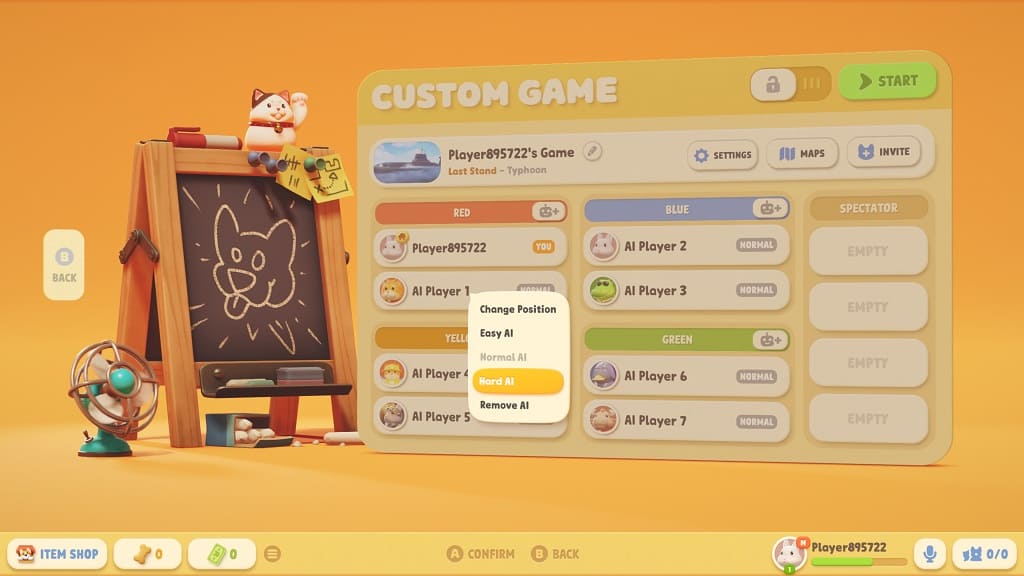
3. From there, select Custom Match.

4. In the Custom Match menu, select Create on the top right side.

5. You then need to select which mode and map you want to play.

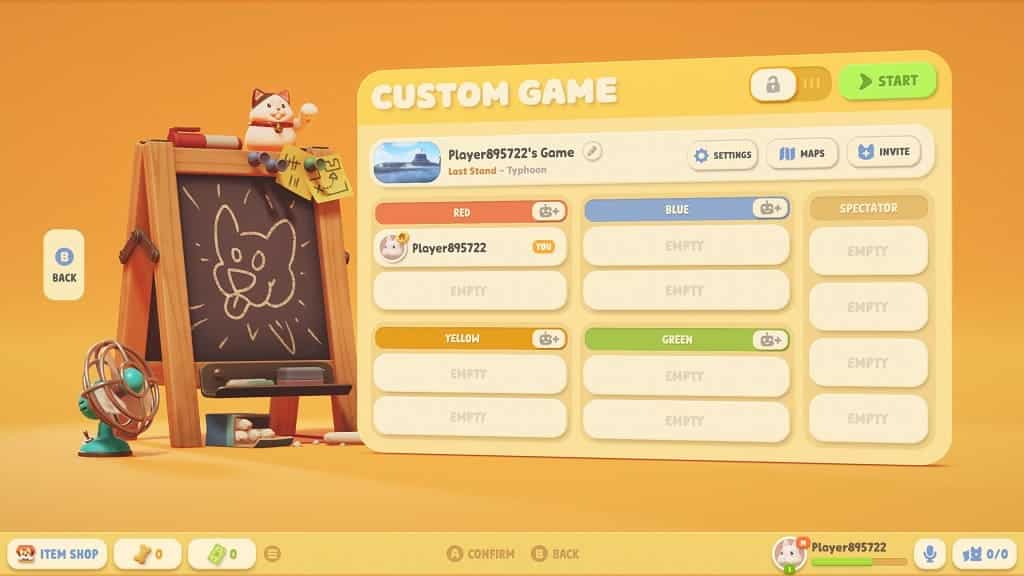
6. Once you created a custom game, select the lock icon on the top right side of the Custom Game menu. This will add a password requirement to your match, which prevent other players from joining your game unless you personally invite them.

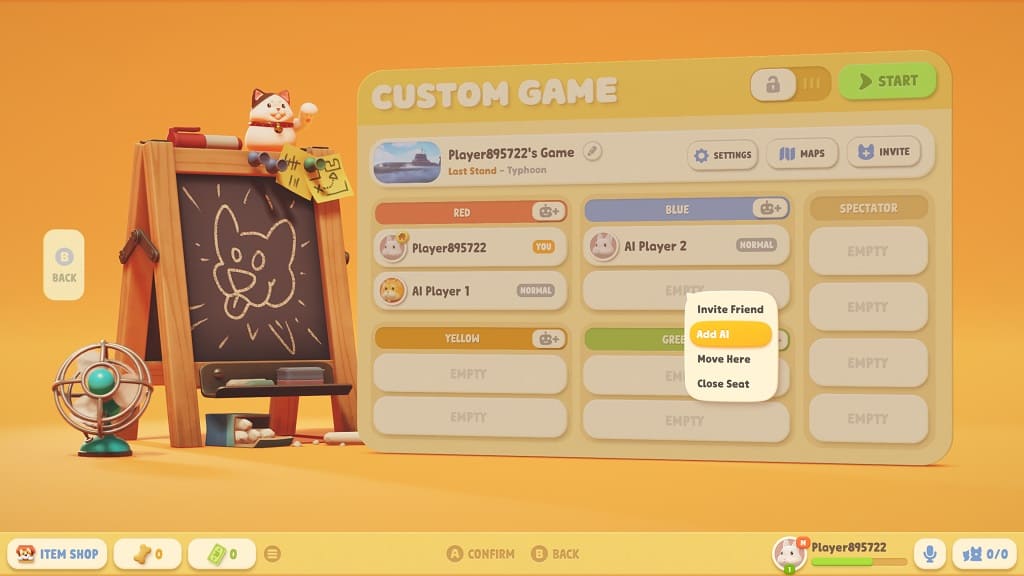
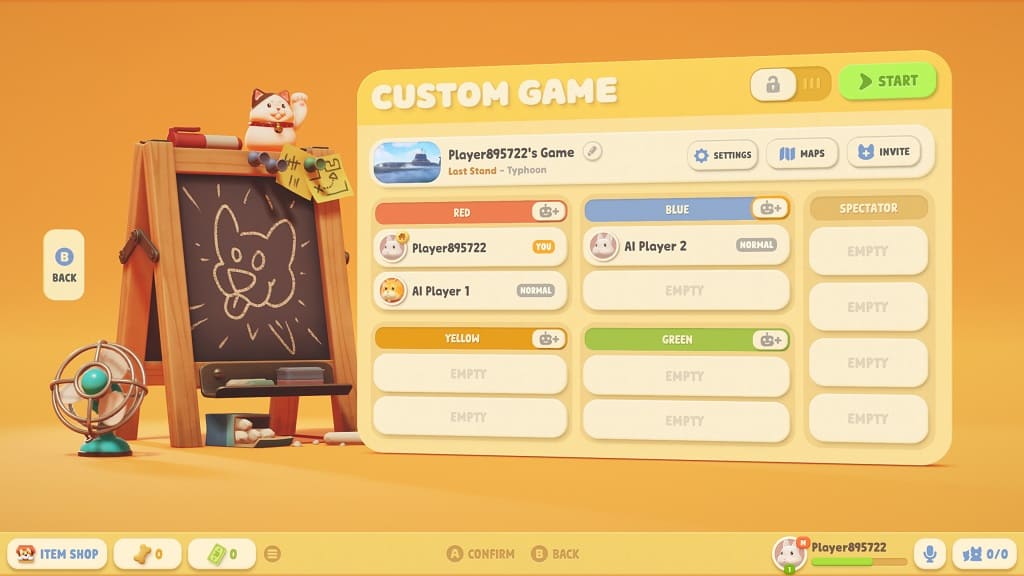
7. From the same Custom Game menu, you can either select the robot icon with the plus sign or select an “Empty” slot and then select Add AI.

8. To change the difficultly level of a bot, select the AI Player. In the pop-up menu, you can then change the difficulty to any of the following:

  • Easy AI
  • Normal AI
  • Hard AI

9. Once you are ready to start the match, select the Start option on the top right side of the screen.

How to disable crossplay in Xbox version of Party Animals

By default, cross network matchmaking is enabled when playing Party Animals on Xbox One, Xbox One S, Xbox One X, Xbox Series S and Xbox Series X. This will allow you to play the multiplayer game with PC players.

If you think that some of the PC players have an unfair advantage, or outright cheating, then you can check out this guide to see how you can disable crossplay on your Xbox.

1. There is no in-game option in Party Animals where you can turn off crossplay. Instead, you need to head over to the Settings menu of your Xbox console.

2. From Settings, go to Account > Prviacy & online safety > Xbox privacy > View details & customize > Communication & multiplayer.

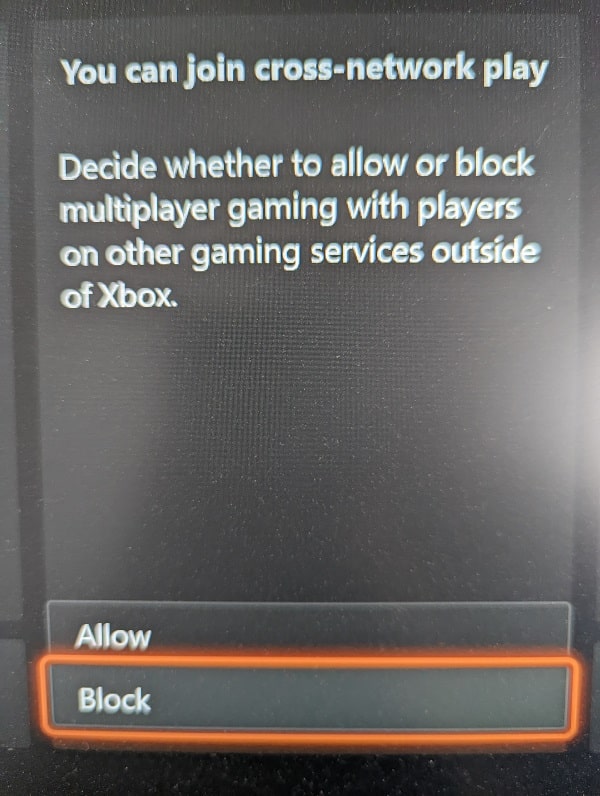
3. From the Account – Communication & multiplayer menu, you should see the “You can join cross-network play” column. Select the drop-down menu underneath it and then select the Block option.

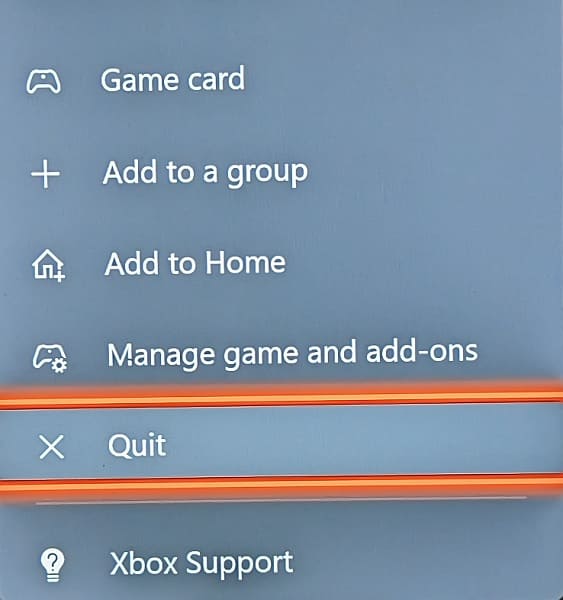
4. Restart Party Animals to disable crossplay. If you have the game on Quick Resume, you need to manually quit out of the game and then launch it again in order to restart.

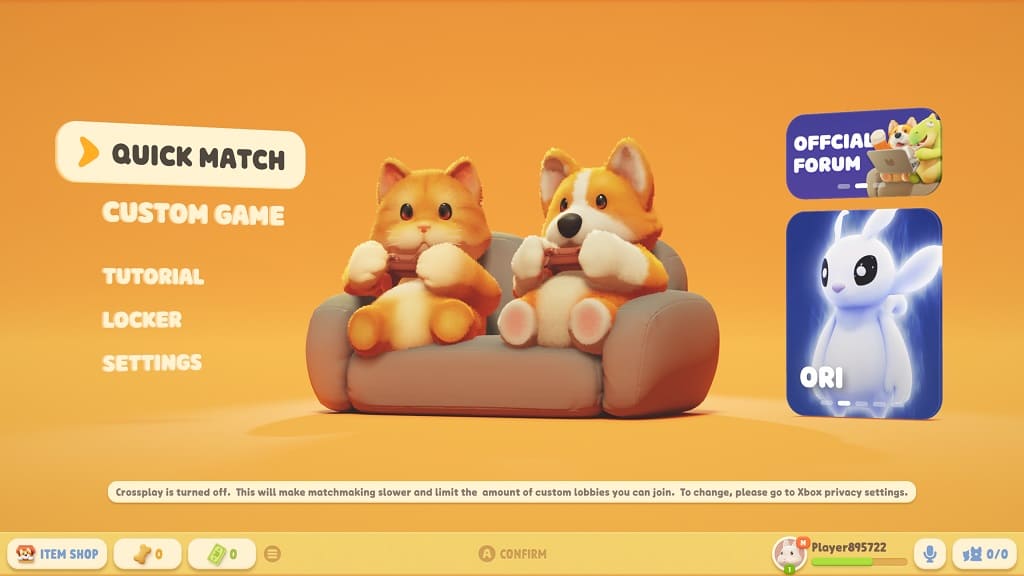
5. You should see the following message in the main menu when cross platform play is disabled:

Crossplay is turned off. This will make matchmaking slower and limit the amount of custom lobbies you can join. To change, please go to Xbox privacy settings.

You should now only be matched up with other Xbox players when playing the online multiplayer.

How to fix Final Fantasy VII Ever Crisis crashing issues

You may encounter crashes when playing Final Fantasy VII Ever Crisis. To see how you can potentially make this mobile RPG run more stable on your device, you can take a look at this troubleshooting article from Seeking Tech.

1. If you have any other applications running, then it may be causing a conflict with Ever Crisis. In this case, you can try closing all opened, suspended and/or background running apps aside from the game.

2. Restarting your device may also help as doing so could free up additional hardware resources.

3. Furthermore, you can try lowering the graphics settings in the game. To do so, you need to take the following steps:

Tap the hamburger icon located on the top right corner in the main menu.

Select Settings from the Menu screen.

If possible, try to switch over to a lower image and performance quality mode to make the game less demanding on your device’s hardware.

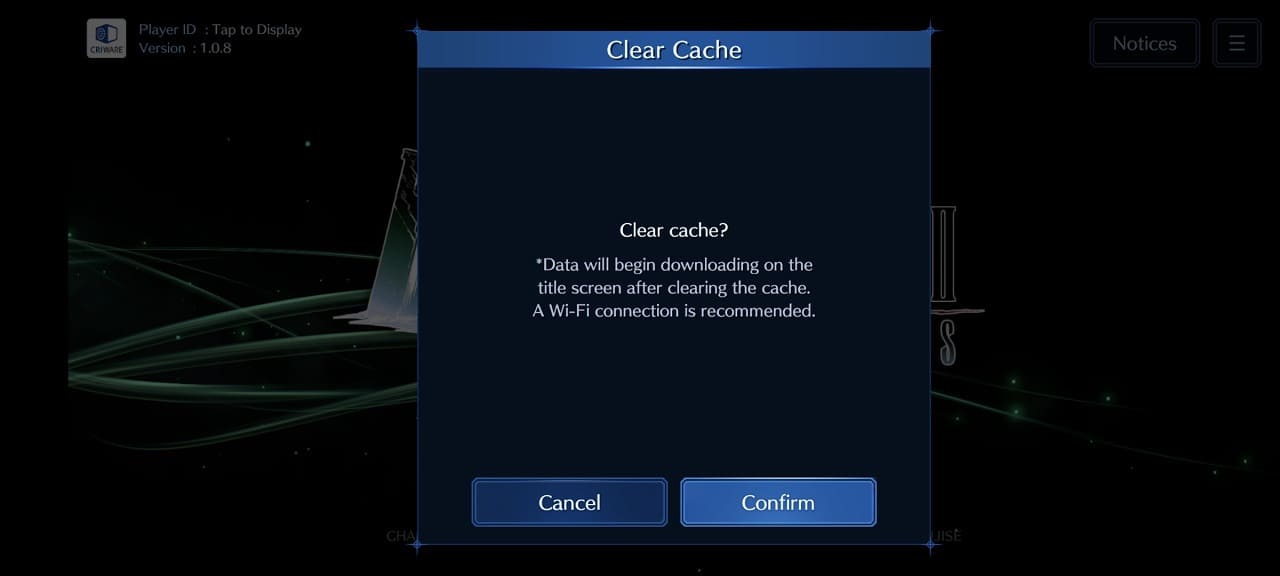
4. You can also try clearing the cache in the game by doing the following:

  • In the “Tap to Start” screen, select the hamburger icon on the top right side.
  • After opening the Menu screen, tap Clear Cache and then Confirm.

5. If the game is still crashing, then you can try deleting Final Fantasy VII Ever Crisis and then re-downloading it from the Apple App Store or Google Play Store.

6. If the local storage where you have the game installed is too full, then it may be causing the game to crash. In this scenario, you can try deleting files from the storage.

We suggest that you leave around 20% of free space.

7. If you have ad block software enabled on your router or device, then you can try whitelisting Final Fantasy VII Ever Crisis. If that doesn’t work, then you can try disabling the ad blocker while playing the game.

8. An unstable connection could be causing the stability problems as well. The development specifically recommends you avoid using a VPN connection.

If you aren’t using a VPN, then we suggest taking a look at this guide to see how you can get a stable connection to the Ever Crisis servers.

How to fix Final Fantasy VII Ever Crisis network errors

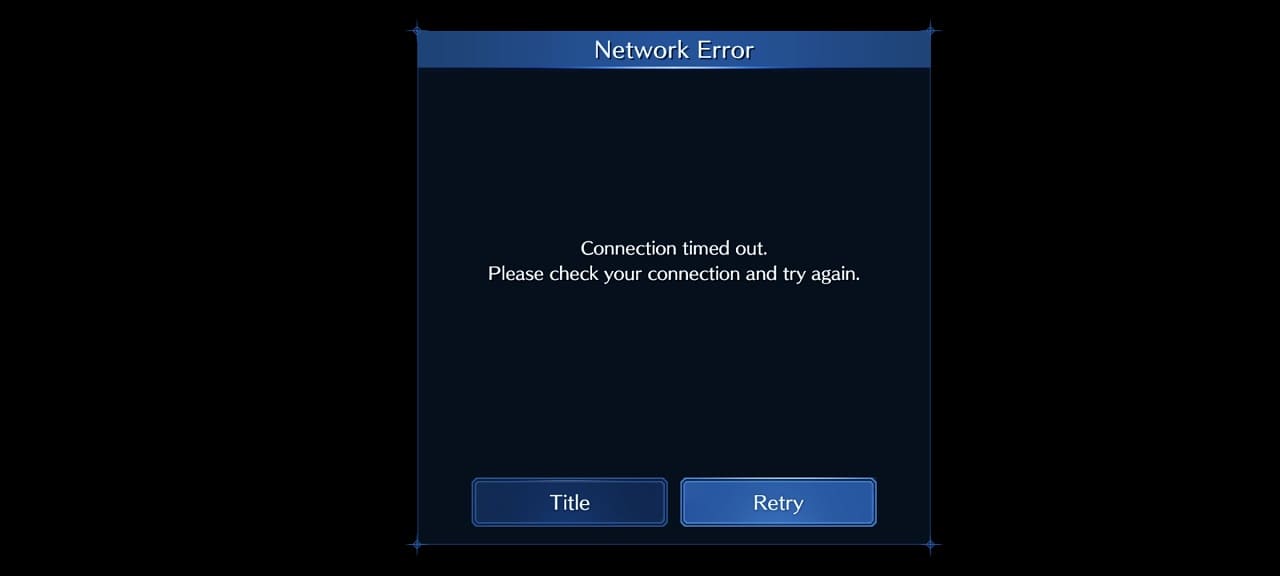
When trying to play Final Fantasy VII Ever Crisis, you may encounter the following Network Error message:

Connection timed out. Please check your connection and try again.

As a result, you won’t be able to play the game until you can connect to the server again. To see how you can fix these network errors, you can take a look at this troubleshooting article from Seeking Tech.

1. For the first step, we recommend checking the official Final Fantasy VII Ever Crisis Twitter page to find any announcements regarding sever maintenance and/or downtime.

If there are server issues, then you won’t be able to log in and play the game until the development team fixes them.

2. If the servers appear to be fine but you are still getting network errors, then you should make sure that the internet connection on your mobile device is stable.

If possible, try to use a Wi-Fi connection over a mobile network. You can also try moving the device around to see if you can get a stronger signal.

3. If you are using a Wi-Fi connection, then you should check to see if you have any concurrent streams or downloads that may be congesting your bandwidth. If there are, then you can try pausing or cancelling them.

4. You should also make sure that you aren’t downloading on the same device you are using to play Final Fantasy VII Ever Crisis. We recommend that you close any other open applications as well.

How to change character appearance in Final Fantasy VII Ever Crisis

In Final Fantasy VII Ever Crisis, you can change the appearances of your party members. To see how you can swap the skins for this mobile RPG, you can take a look at this article from Seeking Tech.

1. To start off, head to the main menu in the game if you aren’t there already.

2. From the main menu, select Party from the left side of the screen.

3. You can then select either Solo Party or Co-op.

4. In the next screen, select the character that you want to swap costumes for.

Note: If you don’t see the character you wanted, then select any character in the party and then tap the “Characters” option located at the button left of the screen. This should open up the Characters menu where you can switch to your preferred party member.

5. After selecting your character, look at the “Main Equip” menu on the right side of the screen.

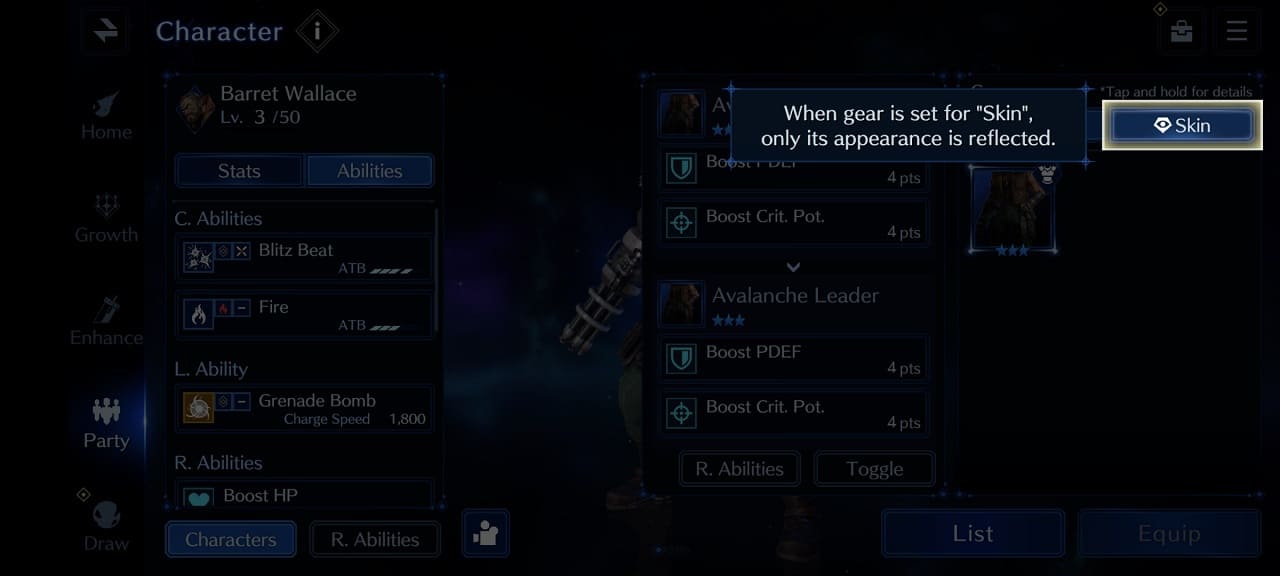
6. From there, select the current skin, which should be the top left box of the Main Equip menu.

7. Afterwards, select the Skin tab.

8. You should then be able to change your character’s appearance with the costumes you have earned playing through Final Fantasy VII Ever Crisis.

How to automatically convert weapons into parts in Final Fantasy VII Ever Crisis

You end up getting a lot of weapons in Final Fantasy VII Ever Crisis. To see how you can automatically convert duplicate weapons that you don’t want into weapon parts for this mobile game, you can take a look at this tutorial from Seeking Tech.

1. For the first step, you need to head over to the main menu.

If you are playing through a mission, you can either finish it or retire from the quest to go back.

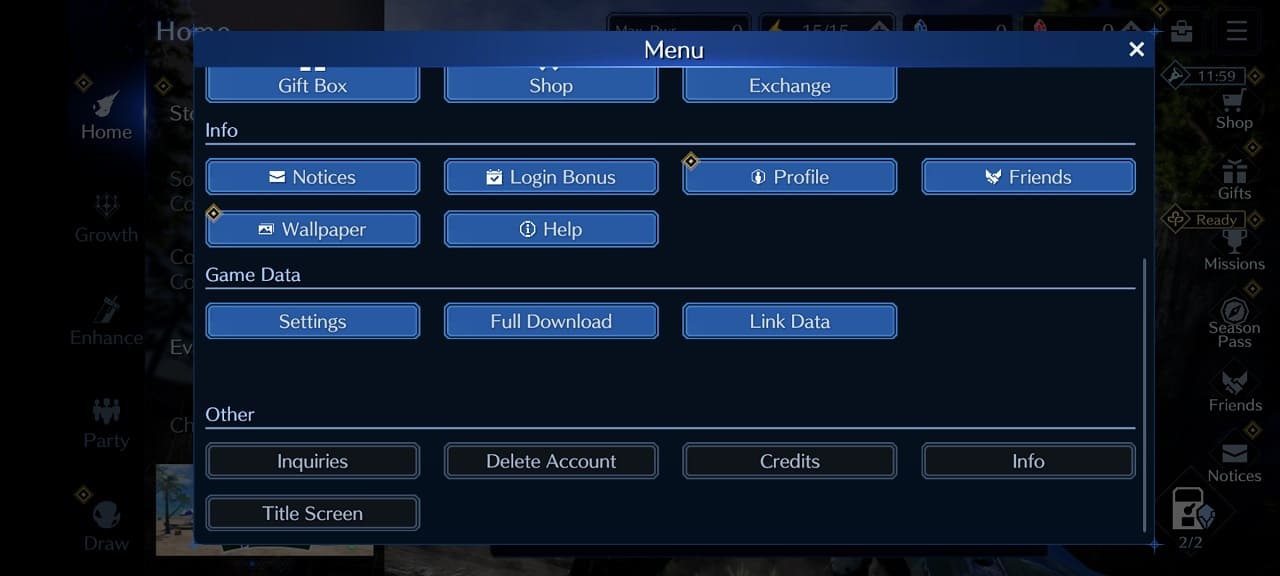
2. In the main menu, tap the icon with the three horizontal lines. It should be located on the top right corner.

3. After opening the Menu screen, scroll down and then select Settings from the Game Data section.

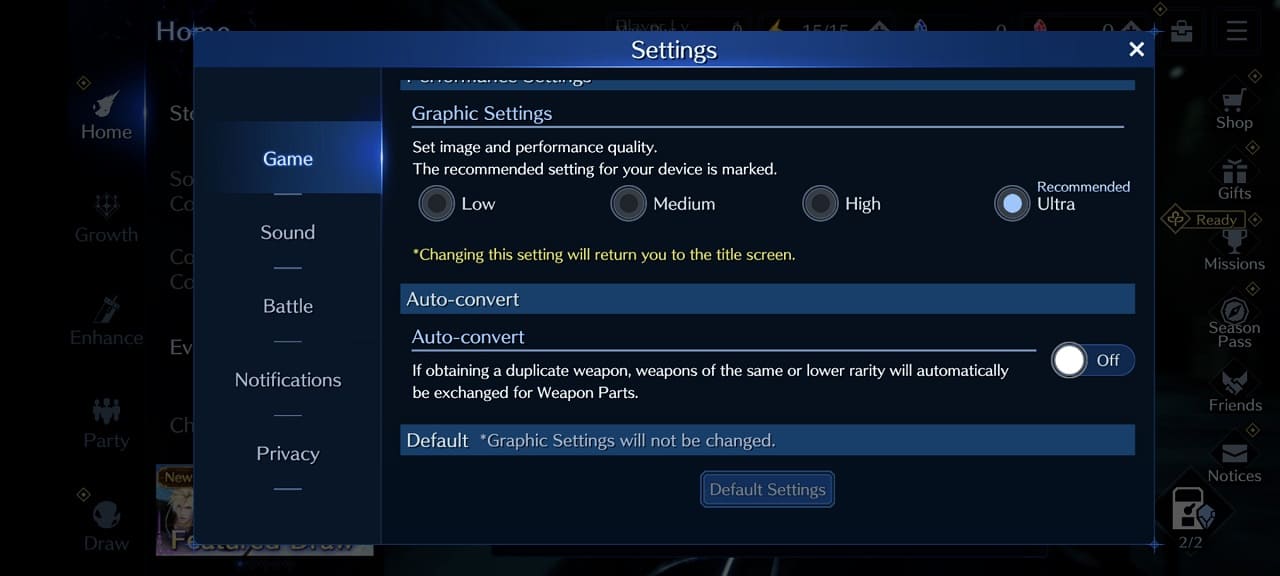
4. From the Settings menu, select the Game tab on the left side if you aren’t viewing it already.

5. You should see the Auto-Convert option with the following description:

If obtaining a duplicate weapon, weapons of the same or lower rarity will automatically be exchanged for Weapon Parts.

6. Tap the switch located to the right of the option to turn this feature On.

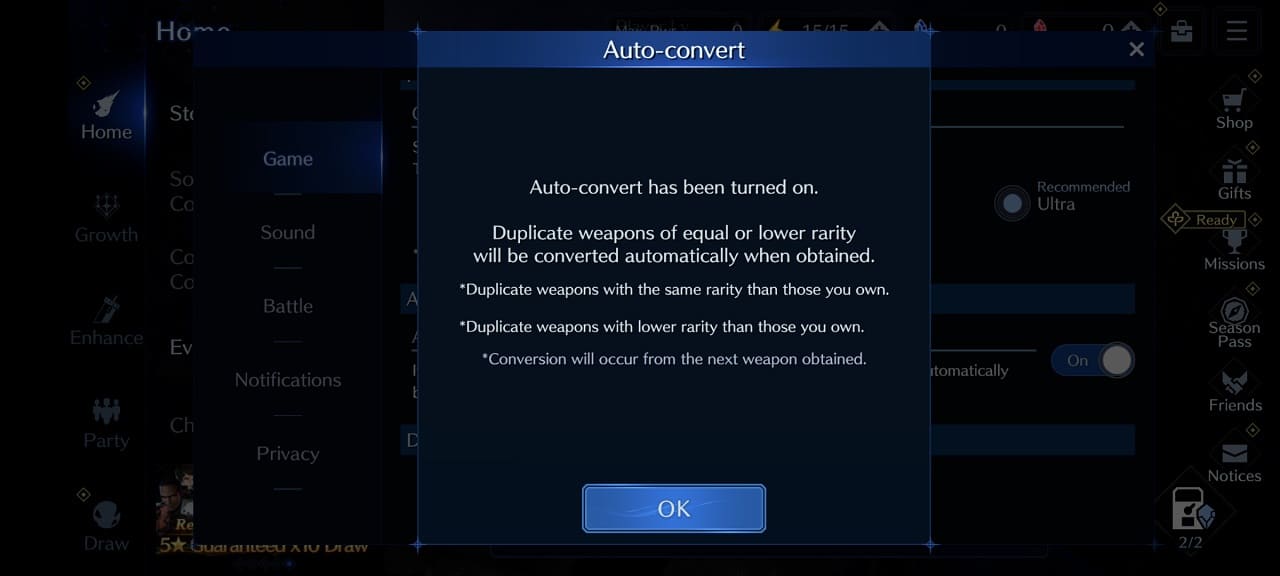
7. You should then see a notification saying that any duplicate weapons you obtained that are of equal or lower rarity will be automatically converted over to weapon parts.

Here, you need to select OK to confirm the change.

How to fully download Final Fantasy VII Ever Crisis

When you download Final Fantasy VII Ever Crisis from the Apple App Store or Google Play Store, you will only be downloading a portion of the game. To see how you can download the full mobile game in advance, you can take a look at this tutorial from Seeking Tech.

1. If you haven’t done so already, make sure you open the game, connect to its server and then head over to the home screen.

2. In the home menu, tap the hamburger icon on the top right side in order to open the Menu.

3. From there, scroll down to the Game Data section.

4. Tap the Full Download option.

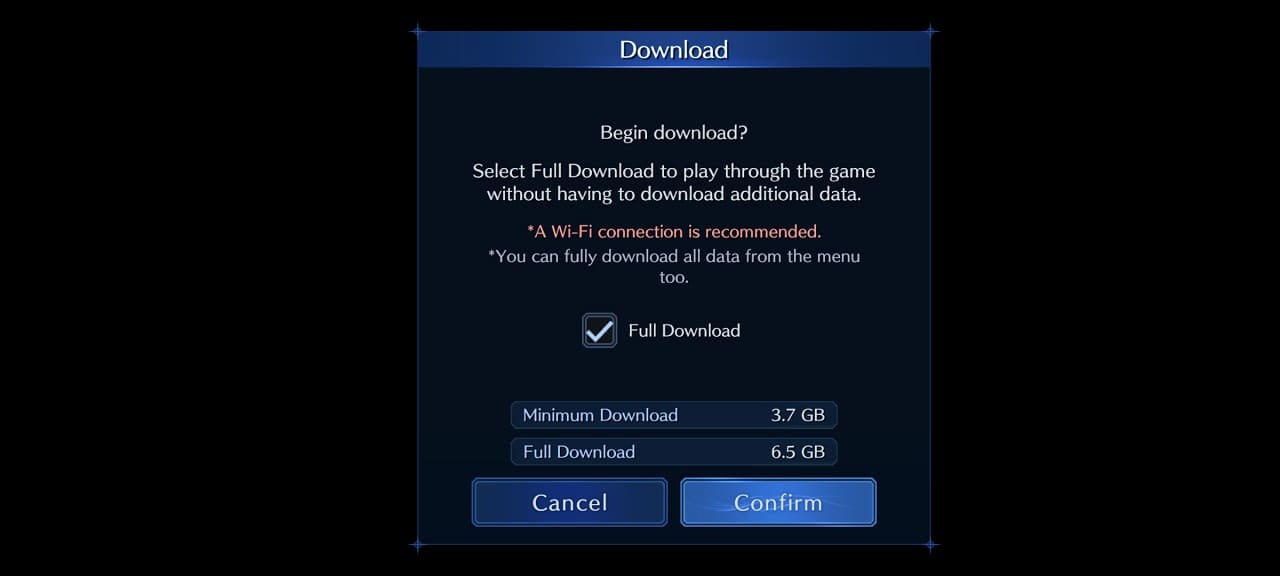
5. If there is a new update available, then you will see a Download notification with the following message:

Begin download? Select Full Download to play through the game without having to download additional data.

You should also see a red text that says, “A Wi-Fi connection is recommended.” So, if possible, try to switch over to Wi-Fi instead of using mobile data.

6. From the Download notification, make sure that the box next to Full Download is checked and then tap Confirm.

7. Wait for the download to complete.

How to fix Payday 3 HDR issues on console

Payday 3 may look a little off in HDR when you are playing the game on a PlayStation 5, Xbox Series X or Xbox Series S. To see how you can potentially fix this display issue, you can check out this troubleshooting article from Seeking Tech.

Before we start, it is important to note that Payday 3 does not officially support HDR on consoles at launch. So, if the game looks off to you, then you can either play it in SDR or convert the SDR image to HDR.

How to play in SDR

To play Payday 3 in SDR, you need to disable any Auto HDR features on your console.

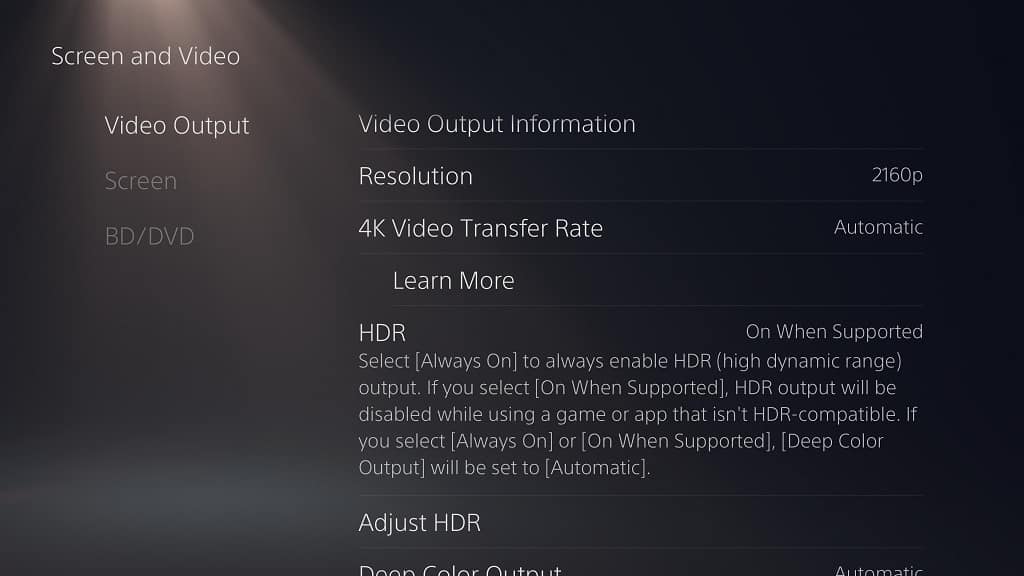
On your PS5, go to Settings > Screen and Video > Video Output > HDR and then make sure that HDR is set to “On When Supported.”

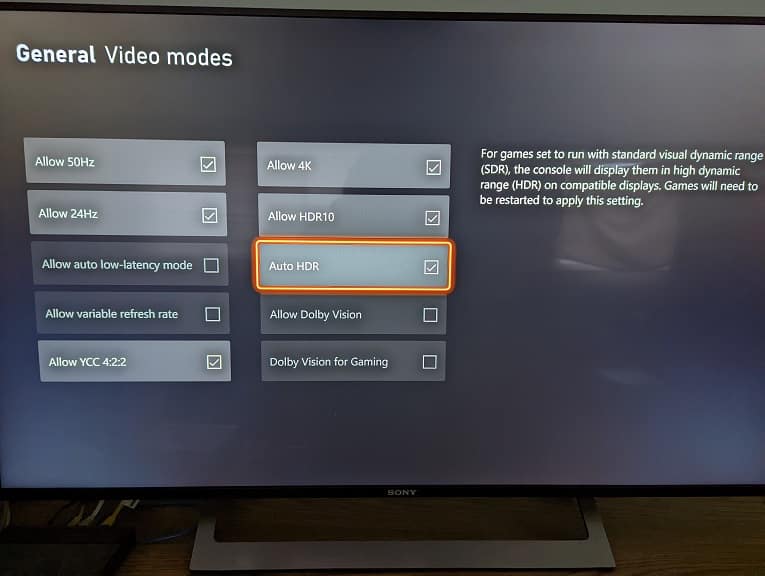
For the Series X or Series S, go to Settings > General > TV & display options > Video modes and then make sure that Auto HDR is not selected.

You should also check the settings of your television screen or monitor to make sure you disable any features that will convert SDR into HDR.

How to play with Auto HDR

If you want to try playing Payday 3 with the SDR image converted over to SDR, then you need to do the following:

For the PS5, go to Settings > Screen and Video > Video Output > HDR and then make sure that HDR is set to “Always On.”

On the Xbox Series X or Xbox Series S, head over to Settings > General > TV & display options > Video modes and then make sure that Auto HDR is selected.

How to adjust the brightness settings

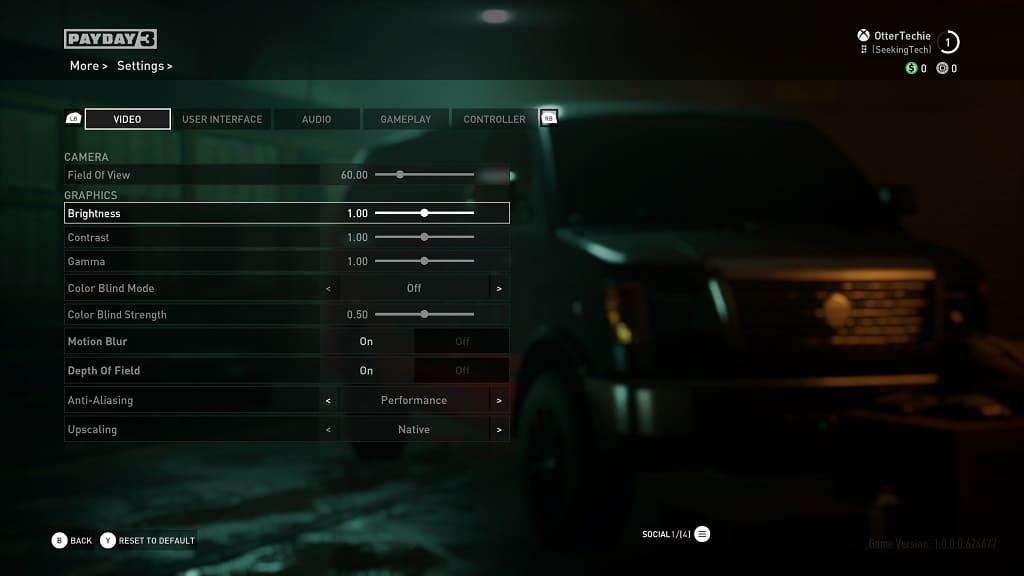
You can also use the in-game menus of Payday 3 to adjust the brightness settings. In order to do so, head over to Settings > Video.

From there, you will be able to adjust the Brightness, Contrast and Gamma levels.