How to make dodging easier in Marvel’s Spider-Man 2

Marvel’s Spider Man 2 features a lot of chaotic combat scenarios where you will be surrounded by a bunch of enemies. If you find that you have a hard time dodging in this superhero game, then you can check out this guide at Seeking Tech to see how you can make dodging easier.

Method #1:

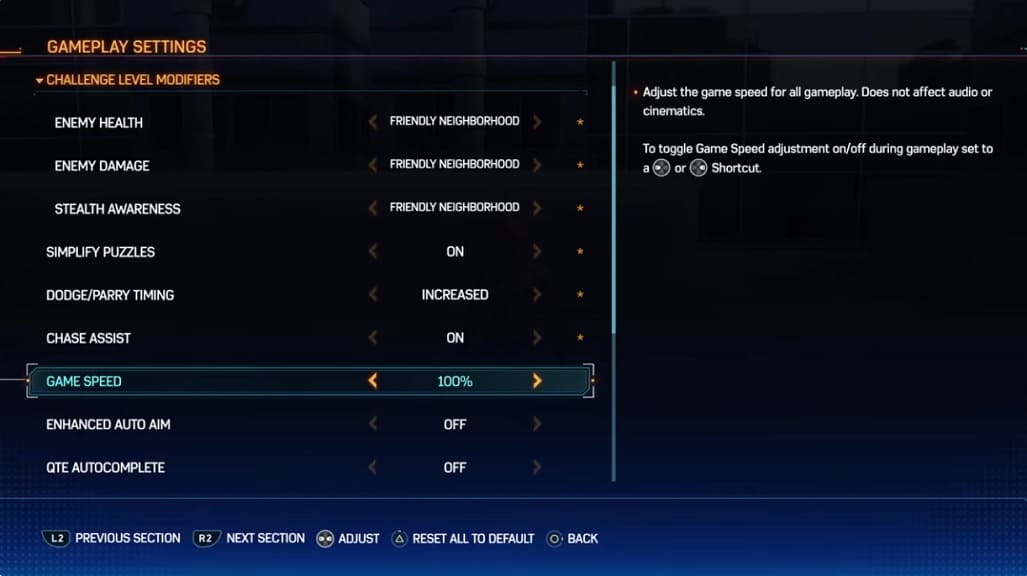
For the first method, you can try lowering the game speed. In order to do so, you need to head over to the Settings menu and then select Gameplay.

In the Gameplay section, you will find the Game Speed option, which has the following description:

Adjust the game speed for all gameplay. Does not affect audio or cinematics.

The Game Speed is set to 100% by default. You will be able to slow the gameplay down to 30%, 50% or 70%. During gameplay, you will also be able to adjust the speed in real-time with the left and right directional buttons.
By slowing down the game, you should have more time to identify incoming enemy attacks, which should make them easier to dodge.

Method #2:

Spider-Man 2 also has a setting where you can dodge all attacks by simply holding the dodge button. To turn this feature on, head to Settings and then select Controls.

Next, scroll down until you get to Continuous Dodge. This should be showing the following description:

When enabled, hold Circle to continuously dodge.
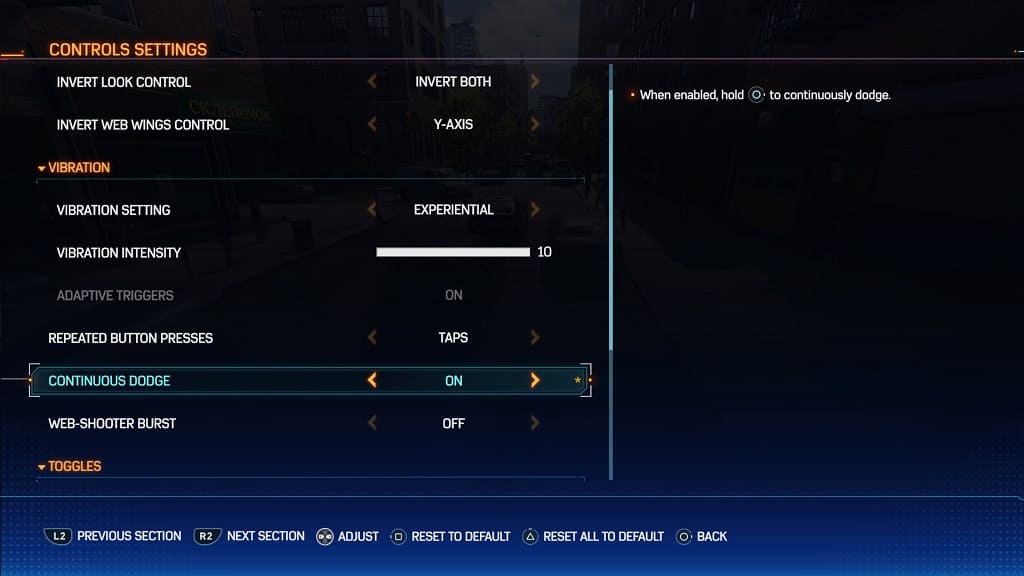
By turning on this feature, you can simply hold down the dodge button and Spider-Man will be able to evade all dodgeable attacks. As a result, you don’t have to worry about timing.

How to turn off crime notifications in Marvel’s Spider-Man 2

When exploring New York City in Marvel’s Spider-Man 2, you will get notified of any ongoing crimes. If you don’t feel like fighting off criminals and find that these notifications to be annoying, then you can check out this Seeking Tech guide to see how you can turn off the messages.

1. For the first step, you need to head over to the Settings screen in Spider-Man 2.

2. Once you get there, select UI.

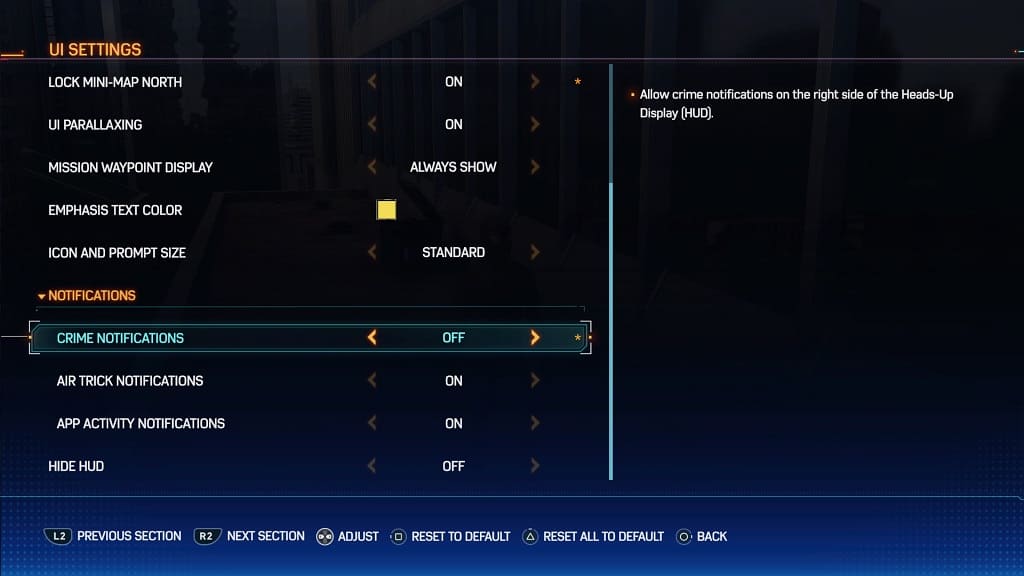
3. From the UI Settings screen, scroll down to the Notification section. You should find Crime Notification there, which has the following description:

All crime notifications on the right side of the Heads-Up Display (HUD).

4. Be default, this setting is set to “ON.” To disable the crime pop-up messages, make sure it is set to “OFF” instead.

5. Afterwards, you can exit the Settings menu and return to playing Spider-Man 2.

You should no longer get any notifications from any nearby crimes.

How to prevent yourself from getting nauseated in Marvel’s Spider Man 2

You may experience motion sickness in Marvel’s Spider Man 2 due to the fast-paced combat and exploration, which cause the camera to move around hastily. To see how you can prevent yourself from feeling nauseated when playing this superhero game, you can check out this article from Seeking Tech.

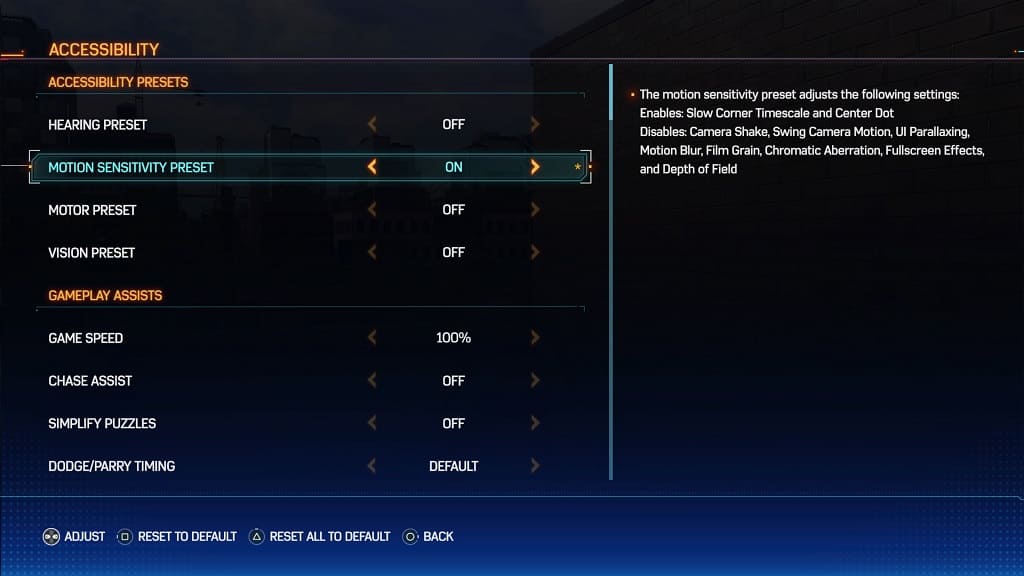
1. Spider-Man 2 offers an accessibility option for those who get motion sick easily while playing videogames.

To turn this on, open the Settings menu in the game and then select Accessibility from there. You should find the Motion Sensitivity Preset from there.

By enabling this setting, you will turn on the following features:

  • Slow Corner Time Scale
  • Center Dot

The following will also be disabled:

  • Camera Shake
  • Swing Camera Motion
  • UI Parallaxing
  • Motion Blur
  • Film Grain
  • Chromatic Aberration
  • Fullscreen Effects
  • Depth of Field

All of these can be turned off individually in the Settings menu as well if you want to disable some of them but keep other features enabled.

2. There are also a few things you can do personally to alleviate the motion sickness symptoms.

If possible, you can try chewing gum while playing Spider-Man 2. Staying hydrated and having a fan blow on your face should also be helpful.

3. If you start to feel nauseated, it is best that you stop playing immediately as soldering on would only lead to you getting sicker.

We recommend that you play until you start feeling motion sickness. You should then stop until you recover and feel normal again. Over time, you should be able to play in longer sessions without experience nausea as you get more familiar with the camera movements in Spider-Man 2.

How to change servers in The Finals

You are able to switch to a different region server in The Finals. To see how you can properly do so in this online multiplayer game, you can take a look at this guide from Seeking Tech.

1. To begin, open the System Menu in the game, this can be done by pressing the Options button on a PlayStation controller or Menu button on an Xbox controller.

2. Next, you need to select Settings from the System Menu.

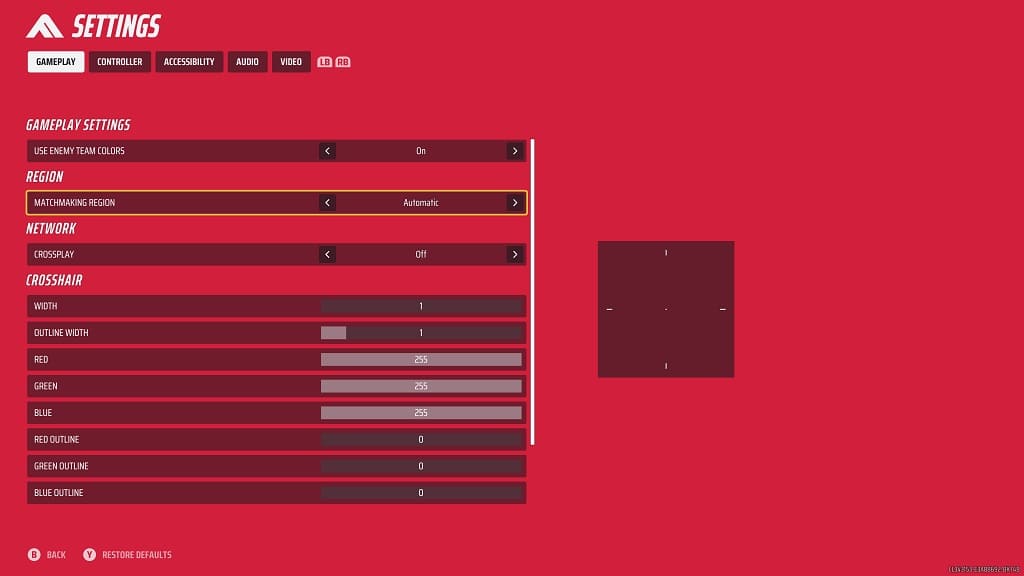
3. You should now be viewing the Gameplay tab in the Settings screen.

If you aren’t, then you can use the L1 and R1 buttons or LB and RB buttons to switch tabs until you get there.

4. Afterwards, move the cursor down to Matchmaking Region.

5. By default, the matchmaking is set to Automatic. Use the right or left directional pad to change it to any of the three following options:

  • Asia
  • Europe
  • North America

6. You can then exit the System Menu.

When you try to play an online match again, you should be connected to the new region server you previously selected.

How to change the field of view in The Finals

If you find the field of view to be too narrow or too wide in The Finals, then you can check out this guide at Seeking Tech to see how you can change it.

1. For the first step, you need to head into the System Menu in the game and then make your way to Settings from there.

If you are playing with a PlayStation controller, you can open the System Menu by pressing the Options button. On Xbox, you need to press the Menu button.

2. In Settings use the L1 and R1 buttons on a PlayStation pad or LB and RB buttons on an Xbox pad to change tabs until you get to Video.

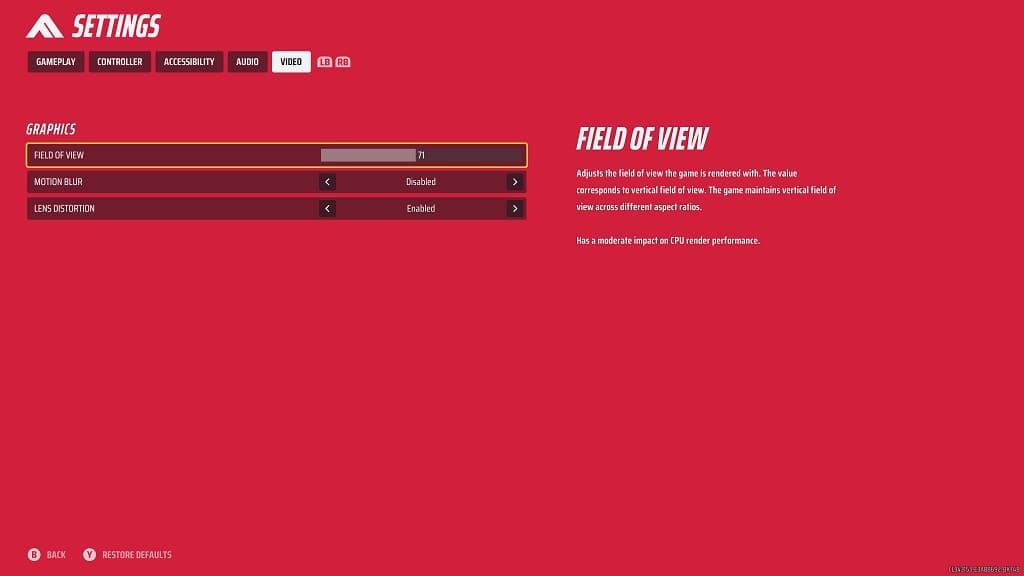
3. From the Video tab, move the cursor down to Field of View. It should be showing the following description:

Adjust the field of view the game is rendered with. The value corresponds to vertical field of view. The game maintains vertical field of view across different aspect ratios.

Has a moderate impact on CPU render performance.

4. The default value for the Field of View is 71. You will be able to narrow the angle all the way down to 45 or all the way up to 100.

How to fix input lag and aiming issues in The Finals

When playing The Finals with a controller, you may notice that there is a fair bit of input lag, which could end up making it harder to aim. To see how you can potentially fix these latency issues, you can take a look at this troubleshooting article from Seeking Tech.

1. For the first step, make sure you have the controller connected to your PC or console. This is because using a wired connection should produce less input delay when compared to wireless communication.

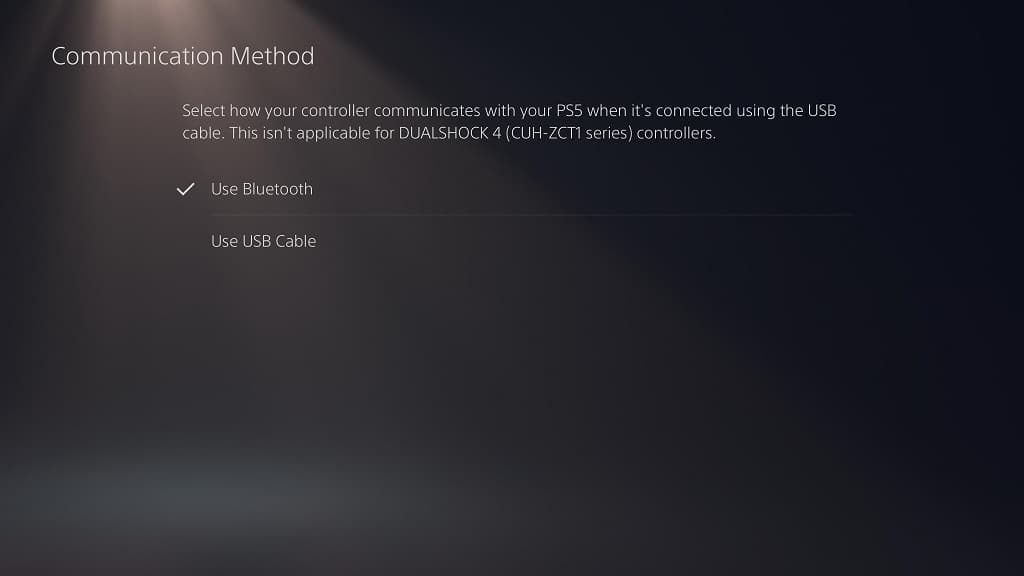
If you are playing The Finals on a PlayStation 5, head over to the console’s Settings menu and then select Accessories > Controller (General) > Communication Method > Use USB Cable.

2. Next, you should make sure you have Game Mode enabled on your TV or monitor. This picture setting will also reduce the input lag.

3. If aiming still does not feel quite right after you reduced the input latency, then you can head into the System Menu in the game and then go to Settings.

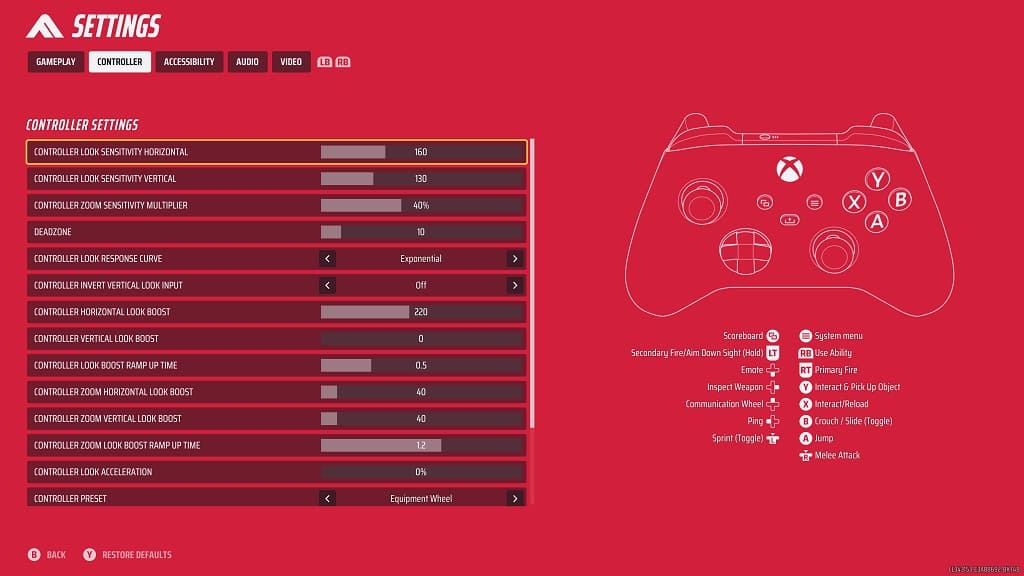
In Settings, navigate over to the Controller tab and you should see the following adjustable options:

  • Controller Look Sensitivity Horizontal
  • Controller Look Sensitivity Vertical
  • Controller Zoom Sensitivity Multiplier
  • Deadzone
  • Controller Look Response Curve
  • Controller Invert Vertical Look Input
  • Controller Horizontal Look Boost
  • Controller Vertical Look Boost
  • Controller Look Boost Ramp Up Time
  • Controller Zoom Horizontal Look Boost
  • Controller Zoom Vertical Look Boost
  • Controller Zoom Boost Ramp Up Time
  • Controller Lock Acceleration

We suggest that you play with all of these settings until aiming feels natural for you in The Finals.

How to block the PS VR2 see-through view from your TV

When playing a PlayStation VR2 game, you can press the Function button to activate the see-through mode. However, this view can end up confusing you if you look straight at your television screen or computer monitor as the screen will mirror what you are seeing.

To see how you can block the PS VR2 see-through view from being shown on TV or monitor, you can check out this guide at Seeking Tech.

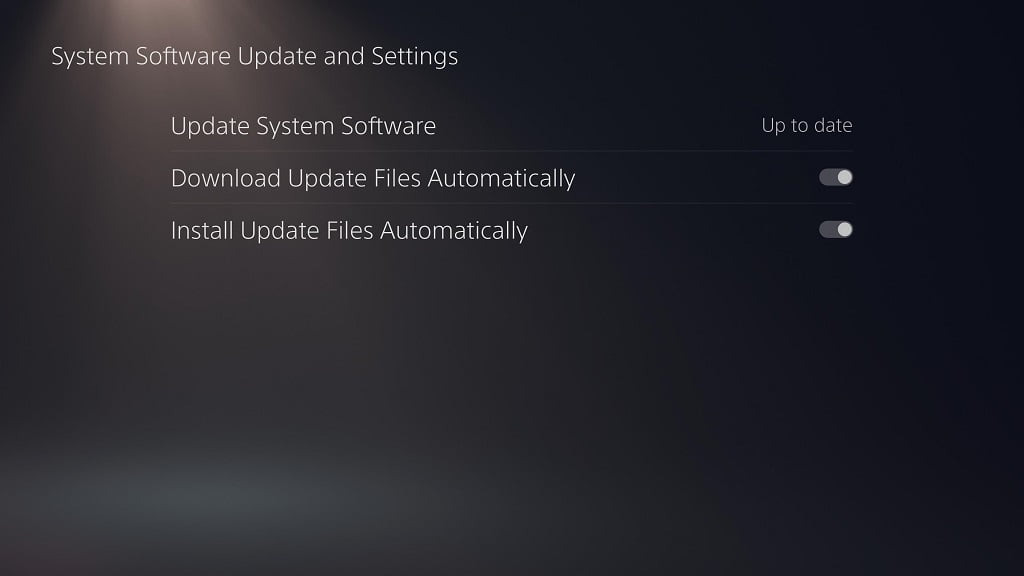
1. If you haven’t done so already, make sure you have the latest firmware installed for your PS5 as the ability to block the see-through mode was added in a recent update.

You can manually update the console by going to Settings > System > System Software > System Software Update and Settings > Update System Software > Update Using Internet.

2. Next, you need to make sure that you connect your PlayStation VR2 to the PlayStation 5 and then turn the virtual headset on.

If prompted, make sure you update the VR headset.

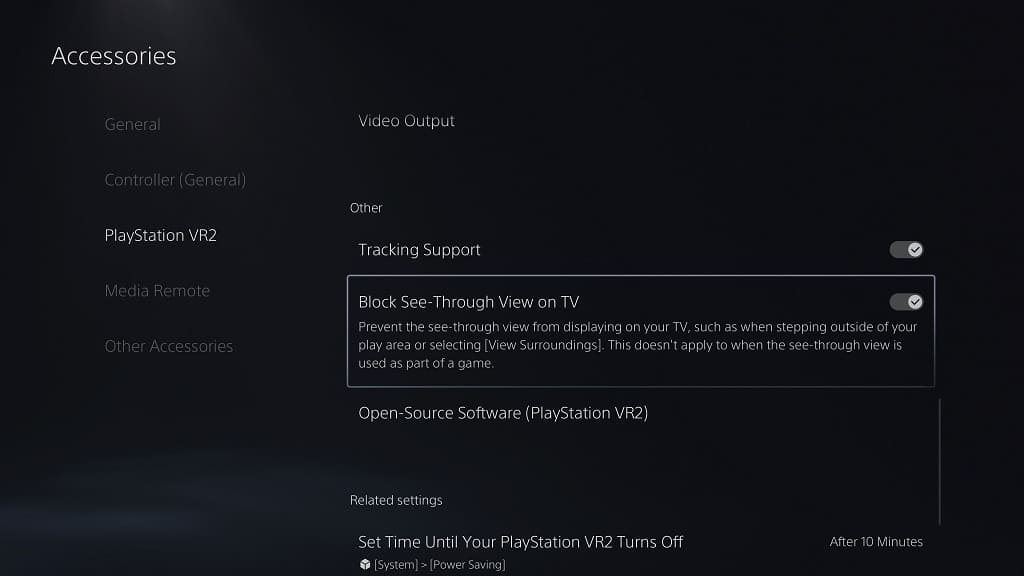
3. Once you have everything set up, go to Settings > Accessories > PlayStation VR2.

If you don’t see the PlayStation VR2 option, then you should check to see if the virtual headset is connected to the PS5 and turned on.

4. From the PlayStation VR2 tab in the Accessories menu, move the cursor down to Block See-Through View on TV. It should show the following description:

Prevent the see-through view from displaying on your TV, such as when stepping outside your play area or selecting [View Surroundings]. This doesn’t apply to when see-through view is used as part of a game.

5. Make sure you set the Block See-Through View on TV setting to On.

The next time you use the see-through view mode, you should no longer see your TV or monitor broadcast it on the screen.

How to disable voice chat in The Finals

Voice chatting is enabled by default in The Finals. If you don’t want to communicate with others while playing this multiplayer first-person shooter, then you can check out this guide at Seeking Tech to see how you can turn off this feature.

1. For the first step, you need to open the System Menu.

If you are playing with a PlayStation controller, then you have to press the Options button. On an Xbox gamepad, you need to press the Menu button.

2. Select Settings from the System Menu.

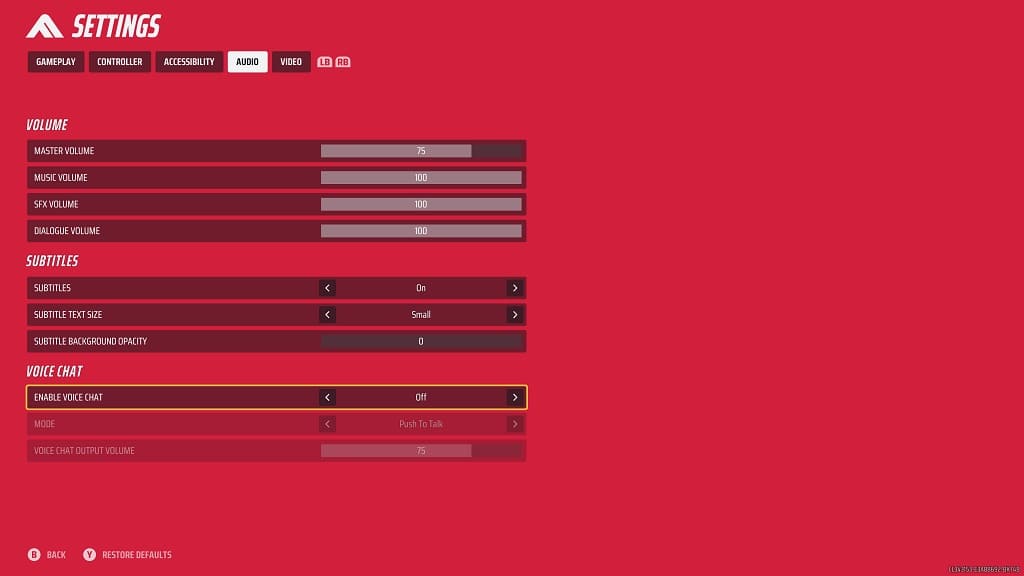
3. Next, you need to switch over to the Audio tab in Settings.

You can change tabs with the L1 and R1 buttons on PlayStation or LB and RB buttons on Xbox in The Finals.

4. Move the cursor down to Enable Voice Chat in the Audio tab.

5. Use the left or right directional pad to set this setting to Off.

If you want to keep voice chat enabled but want to adjust how it is utilized, then you can set the Enable Voice Chat to On. Afterwards, you will be able to switch between the Push to Talk or Open Microphone mode as well as be able to adjust the Voice Chat Output Volume.

6. Once you are done changing the voice communication settings, you can exit the system menu and return to playing the game.

How to turn off chromatic aberration in The Finals

The Finals videogame uses chromatic aberration by default. This visual effect makes objects appear blurrier in order to create a filmic effect.

If you would rather play this multiplayer game without chromatic aberration, then you can check out this Seeking Tech guide to see how you are able to disable it.

1. For the first step, you need to make your way over to the Settings screen in The Finals.

You can do so from the System Menu, which is brought up by pressing the Menu button on an Xbox controller or Options button on a PlayStation gamepad.

2. From Settings, you need to switch over to the Video tab.

You can press the LB and RB buttons on Xbox or L1 and R1 buttons on PlayStation to change tabs.

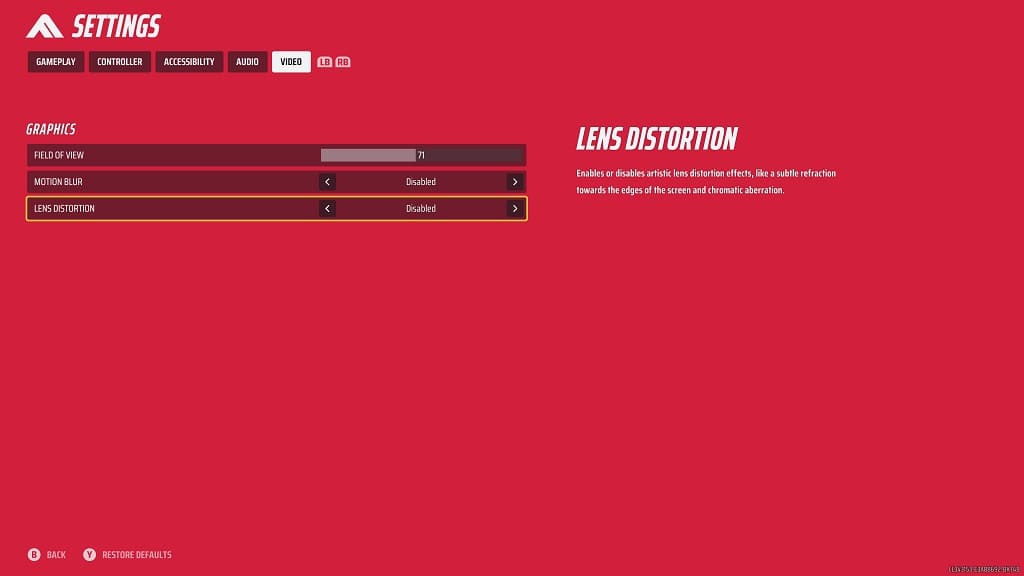
3. Once you get there, move the cursor down to Lens Distortion, which should have the following description:

Enables or disables artistic lens distortion effects, like a subtle refraction towards the edges of the screen and chromatic aberration.

4. Lens Distortion is set to “On” by default. Use the left or right directional pad button to switch it over to “Off.”

5. You can then back out of the Settings menu.

When you start playing a match in The Finals again, you should no longer see any Lens Distortion.

How to make to voice dialogue volume louder in Marvel’s Spider-Man 2

When playing Marvel’s Spider-Man 2, you may find that you have a hard time hearing the dialogue. To see how you can make the voices clearer, you can take a look at this tutorial from Seeking Tech.

1. To start off, head to the Settings screen in the game.

2. From there, make your way to Audio.

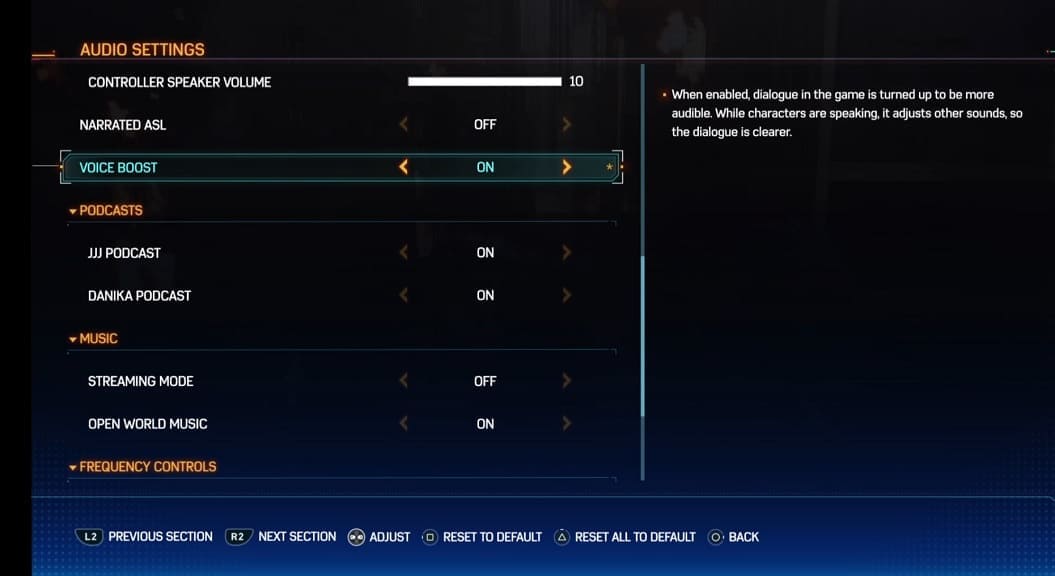
3. In the Audio Settings screen, scroll down and then move the cursor to Voice Boost. This setting should have the following description:

When enabled, dialogue in the game is turned up to be more audible. When characters are speaking, it adjusts other sounds, so the dialogue is clearer.

4. Make sure you set Voice Boost to On.

5. Afterwards, you can close the Settings screen and then return to playing the superhero game.

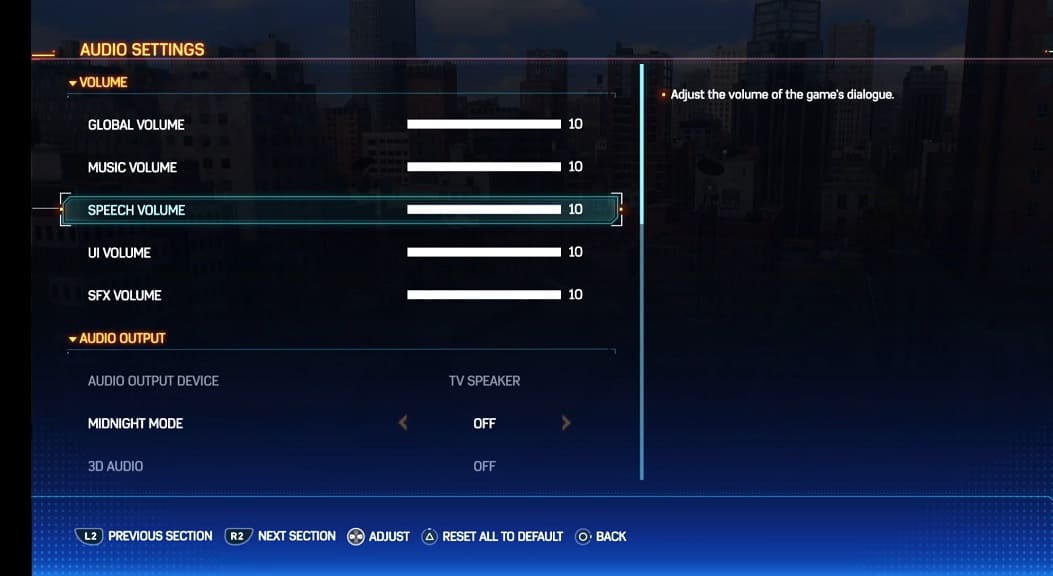
If the dialogue volume is still too low, then you can return to the Audio Settings screen. From there, you can try turning down the Music Volume, UI Volume and SFX Volume sliders while keeping the Global Volume and Speech Volume sliders at the maximum.

Test out the new volume levels to see if the dialogue sounds louder.