How to disable camera shake in Star Ocean: The Second Story R

You may notice that the camera will occasionally shake around in Star Ocean: The Second Story R. If you find that this visual effect to be a little too distracting, then you can check out this guide from Seeking Tech to see how you can lessen or completely disable it.

1. First off, you need to head over to the System Settings menu.

You can get there by pressing the Triangle button on PlayStation or X button on Switch to open the Camp Menu. From there, you can then navigate over to System and then Settings.

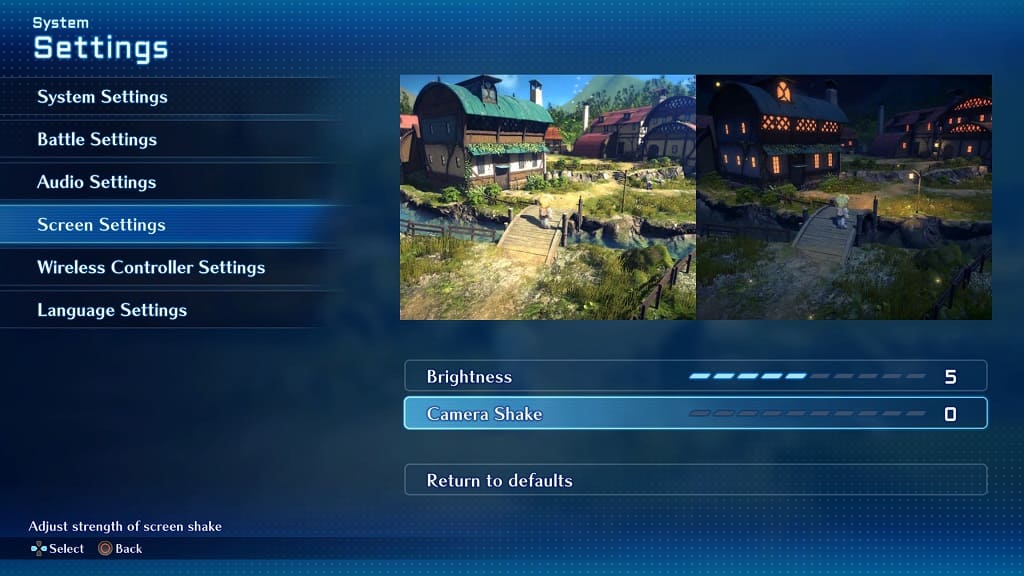
2. Once you get to System Settings, select Screen Settings from the left column.

3. On the right side, you should see the Camera Shake setting, which is set to a maximum value of 10 by default.

4. Use the left analog stick or left directional pad to reduce the Camera Shake effect. To completely disable it, make sure that the value is set to 0.
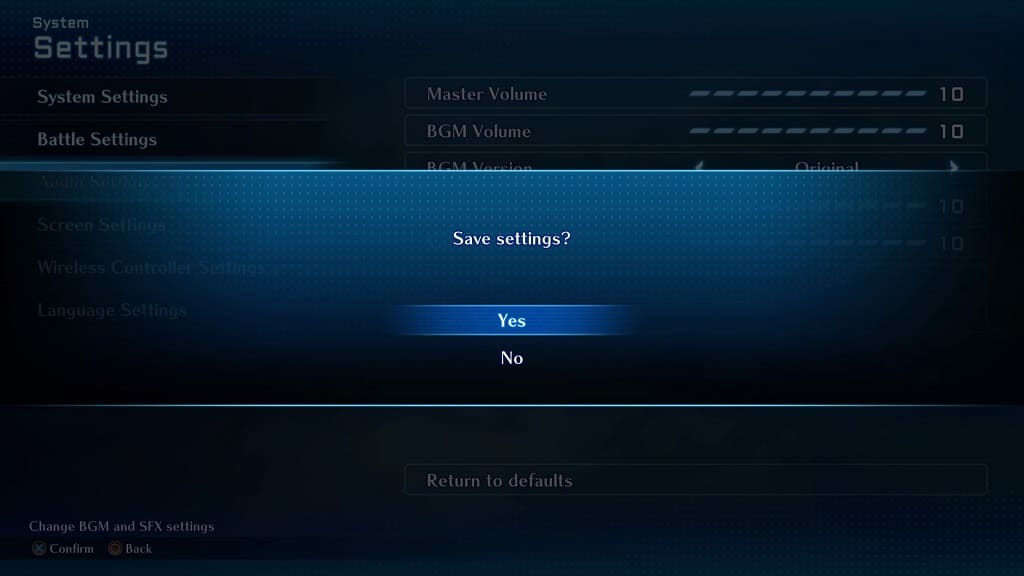
5. Exit the System Settings menu. When you see a message asking if you want to save the change you just made, you need to select Yes.
How to change the voice type in Star Ocean: The Second Story R

Star Ocean: The Second Story was first released for the PS1 and later ported to the PSP under the name of Star Ocean: Second Evolution. For the portable remaster, Square Enix changed the voice acting to the game.

The latest iteration, Star Ocean: The Second Story R, also features new voice overs. To see how you can switch between the voice acting of the latest version to Star Ocean: Second Evolution, you can check out this guide at Seeking Tech.

1. Start off by opening the Camp Menu in The Second Story R and then making your way to System > Settings.

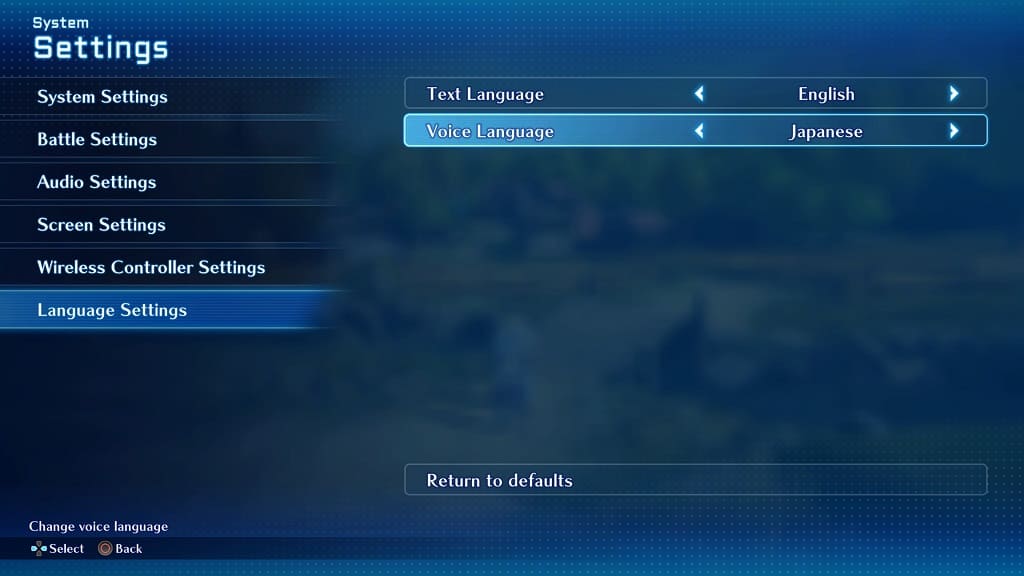
2. You should now be in the System Settings menu. Here, you need to select Language Settings. Afterwards, make sure that Voice Language is set to Japanese.

If you are using English voice overs, then you are limited to using the recordings that were made for The Second Story R.

3. From the same System Settings menu, you need to select Audio Settings.

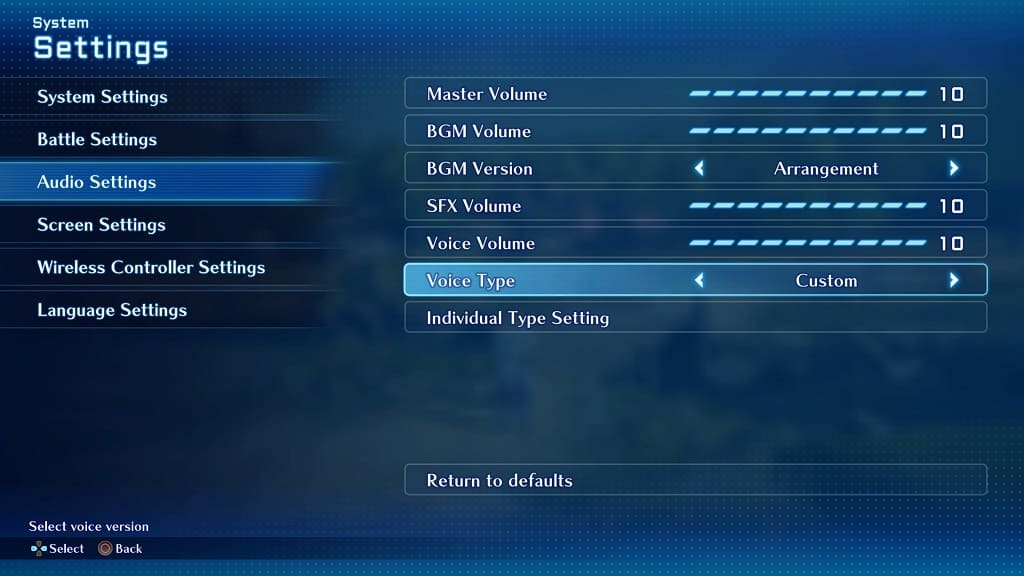
4. Afterwards, move the cursor down to Voice Type. If this is greyed out, then you need to change the Voice Language to Japanese.

5. With Voice Type, you will be able to pick between the following:

  • SOR2
  • SO2SE
  • Custom

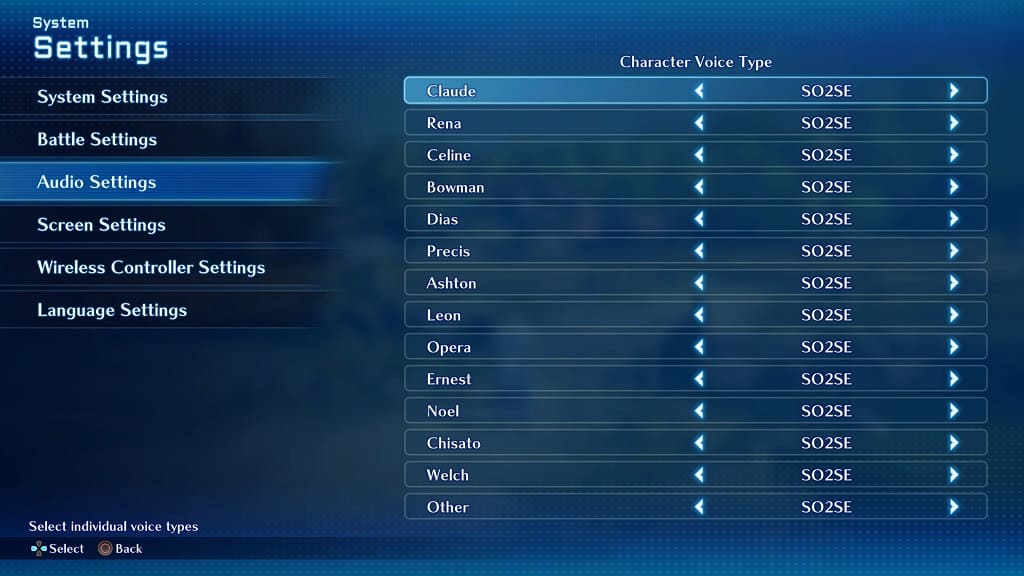
If you chose Custom, the Individual Type Setting becomes selectable. If you select it, you will be taken to a Character Voice Type screen where you can select the voice over for an individual character. The options here include the following:

  • SOR2
  • SO2SE
  • Off

The “Off” option will mute the voice of the individual character.

6. Once you are done, you can exit the System Settings menu and then save your new voice type customization options when asked.

How to automatically skip spell animations in Star Ocean: The Second Story R

While some of the bigger spells in Star Ocean: The Second Story R may look spectacular, these magic attacks will also take a lot of time to animate.

If you are tired of seeing the same animations over and over again, then you can check out this Seeking Tech tutorial to see how you can automatically skip them in battles.

1. To start off, you need to open the Camp Menu. You can do so during exploration by pressing Triangle on a PlayStation pad or X on a Nintendo Switch pad.

2. From the Camp Menu, select System and then head into Settings in the proceeding screen.

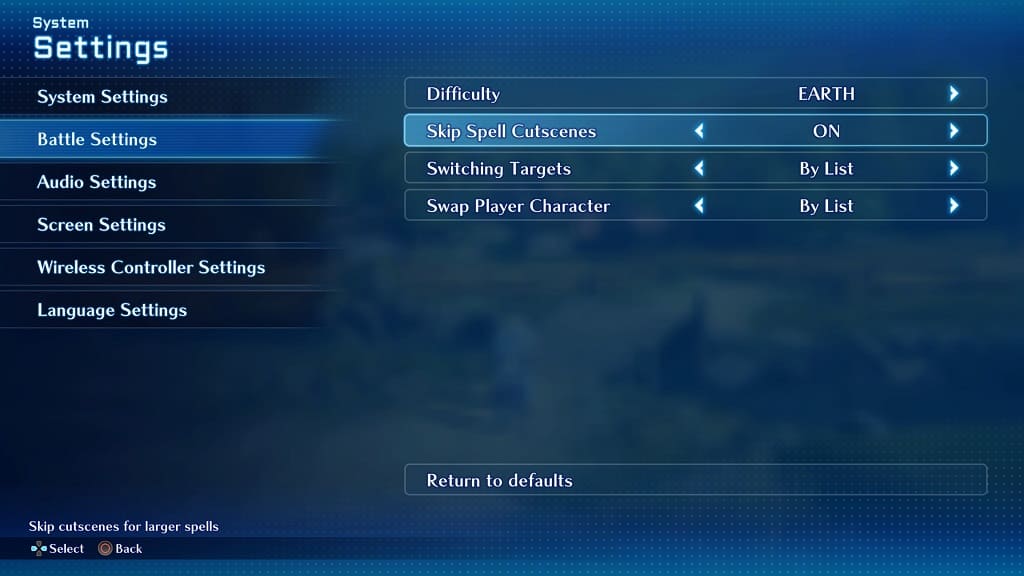
3. Once you get to the System Settings menu, select Battle Settings on the left side.

4. On the right side, you should see the Skip Spell Cutscenes setting. By default, this is set to “Off.”

Use the left analog or directional pad settings to change it to “On” instead.

5. You can then close the System Settings screen. When you do, make sure you select Yes when the game asks if you want to save your new settings.

How to change the voice language in Star Ocean: The Second Story R

Star Ocean: The Second Story R supports both English and Japanese voice-overs. To see how you can change the voice language in the remake of the classic JRPG, you can check out this article from Seeking Tech.

1. Start off by heading over to the System Settings menu.

If you have already loaded into your save file, then you need to press Triangle on a PlayStation gamepad or X on a Nintendo Switch gamepad to open the Camp Menu during exploration.

2. From there, navigate over to System and then Settings.

3. Next, you need to select Language Settings from the left column of the System Settings screen.

4. On the right side, you should be able to find Voice Language.

Use the left analog stick, or left and right directional pad buttons, to switch between English and Japanese voice overs.

5. After you are done changing the voice language, exit out of the System Settings menu. When prompted to save your changes, make sure you select Yes.

How to lower the background music volume in Star Ocean: The Second Story R

You may find that the background music to be a little too loud in Star Ocean: The Second Story R. The BGM may even drown out the voices in the dialogue. To see how you can lower its volume, you can check out this guide from Seeking Tech.

1. For the first step, you need to head over to the System Settings menu.

To do so, open the Camp Menu while exploring the field by pressing the Triangle button on the PlayStation controller or X button on the Nintendo Switch controller.

From the Camp Menu, select System and then Settings.

2. In the System Settings screen, select Audio Settings on the left side.

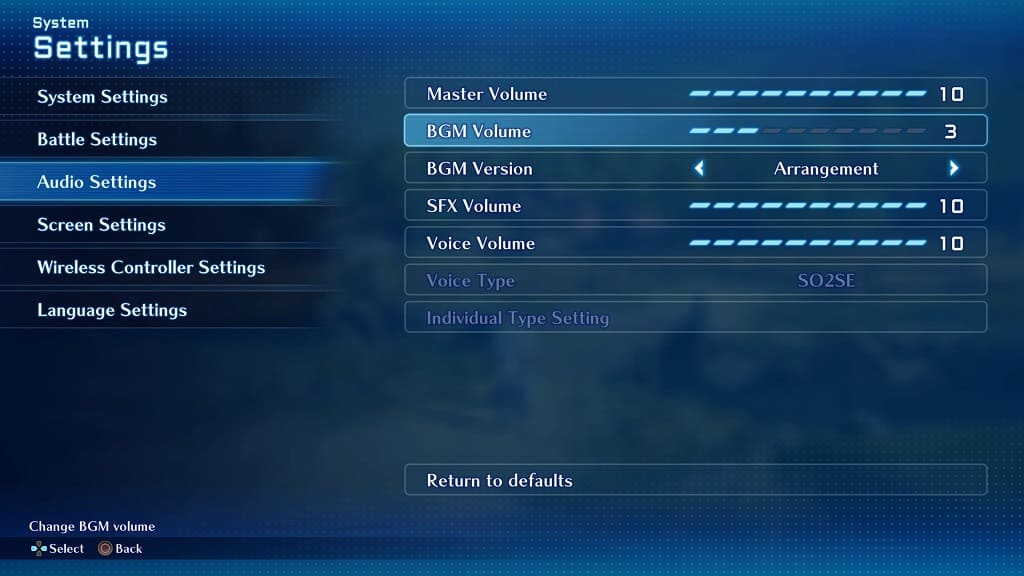
3. On the right side, move the cursor to BGM Volume.

4. By default, the BGM Volume is set to the maximum value of 10.

You need to use the left directional button, or tilt the left analog stick to the left, to decrease the loudness of the background music.

To mute the soundtrack completely, move the slider all the way to 0.

5. Afterwards, back out of the System Settings menu.

Make sure you save your new settings when asked to apply the new volume level for the background music.

How to change the soundtrack in Star Ocean: The Second Story R

While Star Ocean: The Second Story R uses the re-arranged soundtrack by default, you will be able to switch back to the original OST. To find out how you can properly change the BGM in this role-playing game, you can take a look at this tutorial from Seeking Tech.

1. For the first step, open the in-game Camp Menu. This can be done by pressing the Triangle button on the PlayStation controller or X button on the Nintendo Switch controller while exploring the field.

2. From the Camp Menu, select System and then Settings in the following screen.

3. In the System Settings menu, select Audio Settings from the left column.

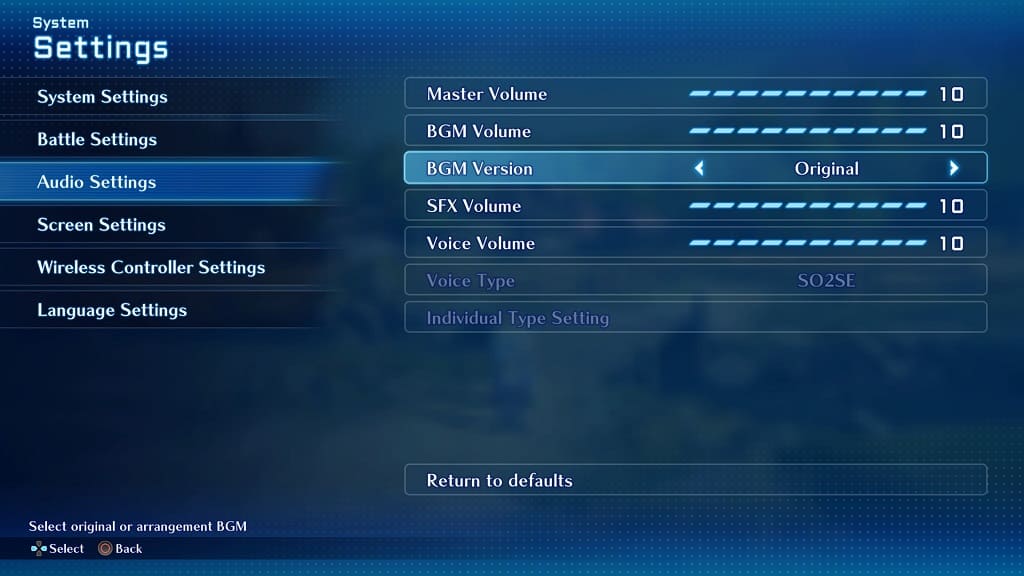
4. On the right side, you should then see BGM Version.

5. By default, BGM Version is set to “Arrangement” in Star Ocean: The Second Story R.

You can tilt the left analog stick to the left or right, or use the left and right directional pad, to change it back to the “Original” soundtrack.

You should hear the background music changed in real-time as you switch between the two options.

6. After you are done, exit out of the System Settings menu. Make sure you select Yes when asked if you want to save your recently changed settings.

How to fix Marvel’s Spider-Man 2 invisible wall issues

When playing Marvel’s Spider-Man 2, your character may end up getting stuck as if he can’t move past the invisible walls surrounding him. To see how you can potentially fix these issues, you can take a look at this guide from Seeking Tech.

Temporary Fix

For a temporary fix, you need to load into an earlier save file. In order to do so, you need to do the following:

If you are still playing the game, then you need to press the Options button to open the in-game menu and then select Quit.

From the main menu, select your Save Slot.

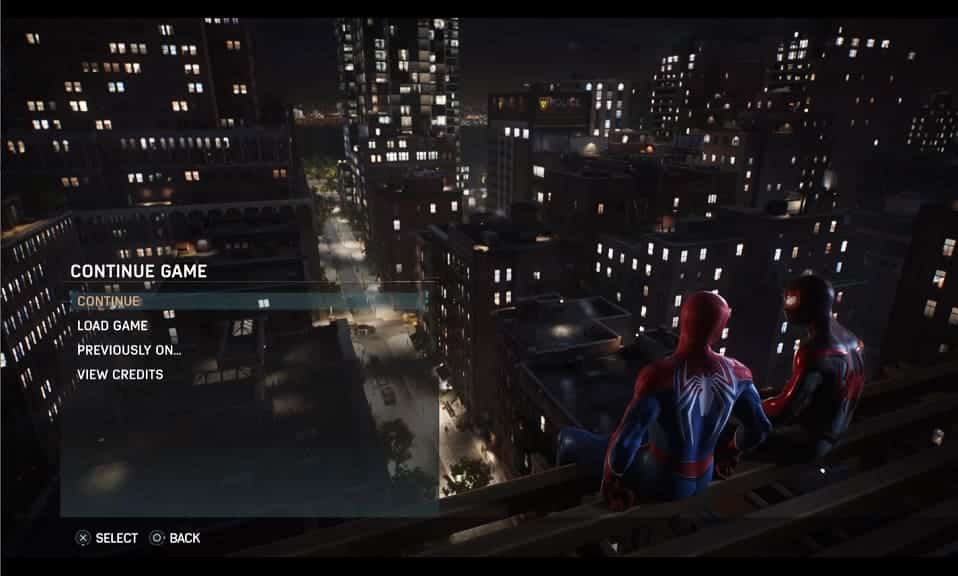
In the Continue Game screen, you can either select Continue to load your most recent save or Load Game to choose between your previous manual or automatic save files. Hopefully, you won’t lose out on a lot of progression.

When you load back into an older save file, try to avoid getting stuck in the same place again.

Permanent Fix

For a more permanent fix, you need to wait until the development team at Insomniac Games addresses the invisible wall issues.

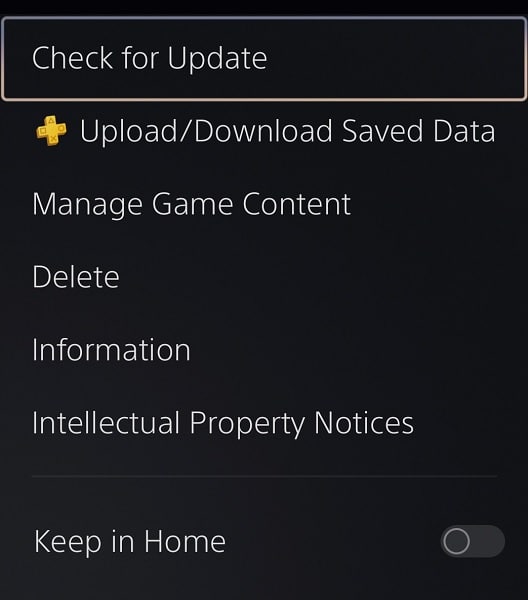
To manually check if a new patch is available for this superhero game, go back to the home screen of the PS5. From there, move the cursor over to the Marvel’s Spider-Man 2 logo and then press the Options button. Finally, select the Check for Update available.

The new update may help reduce the frequency of you getting stuck in the environment geometry.

How to fix Marvel’s Spider-Man 2 overheating issues

In some scenarios, you may see an overheating message when playing Marvel’s Spider-Man 2. This may occur during one of the missions where Miles Morales needs to control a drone or in the Mysterio quest.

To see how you can prevent your PlayStation 5 or PlayStation 5 Digital Edition console from overheating, you can take a look at this guide from Seeking Tech.

1. For the first step, you should make sure that you have enough free air space around your console. Sony recommends that you leave at least 4 inches of empty space surrounding the PS5.

Furthermore, you should also make sure that you leave the system with an open top. Otherwise, the heat will end up getting trapped if something is blocking the top of the console.

2. If the room temperature is hot, then it may cause the console to overheat faster than usual. In this case, you can try cooling the room down by opening the window, using a fan or turning on the air conditioner.

3. You should also make sure that your console isn’t dusty as the particles will be slowing down the airflow needed to cool its internals. If you need to clean your gaming system, then we suggest taking a look at TronicsFix’s helpful video guide below:

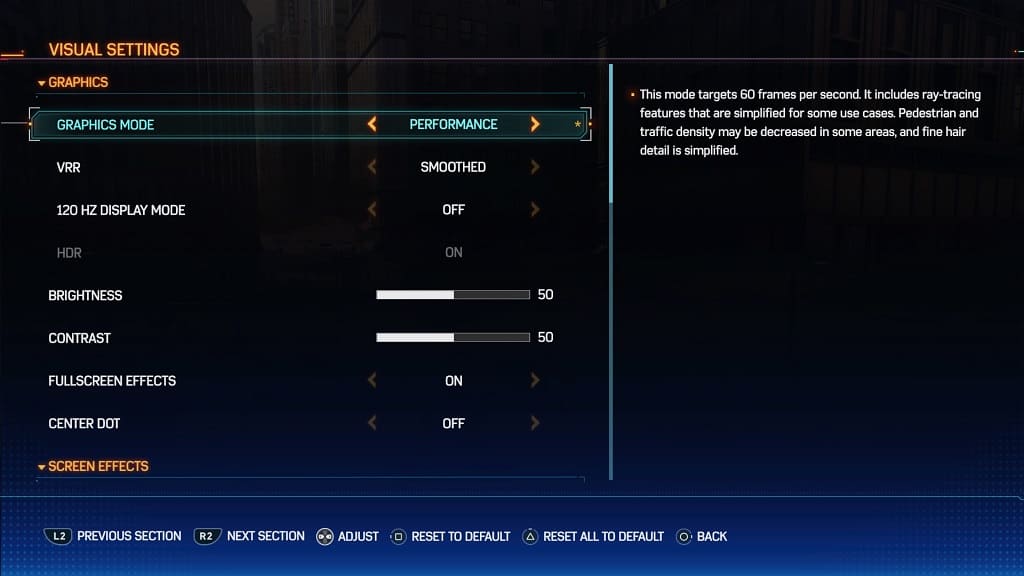
4. You can also try changing the Graphics Mode in Spider-Man 2. You can do so by going to Settings > Visual > Graphics Mode.

5. Make sure you have the latest patch downloaded for the game.

A new update may make the performance more efficient, potentially leading to less hardware usage and, therefore, lessen the chance of the console overheating.

6. You should also check to see if you have the latest firmware downloaded and installed for your PlayStation 5 as well.

How to hide the HUD in Marvel’s Spider-Man 2

Marvel’s Spider Man-2 features a somewhat intrusive heads-up display, especially during combat sequences. If you would like to hide the HUD in this open-world superhero game, then you can check out this guide from Seeking Tech to see how you can properly do so.

1. To begin, you need to head into the Settings menu and then select UI.

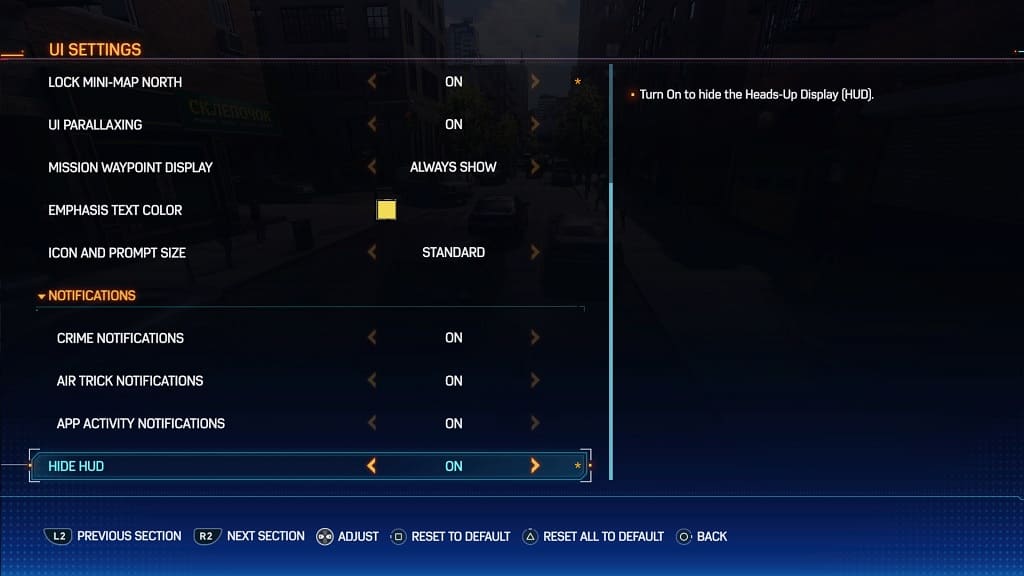
2. You should now be in the UI Settings menu, which is where you need to scroll down and then move the cursor over to Hide HUD. This option should be showing the following description:

Turn On to hide the Head-Up Display (HUD).

3. By default, the Hide HUD option is set to “Off.” To make the heads-up display invisible, make sure you set it to “On” instead.


4. Afterwards, exit out of the Settings menu and then return to playing Spider-Man 2. You should notice a more immersive experience due to the lack of overlayed menus during combat and exploration.

How to disable controller hints in Marvel’s Spider-Man 2

When playing Spider-Man 2, you may occasionally see controller hints appear on the bottom left side of the screen. If you find that these pop-ups to be too distracting and/or unhelpful, then you can check out this guide at Seeking Tech to see how you can disable the messages.

1. Open up the in-game Settings menu if you haven’t done so already.

2. Select UI from the Settings screen.

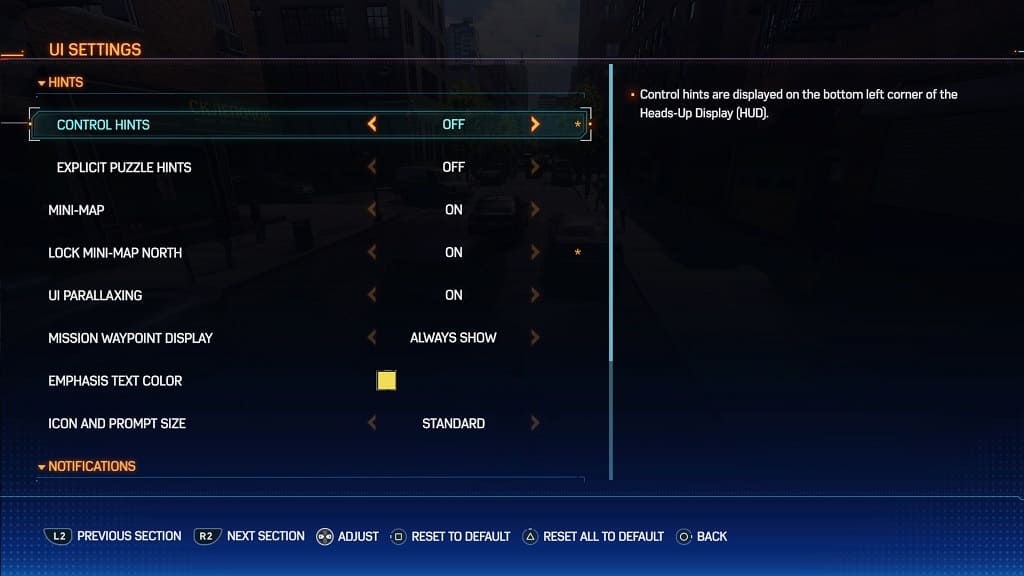
3. In the UI Settings menu, you should see the Control Hints option, which has the following description:

Control hints are displayed on the left corner of the Heads-Up Display (HUD).

4. By default, the Control Hints option is set to “On.” To disable these tutorials, you need to set it to “Off.”

5. After disabling the hints, exit the Settings menu.

When you return to playing Spider-Man 2, you should no longer see these messages appear.