How to turn off bloom in Helldivers 2

If you find the graphics in Helldivers 2 to be overly bright, then it may be due to bloom. To see how you are able to turn off this effect in this online cooperative game, you can check out this tutorial from Seeking Tech.

1. Start off by opening the in-game menu and then heading into Options from there.

2. You should then select Visuals on the left side.

3. On the right side, move the cursor over to Bloom, which has the following description:

Enabling this setting makes bright surfaces grow.
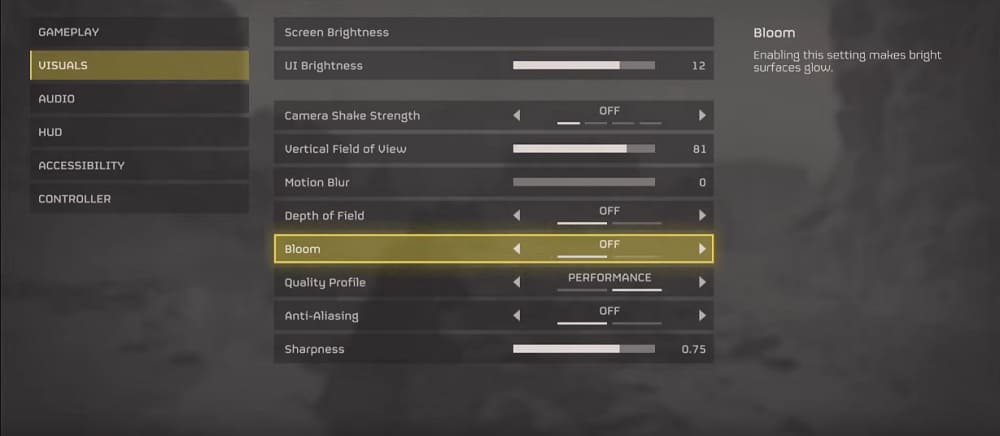
4. Make sure the Bloom setting is set to Off and then return to the game.

The graphics should no longer appear to be too bright.

How to disable depth of field in Helldivers 2

Helldivers 2 uses depth of field by default. If you don’t like the blur this effect adds to the visuals, then you can check out this article from Seeking Tech to see how you can disable it.

1. Begin by opening the in-game menu, if you haven’t done so already, and then make your way to the Options section.

2. Once you get there, select Visuals on the left column.

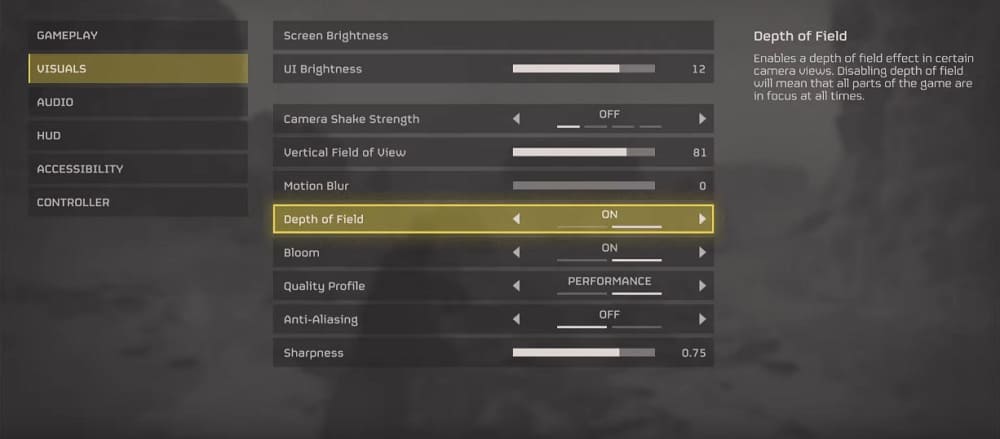
3. On the right side, move the cursor down to Depth of Field. It should show the following description:

Enables a depth of field effect in certain camera views. Disabling depth of field will mean all parts of the game are in focus at all times.

4. Make sure that the Depth of Field is set to Off and then exit the menus.

The blur should now go away in the game.

How to turn off motion blur in Helldivers 2

Motion blur is enabled by default in Helldivers 2. If you find that this visual effect is making the graphics blurrier than you would like, then you can check out this Seeking Tech guide to see how you can turn it down or disable it completely.

1. Open the in-game menu and then head to Options from there.

2. Afterwards, select Visuals on the left side.

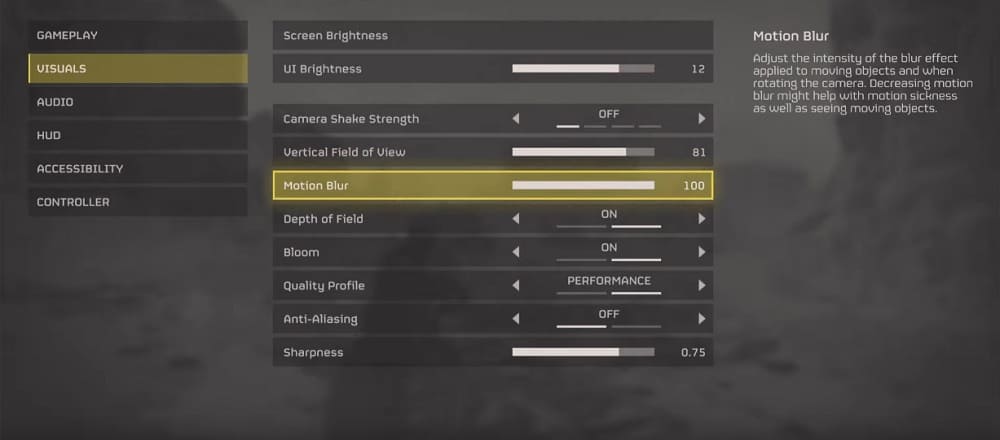
3. On the right side, move the cursor down to Motion Blur. The following description should appear on the right side:

Adjust the intensity of the blur effect applied to moving objects and when rotating the camera. Decreasing motion blur might help with motion sickness as well as seeing moving objects.

4. Reduce the blur effects by moving the slider to the left. To completely disable it, move it all the way to the left until you reach 0.

5. Return to the game and test it out to see if you prefer the graphical setting. If not, you can re-adjust in the menu.

How to change the field of view in Helldivers 2

If you find that the camera is too close to your character in Helldivers 2, then you can check out this guide at Seeking Tech to see how you can widen the field of view.

1. If you haven’t done so already, open the in-game menu and then navigate over to Options.

2. Next, select Visuals on the left side.

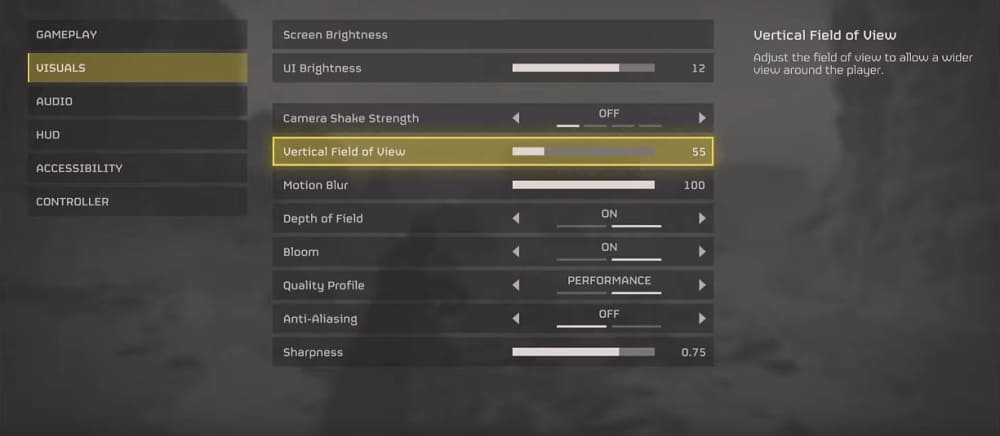
3. On the right side of the same screen, move the cursor down to Vertical Field of View. You should see the following description:

Adjust the field of view to allow a wider view around the player.

4. To widen the FoV, move the slider to the right.

5. Exit the menu and go back to playing Helldivers 2. If you need to re-adjust the angle, you can return to the Options > Visuals screen.

How to disable camera shake in Helldivers 2

By default, the camera will shake around in Helldivers 2. If you find the movement to be too distracting, especially during combat, then you can check out this tutorial at Seeking Tech to see how you can turn it off.

1. To begin, open the pause menu and then switch over to the Options tab.

2. From there, select Visuals on the left column.

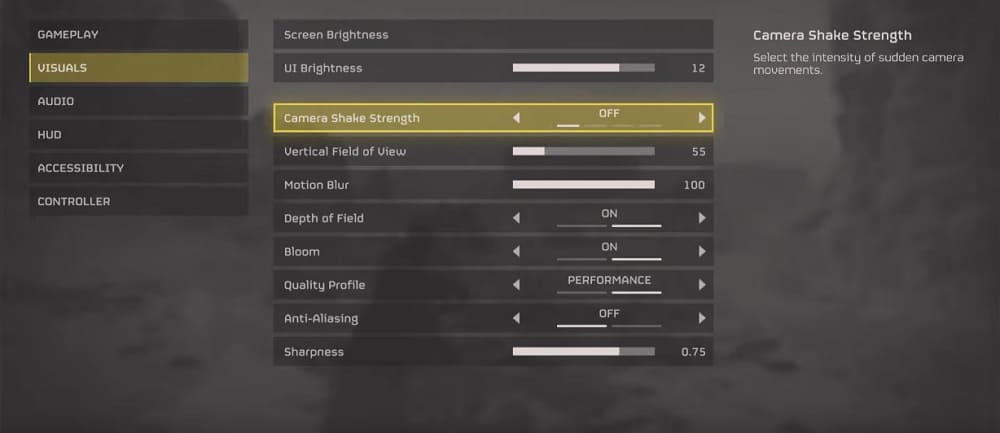
3. On the right side, move the cursor down to Camera Shake Strength. It should have the following description:

Select the intensity of sudden camera movements.

4. Make sure that the Camera Shake Strength setting is set to Off.

When you return to playing Helldivers 2, the in-game camera should no longer shake around.

How to turn off motion blur and depth of field in Skull and Bones

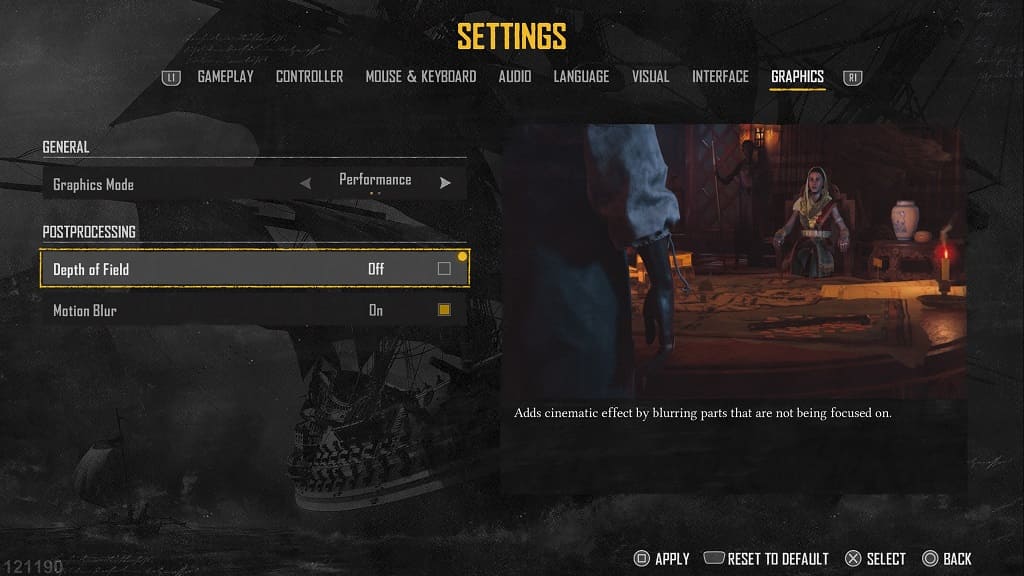
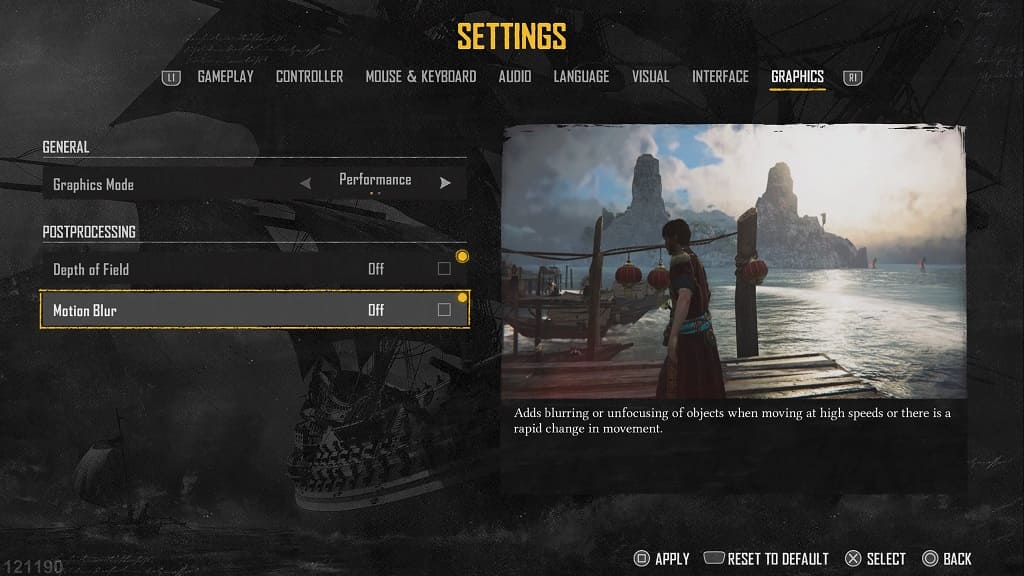
Skull and Bones uses motion blur and depth of field by default. If you find these visual effects to be a hindrance, then you can check out this guide at Seeking Tech to see how you can disable them.

1. Open the Settings screen if you haven’t done so already.

2. From there, head over to the Graphics tab.

3. You should now see the following options:

Depth of Field: “Adds cinematic effect by blurring parts that are not being focused on.”

Motion Blur: “Adds blurring or unfocusing of objects when moving at high speeds or there is a rapid change in movement.”

4. Make sure that both settings are set to Off and then apply the change.

How to make the sails invisible during combat in Skull and Bones

The sails on your ship can block your vision during combat. If you want to make them invisible, then you can check out this guide at Seeking Tech to see how you can properly do so.

1. Open the Settings menu if you haven’t done so already.

2. You should be in the Gameplay tab, where you need to scroll down until you see the Dither Sails in Combat setting. It should have the following description showing on the right side of the screen:

Determines if sails should be dithered (make see through) when in combat using the external camera.

3. Make sure that the Dither Sails in Combat setting is set to On.

4. Exit the Settings menu.

During combat, the sails on your ship should now be invisible.

How to turn off adaptive triggers in Skull and Bones

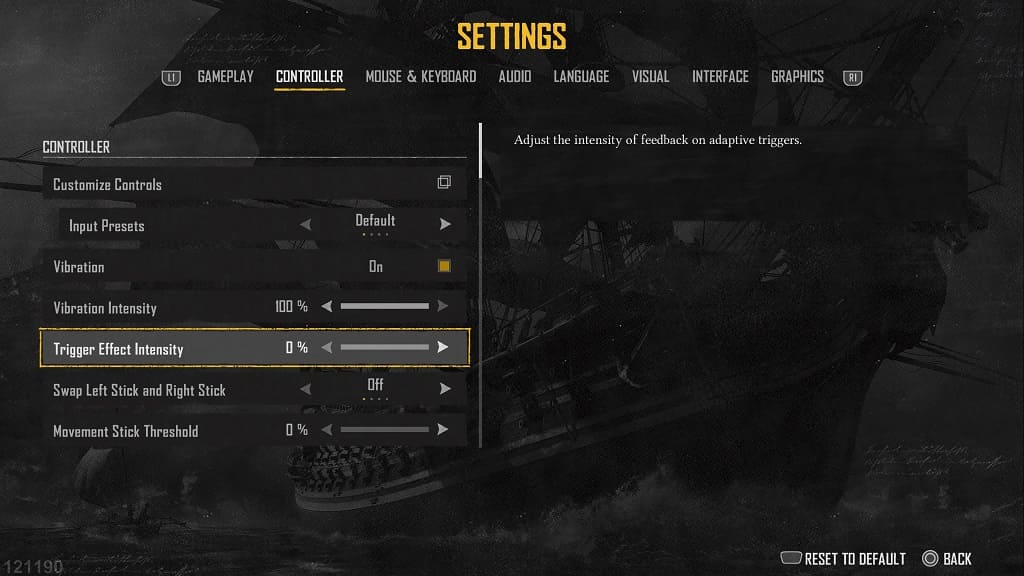
Skull and Bones support the adaptive triggers of the DualSense as you will feel resistance when pressing down on the L2 and R2 buttons. If you would rather disable this controller feature, then you can check out this guide from Seeking Tech to see how you can do so.

1. To begin, head over to the Settings menu and then view the Controller tab.

2. From there, scroll down to Trigger Effect Intensity. You should see the following description on the right side:

Adjust the intensity of feedback to adaptive triggers.

3. Move the slider all the way down to 0%.

4. Exit the Settings menu.

When you return to playing Skull and Bones, you should no longer feel any resistance when pressing down on the L2 and R2 buttons.

How to disable camera shake in Skull and Bones

The camera will shake on its own by default in Skull and Bones. If you want to disable this visual effect so that you can see better, you can check out this guide at Seeking Tech.

1. To start off, head over to the Settings menu.

2. From there, you need to go to the Gameplay tab if you aren’t there already.

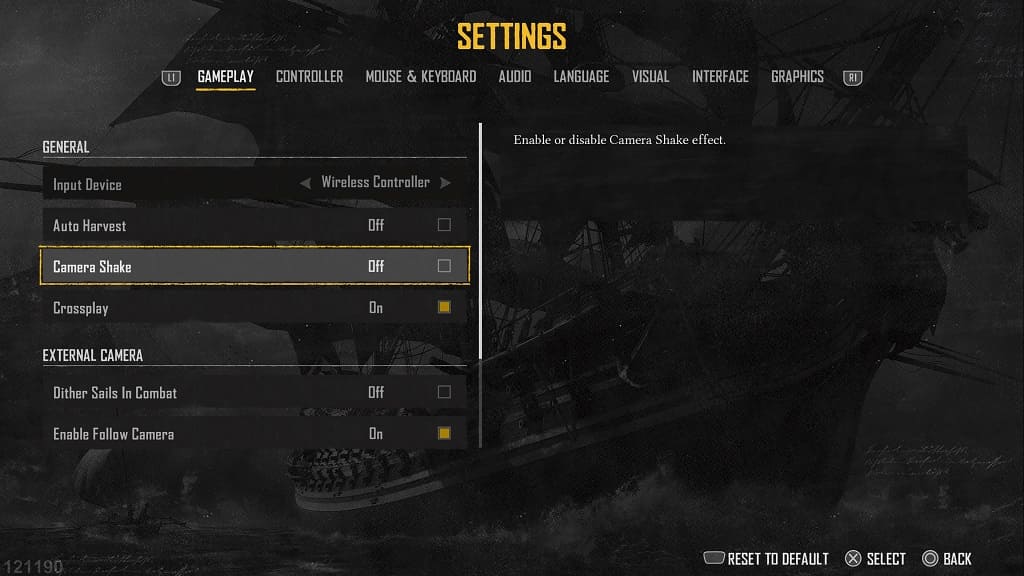
3. Next, scroll down to Camera Shake. It should show the following description:

Enable or disable Camera Shake effect.

4. Make sure that this setting is set to Off and then exit the Settings menu.

The in-game camera should no longer shake.

How to disable crossplay in Skull and Bones

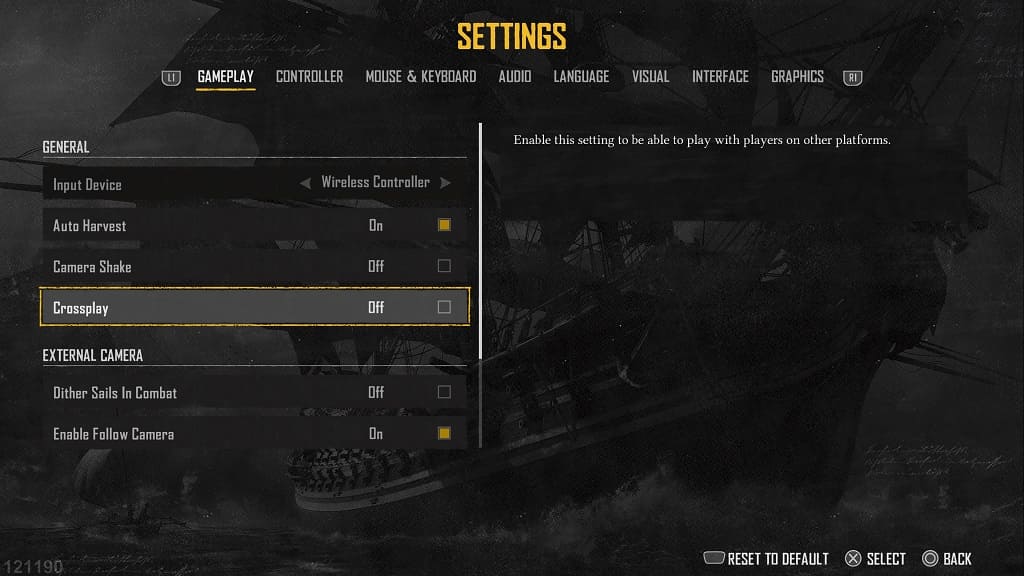
Cross platform matchmaking is enabled by default in Skull and Bones. If you would like to turn this feature off, then you can check out this Seeking Tech guide to see how you can properly do so in this online title.

1. If you haven’t already, exit the game and head back out to the Main Menu.

2. From there, go to Options and then select Settings.

3. In Settings, make sure you are viewing the Gameplay tab.

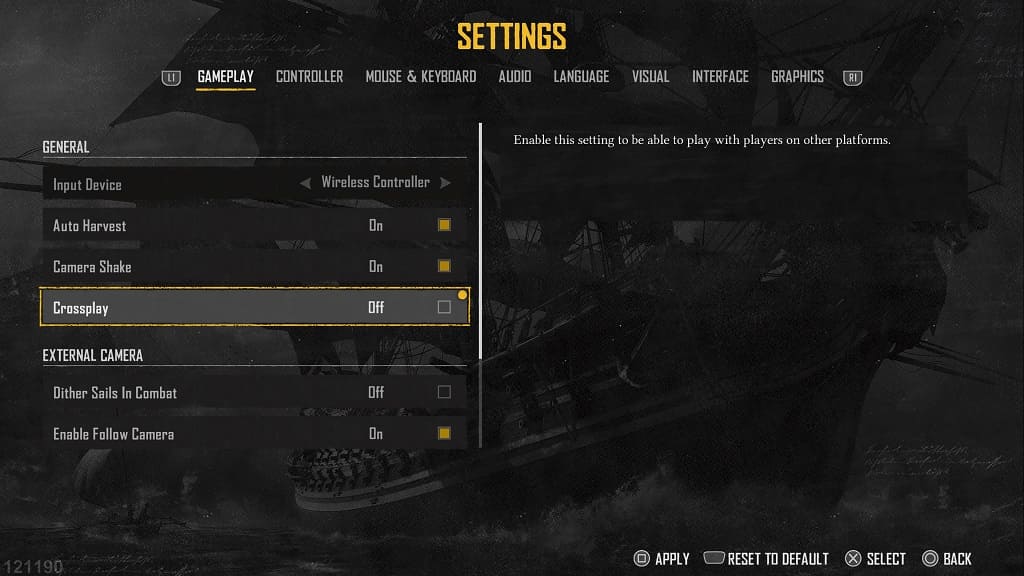
4. Next, scroll down to Crossplay. You should see the following description:

Enable this setting to be able to play with players on other platforms.

5. Make sure that the Crossplay setting is set to Off and then exit the Settings menu.

You should now only be matched up with other players from the same platform.