How to fix Final Fantasy XVI input lag issues

You may find that your button inputs aren’t as responsive as you would like when fighting against enemies in the intense combat of Final Fantasy XVI. To see how you can reduce the input latency in this action-heavy role-playing game, you can take a look at this troubleshooting article from Seeking Tech.

1. To start off, we recommend checking the settings of your television. Most modern TVs come with a picture setting that reduced input lag when playing videogames such as Final Fantasy 16.

Try to look for and enable Game Mode, Game Optimizer Mode or something similar.

2. If you haven’t done so already, you should make sure that you are prioritizing frame rate in the game. To change the graphics mode, go to the System Menu in Final Fantasy XVI and then switch over to the Graphics Settings tab. From there, make sure that Game Performance is set to Frame Rate.
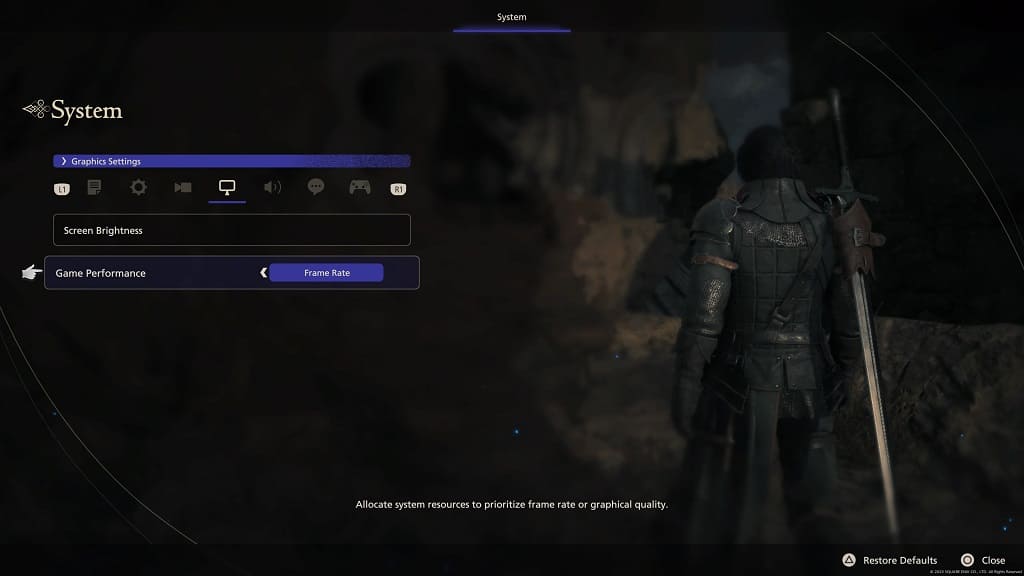
By doing so, you will be able to play the game at up to 60 frames per second, which should result in less input delay due to higher frame rate.

3. If your TV or monitor supports Variable Refresh Rate, then you should turn this feature on from the screen’s settings menu.

Afterwards, go to the home screen of your PlayStation 5 and then select the gear icon on the top right corner of the screen. Once you get to the Settings menu, go to Screen and Video > Video Output > VRR. Finally, make sure to set VRR to Automatic.
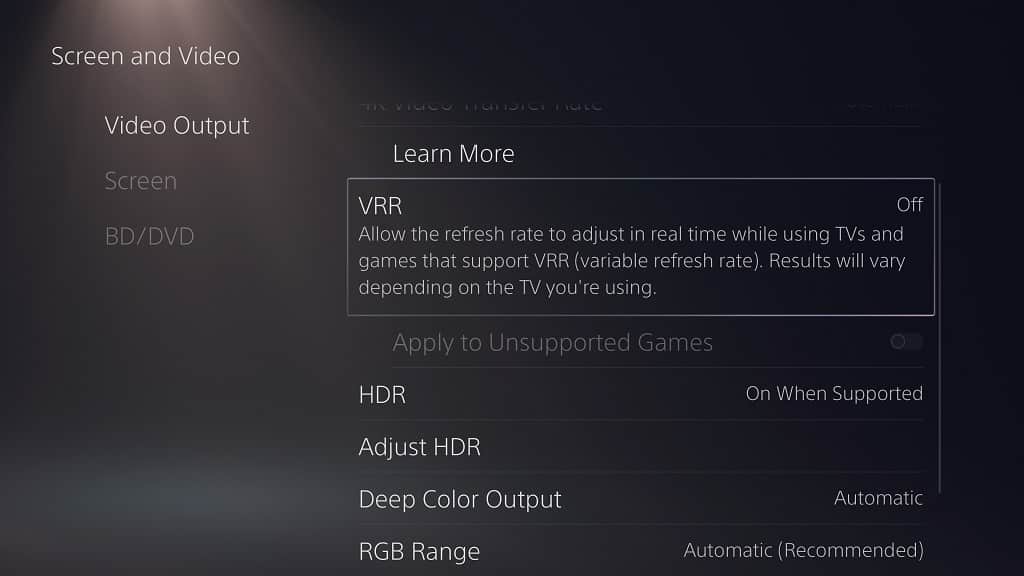
Variable Refresh Rate will help remove any stutters if the frame rate drops to as low as 48 fps. Therefore, you should experience less input delay.

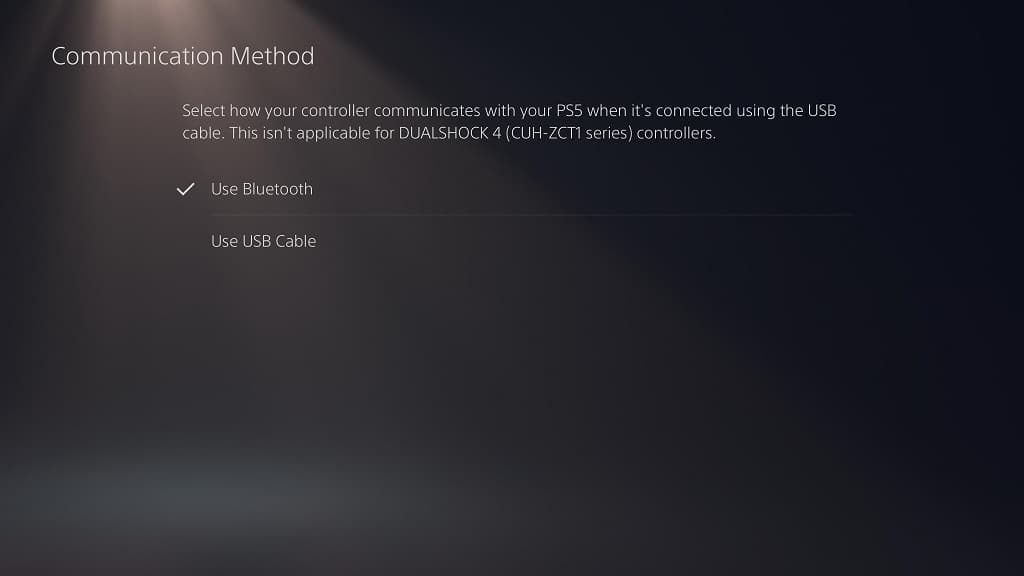
4. If your DualSense is connected to your PlayStation 5 wirelessly, then it may lead to more input lag. If you don’t mind being tethered, then we recommend connecting the controller via a USB cable to your console in order to reduce latency in Final Fantasy XVI and other games.

Once you do, go back to the Settings menu of your PS5. From there, select Accessories > Controller (General) > Communication Method. Make sure that you have the Use USB Cable selected from the Communication Method menu.
5. Of course, you should also check to see if there is a new patch available to download. Square Enix has previously confirmed a launch day patch that improves the performance of the game, which should hopefully mean less input latency as well.

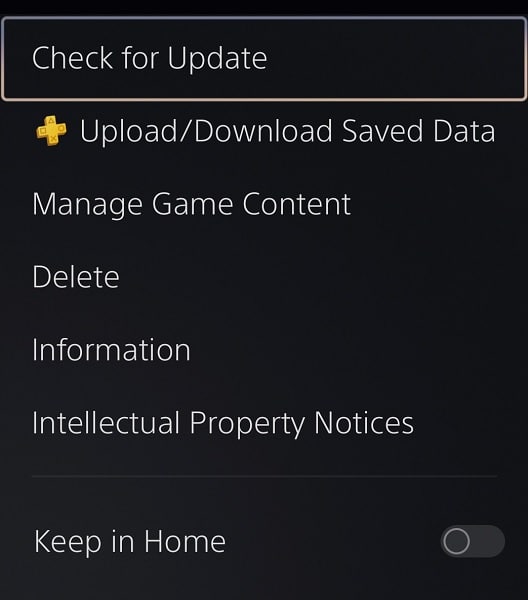
To check if there is a new patch to download and install, move the cursor over to the Final Fantasy XVI game icon from the home screen and then press the Options button. You can then select the Check for Update option.
How to access the Final Fantasy XVI photo mode and take screenshots

You might want to take a bunch of photos while going through your journey in the impressive looking Final Fantasy XVI. To see how you can access the photo mode in this Japanese role-playing game, you can check out this tutorial from Seeking Tech.

1. If you haven’t done so already, make sure you load into your save file in Final Fantasy 16.

2. Afterwards, play through the game until you get to a gameplay sequence where you want to take a photo of. Once you get to that point, press the Options button as soon as possible.

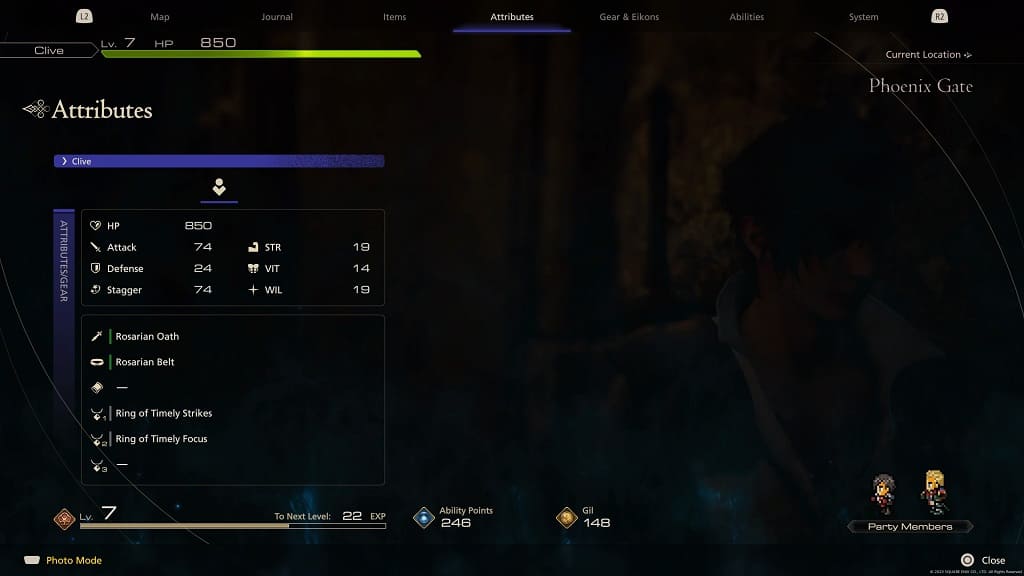
3. You should now be in the Main Menu in the game. Here, you need to use the L2 and R2 shoulder buttons to navigate to the Attributes menu.

4. Once you get to the Attributes menu, you should see an icon located on the bottom left of the screen showing that you can access the Photo Mode by pressing down on the touch pad of the DualSense.

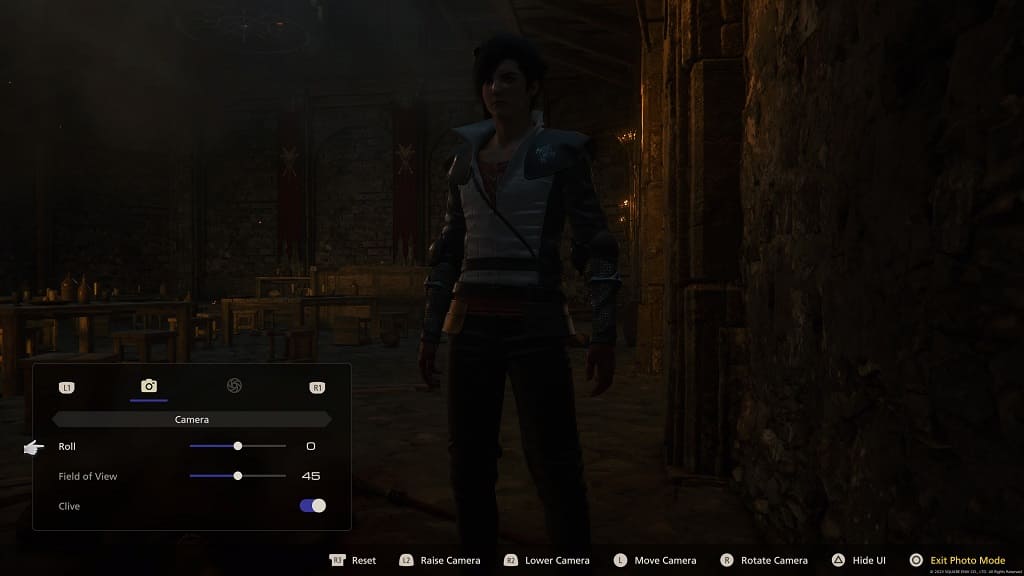
5. After pressing on the touch pad, you should be taken to the Photo Mode. This menu should show the exact moment where you pause the game.

You should see the following control options located at the bottom:

  • R3: Reset
  • L2: Raise Camera
  • R2: Lower Camera
  • L: Move Camera
  • R: Rotate Camera
  • Triangle: Hide UI
  • Circle: Exit Photo Mode

On the bottom left corner, you should also adjust the Camera Roll, Field of View as well as whether or not you want Clive to appear in the shot.

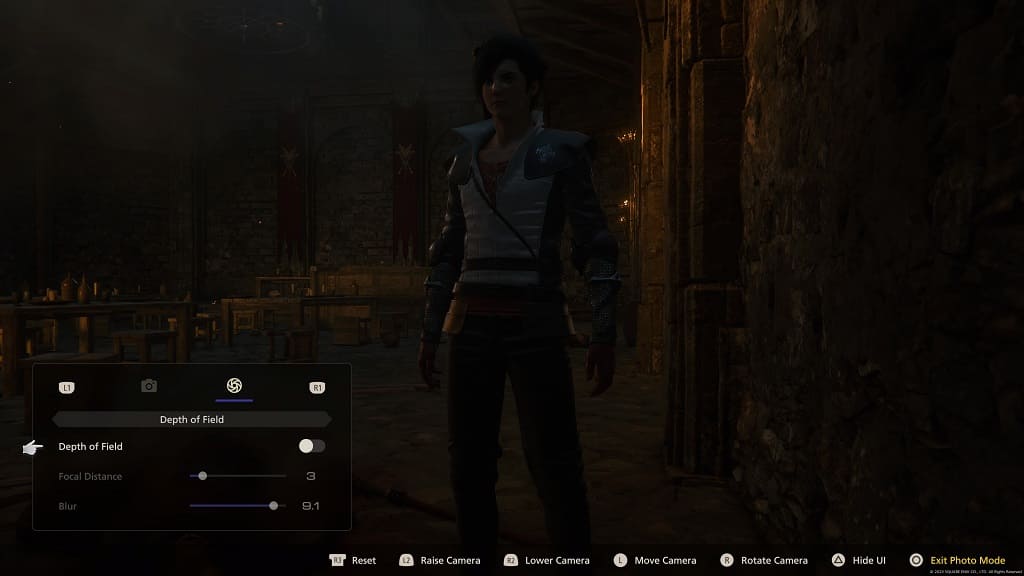
If you press R1, the bottom left corner menu will switch over to the Depth of Field setting. Here, you can choose if you want to enable to disable this visual effect. If you want to turn it on, then you will also be able to adjust its Focal Distance and Blur.

6. Once you got the right camera angle and visual effects, then you can press the Triangle button to hide the user interface of the photo mode.

7. Afterwards, press the Create button in order to take a screenshot.

8. You can find your created photo by doing the following:

Press and hold the PS logo button to open the home screen of your PlayStation 5 or PlayStation 5 Digital Edition console.

  • Go to Settings from the home screen.
  • Head over to Storage from the Settings menu.
  • Select Console Storage and then Media Gallery from the Storage menu.

You should find your newly created photo in the Media Gallery. You can also use this menu to share, delete or further edit the screenshot.

How to change subtitle size, background and more in Final Fantasy XVI

You can change the way the subtitles look, including the size and background, in Final Fantasy XVI. To find out how you can properly do so for this Japanese role-playing game, you can take a look at this tutorial from Seeking Tech.

1. To change the way subtitles look, you first need to go to the System Menu.

If you haven’t loaded into your save file, then you can select Config from the title screen.

If you loaded into your game, then you need to first press the Options button to open the Main Menu. From there, use the L2 and R2 buttons to move over towards the System Menu.

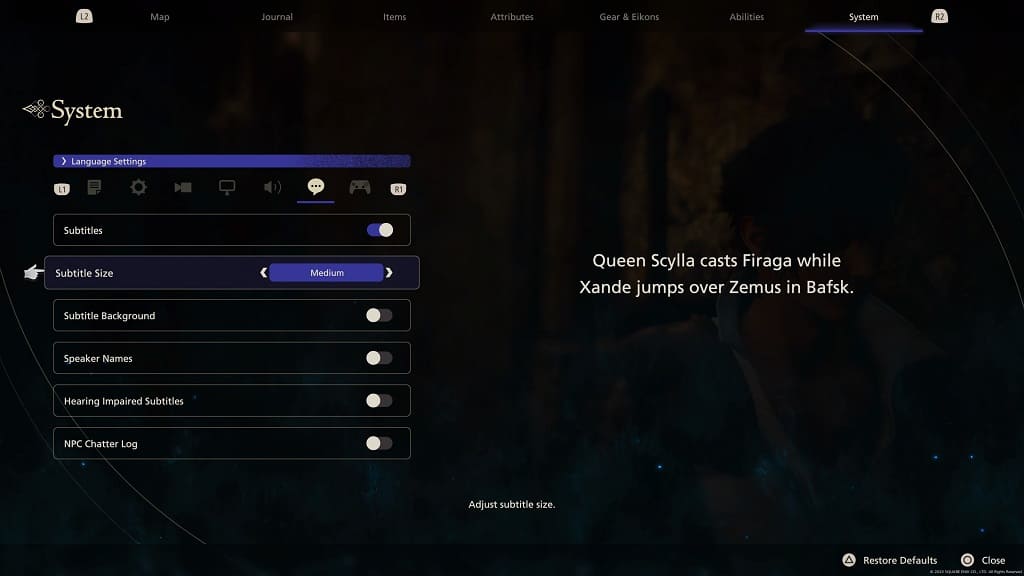
2. Inside of the System menu, use the L1 and R1 buttons to change tabs until you get to Language Settings.

3. Subtitles are automatically enabled in Final Fantasy 16. You can use the Subtitles option in the Language Settings to turn it off completely.

4. If you want to keep the subtitles but change how it is displayed, then you can use the Subtitle Size setting to change the font size. By default, this is set to Medium as you can also change it to Small or Large.

You should see a preview of the new subtitle size shown on the right side of the screen.

5. On the same screen, you can also choose whether or not to add a Subtitle Background, display Speaker Names and enable Hearing Impaired Subtitles.

6. Once you are done with the subtitle changes, press the Circle button to exit out of the System Menu.

When you return to your game, you should notice the changes to how the subtitle is displayed in Final Fantasy XVI.

How to fix ‘internet connection quality isn’t sufficient for game streaming’ error on PS5

When playing a game over cloud streaming on your PlayStation 5 or PlayStation 5 Digital Edition console, you can see the following error message pop up on the screen:

  • “The internet connection quality isn’t sufficient for game streaming.”

You will also get a countdown that shows when you will be kicked out of the cloud streaming server.

To see how you can fix this connection issue, you can take a look at this troubleshooting article from Seeking Tech.

1. This error message indicates that your internet is not fast enough to handle cloud stream. Sony recommends that you have a minimum of 5 Mbps to be able to stream games on your PS5.

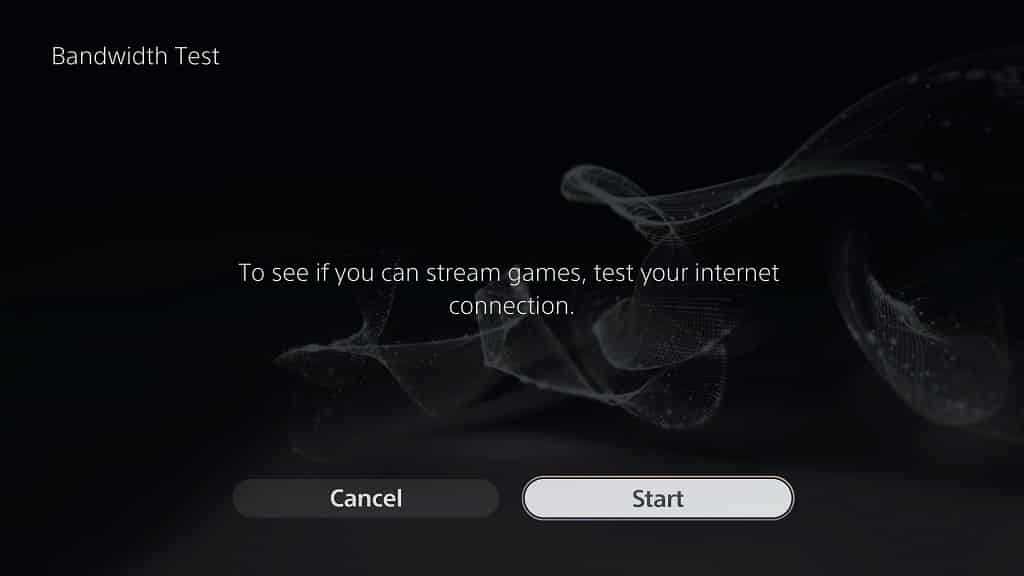
For the first step, we recommend that you open the PlayStation Plus App on the console. From there, select the three dots icon on the top right and then the Bandwidth Test option. Finally, select Start to see if you have enough bandwidth to use cloud streaming. 

2. If your internet appears to be too slow, you should make sure that you don’t have other devices on the same network that may be hogging all of the bandwidth.

If you do, then you should try to pause or stop any ongoing downloads, streams and other internet activities to see if you are able to stream games over the cloud without any issues on your PlayStation 5.

2. If you are using a Wi-Fi connection, then you can try moving the Wi-Fi access point and console closer together. While doing so, you should make sure that there aren’t any physical objects or other wireless devices that may weaken the Wi-Fi connection.

3. If possible, we recommend that you use a wired Ethernet to connect your PlayStation 5 online.

After doing so, go to your console’s Settings menu and then select Network > Settings > Set Up Internet Connection. Finally, make sure that your wired connection is selected instead of Wi-Fi.

4. You can also try power cycling your networking devices. To do so, turn off or unplug the modem, router and other networking hardware. After waiting for several minutes, turn everything back on and then test to see if you are still running into the “internet connection quality isn’t sufficient for game streaming” error.

5. There is a possibility that the cloud servers are down. You can check the current status of the PlayStation Network with this link.

If the servers are down, then you have to wait until they are fully operational again in order to stream games on your PS5 without any problems.

How to find PS Plus last chance to play games on PS5

PlayStation Plus videogames from the Game and Classics Catalogs will expire. As a result, you won’t be able to play them past the expiration date even if you remain a member of the service and downloaded the game files previously.

To see how you can find the full list of the “last chance to play” titles from your PlayStation 5 or PlayStation 5 Digital Edition console, you can take a look at this tutorial from Seeking Tech.

1. For the first step, you need to turn on your console and then go to the home screen menu if you haven’t done so already.

If you are doing something else on your PS5 at this moment, then you can bring up the home screen by pressing and holding the PS logo button on the controller.

2. From the home screen, select the PlayStation Plus app in the Games section. If you are viewing the Media section instead, then you have to press L1 to switch over to Games.

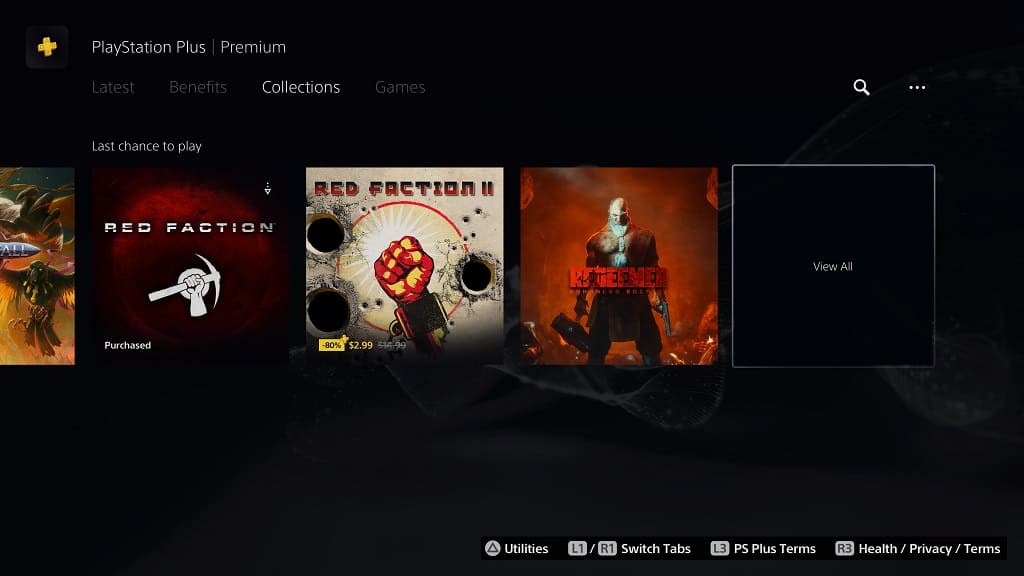
3. Inside of the PlayStation Plus application, press the R1 buttons a few times to switch over to the Collections tab.

4. Next, you have to scroll down to the Collection tab until you get to the “Last chance to play” row.

5. Afterwards, move all the way to the right and then select the View All options.

6. You should find the full list of games that are leaving the Game and Classics Catalogs soon.

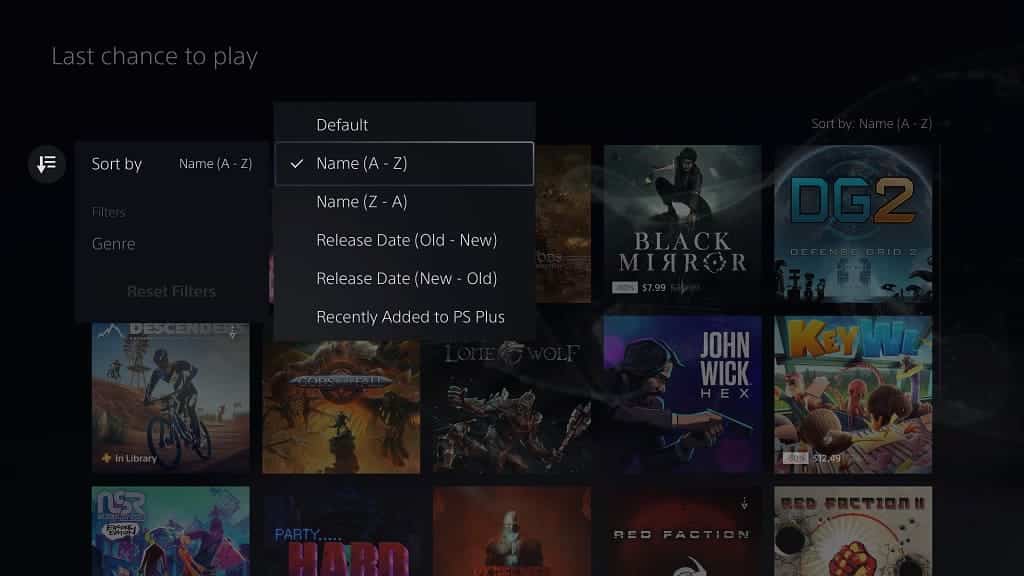
To sort and filter this listing, you can select the Sort and Filter option located on the left side. When it comes to sorting, you should see the following options:

  • Default
  • Name (A to Z)
  • Name (Z to A)
  • Release Date (Old to New)
  • Release Date (New to Old)
  • Recently Added to PS Plus

7. If you are interested in playing a game from this list, then make sure you select it.

You should then see the Download button, as well as the date as to when the game will be removed from PlayStation Plus, on the game’s product page.

How to fix Final Fantasy XVI frame rate issues

You may notice some stuttering and/or frame drops when playing Final Fantasy XVI on your PlayStation 5 or PlayStation 5 Digital Edition console. You can check out this guide from Seeking Tech to see how you can fix the fps issues with this action RPG.

  • 1. If you haven’t done so already, make sure you downloaded the latest patch. The development team at Square Enix has confirmed that the day one patch will improve the performance of Final Fantasy 16. To manually update, you need to do the following:
  • Make sure your PS5 is connected to the internet.
  • Go to the home screen of your console, which you can do by pressing and holding the PS logo button of the DualSense.
  • From the home menu, move the cursor over to the Final Fantasy XVI icon.
  • Next, you have to press the Options, which is the button with the three horizontal lines, on the DualSense.
  • Finally, select the Check for Update option in the pop-up menu to see if a new patch is available to download for this Japanese role-playing game.

2. If you haven’t done so already, make sure you set Game Performance to Frame Rate. By doing, you will increase the fps limit to 60. While the game may still drop frames, it is less noticeable at a higher fps than at 30 or below.

It is important to note that cut scenes are still limited to 30 fps even if you are playing at 60 fps.

In order to change the Game Performance mode, you need to go to the System Menu in Final Fantasy 16. Afterwards, use the L1 and R1 buttons to make your way to the Graphics Settings. You should then be able to change the Game Performance to Frame Rate.

3. If your television set or monitor supports Variable Refresh Rate, then you should make sure it is enabled on the screen’s settings menu.

Afterwards, go to the Settings menu of your PlayStation 5 and then navigate over to Screen and Video > Video Output. Finally, make sure you have VRR set to Automatic.

Variable Refresh Rate will smooth out any frame rate drops as long as it is within the 48 fps to 60 fps range.

4. If the storage drive where Final Fantasy XVI gets too full, then you may experience some performance issues.

If you have the JRPG installed on the console storage, then we recommend leaving at least 82.5 GB of free space. If you have the game installed on a M.2 SSD, then you can try leaving a minimum of 10% when it comes to free space.

In order to check how much free space you have remaining, go to the Settings menu of your PlayStation 5 and then select Storage.

In addition to checking how much space you have left, you can also use the Storage menu to delete games and other data if you need to clear up some room in order to run FF16 optimally.

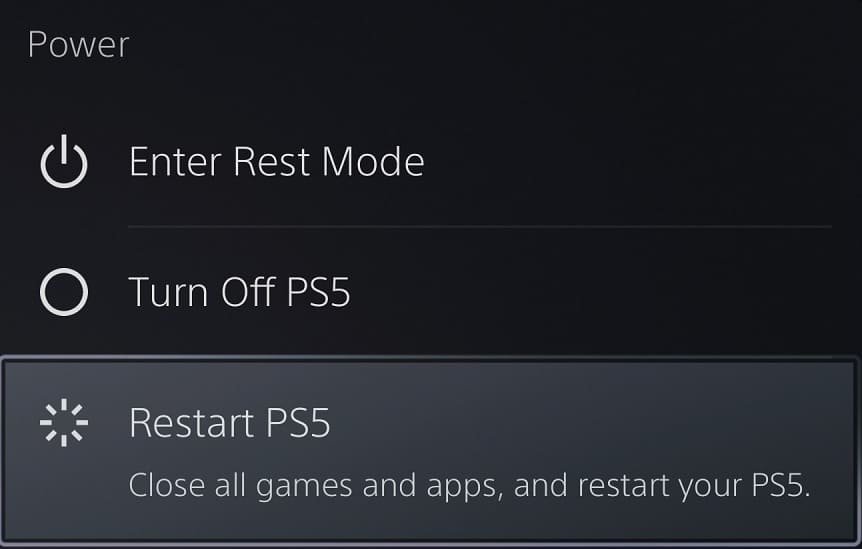
5. If you have been putting your PlayStation 5 in rest mode, then that may be causing the frame rate drops in the game. In this case, we recommend that you save your progress in Final Fantasy XVI and then restart your console.

How to fix Final Fantasy XVI HDR and brightness issues

You may notice that some scenes are too dark, too bright or appear to be washed out in Final Fantasy XVI. To see how you can fix the HDR and brightness issues with this Japanese role-playing game, you can take a look at this troubleshooting article from Seeking Tech.

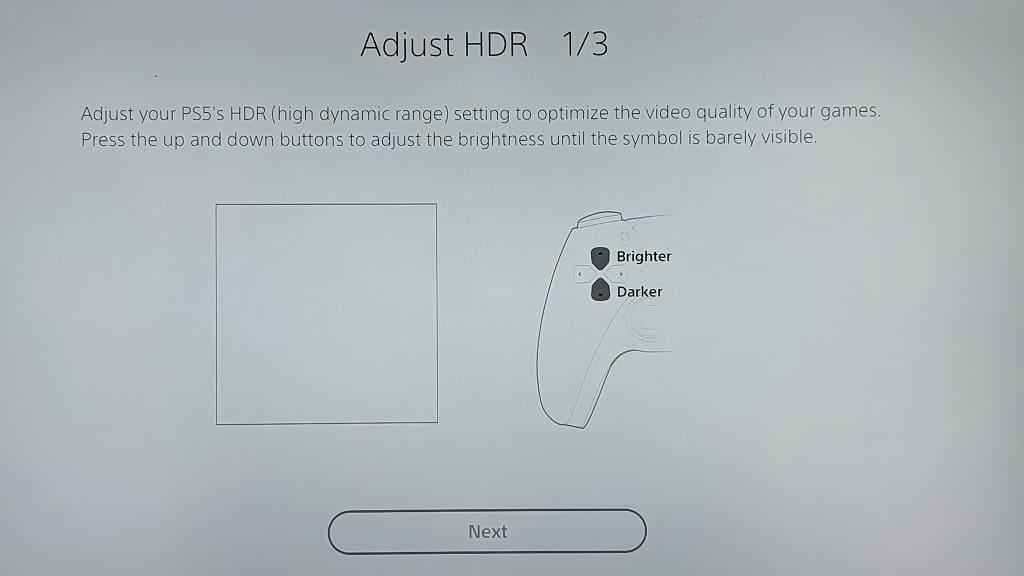
1. For the first step, we suggest that you re-calibrate the HDR output of your PlayStation 5 or PlayStation 5 console if you haven’t done so already. You can find the option to do so from the Settings menu of the console. From there, you need to select Screen and Video > Video Output > Adjust HDR.

Next, follow the directions that appear on the screen in order to calibrate the HDR output of the PS5 to match the capabilities of your television screen or monitor.

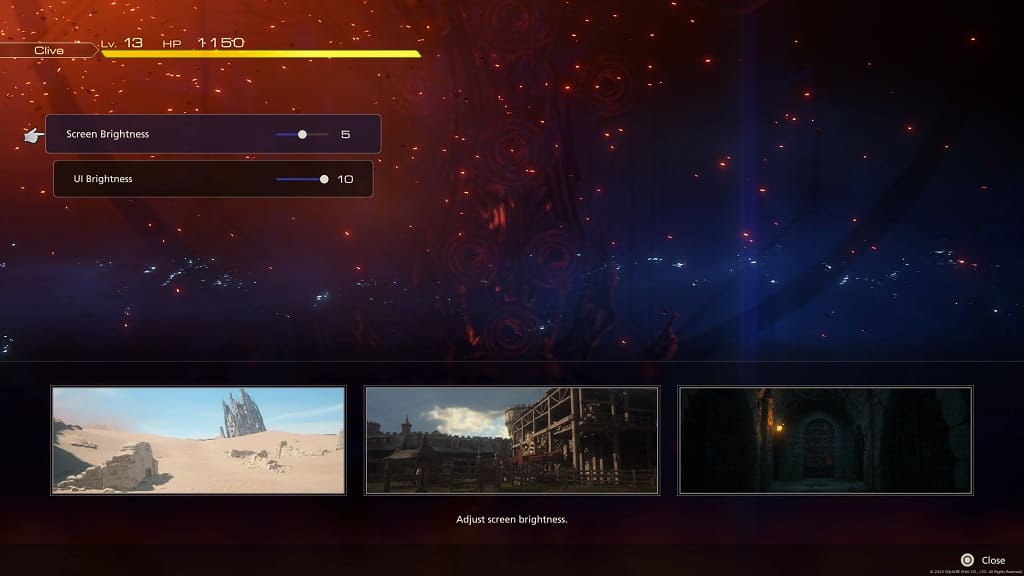
2. Afterwards, we recommend that you use the in-game menu in Final Fantasy 16 to adjust the brightness level. In order to do so, you need to take the following steps:

  • Go to the System menu from either the Title Screen or Main Menu.
  • Change tabs until you get to Graphics Settings.
  • Select Screen Brightness.
  • The default value of the Screen Brightness slider to 5. You can change it, in increments of 1, from a range of 0 to 10.
  • If you find that the current environment you are going through is too dark, then you can try turning up the brightness with this slider. If you find that the area you are in is overly bright, then you can try lowering the brightness level in this menu.
  • You may need to return to the Screen Brightness screen often when moving from a dark area to a brighter area or vice versa to re-adjust.

3. Of course, you can also adjust the brightness of your television set.

If you are playing the game in HDR, then make sure that the brightness of your screen is turned all the way up to the maximum. You can try playing around with other settings, such as the contrast level, as well.

4. Some screens are better at handling HDR than others. So, if possible, you can try playing Final Fantasy XVI on another screen to see if the game looks better.

5. You can also try disabling HDR to see if you prefer playing in SDR.

To turn off HDR, you need to go to the Settings menu of your PlayStation 5 and then make your way to Screen and Video > Video Output. From there, set HDR to Off.

How to turn off the chat log in Final Fantasy XVI

When playing Final Fantasy XVI, you may notice that a chat log will pop up on the left side of the screen when a non-playable character is talking. If you want to turn off this feature in the Japanese role-playing game, then you can check out this tutorial to see how you can properly do so.

1. For the first step, open the System Menu in the game. You can do so by selecting the Config option if you are in the Title Screen.

If you have loaded into your save file, then you first need to bring up the Main Menu by pressing the Options button of the DualSense controller. You then need to use the L2 and R2 buttons to switch over to the System Menu.

2. After arriving at the System menu, you have to switch over to the Language Settings tab. You can change tabs by using the L1 and R1 buttons of the controller.

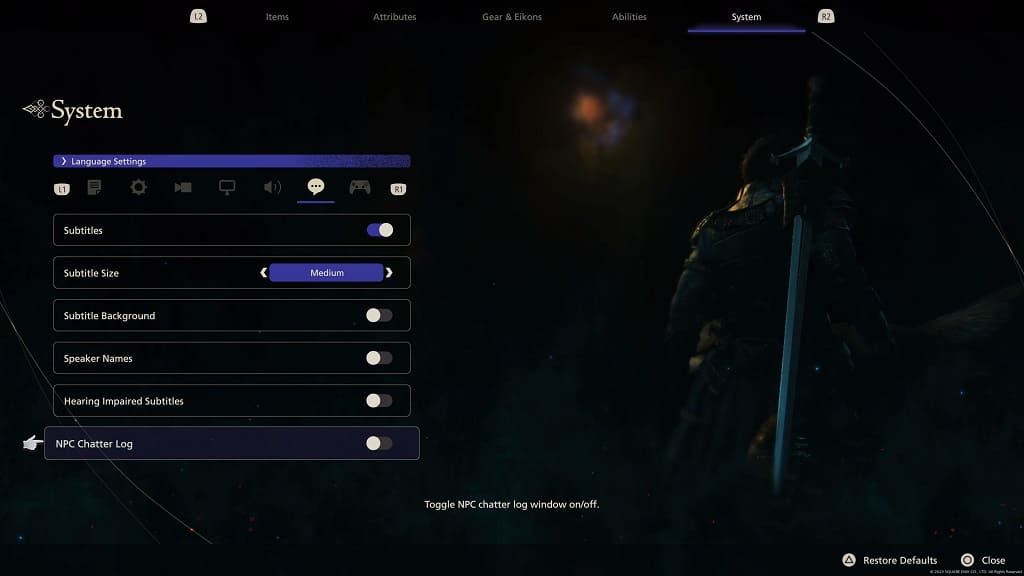
3. From the Language Settings tab, scroll all the way down to the NPC Chatter Log setting, which has the following description:

  • “Toggle NPC chatter log window on/off.”

4. By default, NPC Chatter Log is enabled. Select it with the X button to turn off this feature. You can also use the left directional pad button to disable it.

5. Once you are done, press the Circle button to back out of the System Menu.

When you return to Final Fantasy 16, you should no longer see any chat log appear on the left side of the screen when a non-playable character is talking.

How to change the voice language in Final Fantasy XVI

Final Fantasy 16 supports multiple voice over languages. If you want to change the voice acting to a different language (such as Japanese) for this role-playing game, then you can check out this guide at Seeking Tech to see how you can properly do so.

1. Before we start, it is important to note that you can only change the voice language from the Title Screen.

If you have already loaded into your save file, then you first need to press the Options button on the DualSense in order to bring up the Main Menu. From there, use the L2 and R2 buttons to navigate towards the System Menu.

Next, make sure you are in the System Settings tab; if you aren’t, then use the L1 and R1 buttons until you get there. Finally, select the Return to Title option and then Yes to return to the Title Screen.

2. In the Title Screen, you need to select Config.

3. Once you get to the System menu, use the L1 and R1 buttons to switch over to the Language Settings tab.

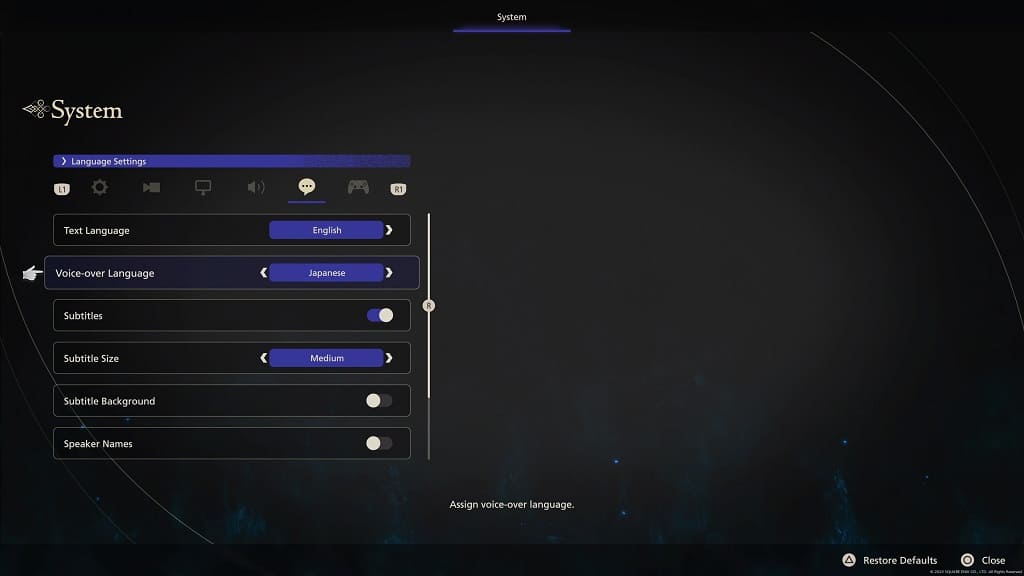
4. You should then move the cursor over to the Voice-over Language setting, which has the following description:

  • “Assign voice-over language.”

5. Use the right or left directional pad button to change the voice language to any of the following:

  • English
  • Japanese
  • German
  • Latin American Spanish
  • Italian

It is important to note that the cut scenes in the game have been designed for English voice overs. Therefore, the mouth movement will only sync with the audio from the voice acting when you are using English as the language. Otherwise, the lip sync won’t match.

6. Once you are done changing the voice language, exit out of the System Menu and then load into your save file from the Title Screen.

The new settings should automatically be applied as you should now be able to hear your preferred language in the dialogue and cut scenes.

How to change target lock to hold in Final Fantasy XVI

By default, you simply have to press a button to stay locked on to a target in Final Fantasy XVI. If you would rather change the controls so that you need to hold the button in order to stay locked-on, then you can check out this tutorial from Seeking Tech to see how you can properly do so.

1. To start off, you need to head into the System menu. This can be done by selecting the Config option from the Title Menu.

If you already loaded into your save file, then you can still get to the System menu by first pressing the Options button to open the Main Menu. From there, use the L2 and R2 shoulder buttons of the DualSense to switch over to the System menu.

2. In the System menu, you should be in the Game Settings tab by default. If you are viewing another tab, then you can sue the L1 and R1 shoulder buttons to change tabs until you get there.

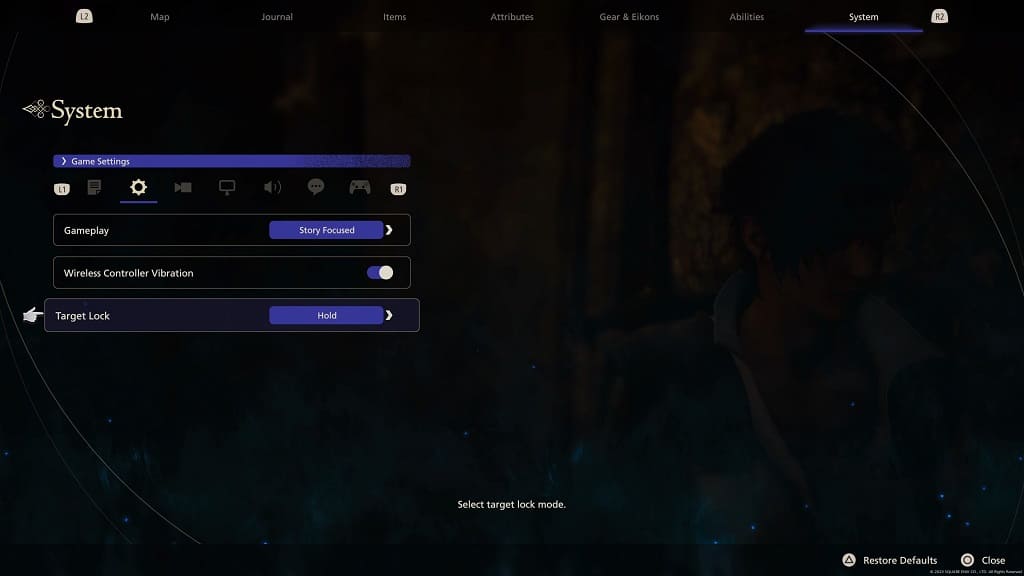
3. From the Game Settings tab, move the cursor down to Target Lock, which should have the following description:

  • “Select target lock mode.”

4. Use the left directional button of the DualSense to change the Target Lock mode from Toggle to Hold.

5. Exit the System menu and the return to the game.

The next time you encounter a battle in Final Fantasy 16, you should notice that you now have to hold on to the target lock button to stay locked onto a target.

For the uninformed, the lock on button is L1 if you are using the Type A or Type B controller layouts. For the Type C controller layout, you have to use the L2 button instead.