You might want to take a bunch of photos while going through your journey in the impressive looking Final Fantasy XVI. To see how you can access the photo mode in this Japanese role-playing game, you can check out this tutorial from Seeking Tech.
1. If you haven’t done so already, make sure you load into your save file in Final Fantasy 16.
2. Afterwards, play through the game until you get to a gameplay sequence where you want to take a photo of. Once you get to that point, press the Options button as soon as possible.
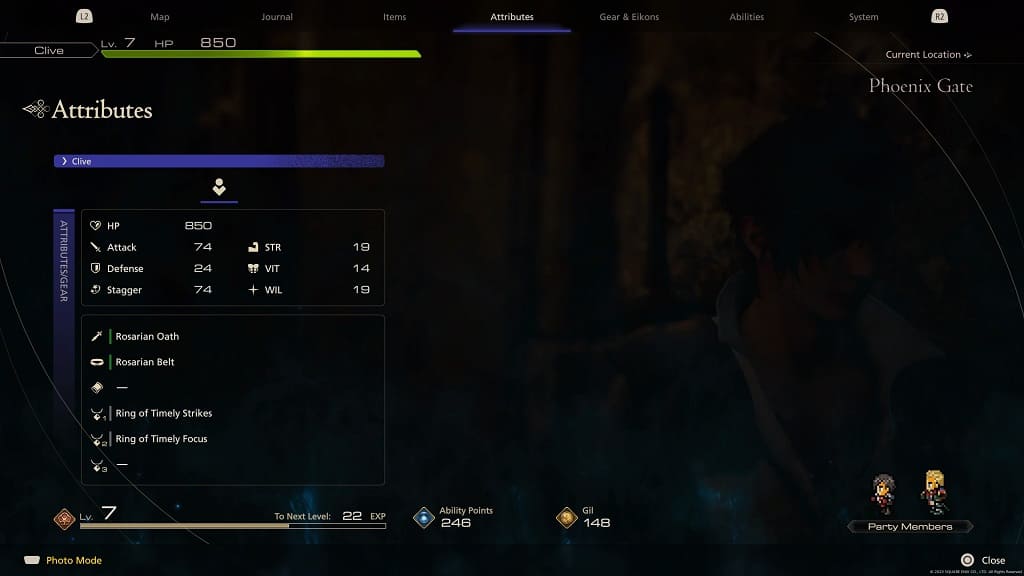
3. You should now be in the Main Menu in the game. Here, you need to use the L2 and R2 shoulder buttons to navigate to the Attributes menu.
4. Once you get to the Attributes menu, you should see an icon located on the bottom left of the screen showing that you can access the Photo Mode by pressing down on the touch pad of the DualSense.
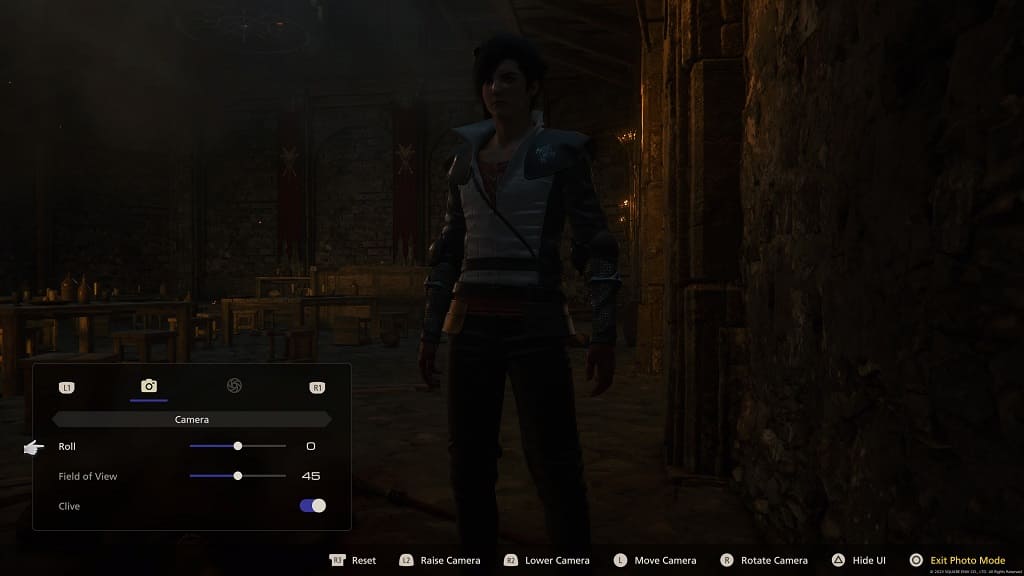
5. After pressing on the touch pad, you should be taken to the Photo Mode. This menu should show the exact moment where you pause the game.
You should see the following control options located at the bottom:
- R3: Reset
- L2: Raise Camera
- R2: Lower Camera
- L: Move Camera
- R: Rotate Camera
- Triangle: Hide UI
- Circle: Exit Photo Mode
On the bottom left corner, you should also adjust the Camera Roll, Field of View as well as whether or not you want Clive to appear in the shot.
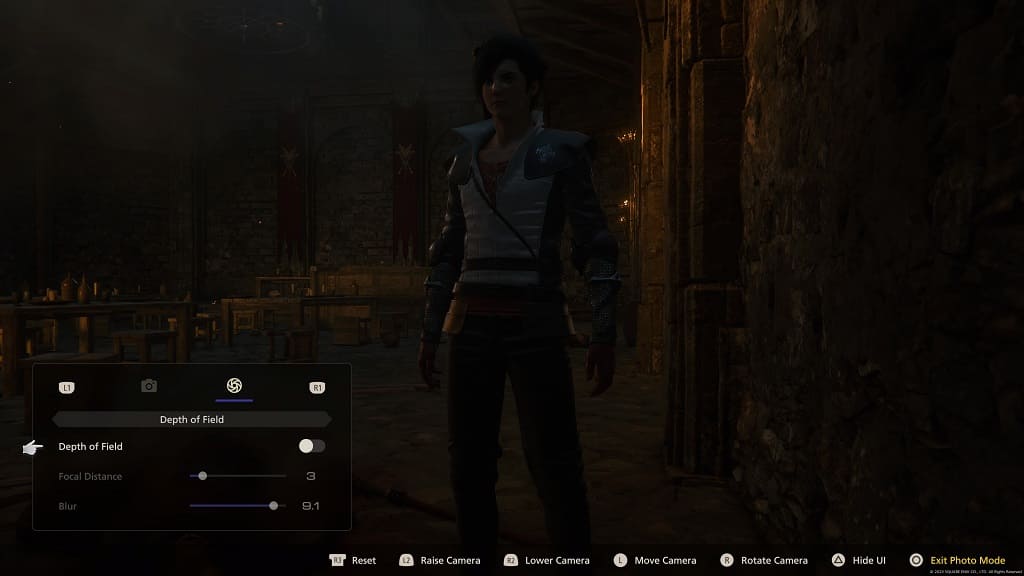
If you press R1, the bottom left corner menu will switch over to the Depth of Field setting. Here, you can choose if you want to enable to disable this visual effect. If you want to turn it on, then you will also be able to adjust its Focal Distance and Blur.
6. Once you got the right camera angle and visual effects, then you can press the Triangle button to hide the user interface of the photo mode.
7. Afterwards, press the Create button in order to take a screenshot.
8. You can find your created photo by doing the following:
Press and hold the PS logo button to open the home screen of your PlayStation 5 or PlayStation 5 Digital Edition console.
- Go to Settings from the home screen.
- Head over to Storage from the Settings menu.
- Select Console Storage and then Media Gallery from the Storage menu.
You should find your newly created photo in the Media Gallery. You can also use this menu to share, delete or further edit the screenshot.