How to fix PlayStation VR2 cinematic mode flickering issues

You may encounter some screen flicker when using the cinematic mode while using the PlayStation VR2. To see how you can potentially fix these problems with this virtual reality headset, you can check out this troubleshooting post from Seeking Tech.

1. To start off, you should make sure that the VR headset is directly connected to the USB Type-C port that is located on the front side of the console. If you are using an extension cord, then it may be causing issues with the data transfer, which could result in the flickering errors.

2. You should also make sure that the USB cable is securely connected to the USB Type-C port of the PS5 as well as your headset. If the connection appears to be loose on the PS VR2, then you can try pushing it into the port.

3. If you haven’t done so already, you can try restarting the game or app where you are experiencing the flickering issues.

4. Furthermore, you can also try restarting your PlayStation 5 or PlayStation 5 Digital Edition console.

5. Make sure that the game, app or console have been updated as well.

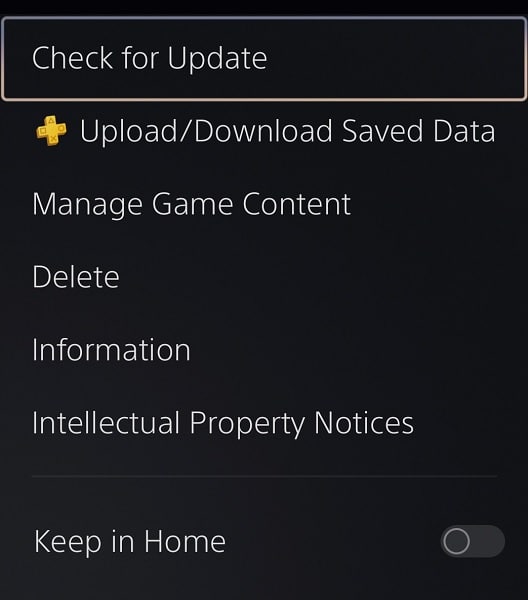
To update a game or app, move the menu cursor over to its icon from the home screen of your PlayStation 5. Afterwards, press the Options button on the controller and then select Check for Update from the small window menu.
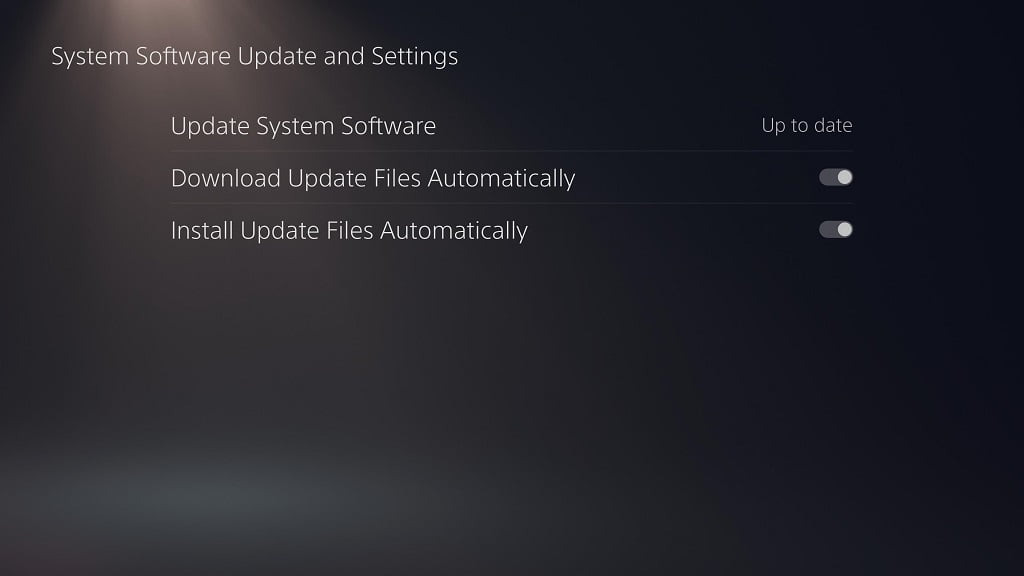
To update the firmware of your console, open its Settings menu and then select the following: System > System Software > System Software Update and Settings > Update System Software > Update Using Internet.
After updating, check to see if you are play games and watch videos via the PSVR2 cinematic mode without any flickering.

6. You should also check to see if the USB cable is damaged. If it is, then you have to send your entire PlayStation VR2 in to Sony for repair as the connection cable is propriety.

How to fix PlayStation VR2 cinematic mode drifting issues

You may notice that the screen may drift when playing a flat screen game or watching a flat screen video by using the PlayStation VR2 headset in cinematic mode. To see how you can fix this drifting issue, you can take a look at this troubleshooting article from Seeking Tech.

1. For the first potential solution, try to press and hold the Options button on the controller. By doing so, the screen will re-center itself based on your current head position.

2. If the screen is still drifting, then you should check the lighting condition of your room. For the PlayStation VR2 to track your head position accurately, the room should be bright.

With that said, you should make sure you aren’t looking directly into a light source as the headset could end up losing its tracking.

2. If you are looking at a simple blank wall with no discernible features, then the headset may lose track of your head position. In this case, you can try putting some tape or other objects on the wall to see if you are still experiencing the drifting problems in the cinematic mode.

3. You can also try turning on Tracking Support for the VR headset and then look directly at your television set. In order to do so, go to the Settings menu of your PlayStation 5 and then navigate over to Accessories > PlayStation VR2. From there, make sure that you have Tracking Support enabled.

By doing so, a border will be added to your TV, which should give your PS VR2 a reference when it comes to tracking.

4. If you didn’t tighten the back strap of your virtual reality headset tight enough, then it may cause the picture to drift as. In order to tighten, turn the dial on the back clockwise.

5. Make sure you have the latest firmware installed for your PS5 or PS5 Digital Edition console as the new update may improve the tracking of the PlayStation VR2 headset and, therefore, eliminate the drifting problems.

You can manually update the gaming system by going over to the Settings menu and then selecting System > System Software > System Software Update and Settings > Update System Software > Update Using Internet.

6. If the virtual reality headset is also drifting when you are playing a PS VR2 game, and you tried all of the aforementioned potential fixes, then there may be a hardware problem.

In this scenario, there is not much else you can do but to contact Sony about potentially getting your headset repaired or replaced.

How to view the play time for Final Fantasy XVI

As a Japanese role-playing game with many optional contents, including a new game plus mode, Final Fantasy XVI can take a long time to complete. To see how you can view your play time in this title, you can take a look at this tutorial from Seeking Tech.

Is there an in-game play time clock in Final Fantasy 16?

Unfortunately, there is currently no way to view your play time from within FF16. Instead, you have to rely on the PlayStation 5 hours played tracker.

It is important to note that the system tracker may not be fully accurate as it only tracks how long the game has remained opened on your PS5. It doesn’t track how much time you spent on a save file.

Furthermore, a PlayStation Network outrage, as well as other issues, may throw off the accuracy of the hours played tracker of your console.

How to find your play time for Final Fantasy XVI

There are two ways you can view the hours you have spent so far playing FF XVI on your PS5.

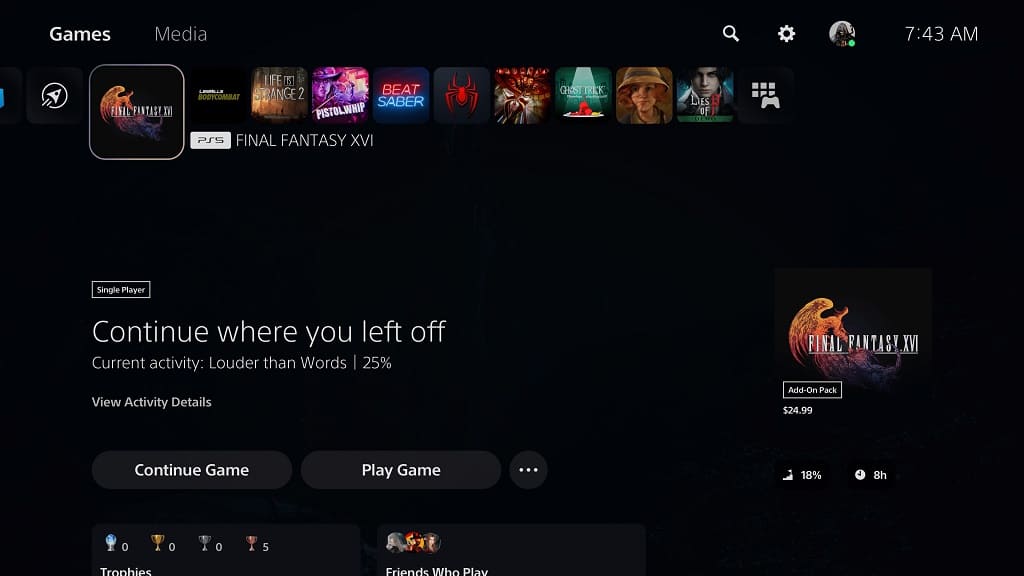
The fastest way to do so is directly from the home screen. To get there, you can simply press and hold the PS logo button on the DualSense. Afterwards, move the menu cursor to the Final Fantasy XVI icon. You should then see a number, displayed in hours (H) located on the bottom right side.

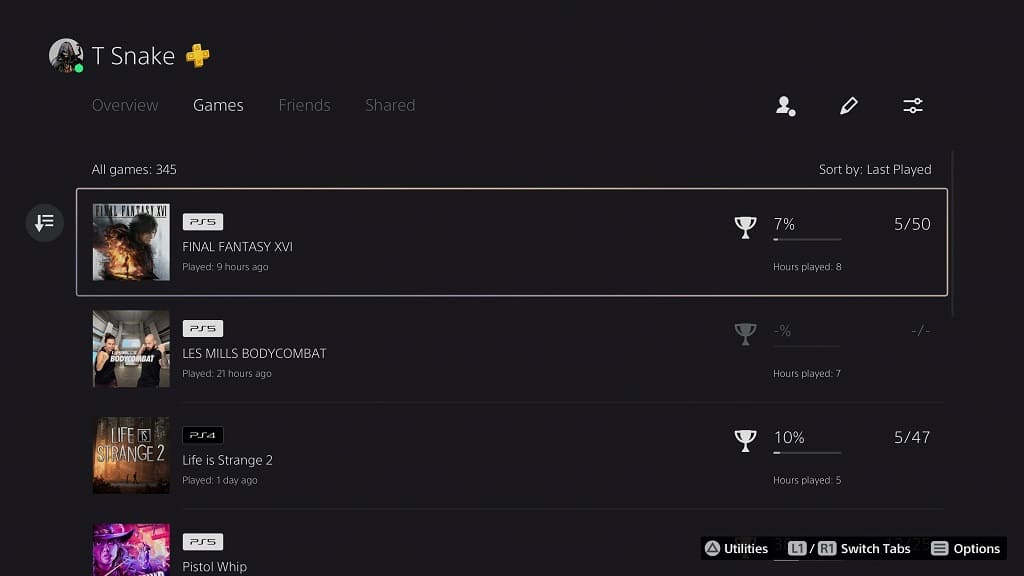
Alternatively, you can select your profile icon from the top right side of the home screen. In the pop-up menu, you should then select Profile. After getting to the Profile menu, select Games. In the Games tab, you will be able to see the number of hours played that have been tracked for Final Fantasy XVI as well as other games that you were playing on your PS5 console.

How to change songs in Les Mills BodyCombat

Les Mills BodyCombat features a nice soundtrack when it comes to getting you into the mood for fitness. To see how you can change songs while playing this virtual reality game, you can take a look at this tutorial from Seeking Tech.

Before we start, it is important to note that the songs are tied to the workout session in Body Combat. Therefore, you won’t be able to change a song for a specific stage as the targets sync up with the beat.

If you are interested in playing a session that contains a specific song, then you need to do the following:

1. If you haven’t done so already, return to the main menu of Les Mills BodyCombat. If you are currently in the middle of a session, then you can either finish it or exit out of it to return to the main menu.

2. Next, you need to select a session. Make sure you don’t select the Start option in the session panel as you will end up starting the workout instead.

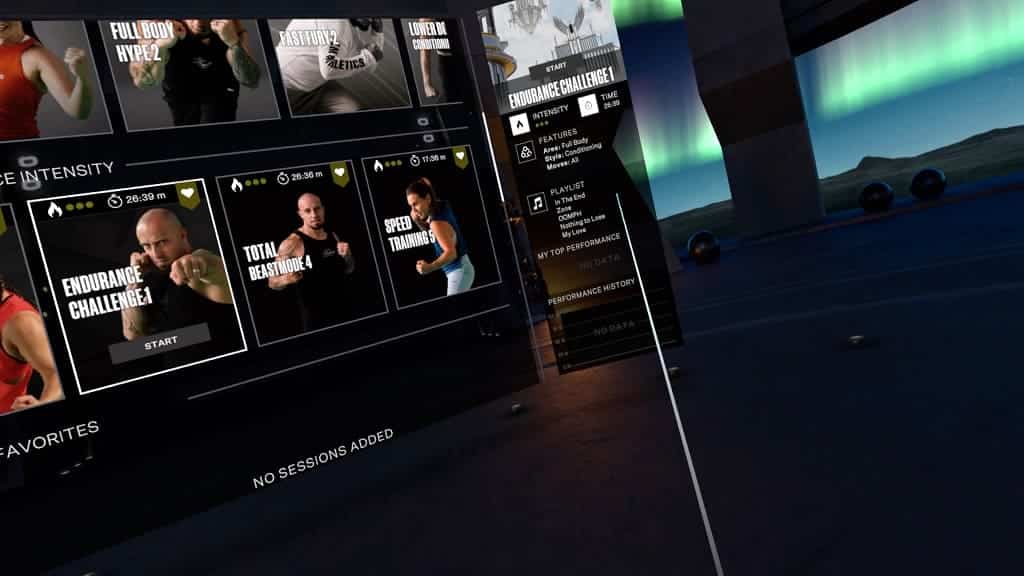
3. If you did the above step correctly, then you should see the right panel pop up in the main menu. This panel provides details on the workout session, including a list of songs that will be played.

Some of the sessions are long and, as a result, will feature multiple music tracks.

4. After finding a workout session with a list of songs that you want to listen to while working out, you can select the Start option to begin the stage.

How to properly do knee strikes in Les Mills BodyCombat

The knee strike in Les Mills BodyCombat can be somewhat tricky and awkward as the game may not register your actions even if you think that you are doing them correctly. You can check out this guide at Seeking Tech to see how you can properly do this exercise in this virtual reality game.

Before we begin, it should be noted that this guide is based on the PlayStation VR2 version of the workout game. With that said, the same tips should also be applicable to the other versions of Les Mills Body Combat as well.

If you haven’t done so already, there is a refresher tutorial that you can select on the top right side of the main menu. In this tutorial, you should see a clip of one of the trainers performing a knee strike as well as a short practice session that follows afterwards.

If you are still having a hard time successfully pulling off a knee strike in Les Mills BodyCombat, then you can follow these tips:

1. When you hold the target, you will see a line. Do not move the target to follow the line. Instead, we recommend that you hold the target in the same place.

2. Once you get towards the end of the line, quickly rotate your inwards and then move your arms downwards towards the end target to smash it. If you are too slow, then your action may not be registered by the game.

3. The game does not read your knee movement at all. Therefore, you can technically perform this motion with either very little knee movement or without moving your knee at all.

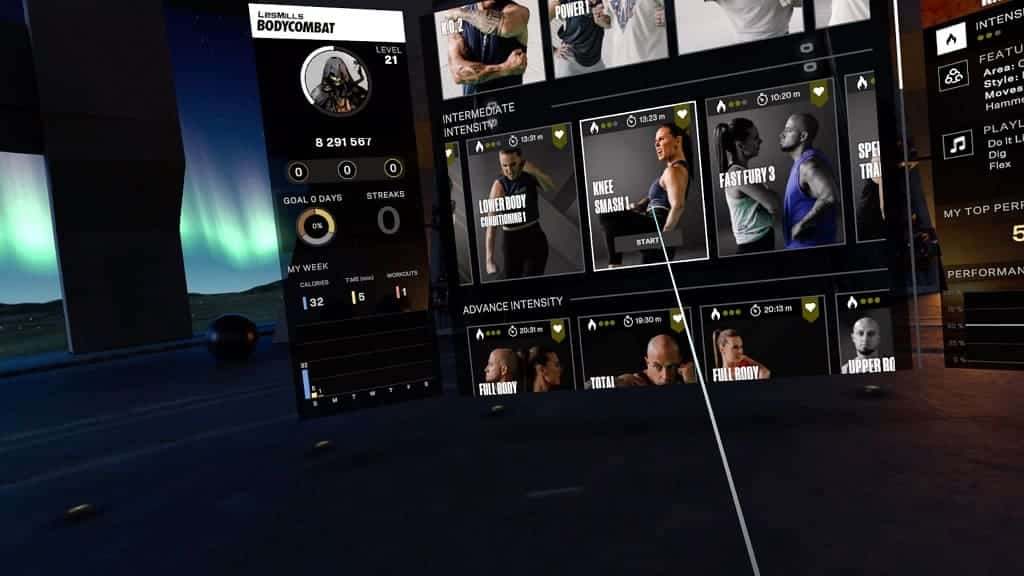
4. It may take several tries until you get to a good rhythm where you can constantly hitting the knee strike targets. You can use the Knee Smash 1 session in the Intermediate Intensity section to practice your strikes until you improve your timing.

Even if you get good, the game may not register your strikes correctly as it is more finicky when compared to the standard punches you do.

Of course, you can simply ignore the missed targets if you care more about getting a good workout instead of achieving a high score.

How to bypass the roomscale launch error in PS VR2 version of Les Mills BodyCombat

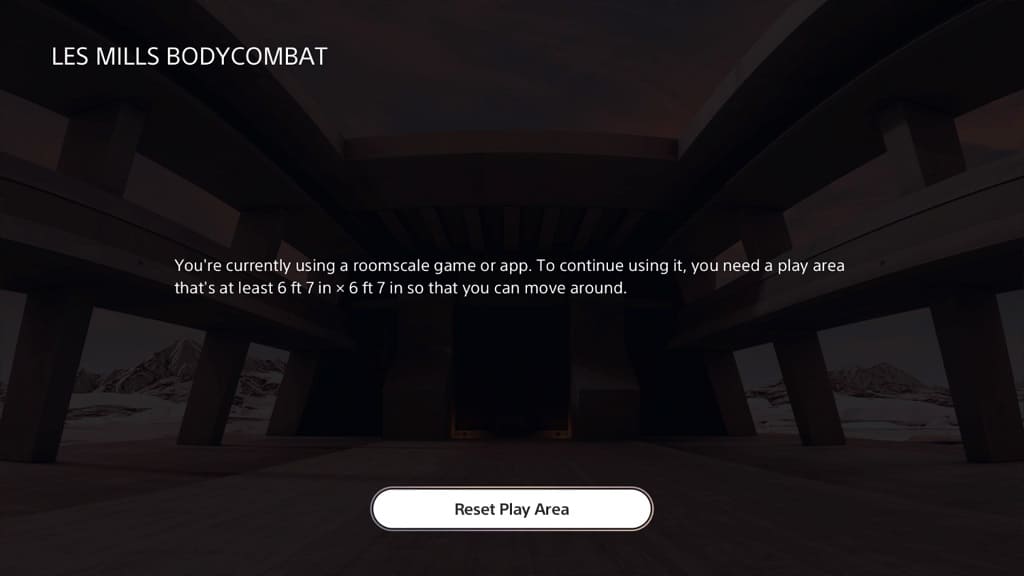
Despite the fact that you will mostly stand around in one small area, the PlayStation VR2 version of Les Mills BodyCombat is a roomscale only game. If you don’t have enough room in the Play Area you previously set, then you will see the following message pop-up:

  • “You’re currently using a roomscale game or app. To continue using it, you need a play area that’s at least 6 ft x 7 in x 6 ft x 7 in so that you can move around.”

As a result, you won’t be able to launch Les Mills BodyCombat. To see how you can bypass this warning screen and boot up the game normally, you can take a look at this troubleshooting article from Seeking Tech.

1. To bypass this screen, we recommend that you edit your Play Area. If you are still in the aforementioned “You’re currently using a roomscale game or app” screen, then you can select the Reset Play Area option.

Otherwise, you can press the PS button while wearing the virtual reality headset to bring up the Control Center menu. Afterwards, select the PlayStation VR2 Quick Settings card. Next, scroll down and then select the Set Play Area option. When asked how you would like to play, select Stand Still and Moving Around. Finally, select Reset Play Area.

2. Next, select the Edit Play Area option.

3. In the Edit Play Area menu, you can use the Left or Right PlayStation VR2 Sense Controller to point and the L2 or R2 button to add or remove your Play Area.

As we stated above, you will spend most of your time standing in a small area when playing Les Mills BodyCombat. Therefore, you can use this menu to manually expand your Play Area to beyond any walls or objects. You only have to make sure that you have plenty of free air space near your body to accommodate for the front and side punches.

Once you managed to meet the minimum 6 ft x 7 in x 6 ft x 7 in requirement, you should be able to start up and play Les Mills BodyCombat.

How to restart a battle with the boss at full health in Final Fantasy XVI

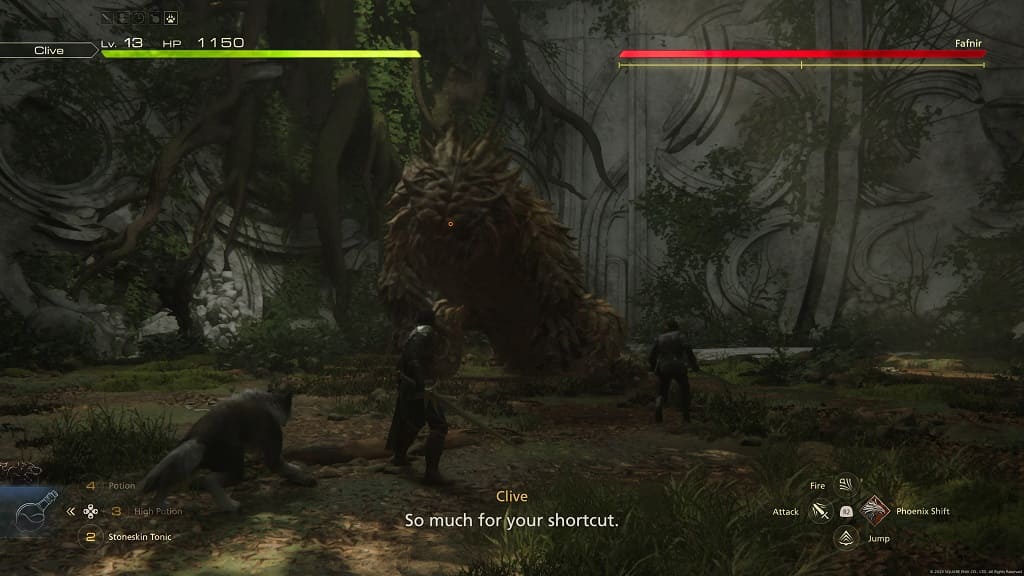
If you enjoy the challenge in Final Fantasy XVI, you may be disappointed to learn that the health bar of a boss will be decreased by 50% if you die and then choose the Retry option. With your character at full health with the maximum of points equipped, this mid boss fight check point significantly decreases the difficulty.

To see how you can fight the same fight again with the boss at 100% health, you can take a look at this tutorial from Seeking Tech.

Before we start, it is important to note that, if you die before removing at least 50% off of the health boss of a boss, then the boss will remain at 100% health when you restart the same fight. Instead, your character will be at 100% of health with a full array of potions to use.

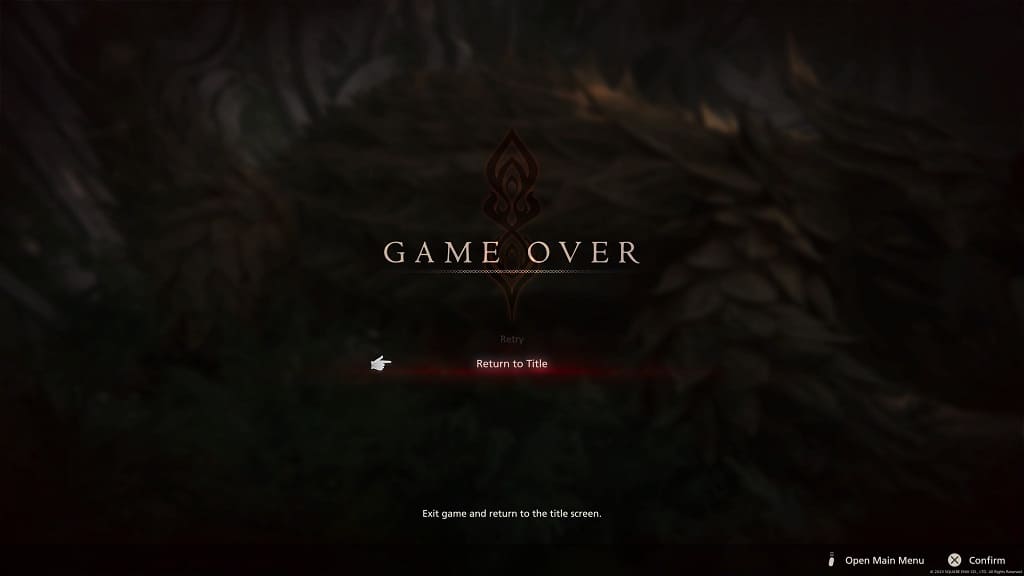
If you deal more than 50% of the damage to a boss but ended up dying, then you need to take the following steps to fight the same battle again with the boss at full health:

1. In the Game Over screen, you need to select the Return to Title option instead of Retry.

2. You should then see a Return to Title Screen notification warning you that any unsaved progress will be lost. Here, you need to select Yes.

While you will lose a bit of progress, the game frequently auto saves; therefore, you most likely don’t need to do much to get back to the boss fight.

3. In the Title Screen, you can choose the Continue option to load your most recent save. Alternatively, you can also select the Load Game option and then select any of your previous Auto Save or Player Save.

4. Once you make your way back to the boss, you should notice that the health bar is back at 100% instead of 50% as you will be starting the fight from the very beginning instead of the middle of battle.

How to level up Torgal in Final Fantasy XVI

Once you unlocked Torgal to fight alongside you in battles, you will be able to level your pet attacks. To find out how you can do so, you can take a look at this tutorial from Seeking Tech.

What Torgal abilities can you level up?

When you unlock Torgal, you will be able to level up the following parameters:

Your pet has ten levels of Pedigree as the pet starts on Level 1. To level this stat up, you need to simply complete battles with Torgal in your party. So, along with the main quest, you might want to complete side quests and seek out any optional fights in order to grind out the Pedigree level.

You can also level up Torgal’s Sic attack. Your pet starts out at Level 1 for this ground-based action and can go all the way up to Level 3. To level this up, you can manually command the create to use Sic by pressing the Left directional button during combat to toggle from Item Shortcuts to Pet Commands and then pressing the Up directional button.

Another attack that can be leveled up is Lifting Attack, which can launch lighting enemies into the air, leveling them open for air combos. To increase the attack power for this move from Level 1 all the way to Level 3, you can manually issue the command during combat. In order to do so, press the Left directional button to switch from Item Shortcuts to Pet Commands and then press the Down directional button.

It is important to note that although Torgal also has a healing ability, which you can access by pressing the left directional button during combat to toggle from the Item Shortcuts layout to Pet Commands layout and then pressing the Right directional button. With that said, you won’t be able to level up the Heal ability at all.

How to level Torgal up quickly

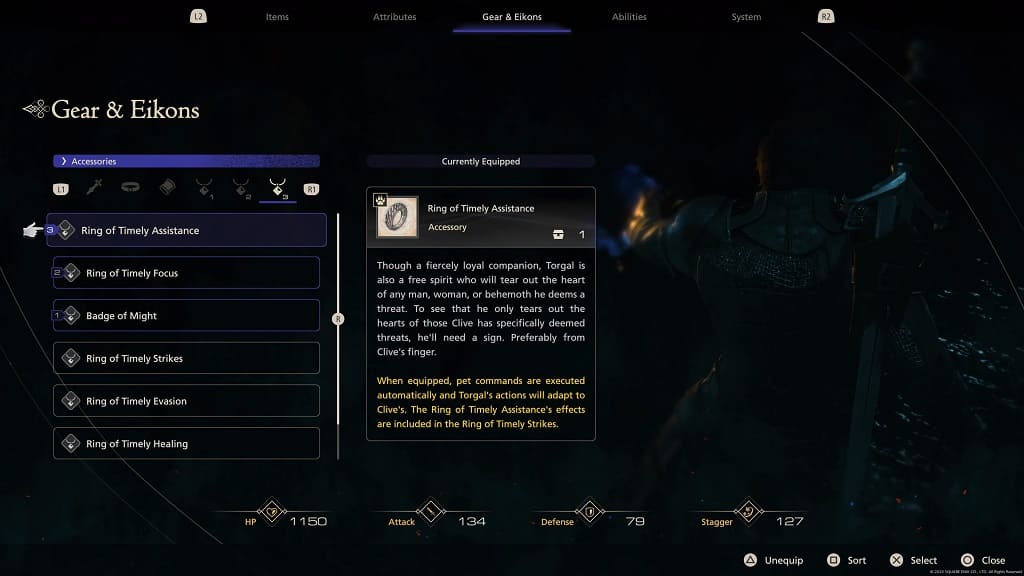
In order to level up Torgal as quickly as possible, we recommend that you equip the Ring of Timely Assistance. By doing so, your pet will automatically attack on its own without your commands, which lets you focus on controlling Clive. With that said, you are still able to manually issue commands with this accessory if you need the pet to perform a specific action.

By having Torgal attack automatically with the occasional manual command, you should be able to level the aforementioned stats much faster than before,

As we stated above, make sure you sure you partake in doing side quests and fight optional battles aside from going straight through the main campaign. You can use the Arete Stone for optional fights.

Furthermore, you can also leave any dungeons you haven’t completed by opening the Map screen and then traveling to another area. Once you return to the same dungeon, you will need to start over from the very beginning of the stage. Since you will keep the experience points, ability points, gil and Torgal’s experience points you earned from completed battles, this should be a great way to grind out the stats for both Clive and his pet companion.

How to fix Final Fantasy XVI crashing issues on PS5

You may experience frequent crashing when playing Final Fantasy XVI on your PlayStation 5 or PlayStation 5 Digital Edition console. You may also see a CE-108255-1 error code stating that “something went wrong with this game or app.”

To see how you can prevent this Japanese role-playing game from glitching out you can take a look at this troubleshooting article from Seeking Tech.

1. For the first step, you should make sure that your PS5 isn’t overheating. There have been several reports stating that Final Fantasy 16 can cause the temperature of the console to quickly rise.

To see how you can deal with the overheating issues of this game, you can take a look at this guide.

2. If you have the game files installed on the M.2 Solid State Drive, then it may be leading to the frequent crashes.

In this case, you can try moving the files to the Console Storage. You can do so by going to the Settings menu of your PlayStation 5 and then selecting Storage.

3. While you are in the Storage menu, you should make sure that you have around 82.5 GB of free space on the Console Storage.

Otherwise, you may experience some performance issues, including crashes, when playing games on the internal SSD.

4. If you haven’t done so already, you should make sure that you have the latest system software installed. A new firmware usually comes with stability improvements, which should result in fewer crashing.

To see if there is a new system software available to download and install, go to the Settings menu of your console and then select System > System Software > System Software Update and Settings > Update System Software > Update Using Internet.

5. While you are at it, you should also make sure you have the latest patch installed for the game as well. The crashing issues seem to be common; therefore, it is likely that the problems will get fixed with future updates.

In order to manually trigger a patch download, move the menu cursor in the home screen of your PS5 to the Final Fantasy XVI game logo. Afterwards, press the Options button on the DualSense controller to bring up the pop-up window. Finally, select the Check for Update option.

6. You can also try rebuilding the database of the PlayStation 5 by doing the following:

  • Completely turn off the console.
  • Press and hold the power button on the console until you hear a second beeping noise.
  • Connect the DualSense to the console via a USB cable and then press the PS logo button on the controller.
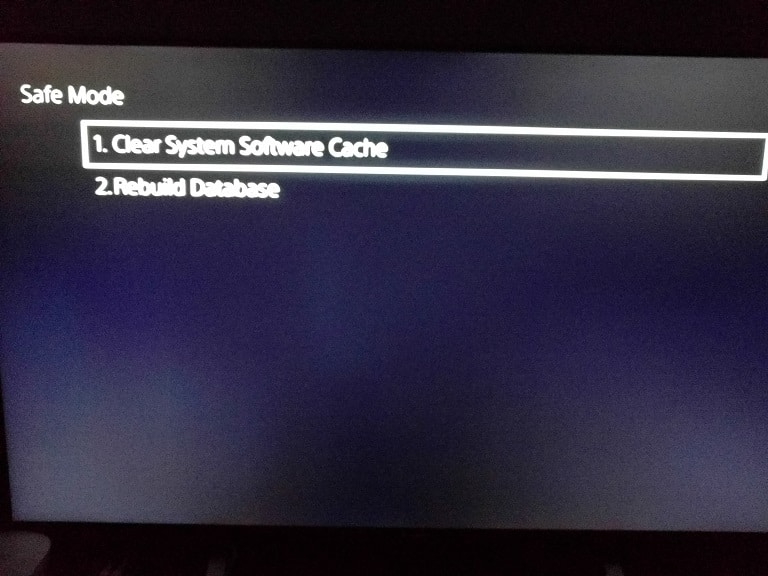
  • Select Clear Cache and Rebuild Database from the Safe Mode menu.
  • Afterwards, select Rebuild Database.

7. You can also try deleting the game files and then re-installing them again.

8. One last potential solution is to factory reset your PS5.

Before doing so, you should back up your files by going to Settings > System > System Software > Back Up and Restore > Back Up Your PS5.

To perform a factory reset, go to Settings > System > System Software > Reset Options > Reset your Console.

Once the factory reset process has been completed, restore your backed up data by heading over to Settings > System > System Software > Back Up and Restore > Restore Your PS5.

What do if there is no voice audio in Final Fantasy XVI

When playing Final Fantasy XVI, you may not be able to hear any dialogue. To see how you can potentially fix this missing voice audio issue, you can take a look at this troubleshooting article from Seeking Tech.

Before we start, it is important to note that not all conversations are voiced in this video game. There are times when a character will only say a few words and nothing else. In these conversations, you should see a background overlay at the bottom of the screen with a prompt saying that you need to press the X button on the controller in order to move on to the next phase of the conversation.

This is most likely done as a cost saving measure as it takes money to hire an actor to voice the lines in this Japanese role-playing game. So, while the important lines are voiced, some of the less important conversations are displayed as text only.

If you also can’t hear dialogue during cut scenes as well as other scenarios where you expect there to be voices, then you should make sure that you didn’t mute the Voice Volume. In order to do so, you need to take the following steps:

Start off by opening the System Menu. You can do so, by selecting Config from the title screen or System from the Main Menu if you already loaded into your save file.

In the System Menu, use the L1 and R1 buttons to switch to the Sound Settings tab.

From the Sound Settings tab, make sure that the Voice-over Volume is not set to 0. In our case, we decided to move this slider all the way to 100 as we found that the voice volume to be a little low.

In the same Sound Settings tab, you can also try increasing the Master Volume. Furthermore, you can try lowering the Music Volume and Effects volume to see if you are able to hear the voiced dialogue better.