Final Fantasy XIV Type D vs. Type E vs. Type F controls

A new patch for the PlayStation 5 version of Final Fantasy 16 adds three new controller layouts.

To find out what the main differences are for these new button assignments, you can check out this comparison article from Seeking Tech.

Final Fantasy 16 Type D vs. Type E vs. Type F Comparison Chart

You can take a look at our comparison table between the Type D, Type E and Type F Controller Layouts below:

Final Fantasy XIV Type D LayoutFinal Fantasy XIV Type E LayoutFinal Fantasy XIV Type F Layout
Move CharacterLeft Analog StickLeft Analog StickLeft Analog Stick
Move CameraRight Analog StickRight Analog StickRight Analog Stick
Use Shortcuts and Pet CommandsUp, Down or Right Directional ButtonsUp, Down or Right Directional ButtonsUp, Down or Right Directional Buttons
Cycle Shortcuts and Pet CommandsLeft Directional ButtonLeft Directional ButtonLeft Directional Button
JumpXXX
Melee AttackSquareR1Square
Eikonic FeatR1SquareR1
MagicTriangleR2L1
EvadeCircleCircleCircle
Hold to Ready Eikonic AbilitiesR2L2R2
Lock OnL1L1L2
Cycle EikonsL2TriangleTriangle
Limit BreakL3 and R3L3 and R3L3 and R3
TauntR2 and Touch PadSquare and Touch PadR2 and Touch Pad
Hold to Use Animal InstinctsL3L3L3
Reset Camera or Cycle Locked on TargetR3R3R3
Open Main MenuOptionsOptionsOptions

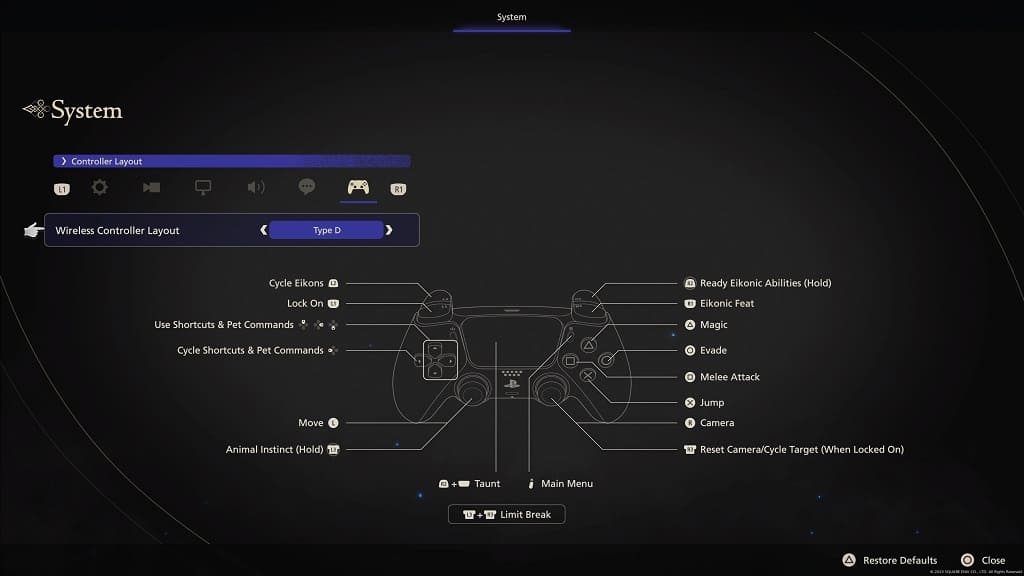
Final Fantasy XIV Type D Controller Layout

The Type D Controller Layout has the same layout as the default Type A with the lone exception being the dodge button, which is now assigned to Circle instead of R1. The R1 button is now for performing Eikonic Feats.

You can find the full layout for Type D below:

  • Left Analog Stick: Move Character
  • Right Analog Stick: Move Camera
  • Up Directional Button: Use Shortcuts and Pet Commands
  • Down Directional Button: Use Shortcuts and Pet Commands
  • Left Directional Button: Cycle Shortcuts and Pet Commands
  • Right Directional Button: Use Shortcuts and Pet Commands
  • Triangle: Magic
  • X: Jump
  • Square: Melee Attack
  • Circle: Evade
  • L1: Lock On
  • L2: Cycle Eikons
  • L3: Hold to Use Animal Instincts
  • R1: Eikonic Feat
  • R2: Hold to Ready Eikonic Abilities
  • R3: Reset Camera or Cycle Locked on Target
  • Options: Open Main Menu
  • L3 and R3: Limit Break
  • R2 and Touch Pad: Taunt

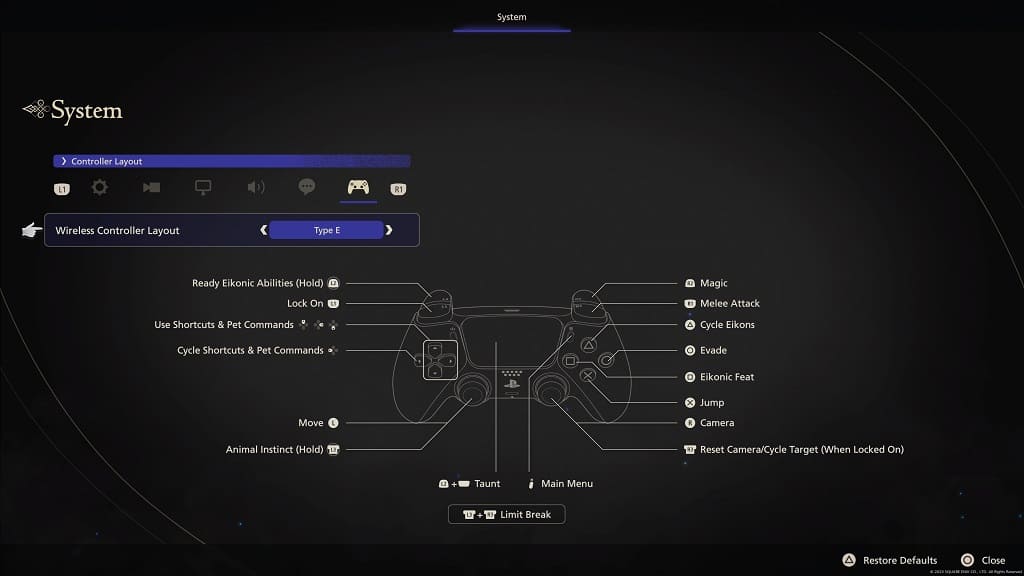
Final Fantasy XIV Type E Controller Layout

For the Type E Controller Layout, the melee attack button has been moved to R1 while magic attack has been moved to R2. You have to use the Square button to use the Eikonic Feat in addition to the Triangle button to change Eikons.

You can find the full Type E button layout below:

  • Left Analog Stick: Move Character
  • Right Analog Stick: Move Camera
  • Up Directional Button: Use Shortcuts and Pet Commands
  • Down Directional Button: Use Shortcuts and Pet Commands
  • Left Directional Button: Cycle Shortcuts and Pet Commands
  • Right Directional Button: Use Shortcuts and Pet Commands
  • Triangle: Cycle Eikons
  • X: Jump
  • Square: Eikonic Feat
  • Circle: Evade
  • L1: Lock On
  • L2: Hold to Ready Eikonic Abilities
  • L3: Hold to Use Animal Instincts
  • R1: Melee Attack
  • R2: Magic
  • R3: Reset Camera or Cycle Locked on Target
  • Options: Open Main Menu
  • L3 and R3: Limit Break
  • R2 and Touch Pad: Taunt

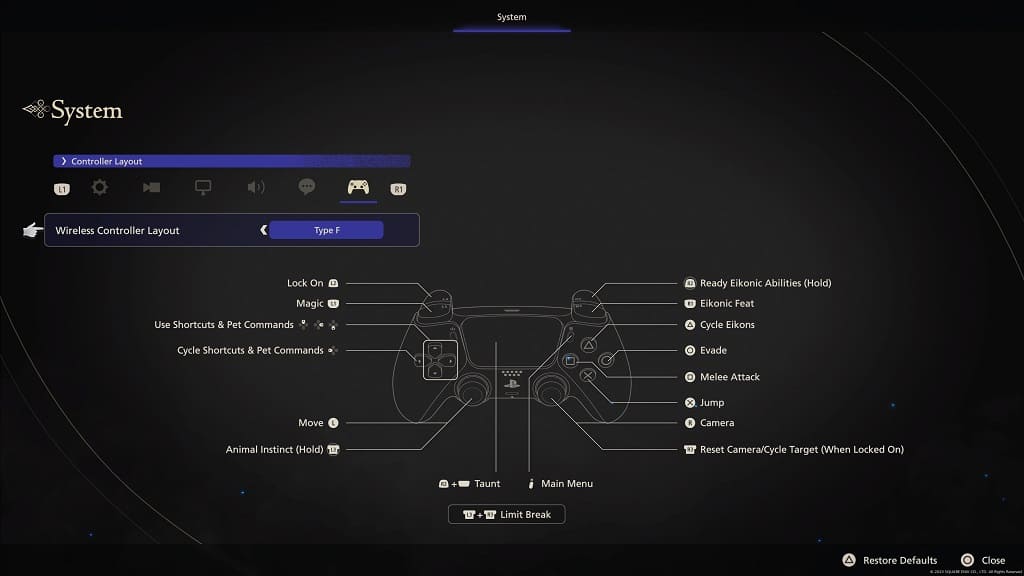
Final Fantasy XIV Type F Controller Layout

When it comes to the Type F Controller Layout, magic attacks have been moved to L1 while L2 is used to lock onto an enemy. The Triangle button is used to cycle through equipped Eikons.

You can take a look at the Type F layout below:

  • Left Analog Stick: Move Character
  • Right Analog Stick: Move Camera
  • Up Directional Button: Use Shortcuts and Pet Commands
  • Down Directional Button: Use Shortcuts and Pet Commands
  • Left Directional Button: Cycle Shortcuts and Pet Commands
  • Right Directional Button: Use Shortcuts and Pet Commands
  • Triangle: Cycle Eikons
  • X: Jump
  • Square: Melee Attack
  • Circle: Evade
  • L1: Magic
  • L2: Lock On
  • L3: Hold to Use Animal Instincts
  • R1: Eikonic Feat
  • R2: Hold to Ready Eikonic Abilities
  • R3: Reset Camera or Cycle Locked on Target
  • Options: Open Main Menu
  • L3 and R3: Limit Break
  • R2 and Touch Pad: Taunt

To see what the differences are between the Type A, B and C layouts in FF16, you can check out this versus guide.

Xbox Elite Wireless Controller Series 2 settings for AEW Fight Forever

To gain a competitive edge in AEW Fight Forever, you can try playing the game with the Xbox Elite Wireless Controller Series 2. You can check out this Seeking Tech guide to find the best settings to use for this gamepad when it comes to playing this wrestling videogame.

P1, P2, P3 and P4 Button Assignments

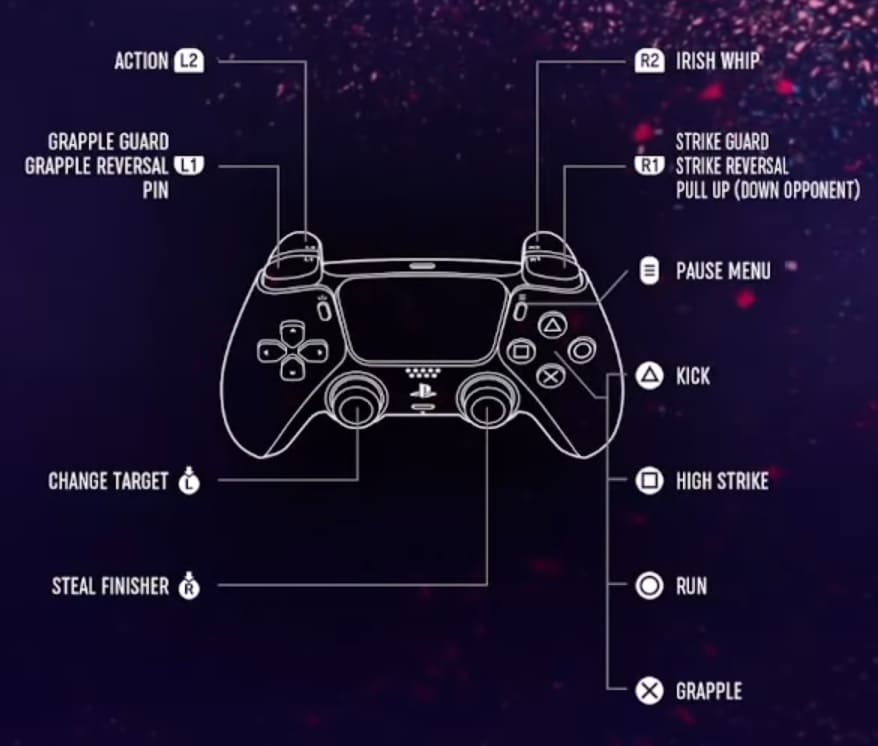
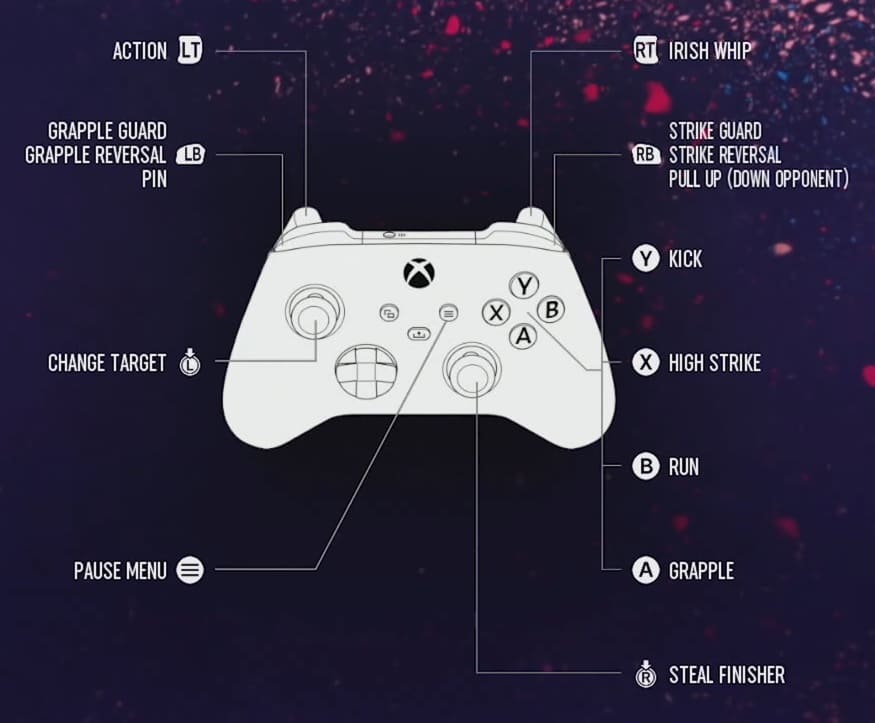
The back buttons of the Xbox Elite Wireless Controller Series 2 can be used as short cuts for the normal buttons. AEW Fight Forever features the following default Xbox button layout:

  • Left Analog: Move Wrestler
  • A: Grapple
  • B: Run
  • X: High Strike
  • Y: Low Strike
  • LB: Grapple Guard, Grapple Reversal or Pin
  • LT: Action
  • Press Down on Left Analog Stick: Change Target
  • RB: Strike Guard, Strike Reversal or Pull Up Downed Opponent
  • RT: Irish Whip
  • Press Down on Right Analog Stick: Steal Finisher

We found that pressing down on the left analog stick to change target and pressing down on the right analog stick to use an opponent’s finisher feel less natural than using the other buttons.

As a result, we ended up assign to left analog stick button to P4 and the right analog stick button to P2. Of course, you can use any of the four buttons on the back of the gamepad to your liking.

You will also be able to adjust the button layout from within the game over at the Options > Controller > Customize Control menu.

Trigger Locks

If using the left and right analog triggers does not feel as responsive as you would like in AEW Fight Forever, then you can pull the trigger lock sliders on the back of the Xbox Elite Wireless Controller Series 2 all the way down. By doing so, you should make the context-sensitive actions with the LT button and Irish Whip with the RT button activate much quicker.

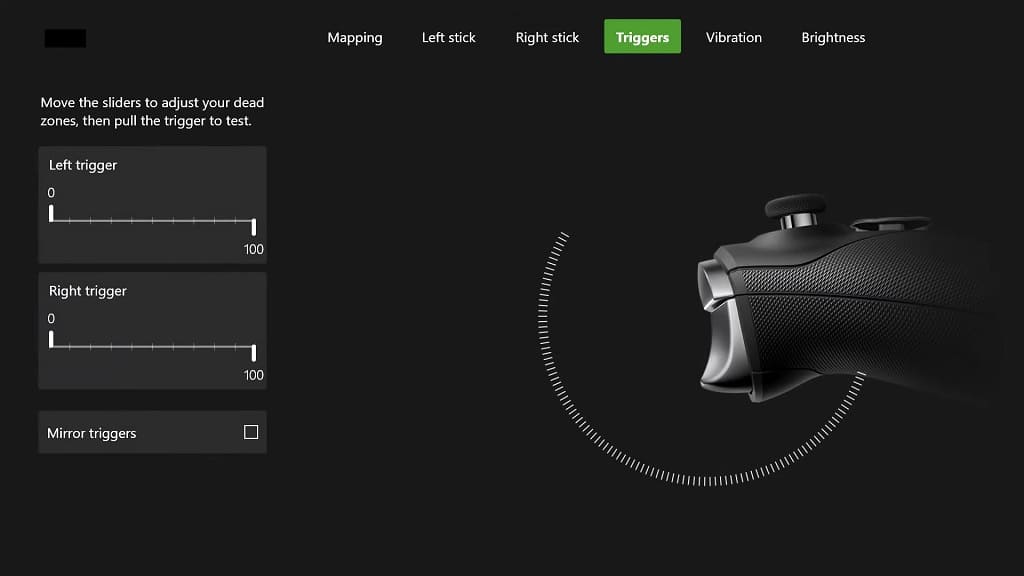
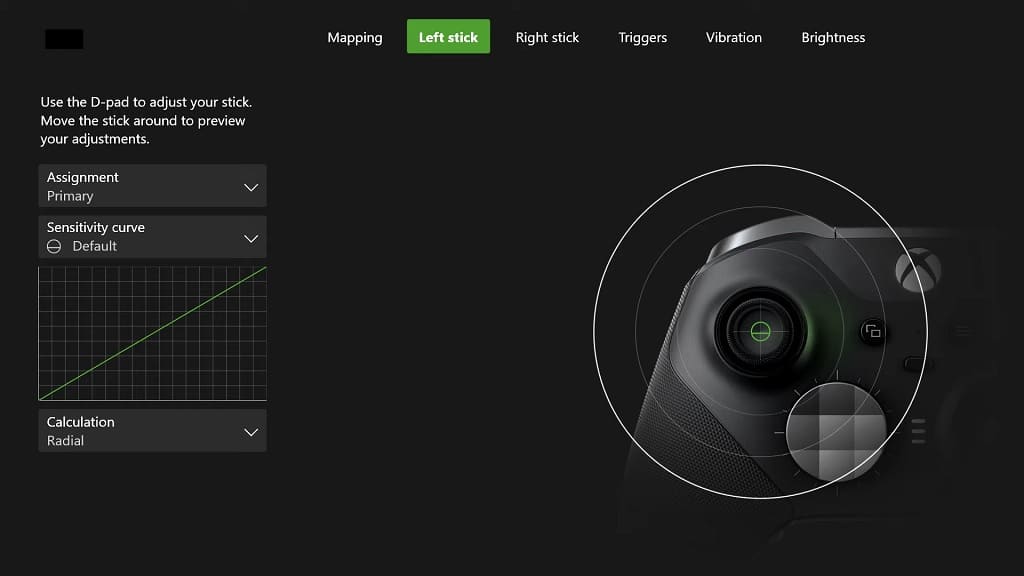
You can also utilize the Triggers menu on the gamepad’s settings to the deadzones of the triggers to make them even more responsive.

Stick Deadzones

If you find that the movement and directional inputs of the left analog stick to be somewhat laggy, then you can use the Left Stick menu of the Xbox Elite Wireless Controller Series 2 to adjust its deadzones.

Wired Connection

To avoid playing with a lot of input lag, we suggest that you plug the Xbox Elite Wireless Series 2 directly to your Xbox One, Xbox One S, Xbox One X, Xbox Series S or Xbox Series X console. Doing so will enable wired communication between the controller and console, which should lead to less input latency as opposed to using the game gamepad over a wireless connection.

PECOOVR PlayStation VR2 Smooth Glasses Spacer Protector review

If you want to use the PlayStation VR2 while wearing glasses, then there is a possibility that you may end up scratching the lenses of the virtual reality headset. To prevent this from happening, you can get a spacer that prevents your glasses from hitting the VR lenses.

During your research, you may have found the PECOOVR PlayStation VR2 Smooth Glasses Spacer Protector on Amazon. So, is this product worth getting? You can find out in this article from Seeking Tech.

What’s Included

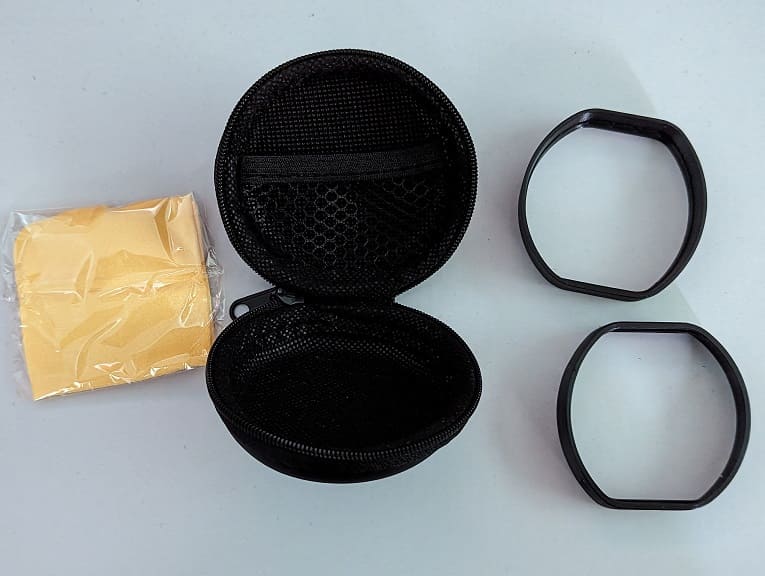
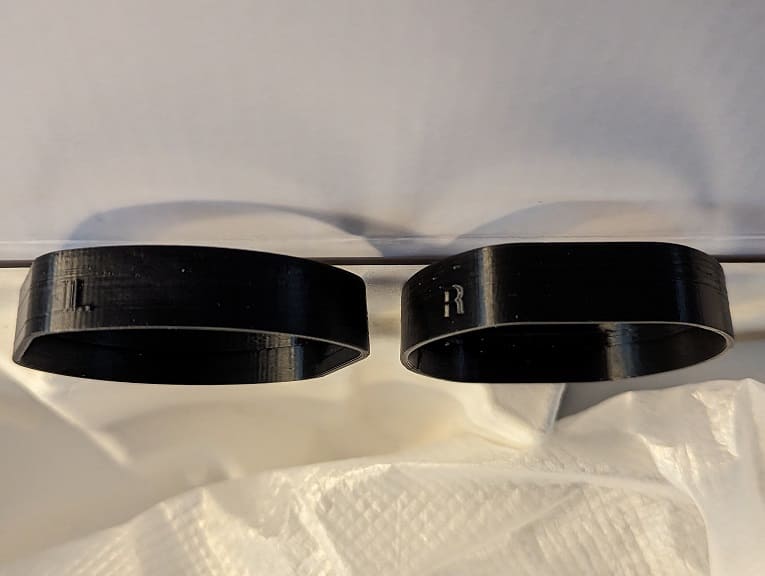
The PECOOVR PlayStation VR2 Smooth Glasses Spacer Protector features a left and right spacer insert for the lenses of the headset. It also features a microfiber cleaning cloth that you can use to wipe your glasses and the lenses clean.

All of these are stored inside a hard carrying case in case you need to take out the spacers and put them away somewhere safe.

Installation

Unfortunately, there aren’t any text instructions included with the PECOOVR PlayStation VR2 Smooth Glasses Spacer Protector. You will only find a video of the steps from a video posted on the Amazon product page or YouTube.

If you need help with the installation, then you can check out our tutorial.

Function

The PECOOVR Spacer does what it advertises as it adds a few extra centimeters to the outer edges of the left and right lenses in the PlayStation VR2 headset. By doing so, your glasses should not be able to make contact, and potentially scratch, the lenses.

While Sony has confirmed that you can wear glasses with the PS VR2, there have been many reports from consumers that they end up scratching the lens. Even if you are extremely careful when putting on and taking off the headset, scratches can happen if you move your head too much while playing a VR game.

Therefore, a spacer such as the PECOOVR can help save you time and money in terms of making you avoid sending your PlayStation VR2 unit in for repair.

We have been playing with the spacers equipped for dozens of hours so far and have found that the lenses of the VR headset have remained scratch free. These hours included playing titles that require a lot of movement such as Beat Saber, Pistol Whip and Les Mills BodyCombat.

Overall

As long as you installed it correctly, the PECOOVR PlayStation VR2 Smooth Glasses Spacer Protector does what it advertises as the product creates space between the lenses of the headset and your glasses. As a result, your glasses won’t cause any scratches to the lens.

While a little bit on the expensive side, it does come with a cleaning cloth and hard carrying case. You can find the current price of the product on Amazon with this link. (#CommissionsEarned).

If you have a 3D printer, or know someone that does, then you can use the print instructions provided by Lowfategg on Thingiverse in order to print out a compatible spacer.

How to install the PECOOVR PlayStation VR2 Smooth Glasses Spacer Protector

The PECOOVR PlayStation VR2 Smooth Glasses Spacer Protector does not come with any printed instructions. To see how you can properly install this accessory to the virtual reality headset, you can take a look at this tutorial from Seeking Tech.

1. If you haven’t done so already, make sure you take the two spacer protectors out of the carrying case.

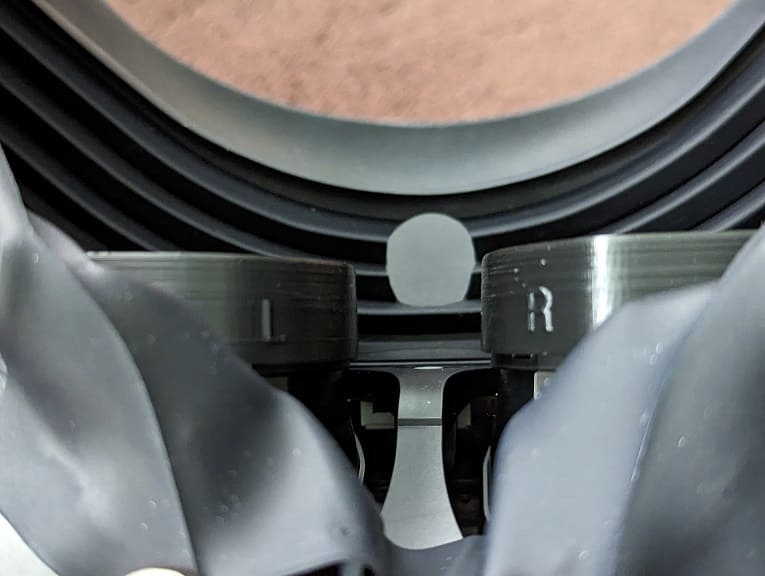
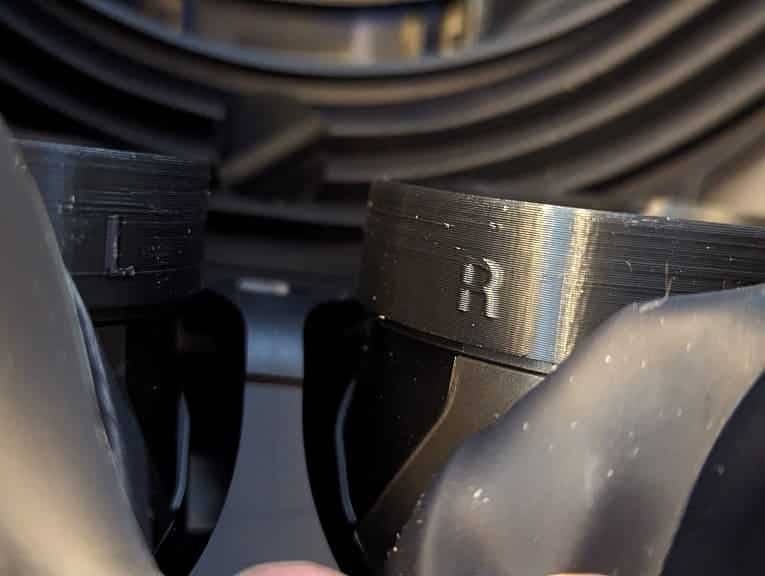
2. Look on the outer rings of the spacer protectors and you should see the L and R letters. You may need to inspect these accessories under bright lights to find these labels.

L indicates that the spacer is intended for the left lens of the PS VR2 while R indicates that it must be put on the right lens.

3. Next, lay the PlayStation VR2 face down on a soft surface. We recommend using a soft surface so that you don’t accidentally scratch or damage the scope and/or tracking cameras when installing the PECOOVR Smooth Glasses Spacer Protectors.

4. You may also want to find a way to keep the PlayStation VR2 upright. You can use your off hand to hold the headset and your other hand for installing the protectors.

In our case, we put the PS VR2 face down on a sofa. The soft surface of the couch prevented any scratches and damage while its back support keeps the headset stable while freeing us to use both hands during the installation.

5. Take one of the spacers and then make sure that the L or R isn’t upside down.

6. The L or R should be pointed towards the nose cut out of the light guard. So, you should make sure that you have the correct positioning.

7. Once you are sure you have the correct position, carefully align the spacer into the outer edge of the lens.

Avoid applying as much force as possible during this step as you don’t want to scratch the lens when maneuvering the spacer around.

8. Once you are done fitting the spacer, carefully push it down the lens in order to secure it. Make sure you push down on all sides of the spacer to ensure that it is equally leveled.

9. After installing one of the spacers, follow the same steps to install the other one.

If you need a video demonstration, then you can check out the following video from the PECOOVR YouTube channel:

10. You should be done installing the PECOOVR Smooth Glasses Spacer Protectors.

If the spacer or your skin made contact with the lenses on the PlayStation VR2, then you can use the cleaning cloth that came with the PECOOVR carrying case to carefully wipe the lens of any dirt, oil and other debris.

How to turn off motion blur in Final Fantasy XVI

Thanks to a recent patch release, you should now be able to disable motion blur in Final Fantasy 16. To find out how you can do so in the JRPG, you can take a look at this tutorial at Seeking Tech.

1. If you haven’t done so already, you should make sure that you have the latest title update installed for the game. Otherwise, you won’t be able to adjust the motion blur effect.

To manually check if there is a new patch to download, open the home menu of your PlayStation 5 (this can be done by pressing and holding the PS button on the DualSense). Afterwards, move the menu cursor over to the Final Fantasy XVI icon and then press the Options button. You should then be able to select “Check for Update” from the pop-up menu list.

2. For the first step, you need to make your way towards the System Menu in FF16.

To do so from the title screen, you can simply select Config.

To do so in the middle of the game, press the Options button outside of a cut scene to open the Main Menu. From there, you can use the L2 and R2 buttons to navigate towards the System Menu.

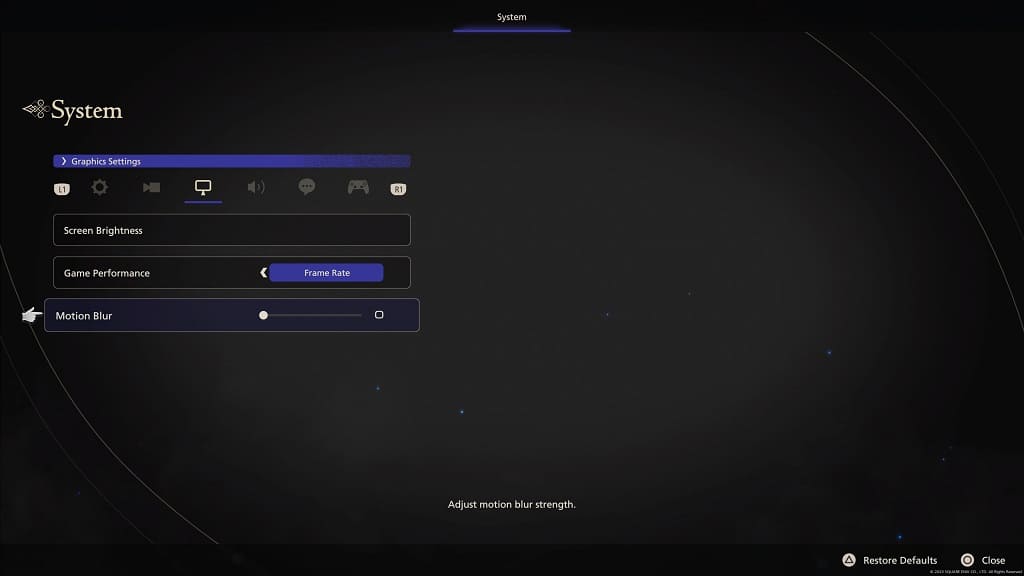
3. From the System Menu, use the L1 and R1 buttons to make your way to the Graphics Settings.

4. After getting to the Graphics Settings tab, move the menu cursor down to Motion Blur option, which should show the following description:

Adjust motion blur strength.

5. By default, the Motion Blur setting is set to 5. You will be able to change it in increments of 1.

To completely disable blurring, we suggest moving the slider all the way down to 0.

6. After changing the Motion Blur setting, exit out of the System Menu and then return to your game.

You should no longer notice any blurring when playing Final Fantasy XVI. If you still see some motion blur, then you can try messing around with the settings of your television set or monitor to see if you are able to disable this effect.

DualSense Edge settings for AEW Fight Forever

To get a leg up in a match, you can use the DualSense Edge when playing the AEW Fight Forever. You can check out this Seeking Tech guide to see what are the best settings for this controller when it comes to playing the wrestling game.

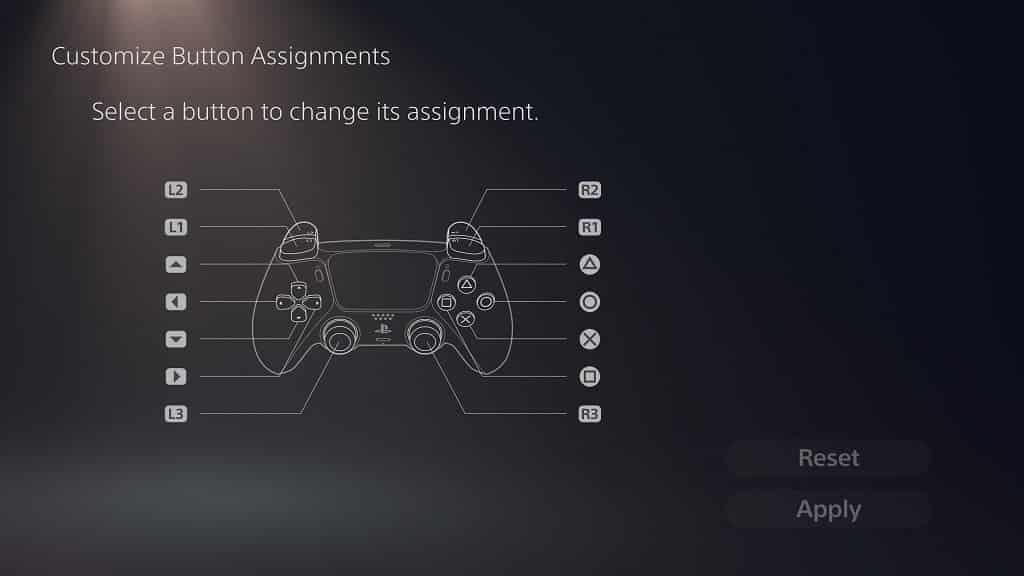
Custom Button Assignments

You can take a look at the default button layout for AEW Fight Forever when using a DuaLSense controller below:

  • Left Analog: Move Wrestler
  • X: Grapple
  • Circle: Run
  • Square: High Strike
  • Triangle: Low Strike
  • L1: Grapple Guard, Grapple Reversal or Pin
  • L2: Action
  • L3: Change Target
  • R1: Strike Guard, Strike Reversal or Pull Up Downed Opponent
  • R2: Irish Whip
  • R3: Steal Finisher

When it comes to the two back buttons of the DualSense Edge, we suggest assigning the left back button to L3 and the right back button to R3 as we don’t like pressing down on the analog stick to trigger an action.

With this customization, you can use the left back button to change targets and the right back button to use an opponent’s finisher.

Of course, you can use whatever layout you feel the most comfortable with. You will be able to customize the button layout by going to Options > Controller > Customize Control menu.

Trigger Stops

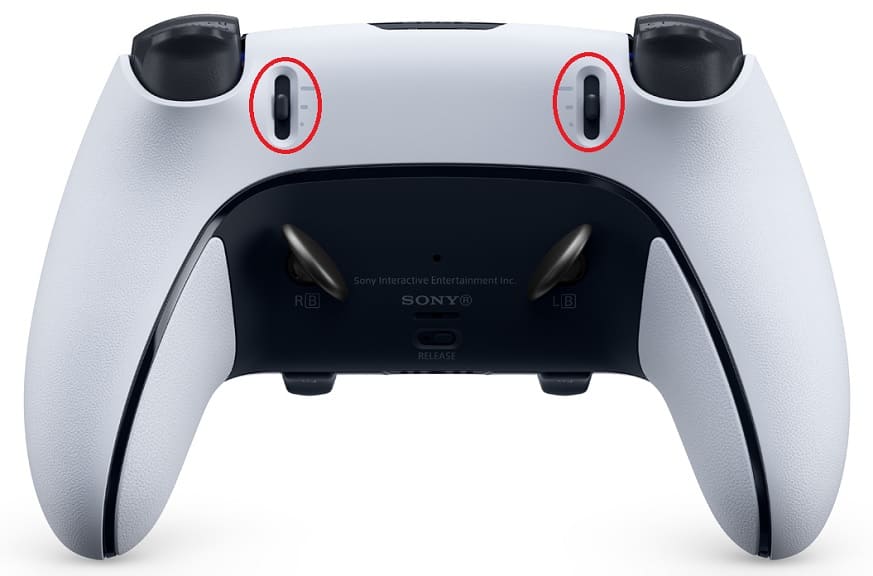
To make the triggers of the DualSense Edge super responsive so that you can pull off the Irish Whip maneuver and other actions as quickly as possible, we suggest that you pull the trigger stop sliders located on the back of the controller all the way down.

You can also use the Trigger Deadzone menu of the gamepad on the PS5 to further adjust the sensitivity of the L2 and R2 buttons.

Stick Sensitivity and Deadzones

If the left analog stick does not feel as responsive as you would like in AEW Fight Forever, then you can try adjusting its sensitivity and deadzones by using the gamepad’s Stick Sensitivity and Deadzones menu on the PS5.

Analog Caps and Back Buttons Attachments

When it comes to the detachable analog caps and back button attachments, you should go with whatever makes you feel the most comfortable with your hand since a match can get quite intense.

Wired Communication

If you want as little input lag as possible in this wrestling game, then we recommend that you plug in the DualSense Edge to the PlayStation 5 console.

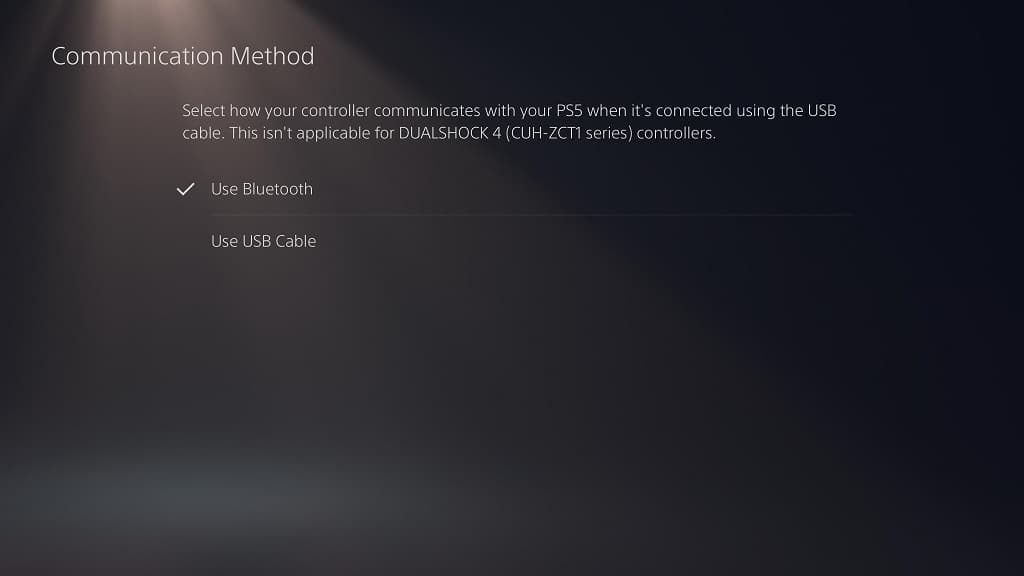
Afterwards, make you way towards the console’s Settings menu and then select Accessories > Controller (General) > Communication Method. Finally, make sure that the Use USB Cable is selected.

How to adjust Lies of P camera sensitivity and controls

Moving the camera is crucial when it comes to attacking and dodging in Lies of P. To see how you can change the camera settings in this action role-playing game, you can take a look at this tutorial from Seeking Tech.

1. For the first step, you need to make your way to the Settings menu.

From the title screen, you can simply select the “Settings” option.

If you have already loaded into the game, you have to open the menu by pressing the Options button on the DualShock 4/DualSense or the Menu button if you are playing on the Xbox One or Xbox Series controller. You then need to select the gear cog icon.

2. Inside of the Settings menu, you need to make your way over to the Camera tab.

You are able to change tabs by using the L1 and R1 buttons on a PlayStation gamepad or LB and RB buttons on the Xbox gamepad.

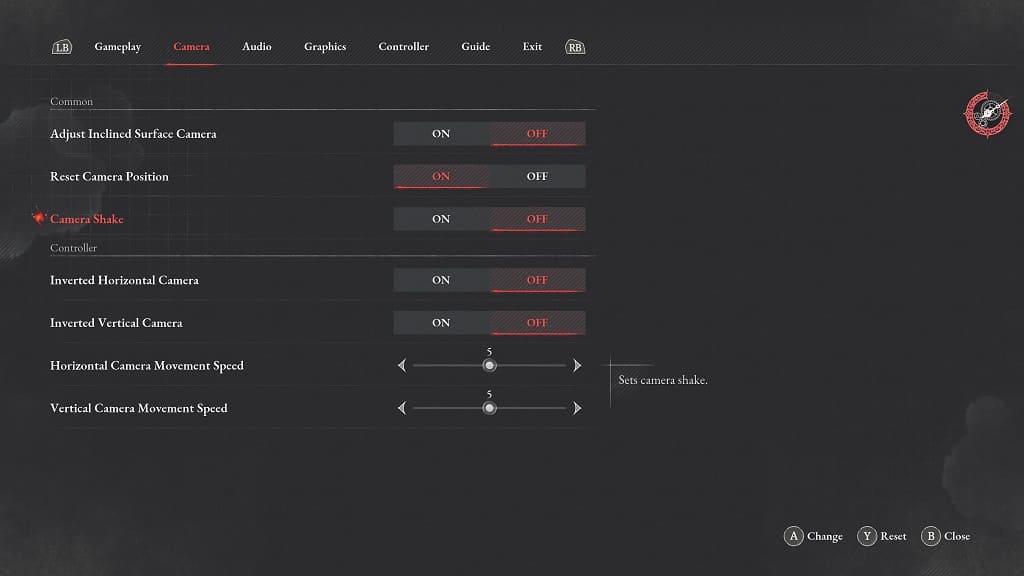
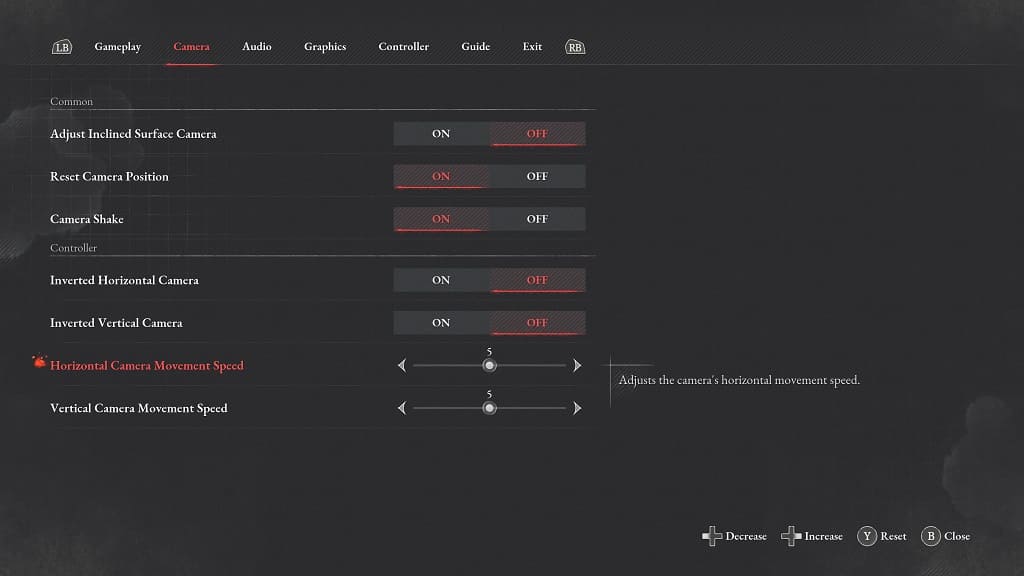
3. In the Camera tab, you will be able to enable or disable the following settings:

  • Adjust Inclined Surface Camera – When enabled, this makes the camera angle more naturally when you are moving at an inclined angle.
  • Reset Camera Button – When turned on, this will reset the camera position (as long as there is nothing to target) to the back of the character.
  • Camera Shake – When enabled, this will make the camera shake in certain scenarios.
  • Invert Horizontal Camera – When turned on, this will make it so that moving the right analog stick to the left side will result in the in-game camera moving to the right direction and vice versa.
  • Invert Vertical Camera – When enabled, this will make it so that moving the right analog stick upwards will pan the in-game camera down and vice versa.

4. From the same Camera tab, you can also adjust the Horizontal Camera Movement Speed and Vertical Camera Movement Speed.

By default, both of these sliders are set to 5. You will be able to change the anywhere from a value of 0 to 10.

5. After you are done changing the Camera settings, exit the Settings menu and return to the game.

Make sure you move the in-game camera around. If it still does not feel quite right, then you can return to the Camera tab in the Settings menu in order to make additional adjustments.

How to change graphics mode in Lies of P

In the PlayStation 5 and Xbox Series X versions of Lies of P, there are three graphics mode. To see how you can change the visual settings for this action role-playing game, you can take a look at this tutorial from Seeking Tech.

1. You won’t be able to change the graphical settings menu if you have already loaded into your save file. Instead, you need to exit out to the Title Screen.

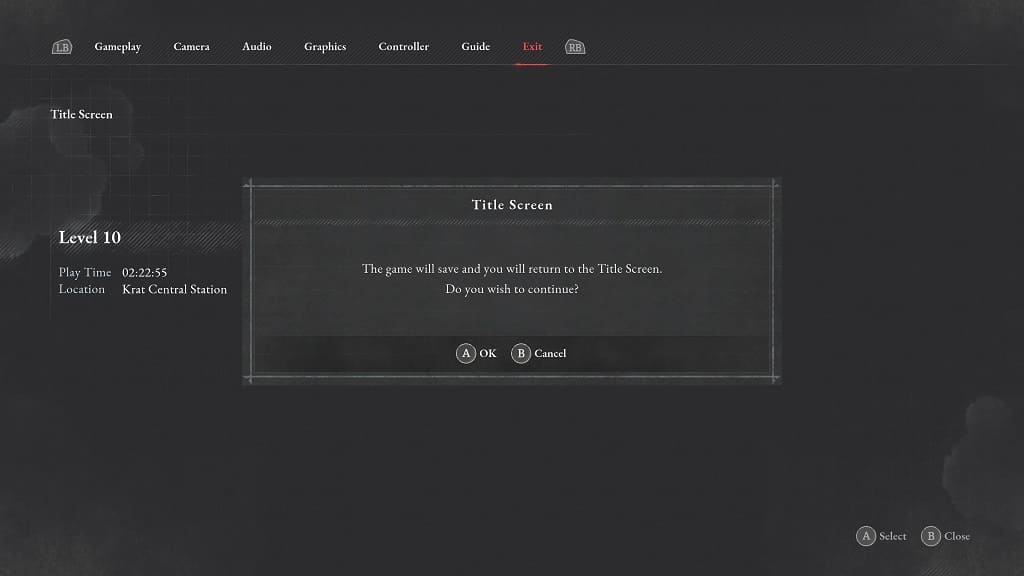
If you are currently playing the game, then you need to press the Options button on PS5 or Menu button on Xbox Series X. Afterwards, select Settings at the top. You then need to use the L1 and R1 buttons or LB and RB buttons to the Exit tab. From there, select Title Screen and then OK in the subsequent pop-up notification.

2. From the title screen, select Settings.

3. After getting to the Settings menu, use the L1 and R1 buttons or LB and RB buttons to switch over to the Graphics tab.

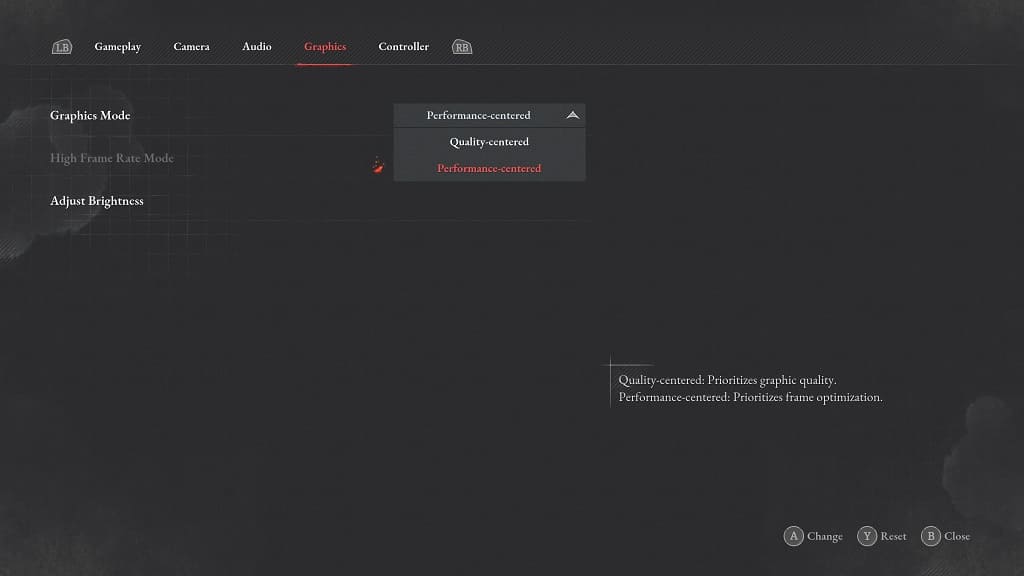
4. You should find the Graphics Mode setting in the Graphics tab. You will be able to select between the following options:

  • The Quality-centered mode changes the native resolution to 1440p with a target frame rate of 30 fps.
  • The Performance-centered mode changes the native resolution to 1080p with a target frame rate of 60 fps.

In both of these modes, the native resolution will be reconstructed to 2160p. If you want more clarity, then you should select Quality-centered. If you prefer having smoother gameplay, then you should select Performance-centered instead.

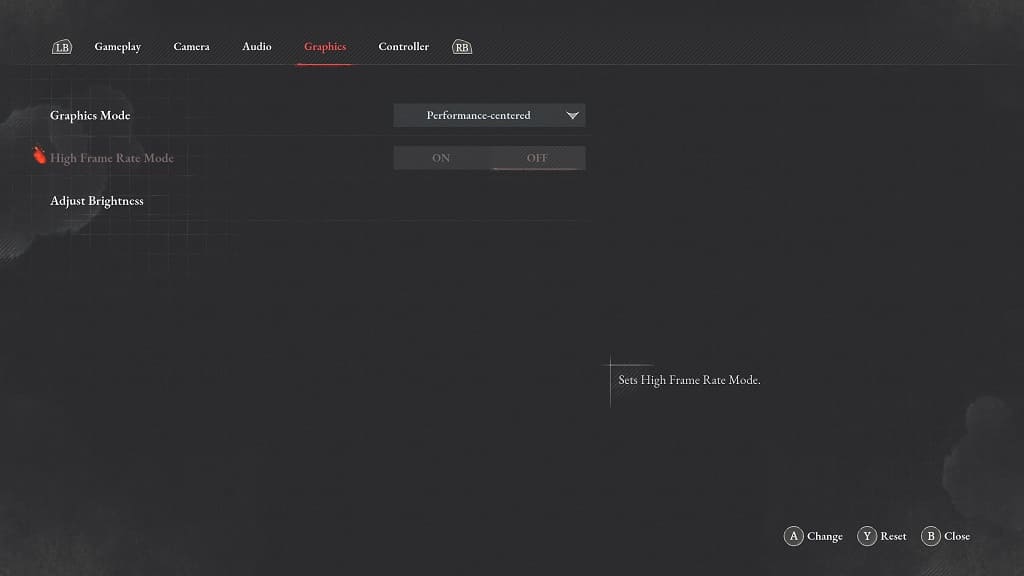
4. If you decide to go with the Quality-centered mode, and have a screen that has a 120 Hz refresh rate, then you can also enable the High Frame Rate Mode.

By doing so, you will be able to play Lies of P in high resolution at 40 fps instead of 30 fps.

5. Once you are done changing the graphics mode, close the Settings menu and then load back into your save file.

You should be able to notice the visual changes right away.

How to fix Lies of P brightness issues on PS5, Xbox Series X and S

You may find that some of the environments in Lies of P to be too dark, too bright or look washed out.

To see how you can fix the brightness issues with the PlayStation 5, Xbox Series X and Xbox Series S versions of this action RPG, you can take a look at this troubleshooting article from Seeking Tech.

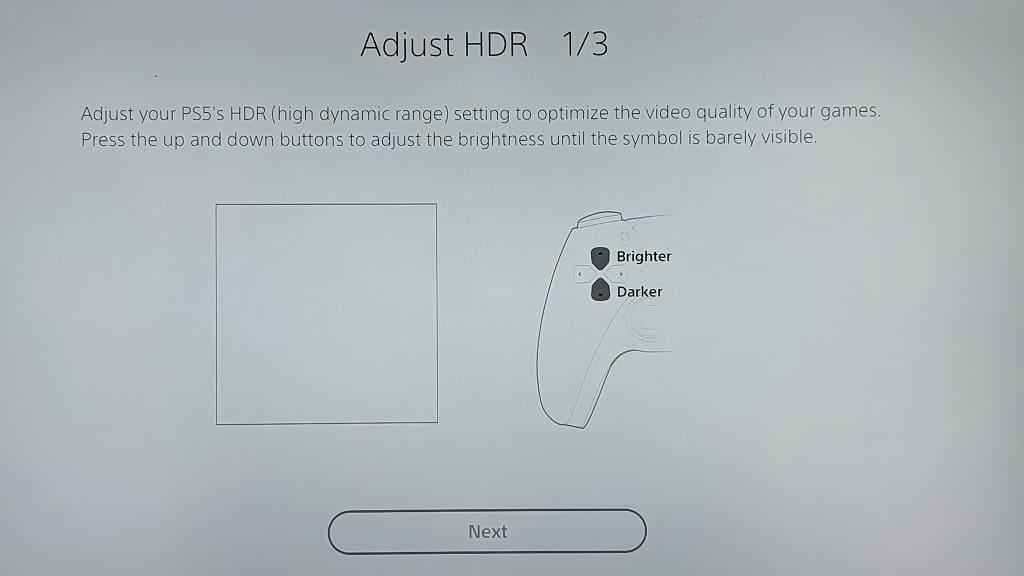
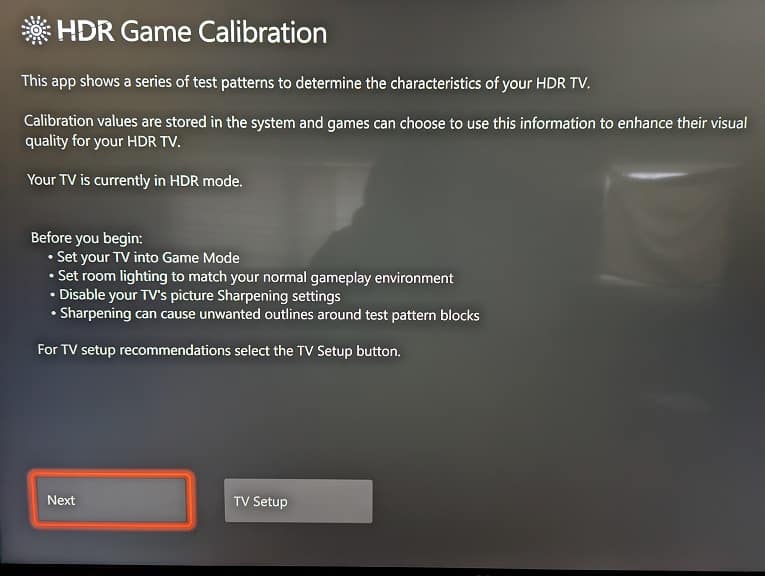
1. To start off, we recommend that you calibrate the HDR output of your game console.

In order to do so with the PS5, you need to go to its Settings menu and then select Screen and Video > Video Output > Adjust HDR.

If you are playing Lies of P on Xbox, then you have to go to its Settings menu on the dashboard and then select General > TV & display options > Calibrate HDR for games.

Afterwards, follow the directions shown on screen in order to calibrate the HDR brightness output.

2. If the brightness still does not look quite right, then you can use the in-game Settings menu. You can do so by selecting “Settings” from the Title screen.

If you have already loaded into your save file, then you need to press the Options button on the PS5 controller or Menu button on the Xbox controller. From the in-game menu, select the gear icon to head into Settings.

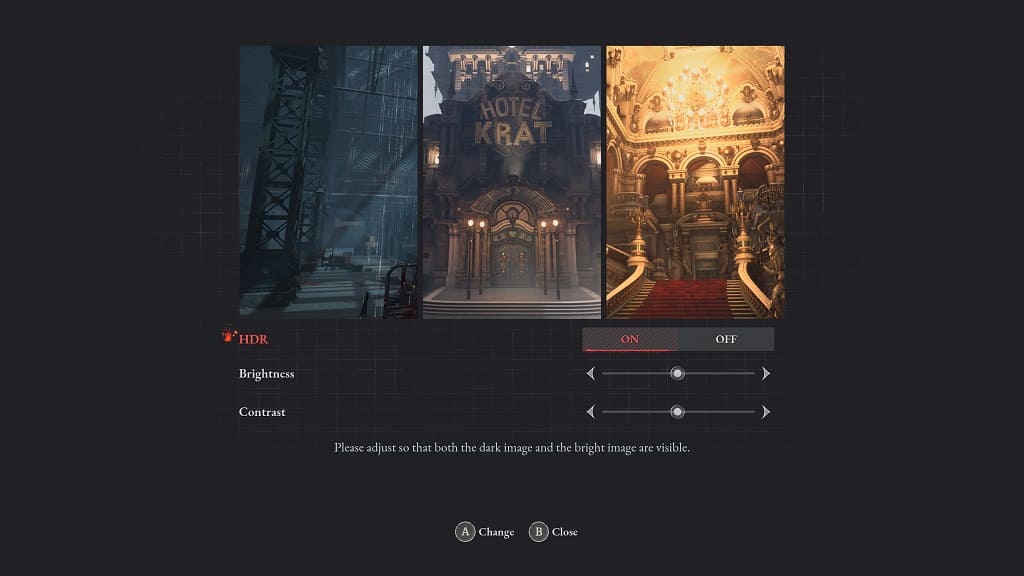
Next, use the L1 and R1 buttons or LB and RB buttons to navigate your way towards the Graphics tab. From there, select the Adjust Brightness setting.

Inside of the Adjust Brightness menu, you will be able to enable or disable HDR. You will also be able to adjust the Brightness and Contrast sliders. When changing these levels, you can use the images at the top as a reference.

You may need to use the Adjust Brightness menu often when you move from one environment to another.

3. Of course, you can also use the settings of your television set or gaming monitor to adjust the brightness and contrast levels if you need to make additional adjustments.

How to properly store the PlayStation VR2

If you aren’t using the PlayStation VR2, then leaving it out in the open can damage the expensive accessory. To see how you can properly store your virtual reality headset, you can take a look at this guide from Seeking Tech.

What can happen if you don’t properly store your PS VR2

If you don’t properly store your PlayStation VR2, then you could risk damaging its lenses due to the overexposure to direct sunlight.

Dust particles and other contaminants can also get to the lens, causing visual artifacts if you don’t wipe them off before using your headset. Dust can also end up blocking the ventilation shaft, which is designed to keep the lens from fogging up.

So, if you are aren’t using the virtual reality headset, it is best that you store it properly in order to avoid any potential damage.

Using the retail box

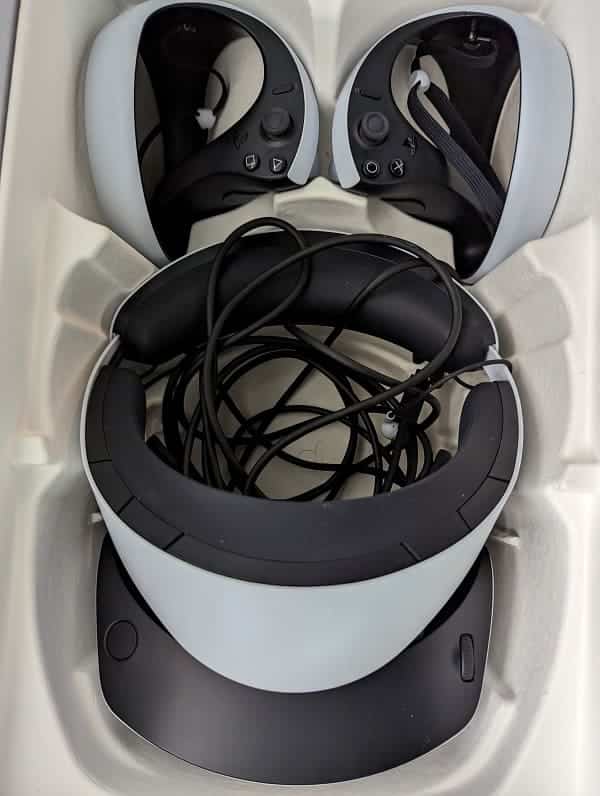
The good news is that packaging box that comes with the PlayStation VR2 can be re-used as a storage box. If you still have it around, then we recommend that you take the following steps:

1. To start off, unplug the PS VR2 from the USB C port of your PlayStation 5.

2. If you have the earphones attached to the earpiece holders, then we suggest that you remove them. Otherwise, the headset may not be able to fit properly in the grooves of the box.

3. If you haven’t done so already, long press the scope adjustment button and then slide the scope all the way in. This is needed to fit the headset into the groove of the retail box.

4. Once you have everything set up, put the headset into its groove in the retail box. Make sure that the earphones aren’t blocking the sides when doing so.

5. Afterwards, carefully put the USB cable in the open space in between the the scope and the headband.

6. If you want to, you can also put the Left PlayStation VR2 Sense Controller and Right PlayStation VR2 Sense Controller into their respective groves.

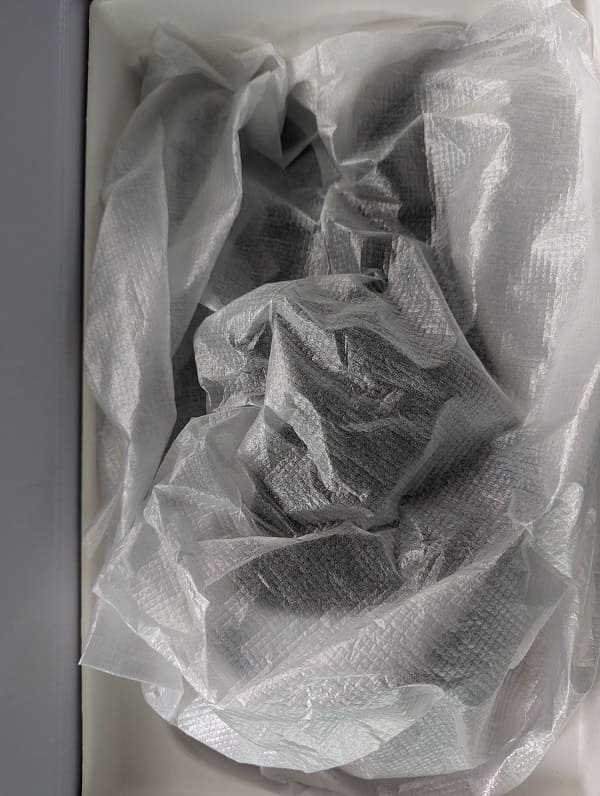
7. The retail box may not close all the way. If it doesn’t, then you can use one of the white plastic sheets that came in the packaging box as a dust cover.

PlayStation VR2 carrying case

If you already threw away the packaging box that came with your PlayStation VR2 and/or would like to easily move the virtual reality headset around, then you might want to consider getting a carrying case.

If you are interested in doing so, then we recommend checking out the Sarlar PlayStation VR2 Hard Carrying Case, which you can find on Amazon with this link. (#CommissionsEarned).