How to avoid smashing the PS VR2 Sense controllers

It is pretty easy to break the left and right PlayStation VR2 Sense controllers if you aren’t careful enough with your surroundings while playing in virtual reality. To see what precautionary steps you can take to prevent these motion controls from breaking, you can take a look at this article from Seeking Tech.

1. For the first step, you should make sure that you have enough free airspace around you, especially if you are using a game that features the room scale play style.

If you are using the sitting play style, then avoid using a seat that has any arm rests as you could easily hit them in you aren’t careful during your play session.

Furthermore, you should also avoid playing the PlayStation VR2 if you are right underneath a ceiling light, ceiling fan or have a low roof as you could easily hit these objects as well. Instead, try to move to a more suitable location if possible.

2. You can also try limiting the play area so that it won’t be anywhere close to a wall, television set and other solid objects.

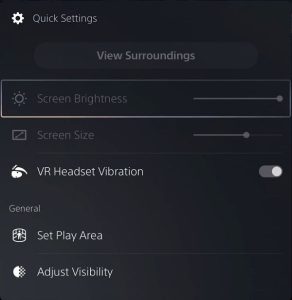
In order to edit your play area, you need to press the PS button on one of the Sense controllers, select the Quick Settings card and then select Set Play Area.
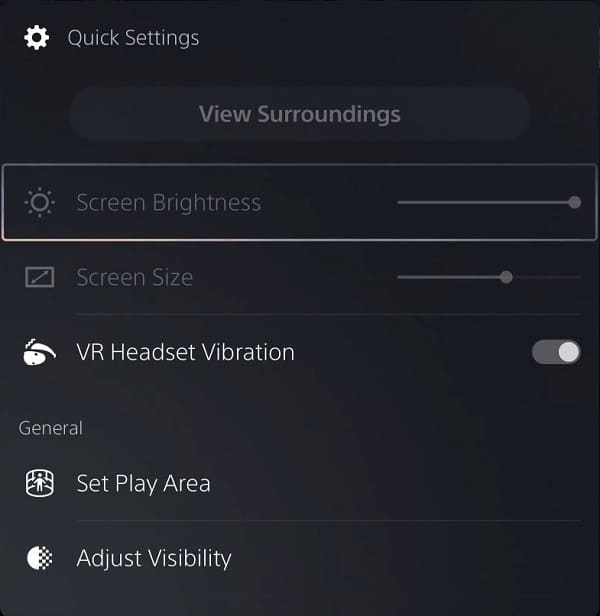
You can also go back to the home screen menu of your PlayStation 5 or PlayStation 5 Digital Edition console. From there, head over to Settings > Accessories > PlayStation VR2 > Set Play Area.

When setting up the Play Area, make sure you manually edit the space so that it is at least several feet away from a wall, television set and other solid objects. This is to ensure that, even if you punch the PlayStation VR2 Sense controllers through the virtual wall, you most likely be hitting air instead of anything solid.

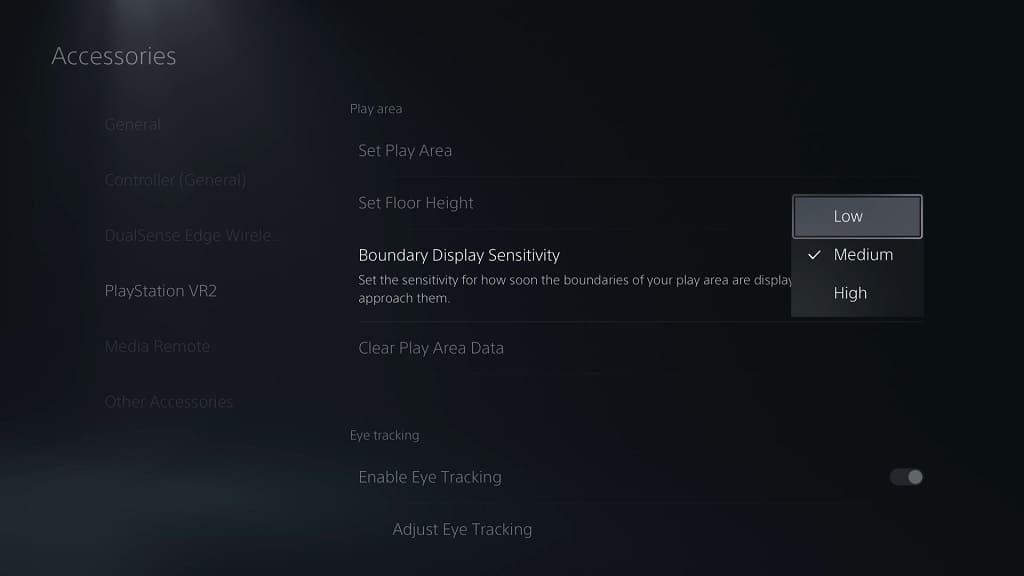
3. You can also set the Boundary Display Sensitivity setting to High, which will make the detection more sensitive to your proximity. As a result, the game should end up pausing and the PS VR2 headset will automatically go into its “View Surroundings” mode where you can see where you are in the real world.

You can find this setting by pressing the PS button, selecting Quick Settings and then selecting Other Settings. Alternatively, you can go to the home screen of your PS5, select Settings, select Accessories and then select PlayStation VR2.

From the PlayStation VR2 menu, you need to select Boundary Display Sensitivity and then set it to High. Once you do, the out of bounds warning should appear a lot sooner.
4. Of course, it is very important that you always wear the wrist strap that is attached to both the left and right PlayStation VR2 Sense controllers

Otherwise, the motion controller can end up slipping out of your hands and either fall to the floor or be sent flying into a solid objects.

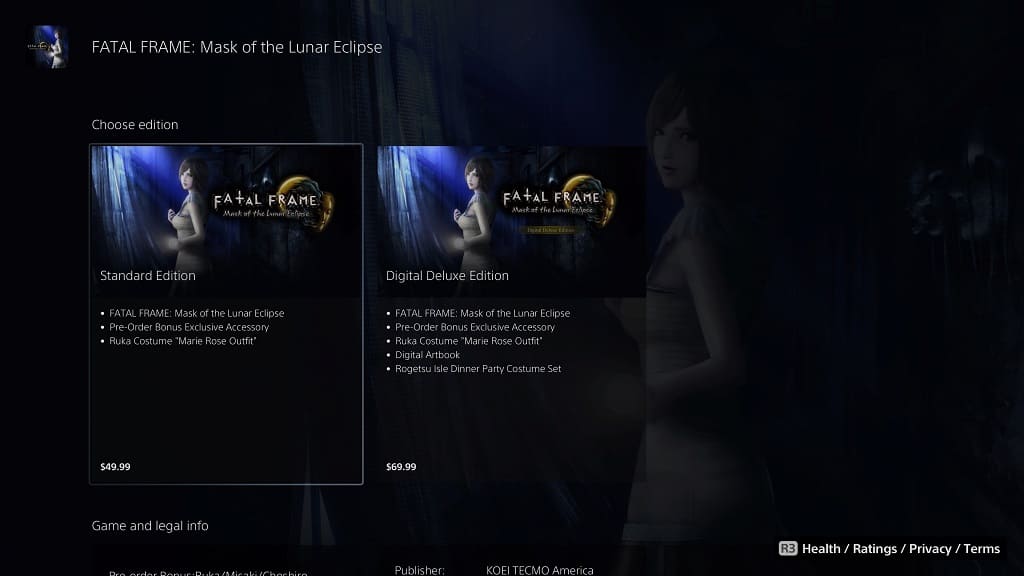
What’s the difference between Fatal Frame: Mask of the Lunar Eclipse Standard and Deluxe Editions?

Fatal Frame: Mask of the Lunar Eclipse is being released for the Nintendo Switch, PC, PlayStation 4, PlayStation 5, Xbox One, Xbox One S, Xbox One X, Xbox Series S and Xbox Series X. When buying this survivor horror game digitally, you may notice that there is a standard and deluxe edition available.

So, what are the main differences between these two versions? You can find out in this comparison article at Seeking Tech.

Fatal Frame: Mask of the Lunar Eclipse Standard vs. Digital Deluxe Edition

You can check out our comparison chart for the standard and digital deluxe editions of Fatal Frame: Mask of the Lunar Eclipse below:

Fatal Frame: Mask of the Lunar Eclipse Standard EditionFatal Frame: Mask of the Lunar Eclipse Digital Deluxe Edition
Base GameIncludedIncluded
Ruka Exclusive Costume "Marie Rose Outfit (DEAD OR ALIVE)IncludedIncluded
Ruka Limited Edition Costume "Fox Mask (White and Red)”IncludedIncluded
Misaki Limited Edition Costume "Fox Mask (Black and Red)”IncludedIncluded
Choshiro Limited Edition Costume "Fox Mask (Black and Blue)”IncludedIncluded
Ruka/Misaki/Choshiro Limited Edition Costume "Spirit Stone Flashlight Hat"IncludedIncluded
Ruka Limited Edition Costume "Japanese Swimsuit"Not IncludedIncluded
Misaki Limited Edition Costume "Dancer Swimsuit"Not IncludedIncluded
Choshiro Limited Edition Costume "Rash Guard & Surf Shorts"Not IncludedIncluded
Ruka Limited Edition Costume "Chinese Evening Dress (Emerald)"Not IncludedIncluded
Misaki Limited Edition Costume "Chinese Evening Dress (Crimson)"Not IncludedIncluded
Ruka Limited Edition Costume "Nightwear (Blue)"Not IncludedIncluded
Misaki Limited Edition Costume "Nightwear (Pink)"Not IncludedIncluded
Ruka Limited Edition Costume "Cat Ears (White)”Not IncludedIncluded
Misaki Limited Edition Costume "Cat Ears (Black)”Not IncludedIncluded
Choshiro Limited Edition Costume "Detective's Hat"Not IncludedIncluded
Ruka Limited Edition Costume "Organ Mask (Rogetsu Kagura - Vocal)"Not IncludedIncluded
Misaki Limited Edition Costume "Organ Mask (Rogetsu Kagura - Bell)"Not IncludedIncluded
Madoka Limited Edition Costume "Organ Mask (Rogetsu Kagura - Strings)"Not IncludedIncluded
FATAL FRAME: Mask of the Lunar Eclipse Digital Art Book with OSTNot IncludedIncluded

Base Game

Both editions come with the base game. For the uninformed, Fatal Frame: Mask of the Lunar Eclipse was originally released for the Nintendo Wii in 2008. However, it was never officially translated into English and never came out in the western regions.

Due to the success of another remastered release in the series, Fatal Frame: Maiden of Black Water, the Mask of the Lunar Eclipse will be made available for the first time in English for the PC and modern consoles.

Pre-Order Bonuses

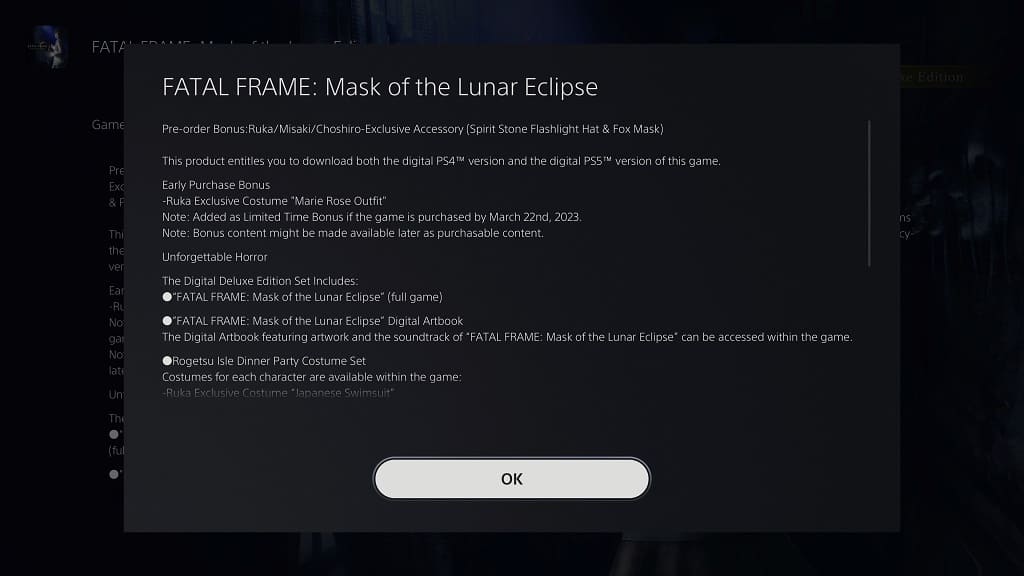
By pre-ordering either the standard or deluxe editions of this title, you will get the following in-game costumes:

  • Ruka Exclusive Costume “Marie Rose Outfit (DEAD OR ALIVE)”
  • Ruka Limited Edition Costume “Fox Mask (White and Red)”
  • Misaki Limited Edition Costume “Fox Mask (Black and Red)”
  • Choshiro Limited Edition Costume “Fox Mask (Black and Blue)”
  • Ruka/Misaki/Choshiro Limited Edition Costume “Spirit Stone Flashlight Hat”

These pre-order DLC bonuses could end up being available for purchase at a later date.

Digital Deluxe Edition Exclusive

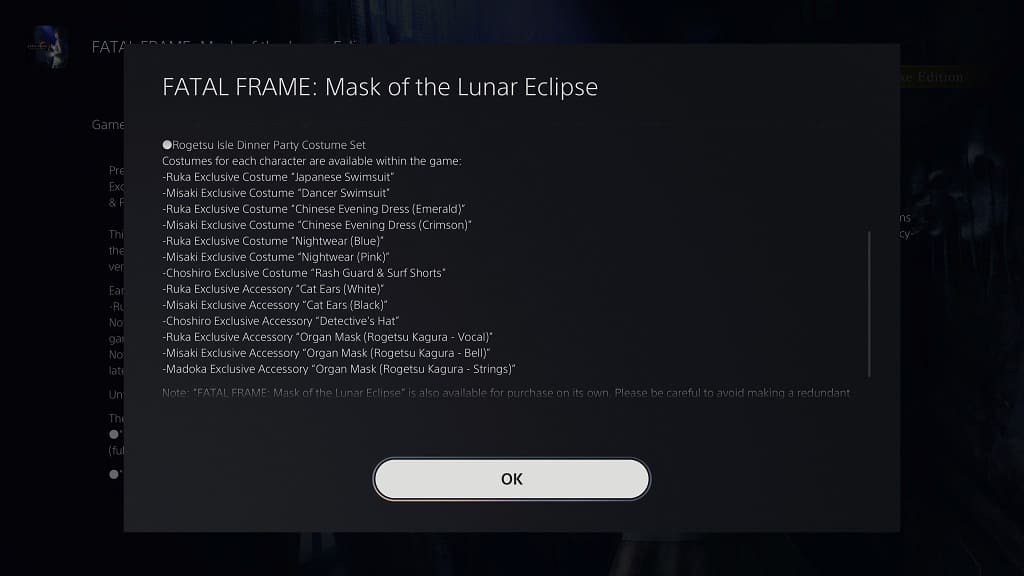
By getting the Fatal Frame: Mask of the Lunar Eclipse Digital Deluxe Edition, you will exclusive get the Rogetsu Isle Dinner Party Costume Set, which provides the following in-game cosmetics:

  • Ruka Limited Edition Costume “Japanese Swimsuit”
  • Misaki Limited Edition Costume “Dancer Swimsuit”
  • Choshiro Limited Edition Costume “Rash Guard & Surf Shorts”
  • Ruka Limited Edition Costume “Chinese Evening Dress (Emerald)”
  • Misaki Limited Edition Costume “Chinese Evening Dress (Crimson)”
  • Ruka Limited Edition Costume “Nightwear (Blue)”
  • Misaki Limited Edition Costume “Nightwear (Pink)”
  • Ruka Limited Edition Costume “Cat Ears (White)”
  • Misaki Limited Edition Costume “Cat Ears (Black)”
  • Choshiro Limited Edition Costume “Detective’s Hat”
  • Ruka Limited Edition Costume “Organ Mask (Rogetsu Kagura – Vocal)”
  • Misaki Limited Edition Costume “Organ Mask (Rogetsu Kagura – Bell)”
  • Madoka Limited Edition Costume “Organ Mask (Rogetsu Kagura – Strings)”

Furthermore, the digital deluxe edition is the only one to come with the FATAL FRAME: Mask of the Lunar Eclipse Digital Art Book, which also comes bundled with the original soundtrack.

Quick Summary

As you can see above, most of the Fatal Frame: Mask of the Lunar Eclipse Digital Deluxe Edition extras are for in-game cosmetics. You will also get a digital art book and OST as extras.

If you are interested in these bonuses, then you can get the deluxe edition. If you don’t care about the art book, soundtrack, costume and accessory bonuses, then you can just get the cheaper standard edition instead.

If you purchase the standard edition of the game but would like to upgrade to get the digital deluxe edition contents, then there should be Digital Deluxe Upgrade Pack available to download as an add-on on the digital storefronts.

Fatal Frame: Mask of the Lunar Eclipse comes out on March 9, 2023, for the Nintendo Switch, PC, PlayStation 4, PlayStation 5, Xbox One, Xbox One S, Xbox One X, Xbox Series S and Xbox Series X.

How to mute the PlayStation VR2 microphone

The PlayStation VR 2 features a built-in microphone. You can check out this step-by-step tutorial to see how you can mute this mic if you don’t want other players to hear you in voice chat.

How to mute the PS VR2 mic from the Control Center

By default, you need to use the Control Center in order to mute the PlayStation VR 2 microphone. In order to do so, you need to take the following steps:

1. While wearing the virtual reality headset, press the PS button in either the left or right PlayStation VR2 Sense controllers.

2. In the Control Center menu, select the Mic icon located at the bottom menu.

3. From the pop-up menu, you then need to make sure that the Mute option is enabled.

How to add the mute button to PlayStation VR2

If you would like to add the mute button to the PlayStation VR2, then you need to change the functionality of the Function Button. For the uninformed, this is the button is located at the bottom right-hand side of the virtual reality headset. By default, this button is set to View Surroundings, which allows you to see through the headset and into the real world in black and white.

You can change the Function button to mute the microphone on the VR headset instead by doing the following:

1. To start off, you need to head over to the PlayStation VR2 menu.

You can get there by pressing the PS button to open the Control Center. From there, select Quick Settings and then Other Settings.

Alternatively, you can go back to the home screen of your PlayStation 5 or PlayStation 5 Digital Edition system. Afterwards, go to Settings > Accessories > PlayStation VR2.

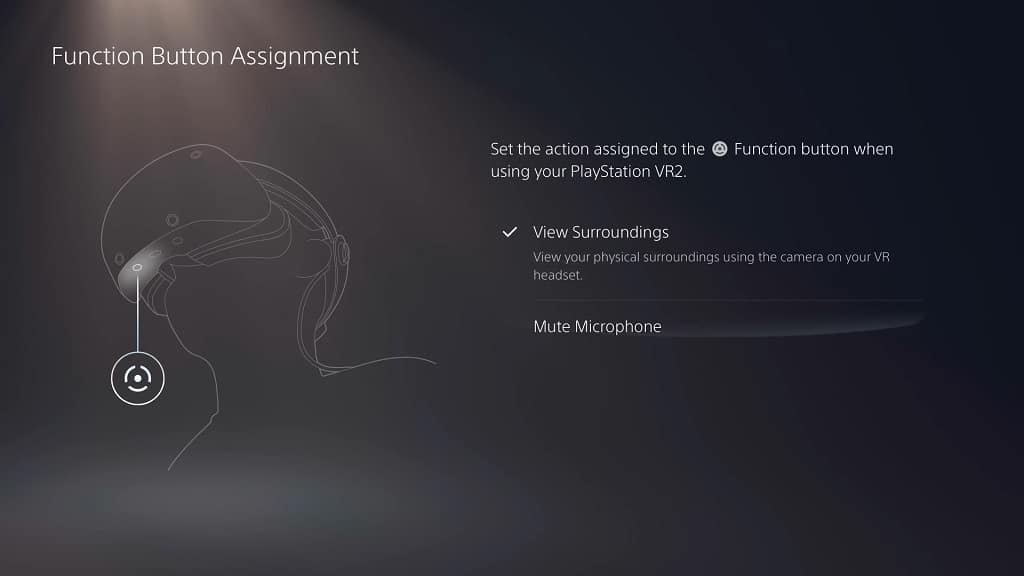
2. In this menu, you need to select Function Button Assignment from the VR Headset section.

3. From the Function Button Assignment menu, make sure that Mute Microphone is selected.

4. When you press the Function button on the PlayStation VR2, you should now be able to mute the virtual reality headset’s microphone.

5. To use the see through mode with the Function button set to Mute Microphone, you need to press the PS button to open the Control Center. From there, select the Quick Settings card. Finally, select View Surroundings.

How to prevent smashing your TV when playing PS VR2

If you aren’t careful, you could easily damage your expensive television set when playing the PlayStation VR2. To see how you can prevent this accident from happening, you can take a look at this guide from Seeking Tech.

1. For the first step, we suggest that you play as few away from your television set as possible. The PS VR2 comes with a 14.7-foot (or 4.5 meter) long cable, so you should have plenty of length to move yourself back.

Furthermore, you only need 6.6 square foot (or 2 square meter) of free space if you want to take advantage of the room scale play style. For the standing and sitting play styles, you need even less room. So, you should have plenty of leeway to work with.

2. If possible, you can also try playing from the aforementioned standing or sitting position.

The room scale play style offers more movement, which will most likely lead to more accidents as you need to move around in the room.

3. If you can only play in room scale, then we recommend that you set your play area to as far away from your television set as possible.

To do so, you need to press the PS button and then select Quick Settings > Set Play Area.

Alternatively, you can go to the home screen of your PlayStation 5 or PlayStation 5 Digital Edition console and then select Settings > Accessories > PlayStation VR2 > Set Play Area.

4. You can also set the Boundary Display Sensitivity to High. By doing so, the virtual reality headset will warn you sooner as you approach the border of the play area.

You can find this setting by pressing the PS button, selecting Quick Settings and then selecting Other Settings.

You can also get to the same menu from the home screen of your PS5 by heading over to Settings > Accessories > PlayStation VR2.

5. You can also use a small carpet, flat cardboard boxes and other objects that you can stand on. By doing so, you should be able to easily tell when you step out of your play area.

6. You do not need to face your television set when playing in VR. Therefore, you can try facing the other way so that you don’t accidentally punch the screen.

Once you re-position yourself, press the hold the Options button on the controller to re-center yourself in the VR game you are currently playing.

7. After you have gone through the initial setup process, you actually don’t need to connect your PlayStation 5 to a television set at all. Thus, you can try playing PlayStation VR2 in another area if you are afraid of breaking your TV.

8. Don’t be afraid to pause the game to re-situate yourself in the real world if you feel that you have no idea of your current position.

In order to do so, press the Function button on the PlayStation VR2 headset, which should activate the see-through mode by default. Afterwards, make sure that your surrounds are safe and then press the Function button to return to the game. Finally, press and hold the Options button to re-center the in-game camera if necessary.

How to fix The Legend of Dragoon soft locking crashes on PS4 and PS5

An emulated version of The Legend of Dragoon was recently released for the PlayStation 4 and PlayStation 5. When playing the classic Japanese role-playing game, however, many players have found that it will soft lock when they try to use specific dragoon magic spells.

As a result, the game will become unresponsive, forcing players to either reload from an earlier save point use the rewind feature to go back to a previous point before the dragoon magic was used in order to continue. One of the workarounds to this issue is to avoid using magic spells during fights altogether; however, this makes the game a lot more difficult when it comes to the turn-based combat. Thankfully, Sony has released a fix to these soft locking glitches.

To find out how you can fix this problem with the PS4 and PS5 versions of The Legend of Dragoon, you can take a look at this troubleshooting article from Seeking Tech.

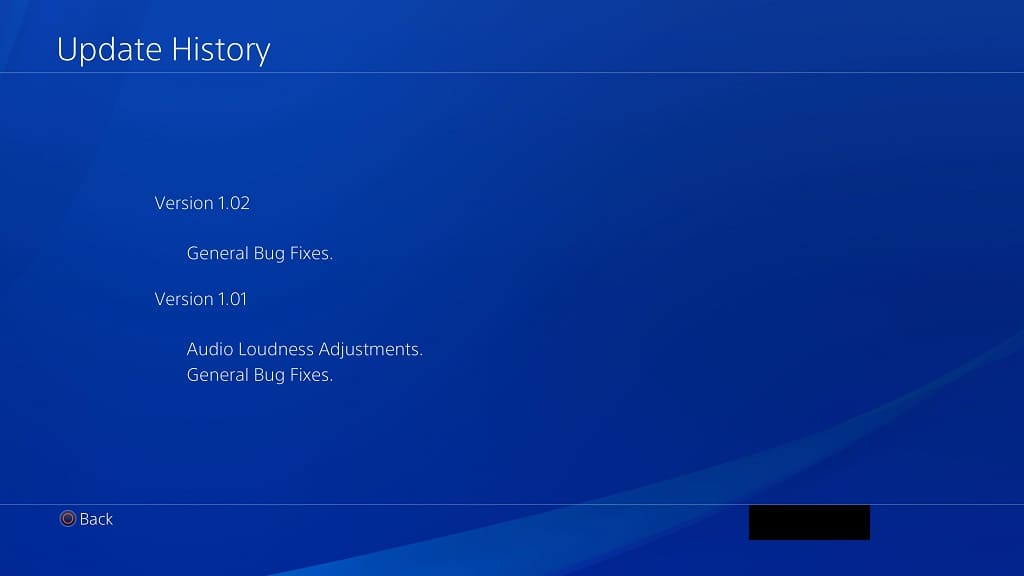
1. The soft locks should be fixed with 1.02 update for the game.

To manually update The Legend of Dragoon to the latest patch, you need to do the following:

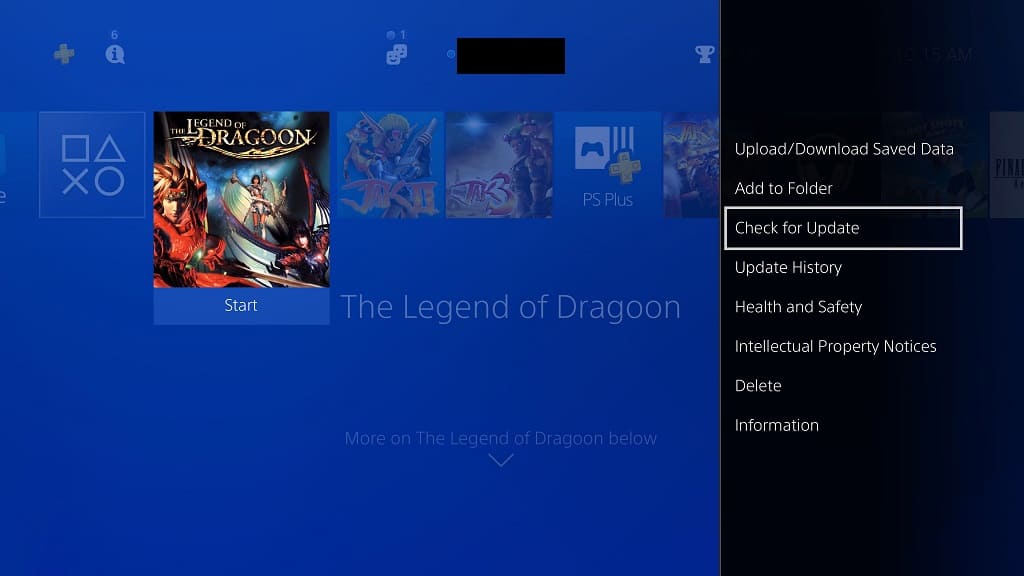
  • Move the cursor over to the game’s icon on the home screen menu of your PlayStation 4, PlayStation 4 Pro, PlayStation 5 or PlayStation 5 Digital Edition console.
  • Press the Options button on the DualSense or DualShock 4 controller.
  • In the pop-up menu, select the Check for Update option.

2. Depending on how you save your game, you may need to take additional steps to fix the soft crashes.

If you are loading back into the game by using quick save feature of the emulator, which allows you to save anywhere in the game, then you need to load into the traditional save feature of The Legend of Dragoon instead in order to apply the soft lock fix. To do so, you can take the following steps:

  • You can continue from the quick save and then look for an opportunity to save the game traditionally at a save point.
  • Afterwards, restart the game and then select Continue from the Title Screen. Load into the save you previously created from the save point.

  • Once you downloaded the 1.02 patch and load the game by using the traditional method, the game should no longer soft lock when you are using specific dragoon magic during battles.
  • You should also be able to use the quick save feature again without any crashing issues once the fix has been applied.

The Legend of Dragoon was originally released for the PS1 system on June 14, 2000, in the U.S. region.

The emulated version of the JRPG came out for the PlayStation 4 and PlayStation 5 on February 21, 2023. It is a part of the Classics Catalog, which you can get if you are a member of PlayStation Plus Deluxe or PlayStation Plus Premium.

If you previously bought the emulated version on the PlayStation Store of your PlayStation 3, PlayStation Portable or PlayStation Vita system, then you can download the PS4 and PS5 versions of The Legend of Dragoon at no additional costs. If not, then you can also purchase this game on the PlayStation Store of your PlayStation 4 or PlayStation 5 console.

What to do if playing PS VR2 while sitting down is not working

While you can play PlayStation VR2 while sitting down, many players have found that they are constantly hitting against the boundary. So, if the seating position does not appear to be working correctly with this virtual reality headset, then you can take a look at this troubleshooting article from Seeking Tech.

1. For the first step, you can try adjusting the Boundary Display Sensitivity setting from the PlayStation VR2 menu.

To go to the PlayStation VR2 menu, make sure that you are wearing the headset and then head to your console’s Setting menu; from there, you need to select Accessories > PlayStation VR2. Alternatively, you can also press the PS button, select the Quick Settings card and then select Other Settings.

In the PlayStation VR2 menu, select Boundary Display Sensitivity and then set this setting to Low.

2. If your head and/or arms are still hitting the boundary, then you can try making the game you are currently playing think that you are using the standing position when you are actually sitting down. In order to do so, you can do the following:

  • In the in-game menu, change the VR play style to standing.
  • Sit down if you haven’t done so already.
  • Make sure you are staring straight ahead.
  • Press and hold the Options button located on the DualSense or the Right PlayStation VR2 Sense controller to reset re-center the in-game camera.

By making the game think that you are standing up when you are actually sitting down, you should be able to have more play area to work with.

3. If the boundary still feels too cramped when you are playing from a seated position, then you can try expanding the play area by doing the following:

To start off, press the PS button, select the Quick Settings card and then select Set Play Area. You can also go to the Settings menu of your PS5 and then select Accessories > PlayStation VR2 > Set Play Area.

Next, make sure that you have enough play area space around your seat.

Keep in mind that the play area only applies to the standing and room scale positions. Therefore, you need to select the standing play style in order for the expanded play area to apply. You can then sit down and re-center the in-game camera.

4. There is a good chance that Sony will fix this issue as it is a common complaint among players. Therefore, you should make sure that your PlayStation 5 and PlayStation VR2 have been updated to the latest firmware releases.

How to fix PlayStation VR2 ‘too many USB devices connected’ error

When you plug in the PlayStation VR2 into your PlayStation 5 or PlayStation 5 Digital Edition console, you may end up seeing the following error message appear on the top right side of the screen:

  • “Too many USB devices connected.”

To see how you can potentially fix this with the virtual reality headset, you can take a look at this troubleshooting article from Seeking Tech.

1. To start off, make sure you unplug any other devices you have connected to your PS5 console if you haven’t done so already.

2. You should also make sure that your PS VR2 headset is connected directly to the USB-C port of the system.

A USB extension cable or hub may end up causing connection issues.

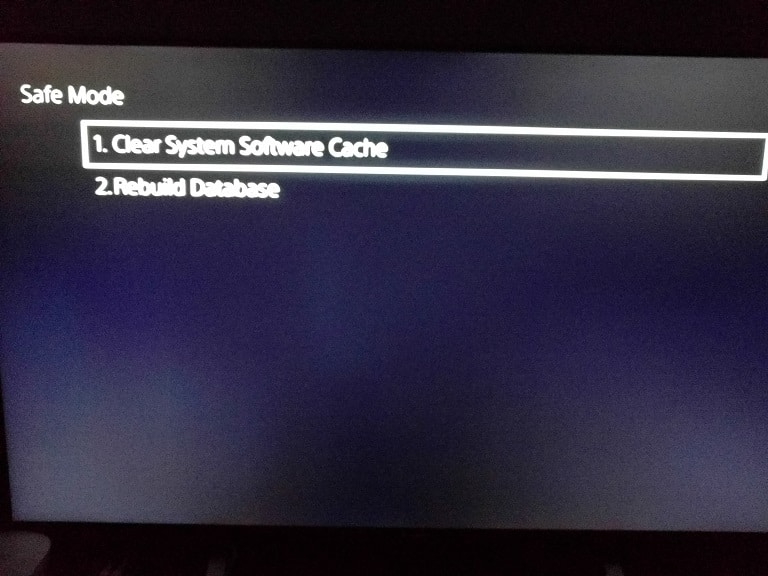
3. If the USB connection appears to be fine, then the next step you can take is to clear the system cache and rebuilding the database by doing the following:

  • You first need to completely turn off your PlayStation 5 or PlayStation 5 Digital Edition console.
  • Next, you need to press and hold the power button for around 7 seconds. You should hear a beeping noise initially and then a second beep around 7 seconds later.
  • You should see a screen appear asking you to plug the DualSense in to one of the USB-A ports of your PS5 and then press the PS button on the controller. So, make sure you do so.
  • You should now be in the Safe Mode menu of your console. Here, you need to select “Clear Cache and Rebuild Database.”
  • You can then select the “Clear System Software Cache” and “Rebuild Database” options.

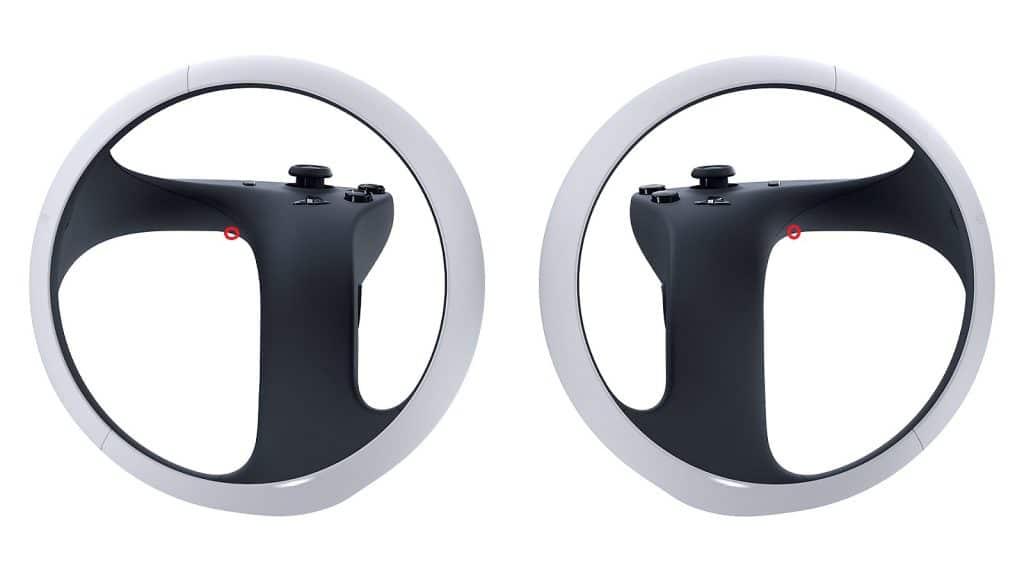
4. Moreover, you can try resetting PlayStation VR2 controllers as well. To find out how to do so, you can follow the steps laid out in this PSVR 2 Sense resetting guide.

5. Even if you managed to get the virtual reality headset to work with any of the aforementioned steps, the solution will most likely end up being a temporary fix.

So, if you are still seeing constantly getting the “too many USB devices connected” warning, then it is very likely that you have defective hardware.

In this case, you need to contact PlayStation Support, or the third-party retailer where you got the VR headset from, in order to exchange the defective product for a new one.

6. If you are still getting the error even with using a brand-new headset, then the problem may be related to the USB-C port on your PlayStation 5. Therefore, you may want to consider getting the port checked out to see if it is defective.

Keep in mind that, even if the USB-C port of your PS5 works for other products, such as recharging another device, it may still be defective when it comes to being used to transfer the data needed to play on the PlayStation VR2.

How to play Atomic Heart with keyboard and mouse controls on Xbox Series X and S

You are able to play Atomic Heart with a keyboard and mouse on your Xbox Series X and Xbox Series S console. By using this control method, you should be able to aim better with your weapons when compared to using the analog sticks of the Xbox controller. To see how you can enable this feature, you can take a look at this tutorial from Seeking Tech.

1. To start off, you need to connect your mouse and keyboard to the Series X or Series S console.

It is important to note that these gaming systems do not support Bluetooth mouse and keyboards. Instead, you need to either use a USB wired connection or USB dongle for a wireless connection.

Plug the USB cable or USB dongle into the USB ports of your console. Both the Xbox Series X and Xbox Series S come with three USB ports, one of which is located on the front with the remaining two located at the backside of the system.

2. Once you have connected your keyboard and mouse, the console should automatically detect the new input methods.

3. If you haven’t done so already, open Atomic Heart.

4. You should be able to use your keyboard and mouse to control the game right away.

5. Unfortunately, Atomic Heart doesn’t show the button layout if you are using the keyboard and mouse. However, it should be the same as the PC version of the game. You can find the layout below:

  • W: Move Forward
  • S: Move Backward
  • A: Strafe to the Left
  • D: Strafe to the Right
  • Spacebar: Jump
  • Shift: Dodge
  • Control: Crouch
  • Left Click: Attack or Shoot
  • Right Click: Secondary Attack or Aim
  • R: Reload or Recharge
  • 1: Change to Weapon #1
  • 2: Change to Weapon #2
  • 3: Change to Weapon #3
  • 4: Change to Weapon #4
  • Esc: Main Menu

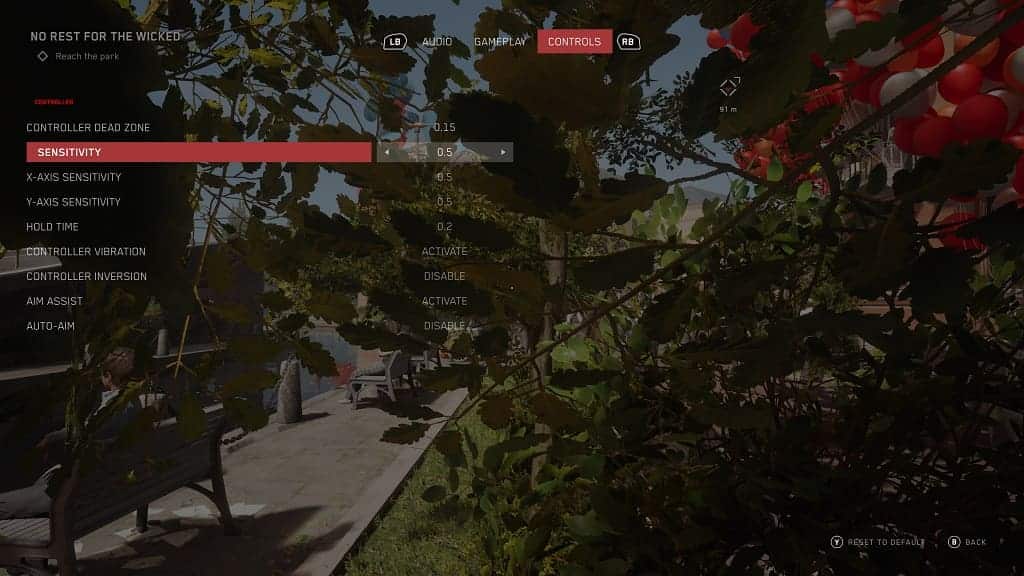
6. You can change the sensitivity settings for the mouse by heading into the Options. From there, make sure you switch over to the Controls tab.

Once you get there, you will be able to adjust the overall sensitivity in addition to the X-axis sensitivity and Y-axis sensitivity.

7. If you want to change the mouse pointer speed and/or switch the left and right click functions, then you need to take the following steps:

  • Press the Xbox button on the Xbox controller to open the Guide menu.
  • Pree the RB button until you get to the Profile & System tab in the Guide menu.
  • Select Settings from the Profile & System tab.
  • Inside of Settings, select Devices & Connections on the left column.
  • On the right side of the same screen, you then need to select Mouse.
  • In the Devices & Connections – Mouse menu, you will be able to change the pointer speed. By default, this is set to 10.
  • Also in the same screen, you can select the “Switch primary & secondary mouse buttons” if you want to switch the left and right click functions.

What to do if Atomic Heart is too dark

You may notice that some of the scenes in Atomic Heart are too dark, making it very difficult to make you what you are viewing. To see how you can make this game brighter, you can take a look at this troubleshooting article from Seeking Tech.

1. To start off, you can use the in-game Brightness slider. In order to do so, you need to take the following steps:

To begin, head into the Options menu, which you can do by selecting Options from the Main Menu. You can also go there by selecting Options from the Pause Menu if you are currently playing the video game.

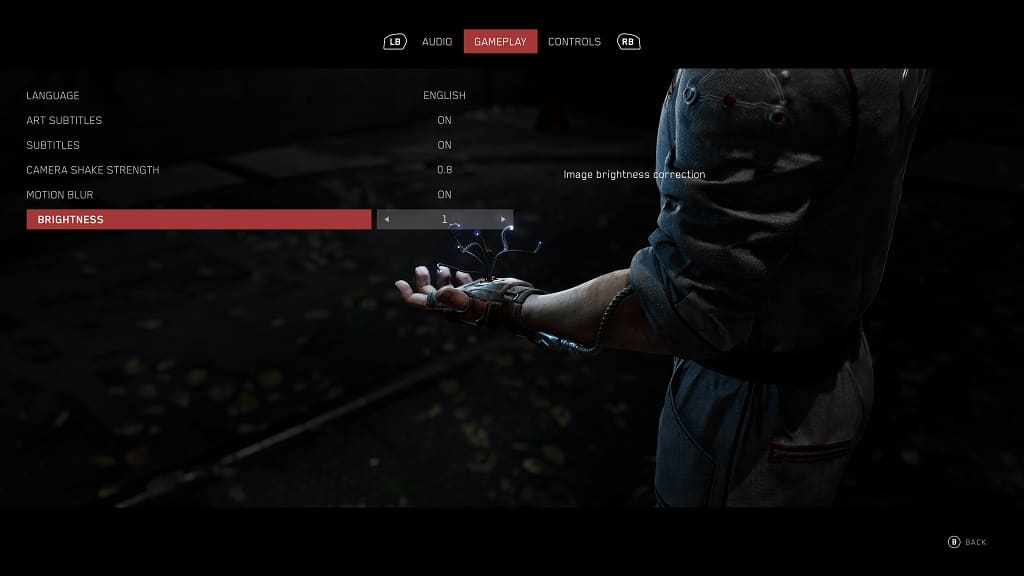
From the Options menu, you need to switch over to the Gameplay tab. For the PS4 and PS5, you need to use the L1 and R1 buttons to switch tabs. For the Xbox consoles, you need to use the LB and RB buttons.

You should then be able to find the Brightness slider in the Gameplay tab of the Options menu. By default, this slider is set to a value of 1. You can increase it in increments of 0.2, which the highest being a value of 2.

2. If the game still appears to be too dark, then you try adjusting its HDR settings. While Atomic Heart does not natively support HDR, your PC, console, television set and/or screen may be automictically converting the SDR image into HDR, which may cause the game to appear over darken.

In addition to adjusting the HDR settings, you can also disable it so that you can play Atomic Heart in SDR to see if you can get a brighter picture.

3. Of course, you can also try adjusting the brightness level on your television set or monitor if you need to further brighten up this game.

Keep in mind that changing the brightness will also effect the better lit scenes in Atomic Heart. So, you may need to constantly adjust the brightness of the game or your screen when moving from a dark scene to a bright scene and vice versa.

4. There is a possibility that the development studio at Mundfish may make the game more visible in dark scenes in future patches. Therefore, you should make sure that you have the latest version of the game downloaded and installed.

What to do if Atomic Heart is causing motion sickness or nausea

When playing Atomic Heart, you may start to feel a little bit woozy. To see how you can prevent motion sickness and nausea while playing this first-person shooter, you can take a look at this guide from Seeking Tech.

  • 1. For the first step, we suggest minimizing the camera shake as the frequent camera movements could be causing your nausea. You can do so by taking the following steps:
  • To start off, you need to head to the Options menu, which you can do from the Main Menu. If you are inside the game at this moment, then you need to pause the game (on consoles, you need to press the Options button on PlayStation or Menu button on Xbox) and then select Options.
  • Inside of the Options menu, you need to switch over to the Gameplay tab. On PlayStation, you can use the L1 and R1 buttons to change tabs in this screen of Atomic Heart. Xbox gamers can use the LB and RB buttons.
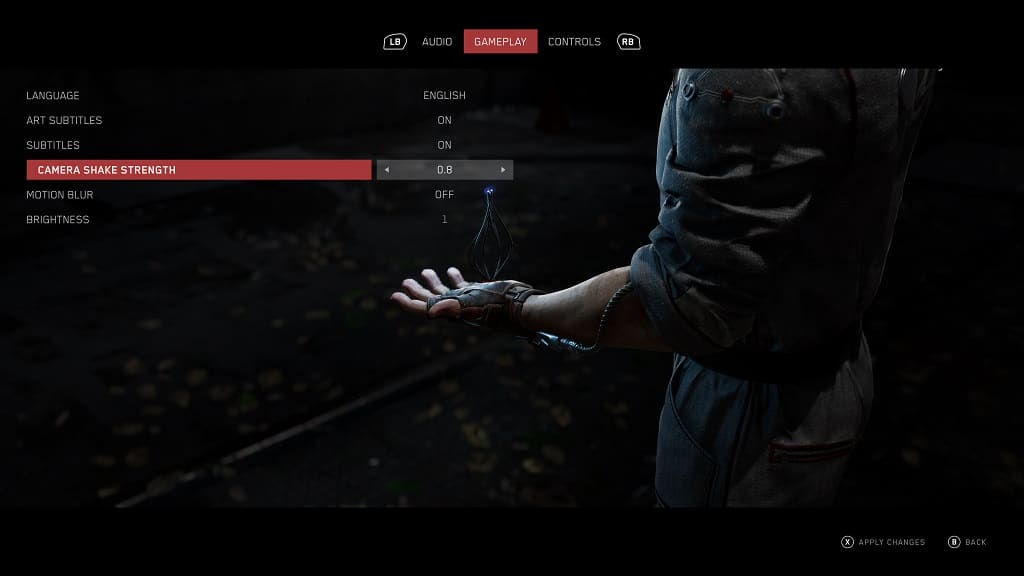
  • From the Gameplay tab of the Options menu, move the cursor over to the Camera Shake Strength setting.
  • Finally, change this setting to the lowest possible value, which should be 0.2.

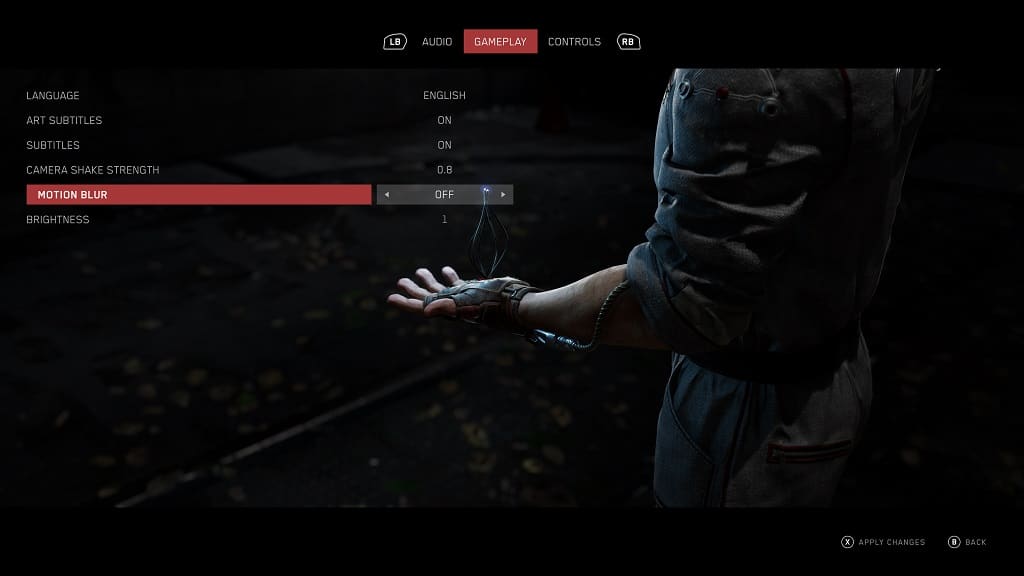
2. While you are in the Gameplay tab of the Option menu, we also suggest turning off the Motion Blur feature as it may also be triggering your motion sickness.

3. Furthermore, you can also try adjusting the Brightness slider in the sale Gameplay tab so that you can get better visibility of the action.

4. An inconsistent frame rate may also lead to nausea. To see how you can get a smoother experience with Atomic Heart, we suggest checking out this fps troubleshooting guide.

5. The development team at Mundfish has stated that they will be adding a field of view slider to Atomic Heart. You should be able to use this slider to decrease or increase how much you see on the screen, which you help alleviate your motion sickness.

So, if you haven’t done so already, make sure that you keep your game updated as the FOV slider is a post-launch update. Once this feature has been added, you should be able to find it in the Options menu.

6. Once you start feeling a little bit nauseous, then we suggest that you stop immediately and then take a break until you feel better before you try to play the game again. If you try to push through, then you will only get sicker.