Star Wars Jedi: Survivor can be played with the Xbox Elite Wireless Controller Series 2. To see what settings you should be using for this gamepad when playing the action-adventure game on the PC, Xbox Series X or Xbox Series S, you can take a look at this guide from Seeking Tech.
P1, P2, P3 and P4 Button Assignments
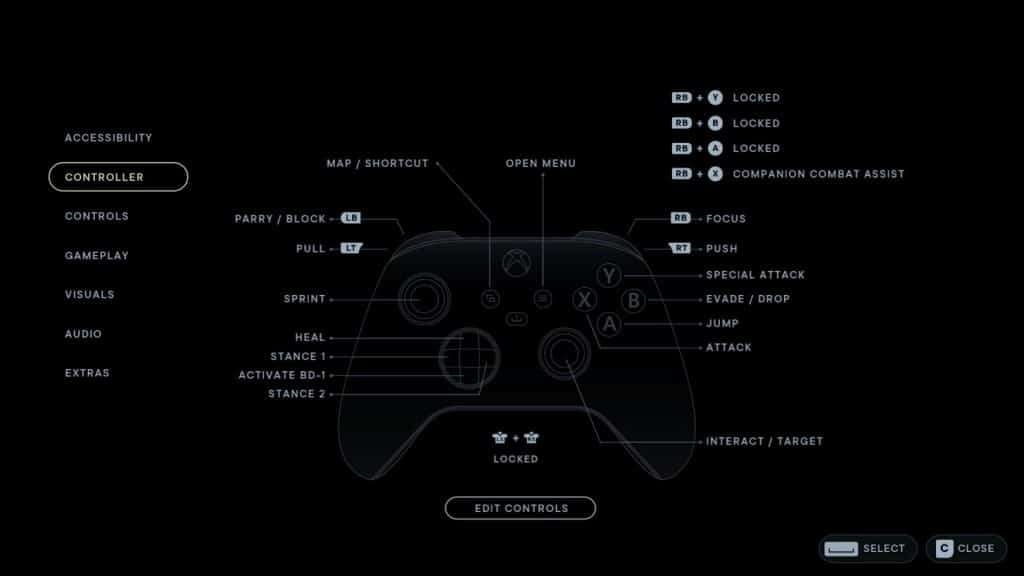
You can find the default Xbox button layout for Jedi Survivor below:
- Left Analog Stick: Move Character
- Right Analog Stick: Move Camera
- Y: Heavy Attack or Special Attack
- B: Evade or Drop
- A: Jump
- X: Attack
- LB: Parry or Block
- LT: Force Pull
- RB: Focus
- RT: Force Push
- Left Analog Button: Sprint
- Right Analog Button: Interact or Target
- Left Analog Button and Right Analog Button: Force Slow
- Up Directional Pad Button: Heal
- Down Directional Pad Button: BD-1 Scan
- Left Directional Pad Button: Lightsaber Stance 1
- Right Directional Pad Button: Lightsaber Stance 2
- RB and Triangle: Lift
- RB and Circle: Confuse
- RB and X: Slam
- RB and Square: Companion Combat Assist
- Menu: Open Menu
- View: Map or Shortcut
The Xbox Elite Wireless Controller Series 2 offers four back paddles. In the Mapping menu of the controller, we recommend that you assign the P4 Paddle to the Left Analog Button. By doing so, you can use the back paddle to run instead of pressing down on the left analog stick.
We also recommend assigning the P2 Paddle to the Right Analog Button. This should make it easier to switch targets during combat as you no longer have to press down on the right analog stick.
You can assign the remaining P1 and P3 Paddles to any other buttons you feel like. You can use them to switch lightsaber stances, heal, use BD-1 scan or other actions.
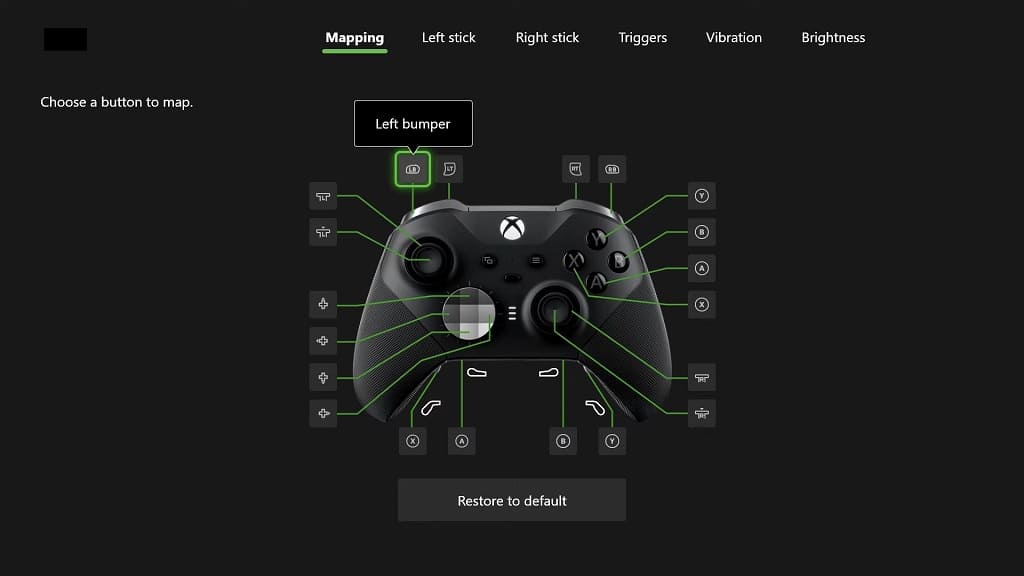
For further customization, you can select the Edit Controls option from the Controller section of the Options menu in Star Wars Jedi Survivor to reassign the buttons to your liking.
Trigger Locks
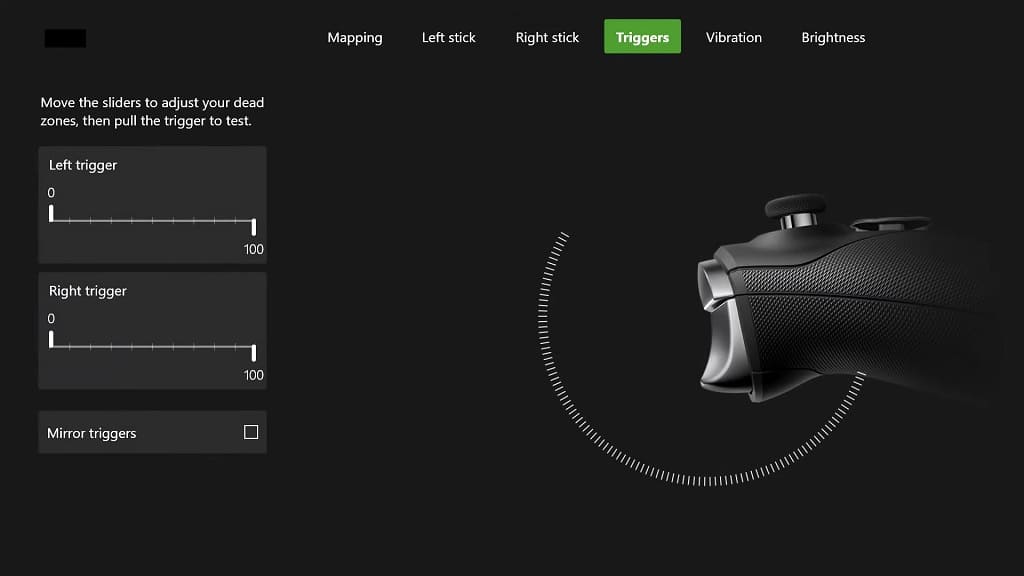
When it comes to the LT and RT buttons, we suggest that you move the sliders for both all the way to the bottom on the backside of the Xbox Elite Wireless Controller Series 2. This should make the Force Push and Force Pull actions more responsive.
You can further tune the LT and RT buttons from the Triggers menu of the gamepad.
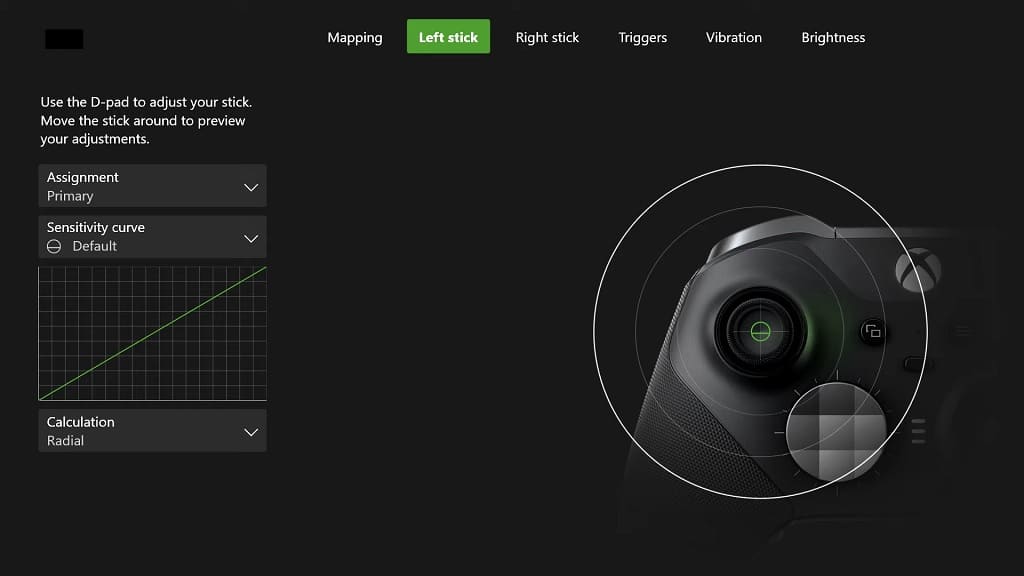
Stick Deadzones
You can also use the Left Stick and Right Stick menus of the Xbox Elite Wireless Controller Series 2 to adjust the deadzones of both analogs if you feel that moving the character and/or looking around feels sluggish.
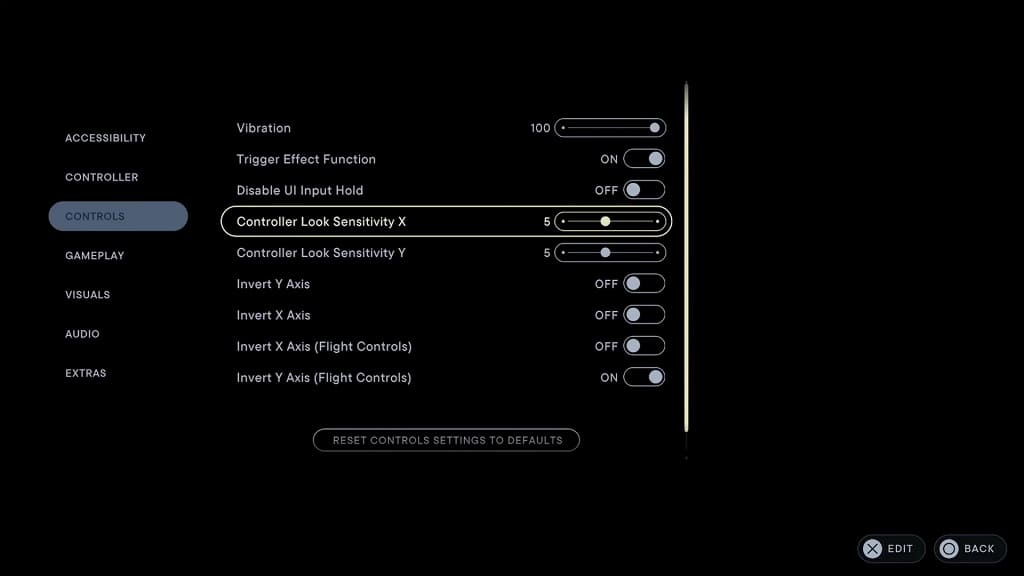
Furthermore, you can adjust the sensitivity of the right analog stick from the Controls section in the Options menu when you are playing Jedi Survivor.