How to customize subtitle display settings in The Finals

The Finals feature subtitles by default. To see how you can change the settings for these captions, you can take a look at this tutorial from Seeking Tech.

1. To start off, you need to open the Settings menu in The Finals.

2. Inside of Settings, open the Accessibility tab.

3. From there, you should see the Subtitles section.
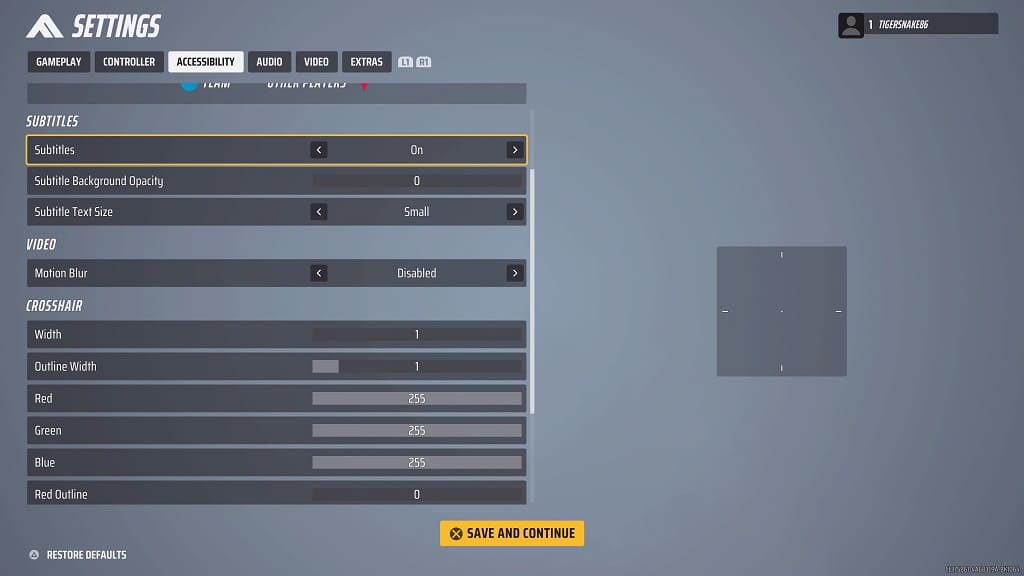
You should see the following options:

Subtitles – This lets you enable or disable text on the bottom of the screen when someone is talking.

Subtitles Background Opacity – This lets you add a dark background to the subtitles that will make them easier to read. The slider is set to 0 by default, which means that there isn’t any background.

Subtitle Text Size – This lets you change the size of the subtitles, which is set to Small by default. You can also choose the Medium or Large options. Each time you change this feature, you should see a sample text appear at the bottom of the screen.

How to fix connection failed error when trying to login to The Finals on PS5

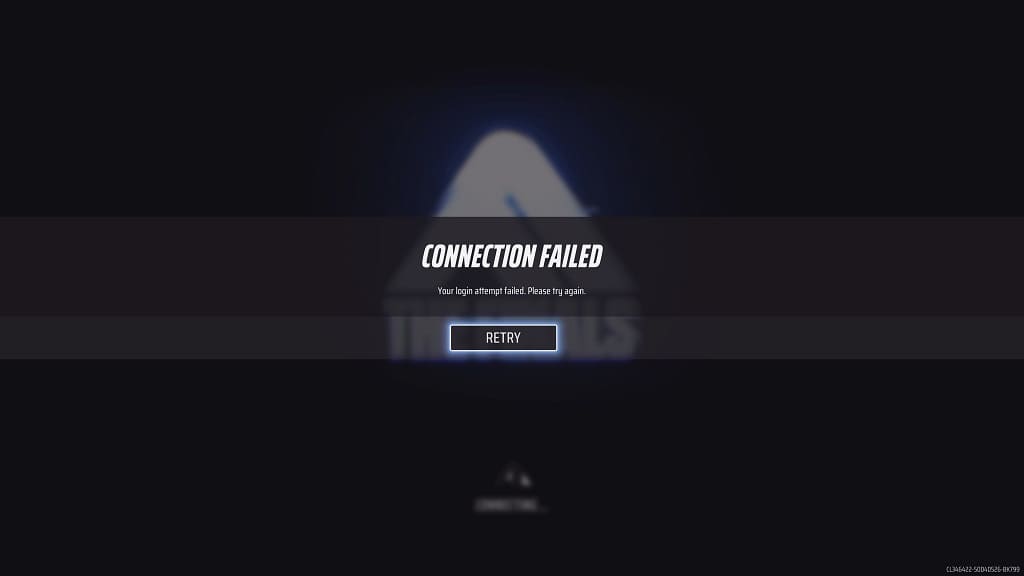
When trying to log into the servers of the PlayStation 5 version of The Finals, you may notice the following error message:

Connection Failed. Your login attempt failed. Please try again.

To see how you can potentially fix this issue, you can take a look at this troubleshooting article from Seeking Tech.

If you see the “connection failed” notifications when trying to connect to the servers, then you may have the wrong version of the game downloaded. Before The Finals officially, there were multiple beta versions available. If you try to connect to the beta releases, then you will end up seeing the aforementioned error.

So, to get past the startup screen, you need to download the full game by taking the following steps:

1. If you haven’t done so already, delete the beta version of The Finals.

If you have the game in the home screen, then you can hover over it. It should have the title of “The Finals Beta.” Afterwards, press the Options button on the controller and then choose the Delete option.

2. To find the full version of The Finals, go to the PlayStation Store App and search for it.

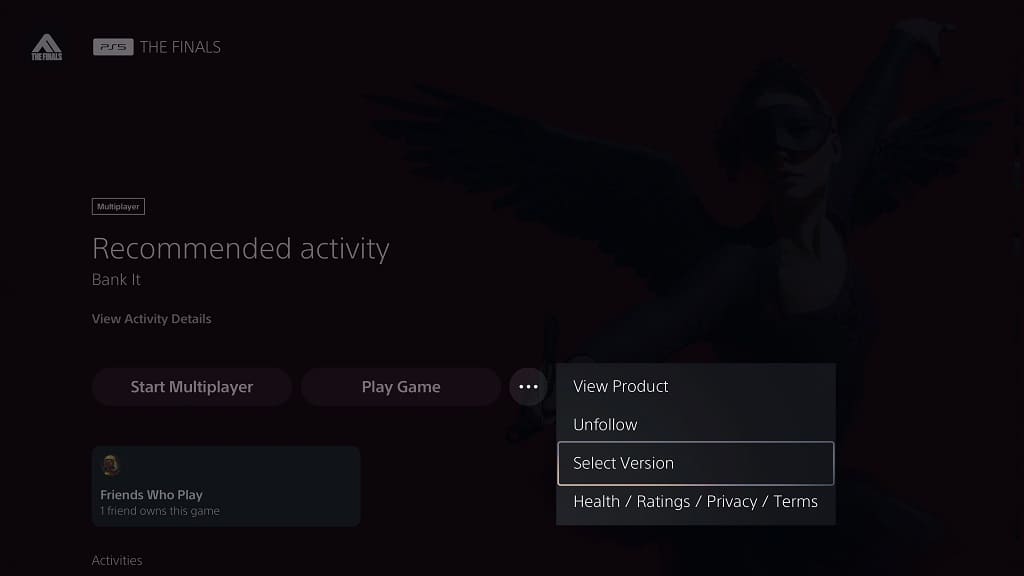
3. From the product page, you may see the full game version appear on the right side at the top.

If you don’t see it, select the “…” icon at the top and then pick “Select Version.” You should then be able to select the full game from there.

4. Download the full version. Once the installation is complete, you should no longer see the “connection failed” error when connecting to the online servers.

How to change servers in The Finals

You are able to switch to a different region server in The Finals. To see how you can properly do so in this online multiplayer game, you can take a look at this guide from Seeking Tech.

1. To begin, open the System Menu in the game, this can be done by pressing the Options button on a PlayStation controller or Menu button on an Xbox controller.

2. Next, you need to select Settings from the System Menu.

3. You should now be viewing the Gameplay tab in the Settings screen.

If you aren’t, then you can use the L1 and R1 buttons or LB and RB buttons to switch tabs until you get there.

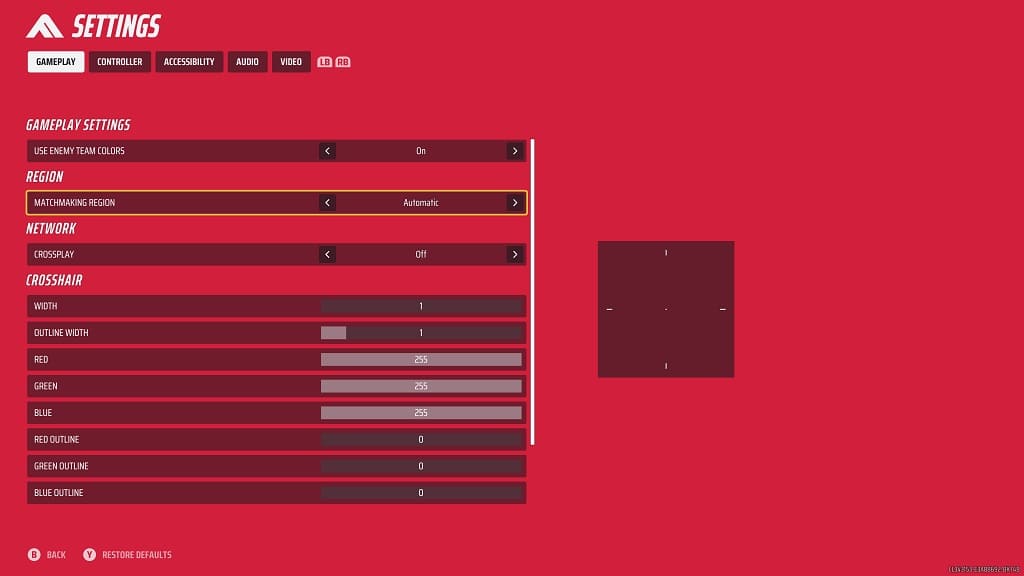
4. Afterwards, move the cursor down to Matchmaking Region.

5. By default, the matchmaking is set to Automatic. Use the right or left directional pad to change it to any of the three following options:

  • Asia
  • Europe
  • North America

6. You can then exit the System Menu.

When you try to play an online match again, you should be connected to the new region server you previously selected.

How to change the field of view in The Finals

If you find the field of view to be too narrow or too wide in The Finals, then you can check out this guide at Seeking Tech to see how you can change it.

1. For the first step, you need to head into the System Menu in the game and then make your way to Settings from there.

If you are playing with a PlayStation controller, you can open the System Menu by pressing the Options button. On Xbox, you need to press the Menu button.

2. In Settings use the L1 and R1 buttons on a PlayStation pad or LB and RB buttons on an Xbox pad to change tabs until you get to Video.

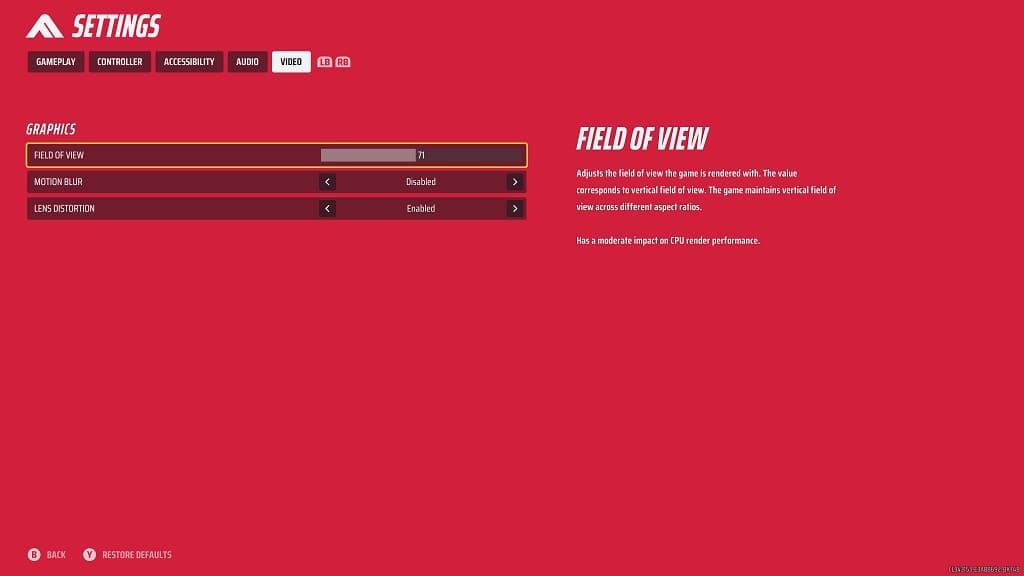
3. From the Video tab, move the cursor down to Field of View. It should be showing the following description:

Adjust the field of view the game is rendered with. The value corresponds to vertical field of view. The game maintains vertical field of view across different aspect ratios.

Has a moderate impact on CPU render performance.

4. The default value for the Field of View is 71. You will be able to narrow the angle all the way down to 45 or all the way up to 100.

How to fix input lag and aiming issues in The Finals

When playing The Finals with a controller, you may notice that there is a fair bit of input lag, which could end up making it harder to aim. To see how you can potentially fix these latency issues, you can take a look at this troubleshooting article from Seeking Tech.

1. For the first step, make sure you have the controller connected to your PC or console. This is because using a wired connection should produce less input delay when compared to wireless communication.

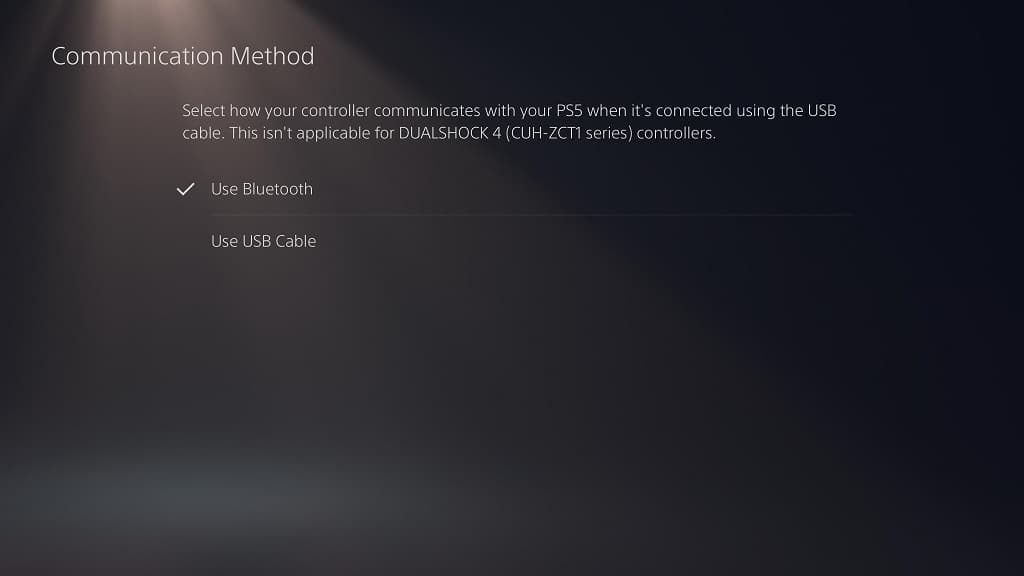
If you are playing The Finals on a PlayStation 5, head over to the console’s Settings menu and then select Accessories > Controller (General) > Communication Method > Use USB Cable.

2. Next, you should make sure you have Game Mode enabled on your TV or monitor. This picture setting will also reduce the input lag.

3. If aiming still does not feel quite right after you reduced the input latency, then you can head into the System Menu in the game and then go to Settings.

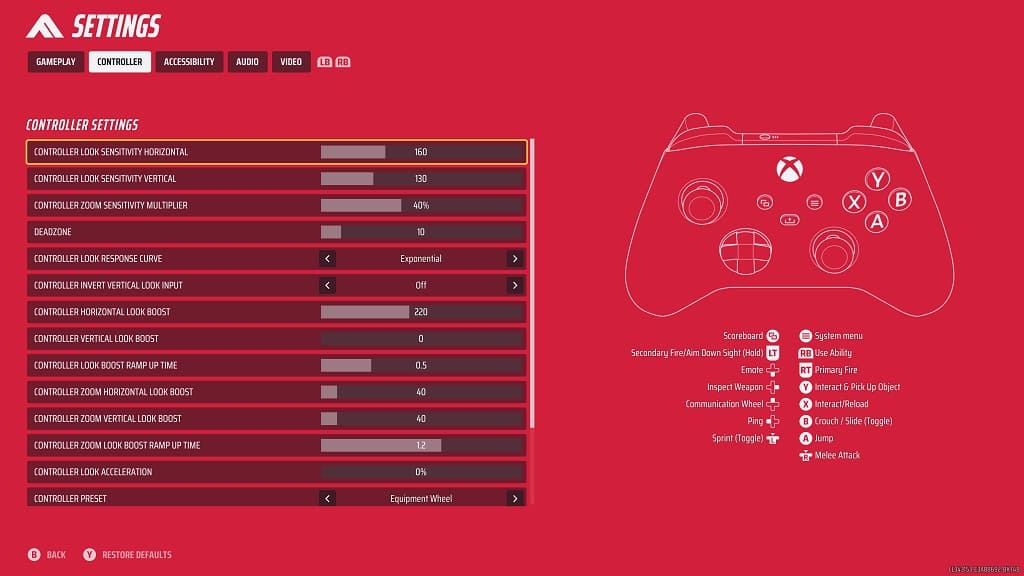
In Settings, navigate over to the Controller tab and you should see the following adjustable options:

  • Controller Look Sensitivity Horizontal
  • Controller Look Sensitivity Vertical
  • Controller Zoom Sensitivity Multiplier
  • Deadzone
  • Controller Look Response Curve
  • Controller Invert Vertical Look Input
  • Controller Horizontal Look Boost
  • Controller Vertical Look Boost
  • Controller Look Boost Ramp Up Time
  • Controller Zoom Horizontal Look Boost
  • Controller Zoom Vertical Look Boost
  • Controller Zoom Boost Ramp Up Time
  • Controller Lock Acceleration

We suggest that you play with all of these settings until aiming feels natural for you in The Finals.

How to disable voice chat in The Finals

Voice chatting is enabled by default in The Finals. If you don’t want to communicate with others while playing this multiplayer first-person shooter, then you can check out this guide at Seeking Tech to see how you can turn off this feature.

1. For the first step, you need to open the System Menu.

If you are playing with a PlayStation controller, then you have to press the Options button. On an Xbox gamepad, you need to press the Menu button.

2. Select Settings from the System Menu.

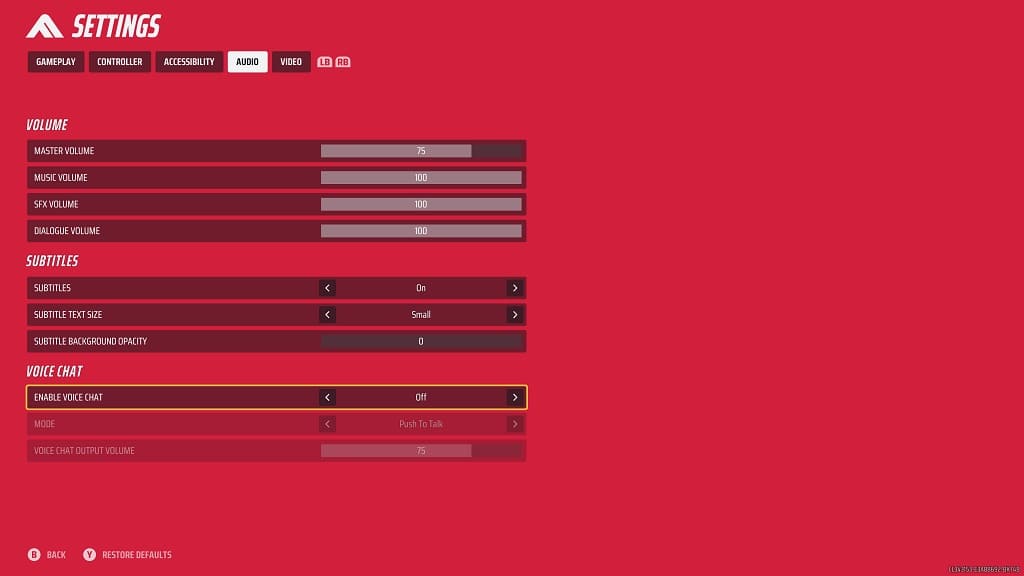
3. Next, you need to switch over to the Audio tab in Settings.

You can change tabs with the L1 and R1 buttons on PlayStation or LB and RB buttons on Xbox in The Finals.

4. Move the cursor down to Enable Voice Chat in the Audio tab.

5. Use the left or right directional pad to set this setting to Off.

If you want to keep voice chat enabled but want to adjust how it is utilized, then you can set the Enable Voice Chat to On. Afterwards, you will be able to switch between the Push to Talk or Open Microphone mode as well as be able to adjust the Voice Chat Output Volume.

6. Once you are done changing the voice communication settings, you can exit the system menu and return to playing the game.

How to turn off chromatic aberration in The Finals

The Finals videogame uses chromatic aberration by default. This visual effect makes objects appear blurrier in order to create a filmic effect.

If you would rather play this multiplayer game without chromatic aberration, then you can check out this Seeking Tech guide to see how you are able to disable it.

1. For the first step, you need to make your way over to the Settings screen in The Finals.

You can do so from the System Menu, which is brought up by pressing the Menu button on an Xbox controller or Options button on a PlayStation gamepad.

2. From Settings, you need to switch over to the Video tab.

You can press the LB and RB buttons on Xbox or L1 and R1 buttons on PlayStation to change tabs.

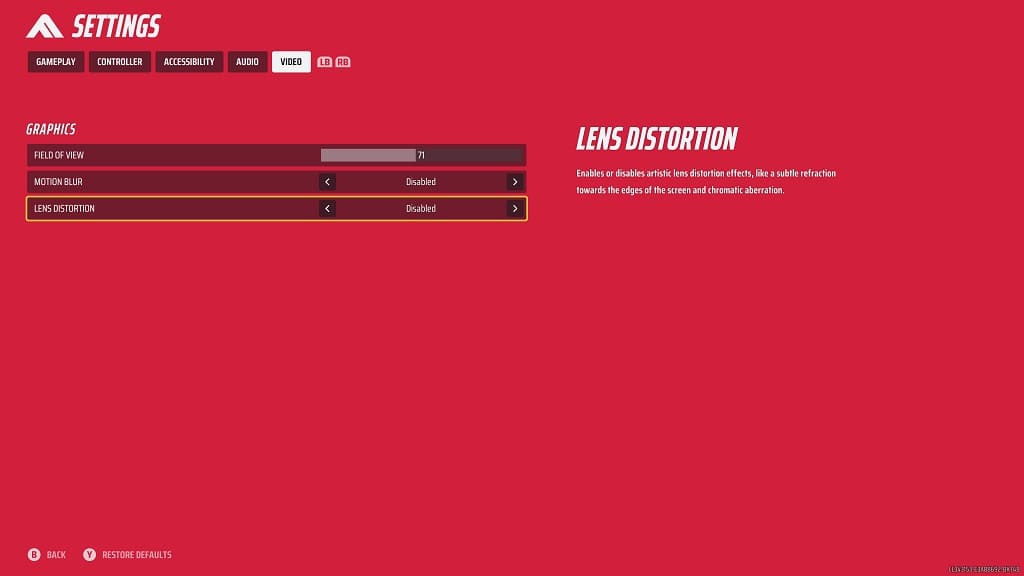
3. Once you get there, move the cursor down to Lens Distortion, which should have the following description:

Enables or disables artistic lens distortion effects, like a subtle refraction towards the edges of the screen and chromatic aberration.

4. Lens Distortion is set to “On” by default. Use the left or right directional pad button to switch it over to “Off.”

5. You can then back out of the Settings menu.

When you start playing a match in The Finals again, you should no longer see any Lens Distortion.

How to enable or disable crossplay in The Finals

The Finals supports cross platform play. To see how you can enable or disable this feature in this first-person shooting multiplayer game, you can take a look at this tutorial from Seeking Tech.

1. Make sure you head into Settings in The Finals if you haven’t done so already.

To do so, press the Menu button on Xbox or Options button on PlayStation to bring up the System Menu. From there, you need to select Settings.

2. In Settings, make sure you are viewing the Gameplay tab.

If you are in another tab, use the LB/RB buttons on Xbox or R1/L1 buttons on PlayStation to change tabs.

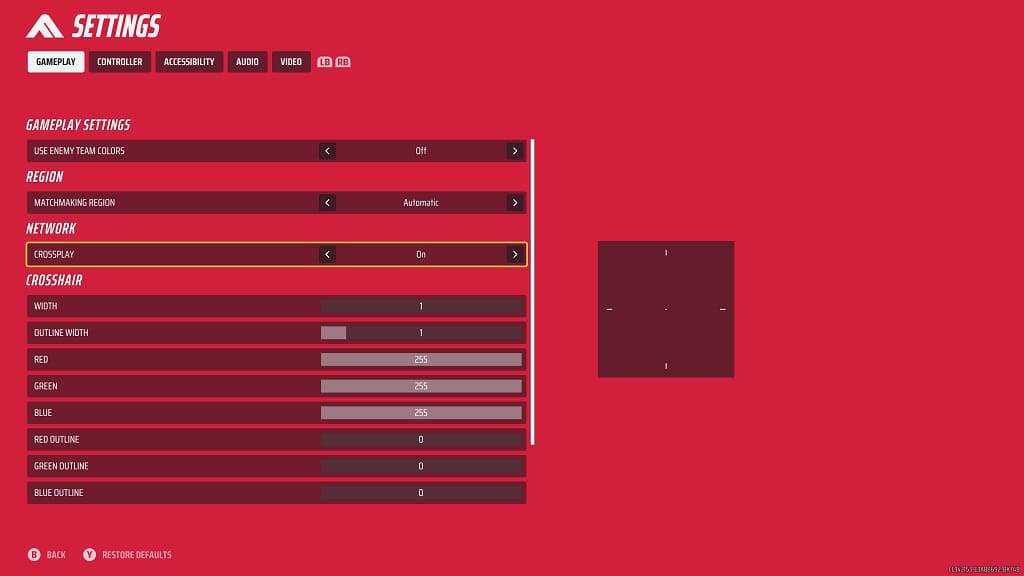
3. Once you get to the Gameplay tab, move the cursor down to Crossplay.

4. Use the left or right directional pad button to set the Crossplay setting to On or Off.

5. You can then exit the Settings menu.

When you try to play online again, you will match up with players on other platforms if you have cross network play enabled. If you have this feature disabled, then you will only be match up with those that are playing on the same platform as you.

The Finals can be played on the PC, PlayStation 5, Xbox Series X and Xbox Series S.