How to fix disable crossplay for Monster Hunter Rise on Xbox

With the Xbox versions of Monster Hunter Rise, you will be able to cross-play with other uses that are playing on Xbox One, Xbox One S, Xbox One X, Xbox Series S, Xbox Series X and Windows PC. If you would rather disable this feature, which is turned on by default, then you can check out this guide at Seeking Tech to see how you can properly do so.

Before we start, it is important to note that the following steps will only disable cross-play with the Windows PC version of the game as players on different Xbox consoles can still play with each other.

To disable the cross-play with the Monster Hunter Rise on Windows PC in you playing on an Xbox console, you need to take the following steps:

1. First off, you need to go to the Settings menu on your Xbox.

2. Inside of the Settings menu, you first need to select Account on the left column

3. Afterwards, you should select the “Privacy & online safety” option on the right side of the same screen.

4. From the “Account – Privacy & online safety” menu, select the “Xbox privacy” option.

5. Next, select the “View details & customize” option in the next screen.

6. Afterwards, you need to select the “Communication & multiplayer” option.

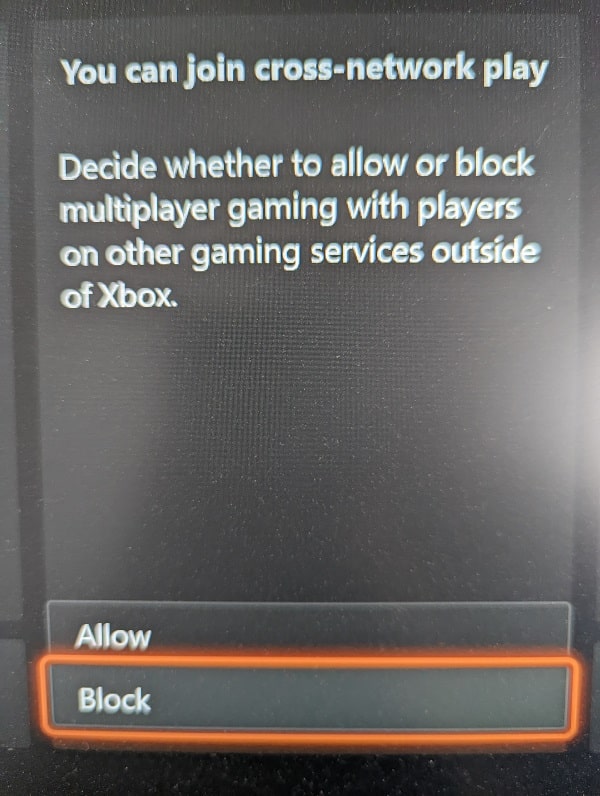
7. You should now be in the “Account – Communication & multiplayer” menu. Here, you should select the drop-down menu at the bottom of the “You can join cross-network” play column.

8. In the drop-down menu, you then need to select Block.
9. Return to Monster Hunter Rise. You may need to restart the game on your Xbox for the cross-play changes to take effect.

10. You should no longer be able to join an online lobby that has any Windows PC players in Monster Hunter Rise. No PC players should be able to join your created lobby as well.

If you want to limit cross-platform play to users for one specific Xbox console, then the only way you can do so is to create your one online lobby and then add a pass code. You can then share the pass code with other users that are playing on the specific Xbox console so that you can all play in the same private lobby.

How to fix disconnection issues with Monster Hunter Rise on Xbox Series X and S

You are able to play Monster Hunter Rise online with friends and strangers on your Xbox Series X and Xbox Series S. If you keep getting disconnected from the online lobby, then you can take a look at this troubleshooting article at Seeking Tech to see how you can potentially fix this connection issue.

1. It should be noted that, if you put your console in rest mode, then you will likely end up being disconnected from the online servers in Monster Hunter Rise.

Therefore, you may want to leave your Xbox Series X or Xbox Series S turned on instead if you don’t want to be removed from the current lobby.

2. Suspending Monster Hunter Rise in Quick Resume will mostly like cause internet connection issues as well. To prevent this from happening, you should avoid trying to go back to the Xbox system menu, opening another game or opening another app.

To read more about how you can avoid Quick Resume issues with this game, you can check out this troubleshooter.

3. You should also make sure that you have a stable internet connection on your Xbox Series X or Xbox Series S.

In order to test network stability, you need to head over to the Settings menu of the console. From there, select General > Network settings > Test multiplayer connection.

If there is an related to the internet connection, then you should see a link appear on the screen. Visit that link for tips on how to fix your problem in order to make the multiplayer experience smoother on the console.

4. If you are downloading and/or streaming at the same time on the same internet connection that you are using to play online multiplayer in Monster Hunter Rise, then you need to pause the other connections. Otherwise, you may end up seeing a lot of lag and/or disconnections.

5. Of course, you should also make sure you have the latest patch for Monster Hunter Rise downloaded on your console.

6. You can also try power cycling your internet setup by taking the following steps:

  • Turn off your Xbox Series X or Xbox Series S.
  • Turn off your modem and/or router.
  • Wait for at least 2 minutes.
  • Turn back on your modem and/or router.
  • Wait for the internet setup to connect online.
  • Turn back on your Xbox Series X or Xbox Series S.
  • Open Monster Hunter Rise and then try to play it online.

How to turn off voice, music and more in Monster Hunter Rise on PS5, Xbox Series X and S

With Monster Hunter Rise on the PlayStation 5, PlayStation 5 Digital Edition, Xbox Series X and Xbox Series S, you will be able to adjust the voice, music and sound effect volume settings. If you like, you can also mute these sounds.

To find out how to do so, you can take a look at this tutorial from Seeking Tech.

1. To start off, you need to head over to the Options menu, which is located in the Title Screen.

You can also access by Options menu in-game by pressing Menu button on Xbox or Options button on PlayStation. From the small pop-up menu, you need to press RB or R1 to switch over to the System tab, where you can then select Options.

2. From the Options menu, select Audio in the left column.

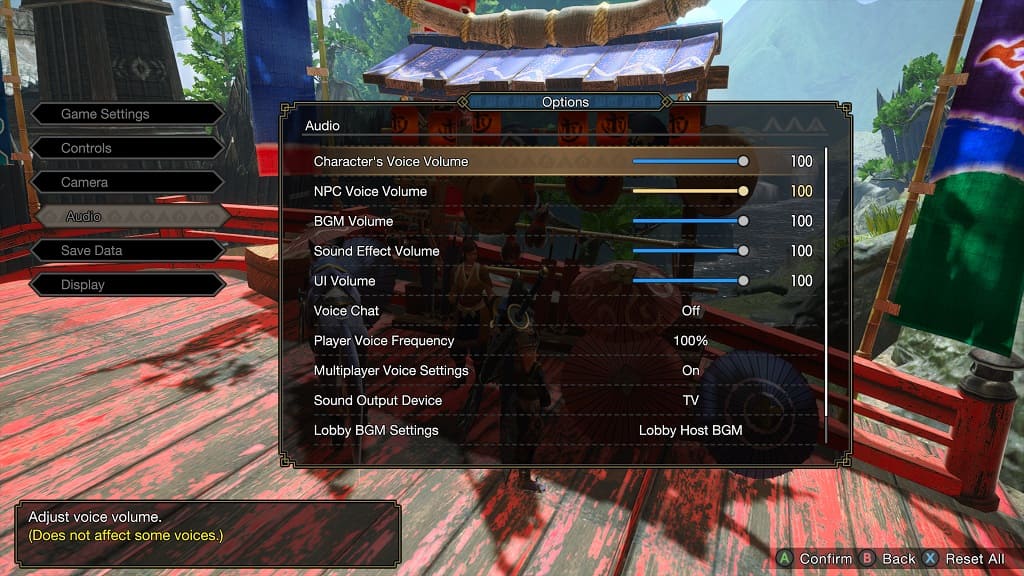
3. In the Audio menu, you will be able to adjust the volume level for the following:

  • The Character’s Voice Volume setting controls how loud your character sounds.
  • The NPC Voice Volume setting is based on the loudness of the other characters in the game.
  • The BGM Volume setting will let you adjust how loud you want the background music to be.
  • The Sound Effect Volume setting will let you control the loudness of the sound effects.
  • The UI Volume setting will let you adjust the audio cues when browsing through the menus in Monster Hunter Rise.

4. To change any of these settings, you first need to select it.

5. Afterwards, you can move the slider with the left analog stick or directional pad. To lower the volume for that specific audio setting, you need to move the slider to the left. To increase the volume, you need to move the slider to the right.

By default, the Character’s Voice Volume, NPC Voice Volume, BGM Volume, Sound Effect Volume and UI Volume settings are all set to the maximum value of 100.

6. If you want to mute any of the aforementioned audio components, then you need to set the value of the sliders to zero.

7. In the same Audio menu, you will be able to adjust the following audio settings:

  • Voice Chat
  • Player Voice Frequency
  • Multiplayer Voice Settings
  • Sound Output Device
  • Lobby BGM Settings
  • 3D Audio

What to do if Monster Hunter Rise won’t launch properly on Xbox Series X or S

You may run into issues when trying to launch Monster Hunter Rise on your Xbox Series X or Xbox Series S console. You can take a look at this troubleshooting article to see how you can get the game to boot up without any problems.

1. If you have the game previously suspended via Quick Resume, then it may be causing issues when you are trying to launch it again.

In this case, we recommend that you remove the game from the Quick Resume list. To do so, you need to take the following steps:

  • Press the Xbox button to open the Guide menu.
  • From there, select the “My games & apps” option.
  • In the “My games & apps” screen, move the cursor over to the Monster Hunter Rise icon and the press the Menu button.
  • In the pop-up menu for Monster Hunter Rise, select the “Remove from Quick Resume” option.

2. You can also try removing the other games from the Quick Resume list as well.

3. If you have been putting your console into Sleep mode instead of shutting it down, then we recommend restarting it.

To do so, press and hold the Xbox button and then select the “Restart console” option.

4. Make sure you have the latest patch downloaded for Rise as the game launched in a little bit of a buggy state.

To manually download the new version, you need to do the following:

  • Press the Xbox button to open the Guide menu and then select the Home option.
  • In the Home menu, move the cursor to the Monster Hunter Rise icon and then press the Menu button.
  • A small pop-up menu should appear, where you need to select the “Manage game and add-ons” option.
  • Finally, you need to select Updates from the “Manage – Monster Hunter Rise” menu.

5. You can also try clearing the system cache of your Xbox Series X or Xbox Series S by doing the following:

  • To start off, you need to fully turn off your gaming system.
  • Once it has been turned off, unplug its power cable.
  • Next, you need to wait for a minimum of 2 minutes.
  • Once at least 2 minutes have passed, plug the power cable back into your Series X or Series S.
  • Turn your gaming system back on and then try to open Monster Hunter Rise.

How to fix Monster Hunter Rise input lag issues on PS5, Xbox Series X and S

Monster Hunter Rise was recently released for the PlayStation 5, Xbox Series X and Xbox Series S. When playing this monster hunting title, you may notice that there is a bit of input lag. To see how you can potentially reduce latency, you can take a look at this troubleshooting article from Seeking Tech.

1. You should get shorter input delay when playing at a higher frame rate.

By default, Monster Hunter Rise will run at 60 frames per second on your PlayStation 5, PlayStation 5 Digital Edition, Xbox Series X or Xbox Series S.

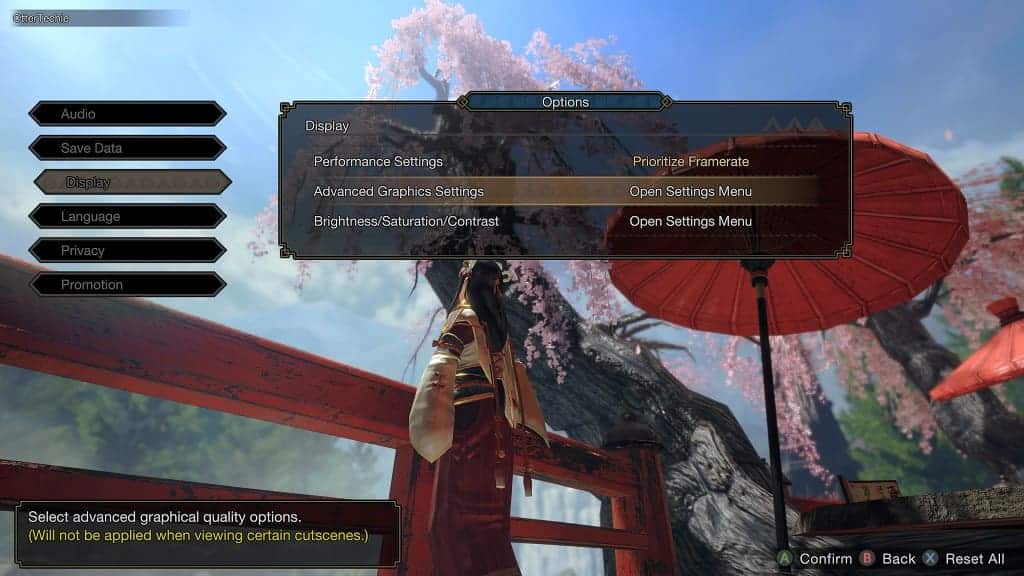
With that said, the frame rate may drop during more intensive sequences. To make sure that is stays at 60 fps as much as possible, we suggest switching over to the Prioritize Framerate mode.

In order to do, you need to go to the Options menu in Monster Hunter Rise. From there, select Display and then Performance Settings. With Performance Settings selected, you need to move to the left to change to Prioritize Framerate.

2. If you have a 120 Hz television set or monitor, then you are able to play this game at up to 120 frames per second on your PS5, PS5 Digital Edition, Xbox Series X or Xbox Series S. By doing so, you should be able to lower the input lag.

To enable 120 Hz on the PlayStation 5, you need to go to the console’s Settings menu and then select Screen and Video > Video Output. From there, set the 120 Hz Output Setting to Automatic.

On the Xbox Series X and Xbox Series S, you need to go to the system’s Settings menu and then select General > TV & display options > Refresh rate. In the small drop-down menu, you then need to select 120 Hz.

Once you are done setting up your console, make sure you change the aforementioned Performance Settings in Monster Hunter Rise to Prioritize Framerate.

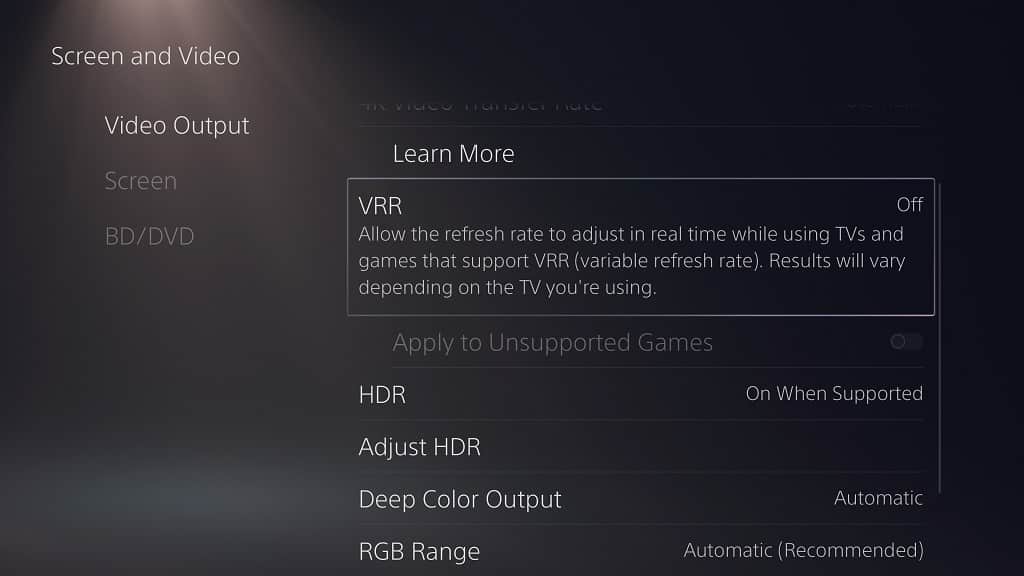
3. Enabling Variable Refresh Rate should help as well if your TV or monitor supports this feature.

You can turn on VRR on the PS5 by going to Settings > Screen and Video > Video Output. From there, set VRR to Automatic.

On the Xbox Series X and S, you need to head over to Settings > General > TV & display options > Video modes. Afterwards, make sure that Allow variable refresh rate is enabled.

4. You can also try using your controllers as wired gamepads as doing so should also help in lowering the input delay in Monster Hunter Rise.

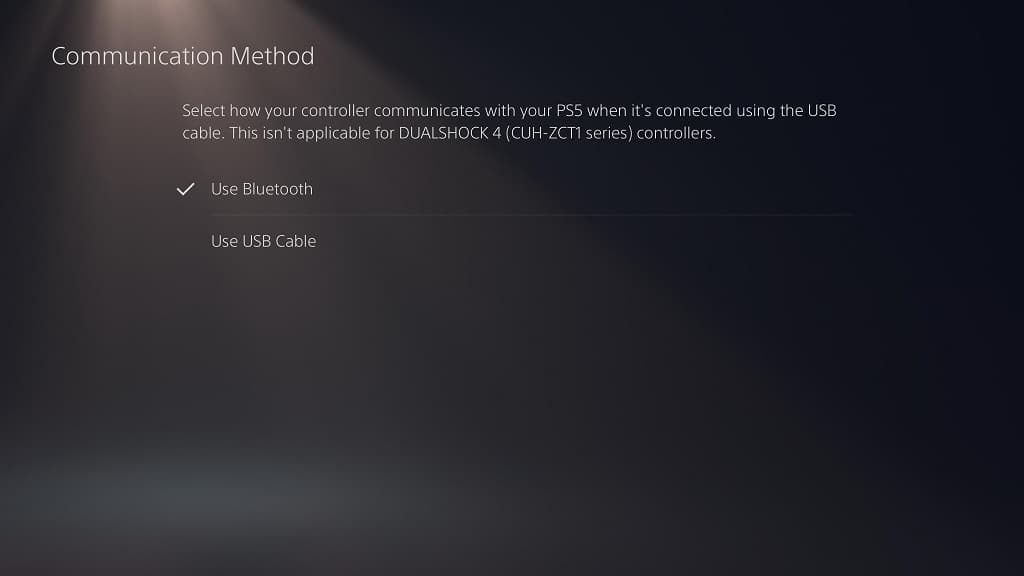
For the PS5, you need to connect the DualSense to the console via a USB cable. Afterwards, you need to go to Settings > Accessories > Controller (General) > Communication Method. Finally, select Use USB Cable from the Communication Method menu.

For the Xbox Series X and S, you can simply plug in the controller to the console via a USB cable.

5. If you haven’t done so already, make sure you have the latest patch installed for Monster Hunter Rise as a new update may help with improving the responsiveness of the game when it comes to controls.

How to fix quick resume issues with Monster Hunter Rise

With the quick resume feature for the Xbox Series X and Xbox Series S versions of Monster Hunter Rise, you should be able to boot back into the game to exactly where to left off. However, many players have found that the game will often crash instead, causing it to restart. As a result, they may end up losing their progress.

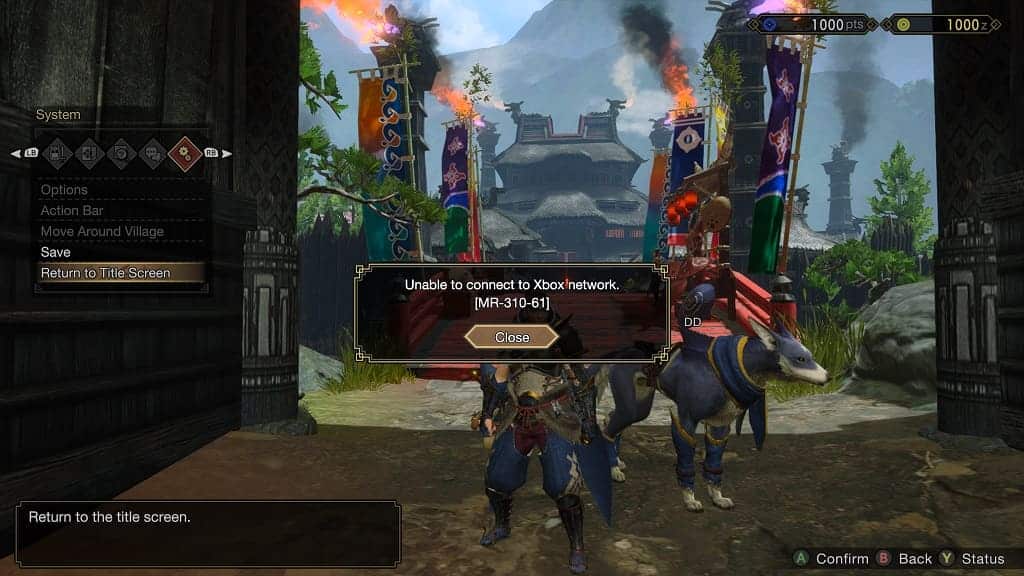
Furthermore, they may get signed out of the game and see the following message:

  • “Unable to connect to Xbox network. [MR-310-061].”

To see how you can potentially fix the quick resume issues in Monster Hunter Rise, you can take a look at this troubleshooting article from Seeking Tech.

Before we begin, it is important to note that Monster Hunter Rise features an online component. Therefore, you will most likely experience some issues when trying to use the quick resume feature while connected to an online lobby in the game.

1. So, if you are playing Monster Hunter Rise by yourself at the moment, then we recommend that you leave the current online lobby.

Once you are playing the game offline, you can try putting it into Quick Resume and the open it again to see if you are still getting a full reboot and/or disconnections.

2. If you have other games on your Quick Resume queue, then you can also try closing them.

In order to do so, you need to take the following steps:

  • Press the Xbox button to bring up the Guide menu.
  • From there, select My games & apps.
  • In the Quick Resume section, hover over icon of the other game and then press the Menu button on your controller.
  • Finally, select the Remove from Quick Resume option from the pop-up menu.
  • Follow the previous steps to remove any other games, expect for Monster Hunter Rise, from the Quick Resume queue.

3. If you don’t want to lose your progress, then we recommend that you manually save your game before putting it in quick resume.

To manually save, press the Menu button while actively playing the game. Next, you need to press the RB buttons several times to switch over to the System tab. From there, you should be able to select the Save option.

You should then be able to safely put Monster Hunter Rise into quick resume. Even if the game ends up restarting instead of booting back to exactly where you left off, you shouldn’t lose any progress as you already saved.

Unfortunately, it is not likely that this issue will be patched in Rise as previous games that don’t quite work with the Quick Resume feature never got new updates to fix this particular problem.