You can gain a little bit of an advantage when playing Street Fighter 6 with a DualSense Edge controller as opposed to a standard DualSense. You can check out this guide from Seeking Tech to see what are the best settings you should be using for the Edge for the latest SF installment.
Custom Button Assignments
The two back buttons can be used to add additional actions.
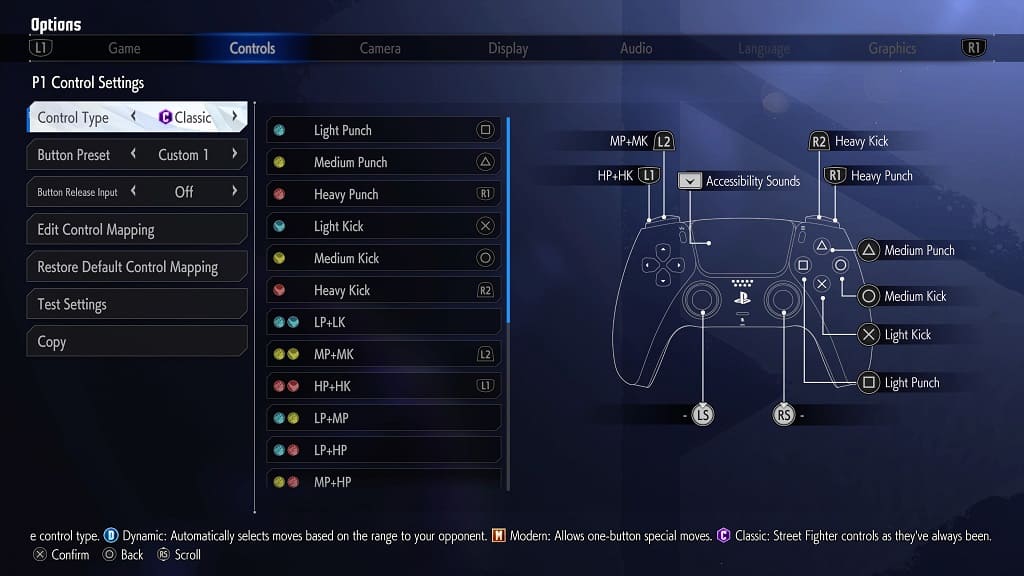
If you are using the Classic control type, which we highly recommend doing so as you will unlock the full move set and damage potential of your characters, then you will have the following default layout:
- Square Button: Light Punch
- Triangle Button: Medium Punch
- R1 Button: Heavy Punch
- X Button: Light Kick
- Circle Button: Medium Kick
- R2 Button: Heavy Kick
- L2 Button: Medium Punch and Medium Kick
- L1 Button: Heavy Punch and Heavy Kick
- Touch Pad Button: Accessibility Sounds
The following actions can also be assigned to any buttons on the controller:
- Light Punch and Light Kick
- Light Punch and Medium Punch
- Light Punch and Heavy Punch
- Medium Punch and Heavy Punch
- Light Punch, Medium Punch and Heavy Punch
- Light Kick and Medium Kick
- Light Kick and Heavy Kick
- Medium Kick and Heavy Kick
- Light Kick, Medium Kick and Heavy Kick
- Taunt
- Simultaneous Input Assistance

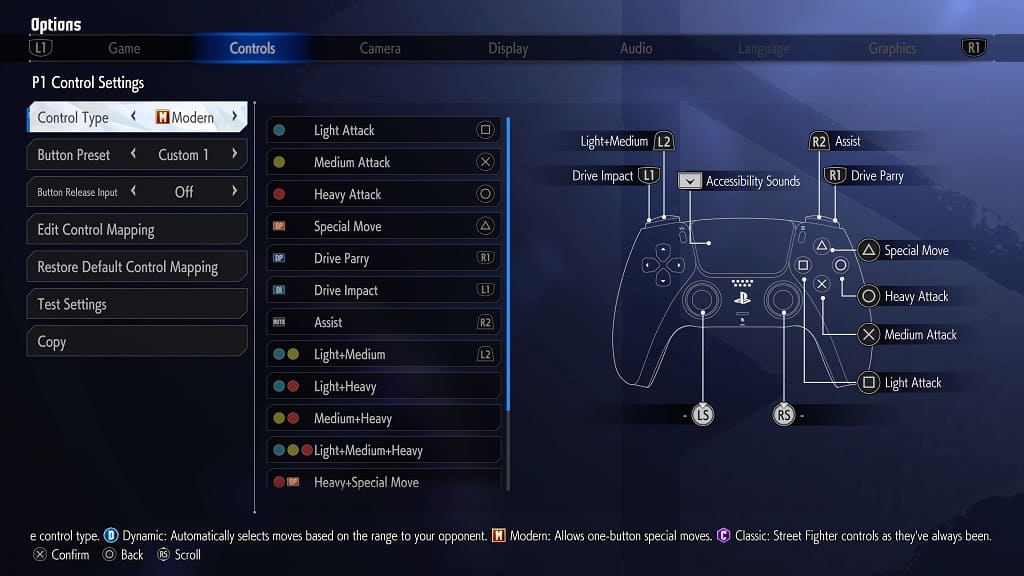
If you want to stick with the Modern control type, then you should see the following default button layout:
- Triangle Button: Light Attack
- X Button: Medium Attack
- Circle Button: Heavy Attack
- Triangle Button: Special Move
- R1 Button: Dive Parry
- L1 Button: Drive Impact
- R2 Button: Assist
- L2 Button: Light Attack and Medium Attack
- Touch Pad Button: Accessibility Sounds
You can also add the following actions to any buttons on the gamepad:
- Light and Heavy Attack
- Medium and Heavy Attack
- Light, Medium and Heavy Attack
- Heavy and Special Move
- Taunt

While the Dynamic control type is also available, there aren’t any additional actions you can add to your controller for this simplified layout.
To add any of the aforementioned unassigned actions to the two back buttons of the DualSense, go to the Controls section of the Options tab and then select either Player 1 Side Control Settings (Battle) or Player 2 Side Control Settings (Battle). Afterwards, select Edit Control Mapping.
Look for the actions that you want to map to the back buttons of the Edge and then set it to L3 and R3.
Once you are done saving your changes, open the Customize Button Assignments menu of the controller and then add L3 and R3 to the two back buttons.
Trigger Stops
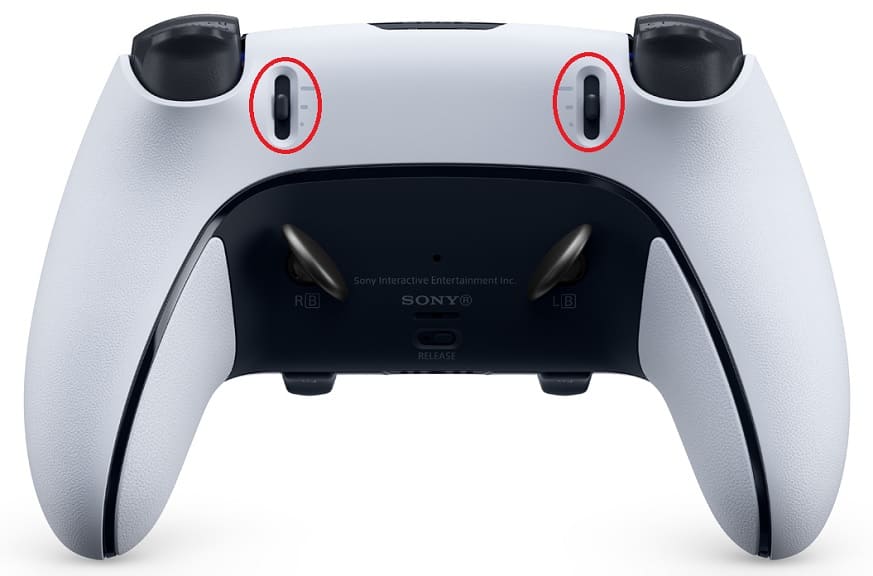
If you haven’t done so already, pull the sliders located on the backside of your Edge all the way down. By doing so, Street Fighter 6 should be able to register your L2 and R2 inputs a lot quicker. In a fighting game, a few extra milliseconds can make all the difference.

You can also further adjust the sensitivity of these trigger buttons from the DualSense Edge’s Trigger Deadzone menu.
Stick Sensitivity and Deadzones
If you prefer using the analog stick instead of the directional pad, then you can use the Stick Sensitivity and Deadzones menu of the controller to adjust the left analog if you are having problems getting your command inputs registered in Street Fighter VI.
Analog Caps and Back Buttons Attachments
As for the analog caps and back button attachments that came with the DualSense Edge, we recommend going with whichever combination that gives you the most comfort as you will most likely by constantly mashing your controller.
Wired Communication
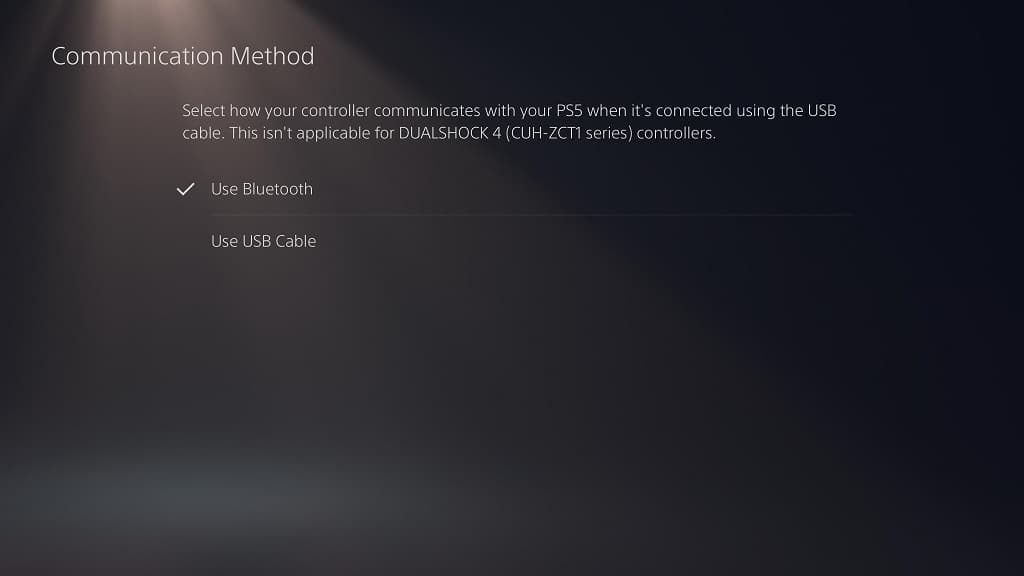
To reduce input lag, we suggest that you plug your Edge controller directly to one of the USB ports of your PS5 console. Afterwards, open the Settings menu of your system and then go to Accessories > Controller (General) > Communication Method. Finally, make sure that Use USB cable is selected.

By doing so, you should be able to reduce the latency when it comes to your button inputs.
