How to change Exoprimal subtitle size and other settings

By default, Exoprimal have subtitles enabled. To see how you can change the way these texts are displayed in the game, you can take a look at this tutorial from Seeking Tech.

1. For the first step, you need to open the in-game Options menu, which can be done by pressing the Menu button on a PlayStation controller or Options button on an Xbox controller.

Keep in mind that the game does not pause when you are using the menus. Therefore, you should make sure that you are safe from any enemy attacks beforehand.

2. Inside of Settings, you should already be in the Gameplay tab of the General section.

If you aren’t, then you can change to the General section by using the L1 and R1 buttons on PlayStation or LB and RB buttons on Xbox.

Once you are in the General section, you can use the L2 and R2 buttons on PlayStation or LT and RT buttons on Xbox to change over to the Gameplay tab.

3. In the Gameplay tab, use the right analog stick to scroll down to Subtitles.
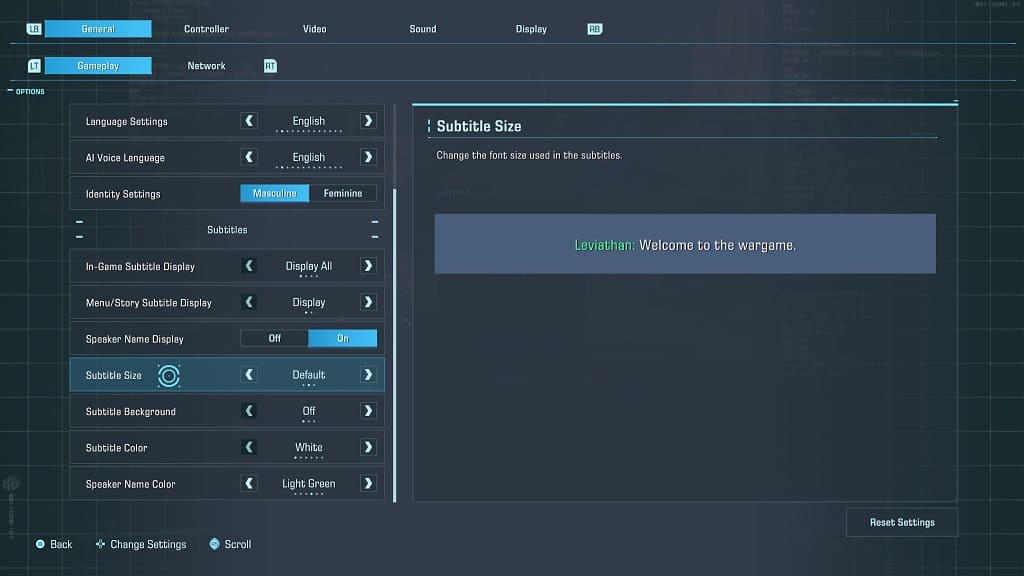
4. From there, you can choose what type of subtitles to show on the screen with the In-Game Subtitle Display setting.

5. You can also choose to enable or disable subtitles for menus and cut scenes via the Menu/Story Subtitle Display setting.

6. Moreover, you also select whether or not to add the speaker’s name to the subtitles with the Speaker Name Display setting.

If you do turn this on, then you can also change the color of the name display via the Speaker Name Color setting located at the bottom of the menu.

7. From the same screen, you can use the Subtitle Size setting to make the texts appear smaller or bigger.

8. To make these texts more visible, you can add a background with the Subtitle Background setting and/or change the subtitle color via the Subtitle Color setting.

9. Once you are done with changing the subtitle settings, exit out of the Options menu and then return to your game.

You should see any edits you made right away in Exoprimal.

How to turn off vibrations in Exoprimal

By default, Exoprimal supports controller vibration if you are playing the game by using a compatible gamepad such as the DualShock 4, DualSense, Xbox One Controller or Xbox Series Controller.

If you find that the rumble to be too distracting or uncomfortable, then you can take a look at this Seeking Tech guide to see how you are able to disable this feature.

1. To start off, you need to head into the Options. Before doing so, make sure you aren’t doing anything important in Exoprimal as the game won’t pause when you are browsing through its menus.

To open the Options button, you need to press the Options button on the DualShock 4 and DualSense or Menu button on the Xbox One Controller and Xbox Series Controller.

2. Once you are in the Options menu, use the L2 and R2 buttons on the PlayStation controller or the LT or RT buttons on Xbox controller to make your way to the Controller section.

3. In the Controller section, make sure you are in the Controller Settings tab.

If you aren’t, then you can use the L1 and R1 buttons on the PlayStation pad or the RB and RT buttons on the Xbox pad to change tabs until you get there.

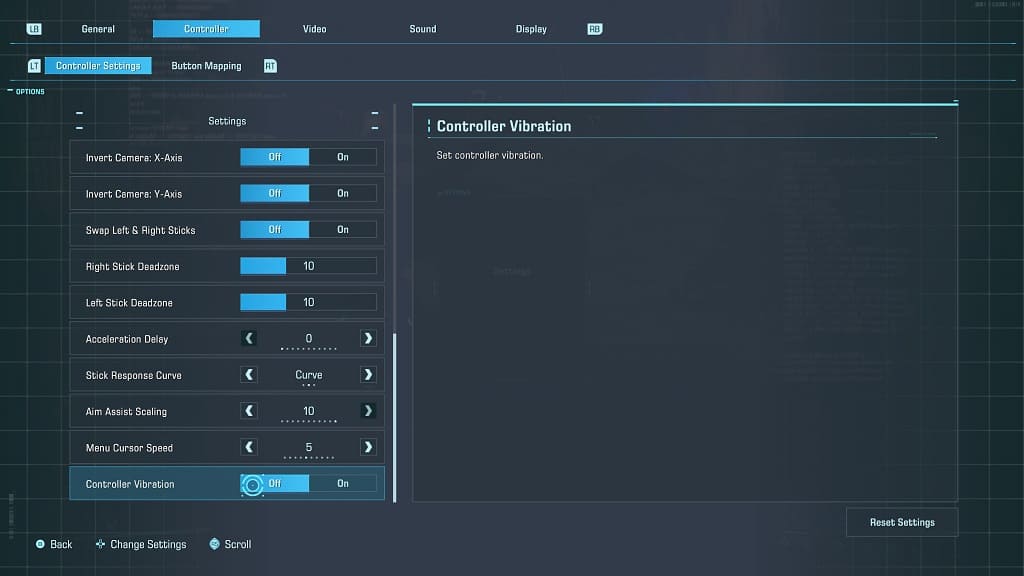
4. Next, use the right analog stick to scroll all the way down to the menu until you get to the Controller Vibration setting, which should show the following description:

  • Set controller vibration.

5. Make sure that the Controller Vibration setting is set to Off.

6. Exit out of the Options menu and then return to your game.

You should no longer notice any haptics when firing your weapons and doing any other actions.

How to fix ‘failed to communicate with the server’ issue in Exoprimal

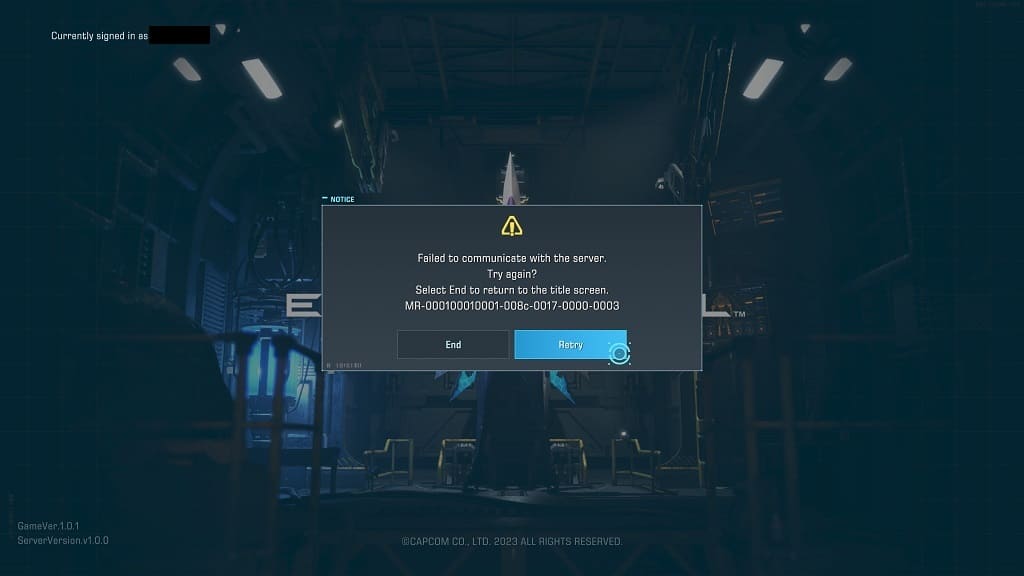
When trying to log into Exoprimal, you may run into the following error notice:

  • “Failed to communicate with the server. Try again? Select End to return to the title screen.”

To see how you can fix this communication issue with this online-only title, you can check out this troubleshooting guide from Seeking Tech.

1. To start off, you can try selecting the Retry option on the notification to see if a subsequent attempt is successful.

2. You can also try restarting the game.

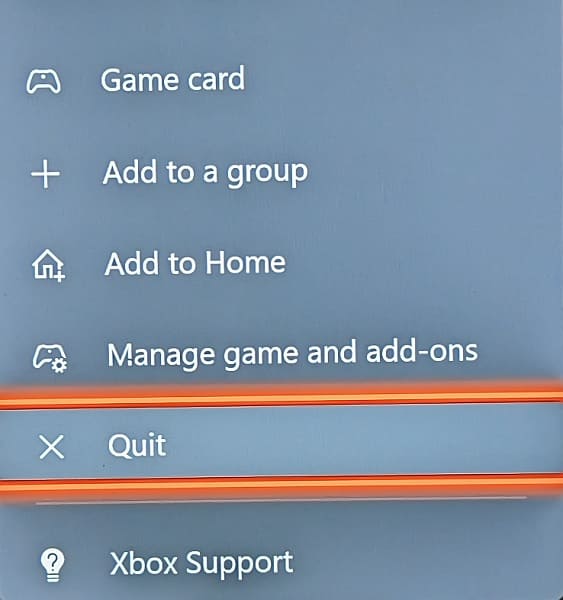
Keep in mind that the Xbox Series S and Xbox Series X console will put the game in Quick Resume. To restart these versions, you need to quit the game from the Xbox Guide menu and then re-open it again.

3. If resetting the game does not work, then you can try restarting your PC, PS4, PS5, Xbox One, Xbox One S, Xbox One X, Xbox Series S or Xbox Series X.

4. You may also want to power cycle your home networking devices.

In order to do so, turn off your router, modem and other electronics used for your internet connection. You should also shut down the PC or console you are using to play Exoprimal.

After waiting for several minutes, turn on your networking devices again. Once your home network is back online, power on your PC or console and then try to log in again.

5. A server issue may also be causing the “failed to communicate with the server.” Online connection errors can occur more frequently at launch when there are loads of players trying to log in and then play the game, potentially overloading the servers.

To check to see if there are server issues, you can take a look at the latest messages from the official Exoprimal Twitter account.

If there are connection issues, then you most likely need to wait until they are resolved on the developer’s end before you can properly connect to Exoprimal and play it again.

How to disable crossplay in Exoprimal

By default, Exoprimal supports crossplay. As a result, you will be able to match up with others that are playing on PC, PlayStation 4, PlayStation 5, Xbox One, Xbox One S, Xbox One X, Xbox Series S and Xbox Series X.

If you would like to be on an equal playing field, then you may want to consider disabling cross-platform play. To see how you can turn off this matchmaking feature, you can check out this step-by-step tutorial from Seeking Tech.

1. For the first step, you need to open the Options menu.

In order to do so, you need to press the Options button if you are using a DualSense and DualShock 4 controller and Menu button on the Xbox One or Xbox Series controller.

It is important to note that the game won’t pause while you are using the menus. So, you should make sure that you are in a safe area.

2. Next, you need to select Settings from the Options menu.

3. Once you get to Settings, you should be viewing the General section by default.

If you are in another section, then you can use the L1 and R1 buttons on PlayStation or LB and RB buttons on Xbox to navigate your way towards General.

4. From the General section in the Settings menu, make sure you are viewing the Network tab.

If not, you can change tabs with the L2 and R2 buttons on PlayStation or LT and RT buttons on Xbox.

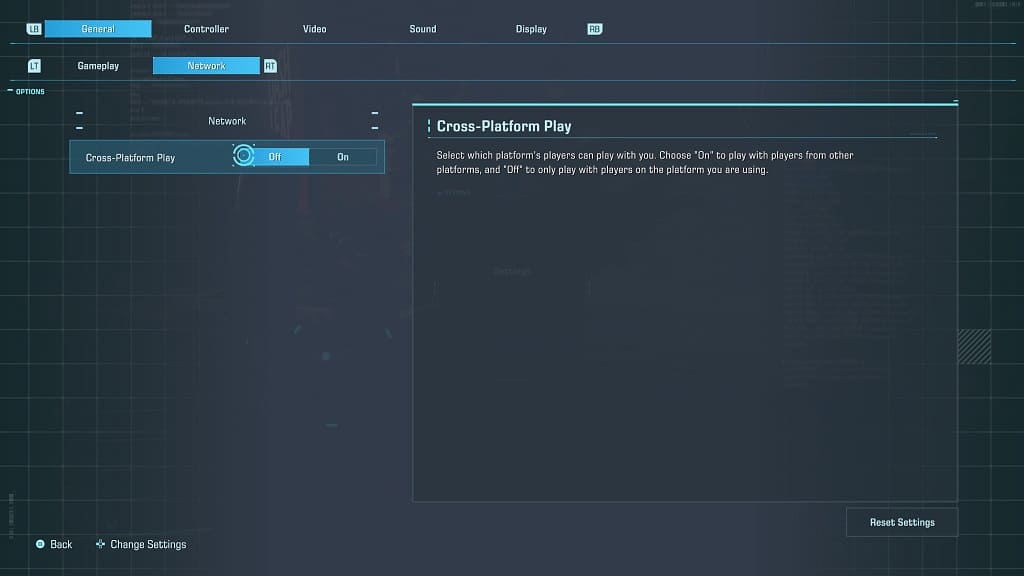
5. After getting to the Network tab, you should see the Cross-Platform Play setting, which should be showing the following description:

Select which platform’s players can play with you. Choose “On” to play with players from other platforms, and “Off” to only play with players on the platform you are using.

6. To disable cross play, make sure the Cross-Platform Play setting is set to Off and then exit the Settings menu.

You should no longer be matched with players from other platforms when playing multiplayer in Exoprimal.

If you are playing on PlayStation, then you should only be matched with other PS4 and PS5 players.

If you are playing on Xbox, then your match making will be limited to other Xbox One, Xbox One S, Xbox One X, Xbox Series S and Xbox Series X players.

PC players will only be able to play with each other when cross-network play is disabled.

How to fix ‘no Capcom ID linked’ issue in Exoprimal

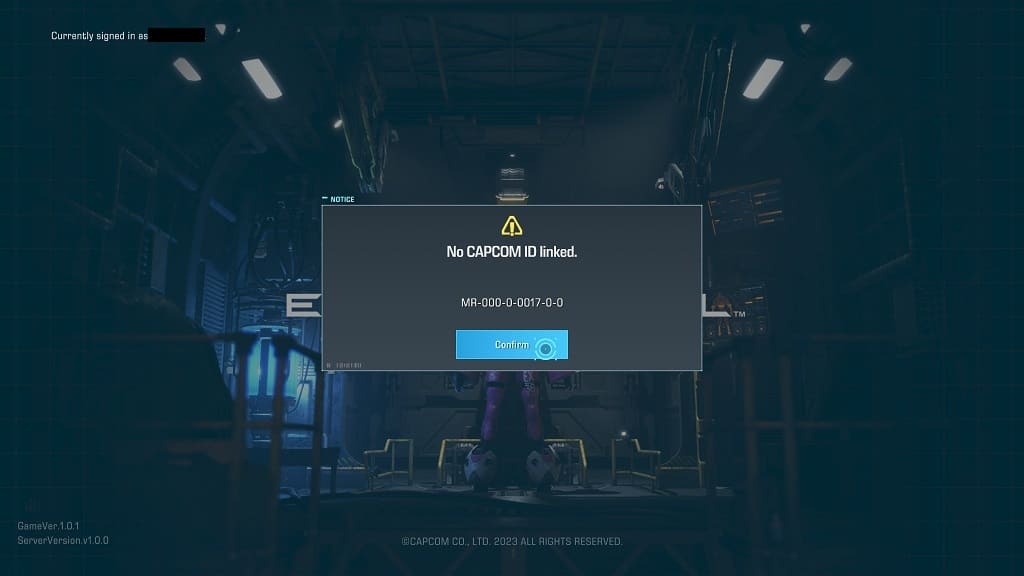
Exoprimal requires that you log into your Capcom ID account in order to start playing. When trying to sign in, you may end up seeing the following error message:

  • “No Capcom ID linked.”

To see how you can fix this sign in issue for this multiplayer game, you can check out this troubleshooting article from Seeking Tech.

1. For the first step, you should double check which account is linked to your Capcom ID.

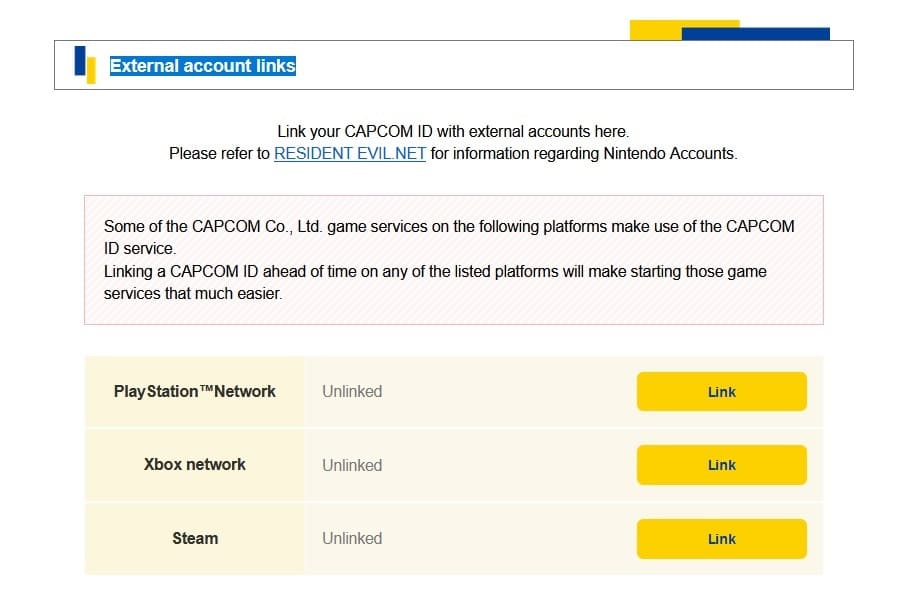
In order to do so, you need to visit the MyPage section of the official Capcom ID website, which you can find in this link. From there, make sure you are signed into your Capcom account. Afterwards, scroll down to Platform Account Information section to see what PlayStation Network, Xbox Live or Steam accounts you have linked.

External account links section from the official Capcom ID website

If it doesn’t match the platform account you are currently using to play Exoprimal, then you can try switching over to the Capcom ID that was used to previously linked to your PSN, Xbox Live or Steam account. You may need to contact Capcom directly if you forgot your previous Capcom ID.

Unfortunately, the link between the Capcom and platform accounts are permanent. Therefore, you won’t be able to use your PSN, Xbox Live or Steam with another Capcom ID.

2. If the aforementioned MyPage showed that you haven’t linked your platform account, then you should select the Link option and then follow the on-screen instructions to complete the linkage. Afterwards, try logging in again in Exoprimal.

3. If you are still getting the “no Capcom ID linked” error, then you can try restarting the game as well as your console in order to reset the server connection.

To close the game on the Xbox Series S or Xbox Series S, then you first need to press the Xbox logo button on the controller. Afterwards, move the menu cursor in the Guide menu to the Exoprimal game icon and then press the Menu button on the controller. Finally, select the Quit option.

4. There is also a possibility that there be a current issue with the game servers that are preventing players from linking and/or logging into the online-only game.

In this case, there is not much you can do other than to wait until the server-side problems are fixed by the development team at Capcom.

To keep updated with any server issues in this game, we recommend that you check out the official Exoprimal Twitter page.

Samsung QN90C and QN90CD wall mount specs

If you got the QN90C (which is also known as the QN90CD) and would like to install it up against a wall, then you can check out this compatibility guide at Seeking Tech.

Screen Sizes

This article will be covering all screen sizes of the QN90C and QN90CD, which should include the following model numbers:

43″:

  • QN43QN90CAF
  • QN43QN90CAFXZA
  • QN43QN90CDFXZA

50″:

  • QN50QN90CAF
  • QN50QN90CAFXZA
  • QN50QN90CDFXZA

55″:

  • QN55QN90CAF
  • QN55QN90CAFXZA
  • QN55QN90CDFXZA

65″:

  • QN65QN90CAF
  • QN65QN90CAFXZA
  • QN65QN90CDFXZA

75″:

  • QN75QN90CAF
  • QN75QN90CAFXZA
  • QN75QN90CDFXZA

85″:

  • QN85QN90CAF
  • QN85QN90CAFXZA
  • QN85QN90CDFXZA

QN90C and QN90CD Dimensions (without Stand)

Dimensions without Stand (in inches):

  • 43″ QN90C and QN90CD: 37.8″ x 22.0″ x 1.1″
  • 50″ QN90C and QN90CD: 43.8″ x 25.4″ x 1.1″
  • 55″ QN90C and QN90CD: 48.3″ x 27.8″ x 1.1″
  • 65″ QN90C and QN90CD: 56.9″ x 32.6″ x 1.1″
  • 75″ QN90C and QN90CD: 65.7″ x 37.7″ x 1.1″
  • 85″ QN90C and QN90CD: 74.5″ x 42.6″ x 1.1″

Dimensions without Stand (in millimeters):

  • 43″ QN90C and QN90CD: 960 mm x 559 mm x 28 mm
  • 50″ QN90C and QN90CD: 1113 mm x 645 mm x 28 mm
  • 55″ QN90C and QN90CD: 1227 mm x 706 mm x 28 mm
  • 65″ QN90C and QN90CD: 1445 mm x 828 mm x 28 mm
  • 75″ QN90C and QN90CD: 1669 mm x 958 mm x 28 mm
  • 85″ QN90C and QN90CD: 1892 mm x 1082 mm x 28 mm

Dimensions without Stand (in centimeters):

  • 43″ QN90C and QN90CD: 96.0 cm x 55.9 cm x 2.8 cm
  • 50″ QN90C and QN90CD: 111.3 cm x 64.5 cm x 2.8 cm
  • 55″ QN90C and QN90CD: 122.7 cm x 70.6 cm x 2.8 cm
  • 65″ QN90C and QN90CD: 144.5 cm x 82.8 cm x 2.8 cm
  • 75″ QN90C and QN90CD: 166.9 cm x 95.8 cm x 2.8 cm
  • 85″ QN90C and QN90CD: 189.2 cmx 108.2 cm x 2.8 cm

QN90C and QN90CD Weight (without Stand)

Weight without Stand (in pounds):

  • 43″ QN90C and QN90CD: 20.7 lbs.
  • 50″ QN90C and QN90CD: 29.8 lbs.
  • 55″ QN90C and QN90CD: 39.0 lbs.
  • 65″ QN90C and QN90CD: 53.4 lbs.
  • 75″ QN90C and QN90CD: 75.2 lbs.
  • 85″ QN90C and QN90CD: 95.9 lbs.

Weight without Stand (in kilograms):

  • 43″ QN90C and QN90CD: 9.4 kg
  • 50″ QN90C and QN90CD: 13.5 kg
  • 55″ QN90C and QN90CD: 17.7 kg
  • 65″ QN90C and QN90CD: 24.2 kg
  • 75″ QN90C and QN90CD: 34.1 kg
  • 85″ QN90C and QN90CD: 43.5 kg

QN90C and QN90CD VESA Mounting Pattern

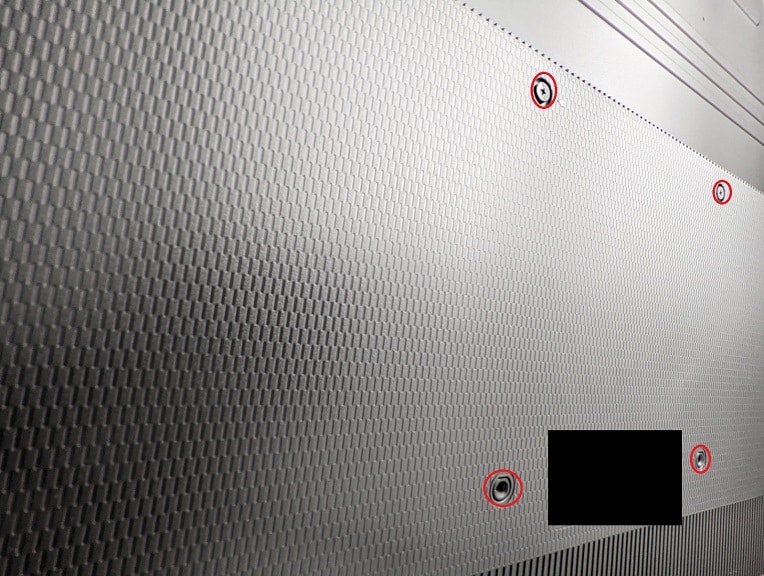
To install the QN90C or QN90CD to a mounting bracket, the screw hole distances must be compatible. The horizontal and vertical distances between the four screw holes, which are measured in millimeters, can be found below:

  • 43″ QN90C and QN90CD: 200 mm x 200 mm
  • 50″ QN90C and QN90CD: 200 mm x 200 mm
  • 55″ QN90C and QN90CD: 200 mm x 200 mm
  • 65″ QN90C and QN90CD: 400 mm x 400 mm
  • 75″ QN90C and QN90CD: 400 mm x 400 mm
  • 85″ QN90C and QN90CD: 600 mm x 400 mm
VESA Mounting Pattern (example from different TV).

QN90C and QN90CD Mounting Screw Type

When it comes to the screw you need to used to attach the mount to the QN90C/QN90CD, Samsung recommends that you use the M8 screw type with a depth of 11 mm to 13 mm.

What third-party wall mounts are compatible with the Samsung QN90C and QN90CD?

For a wall mount to be compatible with the Samsung QN90C and QN90CD, it needs to support the VESA Mounting Pattern for the TV.

The 43-inch, 50-inch and 55-inch versions all use the 200 mm x 200 mm pattern. The 65-inch and 75-inch screen sizes feature a 400 mm x 400 mm pattern. The biggest screen option, the 85-inch, requires a mount that supports the 600 mm x 400 mm screw hole distances.

Furthermore, the mounting bracket needs to be strong enough to hold the weight of the QLED. The QN90C/QN90CD televisions can weigh as much as 95.9 lbs. or 43.5 kg.

You can take a look at our general wall mount recommendations guide to find a fixed, tilting or full motion mounting bracket that is compatible with the QN90C and QN90CD.

Resource:

How to fix sticky DualSense Edge buttons

If the directional pad or face buttons of your DualSense appears to be sticky, then you can check out this troubleshooting article from Seeking Tech to see how you can get them unstuck.

1. For the first step, you can try to loosen up the button by doing the following:

  • Press down hard on the sticky button.
  • Rotate the button while it is pressed down several times clockwise.
  • You can then rotate it a few times counterclockwise.
  • Hopefully, this method will loosen some of the debris that may have been causing the directional pad or face buttons to be stuck.

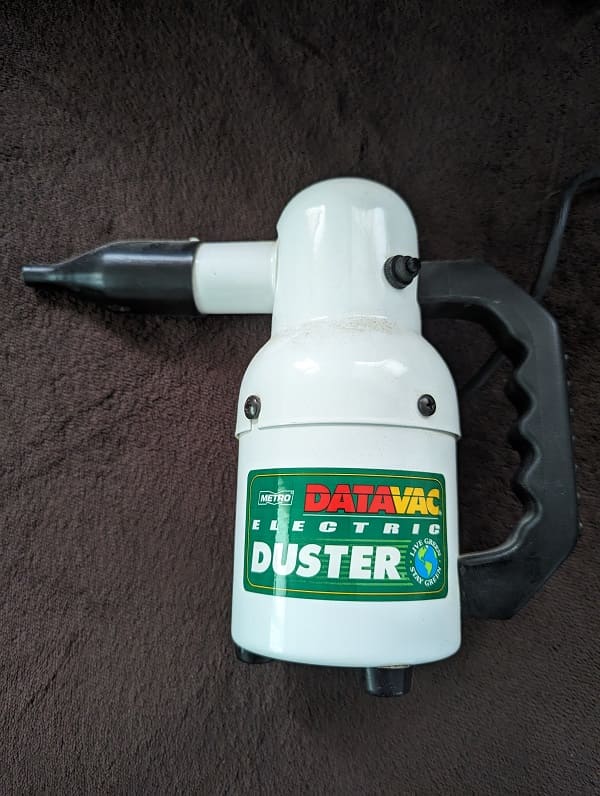
2. If you have an air duster, then you can try blowing air on the outer edges of the sticky button. You may be able to get enough high-pressure air inside of the controller to block off the dust and other substances.

3. You can also try cleaning the button.

In order to do so, you can try using a dry lint-free cloth while the controller is turned off. If that doesn’t work, then you can try adding 99% isopropyl alcohol to remove some of the stickier substances.

If you decide to use the aforementioned solution, try to seep a little it in between the edges of the problematic button. You can then press down hard on the button before rotating it clockwise and counterclockwise to clean the internal portions.

4. You may also want to try taking the controller apart so that you can do a more thorough cleaning on the internal parts. With that said, this is a very complicated process that may end up causing more harm to the gamepad.

If you are still interested in doing so, then you can check out the following How-FixIT YouTube video to see how you can properly dissemble and clean the DualSense Edge:

5. If you can’t seem to loosen the sticky buttons, then you might want to consider sending in your controller to be repaired or replaced.

What to do if the PlayStation VR2 Sense Controllers won’t turn on

Most PlayStation VR2 games require the Sense Controllers. If these accessories do not seem to be powering on, then you can take a look at this troubleshooting article from Seeking Tech.

1. For the first step, we suggest that you try charging the Sense Controllers. If your PlayStation VR2 is brand new, then the internal batteries of its controllers could be depleted.

When recharging, you should use a compatible USB-C cable. For the best compatibility, you can use the USB-C charging cable that came with your PlayStation 5 and/or PlayStation VR2 headset.

Try to wait at least 15 minutes of charging before removing the USB-C cable from the Sense Controllers. Afterwards, press the PS button on the controllers to see if you see any lights appear.

2. It important to note that the Sense accessories will turn off right away if they aren’t connected to your PlayStation 5.

If you haven’t done so already, make sure you set up the PlayStation VR2 with your PS5. In order to do so, connect the virtual reality headset to the USB C port of the game console. Afterwards, turn on the console and then the PS VR2. The PS5 should detect the VR headset and then lead you through the rest of the setup process.

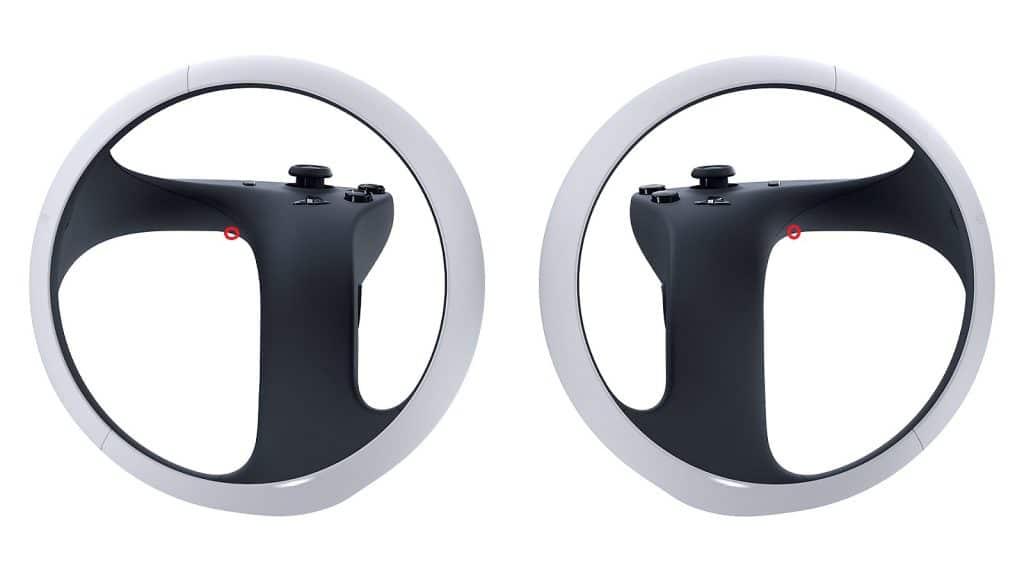
3. If the Sense Controllers still aren’t turning on, then you can try resetting them. To do so, you need to use a thin pin to push down on the reset button located at the bottom of the pin hole for at least 5 seconds.

The pinhole is located next to the L2 or R2 button on the backside. It may be hard to spot if your room isn’t brightly lit.

After resetting the controller, connect it to your PS5 via a USB cable and then press the PS button so that you can re-link it to the console.

4. If the left or right PS VR2 Sense pads still aren’t powering on, then there may be some hardware defect. In this case, you will have to send the controllers in for repair.

Recommended QN90C settings for PS5, Xbox Series X and S

If you bought the Samsung QN90C (also known as QN90CD), then you can check out this Seeking Tech guide to find the best settings to utilize when using this TV to play games on the PlayStation 5, Xbox Series X and/or Xbox Series S.

Model Numbers

This guide should cover all screen sizes of the QN90C, including the following model numbers:

43″:

  • QN43QN90CAFXZA
  • QN43QN90CDFXZA

50″:

  • QN50QN90CAFXZA
  • QN50QN90CDFXZA

55″:

  • QN55QN90CAFXZA
  • QN55QN90CDFXZA

65″:

  • QN65QN90CAFXZA
  • QN65QN90CDFXZA

75″:

  • QN75QN90CAFXZA
  • QN75QN90CDFXZA

85″:

  • QN85QN90CAFXZA
  • QN85QN90CDFXZA

Supported QN90C Console Gaming Features

With the Samsung QN90C, you will be able to play PlayStation 5 games at up to 120 frames per second. The other supported features include Auto Low Latency Mode, HDR10 and Variable Refresh Rate (for as low as 48 fps).

For the Xbox Series X and Xbox Series S, the QN90C can also display supported games at up to 120 fps. With these two consoles, this TV also supports Auto Low Latency Mode, HDR10 and Variable Refresh Rate (for as low as 40 fps).

Recommended QN90C settings for console gaming

To get the best out of your PS5, Series X or Series S consoles with the QN90C, you can take the following steps:

1. To start off, make sure you properly connect your console to the QLED.

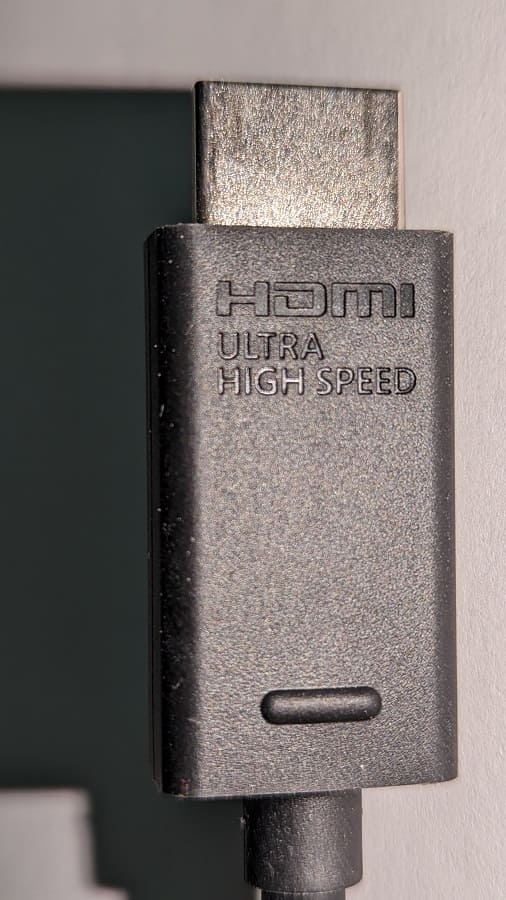
For the PlayStation 5 and Xbox Series X, you can use the HDMI 2.1 cable that came with these consoles to connect to any of the four HDMI ports of the TV.

For the Series S, you can use the HDMI 2.0 cable that came with the system or get a HDMI 2.1 cable.

2. Next, make your way to the Settings> All Settings > Connection > Game Mode Settings > Game Mode. Afterwards, make sure that Game Mode is set to On.

By doing so, you should be able to get the lower input lag possible when playing a PS5 or Xbox Series game. Furthermore, Variable Refresh Rate should automatically be enabled on the QLED television set. VRR will help with minor frame rate drops and screen tearing.

While there are other TV settings that you can mess with, we recommend that you leave them alone for now.

3. On the console side, there are several settings that you may need to change.

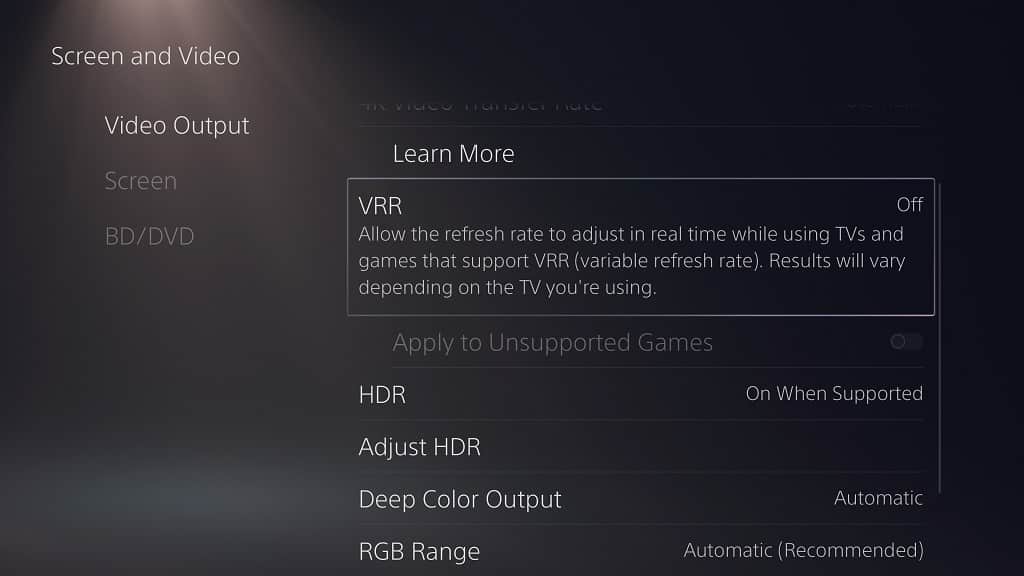
For the PlayStation 5 and PlayStation 5 Digital Edition consoles, head over to the Settings > Screen and Video > Video Output menu. From there, set the following to Automatic:

  • Variable Refresh Rate
  • 120 Hz
  • ALLM
  • 4K Transfer Rate
  • Deep Color Output
  • RGB Range

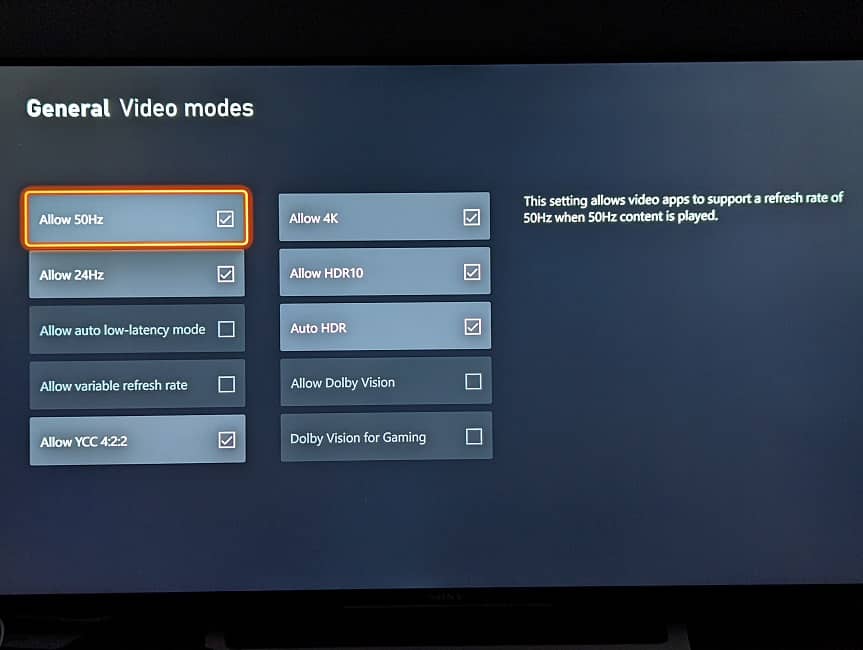
For the Xbox Series X and Xbox Series S, navigate towards the Settings > General > TV & Display Options > Video Modes menu. You should then make sure that the following boxes are selected:

  • Allow Auto-Low Latency Mode
  • Allow variable refresh rate
  • Allow 4K
  • Allow HDR10

5. One last step for the console side, you need to take is to calibrate the HDR output of your console to match the QN90C.

You can find the menu to do so on the PS5 by making your way over to Settings > Screen and Video > Video Output > Adjust HDR.

On the Series X and Series S, you need to go to Settings > General > TV & Display Options > Calibrate HDR for games.

In both of these cases, follow the on-screen instructions to get HDR content to display properly on your QLED.

6. If some scenes in a game you are currently playing appear to be too dark, then you can adjust the Dynamic Black Equalizer setting from the Game Mode Settings menu of the Samsung QN90C.

If you feel that some games are running a little bit choppy, then you can go to the Game Motion Plus Settings from the Game Mode Settings screen. On the next page, you can adjust the Blur Reduction slider to make 60 fps games look smoother or the Judder Reduction slider to make 30 fps games look smoother. Furthermore, you can also add Black Frame Insertion by enabling LCD Clear Motion.

How to fix DualSense Edge vibration issues

The DualSense Edge supports the same haptics used as the DualSense. If the vibrations do not seem as strong, or the premium controller does not rumble at all, then you can take a look at this troubleshooting article from Seeking Tech.

1. For the first step, try to re-charge your controller. The low battery life may lead to a weaker rumble.

2. If re-charing the controller did not make the vibrations feel stronger, then we recommend checking the in-game menu of the game you are currently playing. Some titles may have options where you can adjust the vibration intensity or turn it off completely.

2. If the game has vibrations fully enabled but you are still experiencing issues with your DualSense Edge, then you should try looking in the system menus.

To do so, you need to take the following steps:

  • Press and hold the PS button to open the home menu of your PS5.
  • Select the gear icon on the top right side of the home screen to open the Settings menu.
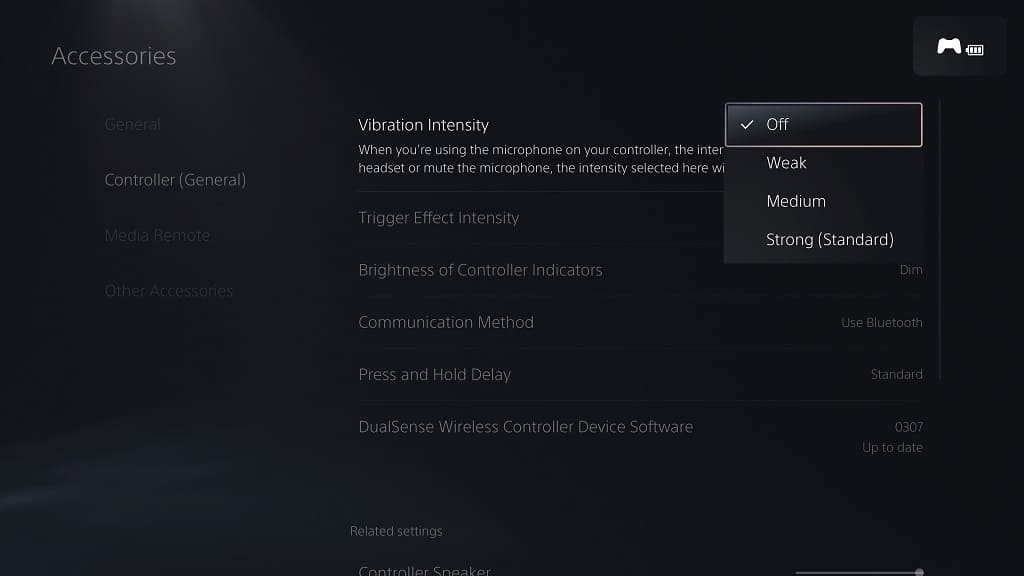
  • From the front page of Settings, go to Accessories > (Controller General) > Vibration Intensity.
  • Set Vibration Intensity to Strong (Standard).

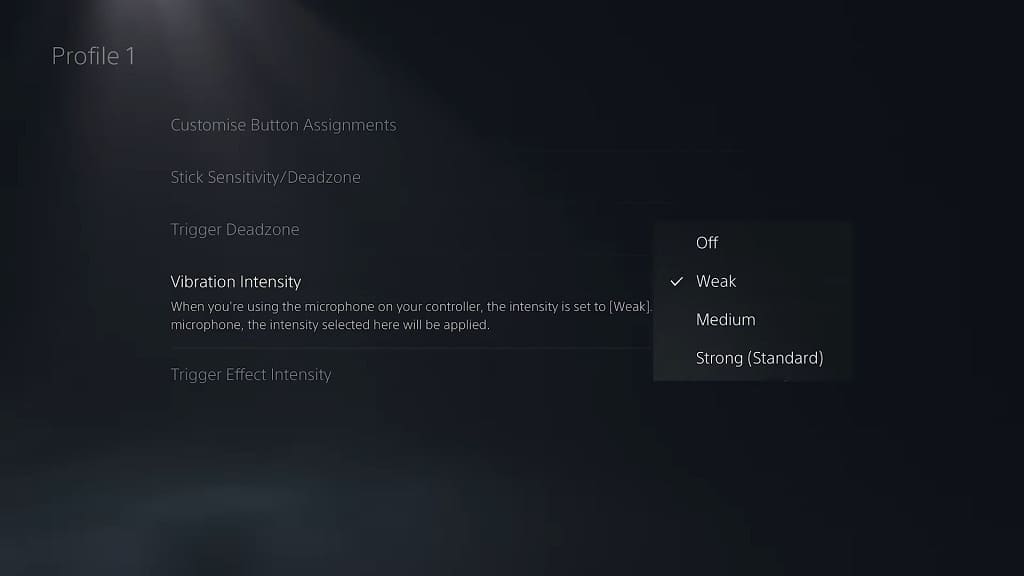
3. If you are using custom profiles for the DualSense Edge, then you need to open the Settings menu. Afterwards, navigate over to Accessories > DualSense Edge Wireless Controller > Custom Profiles.

In the Custom Profiles menu, select or create a custom profile. Next, select Vibration Intensity and then set it to Strong (Standard).

4. You can also try updating the firmware of your DualSense Edge. To find out how you can properly do so, you can take a look at this previous tutorial.

5. If the haptics still aren’t working properly on the controller, then you can try resetting the accessory.

In order to do so, you first need to completely turn off your PlayStation 5 or PlayStation 5 Digital Edition console.

Afterwards, you need a small, thin pin. This is because you need to press down on a button located at the bottom of a small hole located on the back of the DualSense Edge. You will need to hold that button for around 5 seconds to reset the gamepad.

Once you are done with resetting the pad, connect the DualSense Edge to the USB port of the PS5 by using the USB cable that came with the controller. Finally, press the PS button on the gamepad to re-sync it with the game console.

6. If none of the potential solutions have worked so far, then there may be a hardware issue. In this case, you may have to send your DualSense Edge in for repair.