The MSI MPG321UR-QD is capable of displaying PlayStation 5 games with Variable Refresh Rate turned on. To find out how you can enable VRR support for the PS5 and PS5 Digital Edition systems, you can take a look at this article at Seeking tech.
What are the benefits of playing PS5 games with VRR on MSI Optix MPG321UR-QD?
With the 32″ MSI Optix MPG321UR-QD 16:9 4K 144 Hz IPS Gaming Monitor, you can play PlayStation 5 games with no stuttering or screen tearing when Variable Refresh Rate is enabled.
VRR will only work if the PS5 game you are planning maintains a frame rate of at least 48 fps. It if falls below that threshold, then you will start seeing stutters and/or screen tears.
Furthermore, this feature currently only works with PlayStation 5 native games. Backwards compatible PlayStation 4 games are not compatible even if you play them on a PS5 system.
How to turn on MSI MPG321UR-QD VRR support for PS5
In order to enable Variable Refresh Rate for your MSI MPG321UR-QD Gaming Monitor when playing videogames on the PlayStation 5, you need to take the following steps:
1. To begin, we suggest that you update the firmware of your 32″ MSI Optix MPG321UR-QD in case a new update improve the performance and/or fix issues with the computer screen.
You can download the latest firmware file and directions on the official MSI website with the following link:
2. Of course, you should also keep the firmware of your PlayStation 5 or PlayStation 5 Digital Edition updated to ensure that the VRR support is optimized.
3. Next, make sure you connect your PS5 system directly to the HDMI 2.1 port of the 32″ MSI Optix MPG321UR-QD 16:9 4K 144 Hz IPS Gaming Monitor. For the connection, you need to be using a HDMI 2.1 cable.
3. You should also turn on the MPG321UR-QD monitor and PS5 game system.
4. You then need to make sure that the screen is on the correct input source as it should be displaying the PlayStation 5.
5. Open the on-screen display, or OSD, of the MPG321UR-QD by pressing the Navi Key.
6. In the OSD menu, scroll down on the left column and then select Setting.
7. You then need to select HDMI 2.1.
8. Make sure that the HDMI 2.1 setting is set to 4K 120Hz – Console.
9. Go back to the OSD menu and then select Gaming on the left column.
10. You then need to make sure that the Adaptive-Sync setting is set to On. This should make your monitor VRR-ready for PlayStation 5.
11. On your PS5, make sure you are in the home screen, which is the main menu where you have the option to pick which game to open.
12. From the home screen of your game system, go to Settings, which you can do by selecting the gear icon located on the top right side of the menu.
13. In Settings, you next need to head over to Screen and Video.
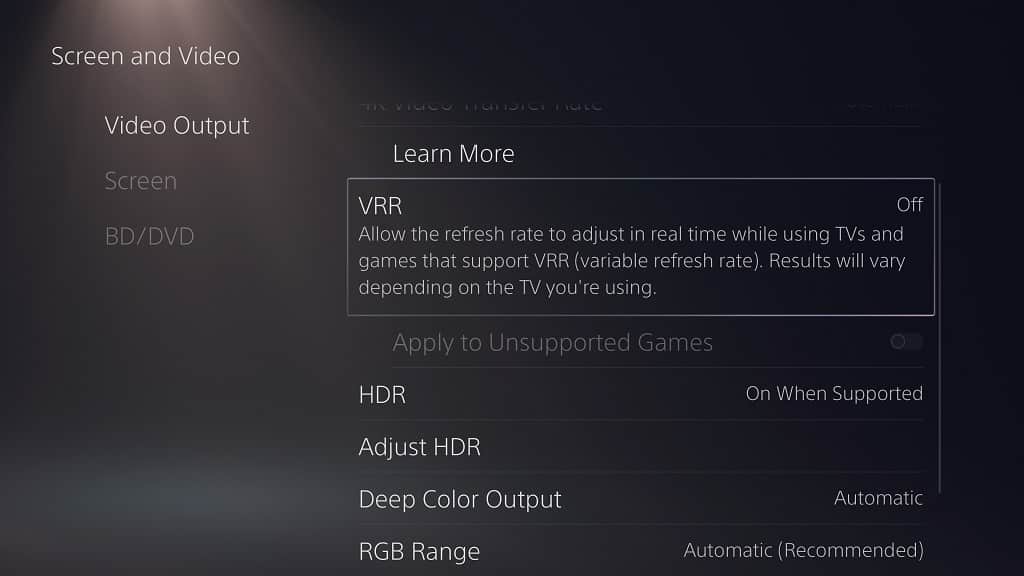
14. From the Screen and Video sub-menu, select Video Output on the left column.
15. On the right side of the same Screen and Video sub-menu, select VRR.

16. Set the VRR setting to Automatic.
17. Optionally, you may also want to turn on “Apply to Unsupported Games” to force Variable Refresh Rate on PS5 games that don’t officially support the feature.
