How to change the turning motion setting in Resident Evil 4 Remake VR

The virtual reality mode of Resident Evil 4 Remake supports both snap and smooth turning. With snap turning, you will be wrapped into the turn, which can be helpful at preventing motion sickness. With smooth turning, the camera will turn without any interruptions.

To see how you can switch between the two, you can take a look at this tutorial from Seeking Tech.

1. Head to the Options menu in the VR mode of RE4R if you haven’t done so already.

2. In Options, you need to be viewing the VR Controls tab. So, select it if you are viewing another tab.

3. You should find the Camera Turn Type setting on this screen. There will be two options:

Snap Turn:

Camera snaps at set angles in the direction the stick is pointed.
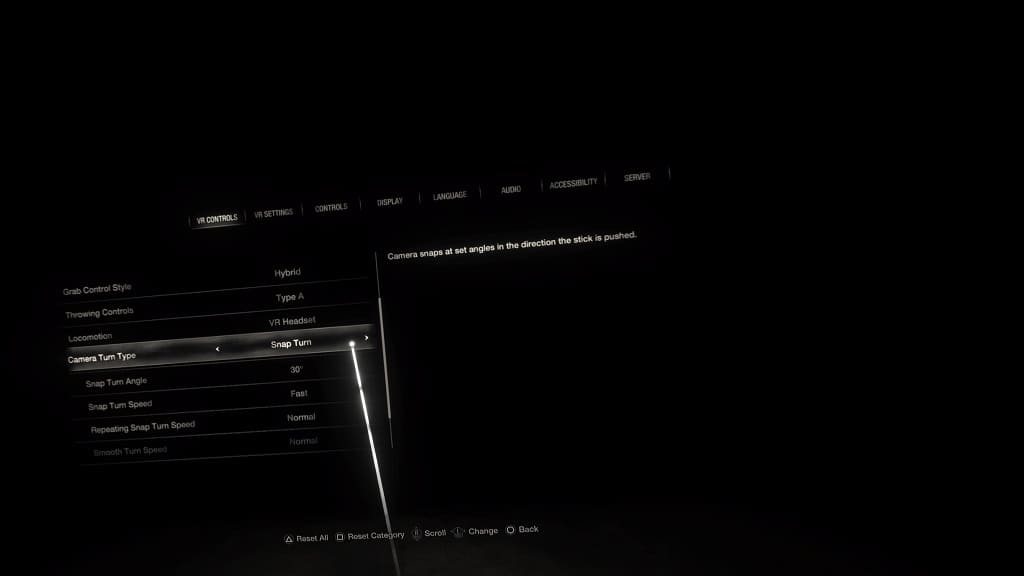
Smooth Turn:

Camera points continuously in the direction the stick is pointed.
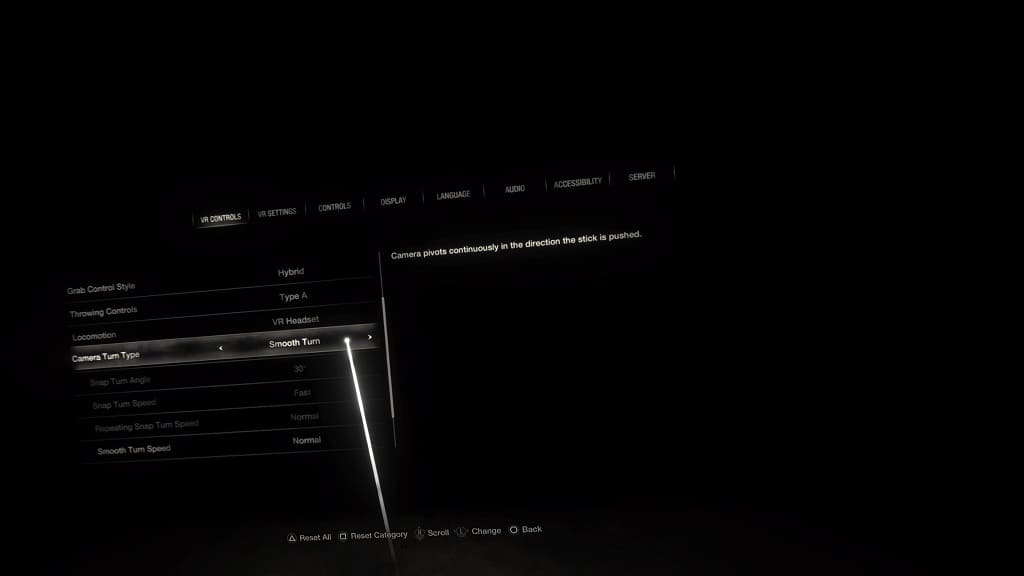
4. If you selected Snap Turn, then you will also be able to adjust the following settings to your liking:

  • Snap Turn Angle
  • Snap Turn Speed
  • Repeating Snap Turn Speed

We suggest playing around with these three until the snap turning feels more naturally and less clunky.

If you selected Smooth Turn instead, then you are able to select the Smooth Turn Speed.

How to fix blurry graphics in Resident Evil 4 Remake VR

When playing the VR Mode in Resident Evil 4 Remake, you may find the graphics to be a little bit too blurry. To see how you can potentially fix this visual issue, you can take a look at this troubleshooting article from Seeking Tech.

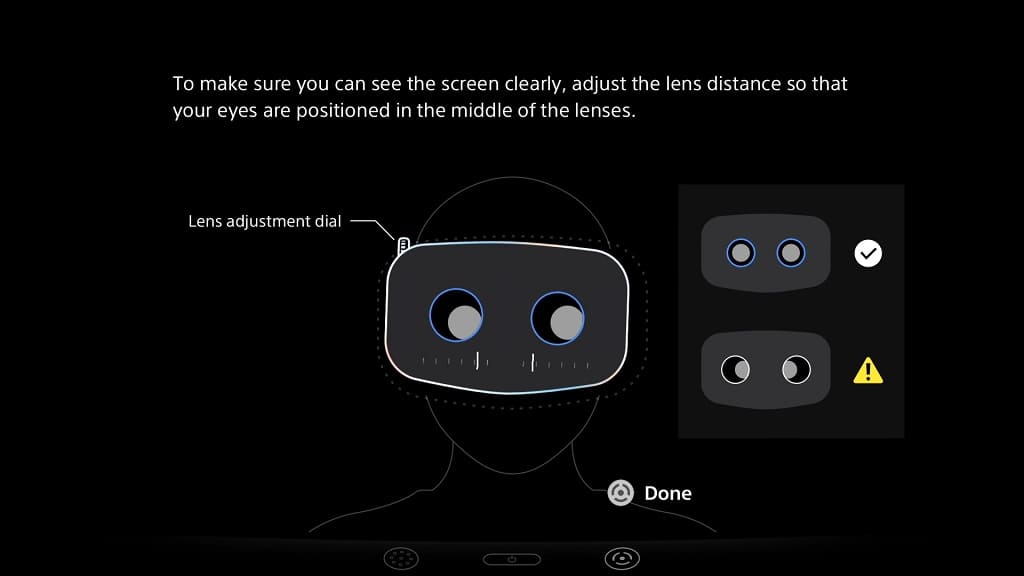
1. To start out, make sure that your PlayStation VR2 headset is adjusted to the sweet spot of your eyes. Otherwise, the graphics will look very blurry.

To re-adjust the sweet spot, press the PS button on either of the PlayStation VR2 Sense controllers to open the Control Center quick menu. From there, select the PlayStation VR2 Quick Settings card.

Afterwards, scroll down and then select Adjust Visibility. Finally, follow the on-screen directions to find your sweet spot.

2. From the same PlayStation VR2 Quick Settings menu, you should also make sure that Eye Tracking is enabled. This is because the virtual reality mode on RE4R uses foveated rendering to increase the visual fidelity depending on where your eyes are looking.

Furthermore, you can also try re-adjusting the eye tracking sensor by selecting Eye Tracking and then Adjust Eye Tracking from the PlayStation VR2 Quick Settings menu. Afterwards, follow the on-screen directions.

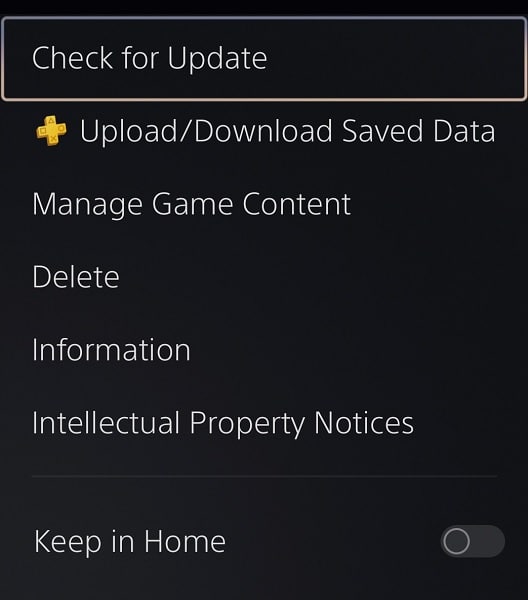
3. You should make sure that you have the latest patch downloaded and installed for the Resident Evil 4 Remake. A new update may increase the resolution and/or visual fidelity of the game when being played in VR.

4. It is also important to note that the game won’t look as good in virtual reality when compared to playing on a flat screen in non-VR.

This is because VR needs more processing power. Not to mention that the lens of the PlayStation VR2 won’t look nearly as sharp as a 4K television screen.

How to change the locomotion movement in Resident Evil 4 Remake VR

If you don’t like the movement controls in the virtual reality mode of Resident Evil 4 Remake, then you can check out this tutorial at Seeking Tech to see how you can change it.

1. You first need to open the Options menu from within the VR mode in RE4 Remake.

2. Once you get there, you should automatically be in the VR Controls tab. If you aren’t, then select it from the top of the screen.

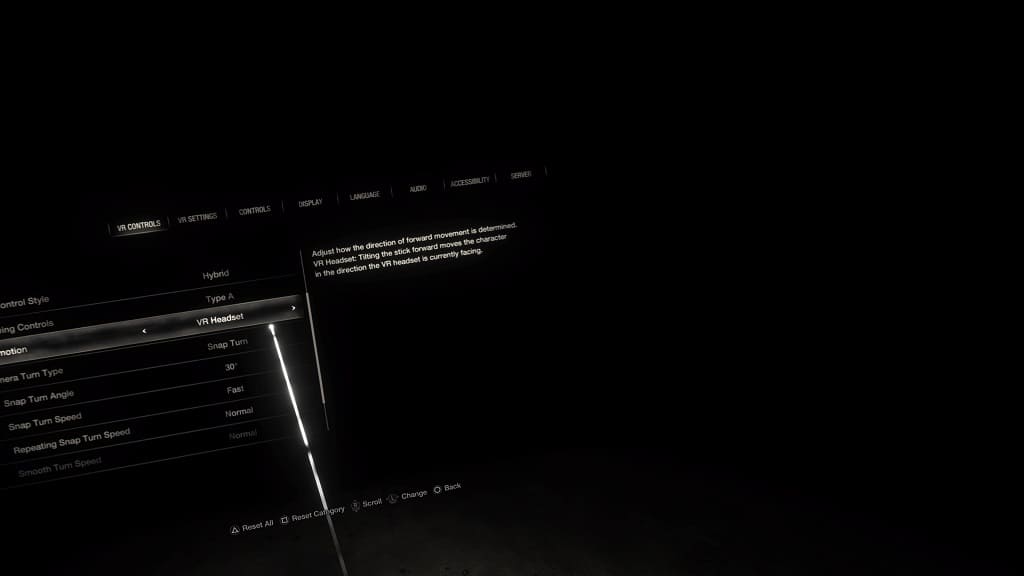
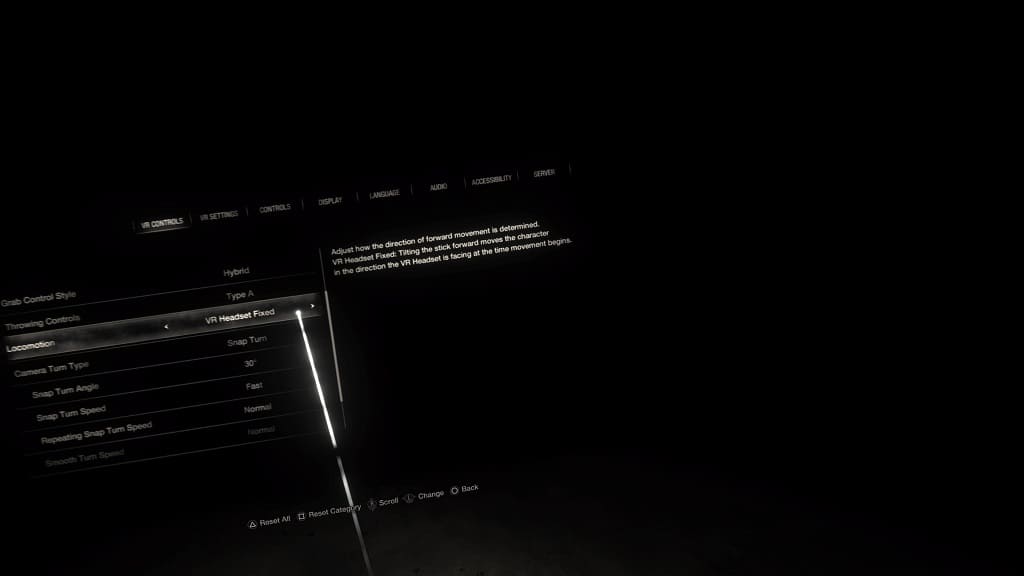
3. You should then find the Locomotion setting with the following options:

VR Headset:

Tilting the stick forward moves the character in the direction the VR headset is currently facing.

Controller:

Tilting the stick forward moves the character in the direction the PSVR2 Sense controller is currently pointing.

VR Headset Fixed:

Tilting the stick forward moves the character in the direction the VR headset is facing at the time movement begins.

4. After changing the Locomotion setting, exit the Options menu and resume playing the game. The new movement type should be applied.

How to change the throwing controls in Resident Evil 4 Remake VR

If you do not like the default throwing controls in the VR mode of the Resident Evil 4 Remake, then you can take a look at this tutorial from Seeking Tech to see how you can change it.

1. For the first step, open up the Options menu in RE4R VR.

2. From there, you need to go to the VR Controls tab if you aren’t viewing it already.

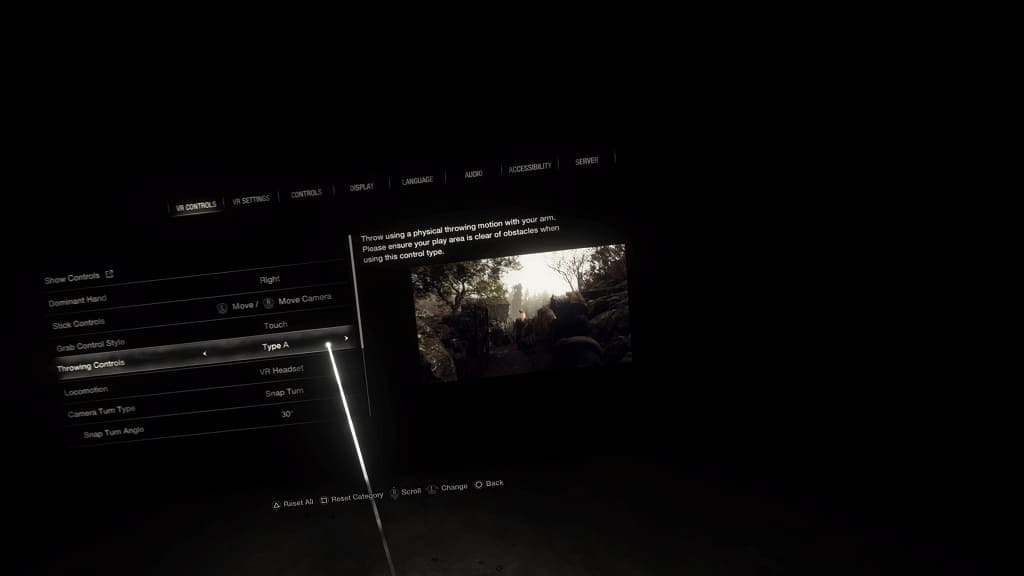
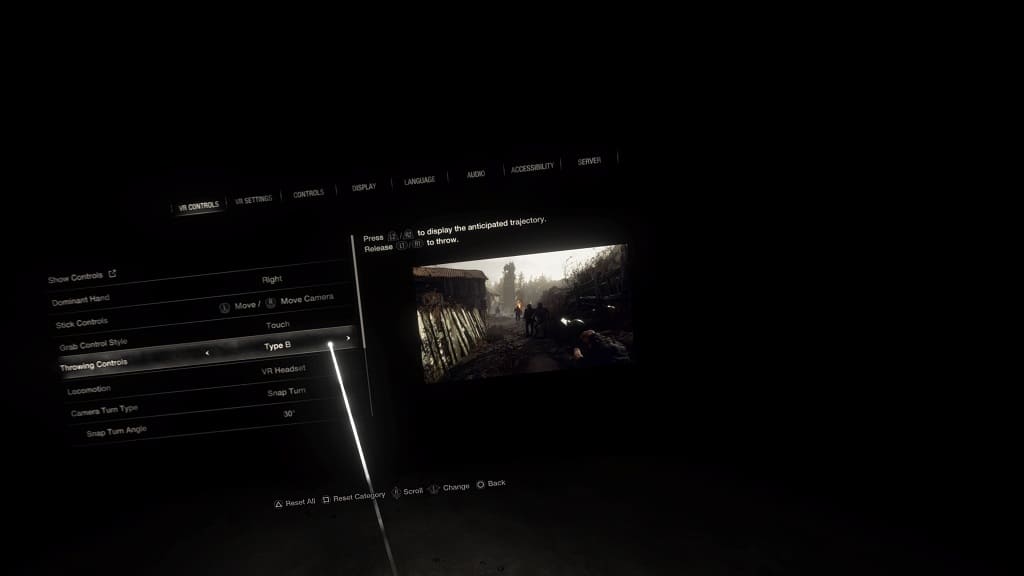
3. You should find the Throwing Controls setting. There are two options that you can switch to:

Type A:

Throw using a physical throwing motion with your arm. Please ensure your plat area is clear of obstacles when using this control type.

Type B:

Press L2/R2 to display the anticipated trajectory. Release L1/R1 to throw.

4. Exit out of the Options menu.

The new throwing controls should now be applied when you return to playing RE4 Remake in virtual reality.

How to change the grab control style in Resident Evil 4 Remake VR

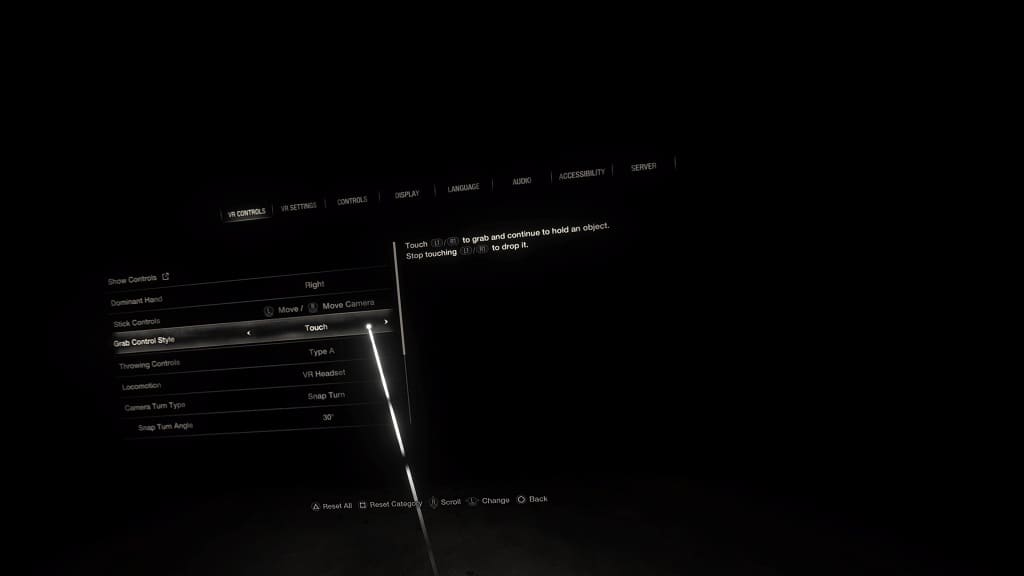
When playing the virtual reality mode in Resident Evil 4 Remake, you need to use the L1 and R1 buttons on the PlayStation VR2 Sense Controllers to grab objects. To see how you can change the grabbing control method, you can take a look at this tutorial from Seeking Tech.

1. To begin, you need to open the Options menu in RE4 Remake.

2. You should be viewing the VR Controls tab by default. If not, select it from the top of the screen.

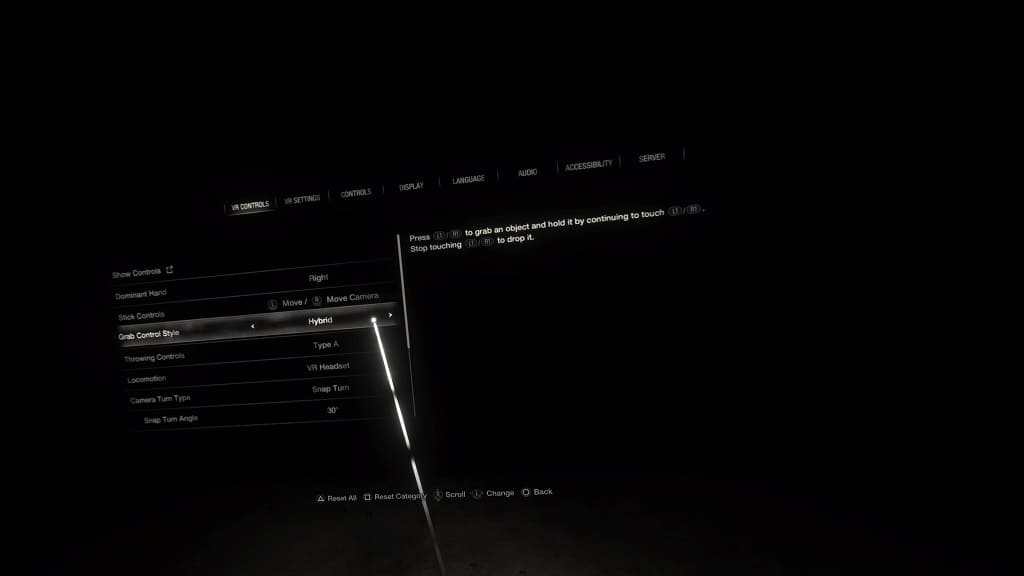
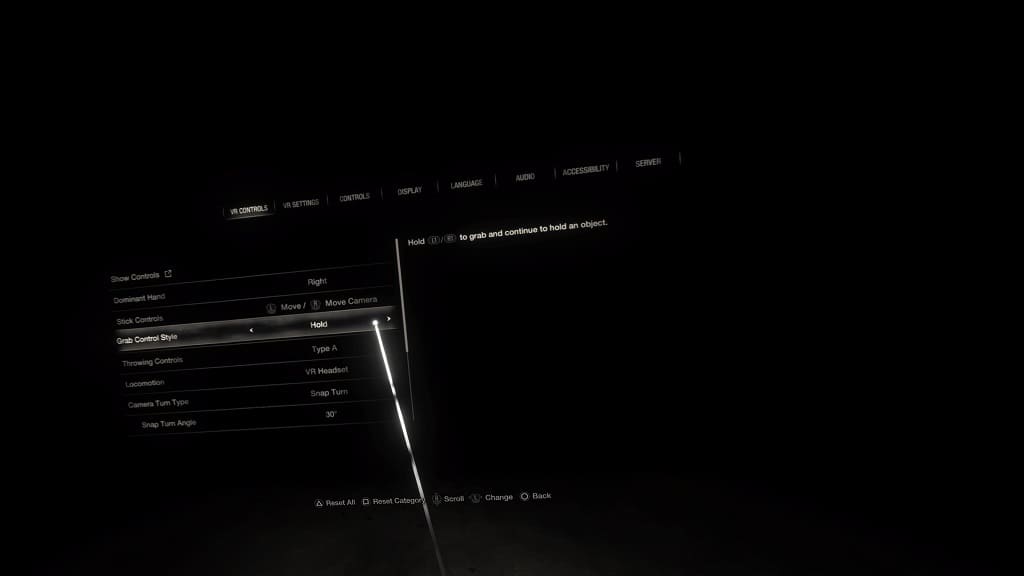
3. From the VR Controls tab, you should see the Grab Control Style setting. You should be able to switch between the three following options:

Hybrid:

Press L1/R1 to grab an object and hold it by continuing to touch L1/R1. Stop touching L1/R1 to drop it.

Hold:

Hold L1/R1 to grab and continue to hold an object.

Touch:

Touch L1/R1 to grab and continue to hold an object. Stop touching L1/R1 to drop it.

For the uninformed, the PlayStation VR2 Sense Controllers can sense your fingers when you touch its button. In supported games such as RE4 Remake, the touches can be registered as inputs even if you don’t physically press down on the buttons.

How to change the VR play style in Resident Evil 4 Remake

When you first start up the VR mode in the Resident Evil 4 Remake, you will be able to select your play style. If you would like to change this setting again after the initial boot up sequence, then you can check out this guide at Seeking Tech to see how you can properly do so.

1. To start out, head to the main menu if you haven’t done so already. This is because you won’t be able to change the VR play style from the pause menu as the option to do so will be greyed out.

2. Go to Options from the main menu.

3. Next, select the VR Settings tab at the top of the Options menu.

4. You should then see the VR Play Style setting, which has the following description:

Configure VR Mode to match your stance.

5. You will be able to switch between Standing or Sitting.

6. Once you are done choosing, exit the Options menu and load back into your game. The new play style should be applied.

How to switch the dominant hand in Resident Evil 4 Remake VR

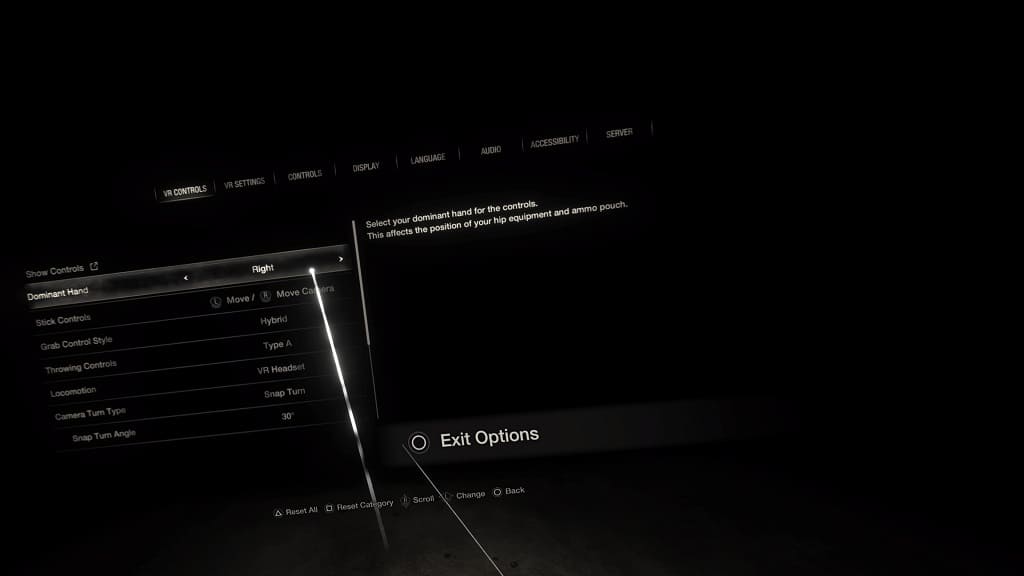
When you first play the VR mode in the Resident Evil 4 Remake, you will be able to pick your dominant hand. This is used for menu navigation as well as the position of your hip equipment and ammo pouch.

If you would like to change the dominant hand setting after the initial boot up sequence, then you can check out this tutorial from Seeking Tech.

1. For the first step, open the Options menu in the RE4R VR.

2. From there, make sure you are viewing the VR Controls tab. If you are in another tab, then you need to select “VR Controls” at the top.

3. You should now be able to see the Dominant Hand setting, which has the following description:

Select your dominant hand for the controls. This affects the position of your hip equipment and ammo pouch.

4. You will be able to switch the dominant to “Left” or “Right.” After you changed to the other hand, the menu pointer will be applied immediately.

5. Exit the menu and then return to playing Resident Evil 4 Remake VR.

How to block the PS VR2 see-through view from your TV

When playing a PlayStation VR2 game, you can press the Function button to activate the see-through mode. However, this view can end up confusing you if you look straight at your television screen or computer monitor as the screen will mirror what you are seeing.

To see how you can block the PS VR2 see-through view from being shown on TV or monitor, you can check out this guide at Seeking Tech.

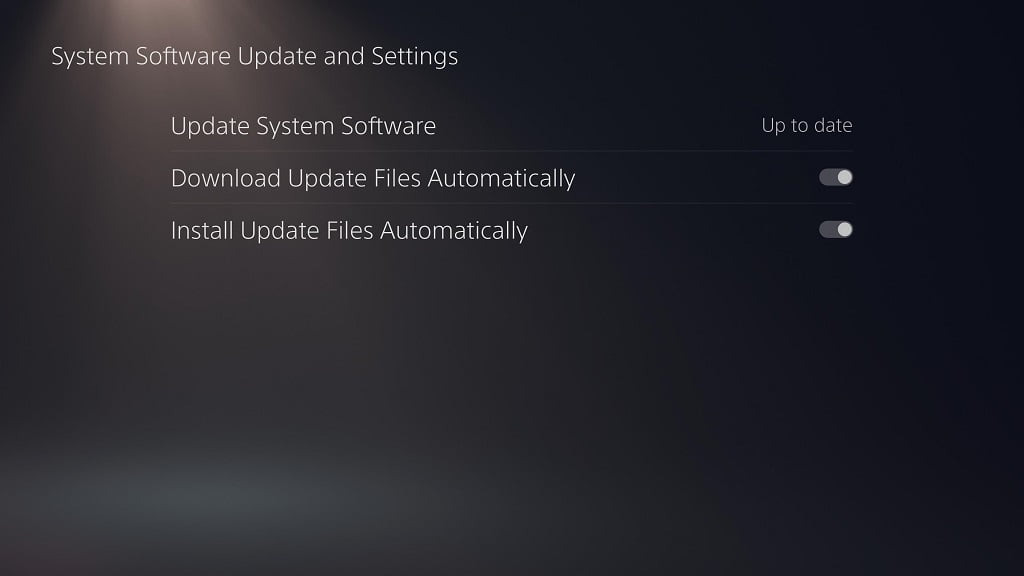
1. If you haven’t done so already, make sure you have the latest firmware installed for your PS5 as the ability to block the see-through mode was added in a recent update.

You can manually update the console by going to Settings > System > System Software > System Software Update and Settings > Update System Software > Update Using Internet.

2. Next, you need to make sure that you connect your PlayStation VR2 to the PlayStation 5 and then turn the virtual headset on.

If prompted, make sure you update the VR headset.

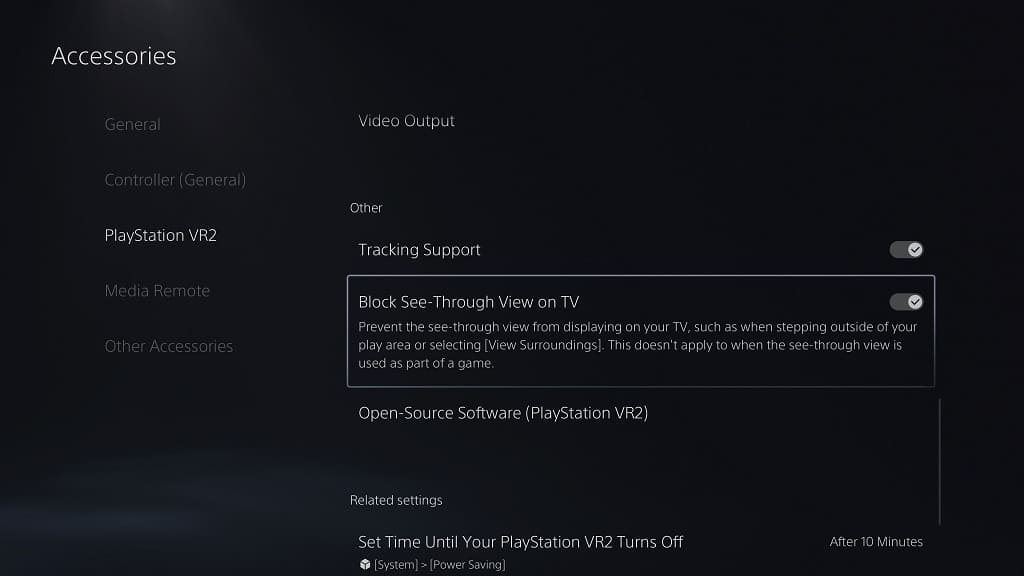
3. Once you have everything set up, go to Settings > Accessories > PlayStation VR2.

If you don’t see the PlayStation VR2 option, then you should check to see if the virtual headset is connected to the PS5 and turned on.

4. From the PlayStation VR2 tab in the Accessories menu, move the cursor down to Block See-Through View on TV. It should show the following description:

Prevent the see-through view from displaying on your TV, such as when stepping outside your play area or selecting [View Surroundings]. This doesn’t apply to when see-through view is used as part of a game.

5. Make sure you set the Block See-Through View on TV setting to On.

The next time you use the see-through view mode, you should no longer see your TV or monitor broadcast it on the screen.

How to prevent motion sickness while playing Synth Riders Remastered Edition

You may get motion sickness while playing Synth Riders Remastered Edition with the PlayStation VR2 headset. To see how you can prevent the nausea from kicking in while you are trying to hit the notes in this music rhythm game, you can take a look this guide from Seeking Tech.

1. We suggest that you avoid playing in the spiral mode until you build up your VR legs. This mode forces you to tilt your head while trying to hit notes, which instantly triggers our motion sickness.

You may also want to avoid the spin mode in the beginning so that your eyes can just focus on the notes that are coming in front of you.

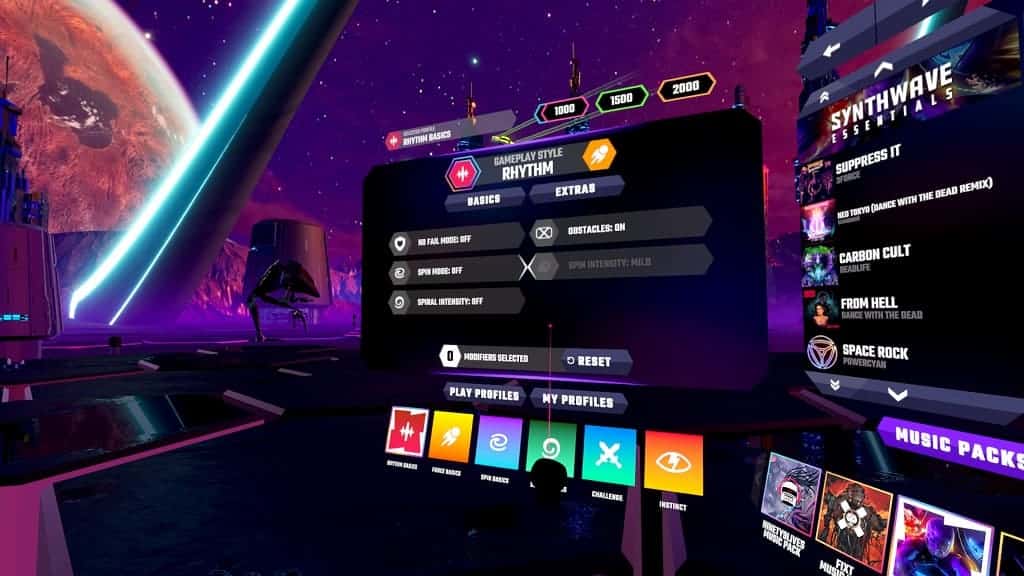
You can find the ability to disable the spiral and spin modes by looking to the left in the song selection screen.

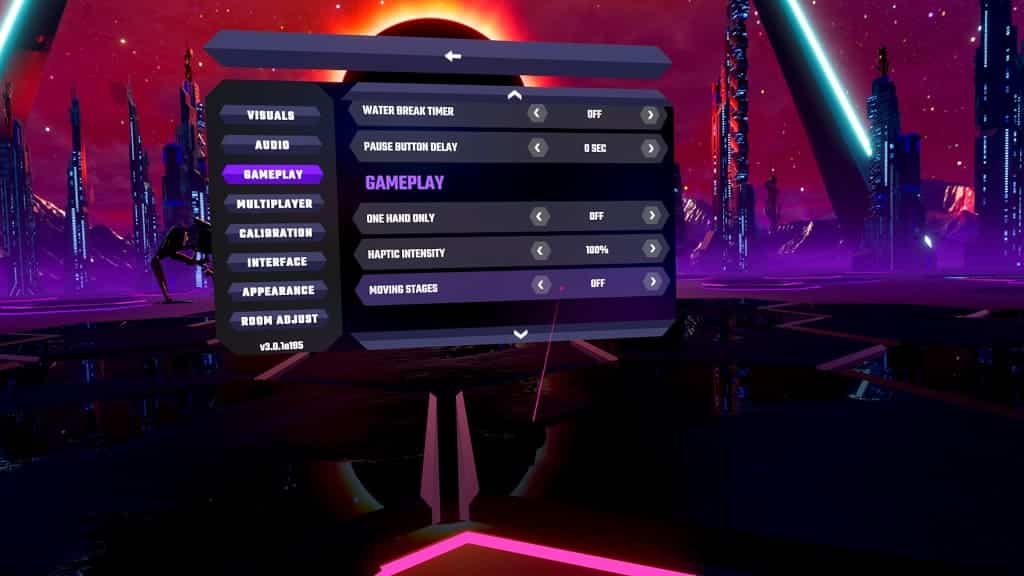
2. By default, the stage will be moving. If you are getting nauseous because of the on-rails movement, then you can disable it by taking the following steps:

  • Open the Settings menu. You can do so from the mode selection screen, song selection screen or pause screen.
  • Inside the Settings menu, select Gameplay.
  • Once you get to the Gameplay tab, scroll down with the right analog stick until you get to the bottom.
  • From there, you can change the Moving Stages setting to Off.

3. If possible, try having a fan blow into your face and/or chew gum while playing Synth Riders Remastered Edition. We found that these activities help ward off any potential motion sickness.

4. If you start feeling nausea, it is important that you stop immediately as powering through will only make you sicker.

Instead, we recommend that you play the game until you get motion sick. You should then stop playing as soon as possible and rest until you feel normal before trying to play again.

By doing this method, you should be able to gradually build up your VR legs so that you won’t end up feeling nauseous as often.

How to change the pause delay in Synth Riders Remastered Edition

In order to prevent accidentally pausing in Synth Riders Remastered Edition, the development team at Kluge Interactive implemented a system where you need to press and hold a button for a few seconds.

If you want to change the pause delay length for the PlayStation VR2 version of this music rhythm game, then you can check out this tutorial from Seeking Tech.

1. For the first step, you need to enter into the Settings menu.

This can be done from the mode selection screen, music level selection screen (you need to select the gear icon) or the pause menu.

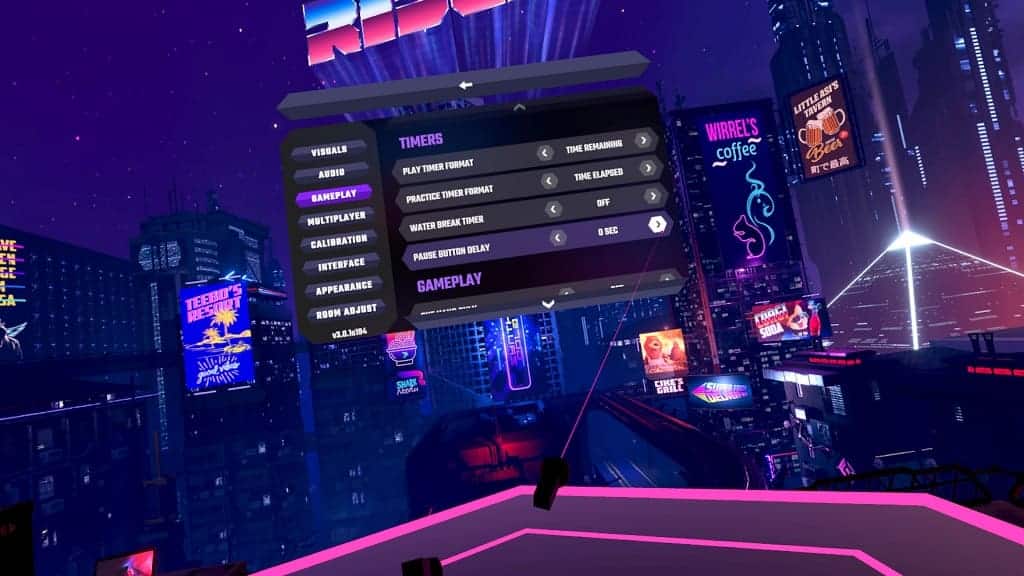
2. Once you make your way into Settings, you need to select Gameplay from the list of options available on the left column.

3. In the Timers section of the Gameplay tab, you should see the Pause Button Delay setting.

4. You can select the left or right arrows in order to increase or decrease the length of the delay to any of the following options:

  • 0 second
  • 1 second
  • 2 seconds
  • 3 seconds

If you want to bring up the pause menu immediately, then you need to select the 0 second option.

For the uninformed, you can pause during the middle of a music stage in Synth Riders Remastered Edition by pressing any of the following buttons:

  • Square
  • Triangle
  • Circle
  • X
  • Options