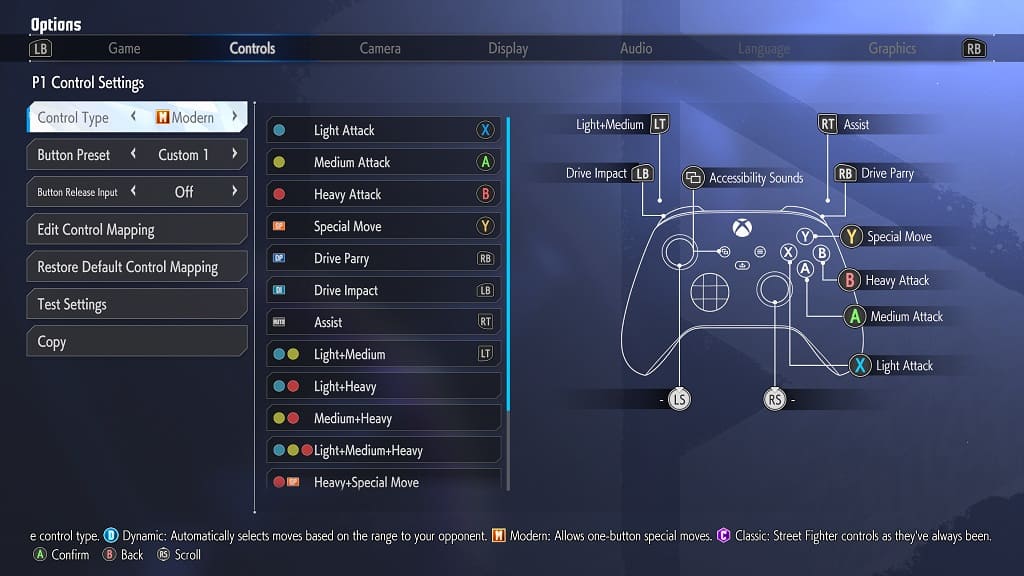
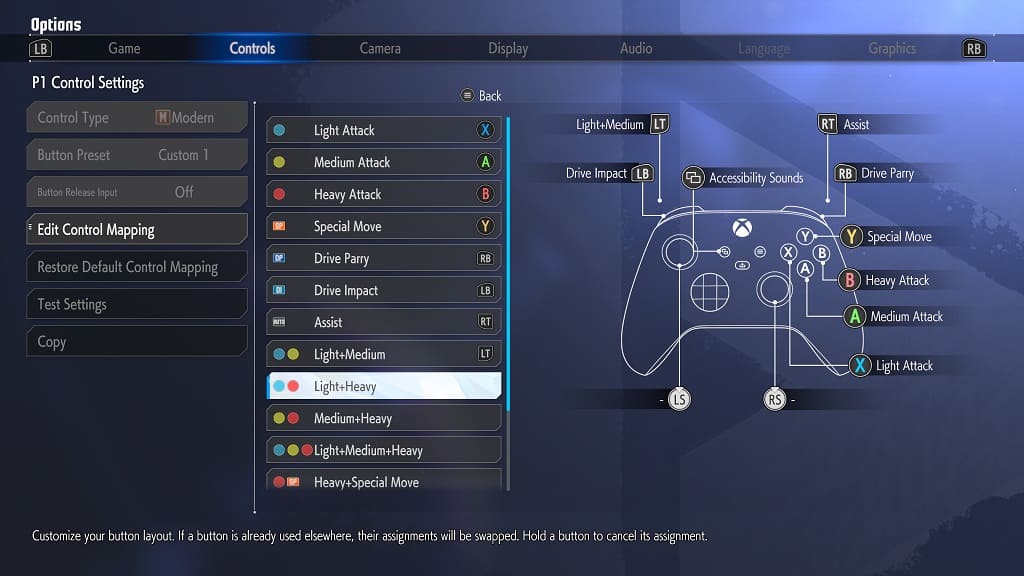
While Street Fighter 6 features a new modernized button layout, you are able to change to a different control type as well as manually map your own actions. To find out how to do so, you can take a look at this article from Seeking Tech.
1. For the first step, you need to go to the main menu of the game if you aren’t there already. Otherwise, you won’t be able to switch the button layout from the pause menu during the middle of a match.
2. While in the main menu, you need to open the Multi Menu, which can be done by pressing the Options button on the DualSense/DualShock 4 or Menu button on the Xbox controller.
3. From the Multi Menu, you need to select Options.
4. Inside of the Options menu, you need to switch over to the Controls tab.
On consoles, you can do so by pressing the R1 button if you are playing on PS4/PS5 or RB button if you are playing on Xbox Series X/S.
5. In the Controls tab, you can choose Player 1 Side Control Settings (Battle) if you want to change the button layout for the controller that is assigned to the Player 1 slot or Player 1 Side Control Settings (Battle) for the controller that is assigned to the Player 2 slot.
6. You should now be in the Control Settings screen. Here, you will be able to change between three Street Fighter 6 button layout presets. To find out more about these control types, you can take a look at this comparison.

7. You will also be able to manually change the button layout by selecting the Edit Control Mapping Option.
The number of actions that you can change depends on the control type. You can find a breakdown of the mappable options below:
Modern Control Type:
- Light Attack
- Medium Attack
- Heavy Attack
- Special Move
- Dive Parry
- Drive Impact
- Assist
- Light and Medium
- Light and Heavy
- Medium and Heavy
- Light, Medium and Heavy
- Taunt
- Accessibility Sounds
Dynamic Control Type:
- Light Attack
- Medium Attack
- Heavy Attack
- Dive Impact
- Dive Parry
- Super Art
- Normal Throw
- Override Arts
- Accessibility Sounds
Classic Control Type:
- Light Punch
- Medium Punch
- Heavy Punch
- Light Kick
- Medium Kick
- Heavy Kick
- Light Punch and Light Kick
- Medium Punch and Medium Kick
- Heavy Punch and Heavy Kick
- Light Punch and Medium Punch
- Light Punch and Heavy Punch
- Medium Punch and Heavy Punch
- Light Punch, Medium Punch and Heavy Punch
- Light Kick and Medium Kick
- Light Kick and High Kick
- Medium Kick and High Kick
- Light Kick, Medium Kick and High Kick
- Taunt
- Simultaneous Input Assistance
- Accessibility Sounds

8. To assign a button to a specific action, move the cursor down to the action you want and then press the button that you want to be assigned.
9. Once you are done making the change, you need to back out of the Edit Control Mapp section. This can be done by pressing the Options button on PlayStation or Menu button on Xbox.
10. When asked if you want to save your changes, select Yes to apply the new button layout.
11. The changes you make will be applied to the Custom 1 Button Prest profile. You can create up to 5 custom profiles for every control type.
