How to fix Final Fantasy XVI frame rate issues

You may notice some stuttering and/or frame drops when playing Final Fantasy XVI on your PlayStation 5 or PlayStation 5 Digital Edition console. You can check out this guide from Seeking Tech to see how you can fix the fps issues with this action RPG.

  • 1. If you haven’t done so already, make sure you downloaded the latest patch. The development team at Square Enix has confirmed that the day one patch will improve the performance of Final Fantasy 16. To manually update, you need to do the following:
  • Make sure your PS5 is connected to the internet.
  • Go to the home screen of your console, which you can do by pressing and holding the PS logo button of the DualSense.
  • From the home menu, move the cursor over to the Final Fantasy XVI icon.
  • Next, you have to press the Options, which is the button with the three horizontal lines, on the DualSense.
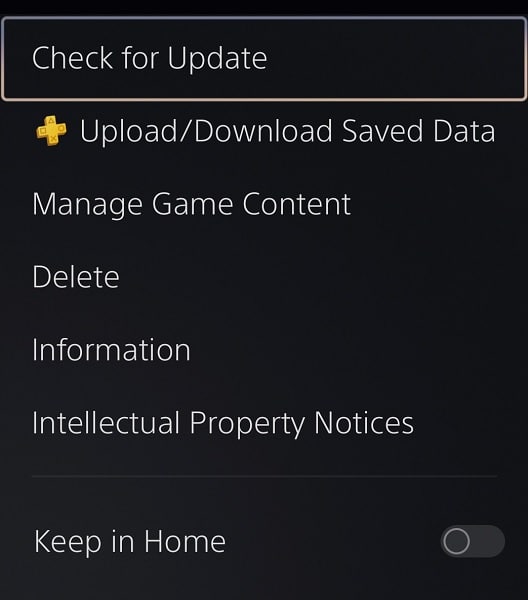
  • Finally, select the Check for Update option in the pop-up menu to see if a new patch is available to download for this Japanese role-playing game.
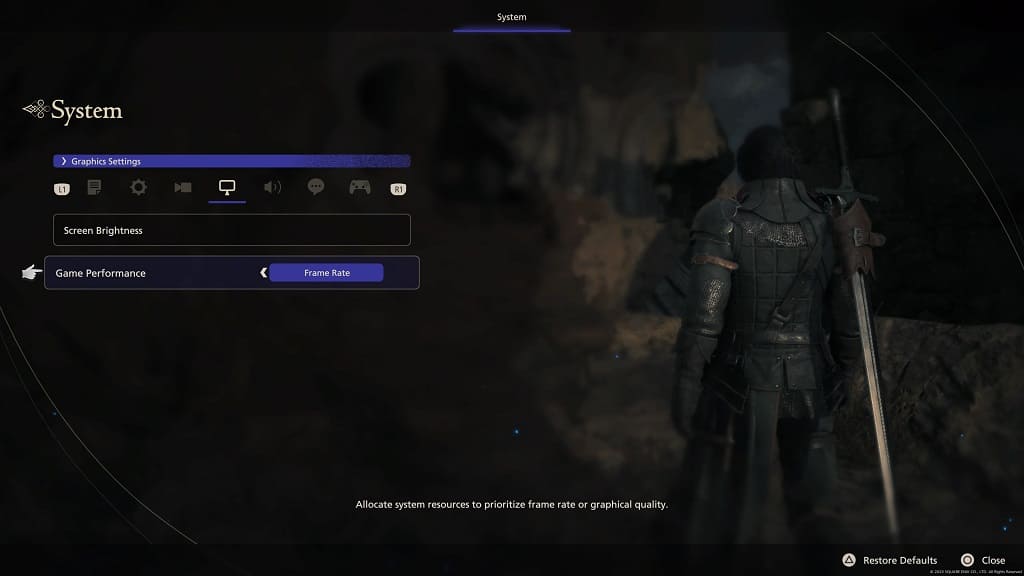
2. If you haven’t done so already, make sure you set Game Performance to Frame Rate. By doing, you will increase the fps limit to 60. While the game may still drop frames, it is less noticeable at a higher fps than at 30 or below.

It is important to note that cut scenes are still limited to 30 fps even if you are playing at 60 fps.

In order to change the Game Performance mode, you need to go to the System Menu in Final Fantasy 16. Afterwards, use the L1 and R1 buttons to make your way to the Graphics Settings. You should then be able to change the Game Performance to Frame Rate.
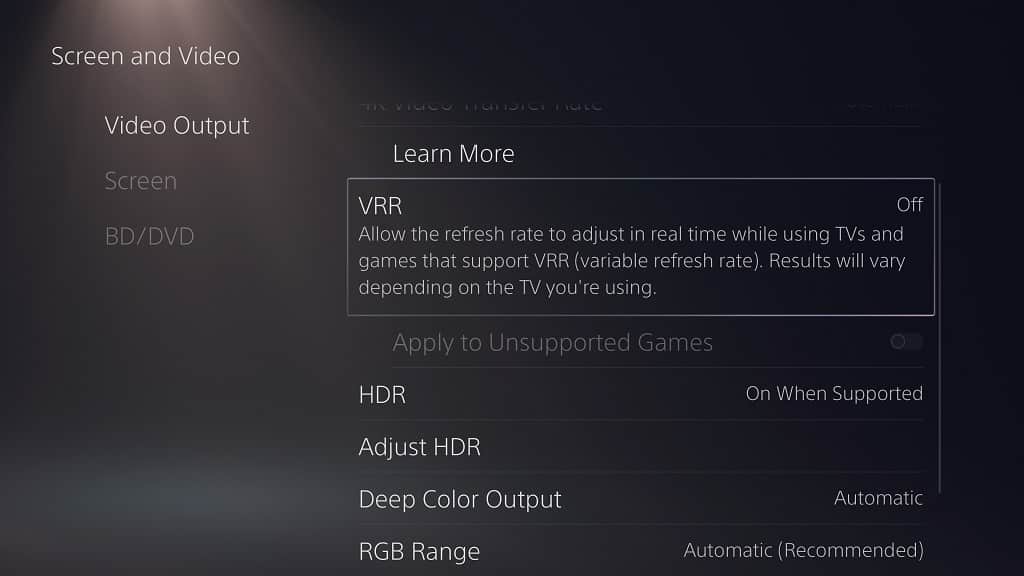
3. If your television set or monitor supports Variable Refresh Rate, then you should make sure it is enabled on the screen’s settings menu.

Afterwards, go to the Settings menu of your PlayStation 5 and then navigate over to Screen and Video > Video Output. Finally, make sure you have VRR set to Automatic.

Variable Refresh Rate will smooth out any frame rate drops as long as it is within the 48 fps to 60 fps range.
4. If the storage drive where Final Fantasy XVI gets too full, then you may experience some performance issues.

If you have the JRPG installed on the console storage, then we recommend leaving at least 82.5 GB of free space. If you have the game installed on a M.2 SSD, then you can try leaving a minimum of 10% when it comes to free space.

In order to check how much free space you have remaining, go to the Settings menu of your PlayStation 5 and then select Storage.

In addition to checking how much space you have left, you can also use the Storage menu to delete games and other data if you need to clear up some room in order to run FF16 optimally.

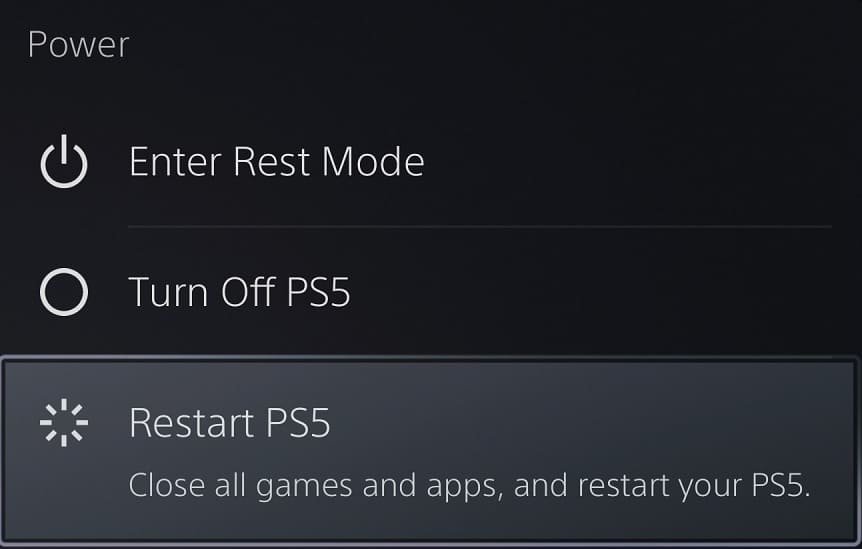
5. If you have been putting your PlayStation 5 in rest mode, then that may be causing the frame rate drops in the game. In this case, we recommend that you save your progress in Final Fantasy XVI and then restart your console.
How to fix Final Fantasy XVI HDR and brightness issues

You may notice that some scenes are too dark, too bright or appear to be washed out in Final Fantasy XVI. To see how you can fix the HDR and brightness issues with this Japanese role-playing game, you can take a look at this troubleshooting article from Seeking Tech.

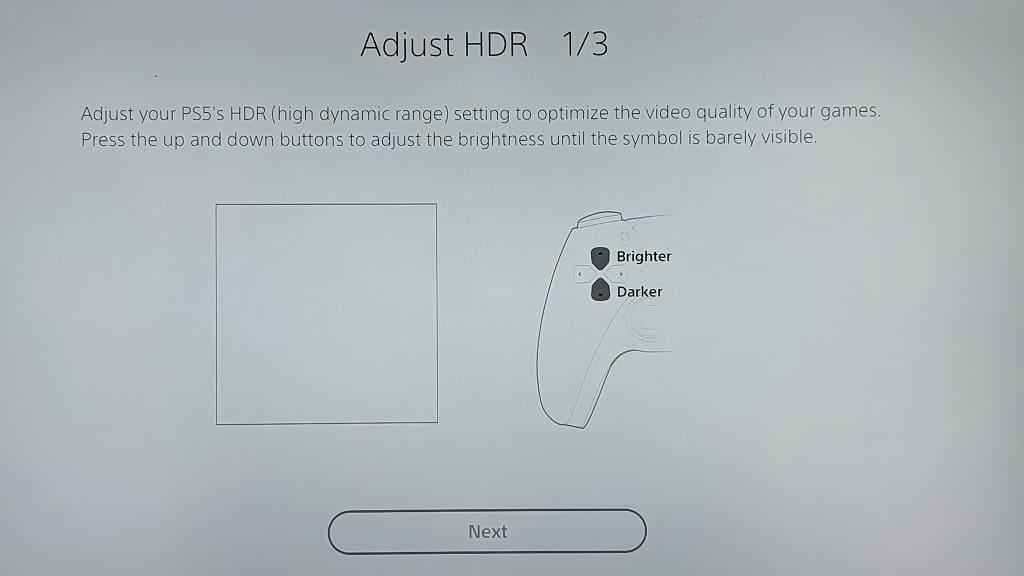
1. For the first step, we suggest that you re-calibrate the HDR output of your PlayStation 5 or PlayStation 5 console if you haven’t done so already. You can find the option to do so from the Settings menu of the console. From there, you need to select Screen and Video > Video Output > Adjust HDR.

Next, follow the directions that appear on the screen in order to calibrate the HDR output of the PS5 to match the capabilities of your television screen or monitor.

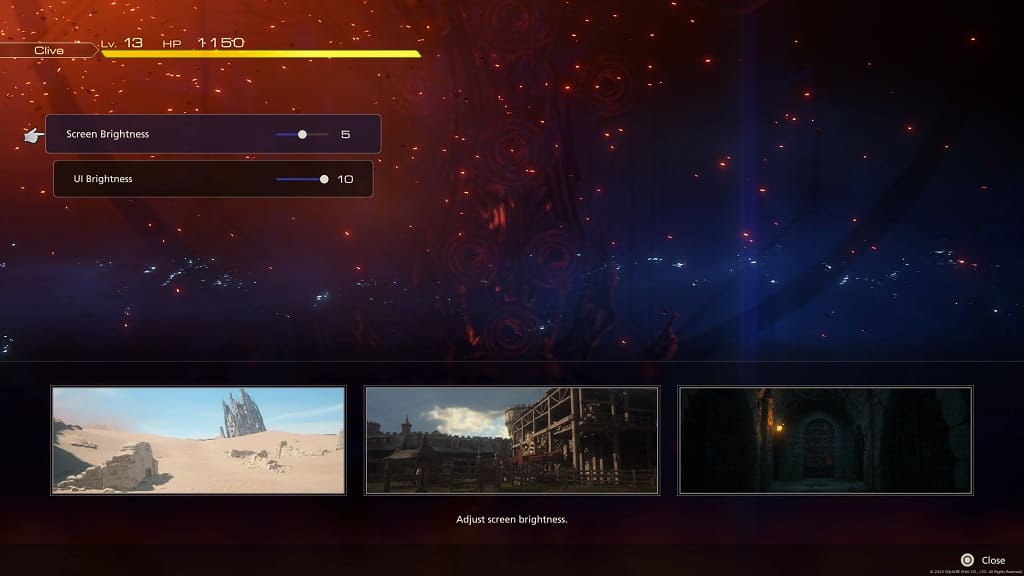
2. Afterwards, we recommend that you use the in-game menu in Final Fantasy 16 to adjust the brightness level. In order to do so, you need to take the following steps:

  • Go to the System menu from either the Title Screen or Main Menu.
  • Change tabs until you get to Graphics Settings.
  • Select Screen Brightness.
  • The default value of the Screen Brightness slider to 5. You can change it, in increments of 1, from a range of 0 to 10.
  • If you find that the current environment you are going through is too dark, then you can try turning up the brightness with this slider. If you find that the area you are in is overly bright, then you can try lowering the brightness level in this menu.
  • You may need to return to the Screen Brightness screen often when moving from a dark area to a brighter area or vice versa to re-adjust.

3. Of course, you can also adjust the brightness of your television set.

If you are playing the game in HDR, then make sure that the brightness of your screen is turned all the way up to the maximum. You can try playing around with other settings, such as the contrast level, as well.

4. Some screens are better at handling HDR than others. So, if possible, you can try playing Final Fantasy XVI on another screen to see if the game looks better.

5. You can also try disabling HDR to see if you prefer playing in SDR.

To turn off HDR, you need to go to the Settings menu of your PlayStation 5 and then make your way to Screen and Video > Video Output. From there, set HDR to Off.

How to turn off the chat log in Final Fantasy XVI

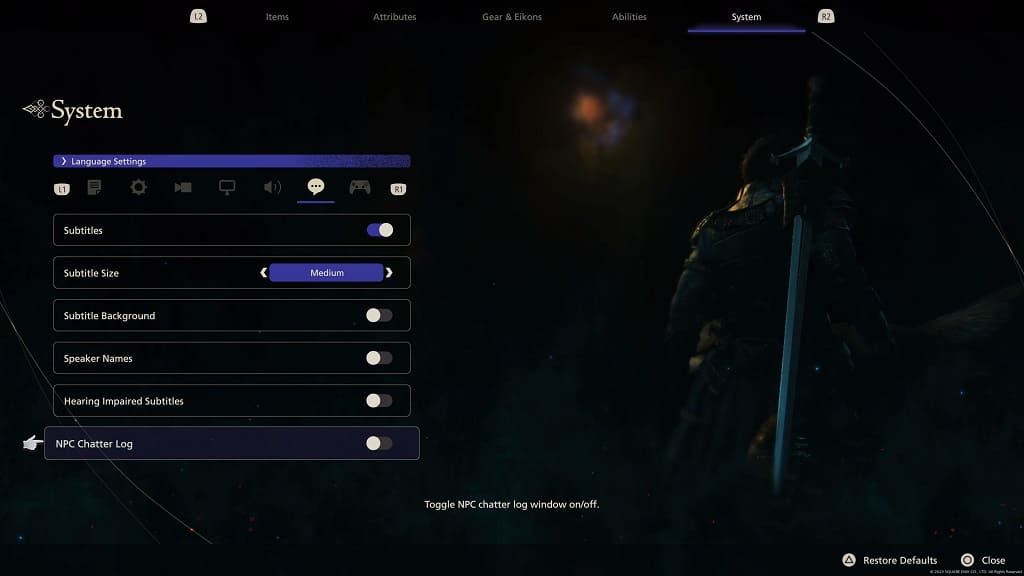
When playing Final Fantasy XVI, you may notice that a chat log will pop up on the left side of the screen when a non-playable character is talking. If you want to turn off this feature in the Japanese role-playing game, then you can check out this tutorial to see how you can properly do so.

1. For the first step, open the System Menu in the game. You can do so by selecting the Config option if you are in the Title Screen.

If you have loaded into your save file, then you first need to bring up the Main Menu by pressing the Options button of the DualSense controller. You then need to use the L2 and R2 buttons to switch over to the System Menu.

2. After arriving at the System menu, you have to switch over to the Language Settings tab. You can change tabs by using the L1 and R1 buttons of the controller.

3. From the Language Settings tab, scroll all the way down to the NPC Chatter Log setting, which has the following description:

  • “Toggle NPC chatter log window on/off.”

4. By default, NPC Chatter Log is enabled. Select it with the X button to turn off this feature. You can also use the left directional pad button to disable it.

5. Once you are done, press the Circle button to back out of the System Menu.

When you return to Final Fantasy 16, you should no longer see any chat log appear on the left side of the screen when a non-playable character is talking.

How to change the voice language in Final Fantasy XVI

Final Fantasy 16 supports multiple voice over languages. If you want to change the voice acting to a different language (such as Japanese) for this role-playing game, then you can check out this guide at Seeking Tech to see how you can properly do so.

1. Before we start, it is important to note that you can only change the voice language from the Title Screen.

If you have already loaded into your save file, then you first need to press the Options button on the DualSense in order to bring up the Main Menu. From there, use the L2 and R2 buttons to navigate towards the System Menu.

Next, make sure you are in the System Settings tab; if you aren’t, then use the L1 and R1 buttons until you get there. Finally, select the Return to Title option and then Yes to return to the Title Screen.

2. In the Title Screen, you need to select Config.

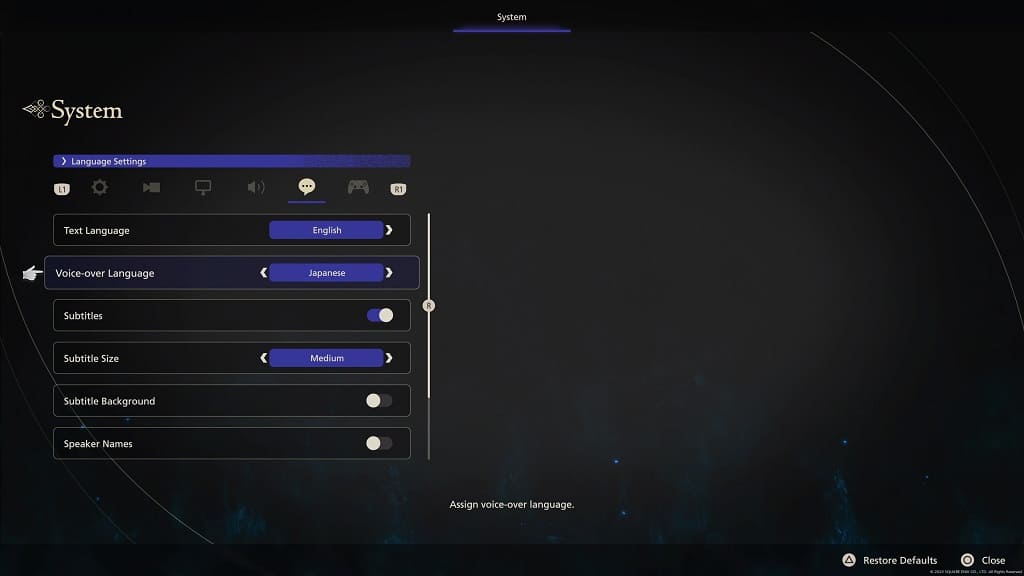
3. Once you get to the System menu, use the L1 and R1 buttons to switch over to the Language Settings tab.

4. You should then move the cursor over to the Voice-over Language setting, which has the following description:

  • “Assign voice-over language.”

5. Use the right or left directional pad button to change the voice language to any of the following:

  • English
  • Japanese
  • German
  • Latin American Spanish
  • Italian

It is important to note that the cut scenes in the game have been designed for English voice overs. Therefore, the mouth movement will only sync with the audio from the voice acting when you are using English as the language. Otherwise, the lip sync won’t match.

6. Once you are done changing the voice language, exit out of the System Menu and then load into your save file from the Title Screen.

The new settings should automatically be applied as you should now be able to hear your preferred language in the dialogue and cut scenes.

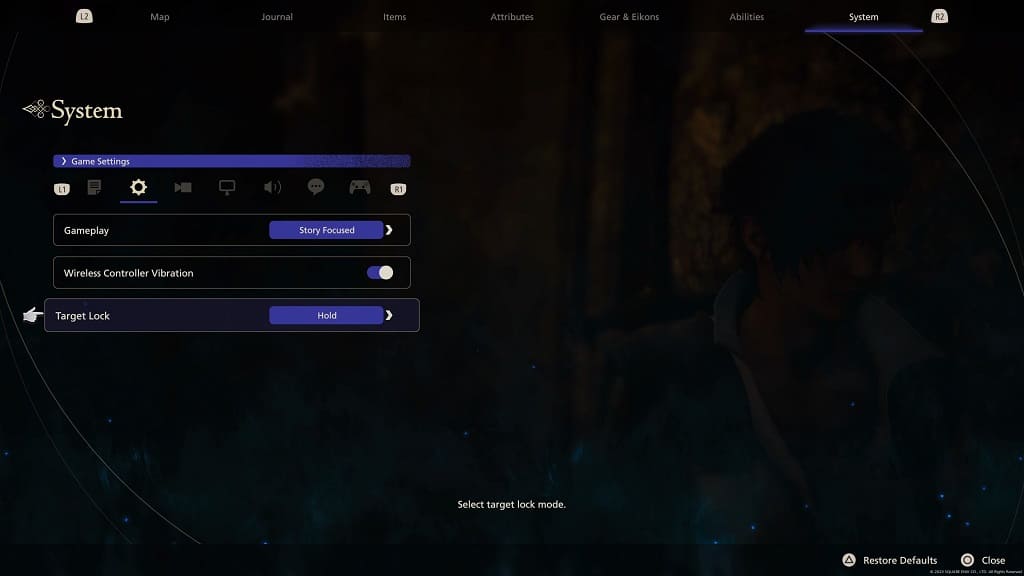
How to change target lock to hold in Final Fantasy XVI

By default, you simply have to press a button to stay locked on to a target in Final Fantasy XVI. If you would rather change the controls so that you need to hold the button in order to stay locked-on, then you can check out this tutorial from Seeking Tech to see how you can properly do so.

1. To start off, you need to head into the System menu. This can be done by selecting the Config option from the Title Menu.

If you already loaded into your save file, then you can still get to the System menu by first pressing the Options button to open the Main Menu. From there, use the L2 and R2 shoulder buttons of the DualSense to switch over to the System menu.

2. In the System menu, you should be in the Game Settings tab by default. If you are viewing another tab, then you can sue the L1 and R1 shoulder buttons to change tabs until you get there.

3. From the Game Settings tab, move the cursor down to Target Lock, which should have the following description:

  • “Select target lock mode.”

4. Use the left directional button of the DualSense to change the Target Lock mode from Toggle to Hold.

5. Exit the System menu and the return to the game.

The next time you encounter a battle in Final Fantasy 16, you should notice that you now have to hold on to the target lock button to stay locked onto a target.

For the uninformed, the lock on button is L1 if you are using the Type A or Type B controller layouts. For the Type C controller layout, you have to use the L2 button instead.

How to invert the camera and change camera sensitivity in Final Fantasy 16

Final Fantasy XVI takes place from a third-person perspective as you are able to move the camera around your character. By default, the camera controls are non-inverted as the in-game camera will move in the same directions as where you are pointing with the right analog stick of the DualSense.

If you want to invert the camera, as well as change its sensitivity settings, then you can check out this tutorial from Seeking Tech to see how you can properly do so.

1. For the first step, you need to open the System menu, which you can do so by selecting Config from the title screen.

If you have already loaded into your save file, then you can press the Options button on the DualSense to open the Main Menu. From there, use the L2 and R2 buttons to make your way towards the System tab.

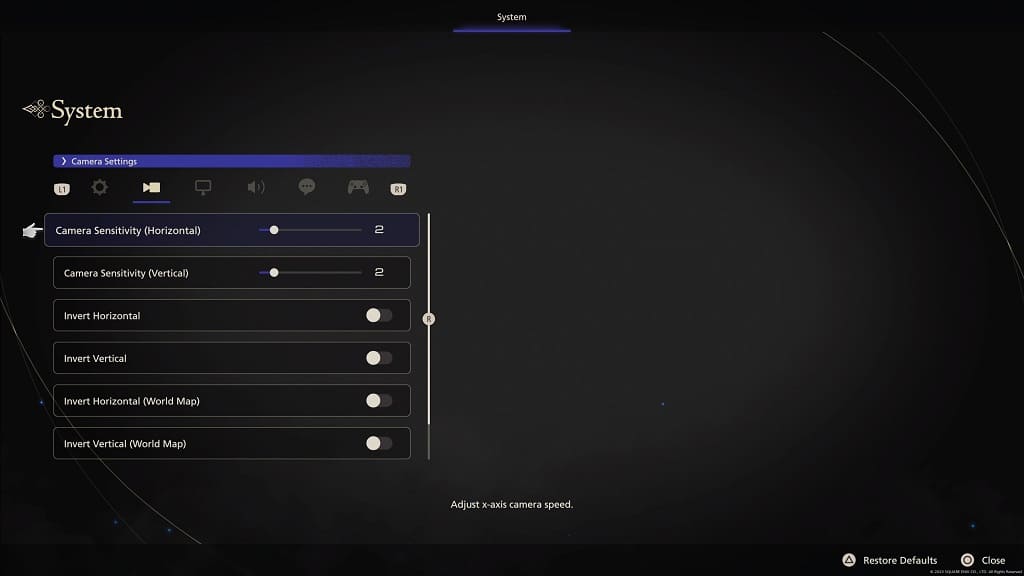
2. In the System tab, use the L1 and R1 buttons to change tabs until you get to Camera Settings.

3. From the Camera Settings menu, you should see the Camera Sensitivity (Horizontal) slider with the following description:

  • “Adjust x-axis camera speed.”

By default, this is set to 2. You will be able to change it, in increments of 1, from 1 to 10.

4. From the same screen, you will also see the Camera Sensitivity (Vertical) slider with the following description:

  • “Adjust y-axis camera speed.”

This is set to a value 2 by default and can be changed to anywhere from 1 to 10.

5. You will also find the Invert Horizontal setting from the same menu with the following description:

  • “Invert x-axis camera controls.”

Turn this on if you want the camera to move left when you push the right analog to the right and move right when you move the right analog to the left.

6. Finally, you should also be able to change the Invert Vertical setting, which has the following description:

  • “Invert y-axis camera controls.”

By enabling this setting, the camera will move upwards when you move the right analog stick down and downwards when you move the same stick up.

7. After you are done making the changes to the camera controls, exit out of the System Menu.

When you load back into your game in Final Fantasy 16, the new in-game camera settings should be active.

How to respec in Final Fantasy XVI

Final Fantasy XIV features ability points that you can use to unlock new moves. Fortunately, you are able to easily respec your character if you find that the ability you previously unlocked is not too helpful with your current play style in this action role-playing game.

You can check out this guide at Seeking Tech to see how you can properly reset the abilities of your character in Final Fantasy 16.

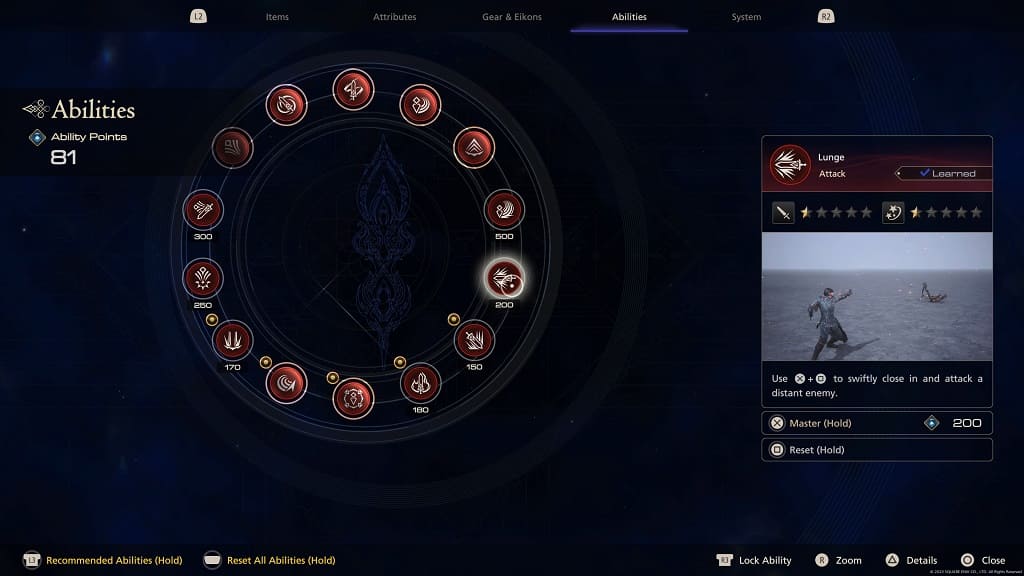
1. If you haven’t done so already, make sure you head over to the Abilities menu.

In order to do so, load into your save file. Once you are outside of combat, press the Options button on the DualSense to open the Main Menu. Afterwards, use the L2 and R2 buttons to maneuver your way over to Abilities.

If you try to change abilities while in combat, then the game will block you from doing so with the following message:

  • “Unable to change or acquire abilities while in combat.”

2. From the Abilities menu, move the cursor to an ability that you want to remove in order to get a refund of ability points. Keep in mind that you won’t be able to reset basic abilities in Final Fantasy XVI.

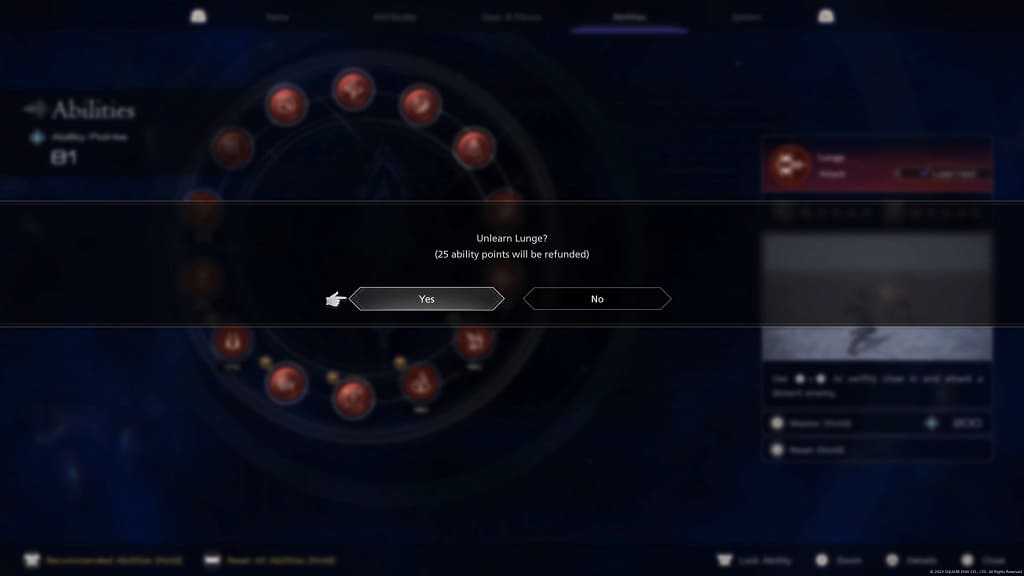
3. With the ability that you want to remove highlighted, press and hold the Square button.

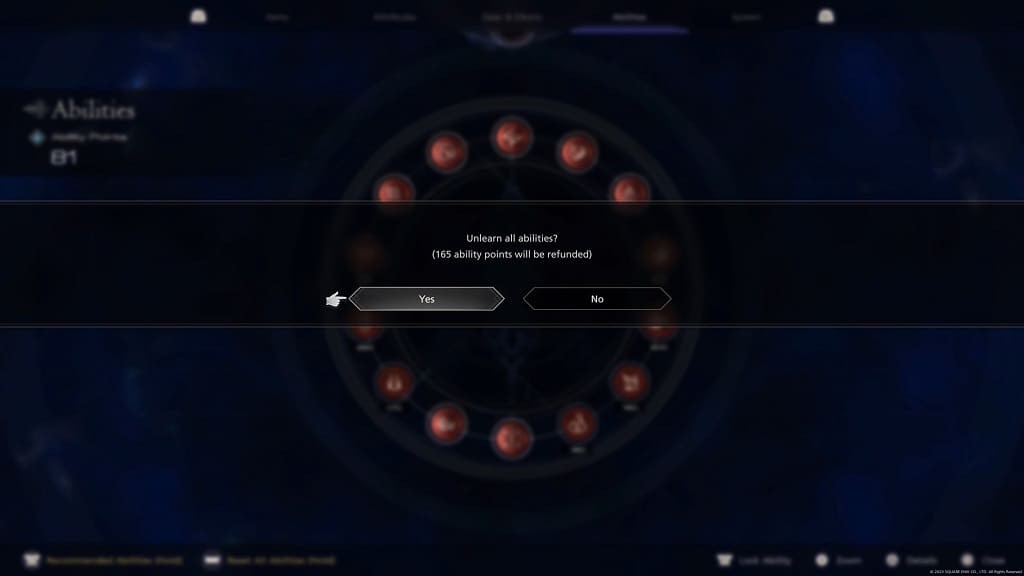
4. You should see a message asking if you want to unlearn the ability as well as showing the amount of ability points that will be refunded. Here, you need to select the Yes option.

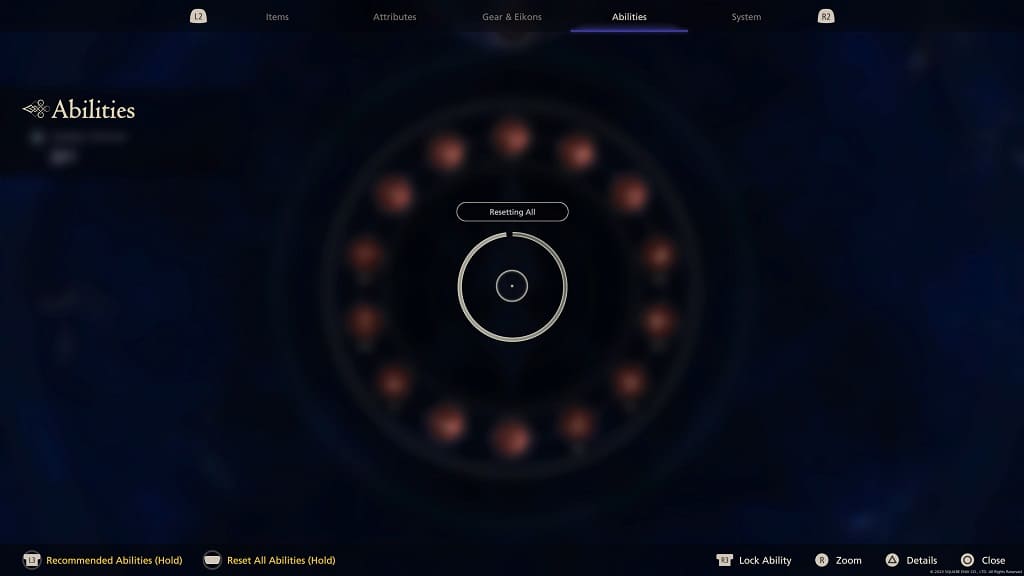
5. If you want to reset all of the abilities you previously unlocked, then you have to press and hold the touch pad button while you are viewing the Abilities menu.

Afterwards, you should see the “Unlearn abilities?” notification that will also show the amount of ability points that will be given back to you.

Select Yes to completely respec your character.

How to parry in Final Fantasy XVI

You are able to parry an incoming attack in Final Fantasy XVI. To see how you can properly perform this counterattack, you can take a look at this tutorial from Seeking Tech.

What are the benefits of parrying?

By performing a successful parry, time will temporarily slowdown while your target will be left open to your attacks.

How to parry in Final Fantasy 16

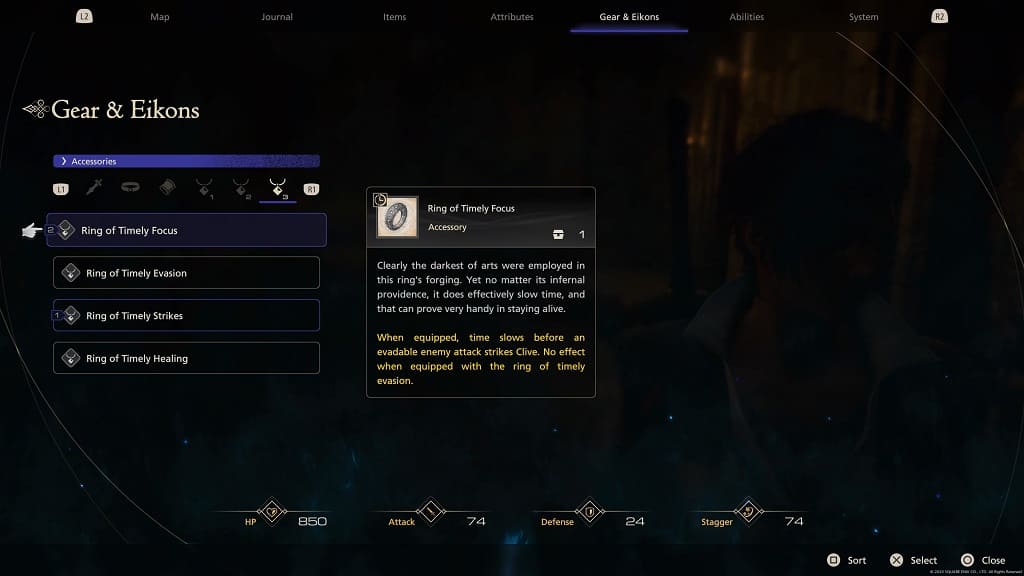
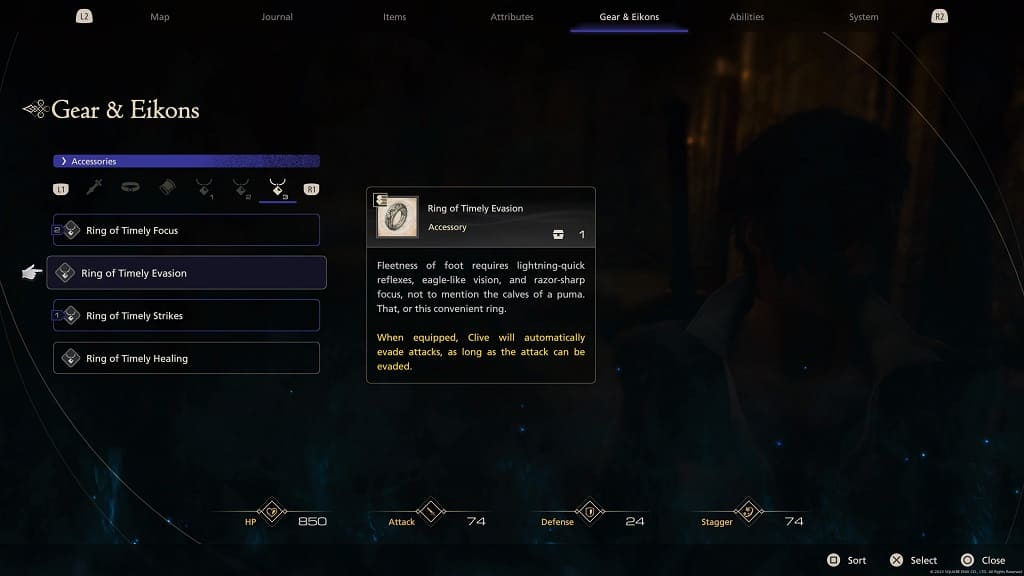
In order to parry you should first make sure that you remove the Ring of Timely Focus and Ring of Timely Evasion.

The Ring of Timely Focus will slow down time when an enemy is about to attack. This accessory will let you evade but not parry.

The Ring of Timely Evasion makes it so that your character will automatically dodge any incoming attacks. As a result, you won’t be able to parry.

To remove these rights, press the Options button while playing Final Fantasy 16 in order to open the Main Menu. From there, use the L2 and R2 buttons to navigate over to Gear & Eikons. In the Gear section, press the Triangle button to remove these rings from your equipment.

For the uninformed, the Ring of Timely Focus and Ring of Timely Evasion are already included in your inventory if you switch over to the Story Focused difficulty at any point. You can check out this comparison to see what the two difficultly modes are for the JRPG.

In order to perform a parry, you need to time your attack in order to interrupt an incoming attack. To attack, you have to press the Square button if you are using the Type A or Type C controller layout. If you are using the Type B controller layout, then you have to press the R1 button.

In terms of timing, the parry window is pretty small. You won’t be able to parry at the very last second. If you attack too early, then you may not be able to parry the enemy’s incoming attack as well.

Since each enemy type has different attack animation, it may take some time to learn the parry windows for each of them. Not to mention that parrying may not work with some enemy attacks.

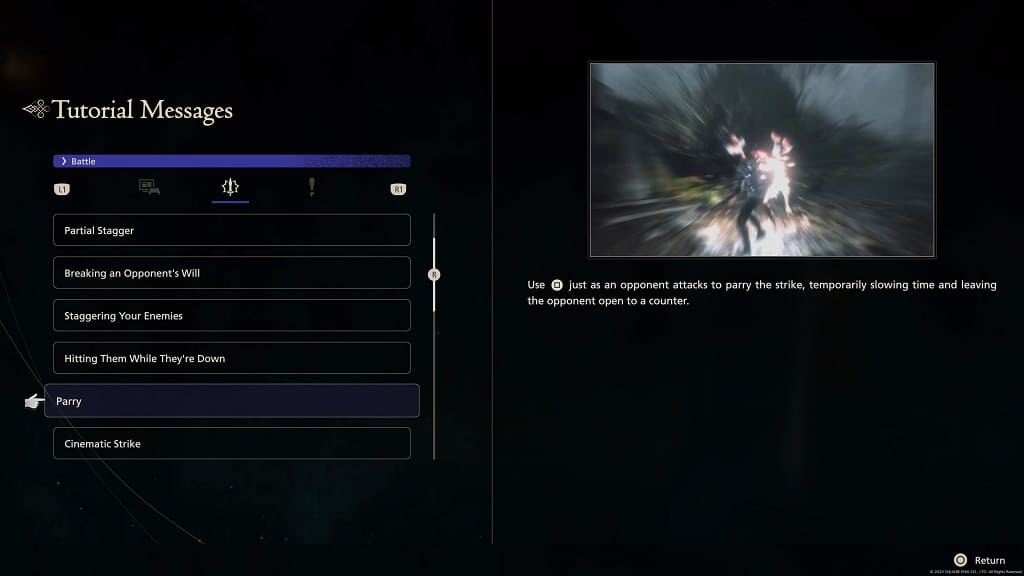
If you need a short video guide on parrying, then you need to press the Options button to open the Main Menu. Next, use the L2 and R2 buttons to head over to the System menu. From there, select Tutorial Messages from the System Settings tab. Finally, you should be able to find the Parry tutorial from the Battle section of the Tutorial Messages menu.

How to change difficulty mode in Final Fantasy XVI

If you want to change the difficulty setting in Final Fantasy XVI, then you can check out this tutorial from Seeking Tech to find out how you can properly do so.

1. If you already started your game, then the only way to change the difficulty is from the title screen. So, for the first step, you should make sure you load into your save file.

2. Once you are inside of the game, press the options button on the DualSense in order to open the Main Menu.

3. From the Main Menu, make your way to the System menu by using the L2 and R2 buttons on the controller.

4. Once you get to the System menu, use the L1 and R1 buttons to navigate over to the Game Settings tab.

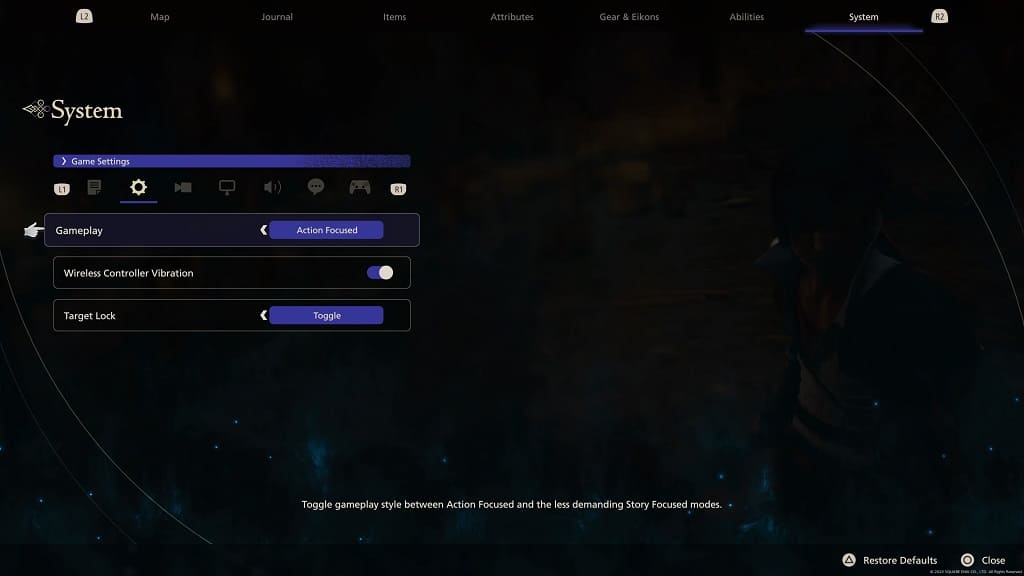
5. From there, you should fine the Gameplay setting. Here, you are able to switch between the Story Focused and Action Focused difficulty modes. You can learn more about the differences between these two difficulties with this post.

6. It is important to note that your equipment won’t change even if you change difficulties.

If you have accessibility rings equipped before, then they will stay equipped even when you switch from Story Focused to Action Focused. If the rings haven’t been equipped, then they will remain unequipped when you switch from Action Focused to Story Focused.

To check to see if you have the right accessibility settings, open the Main Menu by pressing the Options button. Afterwards, use the L2 and R2 buttons to make your way to the Gear & Eikons menu. In the Gear section, you should be able to find whether or not you have accessibility rings equipped.

How to get a good workout with PS VR2 version of Pistol Whip

If you really want to work up a good sweat while playing Pistol Whip with the PlayStation VR2, then you can check out this guide to see which style you should be using.

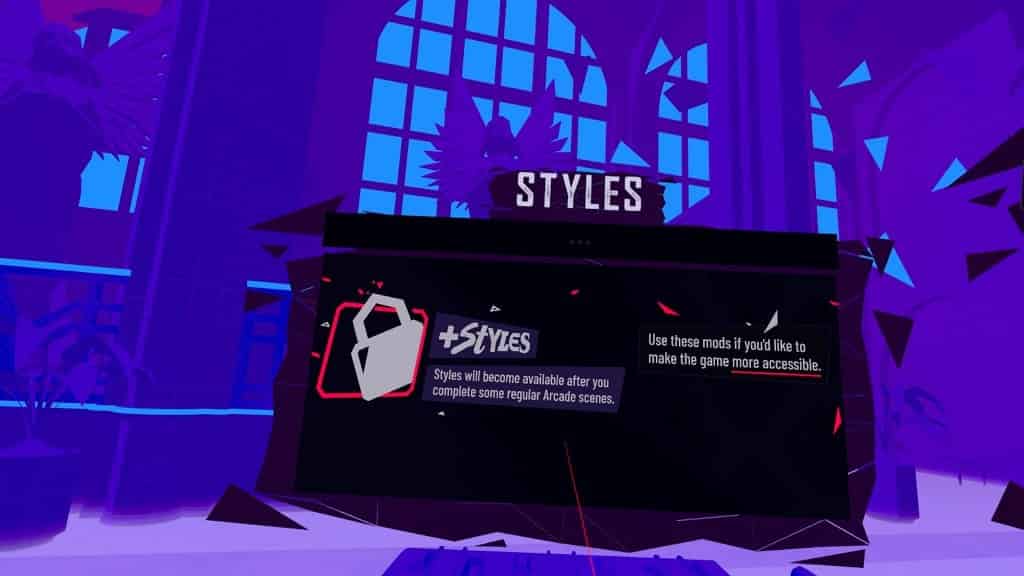
1. To start off, make sure you unlock the Styles menu. To find out how you can do so, you can check out this tutorial.

2. Once you have styles unlocked, go to the Arcade or Party Mode.

3. In the level selection menu, move your head to the left to find the Styles menu.

4. From there, we recommend that you select the Browse tab on the top left side.

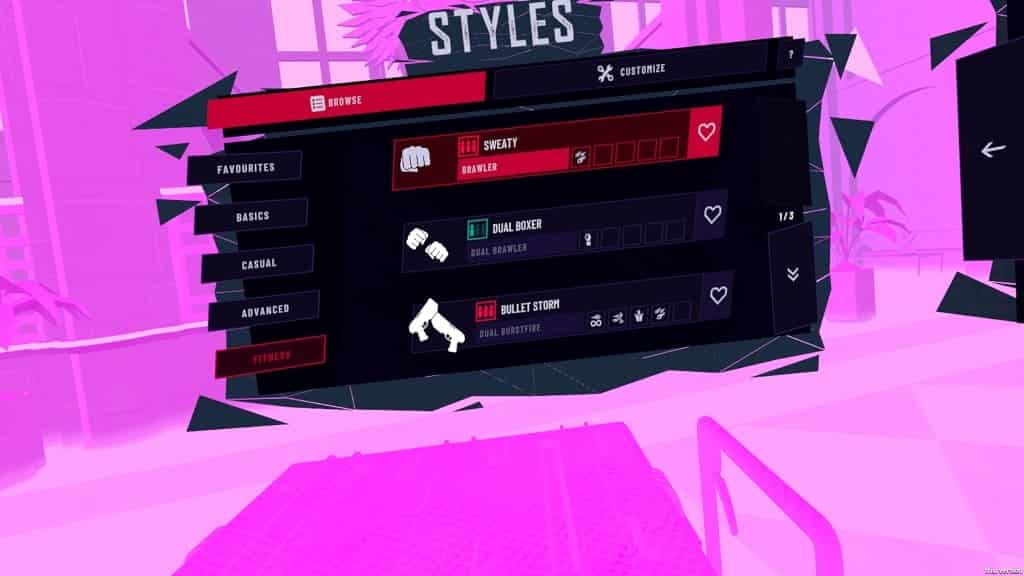
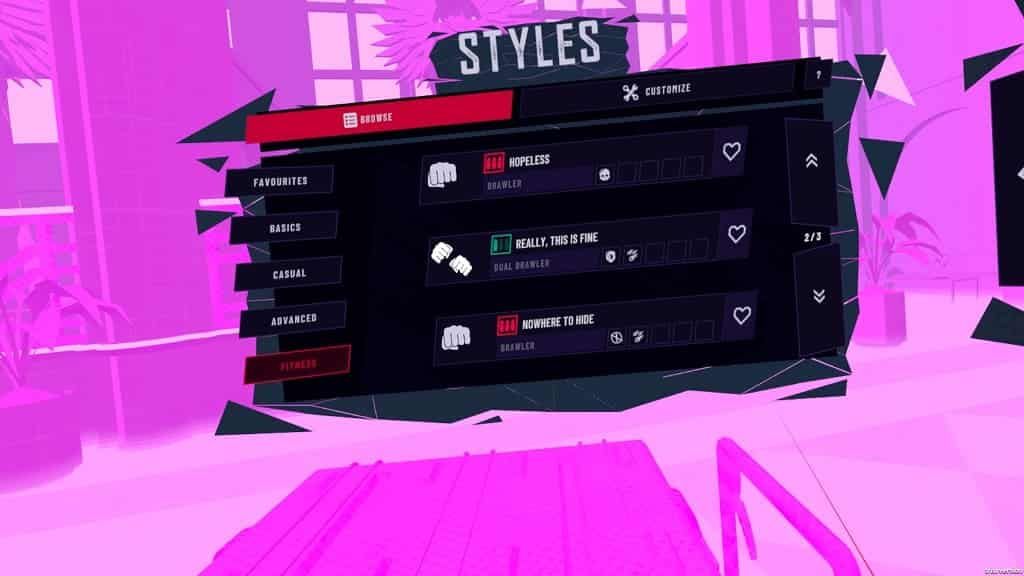
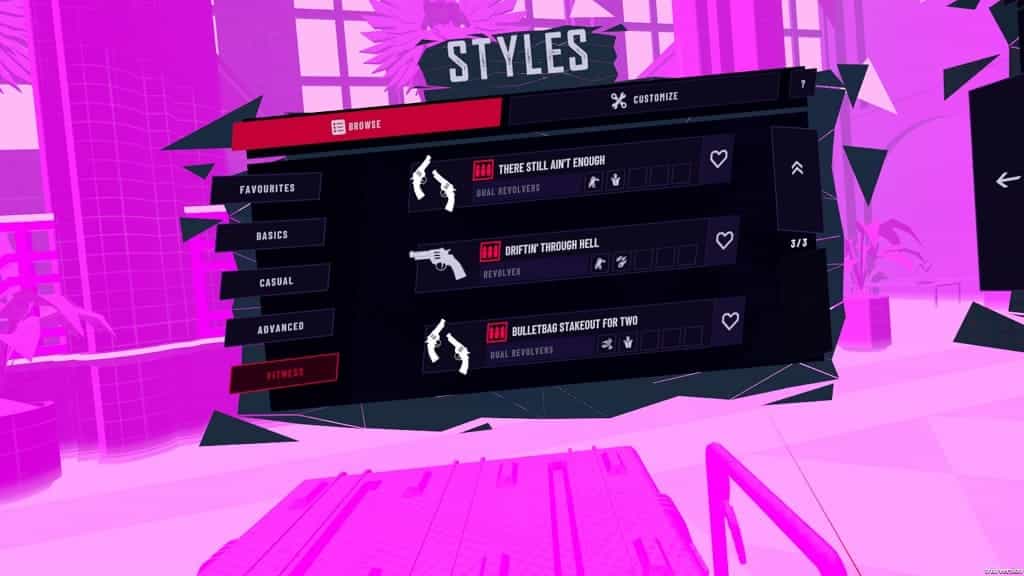
5. You should then select Fitness to find the following list of workout style presets:

Sweaty Style Preset

  • Weapon Preset: One Handed Brawler
  • Modifiers: Bullet Hell

The Sweaty preset increases the number of bullets while limiting your attacks to one-handed punches.

Dual Boxer Style Preset

  • Weapon Preset: Dual Brawler
  • Modifiers: Big Head

This Dual Boxer preset limits you to melee attacks on both hands. With that said, the head size of your targets will be increased.

Bulletstorm Style Preset

  • Weapon Preset: Dual Burstfires
  • Modifiers: Bottomless, Vengeance, Heavies and Bullet Hell

The Bulletstorm Style Preset gives you two Burstfire weapons with no lead to reload. You should expect to see a lot of bullets due to increase enemy fire rate, ricochets and heavily armored targets.

Hopeless Style Preset

  • Weapon Preset: One Handed Brawler
  • Modifiers: Reckless

The Hopeless Style Preset gives you no armor and only a one-handed melee attack.

Really, This is Fine Style Preset

  • Weapon Preset: Dual Brawler
  • Modifiers: Bulletproof and Bullet Hell

The “Really, This is Fine” makes you invincible while also making the enemies fire more bullets. You can only use punching attacks with both hands with this mode.

Nowhere to Hide Style Preset

  • Weapon Preset: One Handed Brawler
  • Modifiers: Unobstructed and Bullet Hell

The Nowhere to Hide removes all the obstacles from the game while also increasing enemy fire rate. You can only attack by punching with one hand.

There Still Ain’t Enough Style Preset

  • Weapon Preset: Dual Revolvers
  • Modifiers: Scavenger and Heavies

The There Still Ain’t Enough preset gives you two revolvers to counter the heavily armored targets. In order to reload, you need to successfully pistol whip a target.

Driftin’ Through Hell Style Preset

  • Weapon Preset: One Handed Revolver
  • Modifiers: Scavenger and Bullet Hell

The Driftin’ Through Hell limits your to using one revolver. This will also increase the enemy fire rate as well as limit reloading to successful pistol whips.

Bulletbag Stakeout for Two Style Preset

  • Weapon Preset: Dual Revolvers
  • Modifiers: Vengeance and Heavies

The Bulletbag Stakeout for Two preset gives to two revolvers. However, the targets receive extra armor while bullets will ricochet.

6. Select a preset you want to try from the Fitness menu.

7. Once you are done, we recommend that you select Customize.

8. From the Customize menu, you should see a list of modifiers that you can add or subtract from the preset.

We highly recommend that you select the Bulletproof. Otherwise, the stage can come to an abrupt and premature end if you took too much damage from bullets and/or obstacles.

If you find that the bullets are coming at you too fast, then you can try enabling the Low Velocity mod from this menu as well.

9. Once you are done setting everything up, look back to the right and then start a level. The preset and/or modifiers you previously set should now be activated in the stage.