Recommended Hisense A65K settings for PS5, Xbox Series X and S

If you bought the 2023 Hisense A6, which is referred to as the A65K, then you can check out this guide to see how you can properly set up this television when it comes to playing PlayStation 5, Xbox Series X and/or Xbox Series S games.

Compatible PS5 Features

When it comes to PlayStation 5 games, the A65K has a maximum refresh rate of 60 Hz, which means that the frame rate tops out at 60 frames per second as opposed to 120 fps.

This television set does support Variable Refresh Rate starting at 48 Hz for the Sony console. Furthermore, you should also be able to use Auto Low Latency Mode and HDR10.

Compatible Xbox Series X and Xbox Series S Features

The frame rate is also limited to 60 fps for Series X and Series S games with the A65K.

With that said, the TV is capable of using VRR with the two Xbox consoles, starting at 40 Hz, in addition to supporting ALLM, HDR10 and Dolby Vision.

How to optimize the A65K for gaming consoles

For the best settings when it comes to playing videogames on your Hisense A65K, we recommend that you take the following steps:

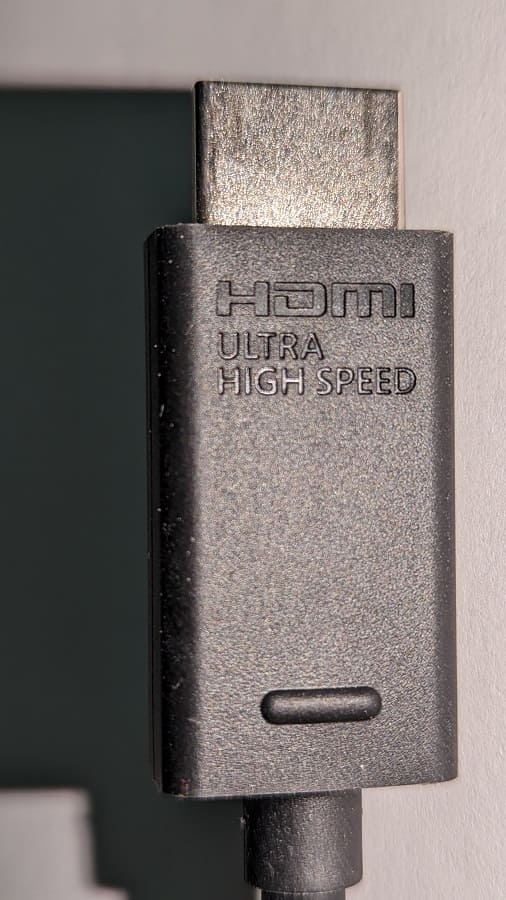
1. If you haven’t done so yet, connect your console to any of the four HDMI ports of the A65K. We recommend using the HDMI cable that came with your PS5, Xbox Series X and/or Xbox Series S for the best compatibility.
2. Next, press the gear cog button on the TV remote and then make your way to Settings > Display & Sound > Picture > Picture Mode > Game. You should then enable Game Mode, which lowers the input lag.

3. Afterwards, navigate over to Settings > Display & Sound > Picture > Advanced Settings > Instant Game Response and then make sure that Instant Game Response is set to Auto as this will turn on Auto Low Latency Mode.

4. You should now go to Settings > Display & Sound > Picture > Advanced Settings > FreeSync and then make sure you enable it. Doing so will also turn on Variable Refresh Rate support.

5. Now turn on your PS5, Xbox Series S or Xbox Series S console, if you haven’t done so already, and then open its Settings menu.

On the PlayStation 5, head over to Screen and Video > Video Output.
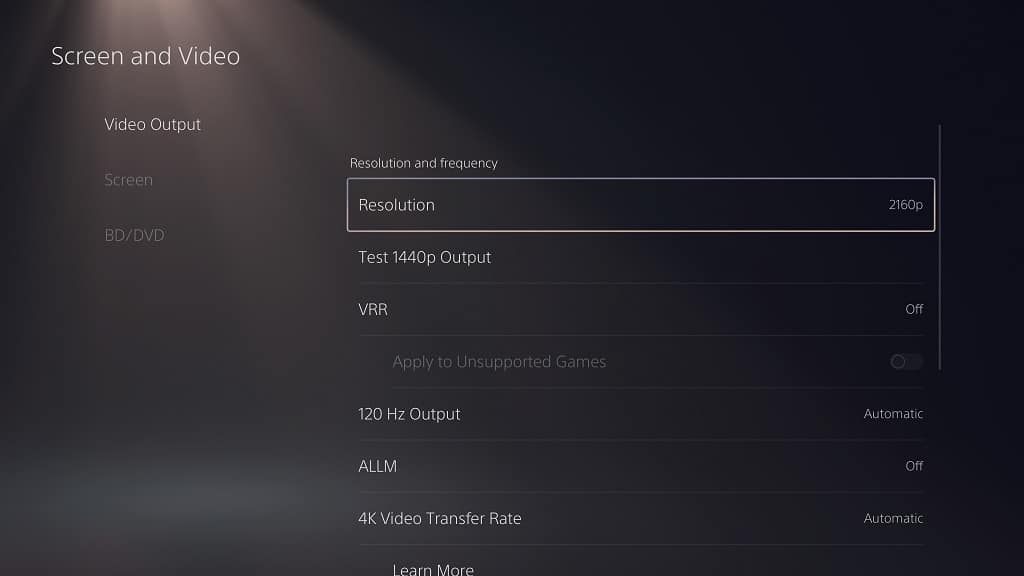
From there, set Resolution to 2160p, HDR to On When Supported and the following options to Automatic:

  • VRR
  • 120 Hz
  • ALLM
  • 4K Transfer Rate
  • Deep Color Output
  • RGB Range

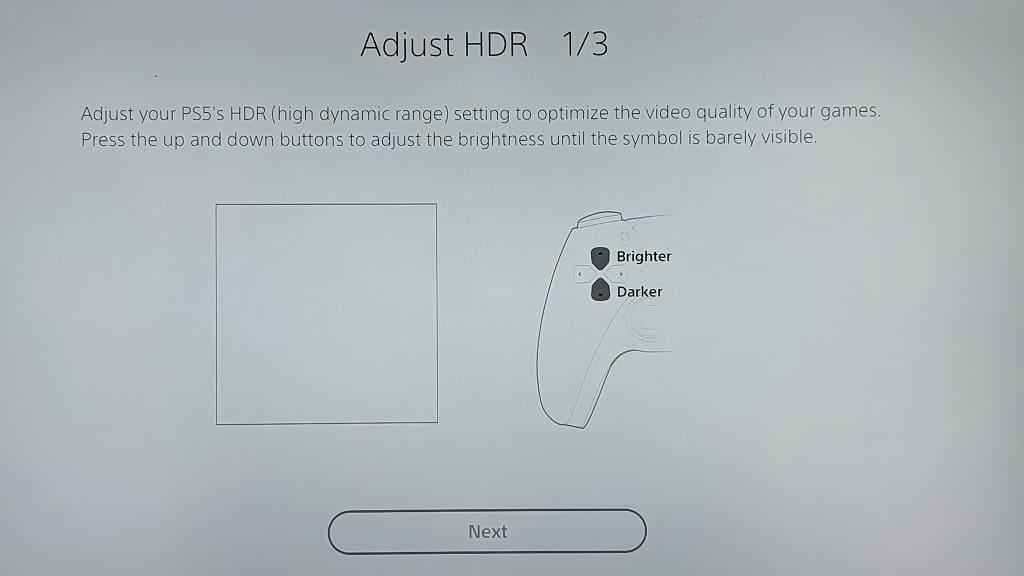
Next, select Adjust HDR and then follow the instructions to calibrate the HDR brightness output of the PS5 to your A65K.

On the Xbox Series X or Xbox Series S, navigate to General > TV & display options > Video modes.
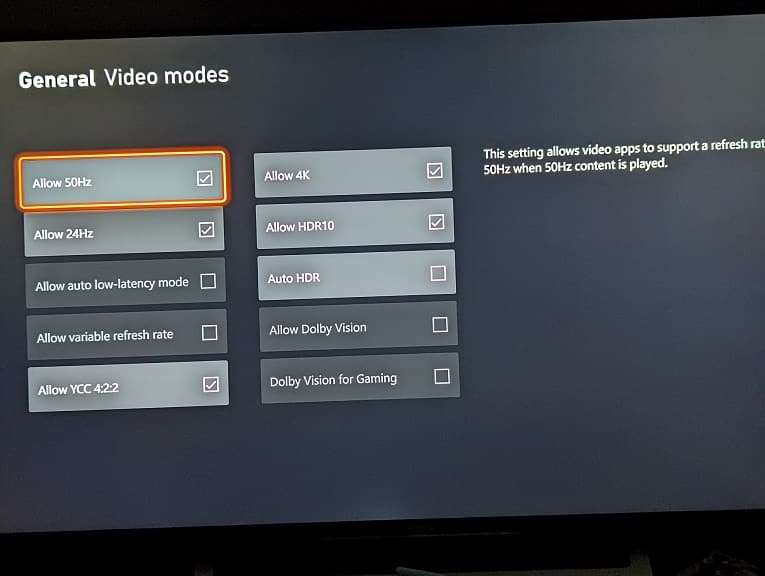
From there, select the following:

  • Allow Auto-Low Latency Mode
  • Allow Variable Refresh Rate
  • Allow 4K
  • Allow HDR10
  • Allow Dolby Vision
  • Allow Dolby Vision for Gaming

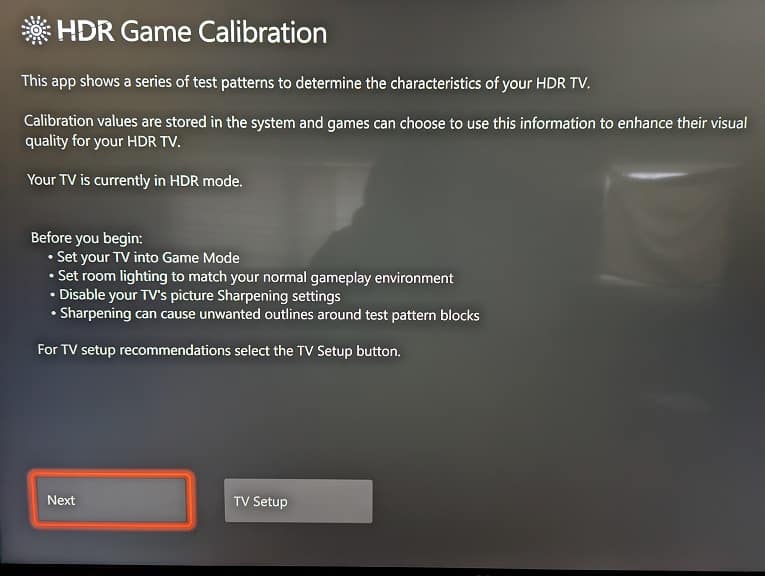
Next, go back to General > TV & display options and make sure that Resolution is set to 4K UHD. On the same screen select Calibrate HDR for Gaming and then follow the instructions to sync up the HDR brightness output of the Xbox to the Hisense A65K.

How to show hitboxes in Killer Instinct: Anniversary Edition

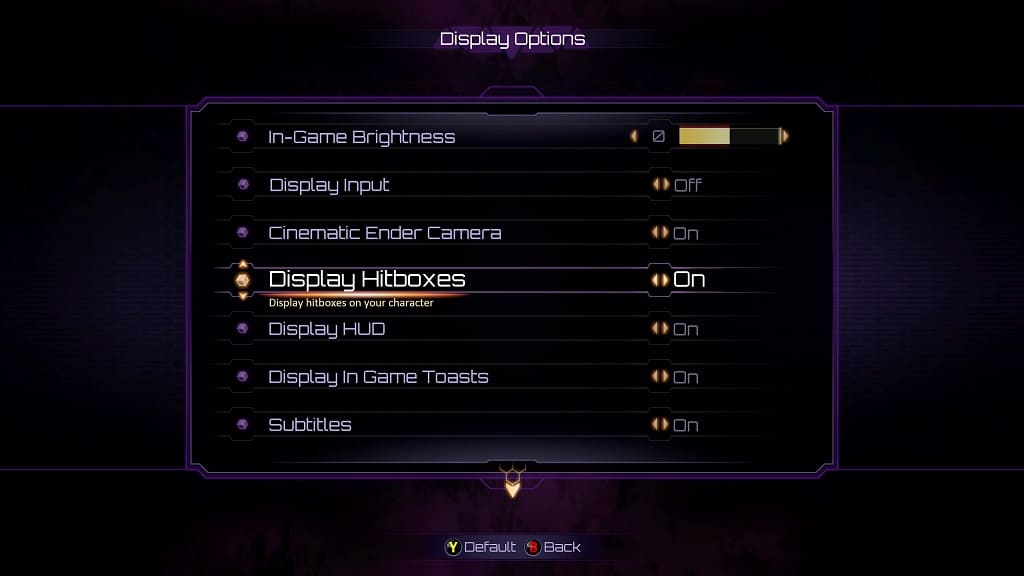
Enabling hitboxes in Killer Instinct: Anniversary Edition can be extremely helpful as you will be able to easily tell if your attacks will hit your opponent or when you will get hit by your opponent’s attack.

To see how you can turn the feature on in this fighting game, you can take a look at this tutorial from Seeking Tech.

1. To start off, you need to head over to the Help & Options menu.

2. From there, select Display.

3. You should now be in the Display Options screen, where you need to move the cursor down to Display Hitboxes. It should have the following description:

Display hitboxes on your character.

4. With the Display Hitboxes setting highlighted, use the left analog stick or directional pad buttons to set it to On.

5. When you exit the Options menu and return to playing Killer Instinct: Anniversary Edition, the hit boxes for both your character and the opponent will be shown.

Recommended Q70C settings for PS5, Xbox Series X and S

If you have the Samsung Q70C (which is also known as the Q70 or Q70CD), then you can check out this Seeking Tech guide to see how you can properly set this QLED up for playing videogames on consoles such as the PlayStation 5, Xbox Series X and Xbox Series S.

Compatible PS5 Features

The Q70C is capable of outputting at a maximum 120 Hz refresh rate in resolutions of up to 4K when connected to a PlayStation 5 console. It also supports HDR10, Variable Refresh Rate (starting at 48 Hz) and Auto Latency Mode.

Compatible Xbox Series X and Xbox Series S Features

When it comes to the Xbox Series X and Xbox Series S, you can play games at up to 120 frames per second in resolutions of up to 4K. The TV also supports the HDR10, Variable Refresh Rate (starting at 40 Hz) and Auto Latency Mode features.

Unfortunately, the Q70C does not support the Dolby Vision HDR format.

How to optimize the Q70C for gaming

To get the best out of the Samsung Q70/Q70C/Q70CD when it comes to playing games on the PS5, Series X and/or Series S, we suggest that you take the following steps:

1. To begin with, connect your console to the QLED screen. All four of the HDMI ports of the Q70C are HDMI 2.1, so you can use any of them.

For best compatibility, use the HDMI 2.1 cable that came with your PlayStation 5 or Xbox Series X console.

If you have an Xbox Series S, then you can either use the HDMI 2.0 cable that came with it or get your own HDMI 2.1 cable.

2. Next, use the TV remote to open the Settings menu and then navigate over to Connection > External Device Manager > Input Signal Plus. Once you get there, make sure that Input Signal Plus is enabled for the HDMI port that is connected to your game console.

3. Afterwards, head over to Connection > Game Mode Settings and then enable the Game Mode setting if you haven’t done so already. This will turn on Variable Refresh Rate as well as lower the input lag.

4. From the same Game Mode Settings screen, you can also enable the Game Bar setting. This will let you open a gaming-specific quick menu by pressing and holding the play/pause button on the remote.

5. We also suggest that you turn on Game HDR as well. If you don’t find it in the Game Mode Settings menu, then see if you can select Game Picture Expert and see if you can turn this setting on from there.

By doing so, you will enable HGiG (HDR Gaming Interest Group).

6. You will also see the following options in the Game Mode Settings screen: Virtual Aim Point (which adds a reticle to the middle of the screen) and Dynamic Black Equalizer (which may make it easier to see in darker in-game environments).

If you select Game Motion Plus Settings, you can make games look smoother although it often comes at a cost of higher input lag.

We suggest that you leave these optional settings alone for now. If you run into issues with specific games, then you can return here to make adjustments.

7. Next, turn on your game console and then head over to its Settings menu.

For the PS5, go to Screen and Video > Video Output. On this screen, you need to set Resolution to 2160p, HDR to On When Supported as well as the following settings to Automatic: VRR, 120 Hz, ALLM, 4K Transfer Rate, Deep Color Output and RGB Range.

You should then select Adjust HDR and then follow the on-screen instructions to sync up the HDR brightness output of your console to your Q70C.

If you have your Xbox Series X or Xbox Series S connected to the QLED, go to Settings > General > TV & Display Options > Video Modes. From there, make sure that the following settings are activated: Allow Auto-Low Latency Mode, Allow Variable Refresh Rate, Allow 4K and Allow HDR10.

Afterwards, return to Settings > General > TV & Display Options and double check to see if Resolution is set to 4K UHD and Refresh Rate is set to 120 Hz. You should then select Calibrate HDR for Gaming and then follow the on-screen directions to match the HDR brightness output of your console to the capabilities of the Samsung Q70C.

You should now be finished with setting up the Q70C for your PS5, Xbox Series X or Xbox Series S.

How to change the combo assist setting in Killer Instinct Anniversary Edition

By default, combo assist is enabled in Killer Instinct Anniversary Edition. This setting allows you to pull off special moves without having to string together a string of button combinations in the correct order with proper timing.

To see how you can enable, disable, or customize this feature, you can take a look at this tutorial from Seeking Tech.

1. While you can enable or disable combo assist directly from the character selection screen (by pressing the X button if you are playing with a controller or fight stick with an Xbox layout), you won’t be able to customize it.

Therefore, we recommend that you head over to the Help & Options screen from the main menu instead.

2. Once you get there, select Controller.

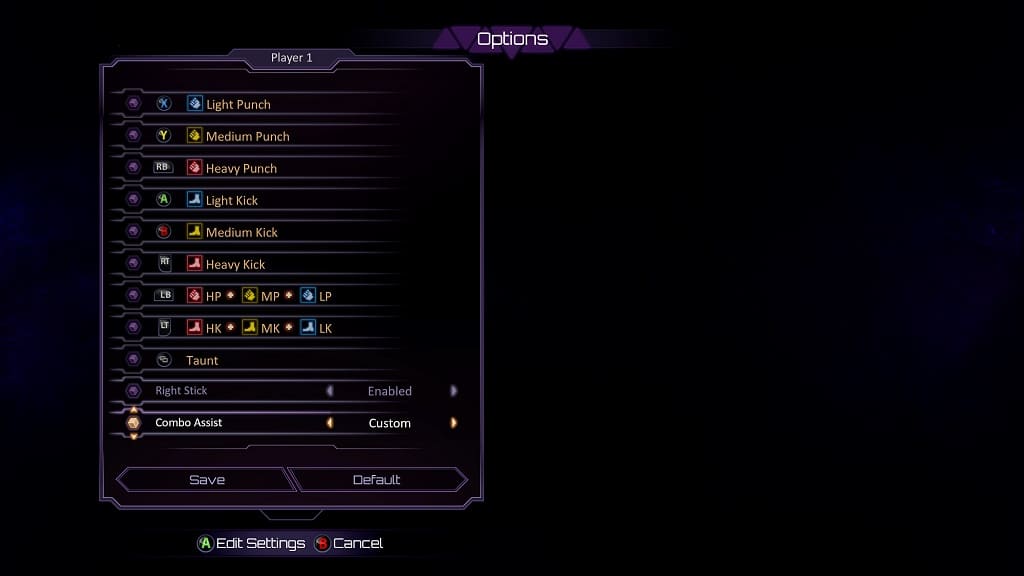
3. On the next screen, scroll down to Combo Assist.

4. You will be able to change the combo Assist to Enabled, Disabled or Custom.

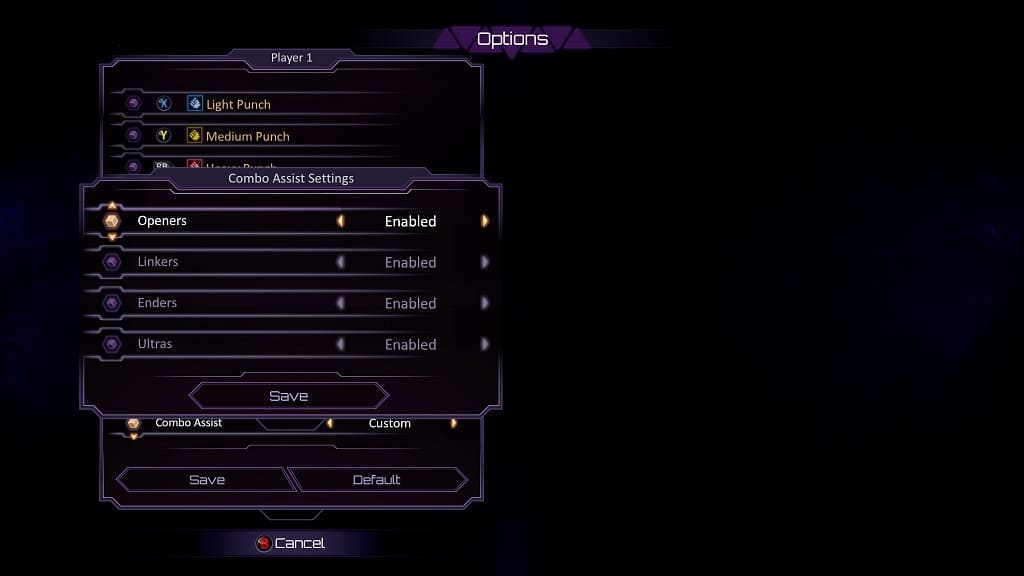
If you choose Custom, you need to open the Edit Settings screen (which can be done by pressing the A button on the Xbox controller). Afterwards, you can choose to enable or disable this assist feature for the following attack types:

  • Openers
  • Linkers
  • Enders
  • Ultras

Select the Save option once you are done to save your custom combo assist settings.

5. After changing the assistance feature, select Save to apply it in the game.

Recommended TCL Q7 settings for playing PS5, Xbox Series X and S games

If you managed to get your hands on the TCL Q7, otherwise known as the Q750G, then you can check out this guide to see what the best settings are to use when it comes to optimizing the QLED for playing videogames on the PlayStation 5, Xbox Series X and/or Xbox Series S consoles.

Supported PS5 Features

With the Q7, the following gaming features are supported on the PlayStation 5:

  • UP to 120 frames per second
  • HDR10
  • Variable Refresh Rate from a range of 48 Hz to 60 Hz or 48 Hz to 120 Hz
  • Auto Low Latency Mode

Supported Xbox Series X and S features

This TCL QLED is capable of the following gaming features if you have an Xbox Series X and/or Xbox Series S:

  • Up to 120 frames per second
  • HDR10
  • Dolby Vision
  • Variable Refresh Rate from a range of 40 Hz to 60 Hz or 40 Hz to 120 Hz
  • Auto Low Latency Mode

How to optimize the TCL Q7/Q750G for gaming

To get the most out of the Q7 or Q750G set when playing games on the PS5, Series X or Series S, we suggest that you do the following:

1. For the first step, make sure you connect your console correctly to the TCL screen.

Use the HDMI 2.1 cable that is included with your PS5 and/or Xbox Series X to connect to the HDMI #1 or HDMI #2 port of the TV in order to unlock the full video transfer bandwidth.

If you have an Xbox Series S, then you can use its included HDMI 2.0 cable to connect to any of the four HDMI ports of the Q7. To get the full video transfer bandwidth, you have to get your own HDMI 2.1 cable and then connect the console to either of the first two HDMI ports.

2. Next, you need to press the home button on the TV remote to go to the home menu of your Q7. From there, press the gear cog button and then select Settings.

Navigate over to the HDMI Mode menu and then make sure that HDMI 2.1 is selected. You should see the following description:

Always use HDMI 2.1 mode for compatibly. Maximum resolution is 8K 60 Hz or 4K 120 Hz.

3. You then need to head over to Settings > System > Game Master.

By turning on Game Master, you will be able to play games at lower input lag in addition to enabling Auto Low Latency Mode and Variable Refresh Rate.

This action will also enable the Game Master menu, which gives you quick access to the videogame settings of the TV. You will be able to view the FPS counter as well as whether or not you have HDR, ALLM and VRR enabled. Furthermore, you can turn on features such as shadow enhancement and aiming aid.

4. Turn on your console and then head over to its video output menu.

If you have the PS5, you can do so by going to Settings > Screen and Video > Video Output.

From that screen, set Resolution to 2160p, HDR to On When Supported as well as VRR, 120 Hz, ALLM, 4K Transfer Rate, Deep Color Output and RGB Range to Automatic.

Afterwards, select Adjust HDR. This will open up the HDR brightness calibration menu for the console. For the steps to sync the console’s HDR brightness output to the Q7.

On the Series X and Series S, head over to Settings > General > TV & display options > Video modes.

You should then make sure that the following options are selected:

  • Allow Auto-Low Latency Mode
  • Allow Variable Refresh Rate
  • Allow 4K
  • Allow HDR10
  • Allow Dolby Vision
  • Allow Dolby Vision for Gaming

Head back to the Settings > General > TV & display options screen and then make sure that Resolution is set to 4K UHD while Refresh Rate is set to 120 Hz.

You should then select Calibrate HDR for Gaming. Over the next three screens, follow the steps to align the console’s HDR brightness output to match the capabilities of the Q7.

You should now be fully set to get the most of this TCL television when it comes to gaming on the PS5, Xbox Series X and/or Xbox Series S.

Recommended X90L settings for PS5, Xbox Series X and S

If you got your hands on the Sony X90L or X90CL, then you can take a look a this Seeking Tech guide to see how you can set up this television set to optimize it for playing PlayStation 5, Xbox Series X and Xbox Series S videogames.

Compatible PS5 Features

With the X90L, the refresh rate is 120 Hz at both 1080p and 4K resolutions on the PlayStation 5. At 1440p, the maximum frame rate drops to 60 fps. Therefore, you want to avoid the middle ground display resolution.

This Sony Bravia television set also supports Auto Low Latency Mode, Variable Refresh Rate (from 48 Hz to 60 Hz or 120 Hz) and HDR10.

Compatible Xbox Series X and Xbox Series S Features

For the two Xbox Series consoles, the refresh rate is also 120 Hz at 1080p and 4K while being limited to 60 Hz at 1440p. The TV support ALLM, VRR (from 40 Hz to 60 Hz or 120 Hz) and HDR10 as well for Xbox games as well.

While Dolby Vision is supported, it limits the refresh rate to 60 Hz at all resolutions.

How to optimize the X90L or X90CL for gaming

In order to get the most with your Sony X90L when it comes to gaming, you can take the following steps:

1. Connect your console to your Sony Bravia.

The PS5 and Xbox Series X both come with HDMI 2.1 cables, which you should use to connect to either HDMI Port #3 or HDMI Port #4 of the X90L.

Since the Xbox Series S only comes with a HDMI 2.0 cable, you can use it to connect to any of the four HDMI ports on the Sony TV. You can also get a HDKI 2.1 cable and then connect the Series S to either the third or fourth HDMI port.

2. Next, use your TV remote to open the TV’s settings menu and then navigate over to the HDMI Signal Format menu. Select the HDMI port that is connected to your game console and then select Enhanced Format (VRR).

If you want to play or watch Dolby Vision content on the Xbox Series X or Xbox Series S, then you can select Enhanced Format (Dolby Vision) instead. Since not a lot of games take advantage of this HDR format, we recommend using Enhanced Format (VRR) as the default and then switching over to Enhanced Format (Dolby Vision) on a game-by-game or video-by-video basis.

3. Next, head over to the Picture section in the Settings menu of your X90L. Here, you need to make sure that the Picture Mode is set to Game, which reduces the input lag and enables Variable Refresh Rate.

This should also turn on the Game Bar, which is a quick settings menu where you can manually switch on or off Variable Refresh Rate, Black Equalizer (which may help you see better in darker games) and Crosshair (which adds a crosshair to the middle of the screen). There is also a Motion Blur Reduction option here but it is disabled when VRR is turned on.

In the same section, make sure you have Auto Picture Mode enabled as this will turn on Auto Low Latency Mode.

4. You should be done with the settings on the X90L side. However, there is still more work to do on the console side.

On the PS5, navigate over to Settings > Screen and Video > Video Output and then make sure you have the following settings set up correctly:

  • Resolution: 2160p
  • VRR: Automatic
  • 120 Hz: Automatic
  • ALLM: Automatic
  • HDR: On When Supported
  • 4K Transfer Rate: Automatic
  • Deep Color Output: Automatic
  • RGB Range: Automatic

On the same screen, select Adjust HDR and then go through the on-screen steps to calibrate the HDR brightness output of your console for the X90L.

For the Xbox Series X and Xbox Series S, go to Settings > General > TV & display options > Video modes and then make sure you select the following boxes:

  • Allow Auto-Low Latency Mode
  • Allow Variable Refresh Rate
  • Allow 4K
  • Allow HDR10

For Dolby Vision, you need to check Allow Dolby Vision and Allow Dolby Vision for Gaming as well.

Next, return to Settings > General > TV & display options and then make sure that Resolution is set to 4K UHD and Refresh Rate is set to 120 Hz.

You should then select Calibrate HDR for Gaming and go through the on-screen steps to tune the HDR brightness output of the Xbox Series console to match the capabilities of your Sony X90L.

You should now be fully optimized to get the most out of your PS5, Xbox Series X and/or Xbox Series S.

Recommended LG UR8000 settings for PS5, Xbox Series X and S

If you recently got the LG UR8000 Series LED 4K UHD Smart webOS 23 with ThinQ AI TV, then you can check out this guide to see how you can properly set it up in order to get the most out of playing videogames on your PlayStation 5, Xbox Series X and/or Xbox Series S.

Supported PS5 Features

With the UR8000, you can play PlayStation 5 games at up to 120 frames per second with Variable Refresh Rate support if you have the 86-inch variant. For the smaller sizes, you are limited to a maximum of 60 fps with no VRR.

All screen sizes of this television support HDR10 and Auto Low Latency Mode when it comes to the PS5.

Supported Xbox Series X and Xbox Series S Features

With the Series X and Series S, the 120 Hz refresh rate and VRR are both limited to the 86-inch screen size. For the smaller sizes, the frame rate tops out at 60 fps with no Variable Refresh Rate.

The TV also supports HDR10 and ALLM when connected to these Xbox consoles. This screen can’t play any Dolby Vision content, however.

How to optimize the UR8000 for gaming

For the best LG UR8000 settings when it comes to playing games on the PlayStation 5, Xbox Series X and/or Xbox Series S, we suggest that you take the following steps:

1. Connect your console to the HDMI port of the UR8000 if you haven’t done so already.

For best compatibility, use the HDMI 2.1 cable that came with your PlayStation 5 and Xbox Series X. If you have a Series S, then you can use the included HDMI 2.0 cable or get your own HDMI 2.1 cable.

For the 86-inch screen size, make sure you connect the console to a HDMI 2.1 port.

On the 43-inch, 50-inch, 55-inch, 65-inch, 70-inch and 75-inch versions, all three of the HDMI ports are 2.0; therefore, you can use any of the available ports.

2. Use the remote of your LG television set to open the Settings menu. From there, head over to the Game section, where you can then enable the Game Optimizer.

By doing so, the TV will lower the input lag in addition to turning on Dynamic Auto Sync and HDMI Deep Color. Furthermore, 120 frames per second and Variable Refresh Rate should automatically be enabled if you have the 86-inch version of the series.

3. From the same Game section, make sure that ALLM is enabled if it hasn’t been turned on already. This will allow the TV to automatically switch over to Game Optimizer whenever it detects that you are connected to a gaming console.

4. There are other settings in the Game menu such as Game Genre, Reduce Blue Light and Dark Room Mode. We recommend that you leave these alone for now. If a game looks off, then you can try playing with these options later on.

5. You should be done setting up your UR8000 from gaming. However, there is still more work to do on the console side.

For the PS5, head over to Settings > Screen and Video > Video Output. In that menu, set Resolution to 2160p, HDR to On When Supported as well as VRR, 120 Hz (if applicable), ALLM, 4K Transfer Rate, Deep Color Output and RGB Range to Automatic.

Afterwards, select Adjust HDR and then follow the on-screen instructions over the next three screens to calibrate the HDR brightness output for your LG UR8000.

For both the Xbox Series X or Series S, go to Settings > General > TV & display options > Video modes. In that screen, select Allow Auto-Low Latency Mode, Allow Variable Refresh Rate (if applicable), Allow 4K and Allow HDR10.

Return to the Settings > General > TV & display options screen and then make sure that Resolution is set to 4K UHD and, if applicable, Refresh Rate is set to 120 Hz.

On the same screen, select Calibrate for HDR Gaming and then follow the steps that appear over the next three screens to configure the HDR brightness output of the console to match the capabilities of the UR8000.

Your TV and console should now be set up to get the most of PlayStation 5, Xbox Series X and/or Xbox Series S games.

Recommended QN85C Settings for PS5, Xbox Series X and S

If you got the Samsung QN85C or QN85CD, then you can check out this guide at Seeking Tech to see what setting you should be using to get the most out of playing video games on your PlayStation 5, Xbox Series X and/or Xbox Series S console.

Supported PS5 Features

With the QN85C, you will be able to play PS5 games at up to 120 frames per second to go along with Variable Refresh Rate (from 48 Hz to 60 Hz or 120 Hz). Also supported are HDR10 and Auto Low Latency Mode.

Supported Xbox Series X and Xbox Series S Features

The QN85C is capable of displaying Series X and Series S games at up to 120 frames per second with VRR (from 40 Hz to 60 Hz or 120 Hz). This TV also supports HDR10 (but not Dolby Vision) as well as ALLM.

How to optimize the QN85C for gaming

For the best settings when it comes to gaming on your Samsung QN85C QLED, we recommend that you take the following steps:

1. If you haven’t done so already, connect your console to the HDMI port of your television set. All four HDMI ports are version 2.1; so, you can use any of them for the connection.

The PS5 and Xbox Series X both come with a HDMI 2.1 cable. Make sure you use them for the connection if you want to unlock the full video transfer bandwidth.

Since the HDMI cable that came with the Xbox Series S is 2.0, the bandwidth will be more limited. This should be fine since the games running on this lower spec console most likely won’t take advantage of the extra bandwidth. With that said, you could still get your own HDMI 2.1 cable for the Series S as well.

2. After connecting the console, open the Settings menu of your Samsung QLED and then navigate over to Connection > External Device Manager > Input Signal Plus.

From there, select the HDMI port that is connected to your console and then make sure that Input Signal Plus is enabled for it. This should turn on HDR10 support.

3. Go back to the Settings menu of the QN85C and then head over to Connection > Game Mode Settings. From there, make sure you have Game Mode enabled.

By doing so, you should enable Auto Low Latency Mode and Variable Refresh Rate along with reducing the input lag.

4. There are other features in the Game Mode Settings menu that we suggest that you leave alone for now. In the future, you can go back here to play with the following on a game-by-game basis:

  • Dynamic Black Equalizer
  • Game Motion Plus
  • Blur Reduction
  • Judder Reduction
  • LED Clear Motion
  • Clear Motion

Dynamic Black Equalizer may help you see better in darker environments. The motion features may make the game appear to run smoother although they come at a cost of higher input latency.

5. Next, you need to make your way to the Settings menu of your game console.

On the PlayStation 5, head towards Screen and Video > Video Output. Once you get there, set Resolution to 2160p, HDR to On When Supported as well as the following settings to Automatic:

  • VRR
  • 120 Hz
  • ALLM
  • 4K Transfer Rate
  • Deep Color Output
  • RGB Range

For the two Xbox consoles, head over to General > TV & display options > Video modes. On this screen, make sure that the following is selected:

  • Allow Auto-Low Latency Mode
  • Allow Variable Refresh Rate
  • Allow 4K
  • Allow HDR10

Go back to the General > TV & display options and then make sure that Resolution is set to 4K UHD and Refresh Rate is set to 120 Hz.

6. One final step is to calibrate the HDR output of your console to optimize it for the Samsung QN85C.

To do so on the PlayStation 5, open its Settings menu and then select Screen and Video > Video Output > Adjust HDR.

On the Xbox Series X and S, navigate over to Settings > General > TV & display options > Calibrate HDR for gaming.

Follow the steps that appear over the next three screens to set up your HDR brightness output.

You should now be done setting up your QN85C for the PS5, Series X and/or Series S.

How to reformat your PS5 M.2 SSD Storage

If you have an issue with the M.2 SSD Storage on your PlayStation 5, then you can try reformatting it. To see how you can properly do so from the console, you can check out this tutorial from Seeking Tech.

1. If you haven’t done so yet, turn on your PS5 and make sure you are in the home screen menu.

2. From the home screen, select the gear cog icon that can be found on the top right side to open up Settings.

3. Select Storage from the list of options.

4. In the Storage screen, select M.2 SSD Storage on the left side.

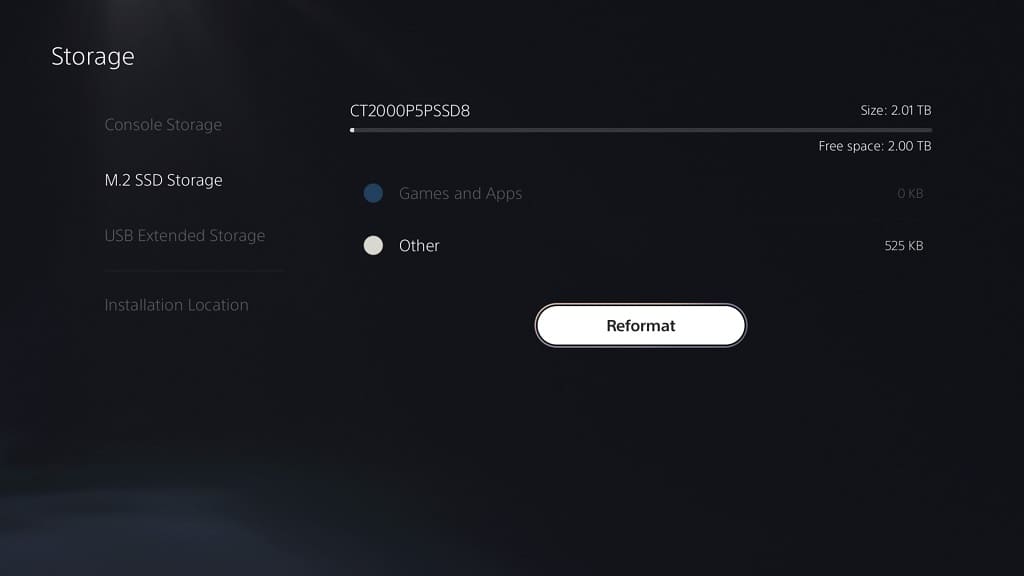
5. On the right side, you should see details on the M.2 expansion drive that you inserted into your PlayStation 5 console. Here, you need to select the Reformat option.

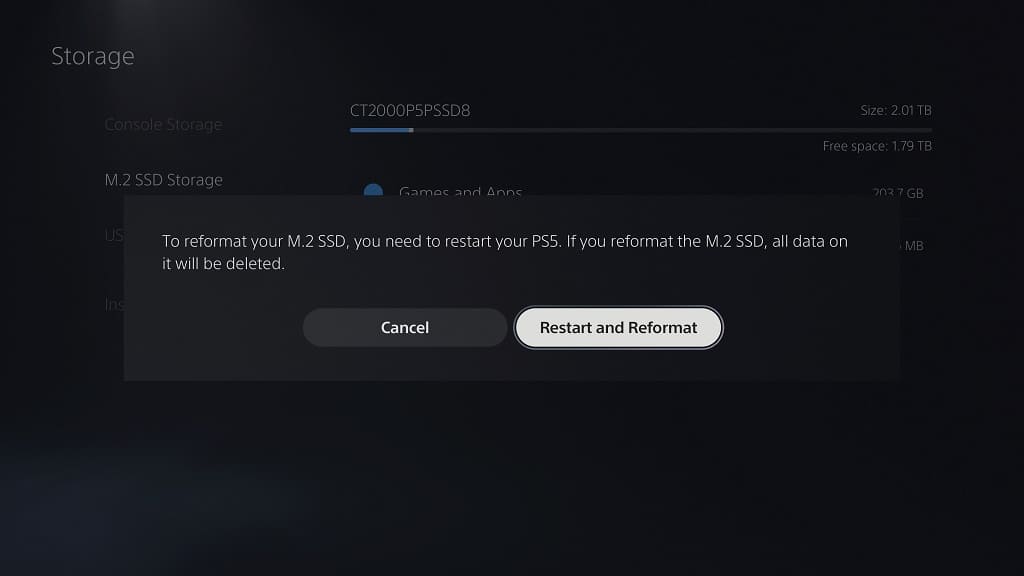
6. You should see the following message:

To reformat your M.2 SSD, you need to restart your PS5. If you reformat the M.2 SSD, all data on it will be deleted.

Select Restart and Reformat.

7. Once the console has rebooted, it should automatically format the M.2 sold state drive once again.

How to fix UNDER NIGHT IN-BIRTH II Sys:Celes input lag issues

You may encounter some input lag while fighting in UNDER NIGHT IN-BIRTH II Sys:Celes. To see how you can potentially fix the latency, you can check out this troubleshooting article from Seeking Tech.

1. For the first potential fix, you should double check to see if you have Game Mode (or a similarly name mode) enabled as doing so will reduce the input delay.

2. We also recommend that you play the 2D fighting game with a connected controller as it should be faster and more stable when compared to wireless.

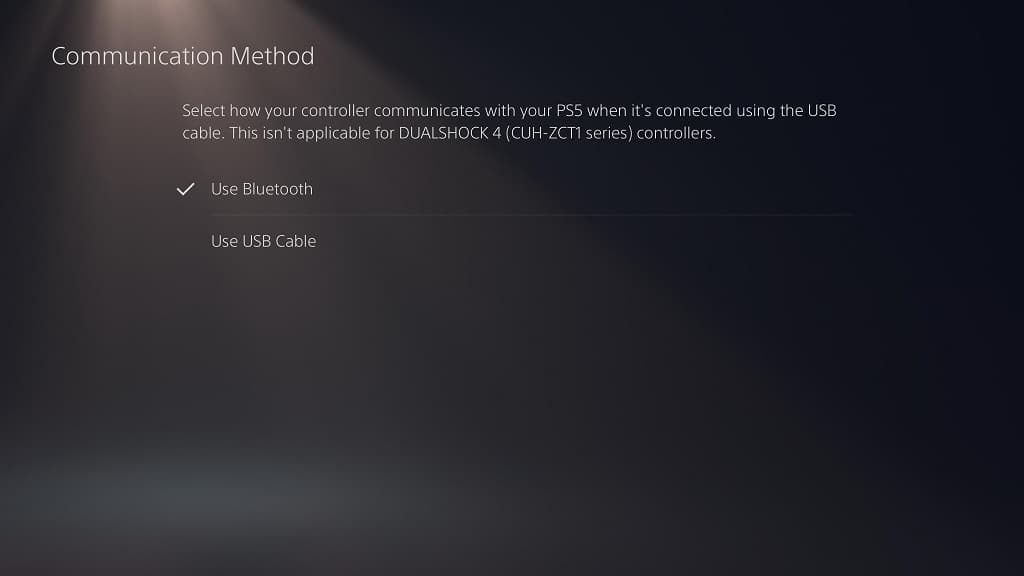
On the PS5, make sure you enabled USB communication by going to the console’s Settings menu and then selecting Accessories > Controller (General) > Communication Method > Use USB Cable.

For the PS4, open the console’s Setting menu and then select Devices > Controllers > Communication Method > Use USB Cable.

3. By default, UNDER NIGHT IN-BIRTH II has Vsync enabled. While this prevents screen tearing, it also adds to the input lag.

To disable it, open the Option menu in the game and then select System. From the System Settings screen, make sure that Vertical Sync is set to Off.

4. Return to the Option menu and then head over to the Game section.

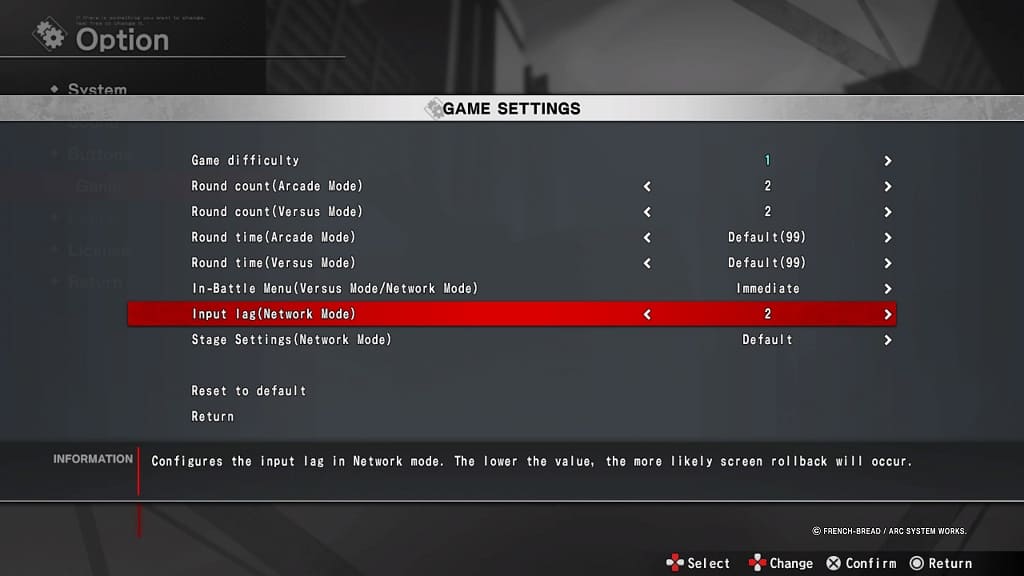
From the Game Settings screen, move the cursor down to Input Lag (Network Mode). It should show the following description:

Configures the input lag in Network mode. The lower the value, the more likely screen rollback will occur.

The default value of the Input Lag (Network Mode) setting is 2. You will be able to change it within a range of 1 to 4. After changing the value, test it out during an online match to see if the controls feel more responsive.