How to change the anti-aliasing method in PS4 version of Red Dead Redemption

The PlayStation 4 version of Red Dead Redemption lets you switch between FXAA and AMD FSR 2. To see how you can change between these anti-aliasing methods, you can take a look at this tutorial from Seeking Tech.

What is anti-aliasing?

Anti-aliasing helps smooth out jaggies that may appear on certain objects. These visual distortions are more likely to appear in games that have a low native resolution.

FXAA vs. AMD FSR 2 in RDR

When it comes to Red Dead Redemption, we found that using the default AMD FSR 2 anti-aliasing method results in a sharper looking game with less jaggies when compared to FXAA.

Keep in mind that the PlayStation 4 version of Red Dead Redemption can also be played on the PlayStation 4 Pro and PlayStation 5 consoles. By doing so, you should get even better image quality with AMD FSR 2 enabled.

How to change the anti-aliasing method

If you want to change how anti-aliasing in the PS4 port of Red Dead Redemption, then you need to take the following steps:

1. Press the Options button on the controller during gameplay to bring up the pause menu.

2. In the pause menu, select Options.

3. Under the Options menu, you then need to select Display.
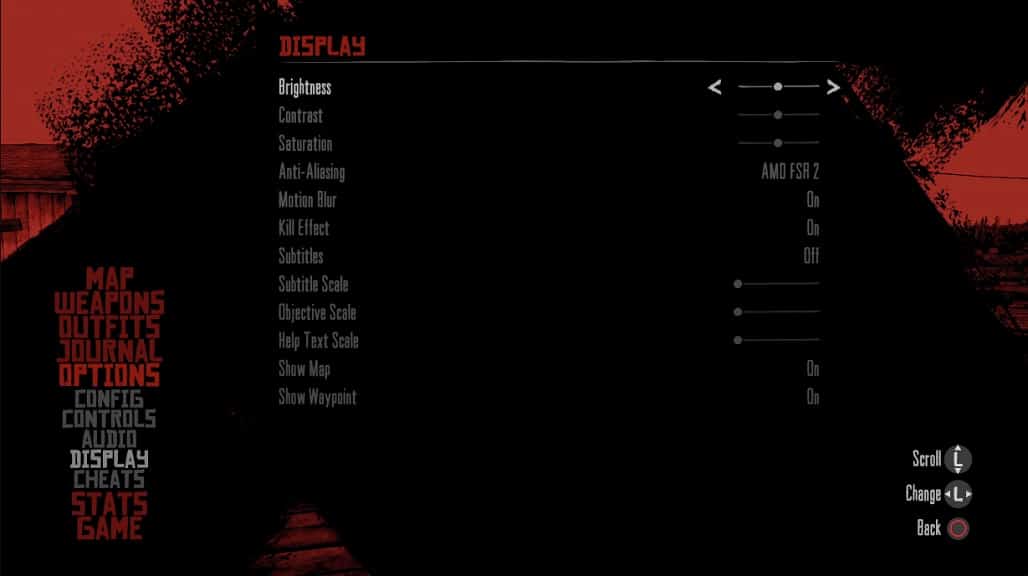
4. On the right side of the same screen, you should see the Anti-Aliasing option. By default, this is set to AMD FSR 2. You will be able to switch it from AMD FSR 2 to FXAA or vice versa.

5. Once you are done changing this setting, exit the pause menu and then test out the new anti-aliasing method in the game. If you prefer how the game looks previously, then you can switch back to the first anti-aliasing setting from the aforementioned Options > Display menu.

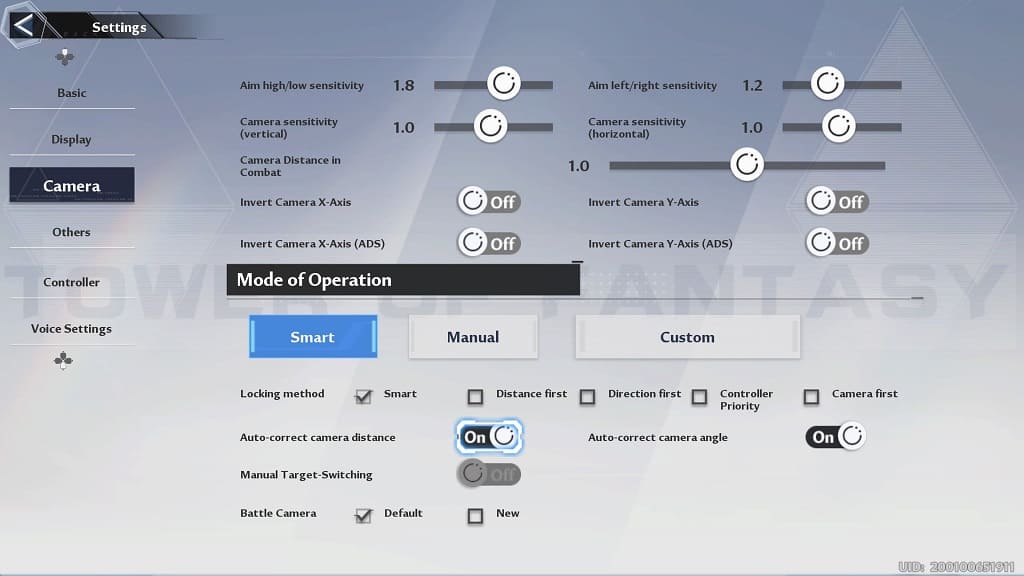
How to fix Tower of Fantasy camera issues on PS4 and PS5

When fighting in the PlayStation 4 or PlayStation 5 versions of Tower of Fantasy, you may encounter camera issues. To see how you can prevent the in-game camera from moving on its own when you are engaged in combat, you can check out this troubleshooting article from Seeking Tech.

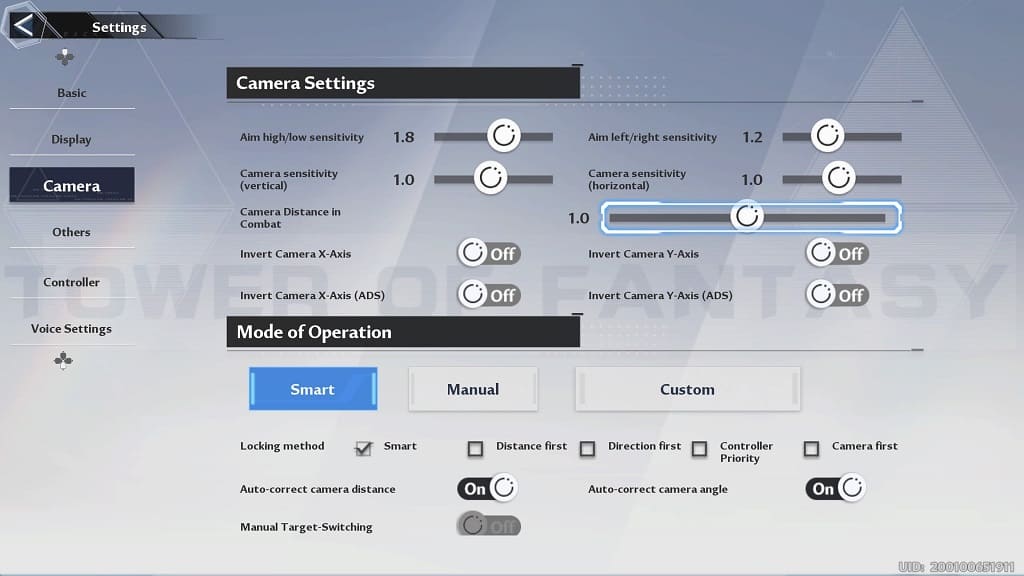
1. First off, make your way to the Settings menu from either the main menu screen or the in-game pop-up menu.

2. Inside of Settings, use the directional pad to change tabs until you get to Camera.

3. From the Camera tab, use the left analog stick to scroll down to the Mode of Operation section.

From there, make sure that both the “Auto-correct camera distance” and “Auto-correct camera angle” settings are set to Off.

By doing so, the camera will no longer zoom in, zoom out or move around on its own when you are attacking an enemy.

4. On the same screen, we also recommend that you scroll up and move the menu cursor to the Camera Distance in Combat slider. Press and hold the X button with the menu cursor on the slider and then use the left analog stick to adjust its value.

We suggest that you set Camera Distance in Combat slider to 1.5 to move the camera back. By doing so, you should end up having a wider view during fighting sequences.

How to switch severs in PS4 and PS5 versions of Tower of Fantasy

You are able to change to a different server in the PlayStation 4 and PlayStation 5 versions of Tower of Fantasy. To find out how you can properly migrate in this online role-playing game, you can take a look at this guide from Seeking Tech.

1. To start off, you need to head over to the main menu in Tower of Fantasy.

If you have already logged into your current server, then you need to logout. You can do so by pressing the Options button on the DualShock 4 or DualSense to bring up the in-game menu, where you can then select Settings.

Inside of Settings, make sure you are viewing the Basic tab; if you aren’t then you can change tabs by using the directional pad.

From the Basic tab in Settings, use the left analog stick to select Switch Accounts. Afterwards, you need to select Back Login to log out of the current server and return to the main menu.

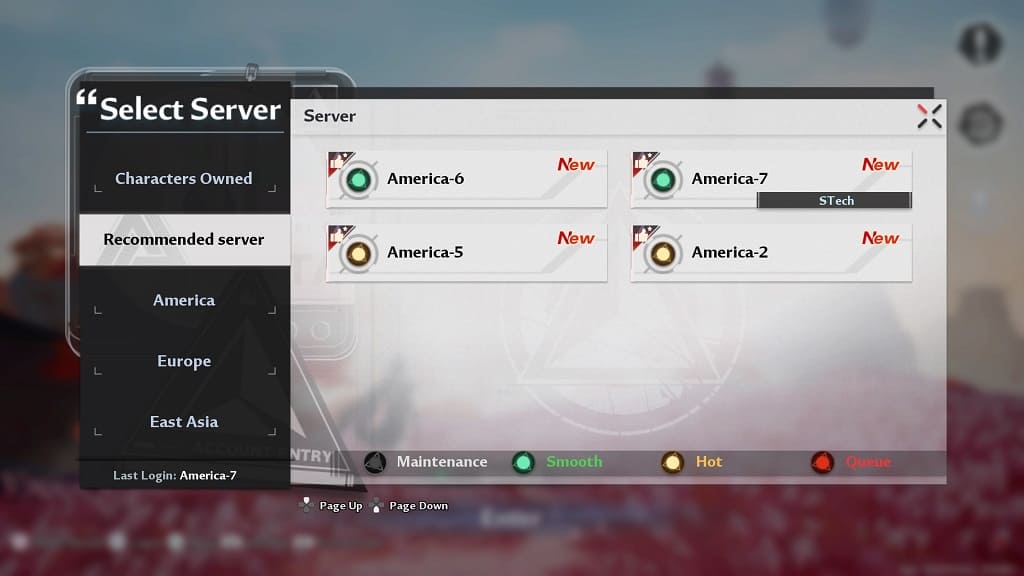
2. From the main menu, press the Square button on your controller to bring up the Select Server menu.

3. Once you get to the Select Server menu, use the directional pad to change to the Recommended Server, America, Europe or East Asia tab.

If you are trying to play with another friend, then you should make sure you select the same servers as them. If you are looking for the best performance in terms of connectivity, then you should select the servers that are greenlit. If you are looking for popular servers, then you should select the yellow-lit ones.

Use the left analog stick to select your new server.

How to reduce flashing lights in Quake II remaster

You may notice that there are flashing lights in the Quake II remaster. If you find that this is distracting and/or uncomfortable, then you can check out this guide at Seeking Tech to see how you can reduce or disable this feature.

1 To start off, you need to head over to the Options menu in the first-person shooting game. This can be done from either the main menu or pause menu.

2. In Options menu, you need to select Accessibility.

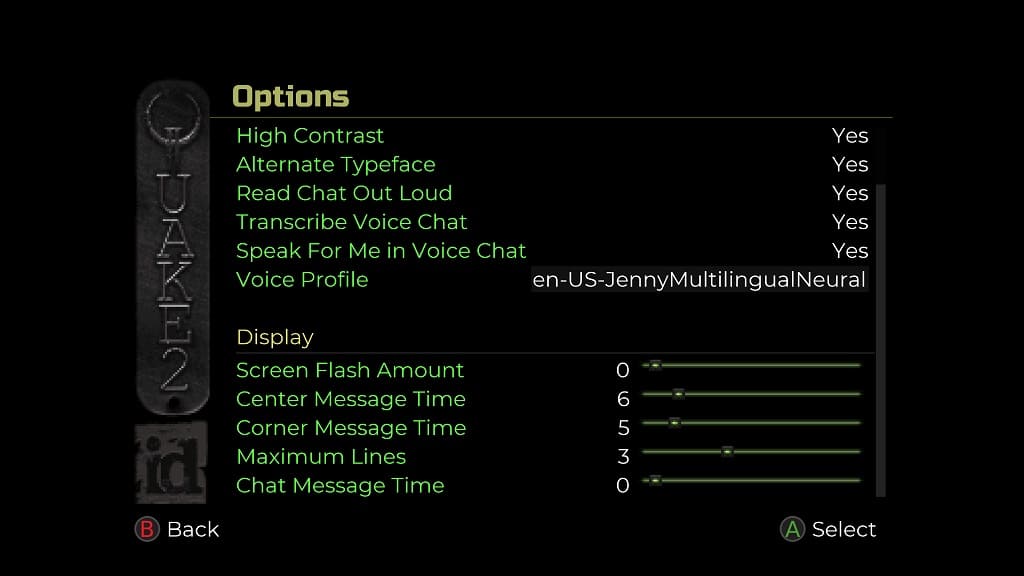
3. On the next screen, you should see the Screen Flash Amount slider.

By default, this is set to 100, which is the maximum value. You are able to decrease in increments of 5.

If you want to completely disable flashing lights, you need to set the Screen Flash Amount to 0.

4. There are other lighting effects that you might want to change if you find that the lighting in the game is still too distracting and/or uncomfortable after reducing or disabling the screen flashing.

If you go to the Display section in the Options menu, you will be able to turn off Bloom Lighting, Muzzle Flashes, Color Lightmaps as well as other graphical features in the remastered version of Quake 2.

How to add multiplayer bots to Quake II remaster

You are able to play the Deathmatch, Team Deathmatch and Capture the Flag modes in the Quake II remaster with bots. To see how you can fight against the computer-controlled characters, you can take a look at this guide from Seeking Tech.

1. Go to the main menu of Quake II remaster if you aren’t there already.

2. From there, select Multiplayer.

3. If you are playing with others locally, then you should make sure that you connect additional controllers before you select Continue.

4. On the next screen, you need to select Local, LAN or Online.

5. In the Match Configuration section on the next menu, select the “Change settings…” option.

6. Make sure that the Game Mode is set to Deathmatch, Team Deathmatch or Capture the Flag.

7. You should see the Bot Settings section appear.

8. For the first step, select the maximum number of players you want in the multiplayer match.

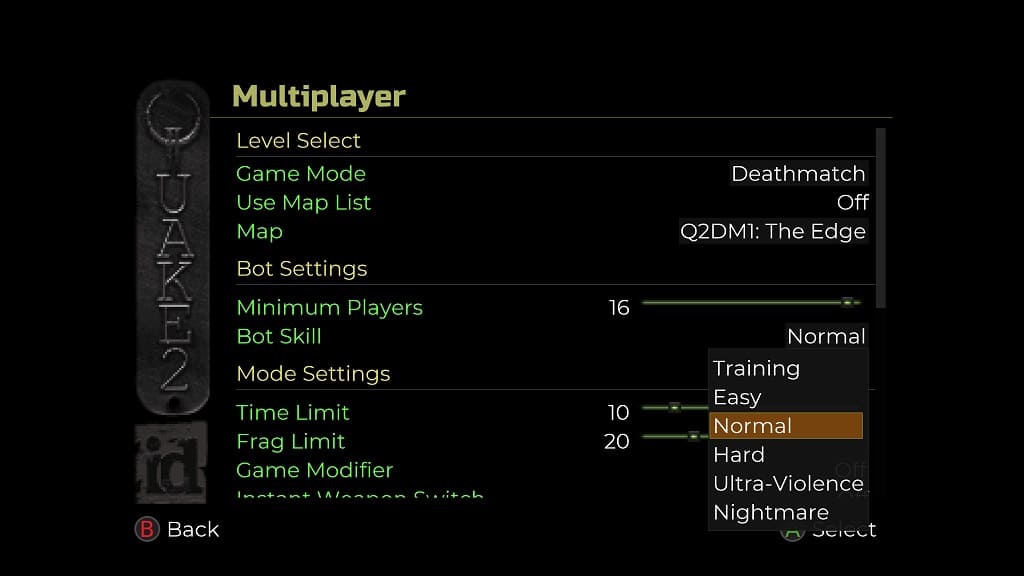
9. The Bot Skill option should then appear. Select it to change the skill level of the computer-controlled characters to any of the following:

  • Training
  • Easy
  • Normal
  • Hard
  • Ultra-Violence
  • Nightmare

10. Change any other settings from the same screen and then back out to the previous menu.

11. Finally, select the Play option to start the multiplayer match with bots.

How set up co-op mode in Quake II remaster

You are able to play through the levels in Quake II remaster cooperatively with other players. To see how you can properly do so in the first-person shooting videogame, you can check out this article from Seeking Tech.

How to enable co-op mode

In order to enable cooperative mode in the Quake II remaster, you need to take the following steps:

1. Select Multiplayer from the main menu.

2. In the Multiplayer screen, you should see the number of controllers connected. If you are playing with others locally, make sure you connect any other controllers you have before you select the Continue option.

3. On the next screen, you can choose to play Local, LAN or Online.

4. Eventually, you should see a screen showing the next match type. Here, you need to select the “Change settings…” option.

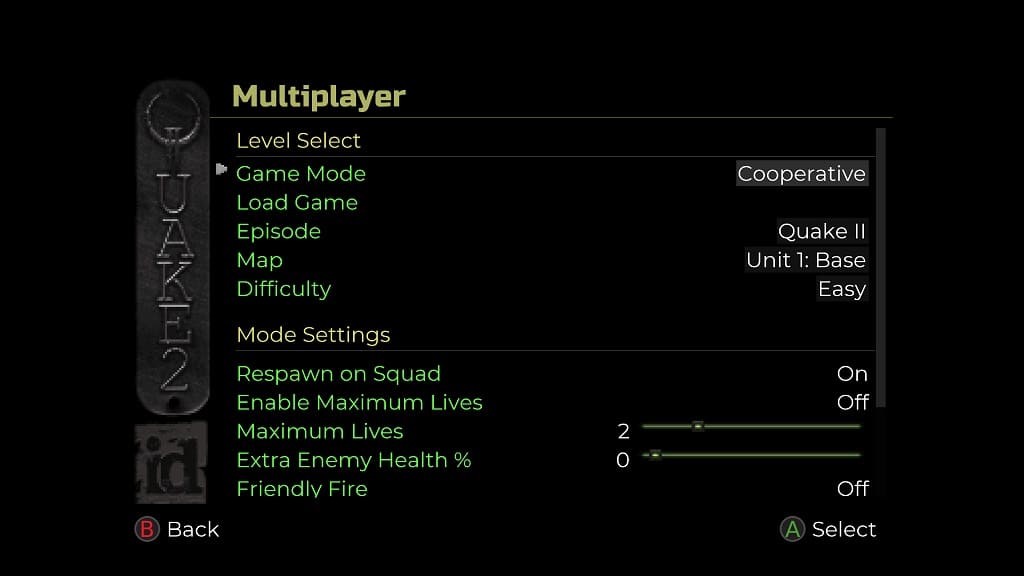
5. In the next screen, change the Game Mode to Cooperative.

6. You should then be able to select the Episode, Map and Difficulty.

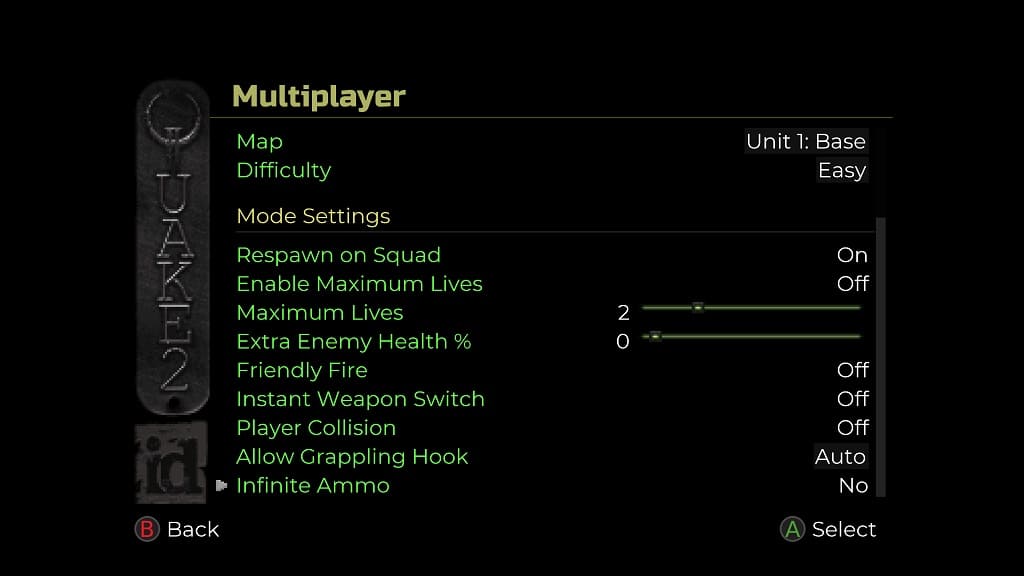
7. At the bottom of the screen, you can also change the following customization options: Respawn on Squad, Enable Maximum Lives, Maximum Lives, Extra Enemy Health Percentage. Friend Fire, Instant Weapon Switch, Player Collision, Allow Grappling Hook, Infinite Ammo.

How does respawning work in Quake II remaster?

In order to respawn your teammate in co-op mode, you need to do either of the following:

1. Clear out all of the enemies in an area.

2. Find a safe place where there are no nearby enemies.

Once the game detects that you are in a safe zone, then your teammates should respawn next to you if you have the “Respawn on Squad” setting enabled previously.

How to change the splitscreen split direction in Quake II remaster

The Quake II remaster allows you to play with others locally via splitscreen. If you would like to change the way your screen is divided up, then you can check out this tutorial from Seeking Tech.

1. For the first step, you need to make your way over to the Options menu.

If you are currently playing the game, then you need to bring up the Game menu first and then select Options. If you are in the title screen, you can simply select Options from there.

2. Next, you need to select Display.

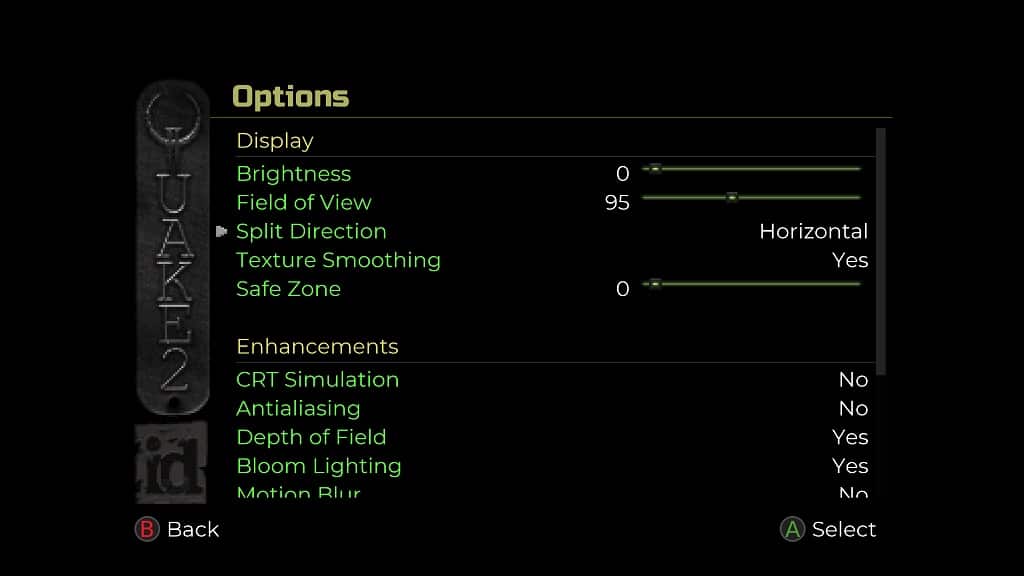
3. You should see the Split Direction section appear near the top. It should be in between Field of View and Texture Smoothing.

4. By selecting Split Direction, you can choose either Horizontal or Vertical.

Horizontal will split the screen where the top and bottom sides are each dedicated to one player if you are playing a two-player session locally.

The Vertical option will split the screen in a way so that the left and right sides are each dedicated to one player.

The Quake II remaster supports splitscreen support for up to 4 players on the PlayStation 4, PlayStation 5, Xbox One and Nintendo Switch. The PC, Xbox Series S and Xbox Series X versions support up to 8 players when it comes to local play.

How to disable camera shake in Tower of Fantasy

The camera may occasionally shake while you are playing Tower of Fantasy. If you find that this effect is making it hard to see in this online role-playing game, then you can check out this tutorial from Seeking Tech to see how you are able to disable it.

1. For the first step, head over to the Settings menu from the home screen in Tower of Fantasy.

If you have already loaded into your character save, then you can still head into Settings from the pause menu. For the uninformed, you can bring up the pause menu by pressing the Options button if you are playing with a DualShock 4 or DualSense controller.

2. From the Settings screen, make sure you are viewing the Basic tab. If you aren’t, then you need to select basic on the left side.

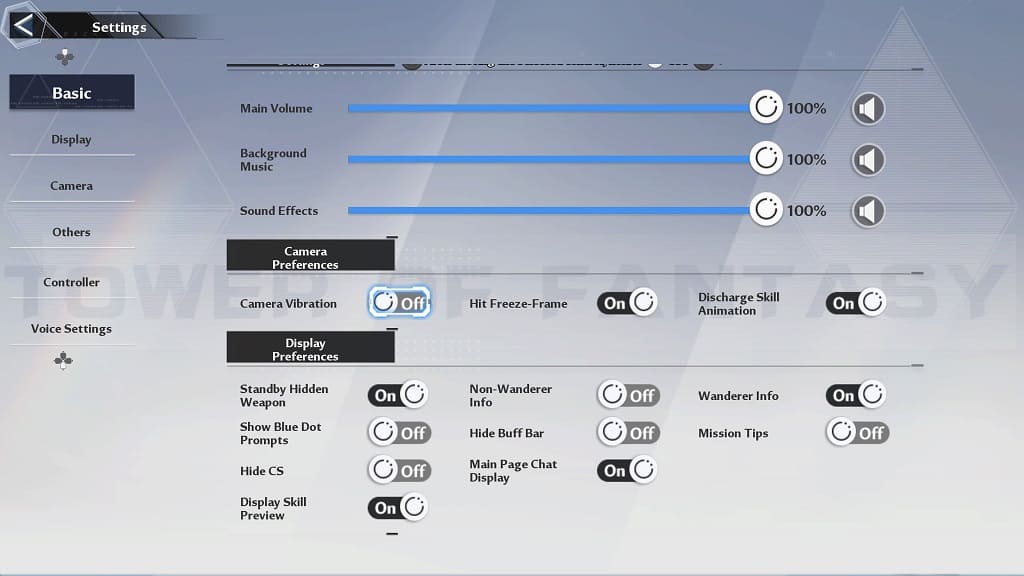
3. In the Basic tab, scroll down to the Camera Preferences section.

4. By default, Camera Vibration is set to On. To disable this feature, make sure you set it to Off instead.

5. Exit out of the Settings menu.

When you start playing Tower of Fantasy again, you should notice that the camera will no longer shake around in some instances.

How to mute Simulacra and Executor voices in Tower of Fantasy

You may eventually get tired of hearing the voices coming from the Simulacra and Executor characters in Tower of Fantasy. To see how you can disable the audio from these characters, you can check out this guide from Seeking Tech.

1. First off, you need to navigate over to the Settings menu.

This can be done from the main screen. If you are using a DualSense or DualShock 4 then you have to press the L2 button.

You can also bring up the in-game menu and then select Settings from there. You can bring up the pop-up menu by pressing the Options button on the PlayStation controller.

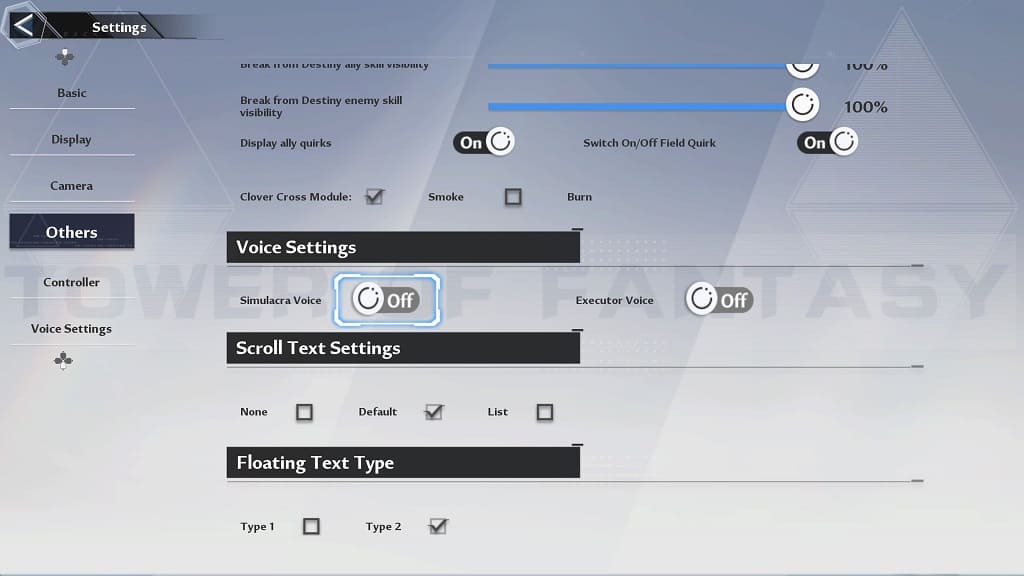
2. After getting to Settings, make sure you select the Other option from the left side of the screen. If you are using a gamepad, then you have to use the directional pad to navigate the left column.

3. On the right side of the screen, you need to scroll down to the Voice Settings. For controller users, you have to use the left analog stick.

4. Make sure that the Simulacra Voice and/or Executor Voice settings are set to Off.

When you return to playing Tower of Fantasy, you should no longer hear any dialogue coming from the Simulacra and Executor.

How to access the Quake II 64 and Call of the Machine levels in Quake II remaster

The Quake II remaster comes with levels from the Quake II 64 videogame as well as the new Call of the Machine expansion. To see how you can play these extra stages, you can take a look at this tutorial from Seeking Tech.

1. If you haven’t done so already, make sure you head over to the main menu.

If you are playing through a level, then you need to bring up the pause screen, save your progress and then select the End Game option.

2. From the Main Menu, select Single Player.

3. Once you get to the Game menu, select Level Select.

4. In the Level Select Screen, select Episode.

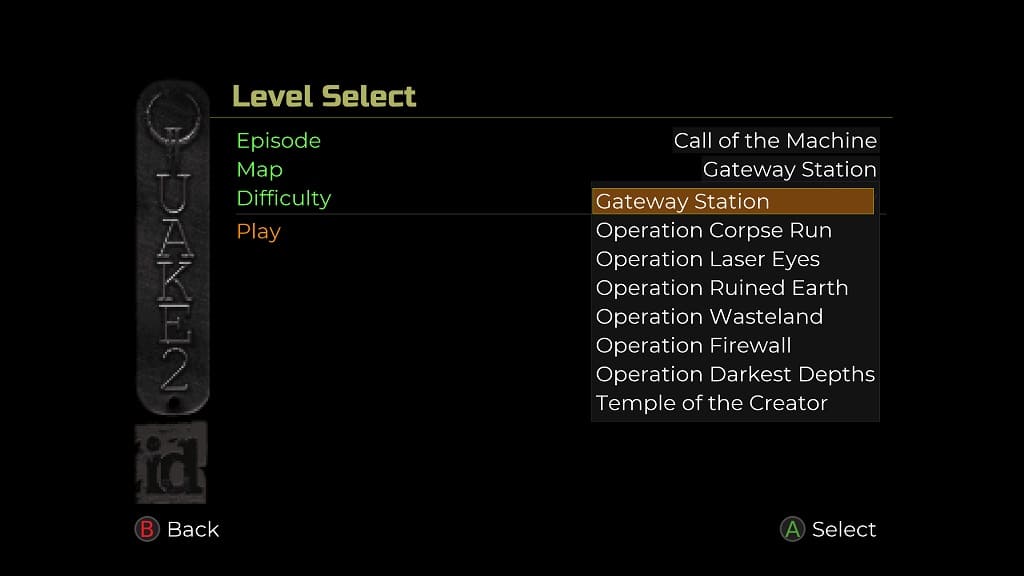
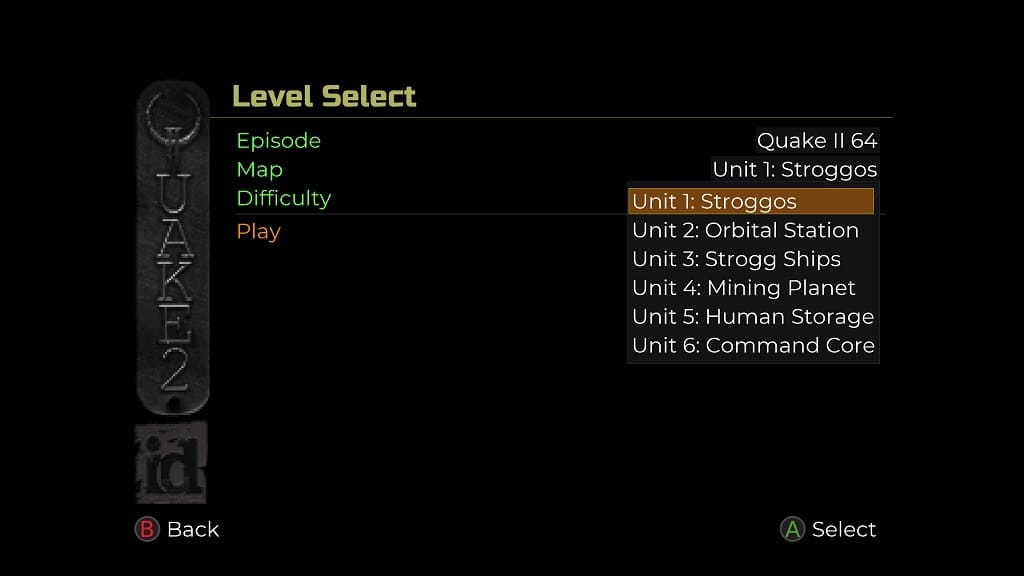
5. You should see a drop-down list. This should include Call of the Machine and Quake II 64. Select either of those.

6. If you are looking for a specific map within these episodes, then you can select the Map option.

The Call of the Machine episode comes with the following maps:

  • Gateway Station
  • Operation Corpse Run
  • Operation
  • Laser Eyes
  • Operation Ruined Earth
  • Operation Wasteland
  • Operation Firewall
  • Operation Darkest Depths
  • Temple of the Creator

The Quake II 64 episode includes the following levels:

  • Unit 1: Stroggos
  • Unit 2: Orbital Station
  • Unit 3: Strogg Ships
  • Unit 4: Mining Planet
  • Unit 5: Human Storage
  • Unit 6: Command Core

By default, you will start on the first map when you switch over to the Call of the Machine aor Quake II 64 episodes.

7. In the Level Select Screen, you can also change the Difficulty setting.

8. Once you are ready, select the Play option to play the map you selected from the Call of the Machine and Quake II 64 episodes.