The Resident Evil 4 Remake added a photo mode. To see how you can use this new feature, you can take a look at this tutorial from Seeking Tech.
1. For the first step, you need to pause the game anytime you want to take a picture of what is being shown on the screen.
To pause the game, you need to press the Options button on your DualShock 4 or DualSense controller if you are playing on a PlayStation 4, PlayStation 4 Pro, PlayStation 5 or PlayStation 5 Digital Edition console. For the Xbox controller, you need to press the Menu button.
2. In the pause screen, you then need to press the square button on your PlayStation controller or X button on your Xbox gamepad.
3. You should now be in the photo mode of Resident Evil 4 Remake.
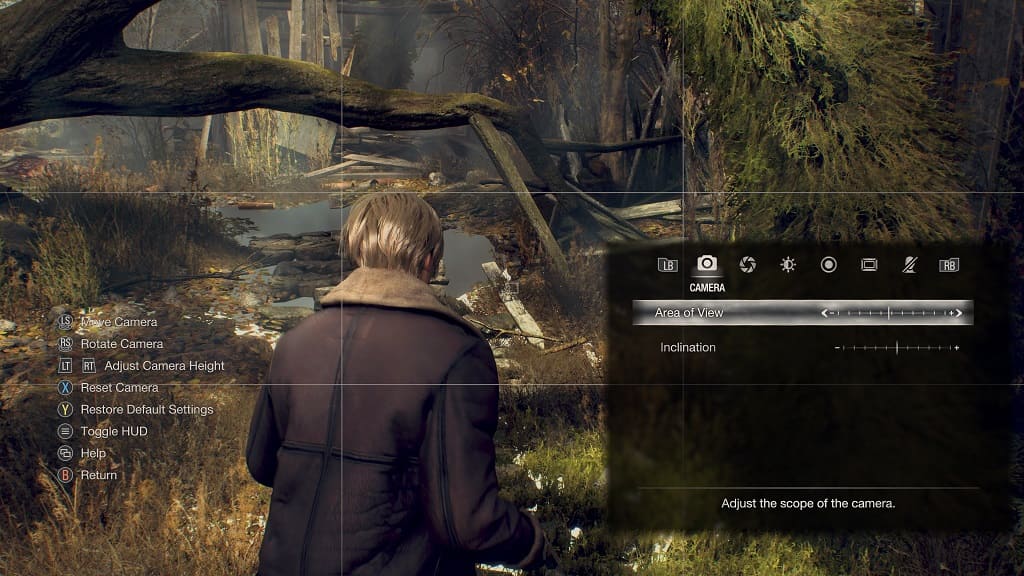
Here, you can use the left analog stick to move the camera and the right analog stick to rotate the camera. You can adjust the camera’s height by using the L2/R2 triggers on PlayStation or LT/RT triggers on Xbox.
4. On the bottom right side of the screen, you should find the customization options menu, which you can navigate by using the directional pad as well as the L1/R1 or LB/RB buttons.
You will be able to adjust the following:
Camera Section:
- Area of View slider
- Inclination slider
Focus Section:
- Blur (On or Off)
- Focusing Distance slider
- Depth of Field slider
- Blur (Short Range) slider
- Blur (Long Range) slider
- Blur (Overall) slider
Effects #1 Section:
- Brightness slider
- Contrast slider
- Vignette (On or Off)
- Vignette Coverage Slider
- Bloom (On or Off)
- Bloom Strength Slider
Effects #2 Section:
- Filters (Orange, Blue Yellow, Vintage, Sepia, Black & White, Pastel, Dark or None)
- Lens Distortion (On or Off)
- Lens Distortion Strength slider
- Chromatic Aberration (On or Off)
- Chromatic Aberration slider
Frames & Logo Section:
- Frame Type (Square, Rectangle, 4:3, Letterbox or None)
- Game Logo (Top Left, Top Middle, Top Right, Middle Left, Middle Right, Bottom Left, Bottom Center, Bottom Right or None)
- Copyright (Bottom Left, Bottom Center, Bottom Right or None)
Other Section:
- Subtitle Display (On or Off)
- Main Character Display (On or Off)
- Enemy Display (On or Off)
- NPC Display (On or Off)
- Fauna Display (On or Off)
- Grid (On or Off)
5. Once you are ready to take the picture, press the Options button on the PlayStation controller or the Menu button on the Xbox controller to make the heads-up display invisible.
6. To take the screenshot, you need to press the Share button on the DualShock 4, Create button on DualSense or Share button on Xbox. The screen will be saved on your console’s local storage.
7. Once you are done taking the screenshot, you can exit the photo mode by pressing the circle button on PlayStation or B button on Xbox to go back to the pause screen.