You are able to play Atomic Heart with a keyboard and mouse on your Xbox Series X and Xbox Series S console. By using this control method, you should be able to aim better with your weapons when compared to using the analog sticks of the Xbox controller. To see how you can enable this feature, you can take a look at this tutorial from Seeking Tech.
1. To start off, you need to connect your mouse and keyboard to the Series X or Series S console.
It is important to note that these gaming systems do not support Bluetooth mouse and keyboards. Instead, you need to either use a USB wired connection or USB dongle for a wireless connection.
Plug the USB cable or USB dongle into the USB ports of your console. Both the Xbox Series X and Xbox Series S come with three USB ports, one of which is located on the front with the remaining two located at the backside of the system.
2. Once you have connected your keyboard and mouse, the console should automatically detect the new input methods.
3. If you haven’t done so already, open Atomic Heart.
4. You should be able to use your keyboard and mouse to control the game right away.
5. Unfortunately, Atomic Heart doesn’t show the button layout if you are using the keyboard and mouse. However, it should be the same as the PC version of the game. You can find the layout below:
- W: Move Forward
- S: Move Backward
- A: Strafe to the Left
- D: Strafe to the Right
- Spacebar: Jump
- Shift: Dodge
- Control: Crouch
- Left Click: Attack or Shoot
- Right Click: Secondary Attack or Aim
- R: Reload or Recharge
- 1: Change to Weapon #1
- 2: Change to Weapon #2
- 3: Change to Weapon #3
- 4: Change to Weapon #4
- Esc: Main Menu
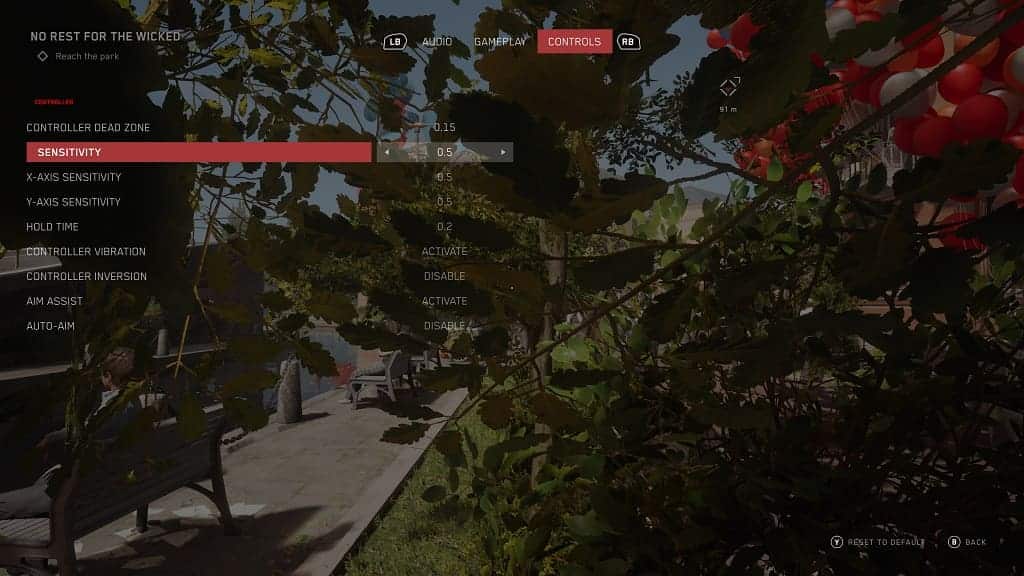
6. You can change the sensitivity settings for the mouse by heading into the Options. From there, make sure you switch over to the Controls tab.
Once you get there, you will be able to adjust the overall sensitivity in addition to the X-axis sensitivity and Y-axis sensitivity.

7. If you want to change the mouse pointer speed and/or switch the left and right click functions, then you need to take the following steps:
- Press the Xbox button on the Xbox controller to open the Guide menu.
- Pree the RB button until you get to the Profile & System tab in the Guide menu.
- Select Settings from the Profile & System tab.
- Inside of Settings, select Devices & Connections on the left column.
- On the right side of the same screen, you then need to select Mouse.
- In the Devices & Connections – Mouse menu, you will be able to change the pointer speed. By default, this is set to 10.
- Also in the same screen, you can select the “Switch primary & secondary mouse buttons” if you want to switch the left and right click functions.
