The Sabrent M.2 NVMe PS5 Heatsink (which has a model number of SB-PSHS) is specifically designed to provide heat dissipation for compatible M.2 solid state drives on the PlayStation 5 and PlayStation 5 Digital Edition gaming systems.
You can check out this step-by-step guide from Seeking Tech to see how you can install this accessory.
1. Before we begin, it should be noted that you will need a solid state drive that will fit with the Sabrent M.2 NVMe PS5 Heatsink as well as be compatible with the PS5.
The Sabrent M.2 NVMe PS5 Heatsink is designed for the Sabrent Rocket 4 Plus. However, it should fit with other similarly-sized solid state drives, which should include the following PS5-compatible SSDs:
- Samsung 980 Pro
- Seagate FireCuda 530
- Western Digital WD_BLACK SN850
In addition to being standalone products, the FireCuda 530 and WD_BLACK SN850 are also bundled with heatsinks. If you have the heatsink version of the FireCuda 530 or SN850, then you wob’t be able to use Sabrent M.2 NVMe PS5 Heatsink unless you first remove the default heatsink from the SSD.
2. If you PlayStation 5 is powered on, make sure to turn it off.
3. Next, you need to unplug the HDMI cable, power cable and other cables you have connected to your console.
4. You also need to remove the stand from the PS5 as well.
5. Afterwards, you need to position your console so that the PS logo on the outer casing is pointing downwards while the backside of the system (which has the HDMI and power ports) is facing you.
6. From your viewpoint, you need to place your right hand on the bottom right corner of the outer casing and your left hand of the upper left corner.
7. With your right hand, lift the bottom righter corner of the outer casing.
8. Afterwards, you need to use your left hand to slide the outer cover off to the left side.
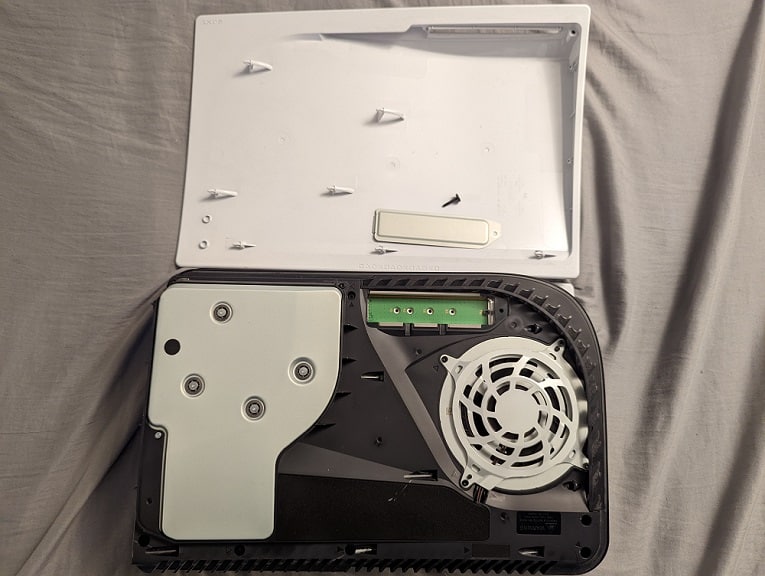
9. After removing the outer cover, you should be able to locate the M.2 expansion bay, which has a metal cover screwed on top of it.
10. Use a cross-head screwdriver to remove the screwdriver holding the metal cover.
11. Remove the metal cover and place it somewhere else as you no longer need it.

12. With the M.2 expansion bay opened, use the cross-head screwdriver to remove the spacer and screw from inside the bay.
13. Place the previously removed spacer in the 80 hole of the expansion bay.
14. Now, insert the compatible solid state drive into the M.2 slot of your PS5 from a diagonally upwards position.
15. Next, push the opposite end of the solid state drive down and then use a cross-head screwdriver with the screw you previously removed from inside the docking bay on the 80 hole to fasten the SSD.
16. Afterwards, you can install the Sabrent M.2 NVMe PS5 Heatsink.
If the thermal tape is not already attached on the bottom of the heatsink, then you need to put the tape on the solid state drive you have previously inserted on the M.2 slot of the PlayStation 5.
17. Next, you need to place the Sabrent M.2 NVMe PS5 Heatsink into the opening of the M.2 expansion bay.
18. You then need to secure Sabrent M.2 NVMe PS5 Heatsink. You can do so by using a cross-head screwdriver with the screw you previously removed from the original M.2 metal cover.
19. Finally, slide the outer cover back on from the left side to the right side to complete the initial installation.
20. To format the M.2 solid state drive you have installed on your PS5, you need to plug the HDMI cable, power cable and other cables back into the system.
21. Turn on your PlayStation 5.
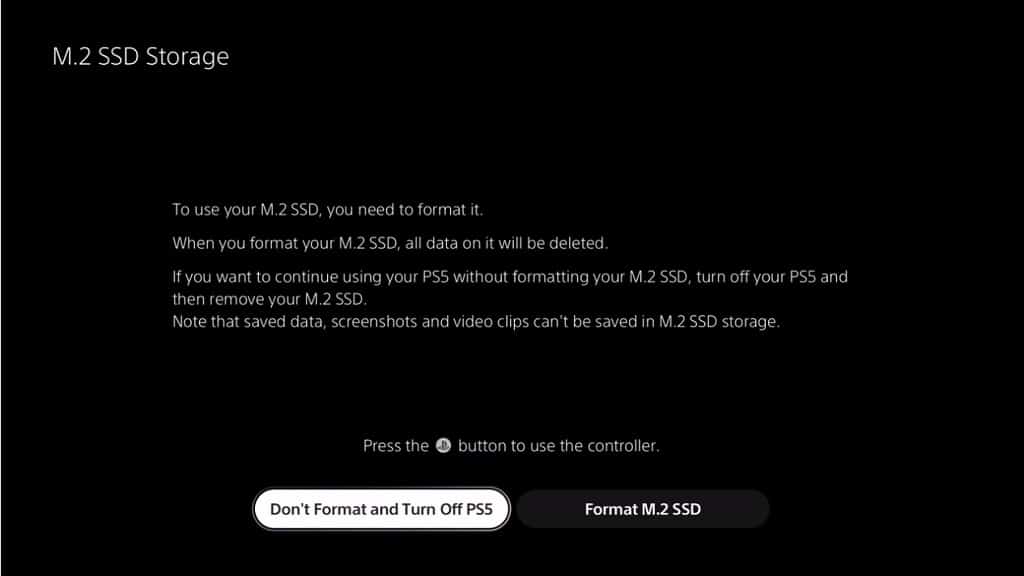
22. During the startup process, you should see the M.2 SSD Storage notification.

23. You will be asked to turn on your DualSense controller by pressing the PS button.
24. You need to then select the Format M.2 SSD option.
25. Once the formatting process has been completed, you should see a screen that shows the sequential read speed of the M.2 SSD you have installed.
26. Select the OK option to go to the Home Screen main menu.
