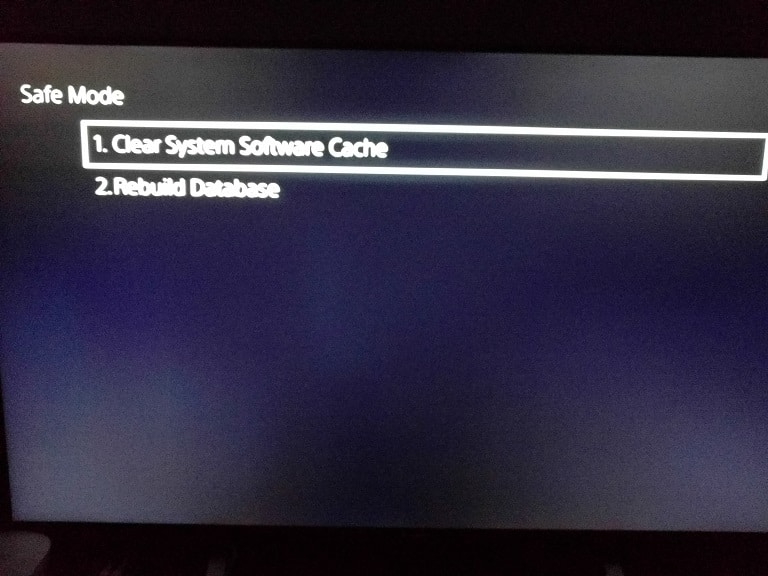
The new firmware update for the PlayStation 5 (and PlayStation 5 Digital Edition) adds the ability to clear the cache of the system without having to unplug it.
To find out how can delete the temporary files in the menu of the system, you can check out this guide at Seeking Tech.
Why you should clear the cache on PS5
If you are experiencing issues with a game crashing or not even launching, then clearing the system cache is a potential fix for these problems.
How to clear the PlayStation 5 cache in Safe Mode
In order to clear the cache of the PlayStation 5 in Safe Mode, you have to take the following steps:
1. As we stated above, the ability to clear the cache in the menu was added in the latest software version of the PS5.
So, if you haven’t done so already, you need to update to the latest firmware. To do a manual update, first head to the home screen, which is the main system menu where you can select a game to play.
2. From the home screen, you will see a gear cog symbol on the upper right corner. Select it to go to the “Settings” menu.
3. From the “Settings” menu, select the “System” option from the list.
4. From the “System” menu, select the “System Software” option from the list on the left side.
5. On the right side of the same menu, select the “System Software Update and Settings” option from the list.
6. From the “System Software Update and Settings” menu, you will see the “Update System Software” option.
If you see the “Up to date” wording to the right of this option, then you don’t need to update the firmware of your PlayStation 5.
Otherwise, select the “Update System Software” option.
7. From the “System Software Update” menu, select either the “Update Using Internet” option, which we recommend, or the “Update from USB Drive” option.
8. With your PlayStation 5 updated to the latest firmware, you need to completely turn off the system. To do so, press the PS button on the DualSense and then navigate down to a list of icons.
9. Select the “Power” icon, which is located all the way to the right by default.
10. In the pop-up menu, select the “Turn Off PS5” option.
11. Make sure that your PS5 system isn’t displaying any lights. If you are seeing an orange light, then it means that your console is in rest mode.
If your system is in rest mode, turn it back on and then repeat steps 8 through 10 to turn it off completely.
12. With your PlayStation 5 turned off, locate the power button on the system. You need to press and hold the button for several seconds. You will hear one beeping noise initially and another beeping noise after a few moments later.
13. If done correctly, the PS5 will booth up in Safe Mode.
14. Follow the instructions on the screen to connect your DualSense to your PS5 by using as USB cable.
15. Press the PS button on your DualSense.
16. You should be in the Safe Mode menu.
Here, you need to select the “5. Clear Cache and Rebuild Database” option from the list.
17. In the next menu, select the “1. Clear System Software Cache” option.

18. In the next screen, select the “OK” option to delete the temporary files on your PS5.
19. Your system will automatically restart after the deletion is completed.
How to clear the PS5 cache without Safe Mode
You can also clear the PlayStation 5 cache without using the Safe Mode. Before the new firmware, the process to deleting the temporary files was to unplug the system from the power outlet, wait for a little bit and then plug it back into the power outlet.
If you are interested in doing so, you need to take the following steps:
1. Make sure that your PlayStation 5 is completely turned off as it should not be displaying any lights.
2. Once you are sure that your PS5 is turned off, unplug the power cord from the power outlet.
Make sure that the system is not in rest mode when you unplug its power cord as doing so may cause damage to the PlayStation 5.
3. Wait for at least 30 seconds.
4. After waiting, plug the PS5 system back into the power outlet.
5. Turn on the game console. The cache should be cleared.
