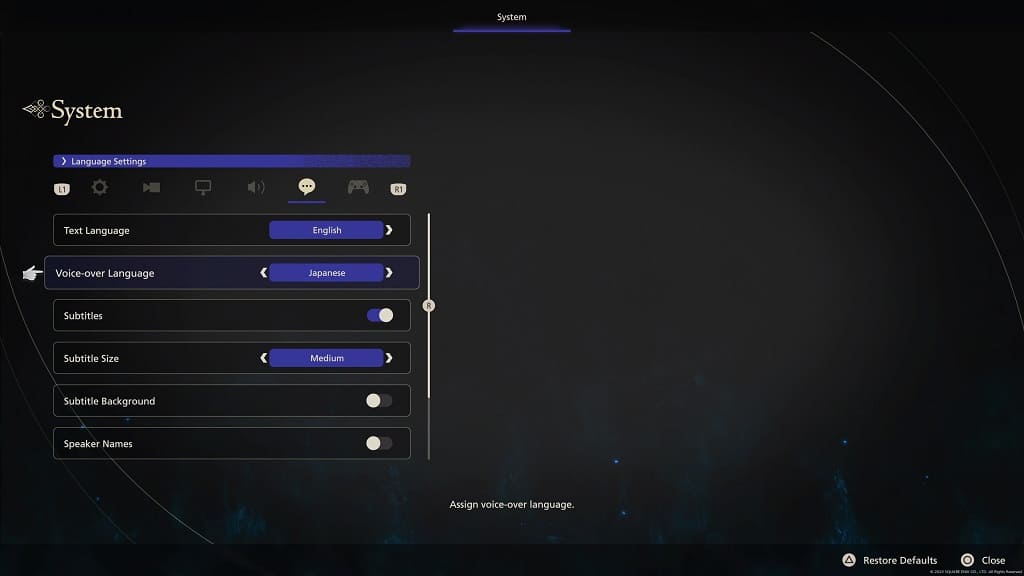
Final Fantasy 16 supports multiple voice over languages. If you want to change the voice acting to a different language (such as Japanese) for this role-playing game, then you can check out this guide at Seeking Tech to see how you can properly do so.
1. Before we start, it is important to note that you can only change the voice language from the Title Screen.
If you have already loaded into your save file, then you first need to press the Options button on the DualSense in order to bring up the Main Menu. From there, use the L2 and R2 buttons to navigate towards the System Menu.
Next, make sure you are in the System Settings tab; if you aren’t, then use the L1 and R1 buttons until you get there. Finally, select the Return to Title option and then Yes to return to the Title Screen.
2. In the Title Screen, you need to select Config.
3. Once you get to the System menu, use the L1 and R1 buttons to switch over to the Language Settings tab.
4. You should then move the cursor over to the Voice-over Language setting, which has the following description:
- “Assign voice-over language.”
5. Use the right or left directional pad button to change the voice language to any of the following:
- English
- Japanese
- German
- Latin American Spanish
- Italian

It is important to note that the cut scenes in the game have been designed for English voice overs. Therefore, the mouth movement will only sync with the audio from the voice acting when you are using English as the language. Otherwise, the lip sync won’t match.
6. Once you are done changing the voice language, exit out of the System Menu and then load into your save file from the Title Screen.
The new settings should automatically be applied as you should now be able to hear your preferred language in the dialogue and cut scenes.
