How to fix Guilty Gear Strive input lag issues on PS5, Xbox Series X and S

When playing Guilty Gear Strive on the PlayStation 5, PlayStation 5 Digital Edition, Xbox Series X or Xbox Series S, you may notice that there is a bit of a delay when it comes to your button inputs and the corresponding action that appears on the screen. To see how you can potentially fix these input lag issues, you can take a look at this troubleshooting article from Seeking Tech.

1. To start off, we suggest connecting your console directly to your television set or gaming monitor. Using an HDMI pass-through or switch may add extra latency.

2. If you are using a television screen, then you should also make sure that you have Game Mode, or a similar mode, enabled as doing so will help reduce the input lag while playing Guilty Gear Strive and other video games.

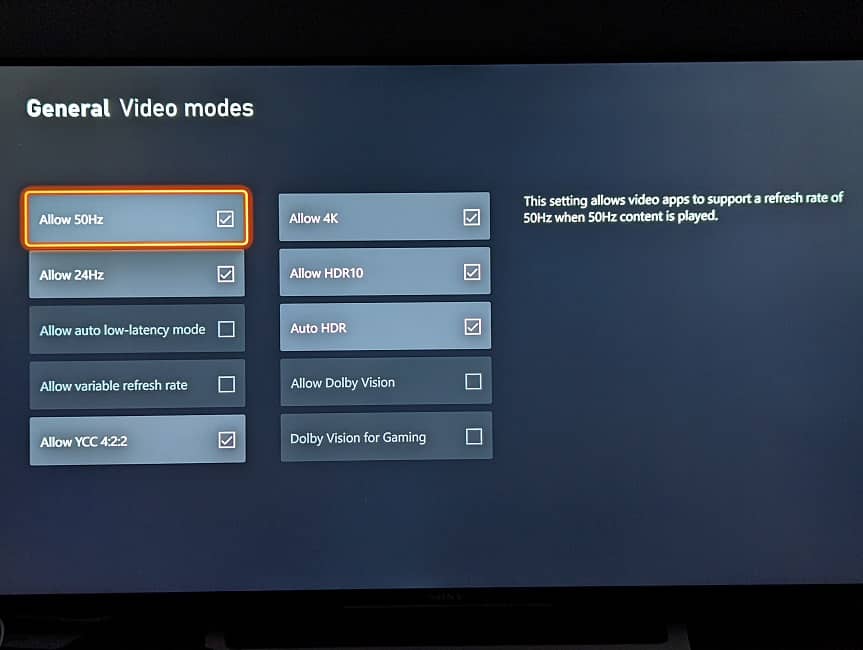
3. If your TV or monitor Variable Refresh Rate, then we recommend enabling this feature in its menus.

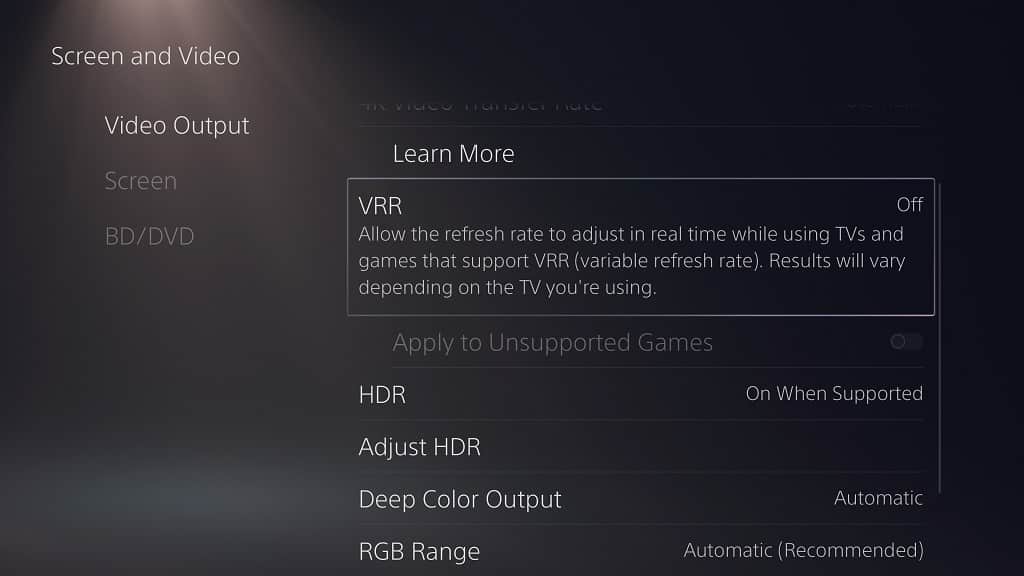
Afterwards, you need to enable VRR on your console as well. For the PS5 systems, you need to head over to Settings > Screen and Video > Video Output and then set VRR to Automatic.
For the Xbox Series consoles, you need to go to Settings > General > TV & display options > Video modes and then make sure that Allow Variable Refresh Rate is enabled.
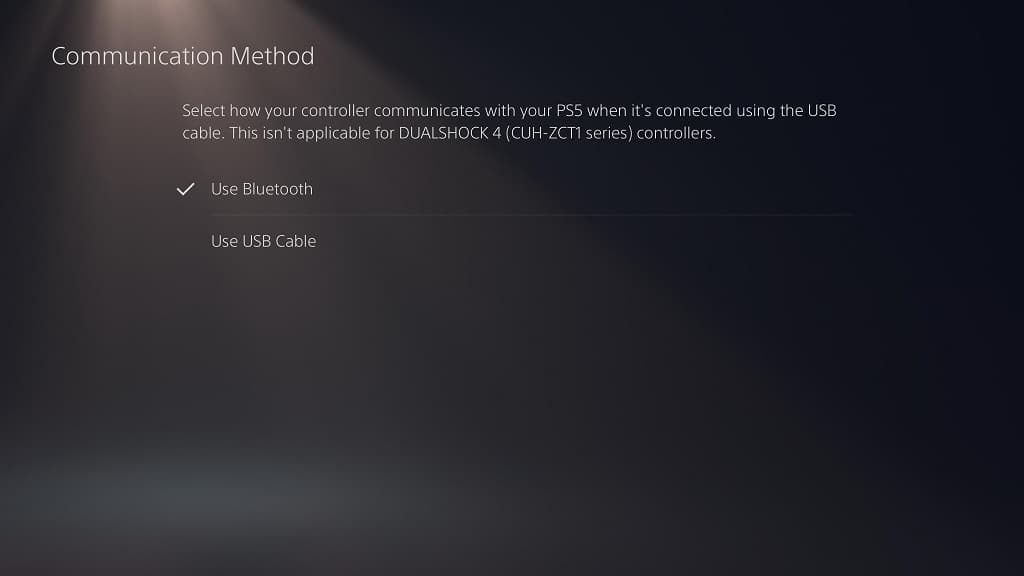
4. We also recommend that you play Guilty Gear Strive by using a wired controller.

If you are using the DualSense or DualSense Edge on the PlayStation 5 version, then you should connect your controller to the console via a USB cable. Afterwards, you need to go to Settings > Accessories > Controller (General) > Communication Method and then make sure that Use USB Cable is selected.
On Xbox, you simply plug the Xbox controller into the USB port of the console to use it as a wired gamepad.

5. If you are experiencing input lag while playing online games, then you should make sure you have a good enough internet connection.

If you are downloading and/or streaming simultaneously on the same network, then you can free up the bandwidth by pausing or stopping these activities while playing online matches in Guilty Gear Strive.

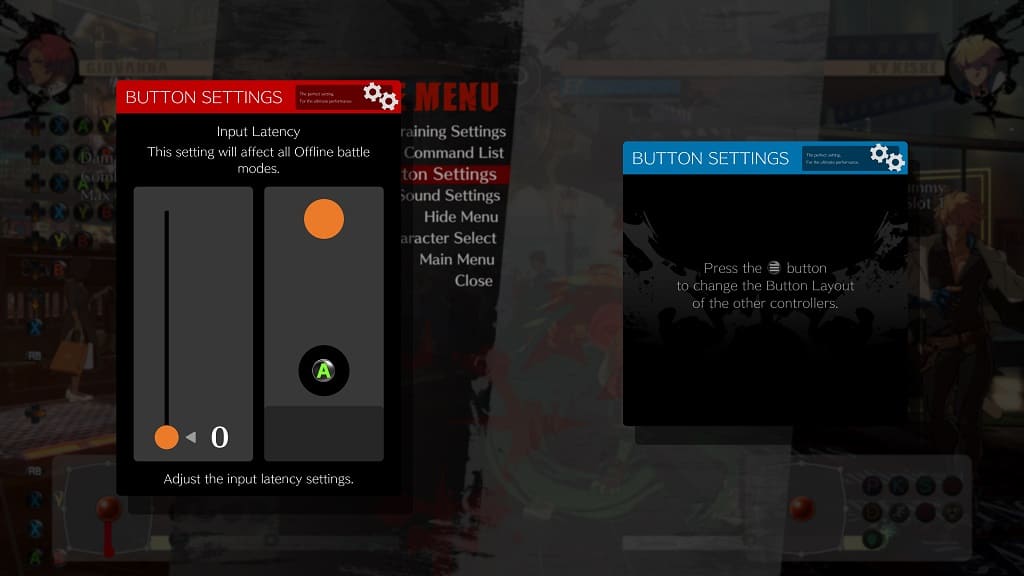
6. For offline matches, you can manually adjust the input latency by using the in-game menu.

In order to do so, you can select Settings from the Main Menu. In the Game Settings menu, you then need to select System Settings > Button Settings (During Battle). From the Button Settings menu, scroll down and then select Input Latency.

If you are in the middle of an offline match, then you can bring up the pause screen and then select Buttons Settings. Next, scroll all the way down and then select Input Latency.

Once you get to the Input Latency menu, press the A button or Xbox or X on PlayStation when the bouncing circle hits the black circle.

If you are getting nowhere near “0,” then you can adjust the input latency slider until you are consistently getting close to “0” with your button presses.
What’s the difference between WWE 2K23 Standard, Cross-Gen, Deluxe and Icon Editions?

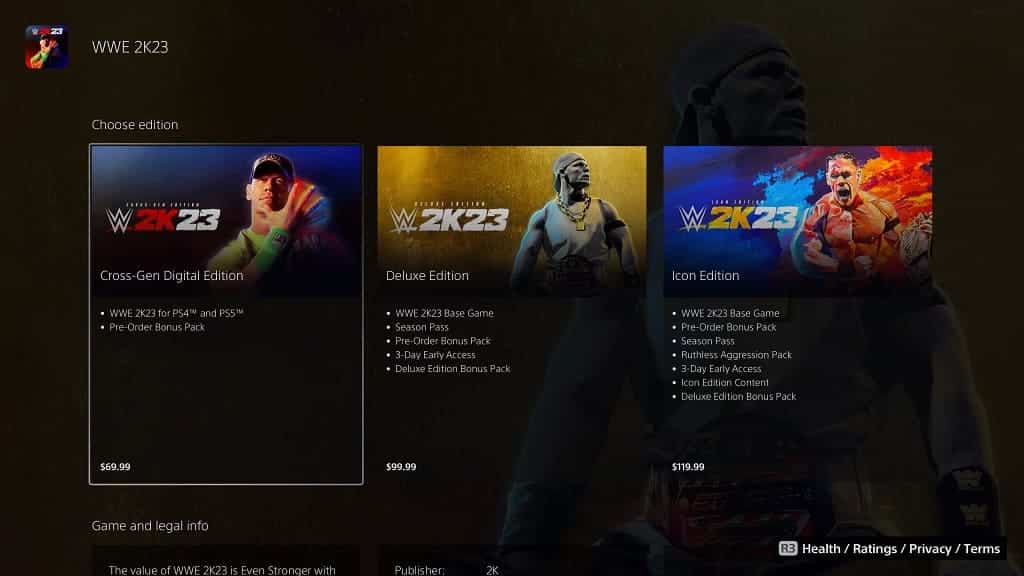
If you are purchasing WWE 2K23, then you will have multiple editions to choose from. You can take a look at this comparison guide to see what the differences are between the Standard, Cross-Gen, Deluxe and Icon Editions of this wrestling video game.

WWE 2K23 Standard vs. Cross-Gen vs. Deluxe vs. Icon Editions Comparison Chart

You can take a look at our comparison table for these four versions of the WWE 2K23 below:

WWE 2K23 Standard EditionWWE 2K23 Cross-Gen EditionWWE 2K23 Deluxe EditionWWE 2K23 Icon Edition
Cross-Buy EntitlementNoYesYesYes
Release Date3/16/233/16/233/13/233/13/23
Bad Bunny Bonus PackIncluded with Pre-OrderIncluded with Pre-OrderIncluded with Pre-OrderIncluded with Pre-Order
Season PassNot IncludedNot IncludedIncludedIncluded
Deluxe Edition ContentNot IncludedNot IncludedIncludedIncluded
Ruthless Aggression PackNot IncludedNot IncludedNot IncludedIncluded
Icon Edition ContentNot IncludedNot IncludedNot IncludedIncluded

Cross-Buy Entitlement

On the Microsoft Store and PlayStation Store, you will have the option between purchasing the Standard or Cross-Gen Editions of this software.

The standard version will only give you access to the last-generation version of the game, which is the Xbox One version on the Microsoft Store and PlayStation 4 version on the PlayStation Store.

If you buy the Cross-Gen Edition, Deluxe Edition or Icon Edition instead, then you will get both the last-generation and new-generation versions. Thus, you will receive the Xbox One and Xbox Series X/S versions on the Microsoft Store or the PS4 and PS5 versions on the PlayStation Store.

Release Date

The WWE 2K23 Deluxe and Icon Editions come with a 3-day early access as both of these will be launching on March 13, 2023.

You need to wait a little bit later if you purchase the WWE 2K23 Standard or Cross-Gen Editions, as these are slated to be released on March 16, 2023.

Bad Bunny Bonus Pack

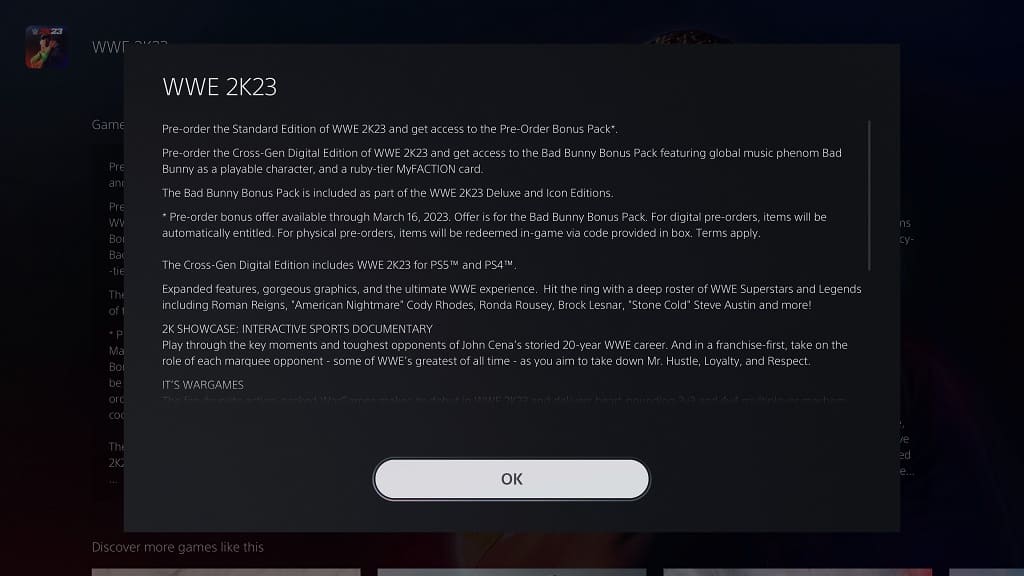
By pre-ordering any of the four editions, you will get the Bad Bunny Bonus Pack, which adds the popula musician as a playable character as well as coming with one Ruby Bad Bunny MyFACTION Card.

Season Pass Content

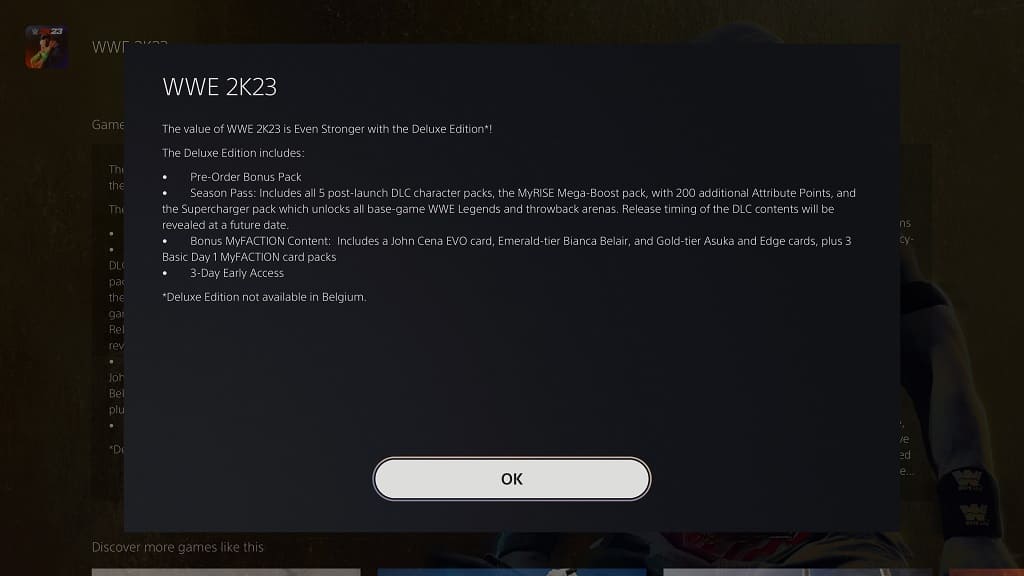
The Deluxe and Icon Editions also include the WWE 2K23 Season Pass, which features five upcoming DLC character bundles. You can find the release dates, as well as the included wrestlers, for each expansion below:

Steiner Row Pack (Release Date: April 19):

  • Scott Steiner
  • Rick Steiner
  • B-Fab (as a manager only)
  • Top Dolla
  • Ashante Adonis

Pretty Sweet Pack (Release Date: May 17):

  • Karl Anderson
  • Luke Gallows
  • Tiffany Stratton
  • Elton Prince
  • Kit Wilson

Race to NXT Pack (Release Date: June 14):

  • Harley Race
  • Ivy Nile
  • Wendy Choo
  • Tony D’Angelo
  • Trick Williams

Revel with Wyatt Pack (Release Date: July 19):

  • Bray Wyatt
  • Zeus
  • Valhalla
  • Joe Gacy
  • Blair Davenport

Bad News U Pack (Release Date: August 16):

  • Eve Torres
  • Wade Barrett
  • Damon Kemp
  • Andre Chase
  • Nathan Frazer

Deluxe Edition Content

Furthermore, you should also get the following content to go along with the Deluxe and Icon Editions:

  • MyRISE Mega-Boost
  • SuperCharger
  • 1x Ruby John Cena MyFACTION Evo Card
  • 1x Emerald Bianca Belair MyFACTION Card
  • 1x Gold Asuka MyFACTION Card
  • 1x Gold Edge MyFACTION Card
  • 3x Basic Premium Launch MyFACTION Packs

Ruthless Aggression Content

The WWE 2K23 Icon Edition is the only version to comes with the Ruthless Aggression, which includes four new playable characters and more. You can find the full list below:

  • Playable Prototype Cena Character
  • Playable Leviathan Batista Character
  • Playable Throwback Randy Orton Character
  • Playable Throwback Brock Lesnar Character
  • WrestleMania 22 Arena
  • John Cena Legacy Championship Belt
  • 1x Prototype Cena MyFACTION Card

Icon Edition Content

Moreover, the Icon Edition will also include one Emerald Paul Heyman Manager MyFACTION Card as well as three Deluxe Premium Launch MyFACTION Packs.

Recap

WWE 2K23 Standard Edition is the cheapest one available as you will get the PS4 version on the PlayStation Store, Xbox One version on the Microsoft Store or the PC version if you are buying this wrestling game for your gaming computer.

If you want both the PS4 and PS5 versions, or Xbox One and Xbox Series S/X versions, then you need to get the Cross-Gen Edition, Deluxe Edition or Icon Edition.

The WWE 2K23 Deluxe Edition comes with the Season Pass, which includes five upcoming DLC character packs to go along with the MyRISE Mega-Boost, SuperCharger, MyFACTION Cards and MyFACTION Packs.

The WWE 2K23 Icon Edition comes with everything included with the Deluxe Edition. Morover, you will get the Ruthless Aggression DLC Pack as well additional MyFACTION Cards and MyFACTION Packs.

So, if you want to have the most playable characters and other content, then we recommend going with the Icon Edition as you should be able to save some cash when compared to buying all of the individual DLC separately.

How to change the field of view in Atomic Heart

The development team at Mundfish recently added an in-game field of view slider to the Atomic Heart videogame on PC, PlayStation 4, PlayStation 4 Pro, PlayStation 5, PlayStation 5 Digital Editon, Xbox One, Xbox One S, Xbox One X, Xbox Series S and Xbox Series X.

Changing the FOV will let you see more of the environments on the screen. It may also prevent motion sickness if you feel nauseous when playing this first-person shooter.

To see how can change the field of view in Atomic Heart, you can take a look at this tutorial from Seeking Tech.

1. As we mentioned above, the field of view setting was added through a patch update, more specifically the 1.3.4.0 or 1.3.5.0 version of the game depending on the platform where you have the game installed.

So, if you haven’t done so already, make sure that you have the latest patch installed before you start up the game.

You can find the full patch notes related to this update with this link.

2. Once you have the latest patch installed for the game, you need to open it if you haven’t done so already.

3. While you can change the field of view setting from the main menu, we suggest doing so from the pause screen instead. This is because you will see the immediate effect of changing this setting from the in-game camera with the action paused.

So, if you are in the Main Menu, make sure you choose the Continue, New Game or Load Game option to head straight into gameplay.

4. Once you are playing Atomic Heart, bring up the Pause Screen.

5. In the Pause Screen, you need to select Options.

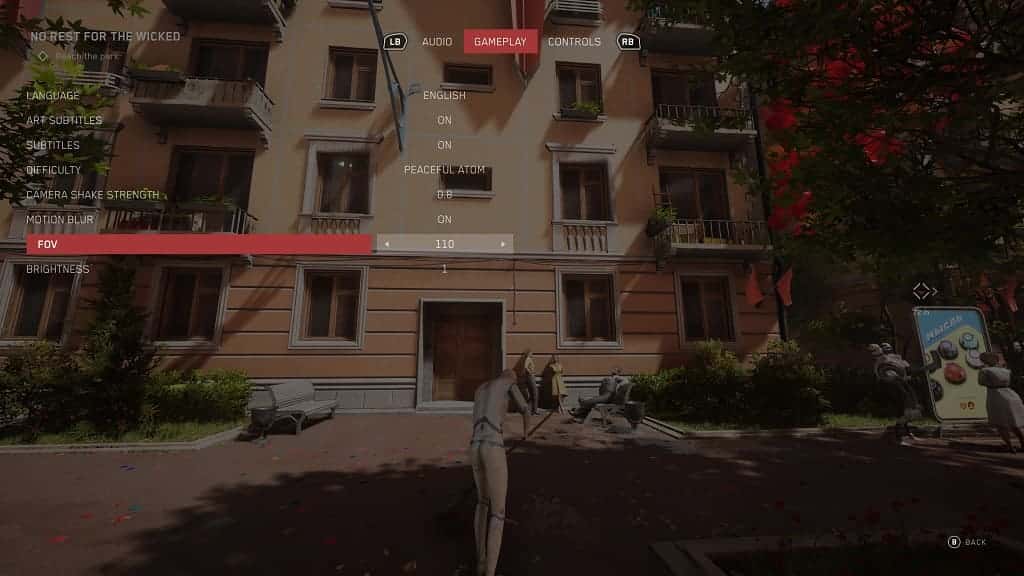
6. After getting to the Options menu, change over to the Gameplay tab.

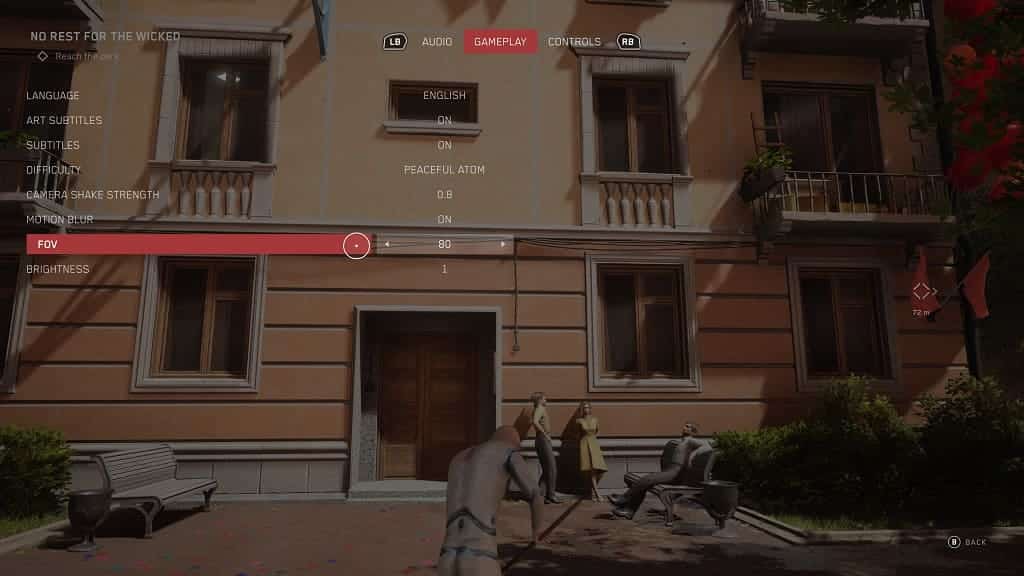
7. You should find the FOV setting in the Gameplay tab of the Options menu. If you don’t see it, then you need to close the game and then make sure that it has been updated to version 1.3.4.0, 1.3.5.0 or later.

8. By default, the FOV slider is set to 80, which is the minimum.

You can increase the field of view, in increments of 1, all the way to 110.

When you change the value, the camera angle will change as well in the background of paused screen, giving you a reference point to fine tune your preferences. The camera will zoom in more if you decrease the number and will pull back more if you make the slider a higher value.

9. Once you find the right FOV value, you can back out of the Pause Menu to return to the game.

How to disable Guilty Gear Strive crossplay on Xbox

The Xbox One, Xbox One S, Xbox One X, Xbox Series S and Xbox Series X versions of Guilty Gear Strive support cross play as you will be able to play online matches with other players from PC, PlayStation 4, PlayStation 4 Pro and PlayStation 5.

With that said, you may end up fighting against more experienced players on PC and PlayStation since this game initially came out on those platforms in 2021. Therefore, you may want to consider disabling this matchmaking feature until you get decent at this game.

To find out how you can turn off crossplay in the Xbox version of Guilty Gear Strive, you can follow this tutorial from Seeking Tech.

1. For the first step, you need to head over to the Main Menu.

If you are currently in a match, then you can finish the fight and then head over to the main menu.

Alternatively, you can press the Menu button on the Xbox controller to bring up the Pause menu. From there, select Main Menu and then Yes to quit the current match and return to the Main Menu of Guilty Gear Strive.

2. Inside the Main Menu, scroll down and then select Settings. This option should be in between COLLECTION and Microsoft Store.

3. After opening the Game Settings menu, you need to select System Settings.

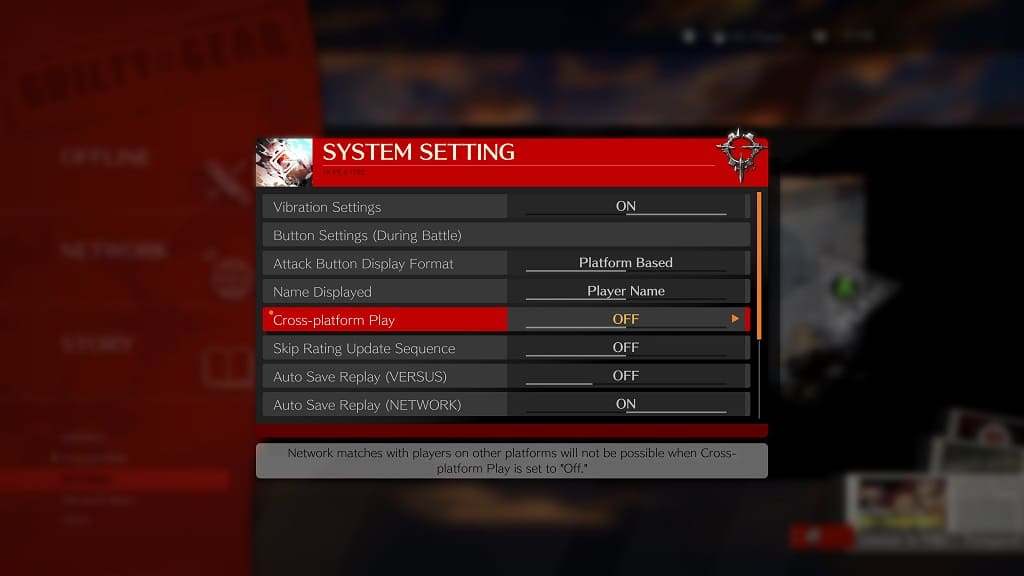
4. From the System Settings menu, move the cursor over to Cross-Platform Play. You should see the following description:

Network matches with players on other platforms will not be possible when Cross-Platform Play is set to “Off.”

5. With the cursor on the Cross-Platform Play, you can use the left and right directional pad buttons, or move the left analog stick to the left and right directions, in order to set this setting to Off.

6. Any changes you made in the Settings menu should automatically be applied to the game.

7. By setting Cross-Platform Play to Off in the System Settings menu, you should no longer be matched with PC or PlayStation players when playing online matches. However, you should still be able to play with other players from the Xbox One and Xbox Series family of consoles.

If you want to re-enable crossplay with other non-Xbox platforms again for this fighting game, then you need to return to the Main Menu of this fighting game and then select Settings > System Settings. From the System Settings screen, make sure that the Cross-Platform Play setting is set to On.

What to do if PS VR2 Sense Controller is not working after an update

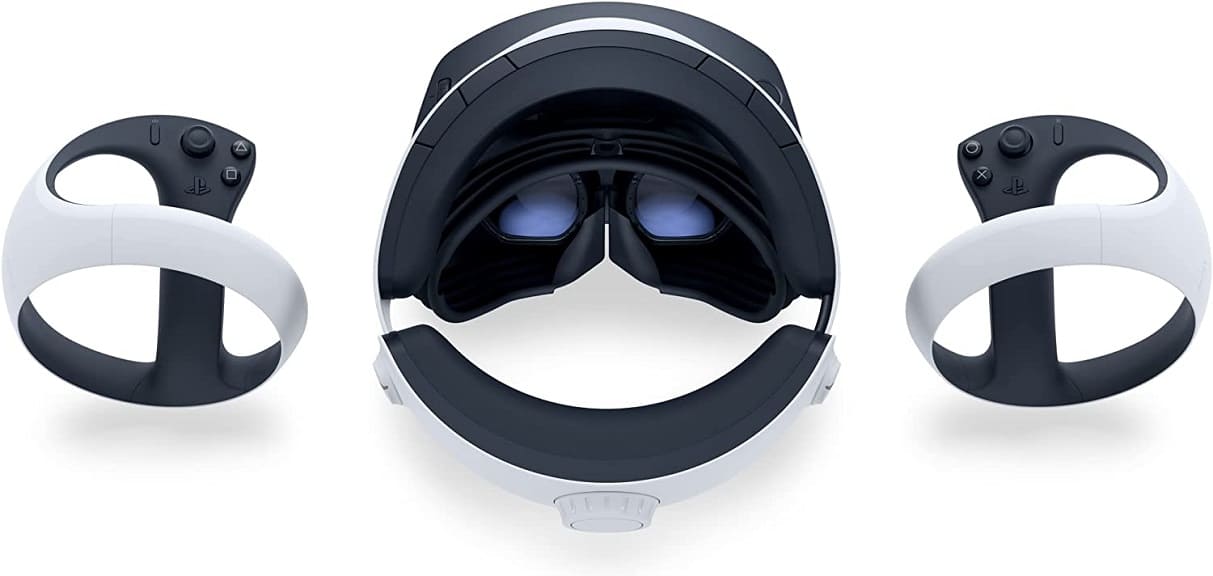
After updating the PlayStation VR2 Sense controllers, you may notice that either the left or right pad may not be working normally, or at all. To see how you can fix these motion control problems, you can follow the troubleshooting steps laid out in this article from Seeking Tech.

1. It is important to note that both the left and right Sense controllers need to be updated before you can use them again. Therefore, you need to go through the update process twice.

If you can’t get the other controller to update, then you can try restarting the console and then turning on the problematic gamepad. You may need to restart several times in order to get the update message to appear.

To see more tips about how you can update these virtual reality game pads, you can check out this link.

2. If you are sure that you have updated your controllers, then you try setting up your Play Area again.

If order to do so, you can press the PS button, select the Quick Settings tile and then select Set Play Area. You can also go to your PS5’s settings menu, select Accessories, select PlayStation VR2 and then select Set Play Area.

3. There is a possibility that your issue may be related to a specific game. In this case, you can try restarting the game.

Alternatively, you can also try to see if there is a new patch available. In order to do so, move the cursor over to the PlayStation VR2 game in the home screen menu of your PlayStation 5 or PlayStation 5 Digital Edition console. Next, press the Options button and then select Check for Update.

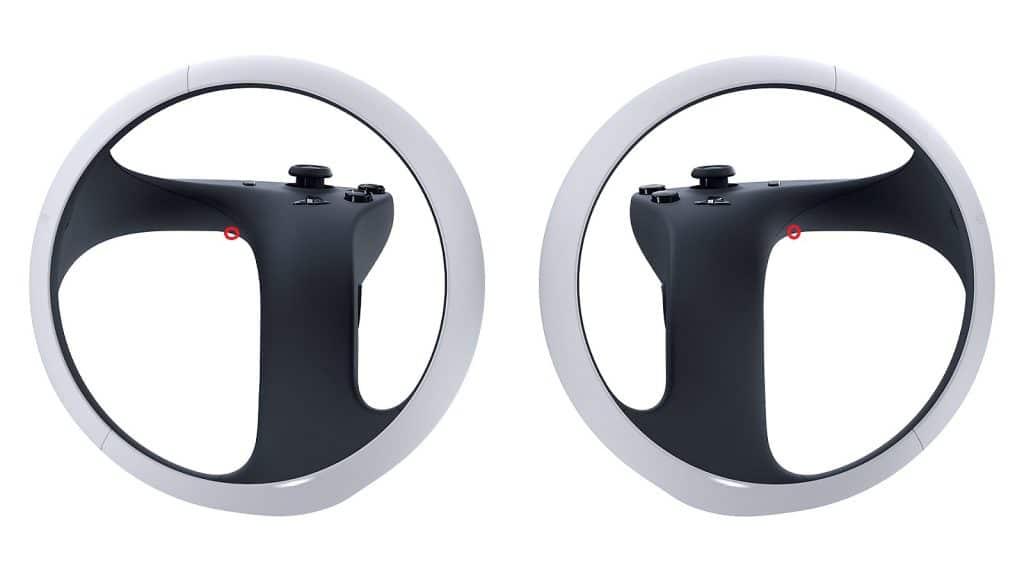
4. You may also want to consider resetting the problematic PS VR2 Sense controller.

To do so, you need to use a pin to press down on the reset button that can be found in a small opening. You should be able to locate it in the following location:

Once you reset the controller, you need to pair it again to your PlayStation 5 again.

5. You motion controller may not be function normally if the battery life gets too low. Therefore, make sure that they are fully charged up if they aren’t already.

6. If none of the aforementioned potential solutions have worked so far, you can take a look at this general PlayStation VR2 Sense Controller troubleshooting guide for the to see if you can get the left, right or both controls to work normally.

Here’s what Sony has to say about PS VR2 causing motion sickness

Playing the PlayStation VR2 may end up causing motion sickness. This is especially prevalent to new virtual reality players or for users who haven’t played in VR for a long time. So, what does Sony has to say about these issues?

According to the user manual, Sony states that using this virtual reality headset may cause “motion sickness, nausea, disorientation, blurred vision, or other discomfort or other abnormalities.” If you experience any of these symptoms, then the company urges you stop playing immediately.

If possible, they recommend that you rest up. You should not partake in any activities that require you to use your “unimpaired vision, balance or coordination” until you recover.

You can find their full statement regarding motion sickness and other issues below:

“Some people may experience motion sickness, nausea, disorientation, blurred vision, or other discomfort or other abnormalities. If experienced, stop using immediately, and remove the VR headset. If you experience symptoms during or after use, rest, and do not engage in any activities that require unimpaired vision, balance or coordination until after symptoms have completely disappeared.”

In another section of the same manual, Sony suggest taking a 15-minute break after every hour-long play session. With that said, these lengths and frequencies will be different from the individual.

If you are new to VR and/or more prone to motion sickness, for instance, then Sony recommends that you take more frequent breaks:

“It may take some time to become accustomed to images from PS VR2. During initial use, it is recommended that you use the product for short periods of time.”

If you are experienced in virtual reality gaming and/or don’t feel any discomfort at all while playing for an hour, then you most likely won’t need any long breaks.

You can find Sony’s comments regarding taking breaks below:

“Generally we recommend that you take 15 minute breaks for every hour of play. However, when viewing virtual reality content, the length and frequency of necessary breaks may vary from person to person—please take breaks that are long enough to allow any feelings of discomfort to subside.”

In addition to building up your VR legs for the PlayStation VR2, there are also tips and tricks that you can use in order to prevent yourself from getting motion sickness. You can take a look at this PSVR 2 nausea prevention guide to see how you can stop feeling nauseous when using this virtual reality headset.

Here’s what Sony has to say about PlayStation VR2 Mura issues

You may notice that there is a bit of noise and/or cloudiness when playing a PlayStation VR2 game on your PlayStation 5 or PlayStation 5 Digital Edition console. This is most likely due to Mura, which is the result of uneven brightness and/or color consistency across pixels.

If you look through the user manual of the PS VR2, you should be able to find a section where Sony talked about this issue. According to the company, Mura is considered to be a “normal occurrence” and isn’t considered to be a sign that the virtual reality headset is not functioning properly.

While the OLED display is made with “precise technology,” the manufacturing process does not result in consistent brightness and color uniformity.

You can find the full statement below:

“Black (dark) pixels and continuously lit pixels may appear in certain locations on the screen. The appearance of such spots is a normal occurrence associated with screens and is not a sign of a system malfunction. Screens are made using highly precise technology. However, a very small number of dark pixels or continuously lit pixels may exist and color irregularities or brightness irregularities may be visible on each screen.”

It is important to note that Mura also occurs on other OLED screens, such as the original PlayStation Vita model and the Nintendo Switch OLED model. So, this issue isn’t just limited to the PS VR2.

So, what can be done if you are noticing that your PlayStation VR2 headset has Mura? For one, you can try adjusting the brightness level, either through the in-game settings or through the PS5 system menus, to see if the cloudiness will become less noticeable in darker or brighter lighting. Mura usually becomes more apparent in extremely dark areas or in places where there is only one primary color being shown.

Of course, you can simply choose to power through and play the game despite the Mura effect. Once you get fully immersed in the experience, you most likely won’t care about the graininess.

While Sony considers Mura to be normal, you may be able to still exchange your virtual reality headset for a new one as well. Some PlayStation VR2 units may have less Mura than others. Of course, there is also a possibility that Mura will be just as prevalent, if not more, with the new unit.

To find out more about how you can deal with this issue, you can take a look at this PlayStation VR2 Mura troubleshooting article.

How to prevent PlayStation VR2 OLED burn in

The PlayStation VR2 uses an OLED display, which provides an incredible contrast thanks to true blacks and HDR support. With that said, it is more susceptible to burn in and other image retentions issues. To see how you can prevent the PS VR2 from suffering these problems, you can take a look at this article from Seeking Tech.

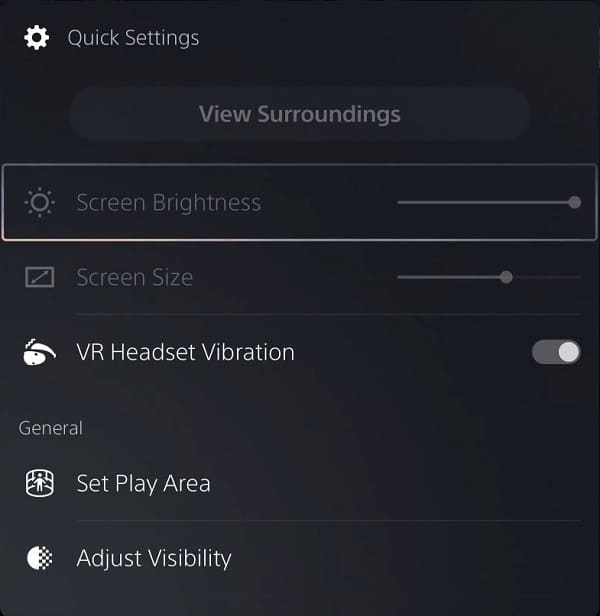
1. For the first precautionary step, you can try turning down the brightness. Most games have a brightness setting that you could use in the in-game menu.

Alternatively, you can also use the system menus of your PlayStation 5 or PlayStation 5 Digital Edition console. In order to do so, you can press the PS button and then select the Quick Settings card. You should then be able to adjust the Brightness slider from there.

You can also press and hold the PS button (or press the PS button and then select home) to head back to the home screen of your PS5. From that location, select Settings > Accessories > PlayStation VR2 and you should see the Brightness slider.

The PlayStation VR2 comes with a great light shield that should block out external lighting as long as you are properly wearing the headset. Therefore, you shouldn’t need to play VR games at the maximum brightness setting in most cases. Not to mention that turning down the brightness level should help remove some of the blurriness you may be experiencing.

2. Some games may also offer a dynamic heads-up-display that will only show up when needed. As a result, these static images won’t stay on the screen for long periods of time, preventing potential image retention.

Thus, we recommend checking the in-game menus to see if there is a dynamic HUD option.

With that said, a vast majority of PlayStation VR2 titles, and modern games in general, do a good job of preventing screen burn-in as the HUDs are usually more transparent.

The only content you most likely have to worry about is playing a retro game with persistent HUD and/or black bars. Watching a video with a static logo or black bars may also cause issues as well.

You may also make the screen size of the cinema mode as big as possible. You can change this screen display size by pressing the PS button and then selecting Quick Settings. You can also head over to the home screen of your PS5 and then selecting Settings > Accessories > PlayStation VR2 to find the same slider.

3. Another way to prevent PlayStation VR2 image retention is to take frequent breaks.

Sony recommend that you take a 15-minute break after every hour when using the PlayStation VR2 headset. If you start feeling motion sickness, then we suggest that you stop immediately and don’t play again until your body starts to feel normal.

When taking a break, remove the virtual reality headset from your head. By doing so, the screen of the PS VR2 should turn off automatically, preventing any potential burn-in problems.

What to do if you can’t update the PS VR2 Sense Controller firmware

If you are having problems trying to update the left or right PlayStation VR2 Sense Controller, then you can take a look at this troubleshooting article from Seeking Tech to see how you can download and install the firmware without any issues.

1. For the first step, make sure that you have the latest system software installed on your PlayStation 5 or PlayStation 5 Digital Edition console; otherwise, you won’t get a prompt asking you to update your PS VR2 Sense controller when you connect it to the system.

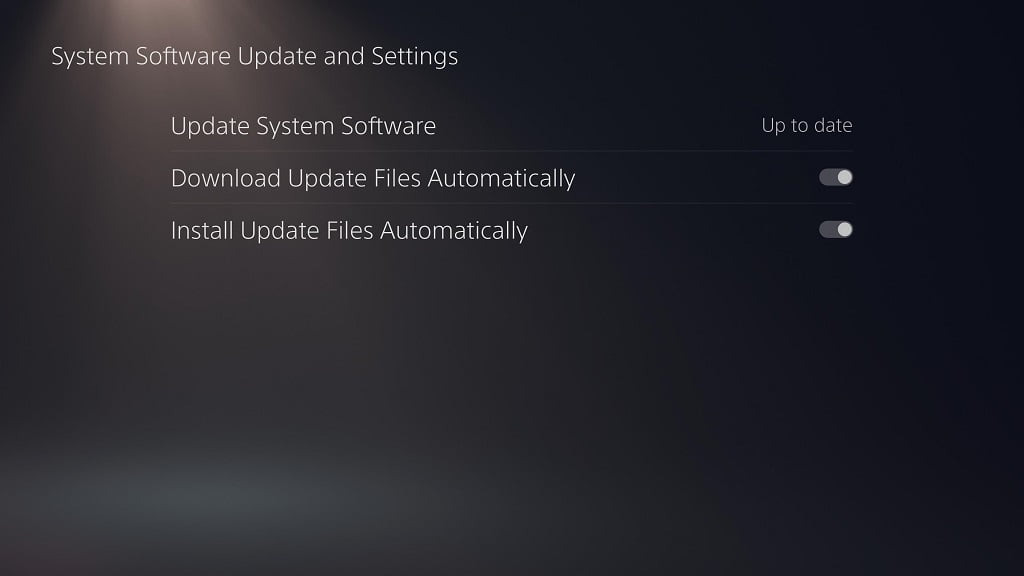
To manually update your PS5, go to the Settings menu from the home screen. From there, you need to select System > System Software > System Software Update and Settings > Update System Software > Update Using Internet.

Once the system has been updated, it should reboot on its own. Afterwards, you can turn on your PlayStation VR2 Sense Controller to check if you are able to see the “PS VR2 Sense Controller (L) Device Software” or “PS VR2 Sense Controller (R) Device Software” message.

2. You should also make sure that your motion controls have sufficient battery life to go through with the update. If not, then you may not be able to install the new firmware.

If you need to recharge, then you should only need to do so for a minimum of 15 minutes in order to get a good enough battery life to go through with the firmware update.

3. If you don’t see the update prompt for the virtual reality controller when it is connected to your console wirelessly, then you can try connecting the controls to the USB port of the PS5 by using a USB cable.

4. You can also try turning off both the left and right Sense controllers, as well as any other controllers you have connected to your PlayStation 5.

Afterwards, only turn on the left or right PlayStation VR2 Sense to see if you are able to get the firmware update message to show up on your television screen.

5. If you are able to update one of the Sense controllers but not the other one, then you can try restarting your PS5.

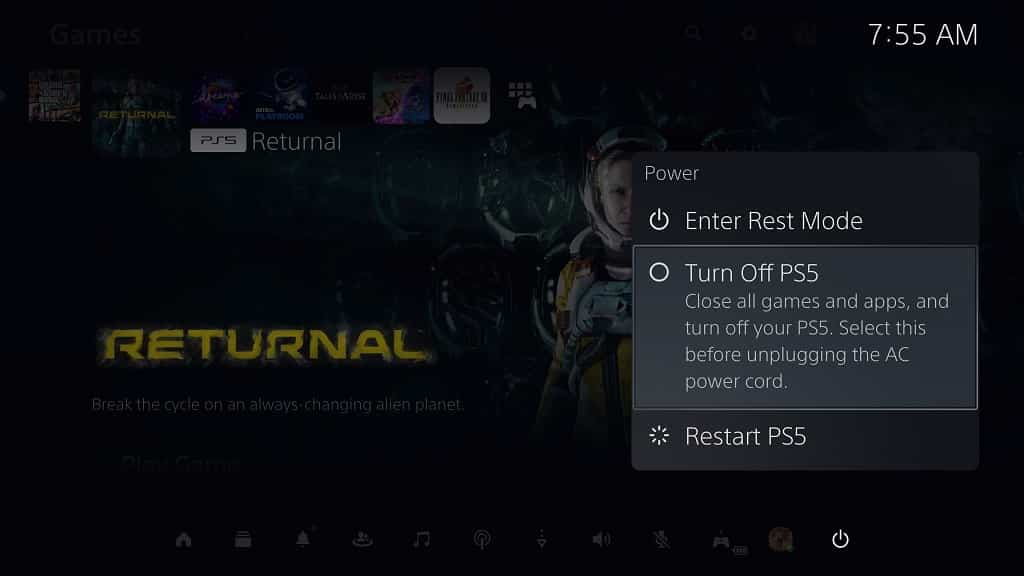
To do so, press the PS button to open the Control Center menu, where you can then select the Power option on the bottom right side. From the Power menu, you then need to select the Restart option.

You may need to restart multiple times to be able to update the motion controls.

5. Resetting the problematic PlayStation VR2 Sense controller may get it to update. In order to do so, you can follow the steps laid out in this guide.

Once you are done resetting the game pad, you need to pair it back to your PlayStation 5 console. Once the connection has been made again, you should be able to see the firmware update message.

How to update the PlayStation VR2 Sense Controller firmware

Just like the DualSense and Dualsense Edge, the PlayStation VR2 Sense can be updated. The new firmware may come with bug fixes, improved stability, new features and more. To see how you can update these virtual reality motion controllers, you can follow the steps laid out in this article from Seeking Tech.

1. You won’t get prompted to update the PlayStation VR2 Sense Controller until you update the firmware of your PlayStation 5 or PlayStation 5 Digital Edition console.

So, if you haven’t done so already, make sure you update your system software by doing the following:

  • Turn on your console and then make sure it is connected to the internet.
  • If you don’t see a prompt to update the system software, then you can head over to Settings from the home screen. From Settings, you then need to select System > System Software > System Software Update and Settings > Update System Software > Update Using Internet.
  • If there is a new update available for the PS5, wait for it to download and install. It should then restart on its own.

2. Once your PS5 has been updated, turn on either the left or right PlayStation VR2 Sense Controller. If there is a new firmware for this accessory available, then you should see the following messages:

For the left Sense Controller:

“PS VR2 Sense Controller (L) Device Software. To use your PS VR2 sense controller (L), you need to update its device software to the latest version. This update will be quick and you console won’t need to restart.”

For the right Sense controller:

“PS VR2 Sense Controller (R) Device Software. To use your PS VR2 sense controller (R), you need to update its device software to the latest version. This update will be quick and you console won’t need to restart.”

Here, you need to select the Update Now option to start the process.

3. Once you update the firmware for one of your PlayStation VR2 Sense Controllers, you need to do the same for the other controller.

To do so, you simply need to turn on the other controller and you should see the aforementioned update screen.

4. After updating the controllers to the latest firmware version, you should be able to use them when playing with the PlayStation VR2 headset.